

First Shoot of 2018: Colmer's Hill
In the blog this week I head out to Colmer's Hill in Dorset for my first shoot of 2018. With fog forecast, would I get the shot from that location that I'd always wanted?
Getting Back into Gear
Landscape photography in January can always be a bit of a hit or a miss but after a two-week break from photography, I was itching to get out again. I had been editing my Winter Solstice Adventure video over the festive period and despite the obvious ups and downs of that day, it had inspired me to get back out with the camera as soon as possible.
During winter my ability to get out with the camera is limited and for the first weekend of January, I only had the possibility of getting out on Saturday morning. Typically though, the weather across the south-west was dubious. To get any decent conditions I would have to travel further than I had time for, and depending on where you looked, the local forecast was everything from blue skies to fog on Dartmoor.
Though I couldn't get a concrete forecast for the Bridport area, there was a chance that fog would be there first thing in the morning so I decided to take a risk and head out to Colmer's Hill. I'd always wanted to capture the peak of Colmer's Hill poking out from mist covered landscape. Maybe this would be the morning!
At Colmer's Hill

An early morning shot from my normal dawn spot. The light wasn't great.
I've photographed Colmer's Hill a number of times now. You can read about some of my previous visits, here, here, and here. With a vision of photographing the hill in fog or mist, I headed straight for the viewpoint at the bottom of Quarry Hill. This lower elevation viewpoint places the top of the hill just above the horizon making it ideal for the type of shot I wanted.
Once there, there wasn't much in the way of low lying fog, but there was still enough interest in the sky to potentially make a good image. It soon became apparent though that light from the rising sun would be slightly later than the documented sunrise time due to a large bank of cloud. So as I was waiting, getting colder, I looked to my left and noticed the hill Eype Down.
Same Location, Different View

A slightly different viewpoint, but still terrible light!
I had originally become aware of this viewpoint when reading Mark Bauer's excellent book Photographing Dorset. So rather than stay where I was and get a shot similar to some of my previous efforts, I decided to grab my bag and tripod, and head to the viewpoint in Mark's book.
It was interesting to see Colmer's Hill from a slightly different angle. Unfortunately, the conditions hadn't improved much, and direct sunlight hadn't made an appearance, but at least I had checked out another viewpoint of one of my favourite locations in Dorset.
Practising Perfect Panoramas
If you watched my recent video, Developing a Passion for Printing, you'll have seen me print a panoramic image of Glencoe. In the video, I also promised myself that I would attempt to take more panoramic images. Though I had learned more about the technique while on a workshop in Glencoe, I was still a long way from being proficient at creating them. So as the conditions weren't ideal for the photograph I was hoping to make, I decided to practice my panoramic technique.
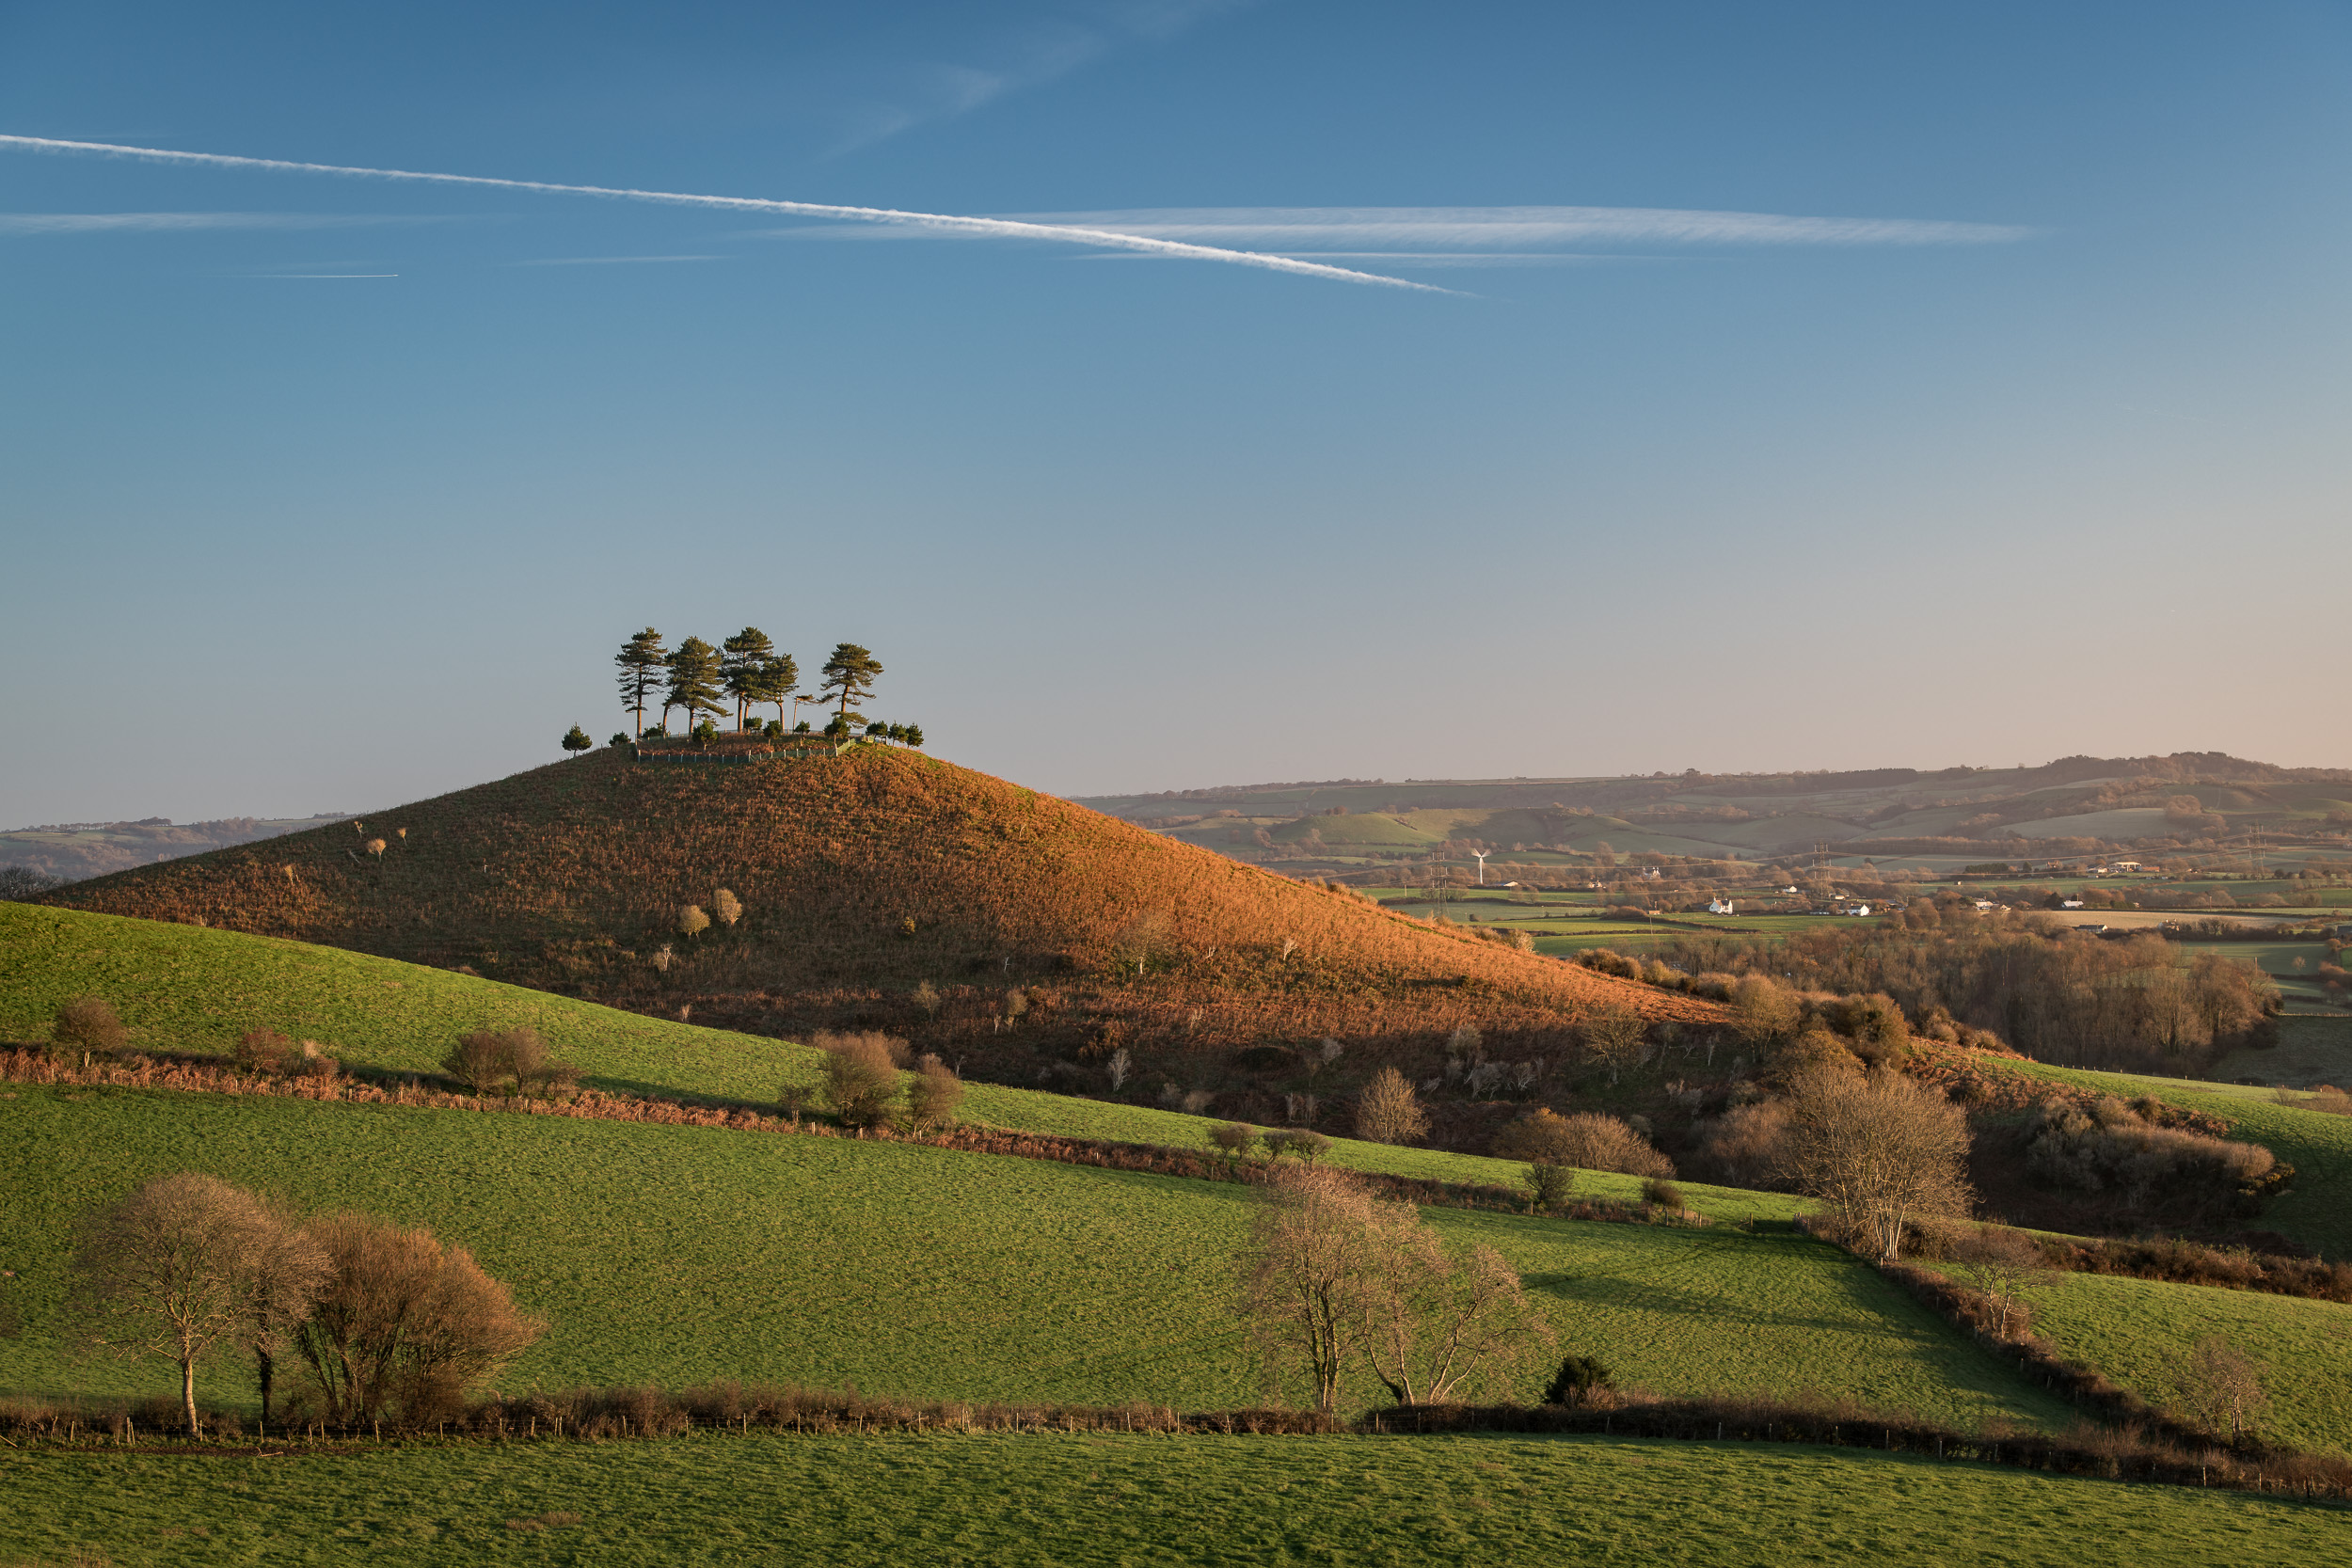
Nikon D850, Nikkor 70-200 mm f/2.8 at 110mm, ISO 64, 1/80th second at f/8. The light was better when I took this image, but my composition options were limited by a line of trees just below the edge of the frame.
Don't Leave Too Early!
After getting a couple of shots from my new viewpoint and practicing my panoramic technique I decided to give up and head home. It was nearly 9 am and I didn't think I was going to get any decent light at this stage. Just as I packed my tripod up and started to head down the hill, I started to see some nice light on the side of Colmer's Hill.
It was spectacular light, not by a long shot, but better than I had seen all morning. I quickly ran back up the hill and set my camera up again. Fortunately, I hadn't need to use filters all that morning so it didn't take too long to get back to a shooting configuration.

Nikon D850, Nikkor 70-200 mm f/2.8 at 1145mm, ISO 64, 1/50th second at f/8. Better light for this shot, but still nothing to get excited about.
While those images were only marginally better, it did remind not to leave a location until you are really, really sure you're not going to miss anything!
So how has your photography been in 2018 so far? Have you ever left a location a little to early and regretted it? Let me know in the comments below.

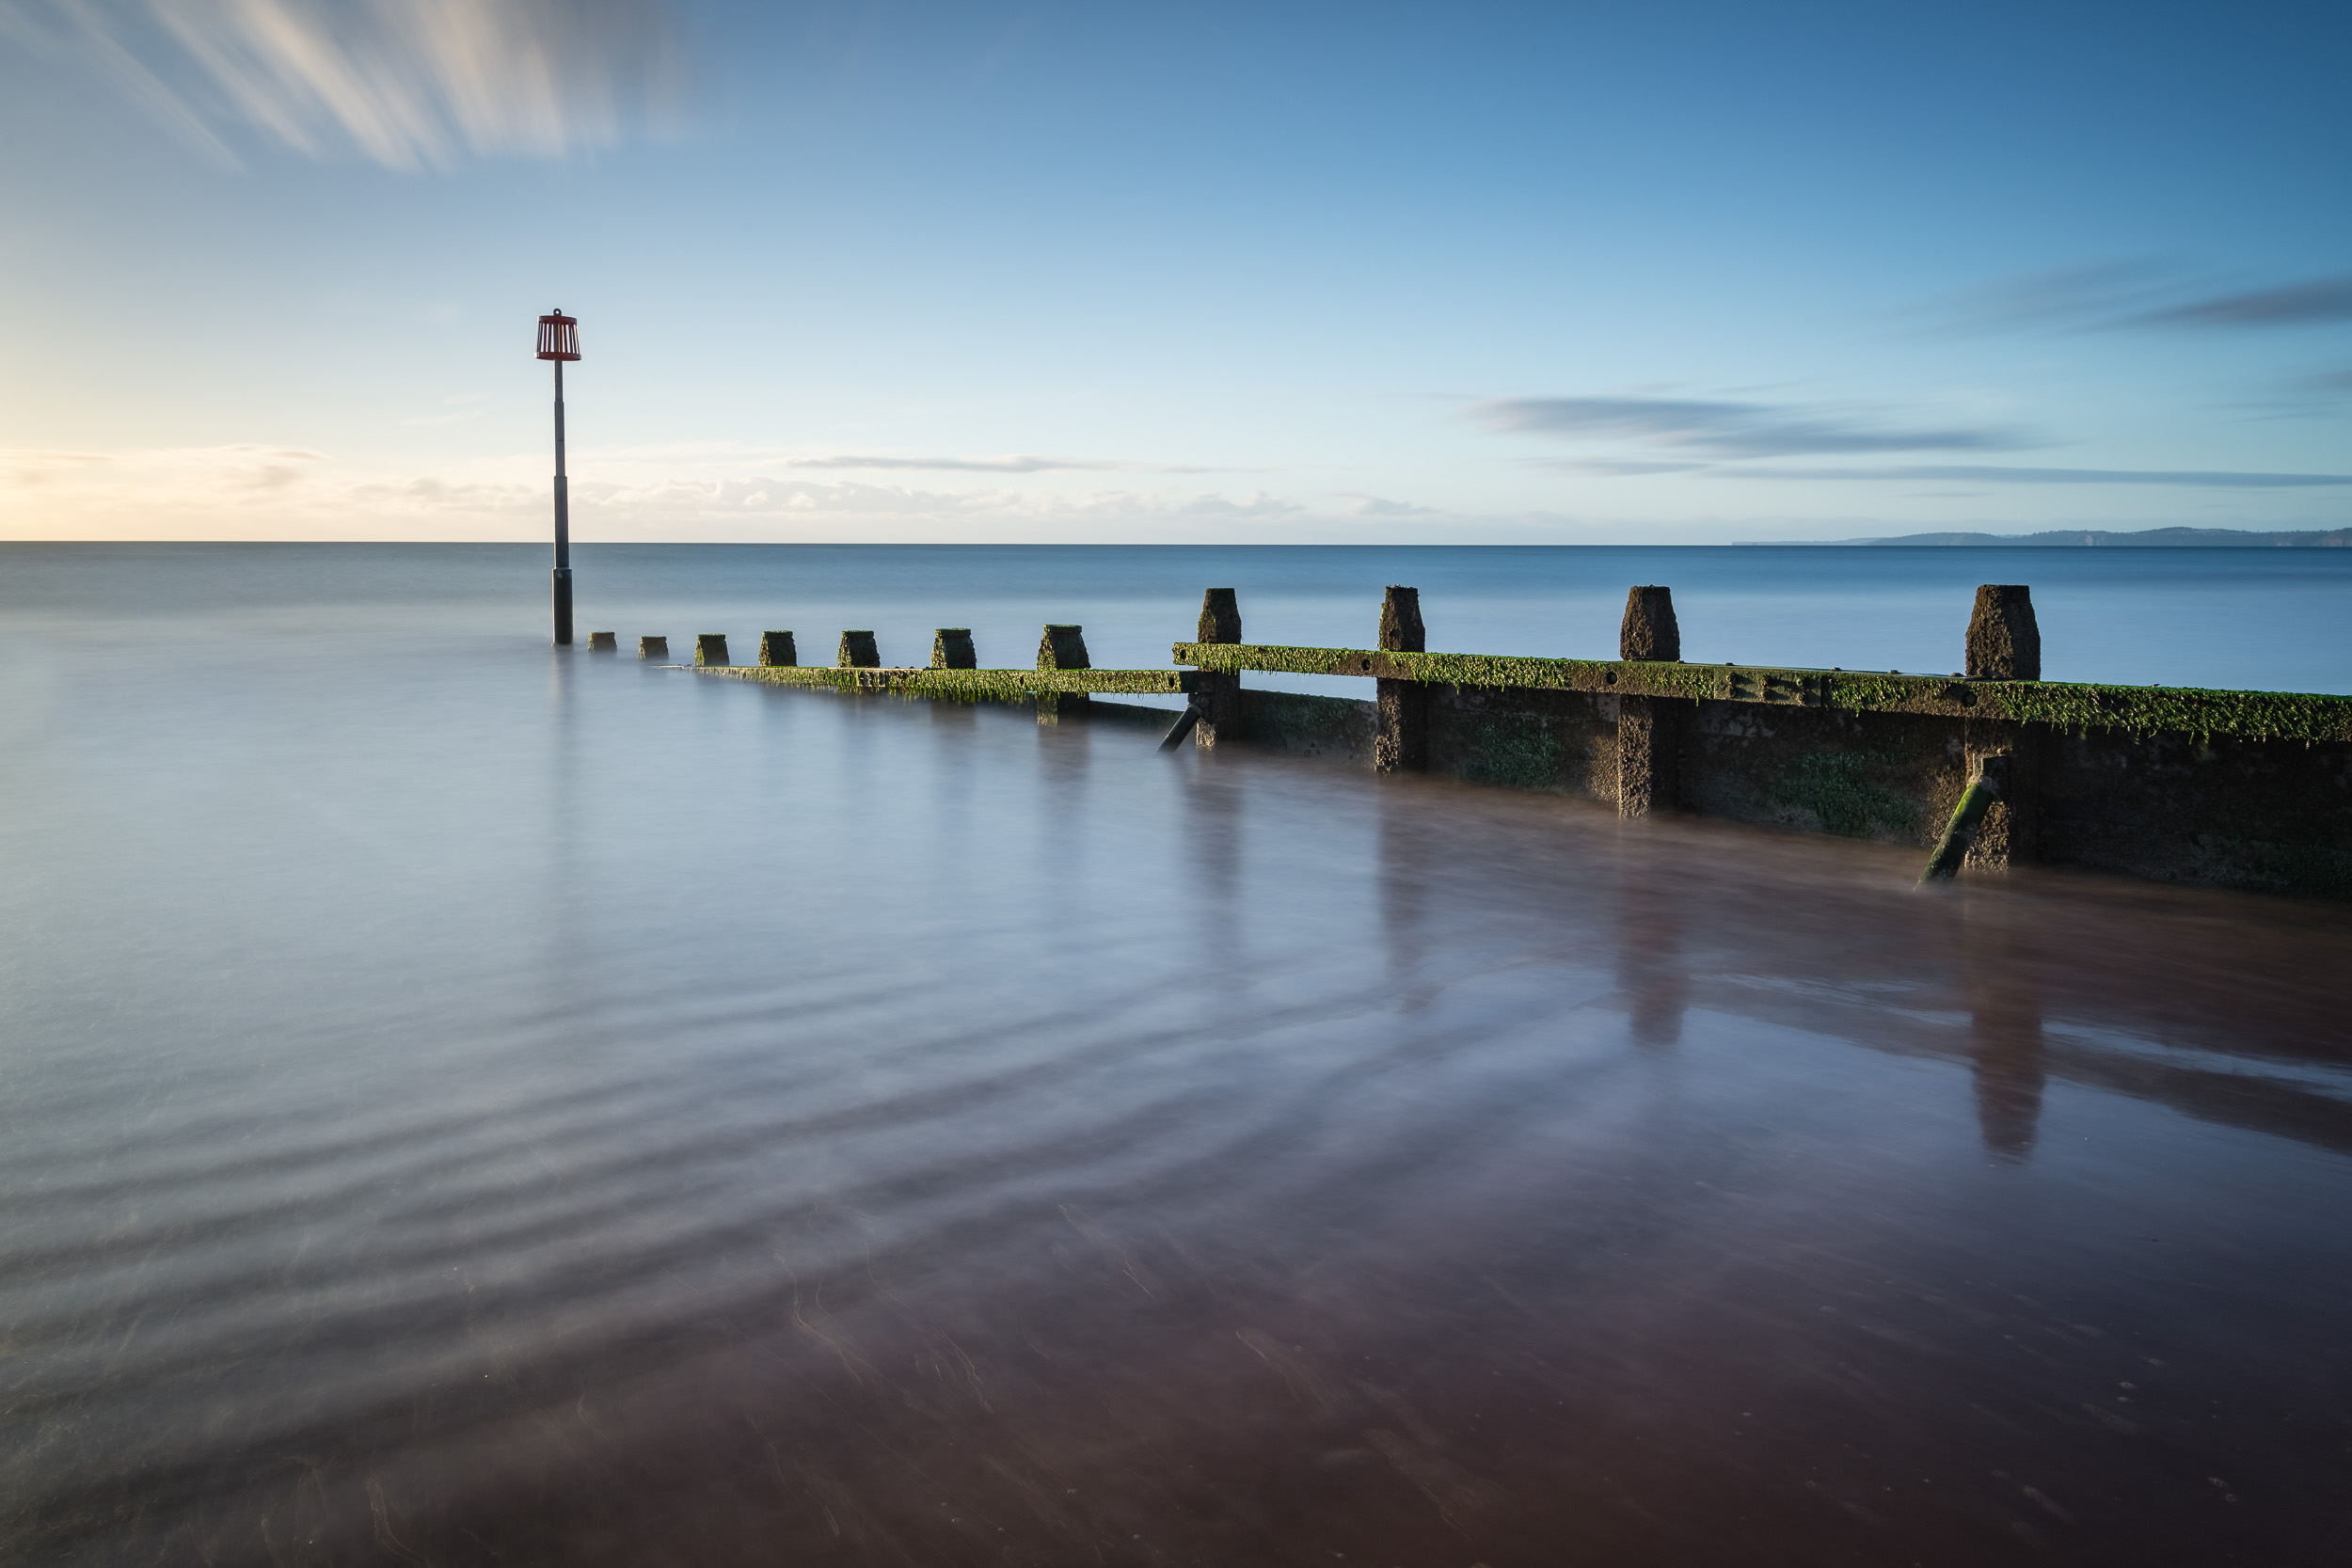
Landscape Photography with the Mactrem AT64C Tripod
In the blog this week I take the Mactrem AT64C Carbon tripod on location to shoot some landscape images to see how it copes with real-world situations. Join me in my video review as I photograph long exposures at Dawlish Warren, use a long lens at Colmer's Hill, and take panoramic images from Pilsdon Pen. Finally, I give you my thoughts on this tripod. Is it worth buying?
Reviews On Location
When Mactrem reached out to me to review their AT64C carbon tripod I thought it would be a great excuse to go out and do some landscape photography. Not that I really need an excuse. I fairly well self-motivated when it comes to landscape photography!
For this review, I didn't want to just unbox the tripod and discuss the technical specs from the comfort of my home. That would be a bit boring wouldn't it? So I thought I would do my review a little differently. I would put the tripod to use in some real-world scenarios, capture some images and share my thoughts on both the photography and the tripod.
By doing this I would not only educate the viewer on the tripods performance on location but for anyone just interested in landscape photography there would be something there for them as well.
Reviewing to Mactrem AT64C Tripod
So regardless if you want to know more about this tripod or you just want to see me shoot some landscapes, I hope you enjoy this video:
I do hope you enjoyed this video and that you either found the review helpful or just liked the photography bit.
If you want to purchase one of these tripods then you can purchase one from Amazon.co.uk by clicking on this link here. Also, until 15th April 2018, if you enter the code UWSN5IQD at checkout, you will receive £15 off the price of the tripod.
So what tripod and head do you use? Would you like to see me do more product reviews on location like this one? Let me know in the comments below.
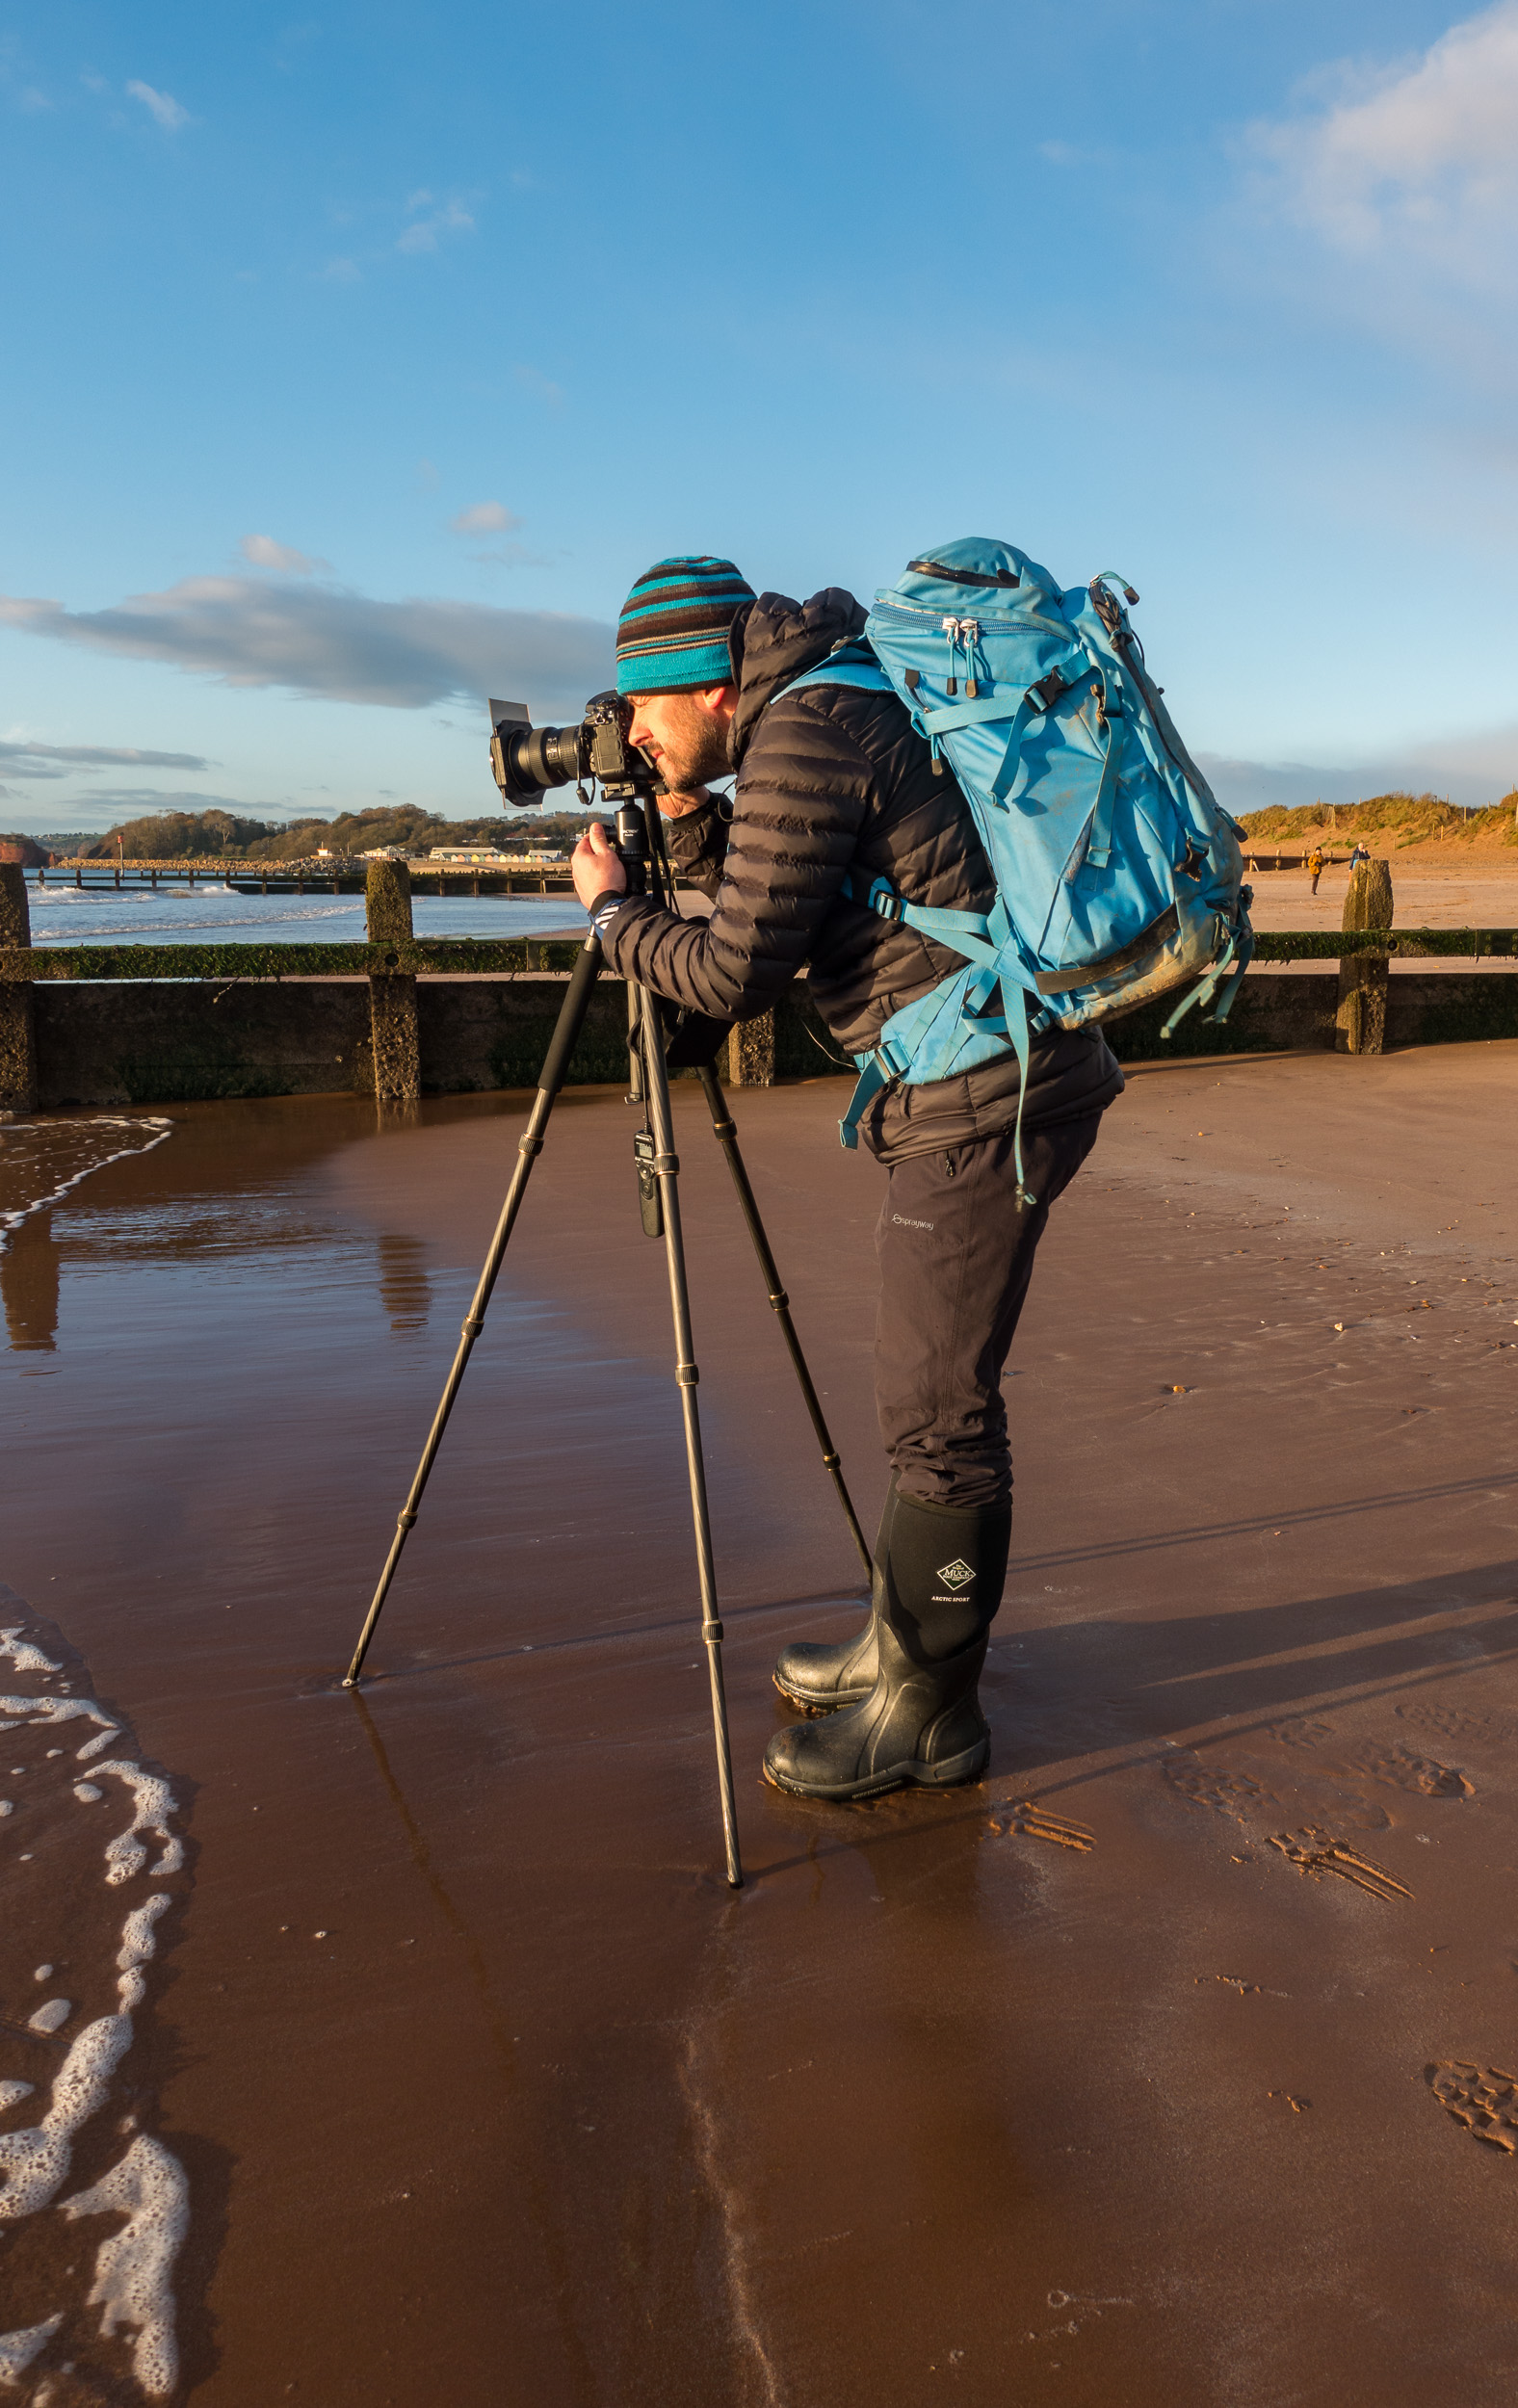
PS. Keep reading as below I'm going to share with you the images that I took at all the locations, along with some shots of me using the tripod.


Getting to Know Colmer's Hill
In this blog post I tell about my 3rd visit to Colmer's Hill and how despite the experience of the previous 2 visits I still have a lot to learn about this fantastic Dorset location.
Third Time Lucky?
On paper Colmer's Hill is a relatively straightforward location to shoot. Its conical shape makes it stand out from the rest of the landscape luring the photographer into some obvious but pleasing compositions. However, as I've just learnt the most obvious composition isn't always the best.
My most recent visit to Colmer's Hill is my third this year. The previous two visits had largely been unsuccessful but I was putting both those visits down as exploratory shoots while I looked for the optimal position. On my third visit, I decided that I would opt to shoot the hill from a less elevated viewpoint so that the top of the hill would be above the horizon. On my previous visits, I had adopted a position on top of the hill opposite Colmer's Hill. This drops the top of the hill below the horizon which, based on the images I've seen, work best when mist surrounds the hill leaving just the peak visible, similar to this image I took on my first visit in January of 2017.
The weather forecast for my most recent visit wasn't for any mist but it did show signs that the high-level cloud could be well illuminated by the rising sun. These predicted conditions together with the plan but of shooting from a lower elevation I thought would provide me with the best chance of getting a good photo. With my plan decided I set the alarm for 04:30!
On my arrival at Quarr Lane at 05:45 the conditions were already looking promising so I quickly headed to my chosen spot. Sure enough, the top of Colmer's Hill was placed nicely above the horizon and I was sure I know had the best spot. So I started to set up my camera and waited for the cloud and light show to start. And start it did. Just not where I wanted it to be. Sure there was sufficient cloud above the top of the hill but the real action was happening just 45 degrees to my right.
Not Quite the Right Spot
The most glorious show of pink clouds was happening just above the spot where the rising sun was. As a personal preference, I don't shoot straight into the sun so I had positioned myself so that it would be excluded from the frame. It seemed like a good plan at the time, after all, the good colour in the sky is not often limited to a single spot. However if I had selected a more northerly position, so the sun was rising directly behind the hill, I would have been able to include the dramatic clouds in my composition.
However, landscape photography is a combination of luck, planning and experience. I had done my planning and luck I can't really control but having little more experience at the location may have allowed me to assess the conditions more effectively and possibly change the spot I was shooting from. It would have been a bit of a walk and might have needed a brisk run but it probably would have been worth it.
However the morning wasn't wasted as I still got out with the camera, enjoyed a lovely sunrise and managed to get this pleasing image.
Nikon D750, Nikkor 70-200mm f/2.8 @ 70mm, f/11, 1/13 sec, ISO 100, Lee Filters ND 0.9 soft grad.
Understanding Your Location
So what did I learn from this trip out with the camera? Well, despite the experience of my previous two visits, and planning for the third, I found that I still had plenty to learn about shooting Colmer's Hill. As I described in my previous blog article, Perseverance - Photographing Bowerman's Nose, it can take many, many trips to a location before you really get to know it and get an image that is worthy of the location. In some cases, you might never really know a location and it will continue to throw you a surprise or two. To be honest, that's probably a good thing though.
Even though I've been there three times I will certainly be going back again. Each time I go though I will understand the location a bit better and I will be able to make the necessary adjustments to increase the likely hood of success.
My Top 3 Tips for Colmer's Hill
So if you fancy a trip to Colmer's Hill, and why wouldn't you, here are my three top tips:
Take a long lens. You'll want something in the range of 24-70mm, but if you have it take a 70-200mm (or something can reach past 100mm).
Explore. You can shoot Colmer's Hill from a number of spots, covering a range of elevations and distance. You might need to go a few times to understand which spots work best and when.
Check Weather and Direction of Light. Colmer's Hill is both a sunrise and sunset location, and it works in a variety of weathers. Choose your spot(s) based on the conditions, but be prepared to change them.
If you'd like to see more of Colmer's Hill why not check out my 5 Minute Photo Adventure video that I shot while I was there. You can see how I created the images above and give you an idea of what it's like to shoot there.
So have you shot Colmer's Hill before? Do you have a favourite spot to shoot it from? Do you have a favourite location that you've visited many times but you still feel you are getting to know it? Let me know in the comments below.

Exploring Colmer's Hill
In this blog post, I talk about my 2nd visit to Colmer's Hill and how I learnt to look for the wider perspective. I also look at the importance moving around to find different compositions of the same subject.
A Change of Plan
One of my photographic goals this year is to explore more of Dorset. I'm very lucky to live in Devon as not only do I have a lot to shoot in my local county, but I also have Cornwall and Dorset as neighbours. For no particular reason, I seem to have spent more time shooting in Cornwall than Dorset. So after reading Mark Bauer's new book Photographing Dorset, I was very much inspired to photograph more of Dorset in 2017.
My original plan for the shoot was to head to Old Harry Rocks near Swanage. However, the weather forecast wasn't concrete for the conditions I wanted. As it is a 2 hr drive there and a 2 hr drive back I didn't feel it was worth the risk on this occasion so I opted for something a bit more local. I had visited Colmer's Hill late last year and with it's close proximity to home I thought that would be a better option.
A Hint of Colour
I arrived at my location in plenty of time for sunrise. Arriving a good hour before official sunrise allows plenty of time to get set up and maybe even have a quick cup of coffee. From my vantage point, I could clearly see Colmer's Hill and the surrounding landscape which had some low lying mist on it and just a splash of colour in the sky. However, the only cloud in the sky was a thick blanket of low cloud far down the coast, exactly where the sun would rise. So unless conditions changed I would have a cloudless sky for my composition and the first light of the day blocked by some coastal cloud.
A New Perspective
The location I was shooting Colmer's Hill from typically requires a long lens to shoot with so the hill can be isolated. So the first few shots I took were with Nikkor 70-200mm f/2.8. Shooting at around 150mm provided me with the composition I was looking for, but the light was very flat and hazy so the shots weren't very inspiring.
As I often do when I'm waiting though I decided to take a few shots with my phone for my Instagram feed. Taking an image from my phone immediately made me realise that I was missing a very different composition. The phone gave me a much wider perspective of the scene and I realised that rather than just including Colmer's Hill I should be including the wider landscape.
A wider perspective. Nikon D750, Nikkor 24-70mm f/2.8 at 42mm, f/11, 1/15 sec, ISO 100.
By opting for a wider composition I could include the distant hills which were surrounded by mist. The sun had risen above the distant cloud by this time so there was just a little colour on the side of the hills and in the sky.
The tight composition I was so focused on getting had prevented me from looking around to see if there was a better composition to be had. If I hadn't decided to take an image with my phone I might well have missed out on a better image.
Same Location, Different View
While it is important to sometimes change lens to give a better composition, it is also important not to stay put in one spot. With some locations that can't be helped, but you can get a number of different views of Colmer's Hill by simply walking about.
A slightly different view of Colmer's Hill.
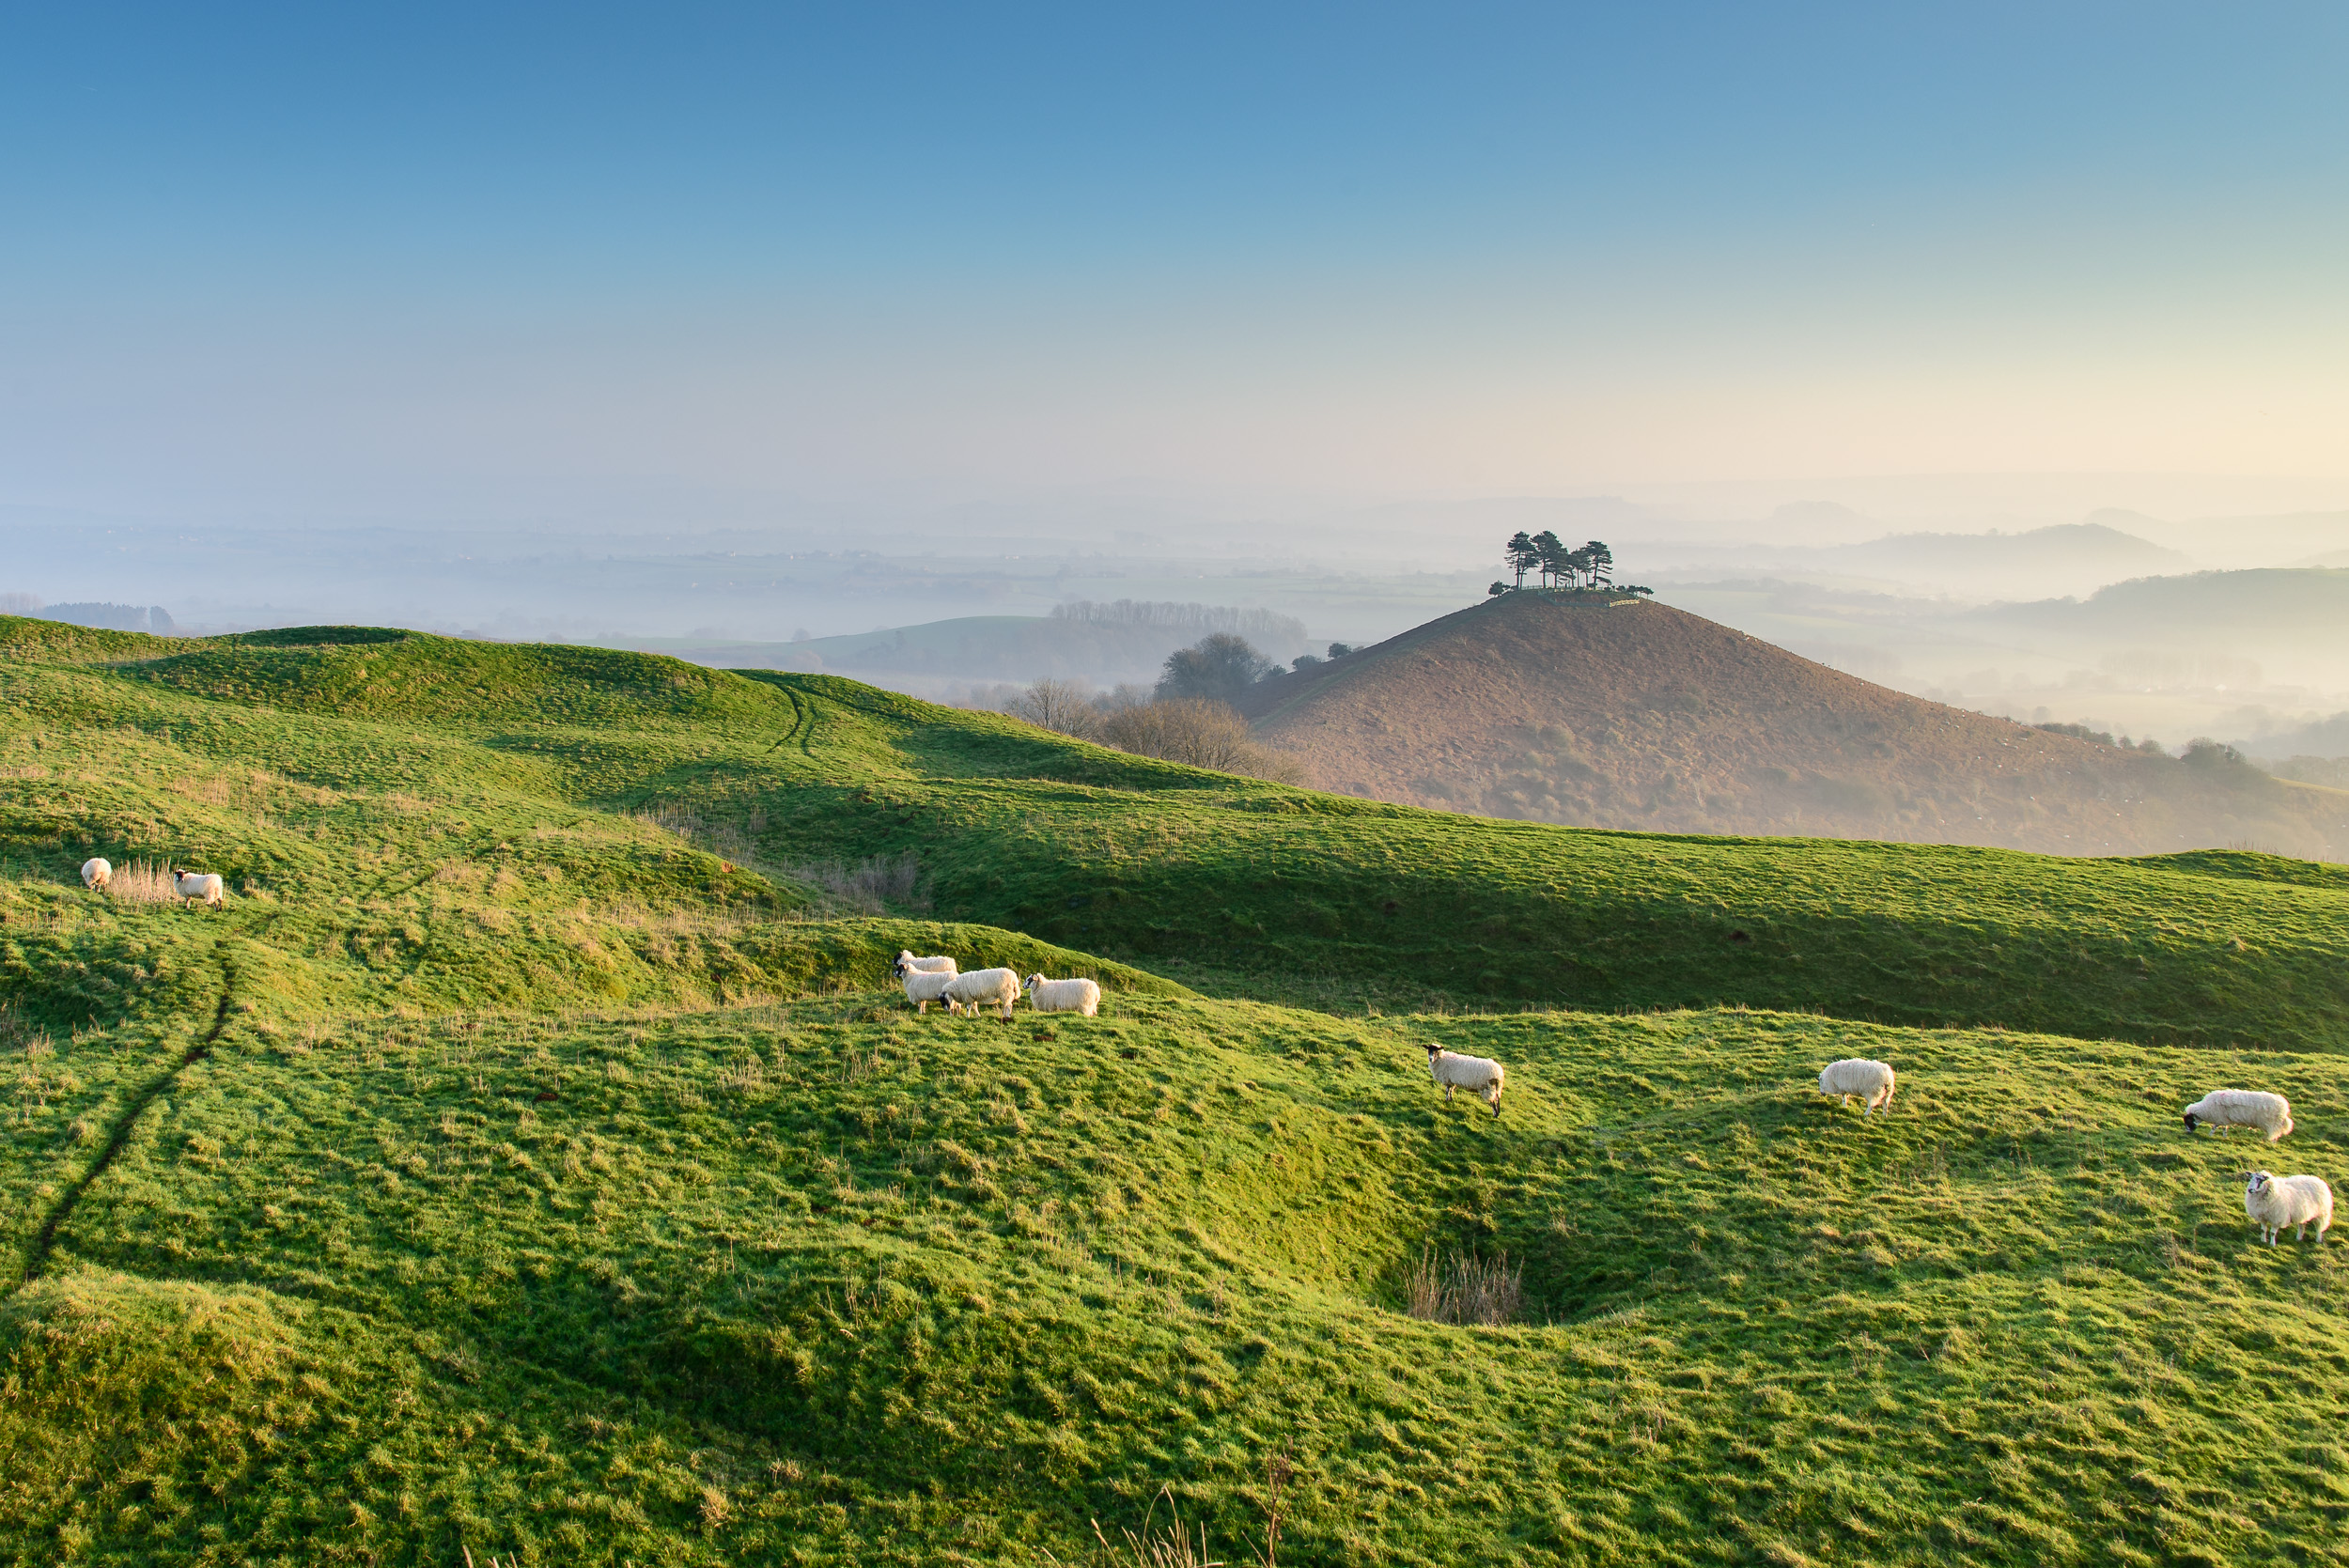
Based on the advice from Mark's book I took a little walk northwards to find some undulating ground which again, given the right light, would make for some interesting foreground for a wide angle composition.
Though the sun was quite high by the time I set my shot up at this location I could see how it might work on another day. I would just some higher cloud and possibly a few less sheep!
I'll Be Back
It's not been the greatest of starts to the year for my photography. It's starting to feel like it's been a long time since I managed to capture a great image. However, I do need to remember that I can really only go out shooting when I have time, not when the conditions are optimal, so I can't expect great results every trip out with the camera.
As always, I will look for the positives from each trip out with the camera. Firstly I learnt not to get too focused on one composition using one lens. Getting the mobile phone out really helped me to see a different view! I've also learnt more about a location that I will probably visit a lot in 2017. It's good to have multiple spots from one location so you can move about a bit to suit the conditions.
Have you had a good start to your photography this year? Have you got some new locations you want to visit this year? Let me know in the comments below.