

The 2020 Unpublished Collection
In this blog post I share with you five photographs that I orginally had no intention of sharing with the world!
The Photos That Didn’t Make the Cut
If you follow any photographer online, you’ll be forgiven for thinking that every time they go out with the camera, they are creating a masterpiece. After all, photographers tend to publish only their best images on their social media feeds. I’m no different.
The reality of the situation is very different. Even the very best of landscape photographers probably feel frustrated more often than they do satisfied.
When I started this blog nearly 5 years ago I said that I would publish my successes and my failures. This is something I have stuck to. Unlike my portfolio page on this website, my blog contains not only my best images but also some rather average images as well. This is OK though as my blog is about sharing the stories behind my landscape photography adventures, and every adventure is not a success!
Even so, there are some adventures that I don’t write about because nothing exciting happened, the pictures weren’t interesting or there was no story to tell. This doesn’t happen that often, but when it does I’m left with some photographs that never see the light of day.
As I’ve had a little more time on my hands recently, I decided to go through my Lightroom catalogue to pick out a few of those lost photographs so I can share with you the reasons why they never got published.
Belstone
Belstone common is one of my favourite Dartmoor locations to photograph and I’m always discovering new compositions like the one in the photograph below. The image is sharp, well exposed and I like the composition, so why didn’t I publish it? The main reason is that it doesn’t excite me. Compared with some of the other photographs I’ve captured at Belstone, this one lacks punch and contrast. What’s missing is the soft light from the rising or setting sun. That aside, in retrospect I should have been happy to publish the photograph.

Belstone, Dartmoor, Devon - Nikon Z7, Nikkor 14-30mm f/4 at 19mm, f/13, 1/5th sec at ISO 64.
Irishman’s Wall
Just a short walk from Belstone is Irishman’s wall and in the photograph below I’ve captured a panoramic image of the wall and Belstone in the distance. Again, I think I may have been over critical with my initial assessment of this image and it would have been worth publishing. My main issue with the image is the grassy area at the bottom right of the image. There isn’t much going on there and I’m not sure it adds anything to image. I still think the composition is good, but what would lift it for me would be some soft light from the left that would capture the undulations in the ground and making that area much more interesting and provide a additional balance to the image.
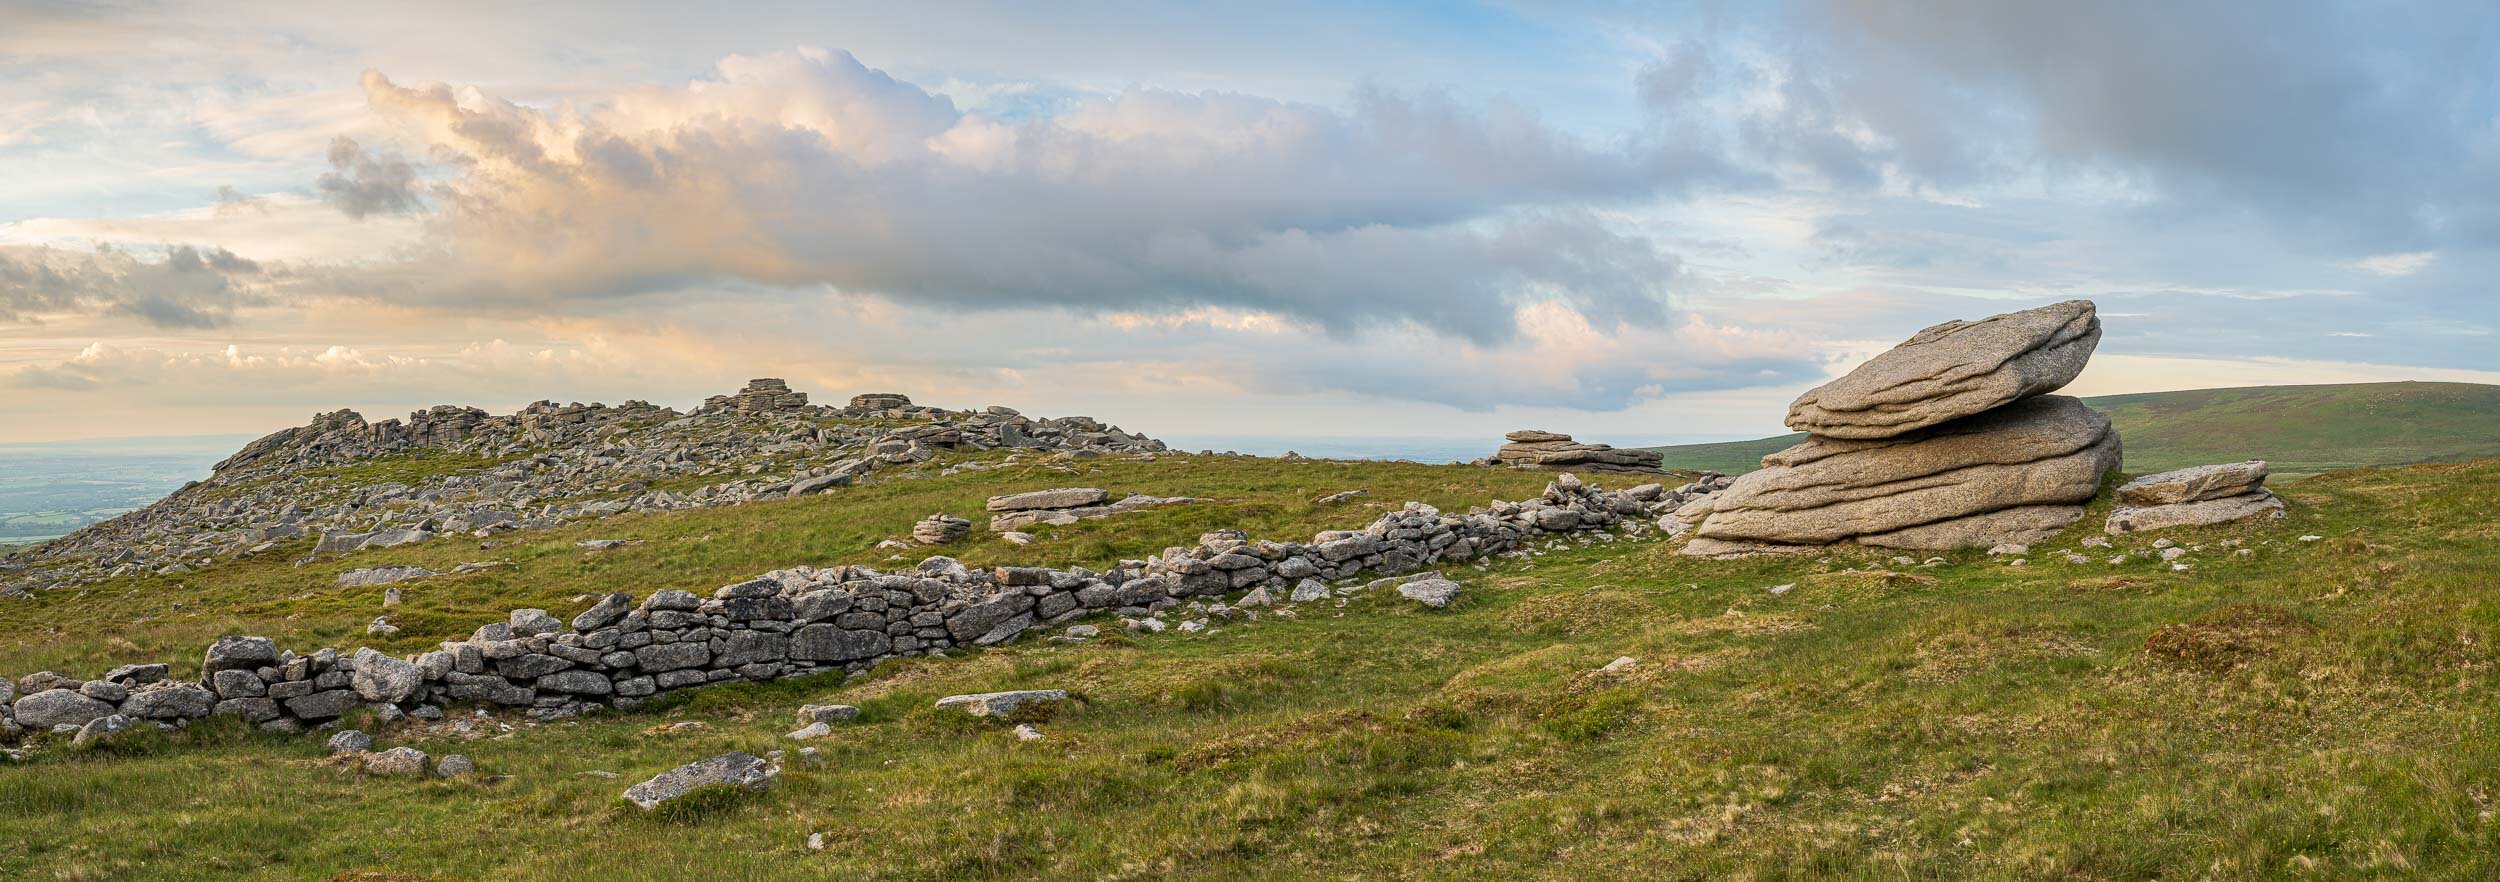
Irishman’s Wall, Dartmoor, Devon - Nikon Z7, Nikkor 14-30mm f/4 at 30mm, f/8, 1/8th sec at ISO 64.
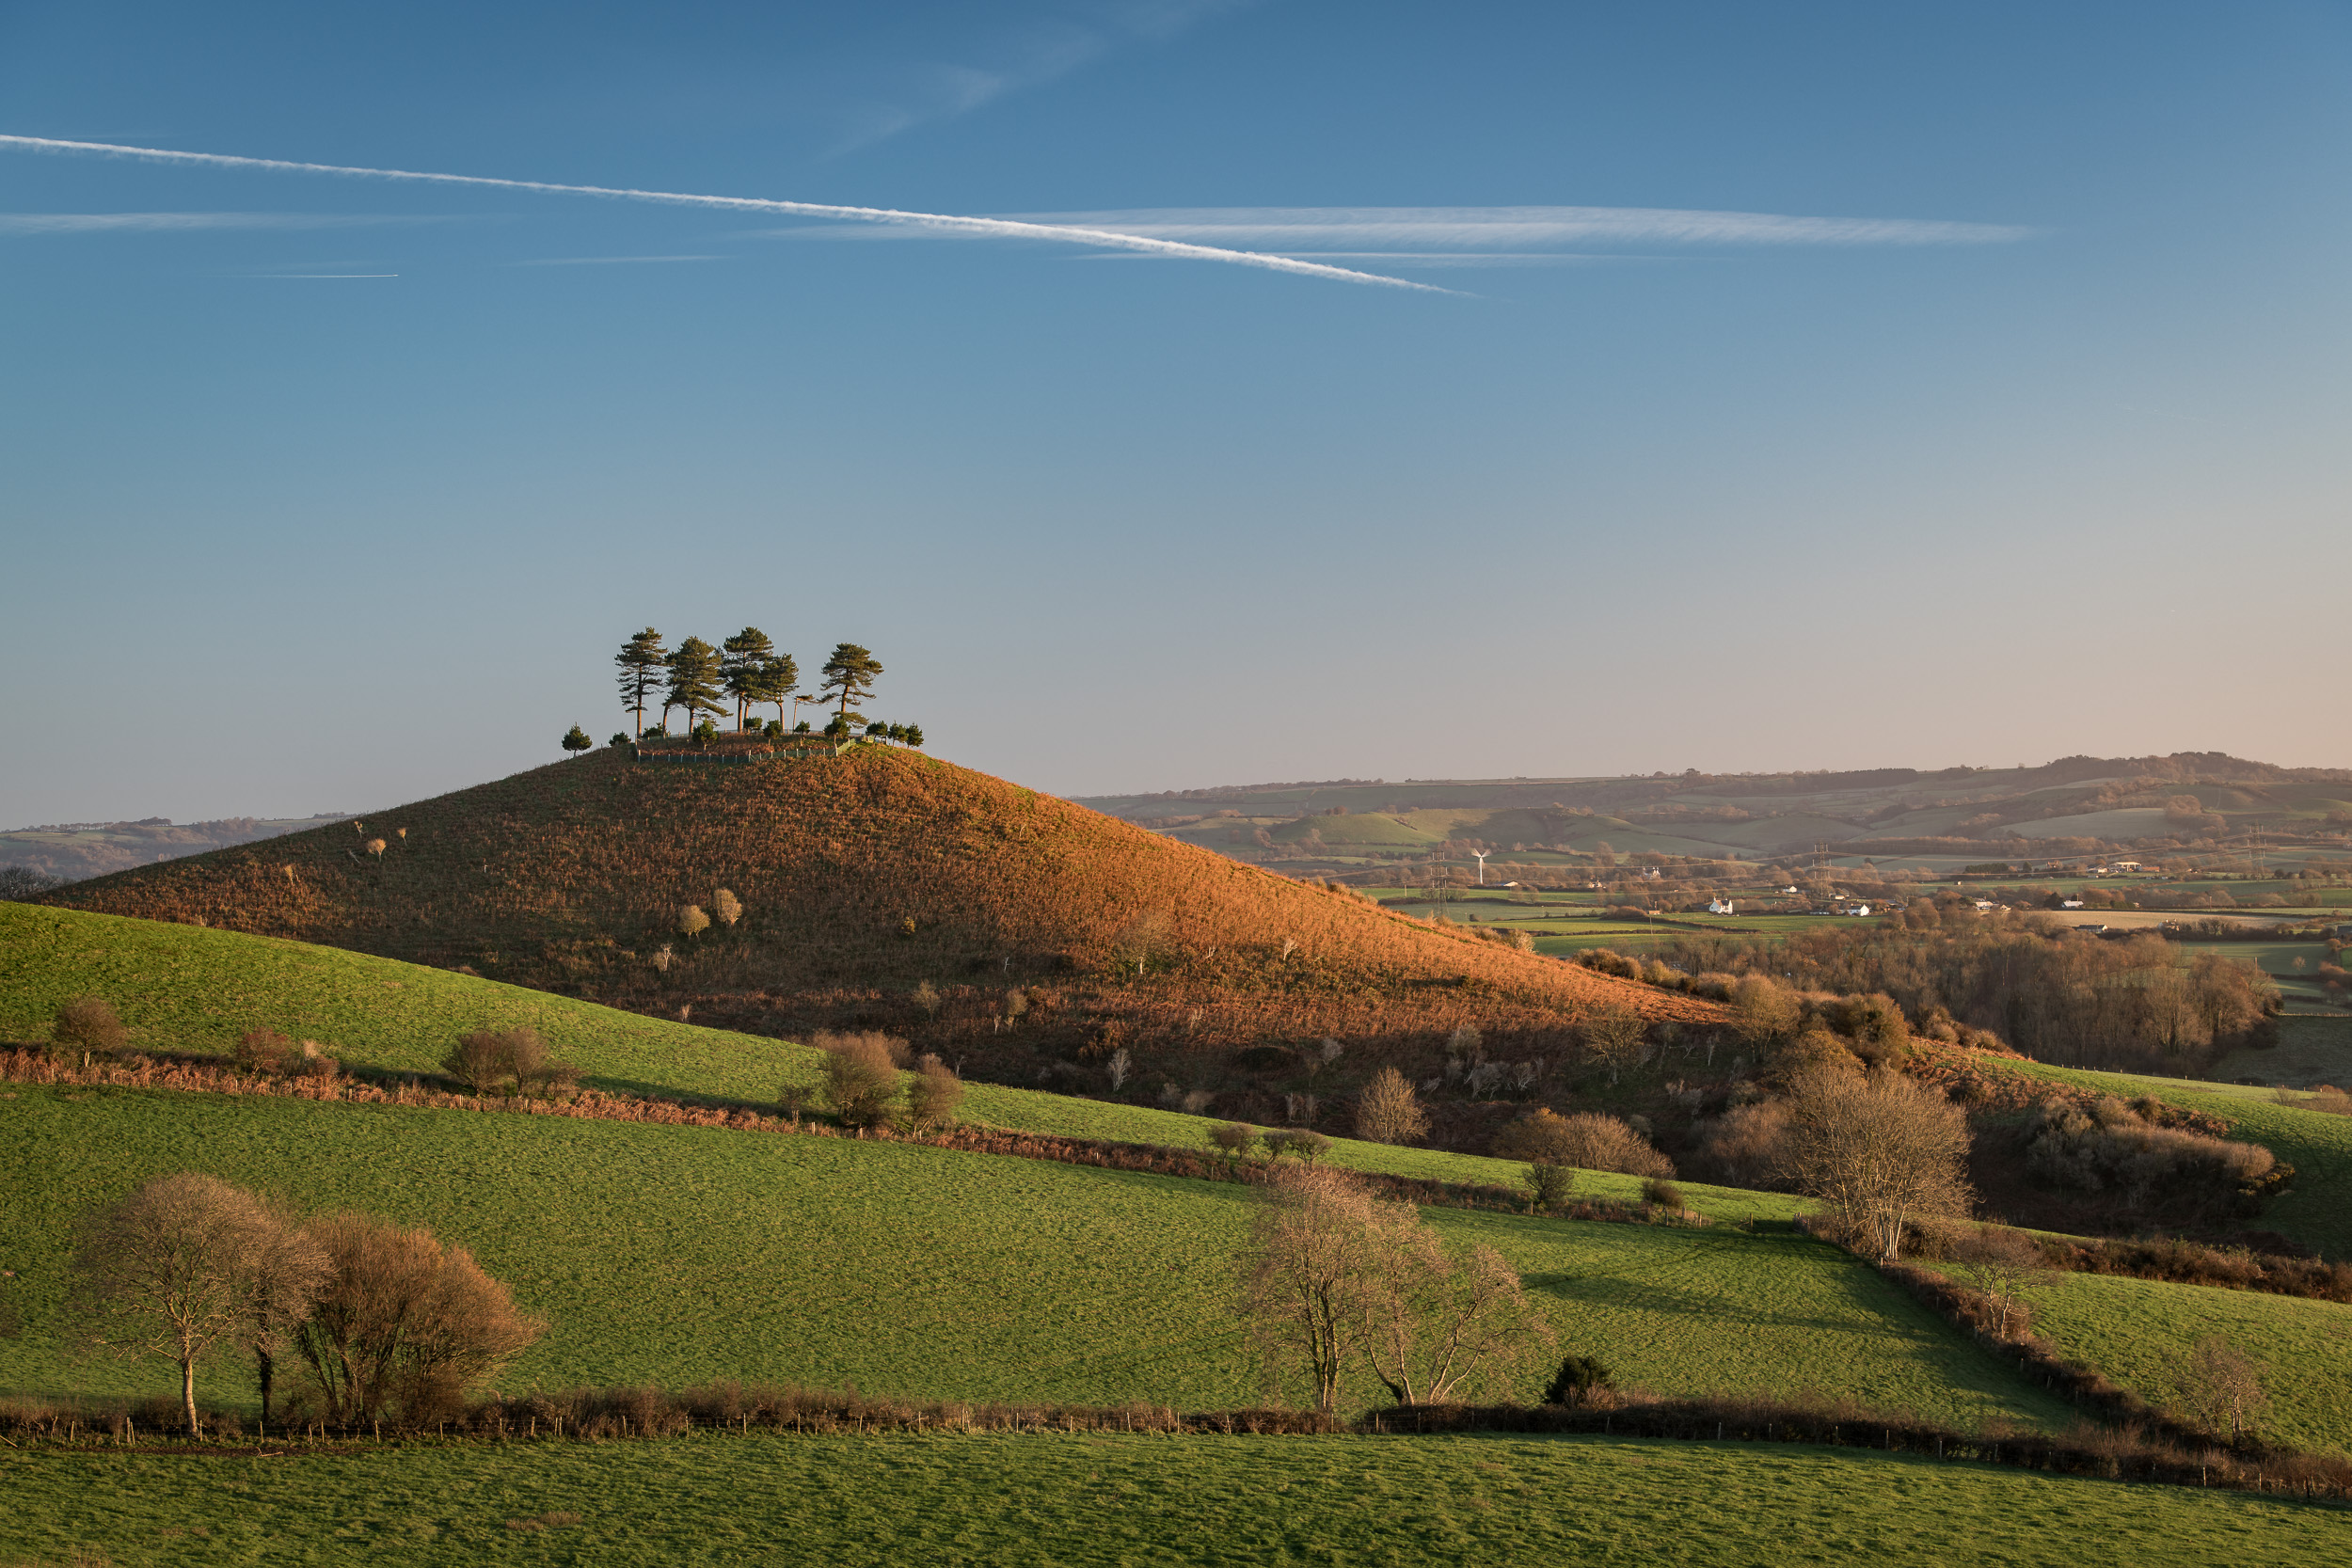
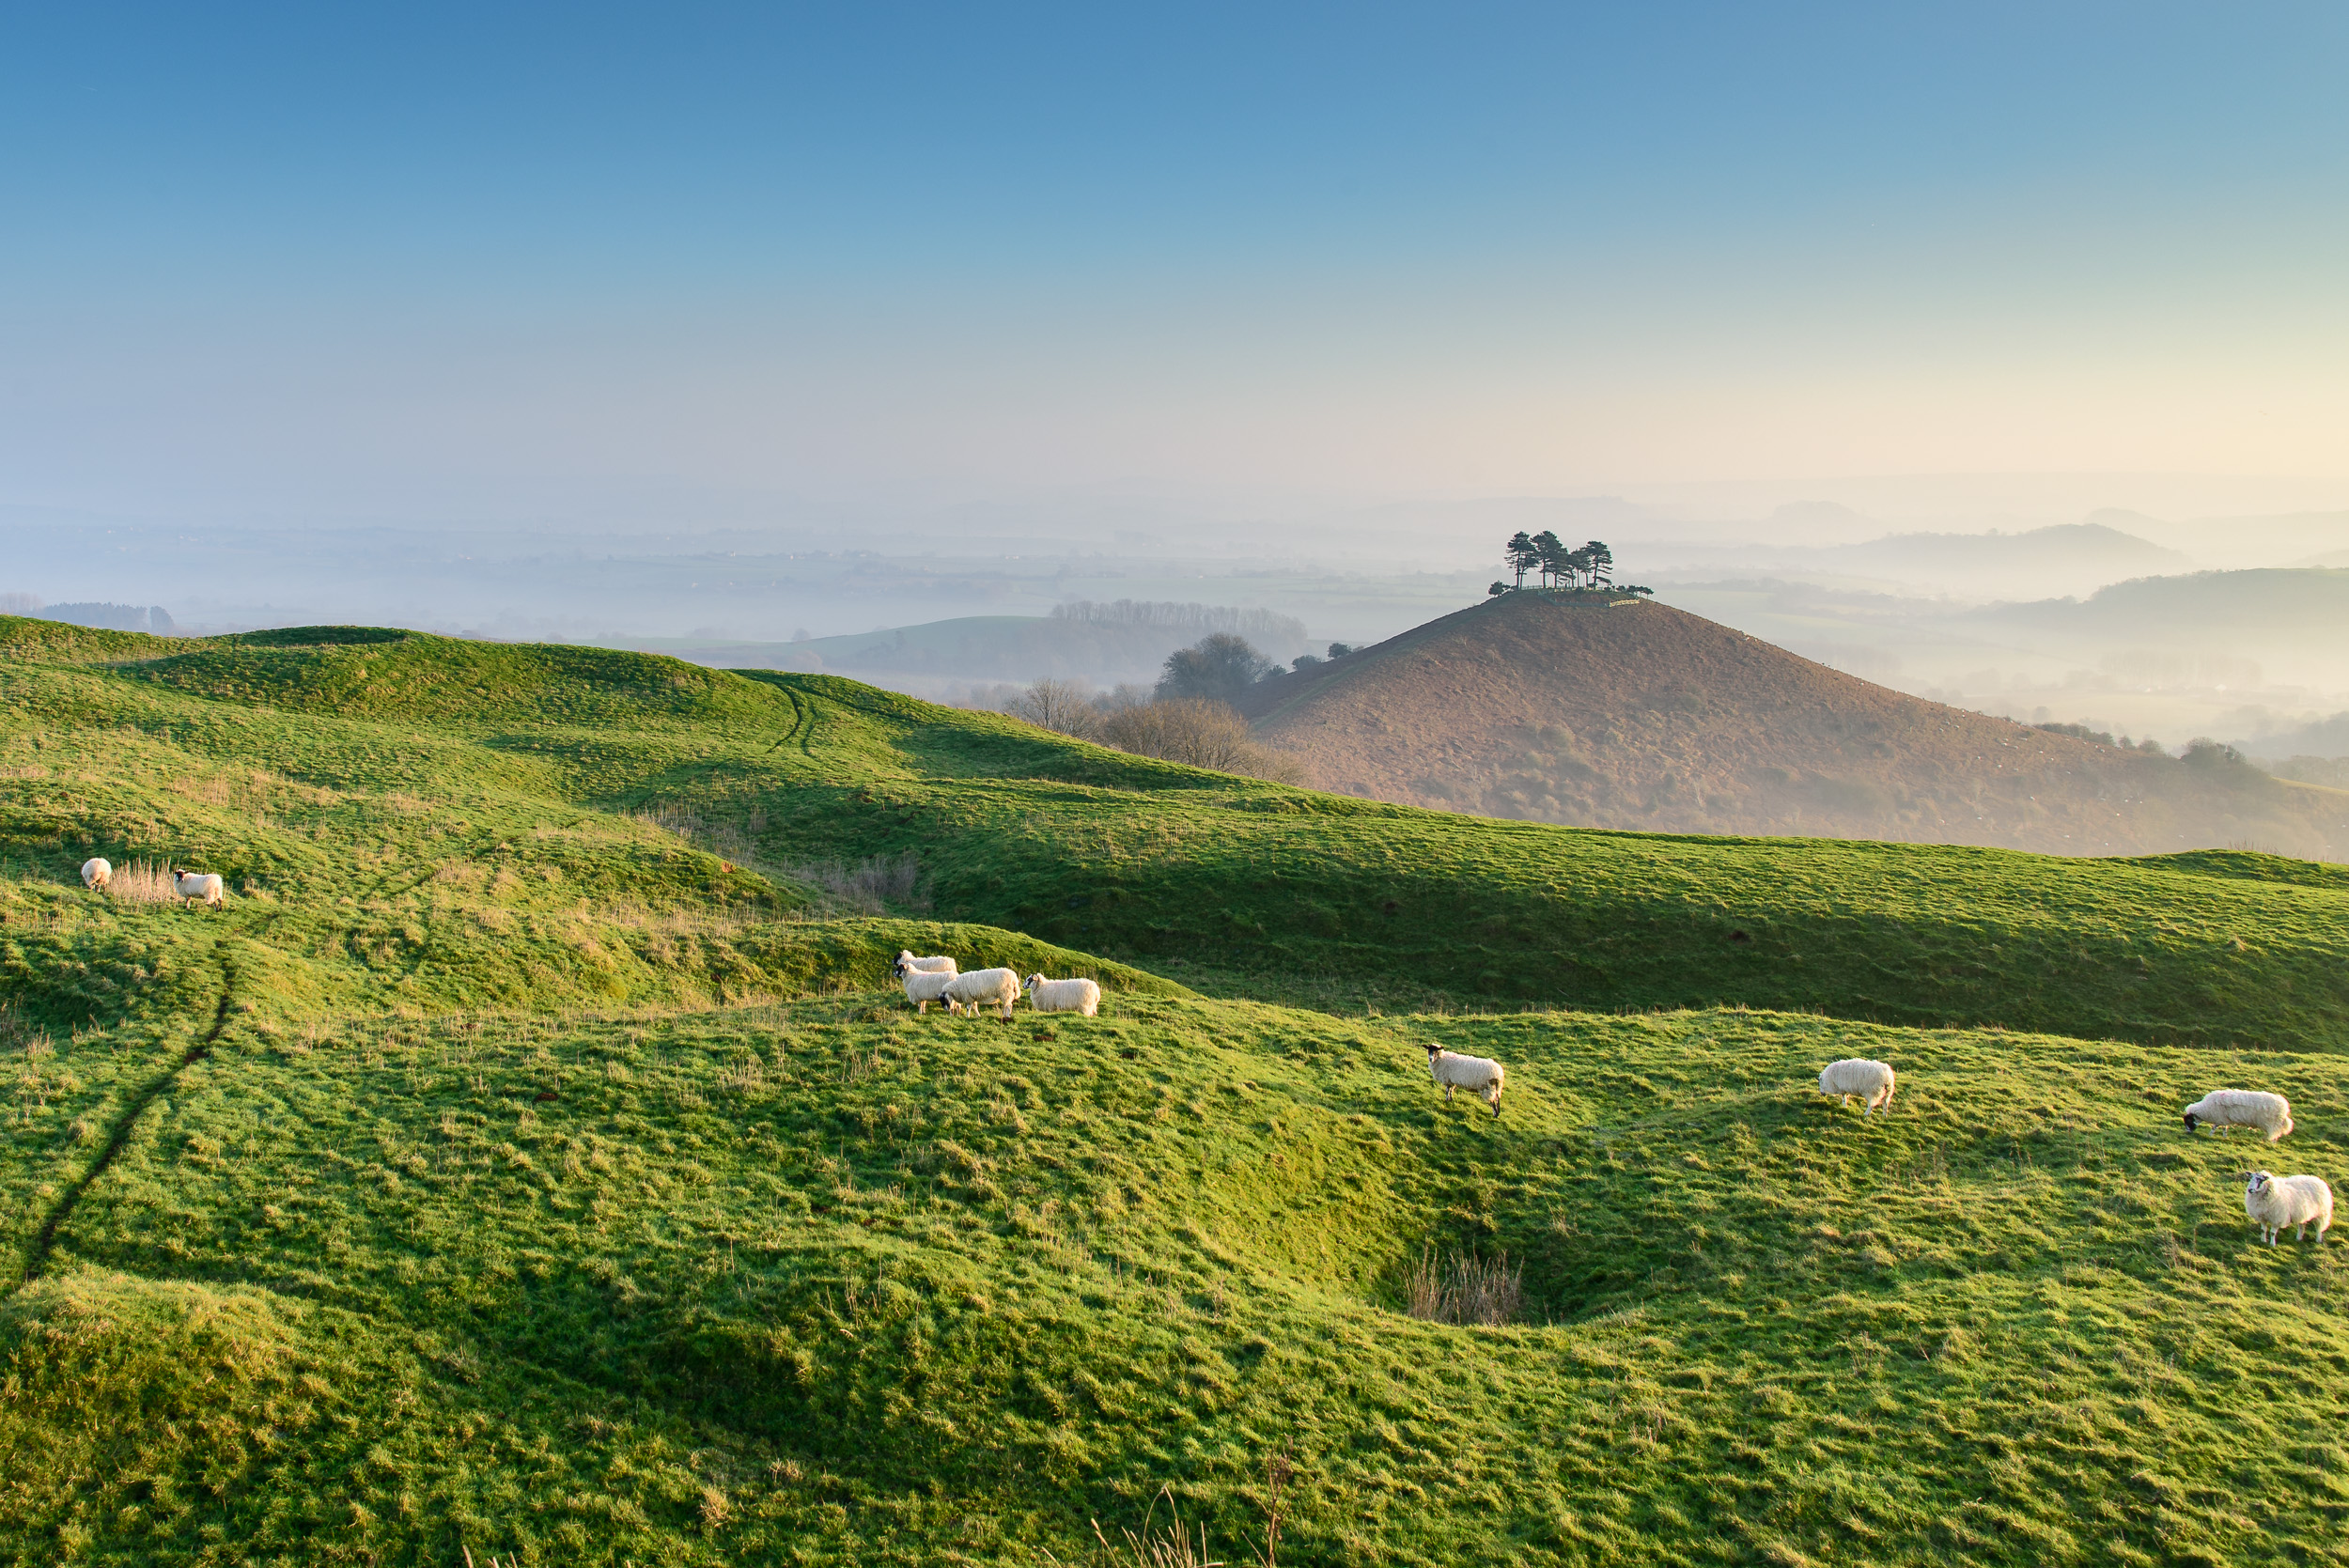
Colmer’s Hill
I’ve been trying to capture of photograph of Colmer’s Hill in good light for many years now. It never seems to be quite right! This image is getting close to the conditions I was looking for but there is a little too much shadow in the foreground, and the sky needs a little more colour. The main reason this photographed was never published is because it is soft. I’ve either slightly missed focused, or what is more likely is that I haven’t given the camera time to settle on the tripod between each of the panoramic frames. I’m almost glad the conditions weren’t amazing as I would have been heartbroken to not have captured an image due to poor camera technique!

Colmer’s Hill, Dorset - Nikon Z7, Nikkor 24-200mm f/4-6.3 at 83mm, f/8, 1/8th sec at ISO 64.
Tunhill Rocks
Tunhill Rocks is a new location that stumbled upon while out walking my dog. This shot is very much an exploratory photograph. I wasn’t out with the serious intention of taking photographs, so it was never my intention to publish any of the photographs from that walk. The composition needs some fine tuning, but I think in the right light it could work. Unfortunately, the evening I took this picture the sun disappeared behind a bank of cloud before I could see what it might look like in good light.

Tunhill Rocks, Dartmoor, Devon - Nikon Z7, Nikkor 24-70mm f/4 at 24mm, f/13, 1/13th sec at ISO 64.
Trendlebere Down
This is another new location for me that I discovered while walking my dog. I like a lot of things about this image but the main reason it never got published as those horrible bright reflections you can see in the water. No matter how I positioned the camera or adjusted the polariser I could not get rid of them. I’m sure that at a different time of day or when the cloud coverage is different, it’s a photograph I could make work.

Trendlebere, Dartmoor, Devon - Nikon Z7, Nikkor 14-30mm f/4 at 17mm, f/11, 20 secs at ISO 64.
I hope you enjoyed that little look at some of the photographs that I’d not published before. I’m not embarrassed by these photographs, far from it. Taking exploratory photographs, trying new compositions, or even finding out that your camera technique that day was poor, is all part of life as a landscape photographer. So, if you have a dreadful day with the camera, don’t worry. As long as you learn something from the experience, you’ll be a better photographer for it.

Mesozoic by Sam Gregory - On My Bookshelf S03E05
Welcome to another episode of On My Bookshelf, and in this episode, I look at Mesozoic by Sam Gregory.
Landscape Photography Inspiration
As many of my regular readers will know I love a good photography book. Lots of those books are from photographers that I admire and feature photographs of a style that I like to take. However, I am a firm believer that by looking at photographs that are from a different style or even a different genre of photography I can l still learn from them and improve my own photography.
This is why I decided to purchase Mesozoic by Sam Gregory. Sam describes the book as a visual abstraction of the Mesozoic period. The photographs contain within the book are not the type of photographs I would normally take but I believe that by studying the photographs in this book that my own photography will be inspired and maybe even influenced.
Hopefully, that video has given you a better understanding of why I purchased the book and you’ll consider picking up a copy yourself (which you can do directly from Sam’s website here). Don’t forget that Sam is a co-host in one of my favourite photography podcasts, The Togcast. Check it out here and those long drives to your next landscape photography destination will fly by!
Finally, if you’ve got a little more time, then why not check out some of the other episodes of On My Bookshelf in this handy playlist.

A New Vision of The Cobb
In the blog this week I tell you about my most recent visit to Lyme Regis in Dorset to capture landscape images of The Cobb, and how an overcast morning changed the way I view this iconic location.
Weather Obsession
I have to admit it, I'm obsessed with the weather. More specifically, the weather forecast. But what landscape photographer isn't slightly obsessed by the weather. I'm constantly checking the forecast and looking for the best place to visit with the limited about of time that I have for my landscape photography.
After a few days of frankly terrible weather, it was going to take some pretty awful conditions to stop me heading out with the camera. After much head scratching over the weather forecast I thought the best place to go would be The Cobb at Lyme Regis in Dorset.
It was a bit of a risk to go there given the predicted cloud cover. Either side of sunrise it was forecasting 100% cloud cover, but around sunrise itself, the cloud cover could drop to around 50%. Combined with the direction of the rising sun, I was hoping to capture an image similar to this one I'd taken a while back.
The Cobb vs The Sea, Lyme Regis, Dorset - Nikon D750, Nikkor 16-35 mm f/4 at 22 mm, f/13, 0.6 secs at ISO 100, Lee Filters ND Grad.
Choose Life, Choose The Cobb
Before I carry on, I've just remembered that I created one of my 5 Minute Photo Adventure videos from The Cobb, so if you want to see what it looks like, then check out the video below. You can also read the blog article for that video here.
Anyway, back to the story of my most recent visit. When I arrived in Lyme Regis, the weather was as forecast and cloud coverage looked to be 100%. As I walked from the car and approached The Cobb I could see that I wasn't the only photographer that high hopes for capturing a good image that morning.
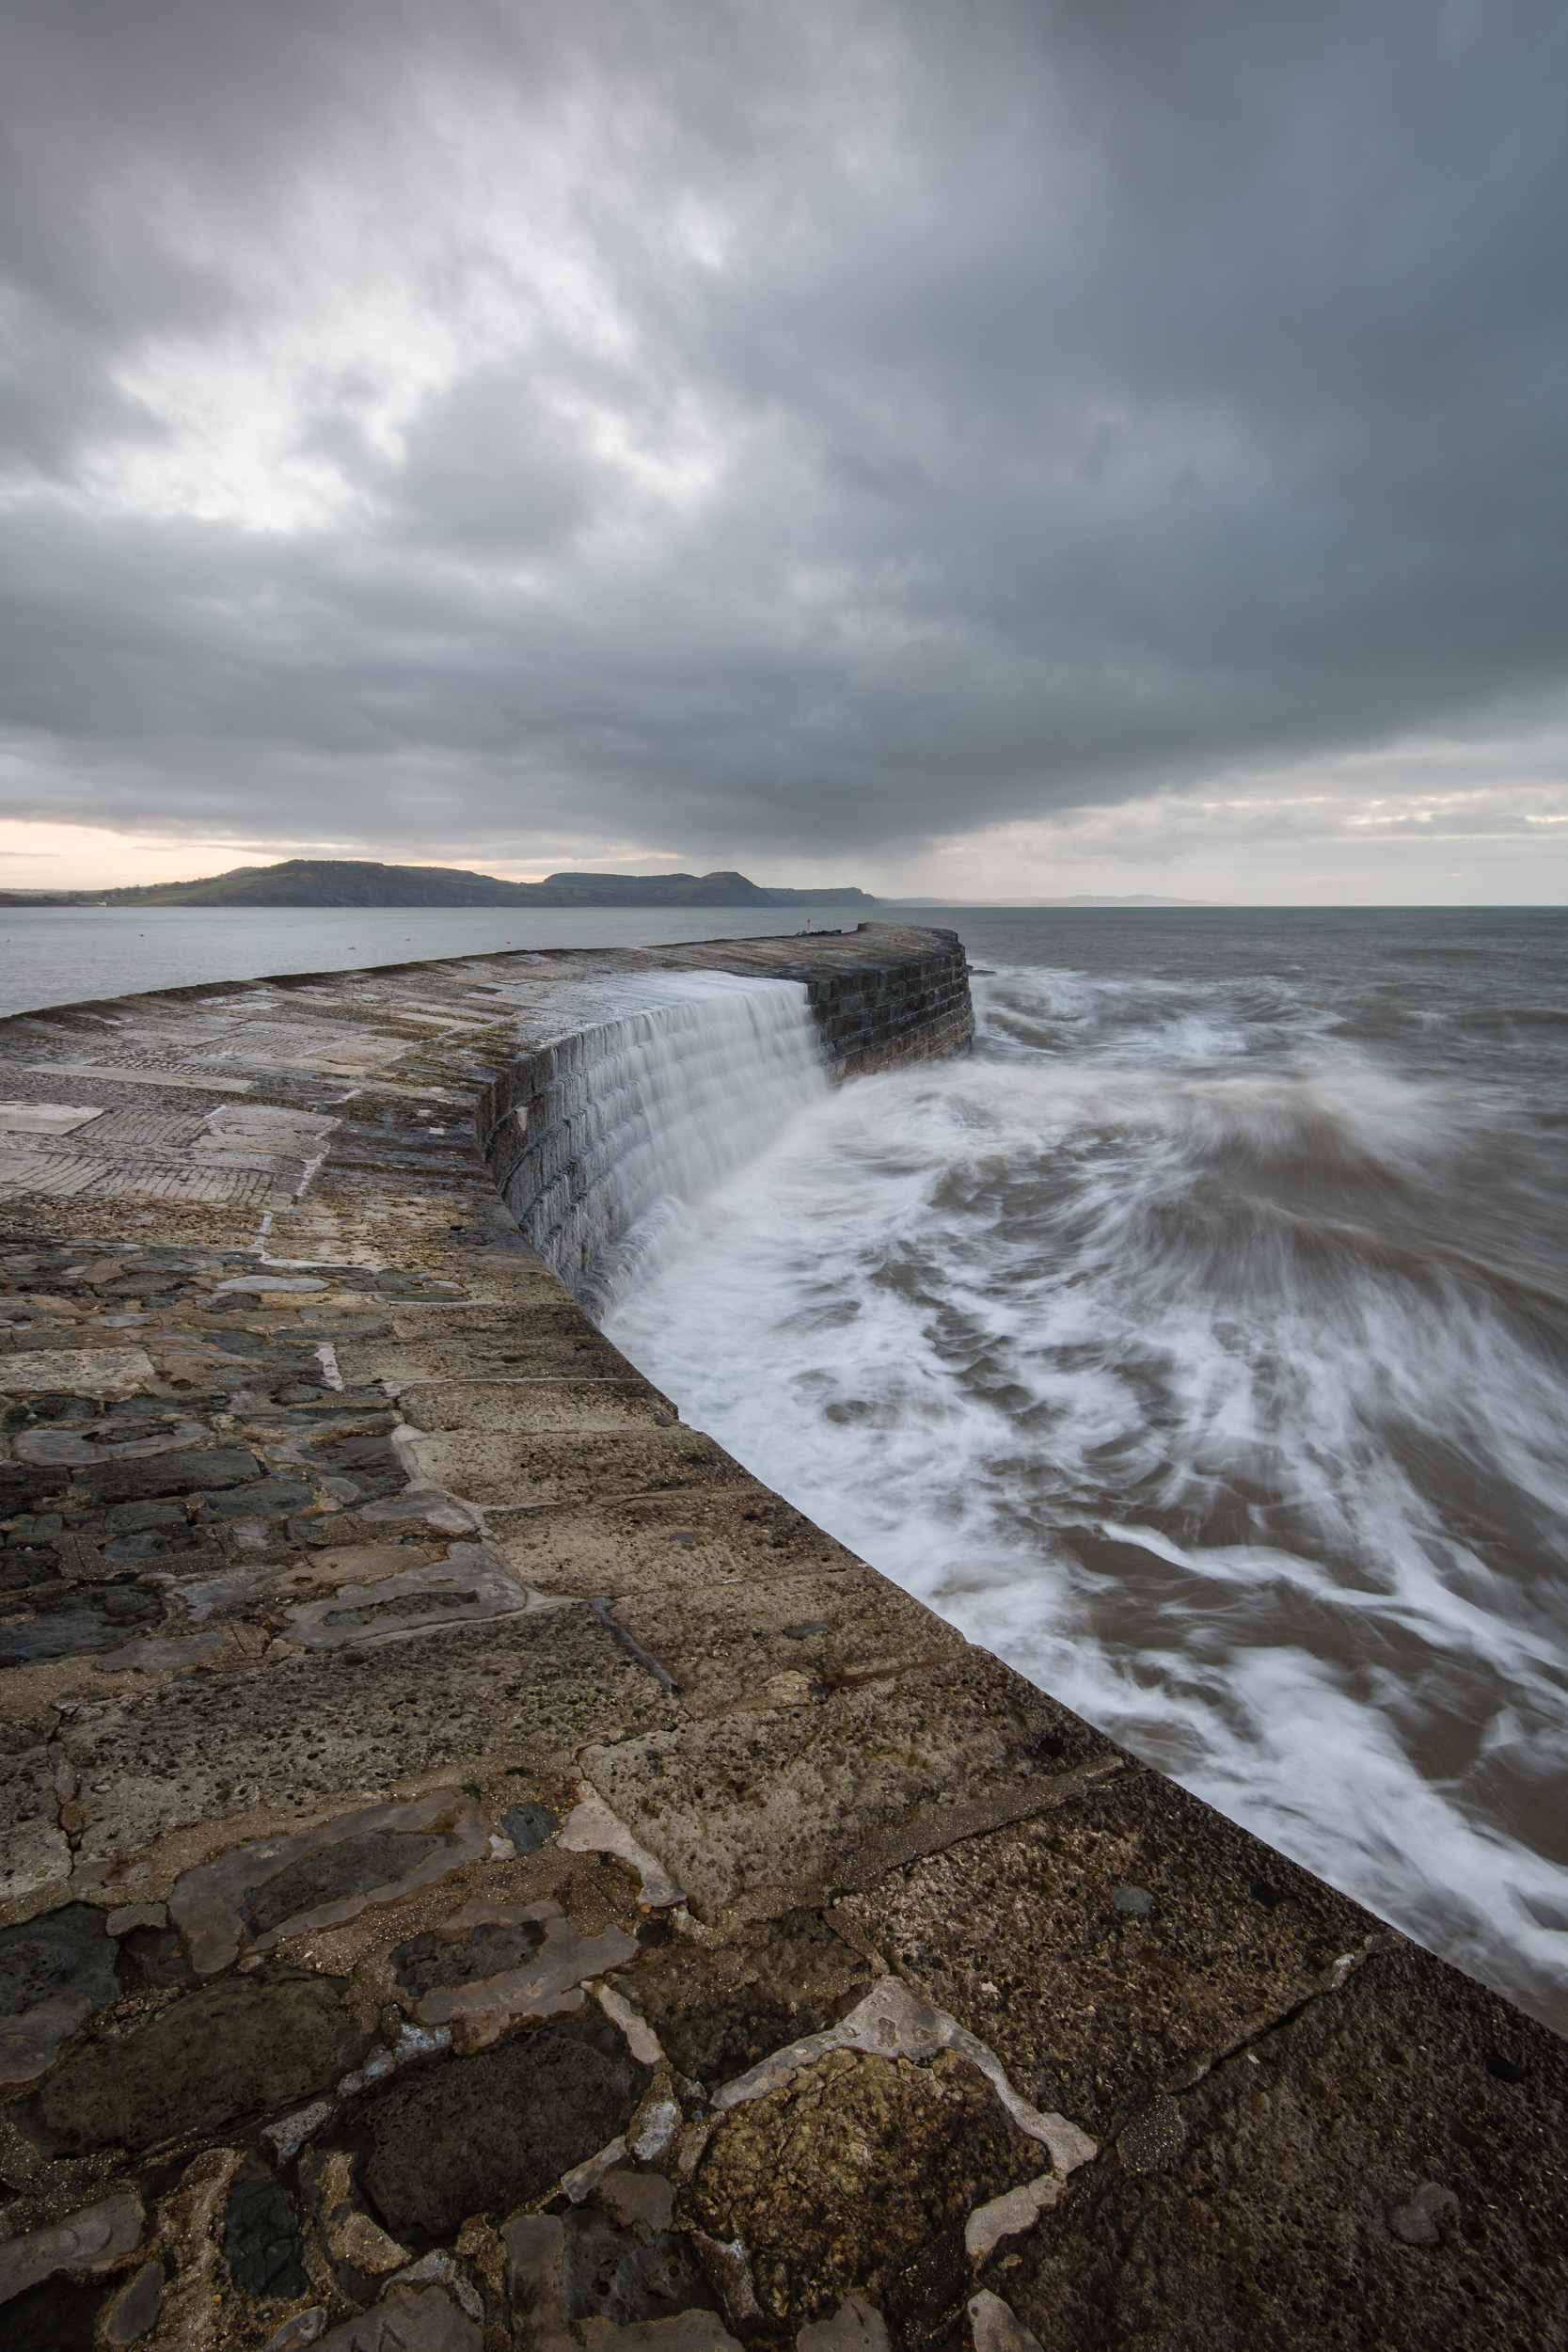
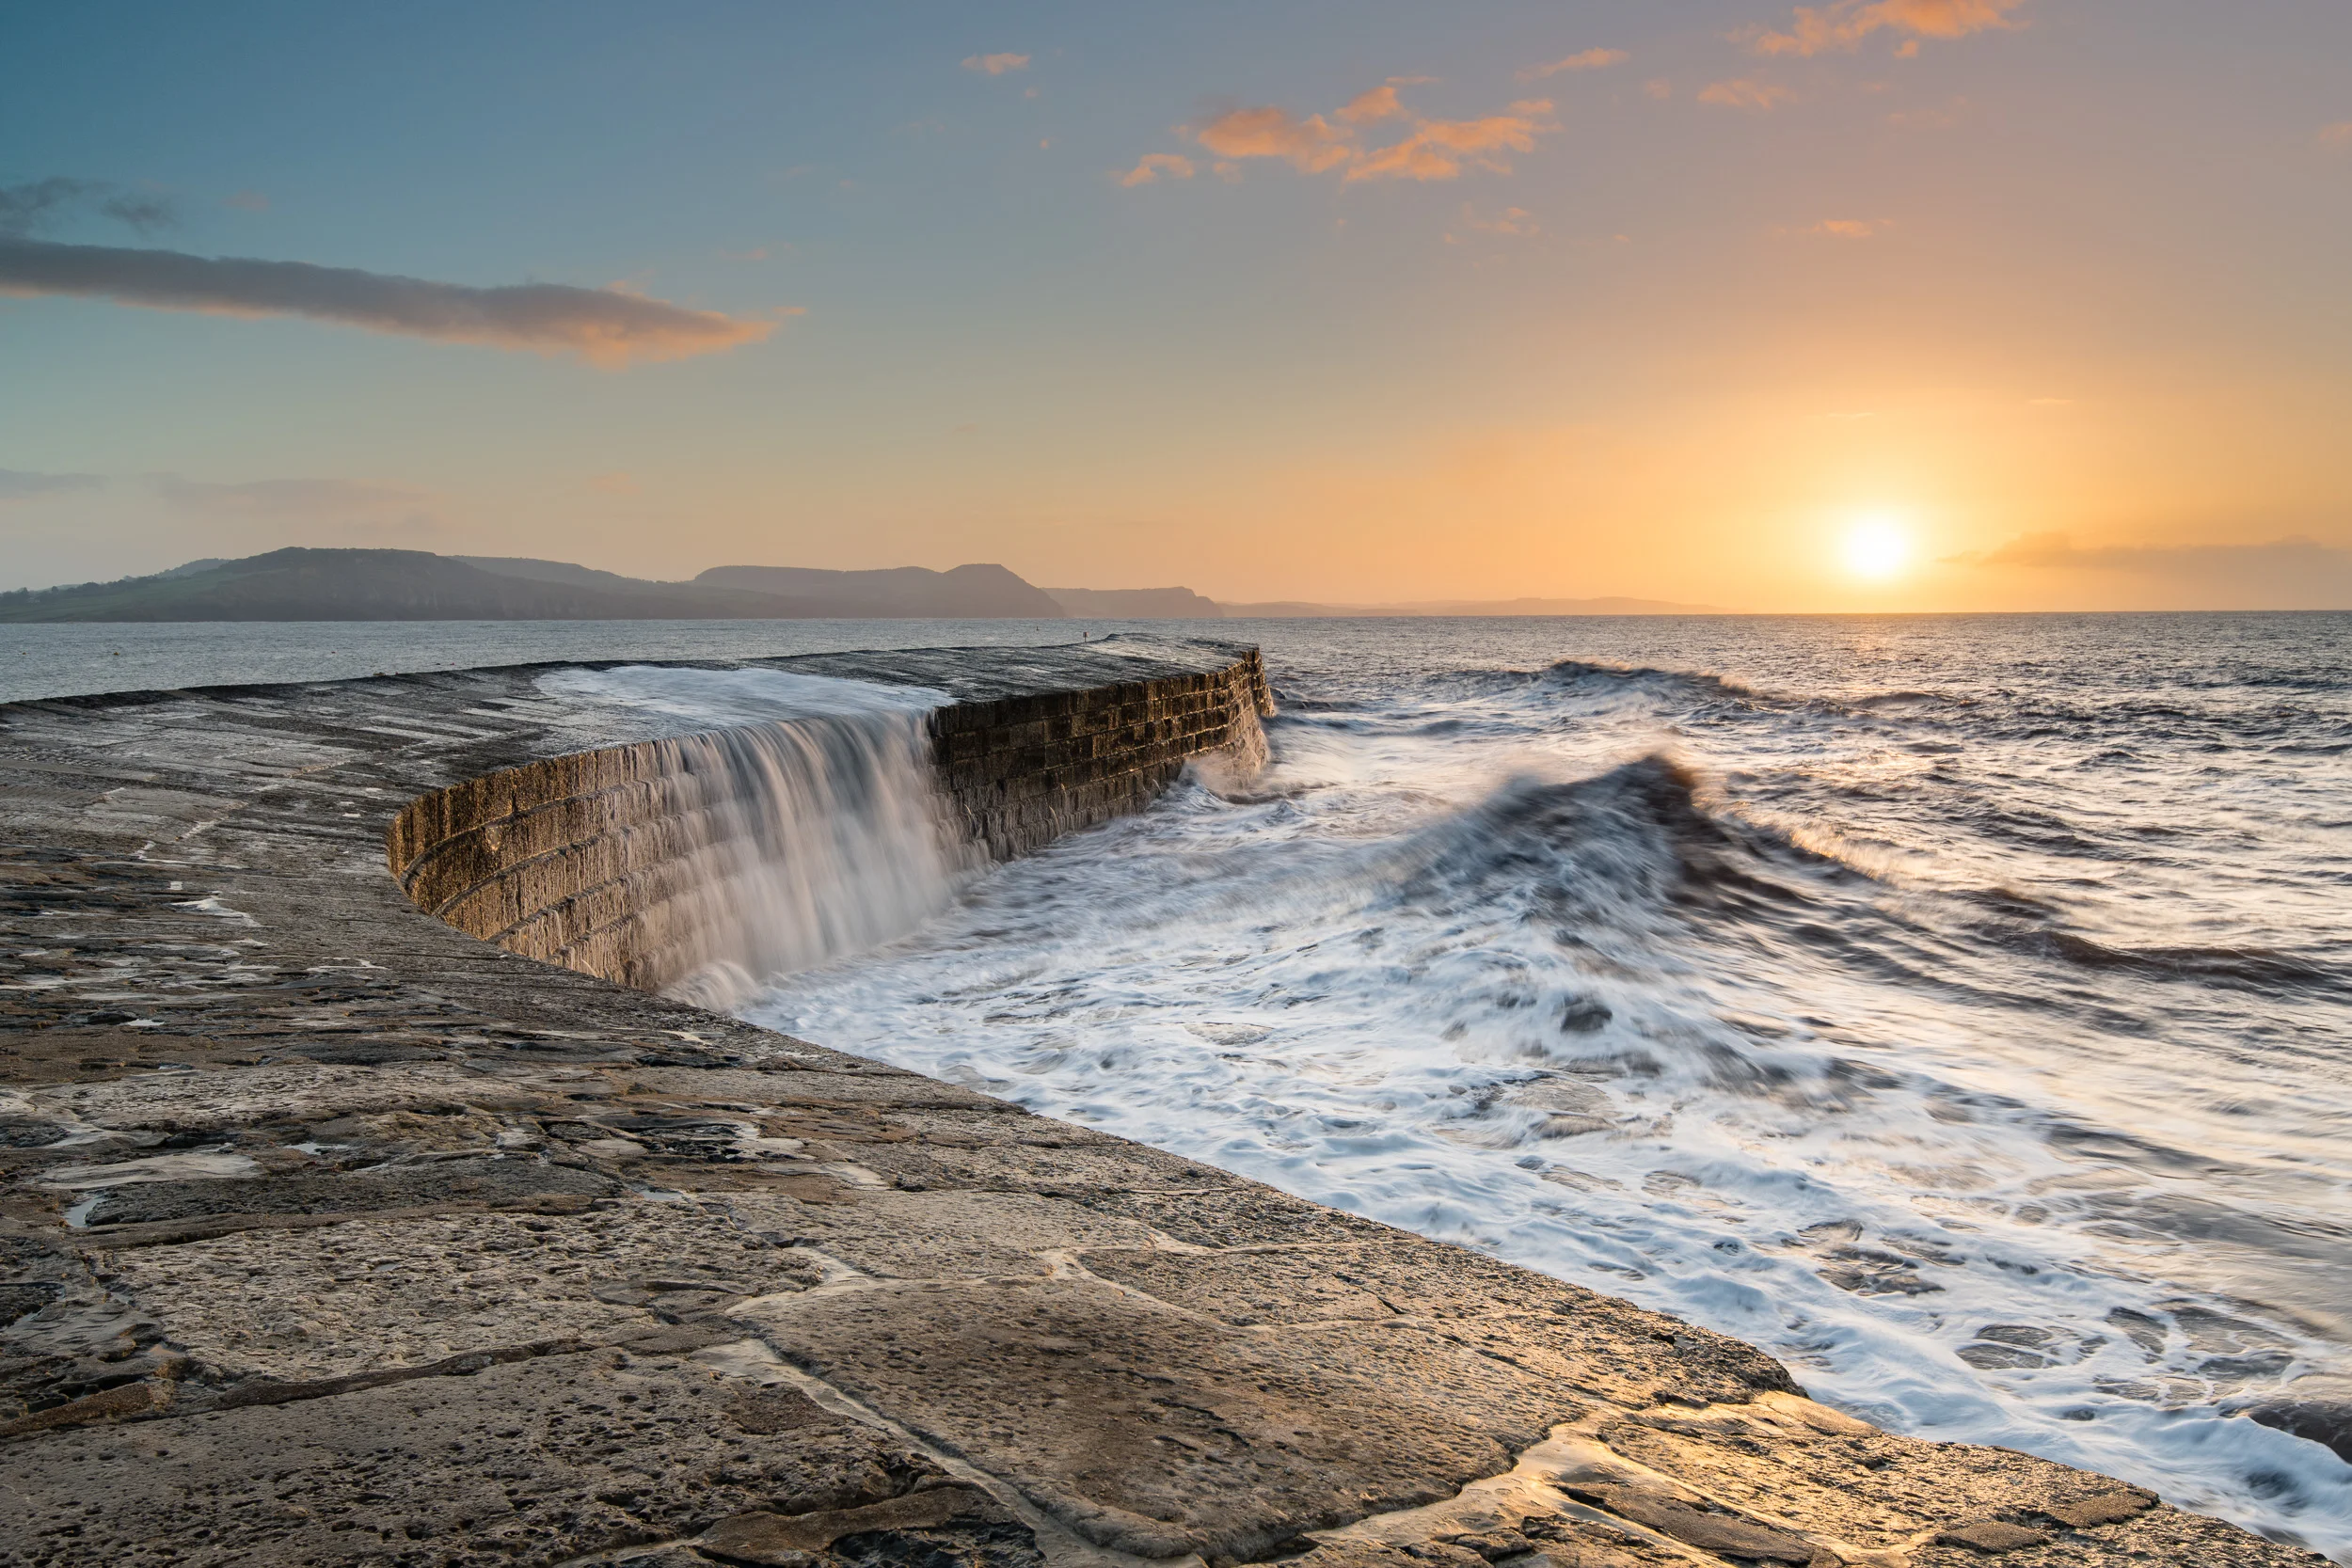
As I setup my camera and took my first few shots, I suddenly changed my mind on the type of shot that I wanted. Rather than trying to repeat the type of shot I showed you earlier, I decided the image below was the style of image I wanted to capture that morning.
A New Vision of The Cobb, Lyme Regis, Dorset - Nikon D850, Nikkor 16-35 mm f/4 at 24 mm, f/13, 30 secs at ISO 64.
The calm waters, overcast sky, the colour of the water and long exposure all add up to a very different, but still pleasing image. Normally I like to capture the drama of the sea at The Cobb, but that morning called for something different.
As soon as I saw the image on the back on the screen on my D850 I realised that I had been missing out on some creative compositions at this location. I would definitely have to visit when the conditions were like this again.
After a short while, a break in the cloud started appearing in the distance, and the mood of the scene changed. Normally I'm happy when the cloud starts breaking up, but in this instance, I wanted the cloud cover to stay at 100%! With the gap in the cloud, the serenity and calmness of the scene was broken.
It was an interesting morning for me. My previous visits to The Cobb had gradually embedded into my mind the type of image I should capture there. This visit broke all that and I left with a renewed sense of excitement about returning to The Cobb on the next grey and overcast day!
Have you had a similar experience? Have you had your perception of a favourite location changed by weather? Let me know in the comments below.

Photographing The Cobb in Dorset: A 5 Minute Photo Adventure
In the blog this week I head to Lyme Regis in Dorset to photograph The Cobb. You can also watch one of my 5 Minute Photo Adventure videos so you can see how I captured the images featured in this blog.
Finally...A Break in the Weather
After what feels like an age, the weather forecasts finally started to show some better weather. January had been a challenging month for my photography. It was the normal combination of lack of time and poor weather, that resulted in not a lot of photography. For anyone who has read my blog for long enough, you'll know that January has historically always been a challenge for me.
It's not just the photography I've been missing, but also going out there and creating new videos for my YouTube channel.
Off to The Cobb
One of the locations that I've always wanted to make a video from is The Cobb in Lyme Regis. It's one of my favourite locations to shoot coastal images. I did actually try and make a video there last year, but I failed to prepare my gear properly. You can read all about that trip here.
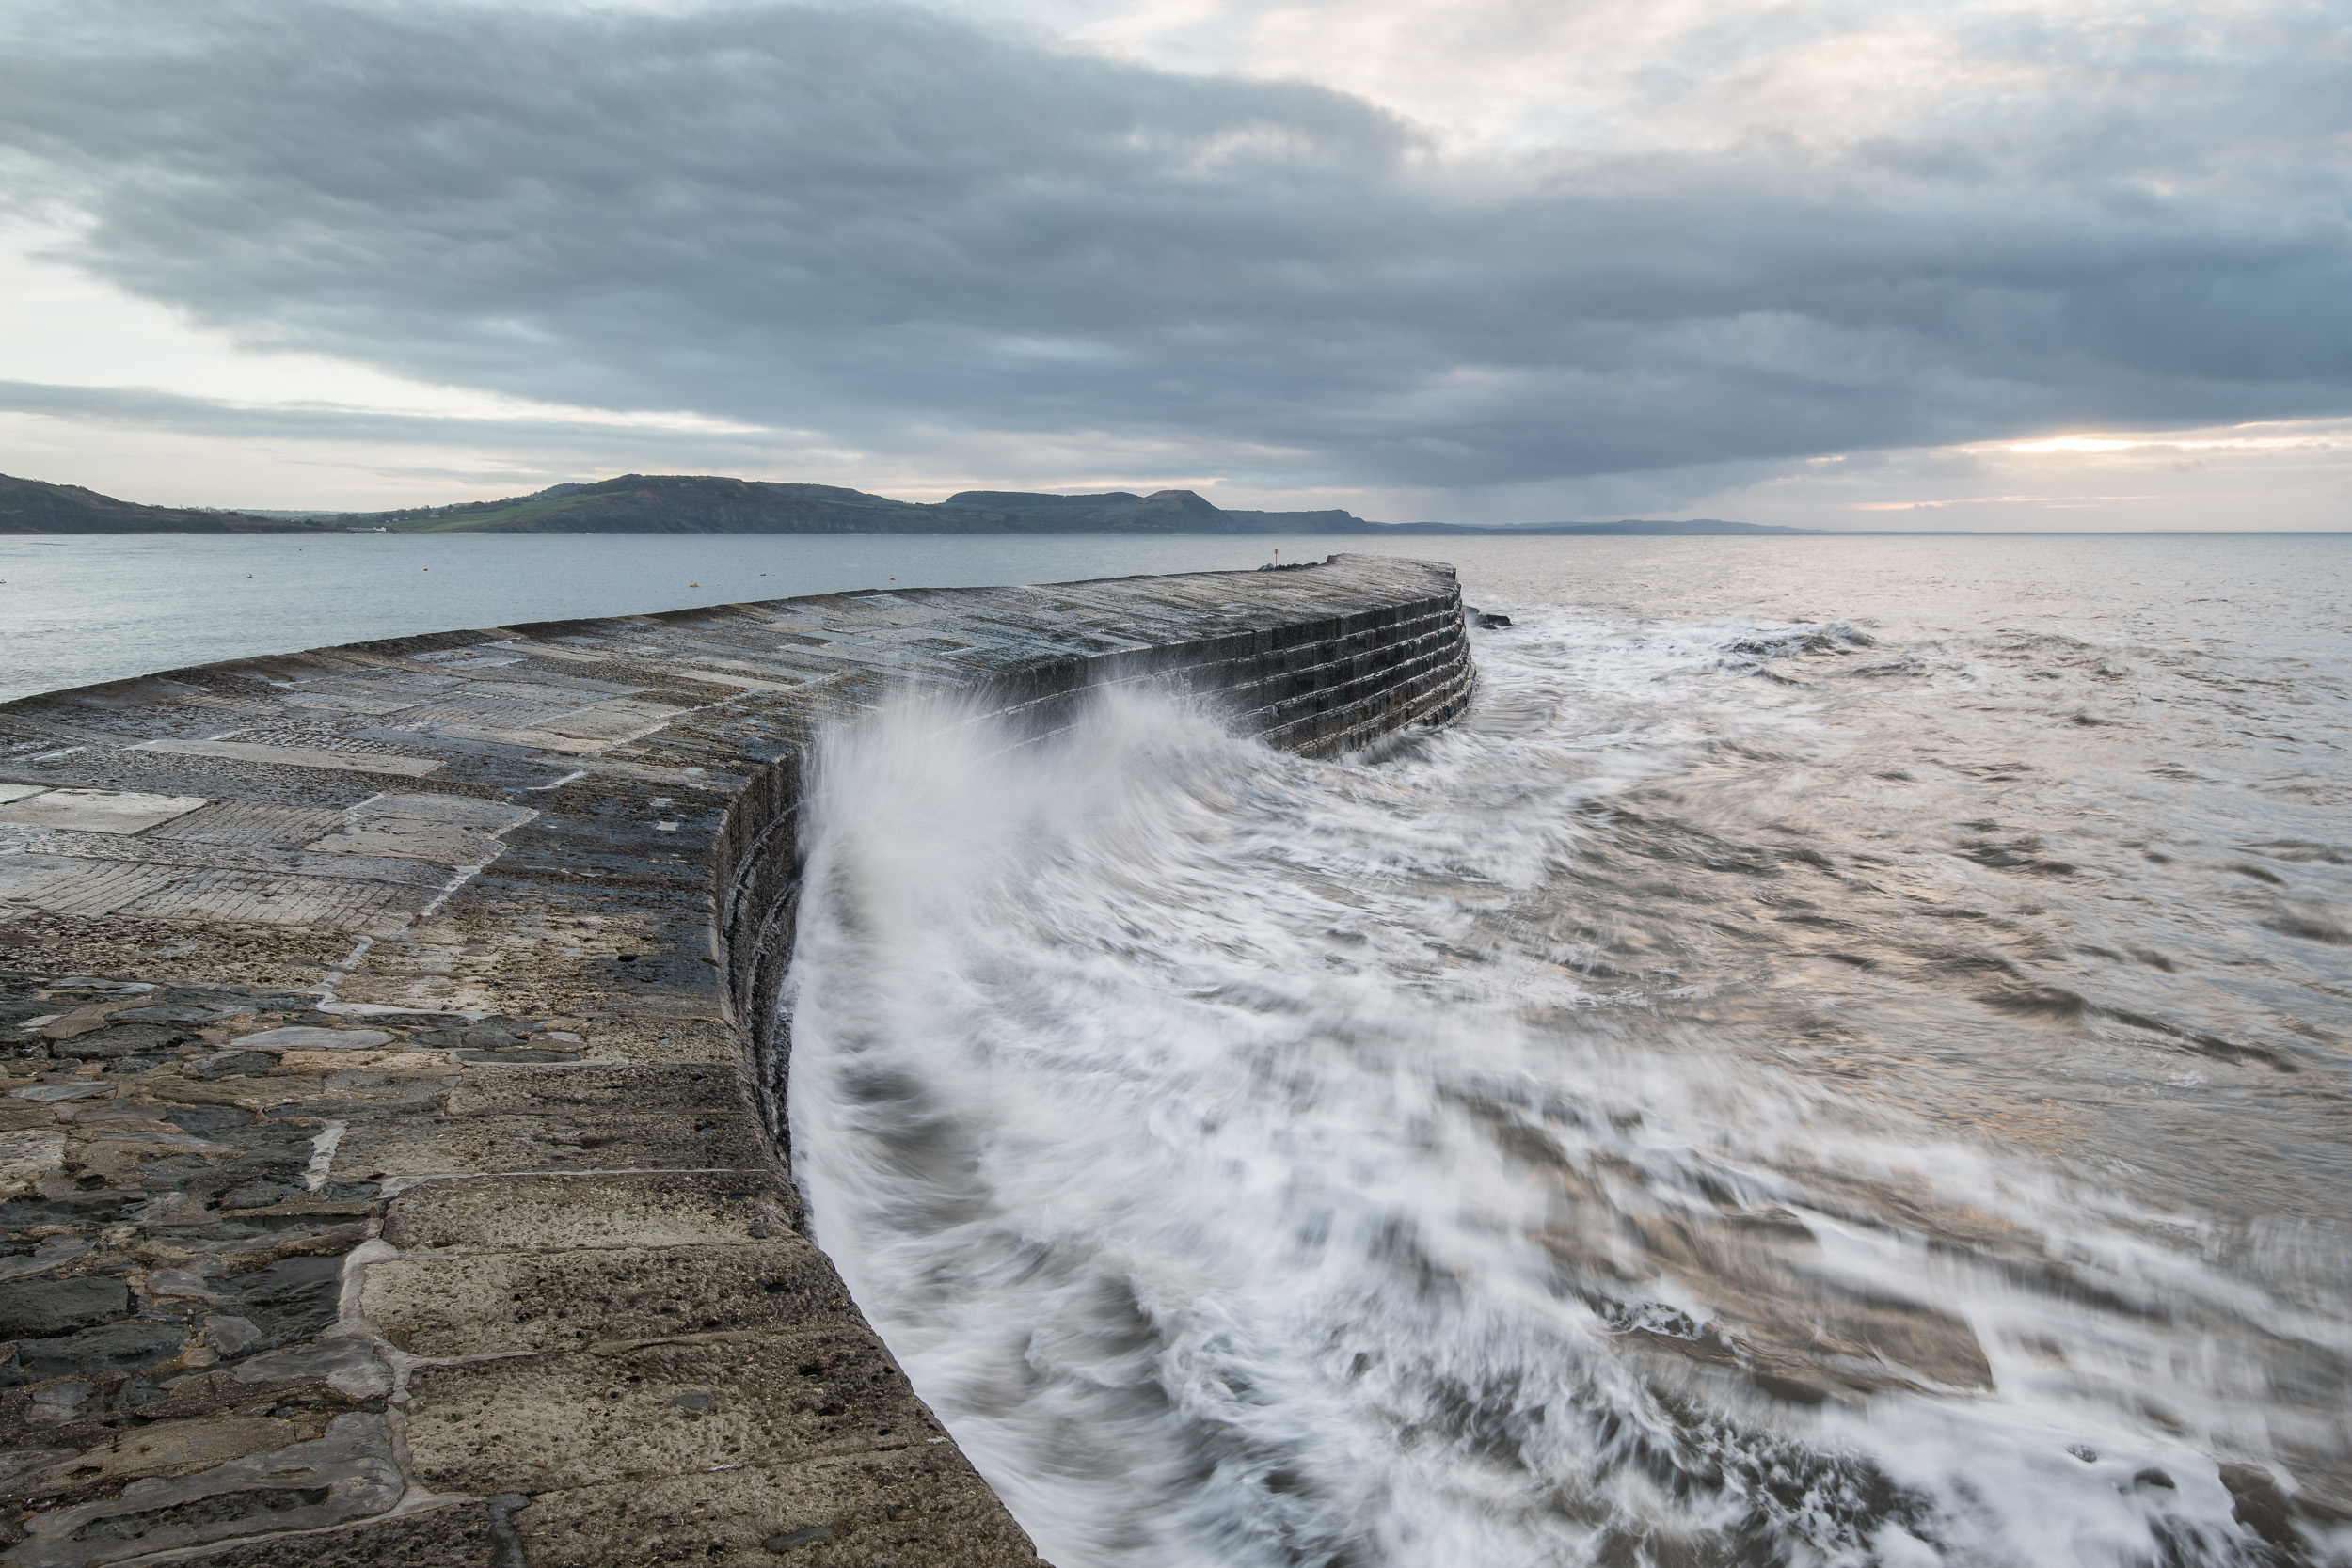
So when the weather, and importantly the tide looked good for a dawn shoot at The Cobb I was super excited to finally make one of my 5 Minute Photo Adventure videos there. Here is the result:
I do hope you enjoyed that video and it has inspired you to photograph The Cobb. It's such a great location to photograph if you like shooting seascapes. Just remember to get there early in the morning (it can get busy with photographers), and watch out for those crashing waves!
Have you photographed The Cobb before? What is your favourite coastal location? Let me know in the comments below.
The Photographs
Here are the photographs you saw in the video, plus a couple of extras.
Nikon D850, Nikkor 16-35mm f/4 @ 19mm, f/13, 2.5 seconds at ISO 64, Lee Filters Circular Polariser and ND Grad.
Nikon D850, Nikkor 16-35mm f/4 @ 22mm, f/11, 1/8th second at ISO 64, Lee Filters Circular Polariser and ND Grad.
Nikon D850, Nikkor 24-70mm f/2.8 VR @ 65mm, f/8, 60 seconds at ISO 64, Lee Filters Circular Polariser.
And finally...
Just a word of caution when visiting The Cobb...

First Shoot of 2018: Colmer's Hill
In the blog this week I head out to Colmer's Hill in Dorset for my first shoot of 2018. With fog forecast, would I get the shot from that location that I'd always wanted?
Getting Back into Gear
Landscape photography in January can always be a bit of a hit or a miss but after a two-week break from photography, I was itching to get out again. I had been editing my Winter Solstice Adventure video over the festive period and despite the obvious ups and downs of that day, it had inspired me to get back out with the camera as soon as possible.
During winter my ability to get out with the camera is limited and for the first weekend of January, I only had the possibility of getting out on Saturday morning. Typically though, the weather across the south-west was dubious. To get any decent conditions I would have to travel further than I had time for, and depending on where you looked, the local forecast was everything from blue skies to fog on Dartmoor.
Though I couldn't get a concrete forecast for the Bridport area, there was a chance that fog would be there first thing in the morning so I decided to take a risk and head out to Colmer's Hill. I'd always wanted to capture the peak of Colmer's Hill poking out from mist covered landscape. Maybe this would be the morning!
At Colmer's Hill

An early morning shot from my normal dawn spot. The light wasn't great.
I've photographed Colmer's Hill a number of times now. You can read about some of my previous visits, here, here, and here. With a vision of photographing the hill in fog or mist, I headed straight for the viewpoint at the bottom of Quarry Hill. This lower elevation viewpoint places the top of the hill just above the horizon making it ideal for the type of shot I wanted.
Once there, there wasn't much in the way of low lying fog, but there was still enough interest in the sky to potentially make a good image. It soon became apparent though that light from the rising sun would be slightly later than the documented sunrise time due to a large bank of cloud. So as I was waiting, getting colder, I looked to my left and noticed the hill Eype Down.
Same Location, Different View

A slightly different viewpoint, but still terrible light!
I had originally become aware of this viewpoint when reading Mark Bauer's excellent book Photographing Dorset. So rather than stay where I was and get a shot similar to some of my previous efforts, I decided to grab my bag and tripod, and head to the viewpoint in Mark's book.
It was interesting to see Colmer's Hill from a slightly different angle. Unfortunately, the conditions hadn't improved much, and direct sunlight hadn't made an appearance, but at least I had checked out another viewpoint of one of my favourite locations in Dorset.
Practising Perfect Panoramas
If you watched my recent video, Developing a Passion for Printing, you'll have seen me print a panoramic image of Glencoe. In the video, I also promised myself that I would attempt to take more panoramic images. Though I had learned more about the technique while on a workshop in Glencoe, I was still a long way from being proficient at creating them. So as the conditions weren't ideal for the photograph I was hoping to make, I decided to practice my panoramic technique.
Nikon D850, Nikkor 70-200 mm f/2.8 at 110mm, ISO 64, 1/80th second at f/8. The light was better when I took this image, but my composition options were limited by a line of trees just below the edge of the frame.
Don't Leave Too Early!
After getting a couple of shots from my new viewpoint and practicing my panoramic technique I decided to give up and head home. It was nearly 9 am and I didn't think I was going to get any decent light at this stage. Just as I packed my tripod up and started to head down the hill, I started to see some nice light on the side of Colmer's Hill.
It was spectacular light, not by a long shot, but better than I had seen all morning. I quickly ran back up the hill and set my camera up again. Fortunately, I hadn't need to use filters all that morning so it didn't take too long to get back to a shooting configuration.

Nikon D850, Nikkor 70-200 mm f/2.8 at 1145mm, ISO 64, 1/50th second at f/8. Better light for this shot, but still nothing to get excited about.
While those images were only marginally better, it did remind not to leave a location until you are really, really sure you're not going to miss anything!
So how has your photography been in 2018 so far? Have you ever left a location a little to early and regretted it? Let me know in the comments below.

A Day Out in Dorset
In this blog post, I tell you about the day I spent photographing some of Dorset's finest coastal locations.
Dorset
Though Dorset is the county next door to where I live, I really don't spend enough time there photographing it. I do love to shoot The Cobb in Lyme Regis, and I have been known to photograph Colmer's Hill on the odd occasion, but I really should spend more time in Dorset exploring further afield.
So when my friends over at Dawn 2 Dusk Photography announced that they were running a special long exposure one day workshop in Dorset, I signed up immediately. It sounded so good that I even convinced my father-in-law to dust off his camera and join me.
I've written about the advantages of attending workshops before when I attended another Dawn 2 Dusk workshop in Glencoe earlier this year. This one would be no different. There would be some excellent tuition on hand, it would be well organised, there's always a great bunch of photographers to get to know, and we would, of course, visit some of Dorset's most iconic coastal locations.
West Lulworth
As the workshop wouldn't start until 9 am in Swanage, I thought I would try and make the most of the day by fitting in a nearby dawn shoot. As sunrise was relatively late on I couldn't be too far away from Swanage, so I decided to go West Lulworth and try my hand at shooting Lulworth Cove.

I will need to explore the cove in more detail if I'm to get the shot I'm looking for.
Upon arriving at West Lulworth it soon became apparent that shooting the cove in its entirety wasn't going to be as easy as I thought it might be. From my shooting location along the western edge of the cove, even with a 16mm lens, I wasn't able to find a spot from where I could get everything in that I wanted. Obviously, this would be a location that I would need to revisit when I had more time to explore.
I did find a nice composition down at the shoreline of the cove though. While I like the composition of the photo below, I think it lacks good light and a bit of colour from the rising sun. The sky was very clear that morning except the point where the sun was rising where there was a blanket of cloud. By the time the sun was rising above the cloud I really had to make a move to Swanage or I'd be late for the start of the workshop!
Nikon D850, Nikkor 16-35mm f/4 at 22mm, f/11, 25 secs at ISO 64, Lee Filters circular polariser.
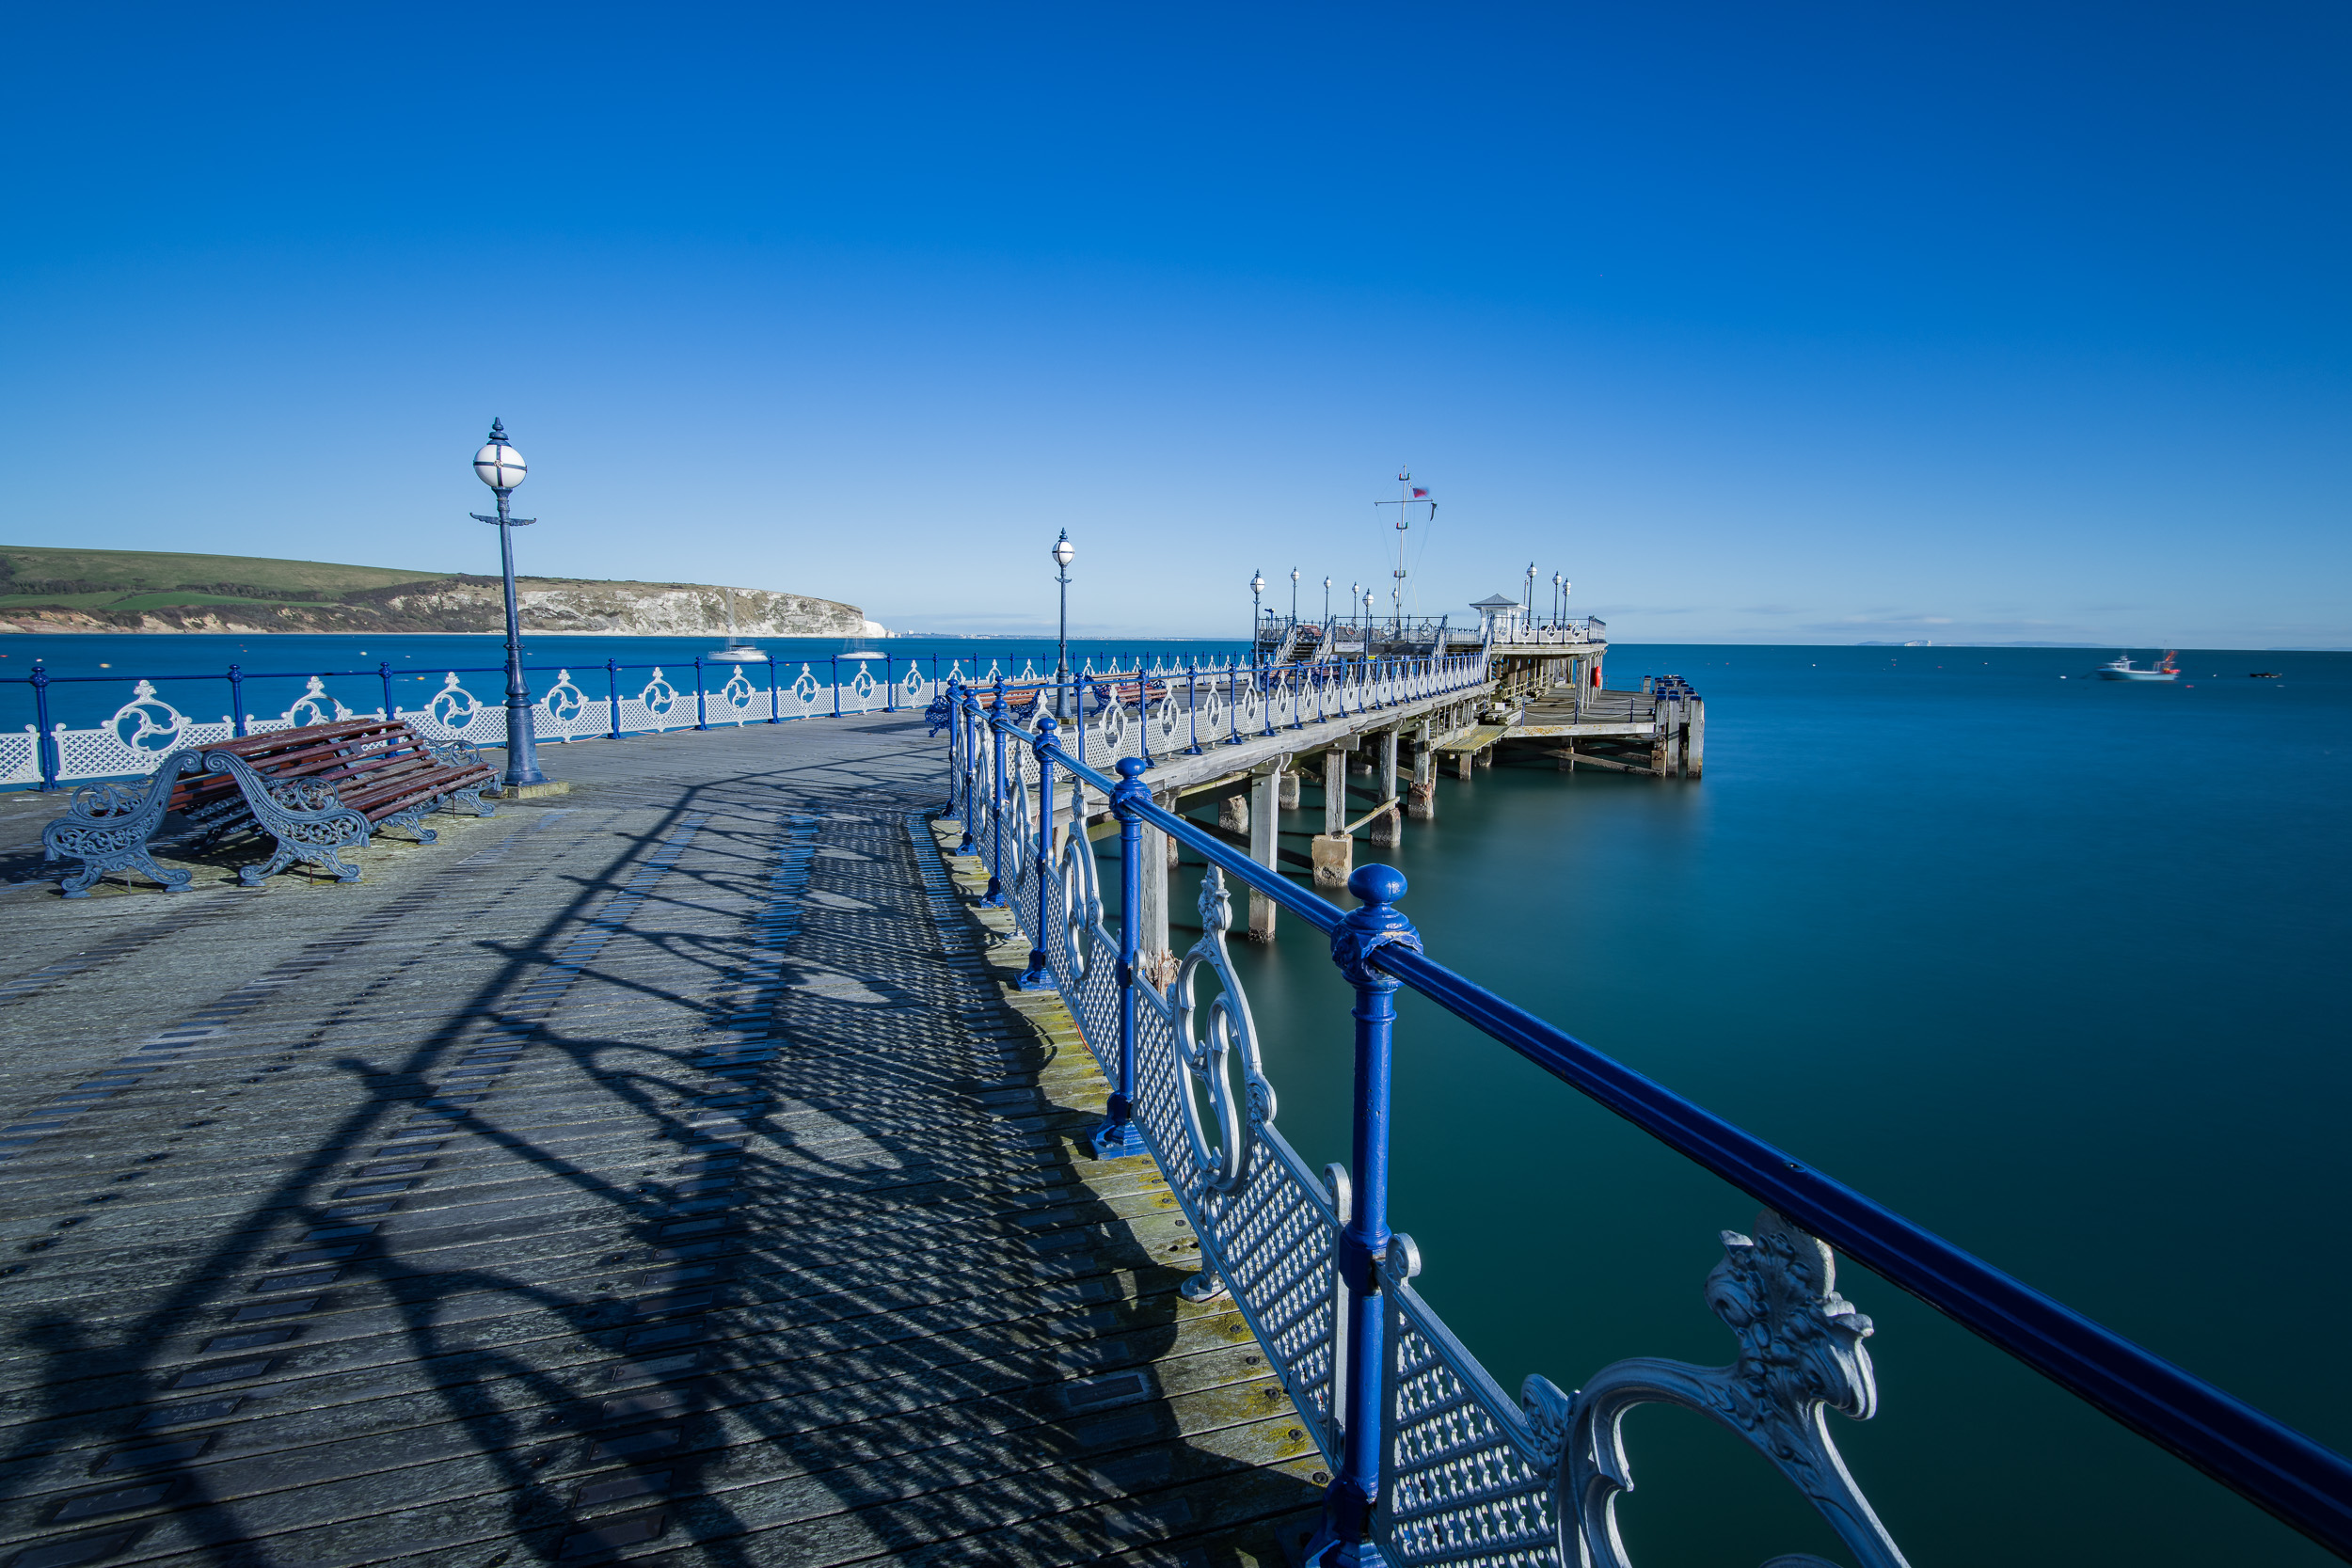
Swanage
After the workshop briefing at 9 am, some witty banter, and some much-needed coffee, the workshop group headed out to photograph both the new pier and old pier at Swanage. Unfortunately, I was unable to make the most out of these locations. Though I got some excellent advice on how to shoot the old pier, I found the clear blue skies not to my taste and I didn't really get any images that I was happy with.
However, getting great images from every location isn't my goal, nor is it ever realistic. I did, however, leave happy knowing that I'd learnt something about composition (there's always something to learn about composition) and that I'd enjoyed meeting some new people.
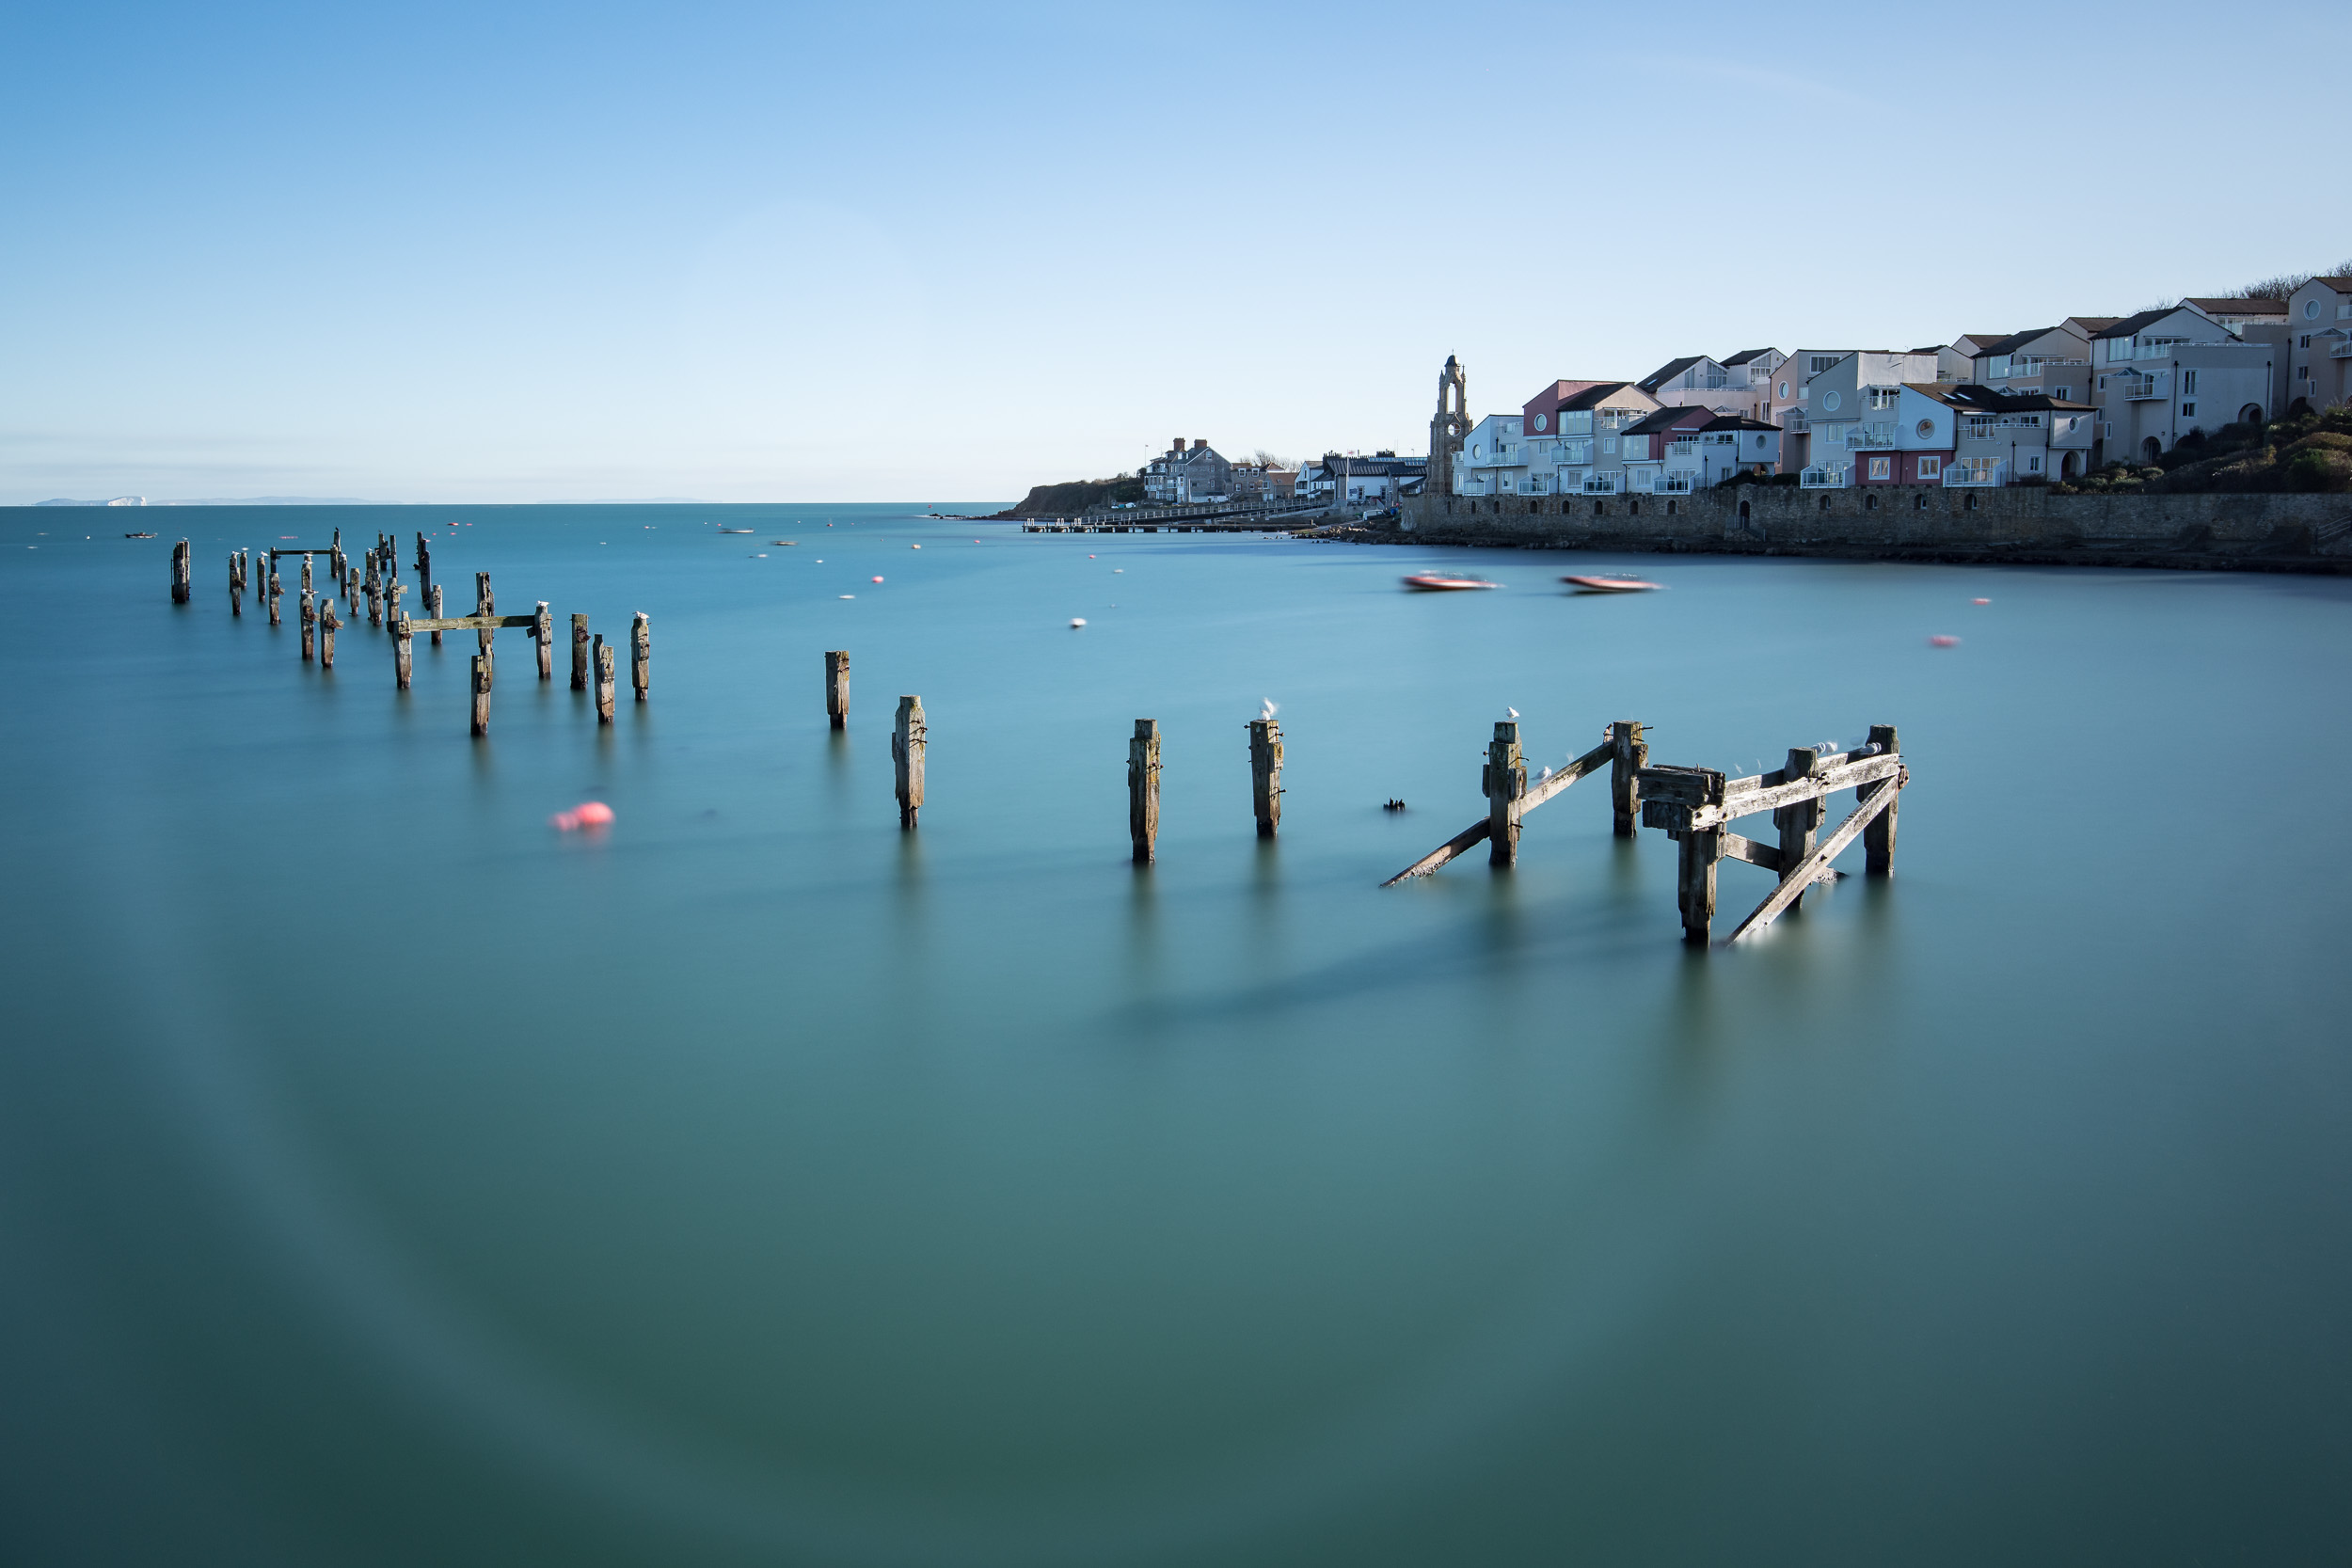
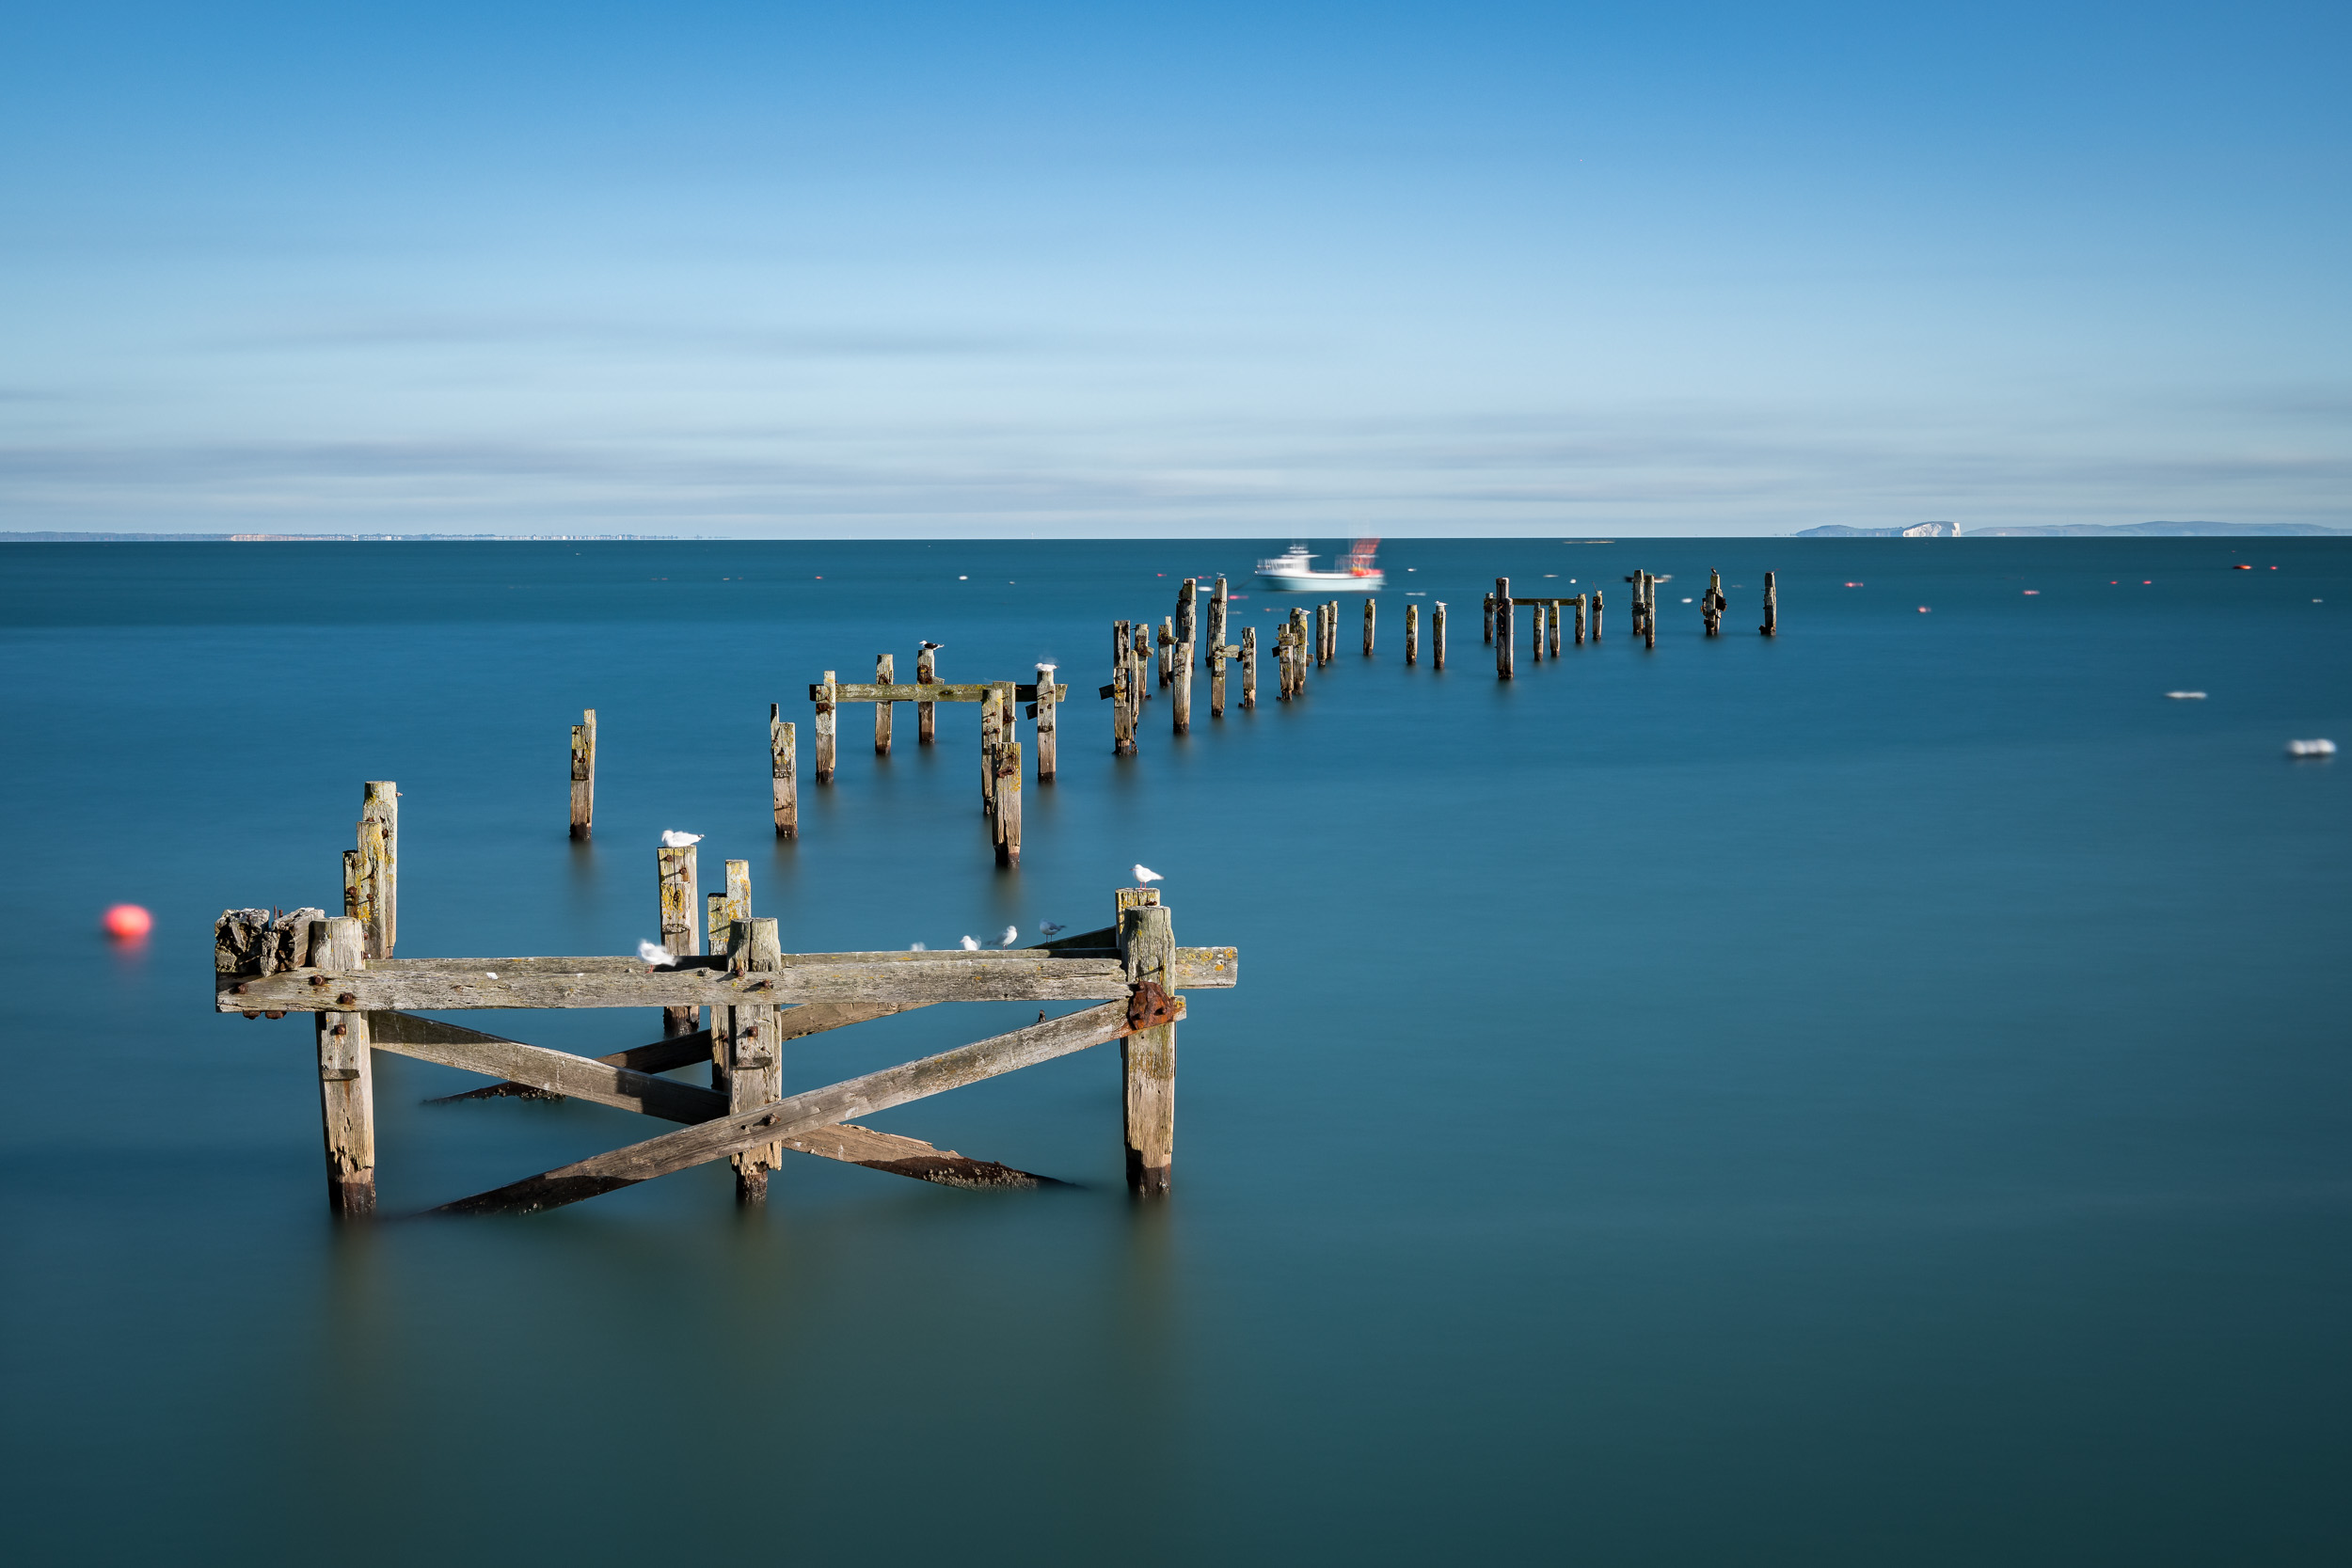
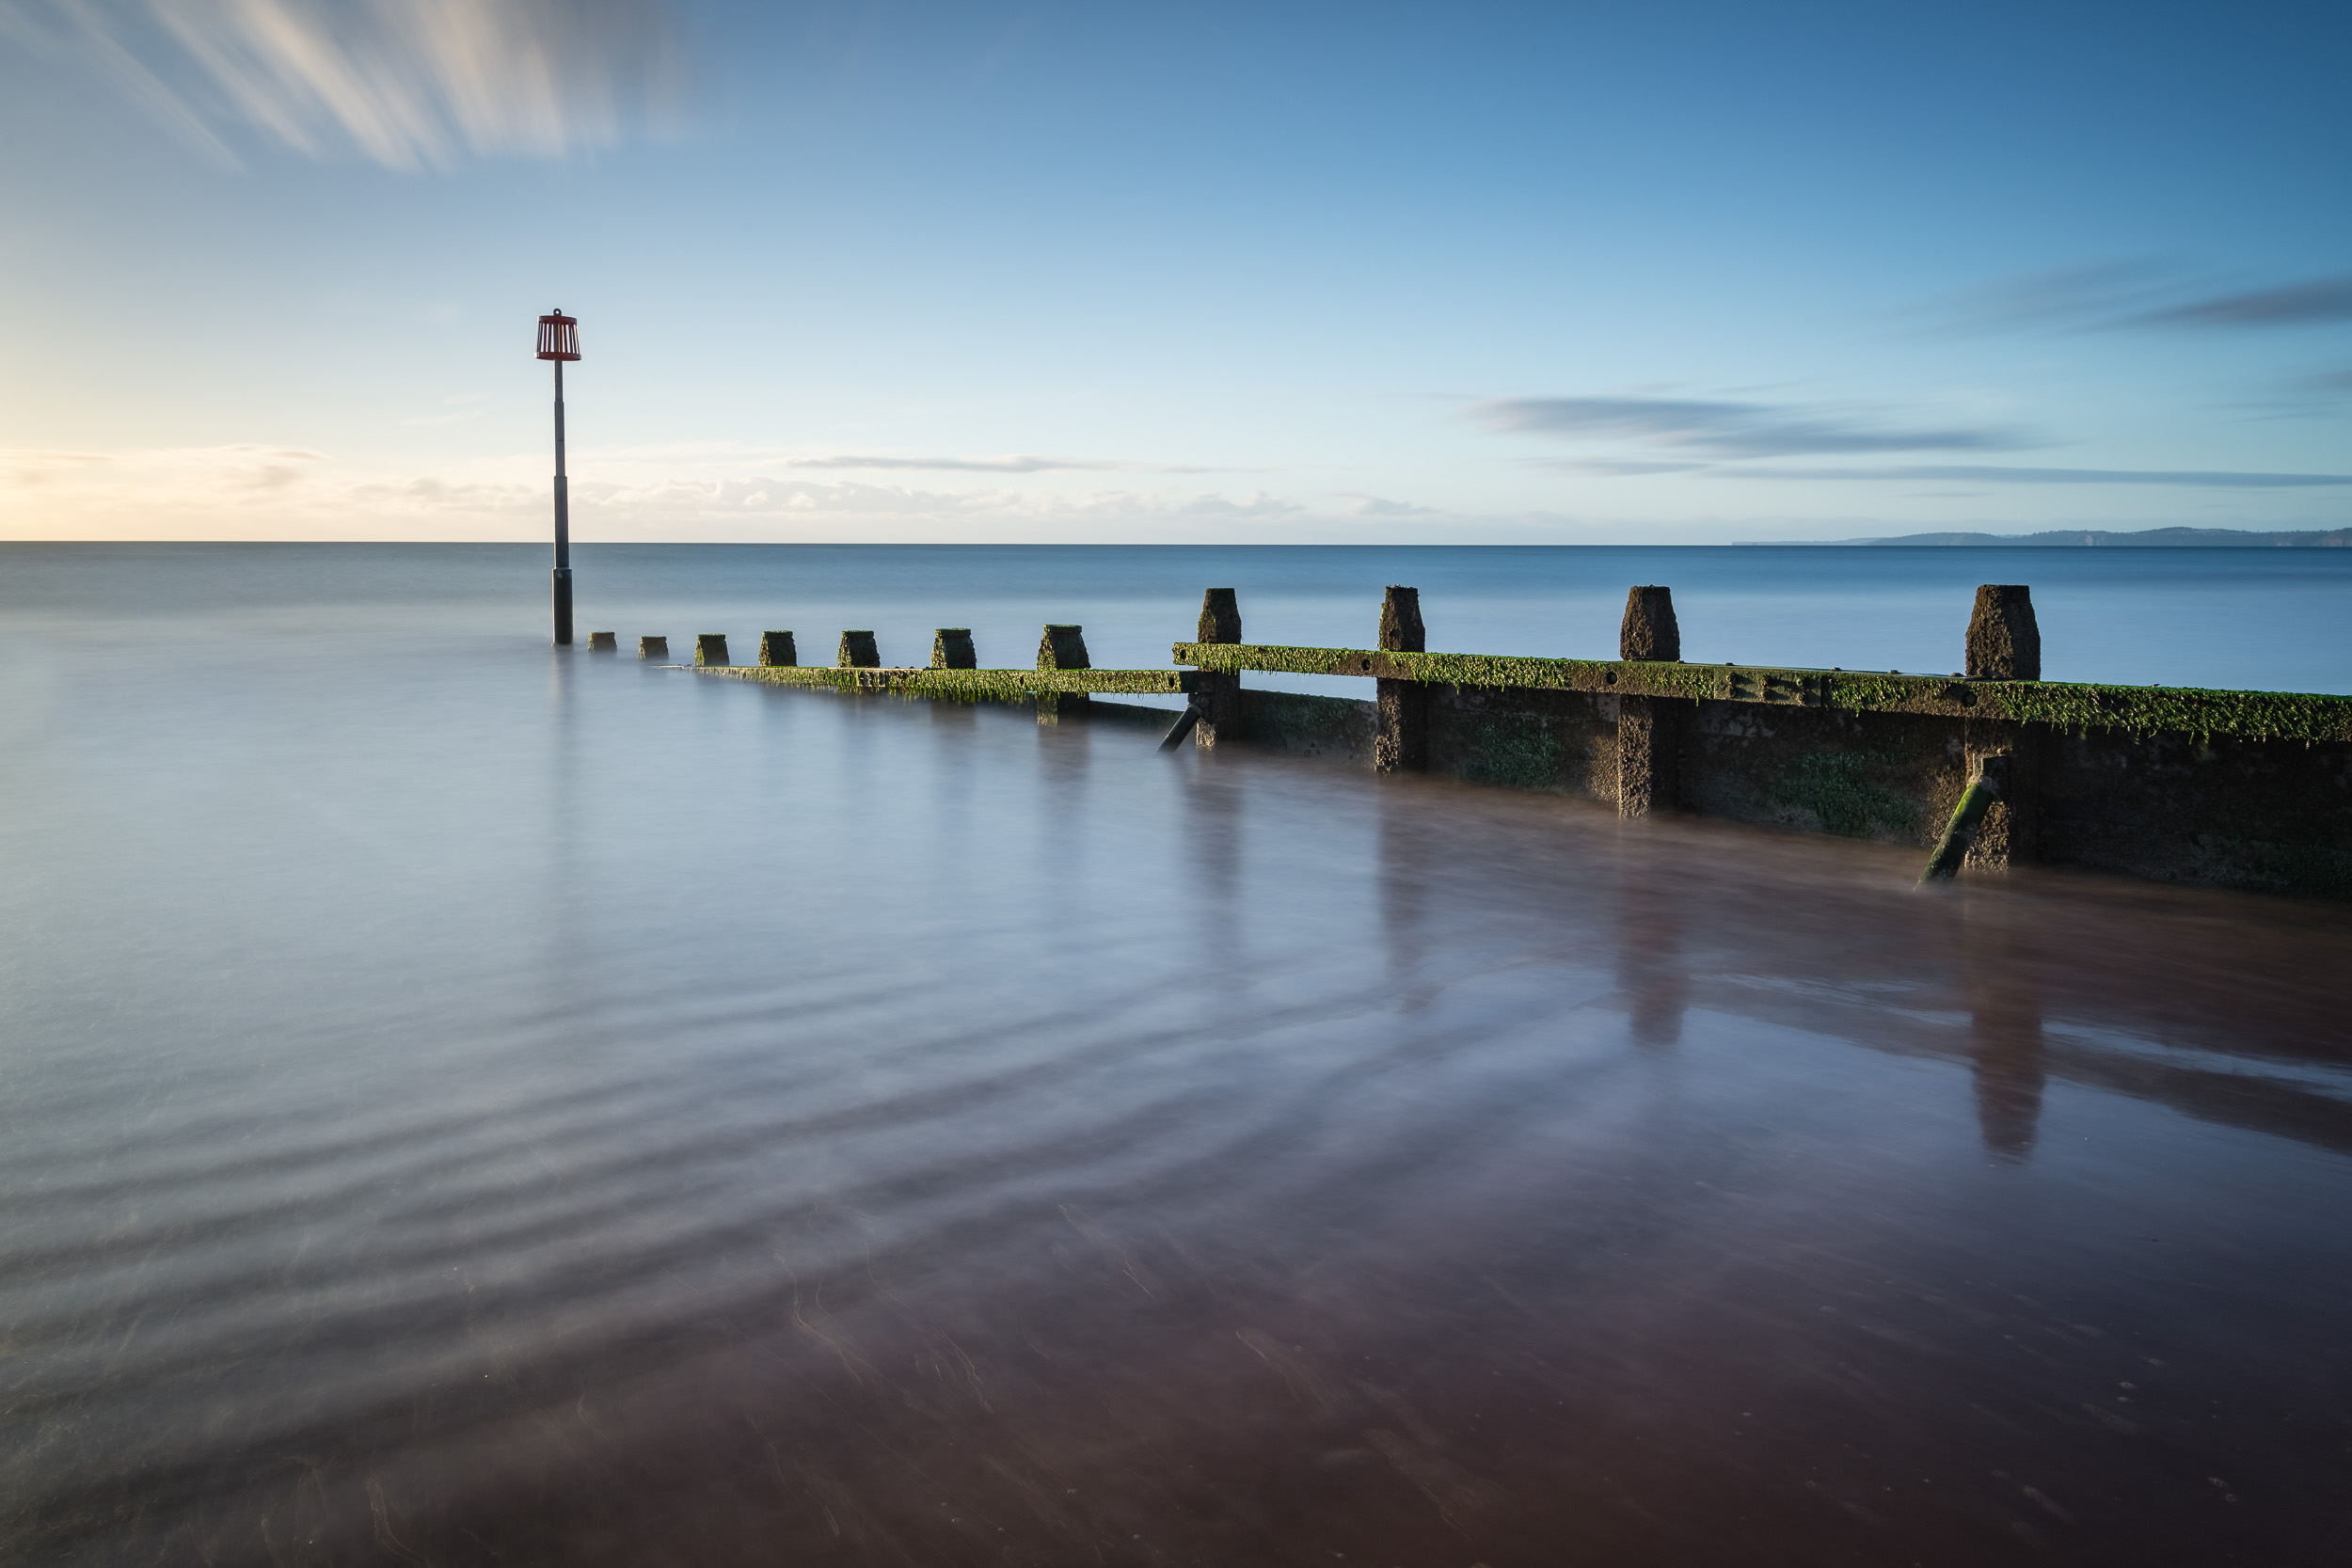
We then moved down onto the beach where we had the opportunity to shoot some groynes, and banjo jetty (which I have shot before). On the advice of one of the instructors, I headed further down the beach to photograph one of the groyne markers beside a small river that fed into the sea. This was a good shout as I managed to get my first good image of the day. It would have been unlikely that I would have found this spot myself so this was another bonus of being on the workshop.
Nikon D850, Nikkor 16-35mm f/4 at 17mm, f/11, 390 secs at ISO 64, Lee Filters Super Stopper.
Kimmeridge
We then all moved onto Kimmeridge where we had a quick picnic lunch and a bit more chat. I had visited Kimmeridge before on a workshop but it was the middle of the day with clear skies so I was really hoping that this visit would be different. There was some cloud in the distant sky and with sunset only a couple of hours away, I was hoping my luck would be in.
As it turned out we didn't get much in the way of action in the sky, but we did get some really nice spots of light on the rocky shore. I've always thought the rocky shore at Kimmeridge was interesting, but the addition of some interesting lighting really got me thinking about the possibilities at this location.
These are two of my favourite shots of the afternoon. I really like the composition, the textures and patterns on the rock, and just a hint of light from the setting sun. These could have been amazing shots if there had been some more interest in the sky. But let's face it, us landscape photographers are rarely completely happy with the conditions!
Nikon D850, Nikkor 16-35mm f/4 at 26mm, f/11, 90 secs at ISO 64, Lee Filters circular polariser and Big Stopper.
Nikon D850, Nikkor 16-35mm f/4 at 21mm, f/13, 30 secs at ISO 64, Lee Filters circular polariser and Little Stopper.

Afterwards, we walked back along the beach to another really interesting spot. In this image you'll see how the rocky ledge creates a nice leading line through the image. It was late on when I took this image so there was very little in the way of light. However, I think with a good sky those pools of water could provide some really interesting reflections.
Overall both myself and my father-in-law had a great time. Though I struggled to create images that I was satisfied within the morning, the two images I created at Kimmeridge more than made up for it. I also picked up some useful compositional tips and, as always, I really enjoyed the social element of the workshop.
Anytime anyone asks me about workshops I always recommend Dawn 2 Dusk Photography, and attending their Dorset long exposure one day workshop is yet another reason why that recommendation remains.
So what are your favourite Dorset locations? Have you been on any workshops recently? Let me know in the comments below.

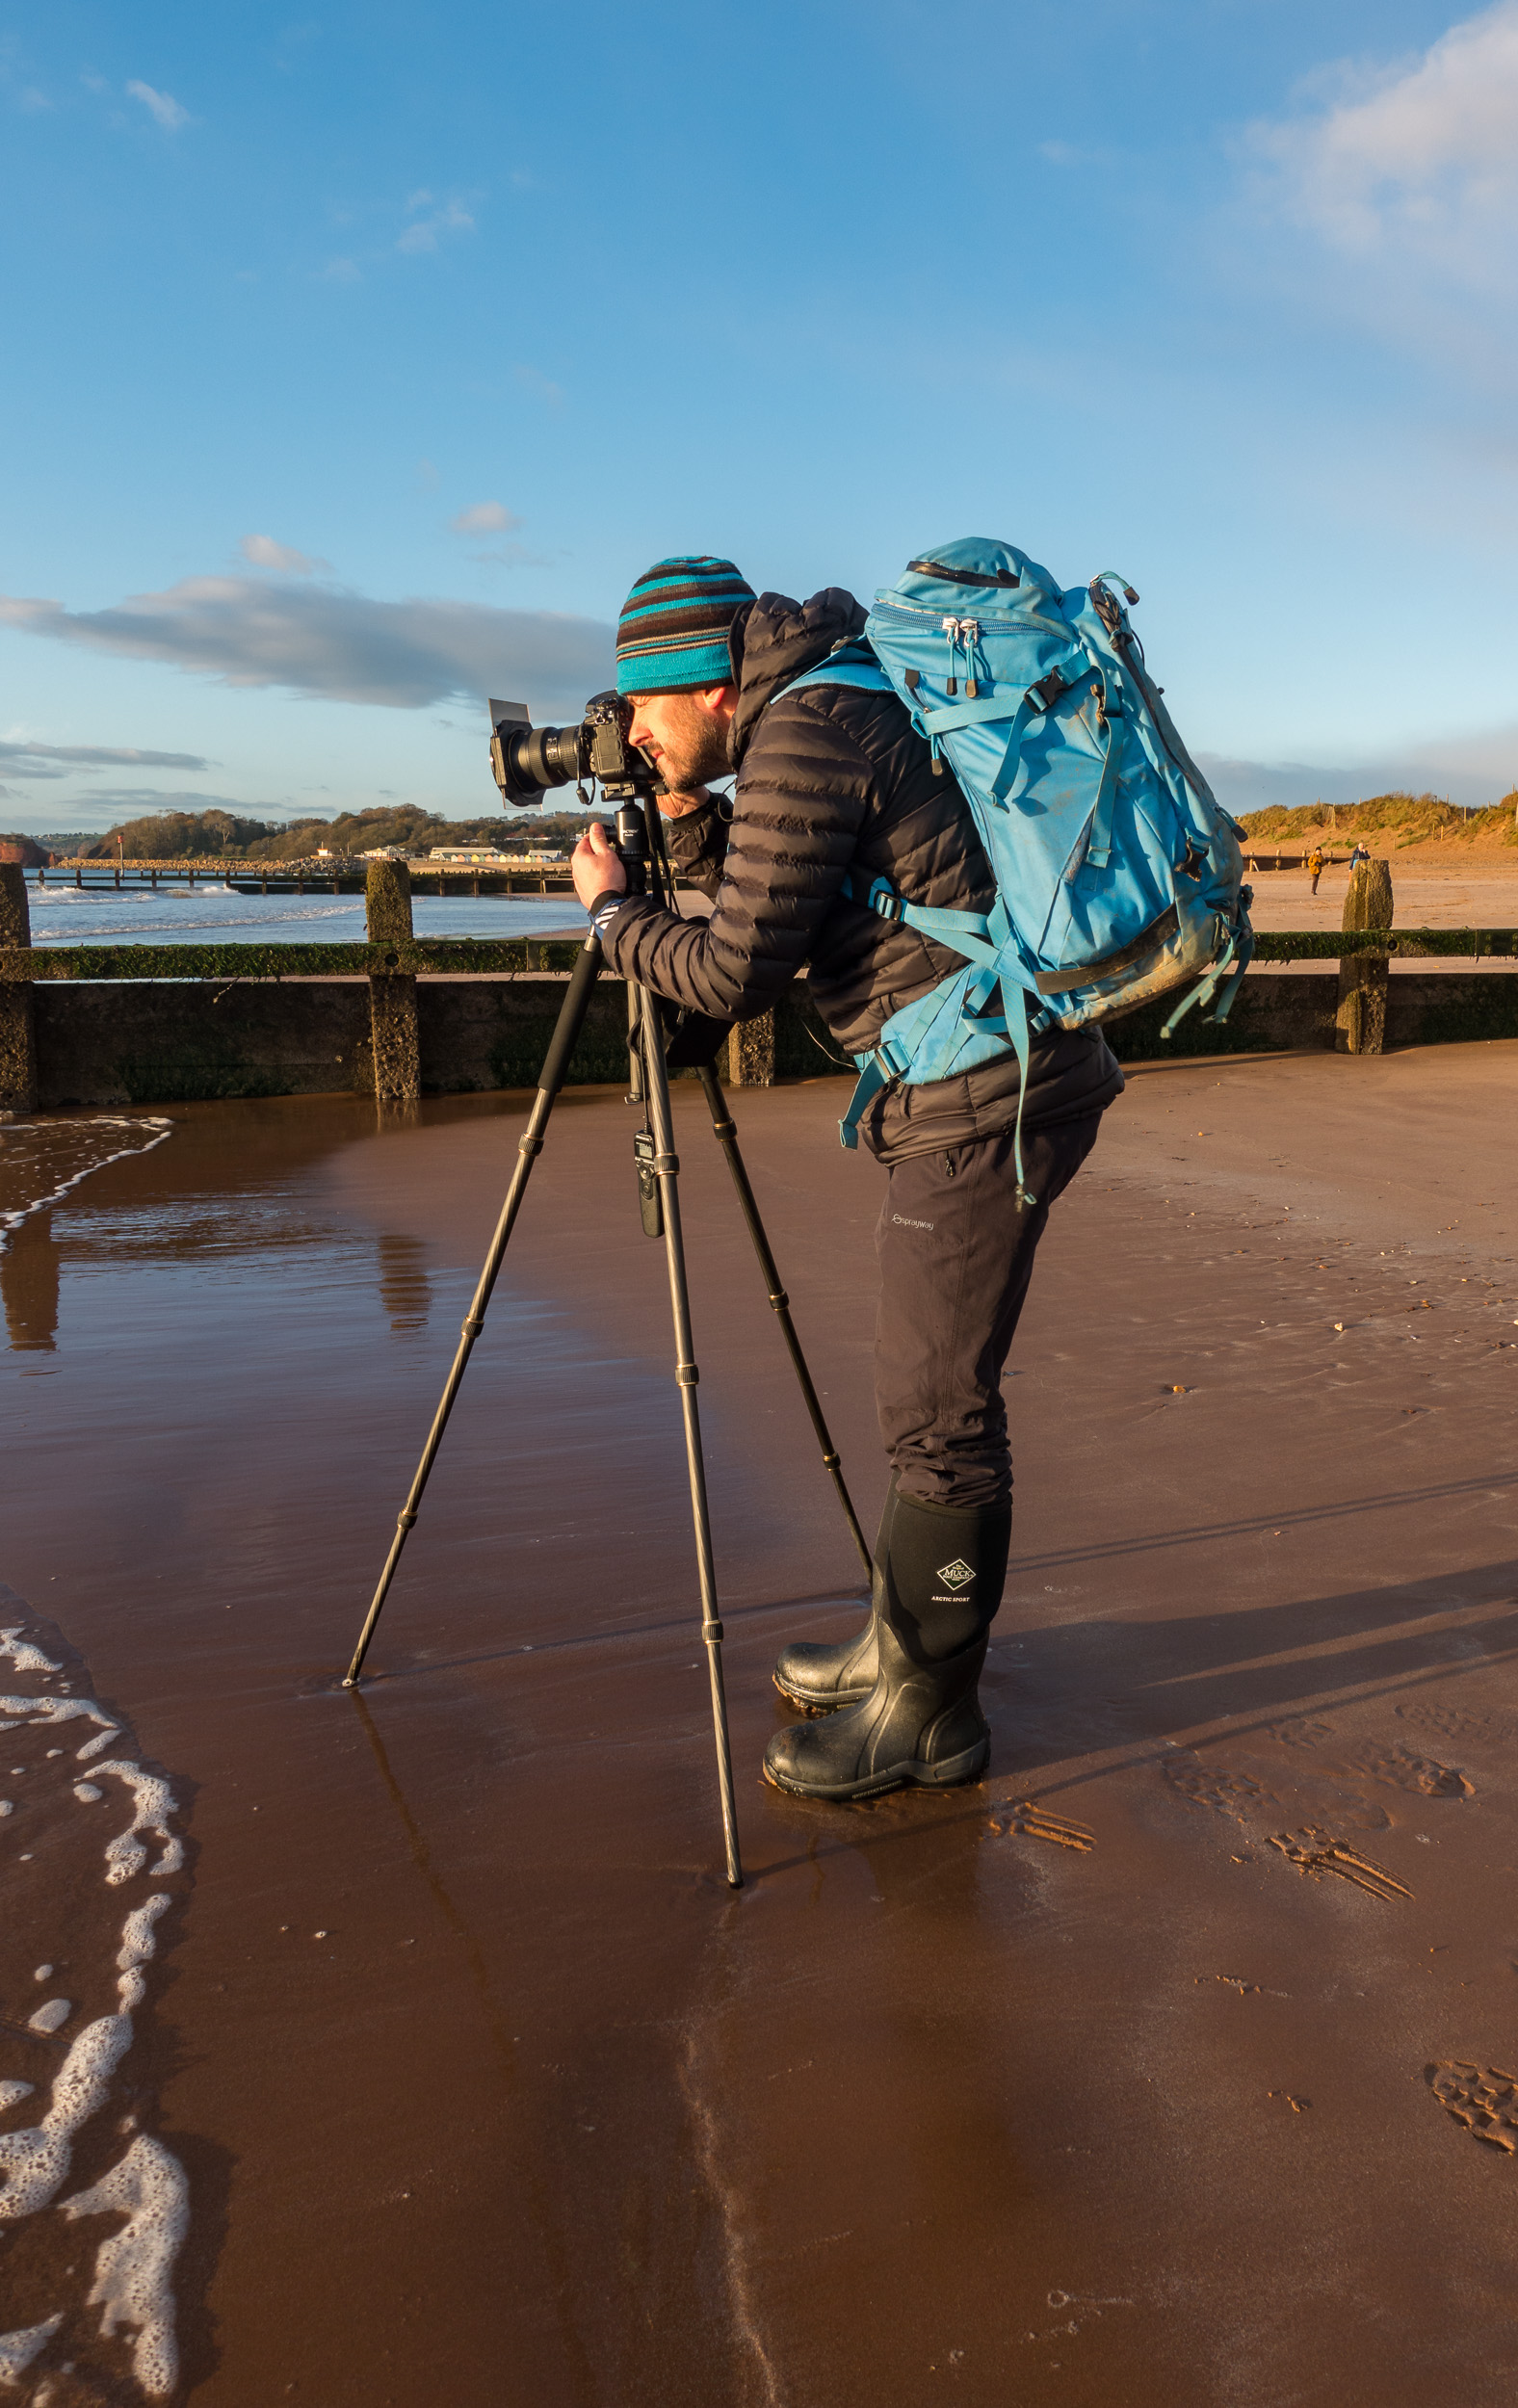
Landscape Photography with the Mactrem AT64C Tripod
In the blog this week I take the Mactrem AT64C Carbon tripod on location to shoot some landscape images to see how it copes with real-world situations. Join me in my video review as I photograph long exposures at Dawlish Warren, use a long lens at Colmer's Hill, and take panoramic images from Pilsdon Pen. Finally, I give you my thoughts on this tripod. Is it worth buying?
Reviews On Location
When Mactrem reached out to me to review their AT64C carbon tripod I thought it would be a great excuse to go out and do some landscape photography. Not that I really need an excuse. I fairly well self-motivated when it comes to landscape photography!
For this review, I didn't want to just unbox the tripod and discuss the technical specs from the comfort of my home. That would be a bit boring wouldn't it? So I thought I would do my review a little differently. I would put the tripod to use in some real-world scenarios, capture some images and share my thoughts on both the photography and the tripod.
By doing this I would not only educate the viewer on the tripods performance on location but for anyone just interested in landscape photography there would be something there for them as well.
Reviewing to Mactrem AT64C Tripod
So regardless if you want to know more about this tripod or you just want to see me shoot some landscapes, I hope you enjoy this video:
I do hope you enjoyed this video and that you either found the review helpful or just liked the photography bit.
If you want to purchase one of these tripods then you can purchase one from Amazon.co.uk by clicking on this link here. Also, until 15th April 2018, if you enter the code UWSN5IQD at checkout, you will receive £15 off the price of the tripod.
So what tripod and head do you use? Would you like to see me do more product reviews on location like this one? Let me know in the comments below.
PS. Keep reading as below I'm going to share with you the images that I took at all the locations, along with some shots of me using the tripod.


Shooting into the Sun at The Cobb
In the blog this week I head off to The Cobb in Dorset to try out the new Lee Filters Reverse ND filter.
I Have a Confession
As a landscape photographer, I have to be prepared to shoot in a wide range of conditions. I like to think that I'm pretty adaptable and can deal with most things. However, there is one scenario that I have to admit to always trying to avoid.
The simple fact is that I don't like shooting straight into the sun. As my most common shooting times are dawn and dusk, this can be a problem at certain locations at certain times of the year. When the sun is just above the horizon at the start or the end of the day, it can be really tricky to control the exposure.
Many photographers get around this issue by bracketing their exposures, but I'm not one for spending much time on post-processing. So when Lee Filters announced they had released a Reverse ND Filter I thought this might be the perfect way help me control my exposures in those situations that I had previously avoided.
Some Bad News

A Super Stopper should not look like this.
Before I start to share with you my initial experiences with the reverse ND grad, I have some bad news about one of my other filters. I'm very sorry to report that Lee Filters Super Stopper has been shattered. The purchase of the reverse ND grad was my 11th Lee filter, so I decided that I would remove the Super Stopper from my filter pouch to make room for the reverse ND grad.
Unfortunately, the Super Stopper appears to have received a knock at some point and shattered. This is the first Lee filter I have lost due to damage. I'm not sure how this has happened. I keep all my filters in a Lee Filters pouch which is then kept in a heavily padded area of my bag. Still, something has happened and the Supper Stopper is no more.
RIP Super Stopper.
One of my Super Stopper images. It was featured in Outdoor Photography magazine (issue August 2017).
The Reverse ND Grad
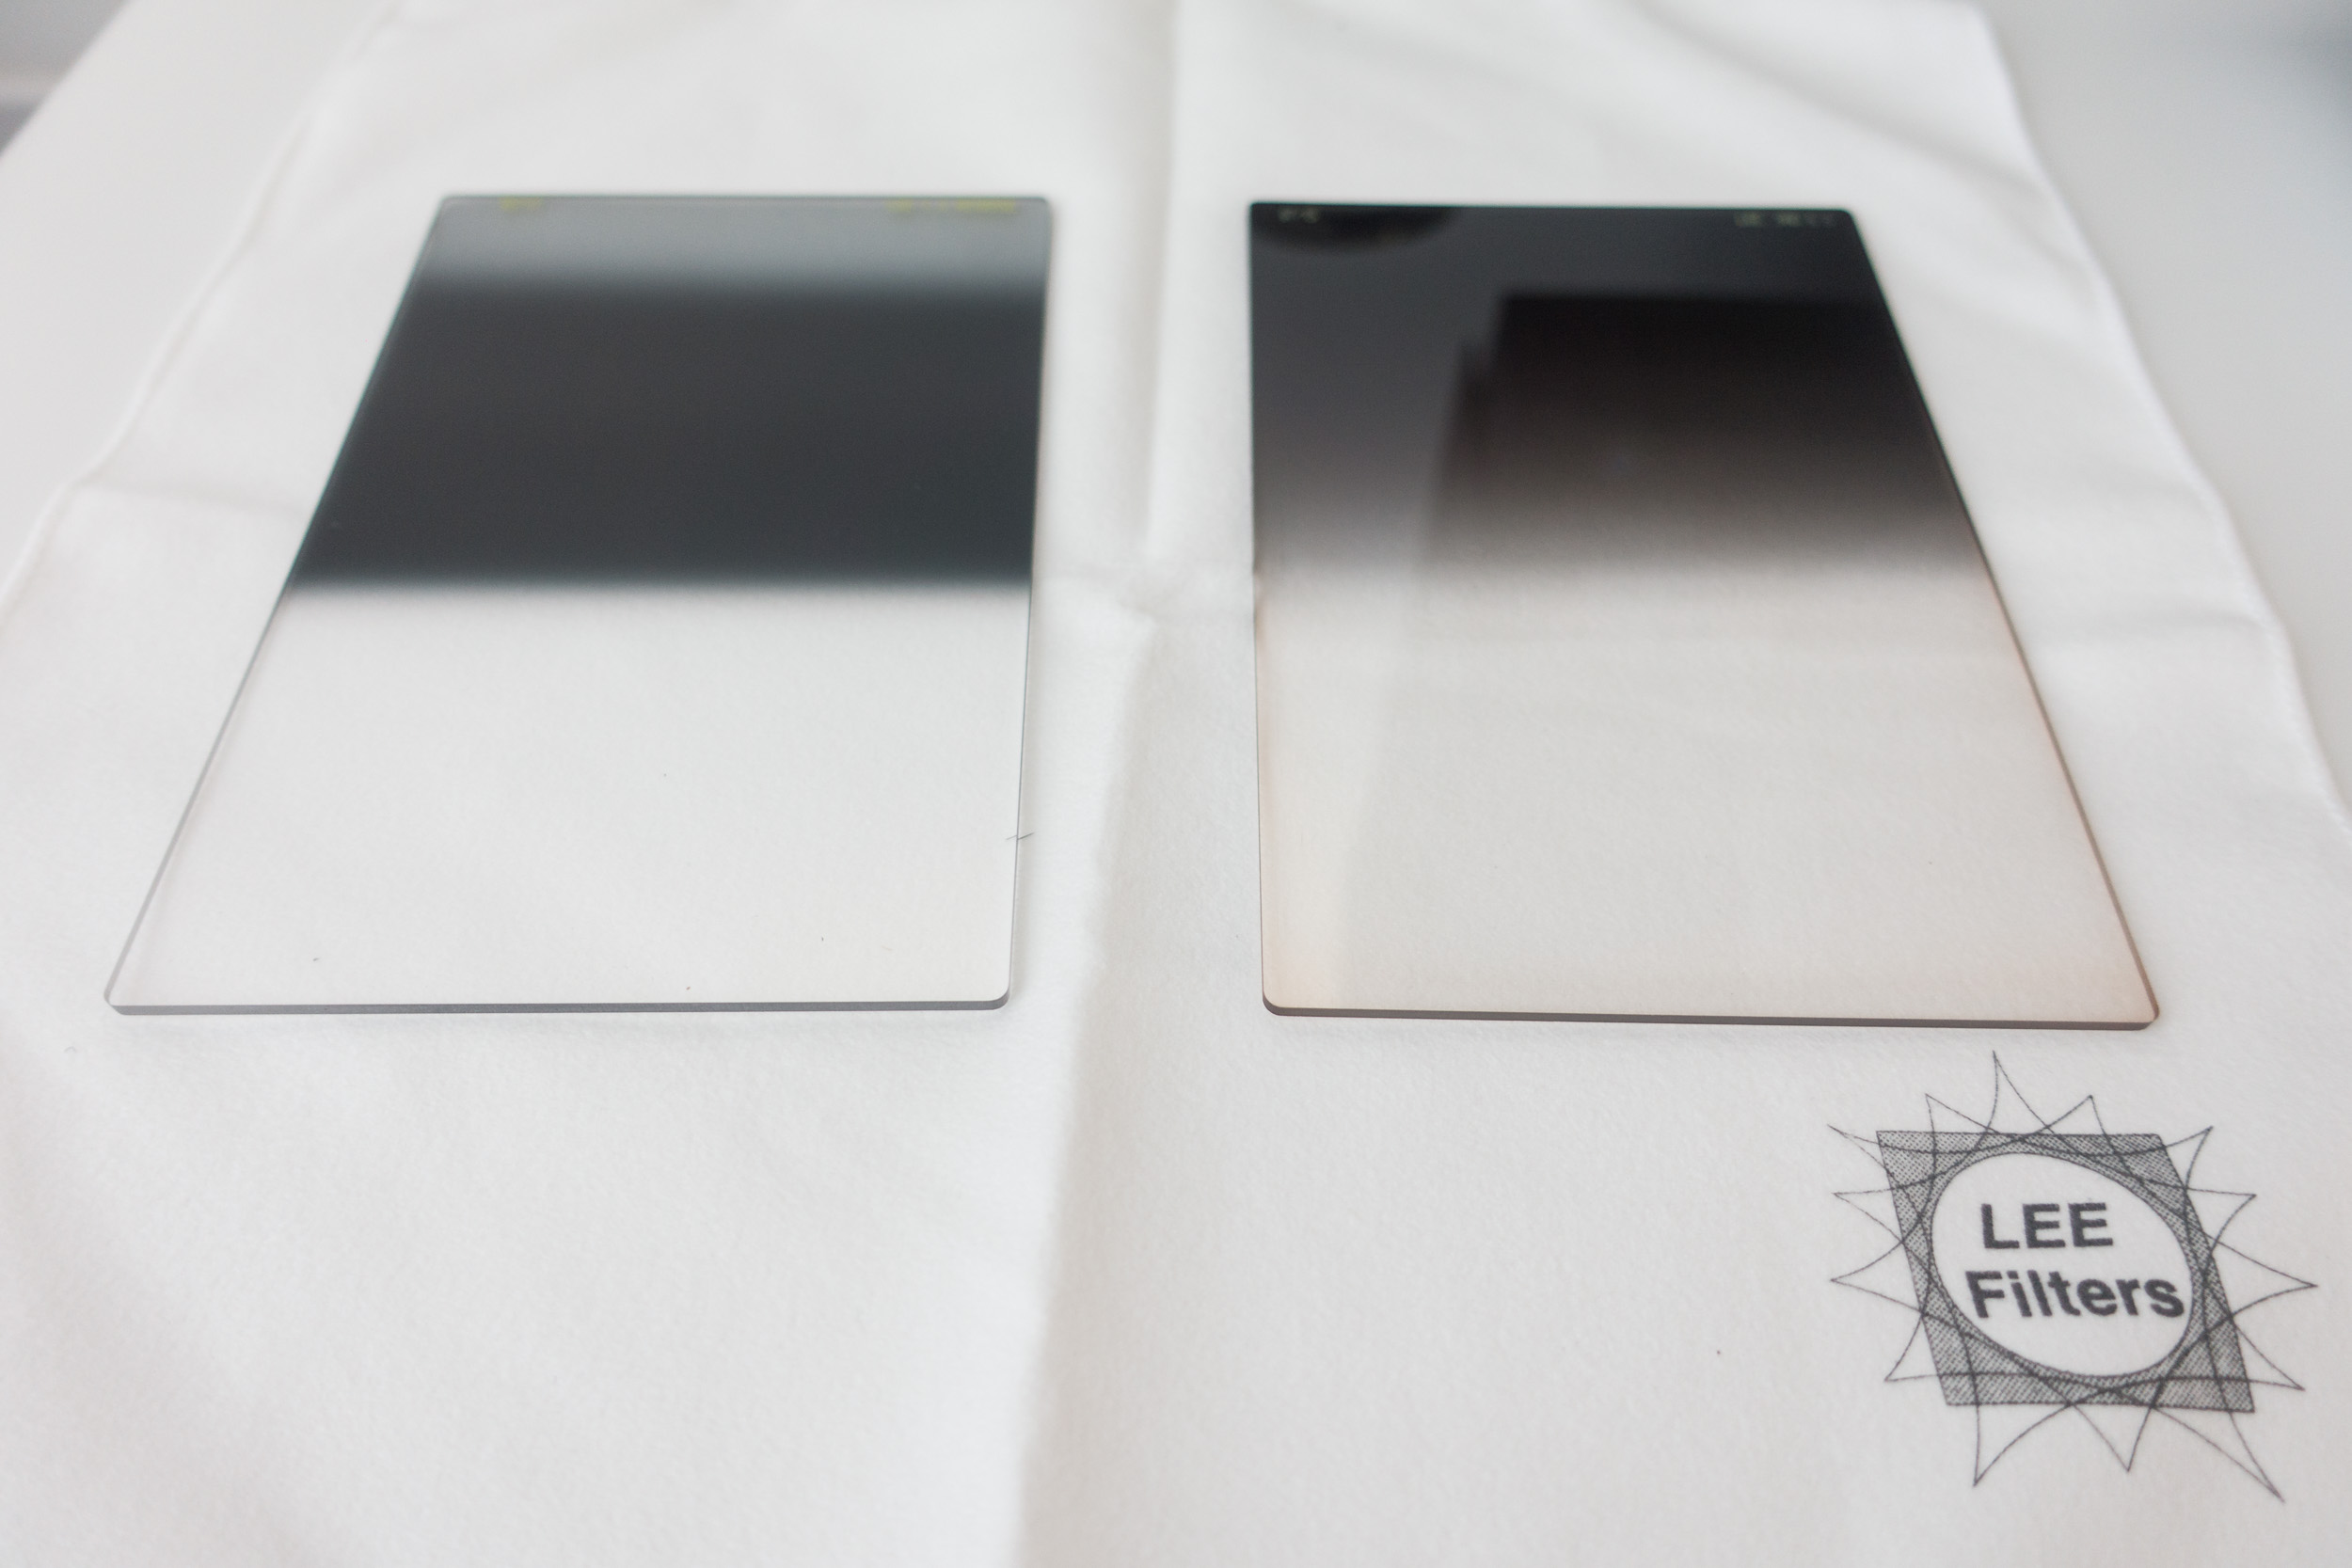
Reverse ND on the left and standard ND grad on the right.
Some of you may be asking what on earth is a reverse ND grad. Perhaps the best way to tell you is to show you.
As you can see from the image above, a standard ND grad is darker at the top and gradually gets lighter the further down the filter you get. However, with the reverse ND grad, the darkest area starts in the middle of the filter, and it gradually gets lighter towards the top of the filter. This allows you to place the darkest area of the filter where you need it most, just above the horizon where the sun is.
At The Cobb
I had been looking for the right location and waiting for the right conditions to try out my 4 stop reverse ND grad for a few weeks. Finally, an opportunity presented itself one morning at The Cobb in Lyme Regis, Dorset. I often wait for January time to visit The Cobb as this is the best time for the rising sun to illuminate the side of this stone pier. However, with clear skies forecast and the sun rising from the end of The Cobb I thought this would be the time to try my new filter.
The light was pretty flat at the start of the sunrise that morning. As I waited for the sun to pop over the horizon I spent a bit of time talking to the 3 other photographers that were also there that morning. As always, I very much enjoy having a chat to my fellow togs. One of those photographers was Anna Stowe. she has a wonderful portfolio of images and I would strongly recommend you follow her Facebook page.
When the sun did rise though I immediately added the 4 stop reverse ND grad to the polariser that was already on the camera. Here are some of the images I took:


The reverse ND grad did exactly the job I wanted it to do. As I took each image I was checking the histogram and was happy not to see any blown highlights. One thing I have noticed is that I did shoot those images at 28mm, which is tighter than the recommend 24mm or wider that Lee Filters say the filter should be used at. This is probably the reason I did spot much graduation towards the top of the image. I will need to remember this next time I use it.
Like a lot of my filters, the reverse ND grad won't be used all the time but it is still a filter that I am very happy to have in my bag. Finally, I can have confidence that when I shoot into the sun I can capture as much of the dynamic range of the seen in a single frame and instantly see results on the back of my camera.
So have you tried the reverse ND grad yet? What technique do you use when shooting into the sun? Let me know in the comments below.

Getting to Know Colmer's Hill
In this blog post I tell about my 3rd visit to Colmer's Hill and how despite the experience of the previous 2 visits I still have a lot to learn about this fantastic Dorset location.
Third Time Lucky?
On paper Colmer's Hill is a relatively straightforward location to shoot. Its conical shape makes it stand out from the rest of the landscape luring the photographer into some obvious but pleasing compositions. However, as I've just learnt the most obvious composition isn't always the best.
My most recent visit to Colmer's Hill is my third this year. The previous two visits had largely been unsuccessful but I was putting both those visits down as exploratory shoots while I looked for the optimal position. On my third visit, I decided that I would opt to shoot the hill from a less elevated viewpoint so that the top of the hill would be above the horizon. On my previous visits, I had adopted a position on top of the hill opposite Colmer's Hill. This drops the top of the hill below the horizon which, based on the images I've seen, work best when mist surrounds the hill leaving just the peak visible, similar to this image I took on my first visit in January of 2017.
The weather forecast for my most recent visit wasn't for any mist but it did show signs that the high-level cloud could be well illuminated by the rising sun. These predicted conditions together with the plan but of shooting from a lower elevation I thought would provide me with the best chance of getting a good photo. With my plan decided I set the alarm for 04:30!
On my arrival at Quarr Lane at 05:45 the conditions were already looking promising so I quickly headed to my chosen spot. Sure enough, the top of Colmer's Hill was placed nicely above the horizon and I was sure I know had the best spot. So I started to set up my camera and waited for the cloud and light show to start. And start it did. Just not where I wanted it to be. Sure there was sufficient cloud above the top of the hill but the real action was happening just 45 degrees to my right.
Not Quite the Right Spot
The most glorious show of pink clouds was happening just above the spot where the rising sun was. As a personal preference, I don't shoot straight into the sun so I had positioned myself so that it would be excluded from the frame. It seemed like a good plan at the time, after all, the good colour in the sky is not often limited to a single spot. However if I had selected a more northerly position, so the sun was rising directly behind the hill, I would have been able to include the dramatic clouds in my composition.
However, landscape photography is a combination of luck, planning and experience. I had done my planning and luck I can't really control but having little more experience at the location may have allowed me to assess the conditions more effectively and possibly change the spot I was shooting from. It would have been a bit of a walk and might have needed a brisk run but it probably would have been worth it.
However the morning wasn't wasted as I still got out with the camera, enjoyed a lovely sunrise and managed to get this pleasing image.
Nikon D750, Nikkor 70-200mm f/2.8 @ 70mm, f/11, 1/13 sec, ISO 100, Lee Filters ND 0.9 soft grad.
Understanding Your Location
So what did I learn from this trip out with the camera? Well, despite the experience of my previous two visits, and planning for the third, I found that I still had plenty to learn about shooting Colmer's Hill. As I described in my previous blog article, Perseverance - Photographing Bowerman's Nose, it can take many, many trips to a location before you really get to know it and get an image that is worthy of the location. In some cases, you might never really know a location and it will continue to throw you a surprise or two. To be honest, that's probably a good thing though.
Even though I've been there three times I will certainly be going back again. Each time I go though I will understand the location a bit better and I will be able to make the necessary adjustments to increase the likely hood of success.
My Top 3 Tips for Colmer's Hill
So if you fancy a trip to Colmer's Hill, and why wouldn't you, here are my three top tips:
Take a long lens. You'll want something in the range of 24-70mm, but if you have it take a 70-200mm (or something can reach past 100mm).
Explore. You can shoot Colmer's Hill from a number of spots, covering a range of elevations and distance. You might need to go a few times to understand which spots work best and when.
Check Weather and Direction of Light. Colmer's Hill is both a sunrise and sunset location, and it works in a variety of weathers. Choose your spot(s) based on the conditions, but be prepared to change them.
If you'd like to see more of Colmer's Hill why not check out my 5 Minute Photo Adventure video that I shot while I was there. You can see how I created the images above and give you an idea of what it's like to shoot there.
So have you shot Colmer's Hill before? Do you have a favourite spot to shoot it from? Do you have a favourite location that you've visited many times but you still feel you are getting to know it? Let me know in the comments below.

Exploring Colmer's Hill
In this blog post, I talk about my 2nd visit to Colmer's Hill and how I learnt to look for the wider perspective. I also look at the importance moving around to find different compositions of the same subject.
A Change of Plan
One of my photographic goals this year is to explore more of Dorset. I'm very lucky to live in Devon as not only do I have a lot to shoot in my local county, but I also have Cornwall and Dorset as neighbours. For no particular reason, I seem to have spent more time shooting in Cornwall than Dorset. So after reading Mark Bauer's new book Photographing Dorset, I was very much inspired to photograph more of Dorset in 2017.
My original plan for the shoot was to head to Old Harry Rocks near Swanage. However, the weather forecast wasn't concrete for the conditions I wanted. As it is a 2 hr drive there and a 2 hr drive back I didn't feel it was worth the risk on this occasion so I opted for something a bit more local. I had visited Colmer's Hill late last year and with it's close proximity to home I thought that would be a better option.
A Hint of Colour
I arrived at my location in plenty of time for sunrise. Arriving a good hour before official sunrise allows plenty of time to get set up and maybe even have a quick cup of coffee. From my vantage point, I could clearly see Colmer's Hill and the surrounding landscape which had some low lying mist on it and just a splash of colour in the sky. However, the only cloud in the sky was a thick blanket of low cloud far down the coast, exactly where the sun would rise. So unless conditions changed I would have a cloudless sky for my composition and the first light of the day blocked by some coastal cloud.
A New Perspective
The location I was shooting Colmer's Hill from typically requires a long lens to shoot with so the hill can be isolated. So the first few shots I took were with Nikkor 70-200mm f/2.8. Shooting at around 150mm provided me with the composition I was looking for, but the light was very flat and hazy so the shots weren't very inspiring.
As I often do when I'm waiting though I decided to take a few shots with my phone for my Instagram feed. Taking an image from my phone immediately made me realise that I was missing a very different composition. The phone gave me a much wider perspective of the scene and I realised that rather than just including Colmer's Hill I should be including the wider landscape.
A wider perspective. Nikon D750, Nikkor 24-70mm f/2.8 at 42mm, f/11, 1/15 sec, ISO 100.
By opting for a wider composition I could include the distant hills which were surrounded by mist. The sun had risen above the distant cloud by this time so there was just a little colour on the side of the hills and in the sky.
The tight composition I was so focused on getting had prevented me from looking around to see if there was a better composition to be had. If I hadn't decided to take an image with my phone I might well have missed out on a better image.
Same Location, Different View
While it is important to sometimes change lens to give a better composition, it is also important not to stay put in one spot. With some locations that can't be helped, but you can get a number of different views of Colmer's Hill by simply walking about.
A slightly different view of Colmer's Hill.
Based on the advice from Mark's book I took a little walk northwards to find some undulating ground which again, given the right light, would make for some interesting foreground for a wide angle composition.
Though the sun was quite high by the time I set my shot up at this location I could see how it might work on another day. I would just some higher cloud and possibly a few less sheep!
I'll Be Back
It's not been the greatest of starts to the year for my photography. It's starting to feel like it's been a long time since I managed to capture a great image. However, I do need to remember that I can really only go out shooting when I have time, not when the conditions are optimal, so I can't expect great results every trip out with the camera.
As always, I will look for the positives from each trip out with the camera. Firstly I learnt not to get too focused on one composition using one lens. Getting the mobile phone out really helped me to see a different view! I've also learnt more about a location that I will probably visit a lot in 2017. It's good to have multiple spots from one location so you can move about a bit to suit the conditions.
Have you had a good start to your photography this year? Have you got some new locations you want to visit this year? Let me know in the comments below.

Saying Goodbye to 2016 in Dorset
For my last shoot and blog post of 2016 I head out to Dorset to shoot some new locations with a couple of different cameras.
Wishful Thinking
For my last shoot of 2016 I was hoping it was going to be a special one. However, hope and reality are rarely the same thing. Inspired by the images I had seen in Mark Bauer's new book Photographing Dorset, I thought I might try and capture a misty Colmer's Hill. It's a location which I've visited but never photographed and given that there was a lot of fog about and it was close to home it seemed like an ideal location.
The weather forecast was predicting some fog but also a lot of cloud. My concern was that though I might have the fog or mist, without some decent light from the rising sun the image might be a little flat. Filled with optimism and eagerness I decided it would be worth a punt though!
Colmer's Hill
Arriving at Colmer's Hill around 07:15 I had arrived in plenty of time. Sunrise wasn't for another hour, but there was still just enough light to walk up the hill opposite Colmer's Hill without the need for a head torch.

Plenty of mist but with flat light and invading sheep it's not the image I was hoping for.
At the top I got all my gear setup and tried a few compositions. Though there was plenty of fog around the surrounding hills, it soon became apparent that the low level cloud was going to block the light from the rising sun. So while I was happy with the compositions I was finding the flat light wasn't giving me results I craved and no amount of post processing was going to fix that.
Still feeling slightly optimistic I stayed around a bit longer. I've left a location too early before and regretted it so I didn't want to be too keen to depart. In this case things didn't get any better. In fact a herd of sheep decided they were going to play Pacman on Colmer's Hill putting an end to my hopes of a good image.
However, as I knew the risks of coming to Colmer's Hill based on the previous nights weather forecast, I had a plan B!
Golden Cap
While researching Colmer's Hill in Mark's book I also took note of a nearby location called Golden Cap. I thought this might make a good backup location should things not pan out at Colmer's Hill. It was only a short drive from my previous location so I had little to loose.
For this location though I was going for a change of camera. I switched from my trusty Nikon D750 to my DJI Phantom 3 4K with a view of taking some aerial shots of the coastline. I've shot coastal images with the drone before and I've really enjoyed the experience. You can see my first video on drone photography below.

A brief appearance from the sun provided some nice light on the land.
It was another hill climb up to Golden Cap, but given all the luxuries of Christmas, it was one I welcomed! After catching my breath at the top of the hill I soon got to work with capturing some images of the coastline.
One of the benefits of shooting the coastline with a drone is the ability to point the camera straight down. This often provides a unique and interesting perspective. However, for a brief time the sun did produce some interesting light on the land so I had to change the position of the camera and drone the get the shot.
I had a lot of fun flying the drone along the coastline looking for compositions but this is my favourite of the day:
The coastline around Golden Cap
Goodbye 2016, Hello 2017
So while my morning out in Dorset wasn't the big success I was looking to end 2016 with, it's always good to get out with the camera and practice. One thing is for sure I will be visiting Colmer's Hill again in 2017. Maybe it will be my new Bowerman's Nose!
So how was your 2016? Did you get out for one last shoot? What are your photography plans for 2017? Let me know in the comments below. Happy New Year to you all!

My Favourite 5 Images from 2016
As tradition often dictates I'm going to look back and show you my 5 favourite images that I took in 2016.
It's Been a Busy Year
Aside from starting this blog, 2016 has been a very busy year for my landscape photography. I have been out with my camera more this year than any other. In 2015 I went out 34 times to shoot landscapes but in 2016 I went out 46 times. Given that I have to fit my landscape photography in between work and family life I'd say that's not a bad effort. Of course that doesn't include the 20 gigs and music festivals I also shot in 2016. Yes, it's been a busy year.
I've been suitably motivated and inspired this year to get out and practice with my camera. Though I haven't been successful in two of the major landscape photography completions this year, it's still be a successful year for me.
So in a somewhat predictable manner I am going to show you my 5 favourite images I took in 2016. Yes I want to share my images with you but the process of selecting the images makes me look back at my catalogue so I can hopefully see an improvement over the previous year.
The Cobb
I won't easily forget this image. It was taken on a very cold morning in Lyme Regis. I had just about given up and was heading in for coffee and bacon rolls when the sun, which had been up for a little while, started to reflect beautifully off the side of The Cobb. For a magic few moments the light was perfect and I shot several frames, this one being my favourite.
The Cobb - Nikon D750, Nikkor 16-35 f/4 at 22 mm, f/13, 0.6 seconds, ISO 100, Lee Filters ND Grad
Trevose Head
My first visit to Trevose Head happened back in March and it was one of those shoots where everything seems to go well. I was feeling creative and the conditions were perfect for the type of image I wanted to capture. I knew it had been a good day when I got home because I had so many keepers to pick from.
The image below though never originally made the cut and I only recently discovered it while looking for a competition entry. Despite the how much I loved the other three images from that shoot I think this is now my favourite and definately a favourite from 2016.
Trevose Head - Nikon D750, Nikkor 16-35 f/4 at 19 mm, f/11, 8 seconds, ISO 100, Lee Filters Little Stopper, ND Grad.
Venford Falls
As I mentioned in my video My 5 Favourite Landscape Photography Locations in Devon, Venford Falls is one of my favourite locations. Hidden, but not difficult to get to, the twin falls are a bit of a magical location. I had been to the falls a couple times before but it wasn't until I visited in spring of 2016 that I got a shot that I was really happy with.
Though I had tried this composition before it was the lush green spring colour that lifted the image to make it an instant favourite.
Venford Falls - Nikon D750, Nikkor 24-70 f/2.8 VR at 24 mm, f/16, 10 seconds, ISO 100, Lee Filters Polariser.
The Daymark Tower
Though I had tried to photograph the Daymark Tower a couple of times before, I was probably doing so at the wrong time of year. The tower is surrounded by a farmers field so for parts of the year it's just a muddy field. I wanted to go when the field was full of fresh crops.
My vision was clear. I wanted the setting sun to illuminate the tower and I really wanted the fresh crops to be gently swaying in the wind. It's not often you get everything you want but everything came together rather nicely the evening I took this image. The light was beaufitul, the sky was lovely, and there was just enough wind to put a little movement into the crops.
Daymark Tower - Nikon D750, Nikkor 16-35 f/4 at 16 mm, f/13, 1/15 second, ISO 100.
Castlerigg, The Lake District
As I previously wrote in my blog, my trip to The Lake District was challenging. The weather was very wet making creative photography difficult. However, through all that I took an image that not only captures the beautiful Lake District landscape but the dramatic weather that is often present. It reminds that despite how bad the conditions can be, patience can often be rewarded.
Autumn Storm at Castlerigg - Nikon D750, Nikkor 70-200 f/2.8 VR at 78 mm, f/9, 1/60 seconds, ISO 100, Lee Filters Polariser and ND Grad.
So what do you think of my 5 images from 2016? Do you have a favourite? Have you selected your top 5 or top images from 2016? Let me know in the comments.