
Bite-Size Blog Post #76 - The Pap of Glencoe
I've spent years looking up at the Pap of Glencoe and wondering what the view from its summit would be like. On my latest trip to the Highlands, I finally made the climb and was rewarded with spectacular views and wonderful photographic opportunities.
A Bucket List Hill
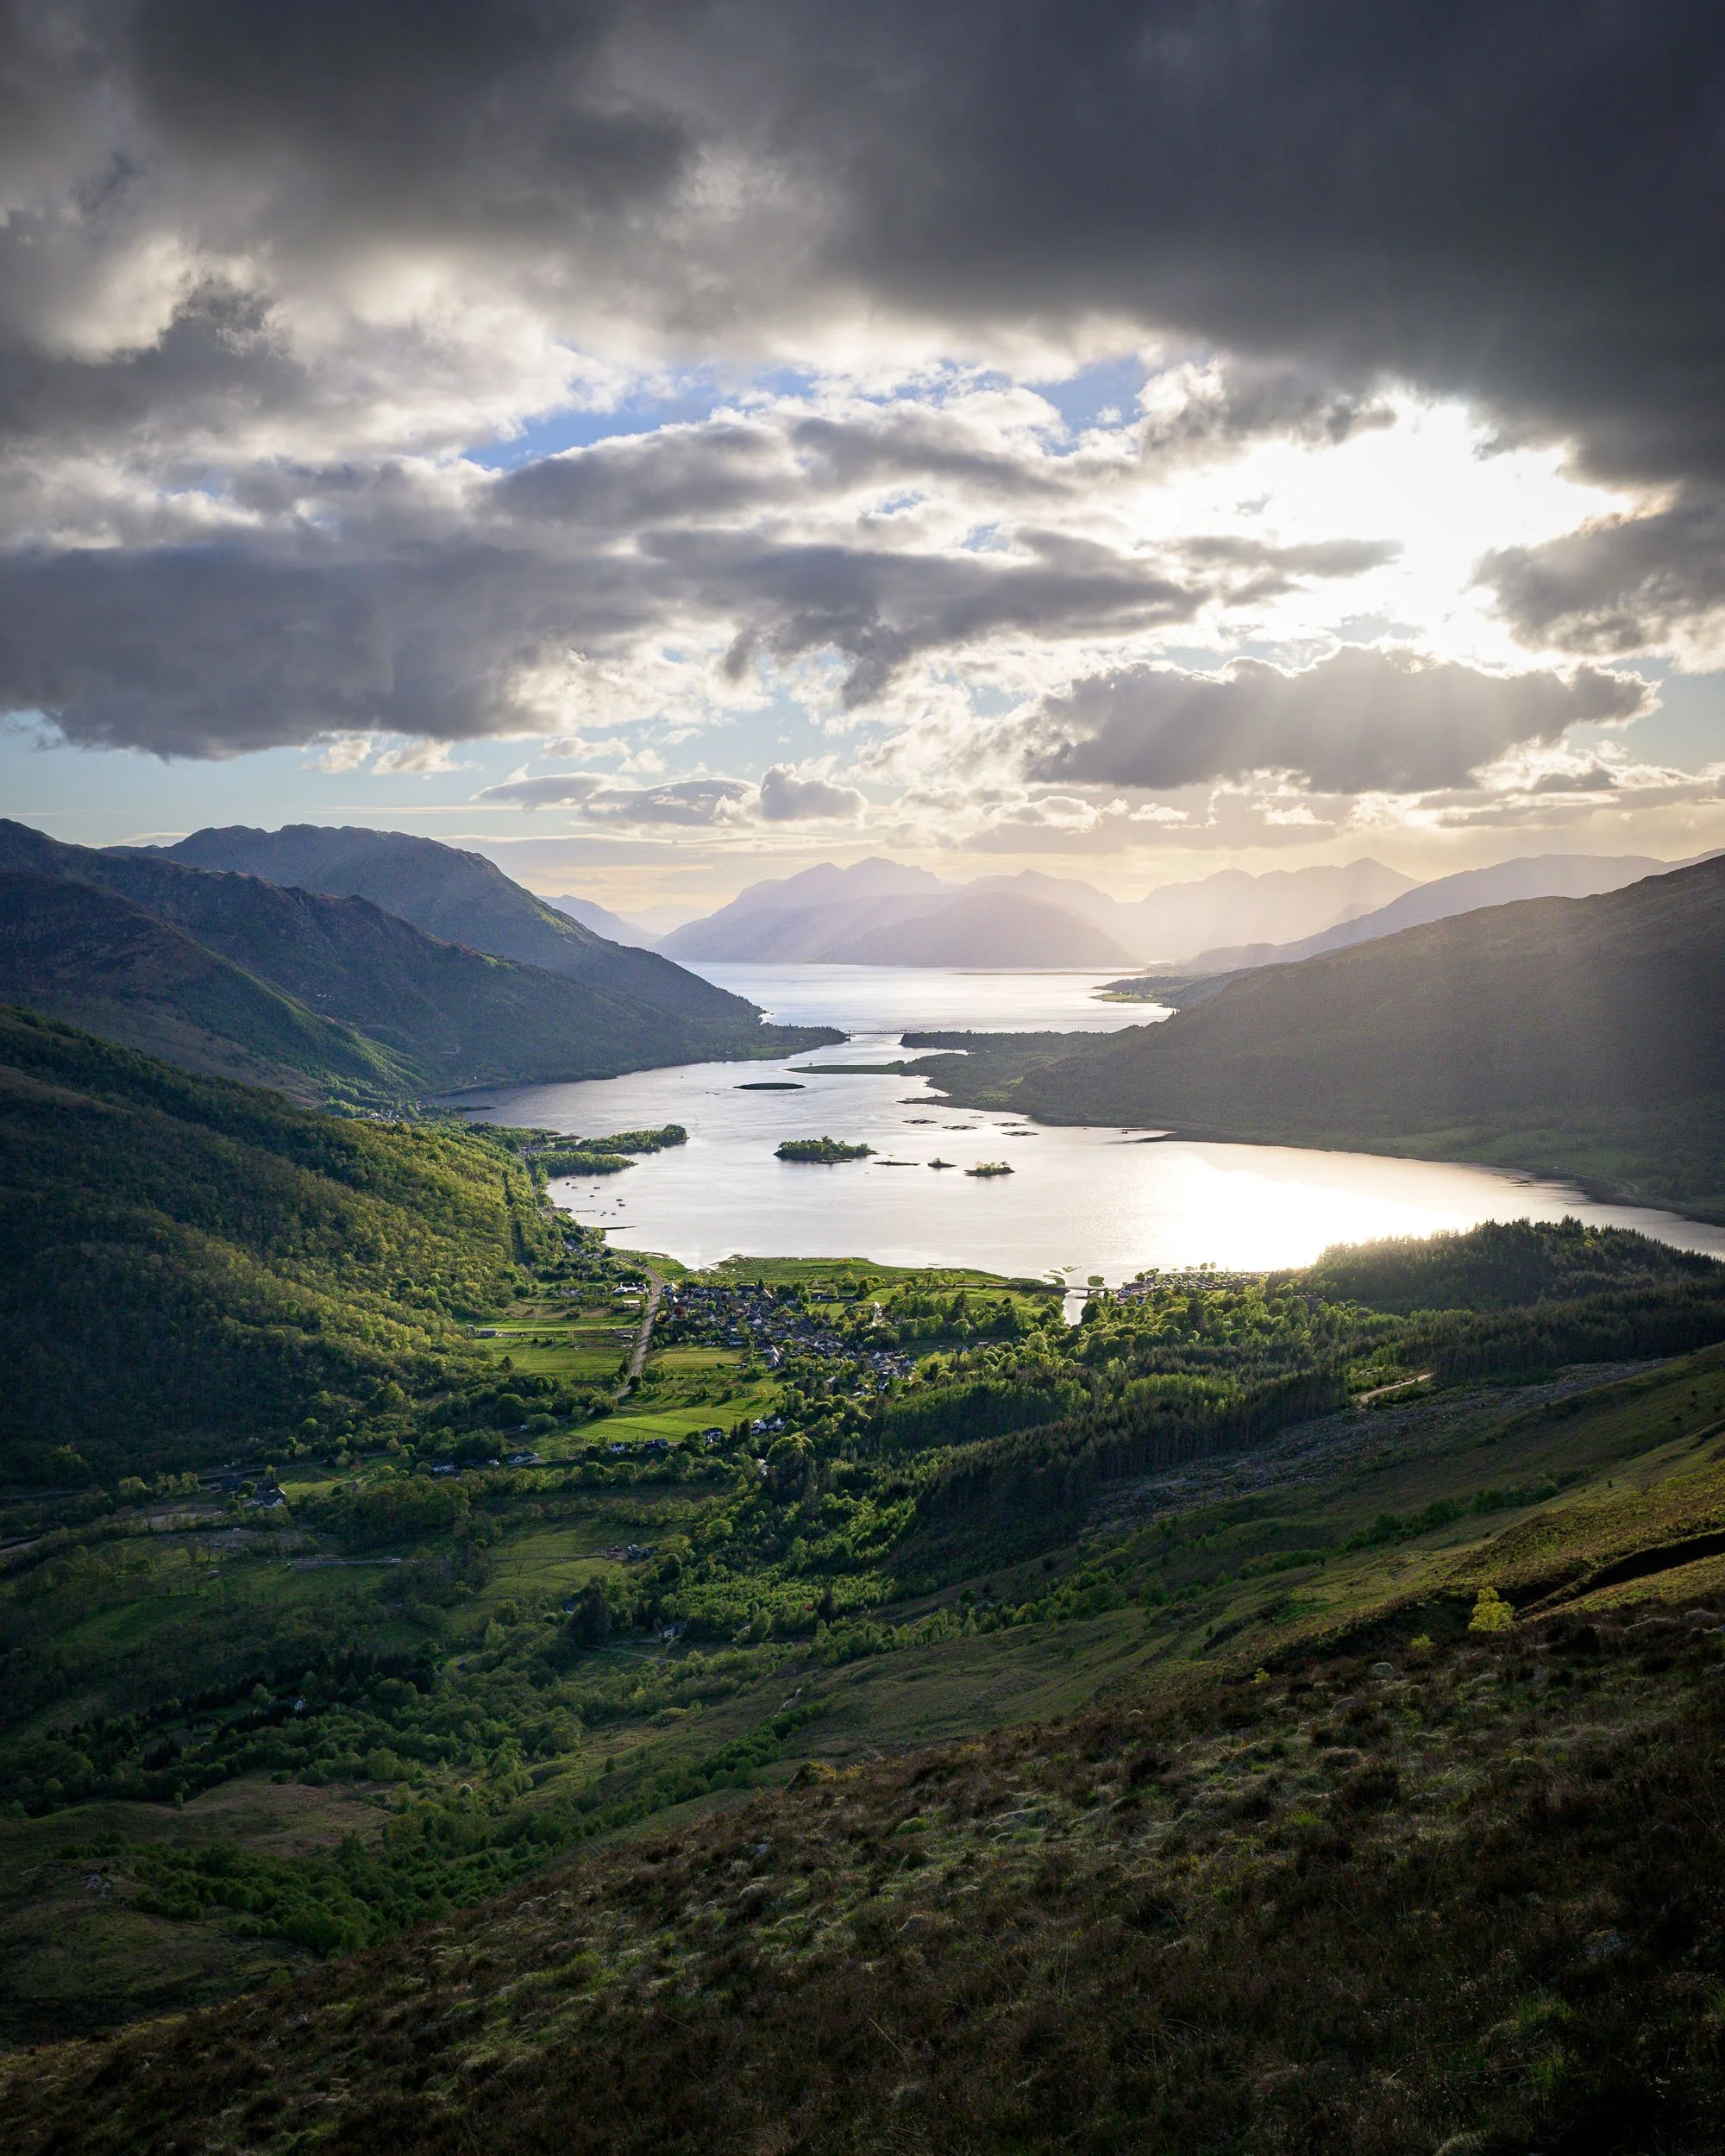
For as long as I’ve been visiting Glencoe, I’ve wanted to ascend the Pap of Glencoe, or to use its Gaelic name, Sgòrr na Cìche. At 742m it’s not a Munro, but what it lacks in height it more than makes up for in grandeur. It has a distinctive shape that can’t be missed when driving past Glencoe village, rising steeply from the shores of Loch Leven. I always imagined that the views from the summit would be spectacular.
On my most recent visit to the homeland, I decided that as long as the weather wasn’t horrendous, I would make time to climb this bucket list hill. So when an evening of relatively good weather presented itself, I jumped in the car and made the short drive to Glencoe. The route I chose provided some excellent views of the hill, increasing my excitement for what lay ahead.
I was soon out of the car and beginning my ascent of the Pap. It’s a steep walk, but one that rewards you with better and better views with every step. The final 150m of ascent are a little trickier as the path narrows, becoming less defined and increasingly rocky, but I was soon at the top admiring some of the finest views that Glencoe has to offer.
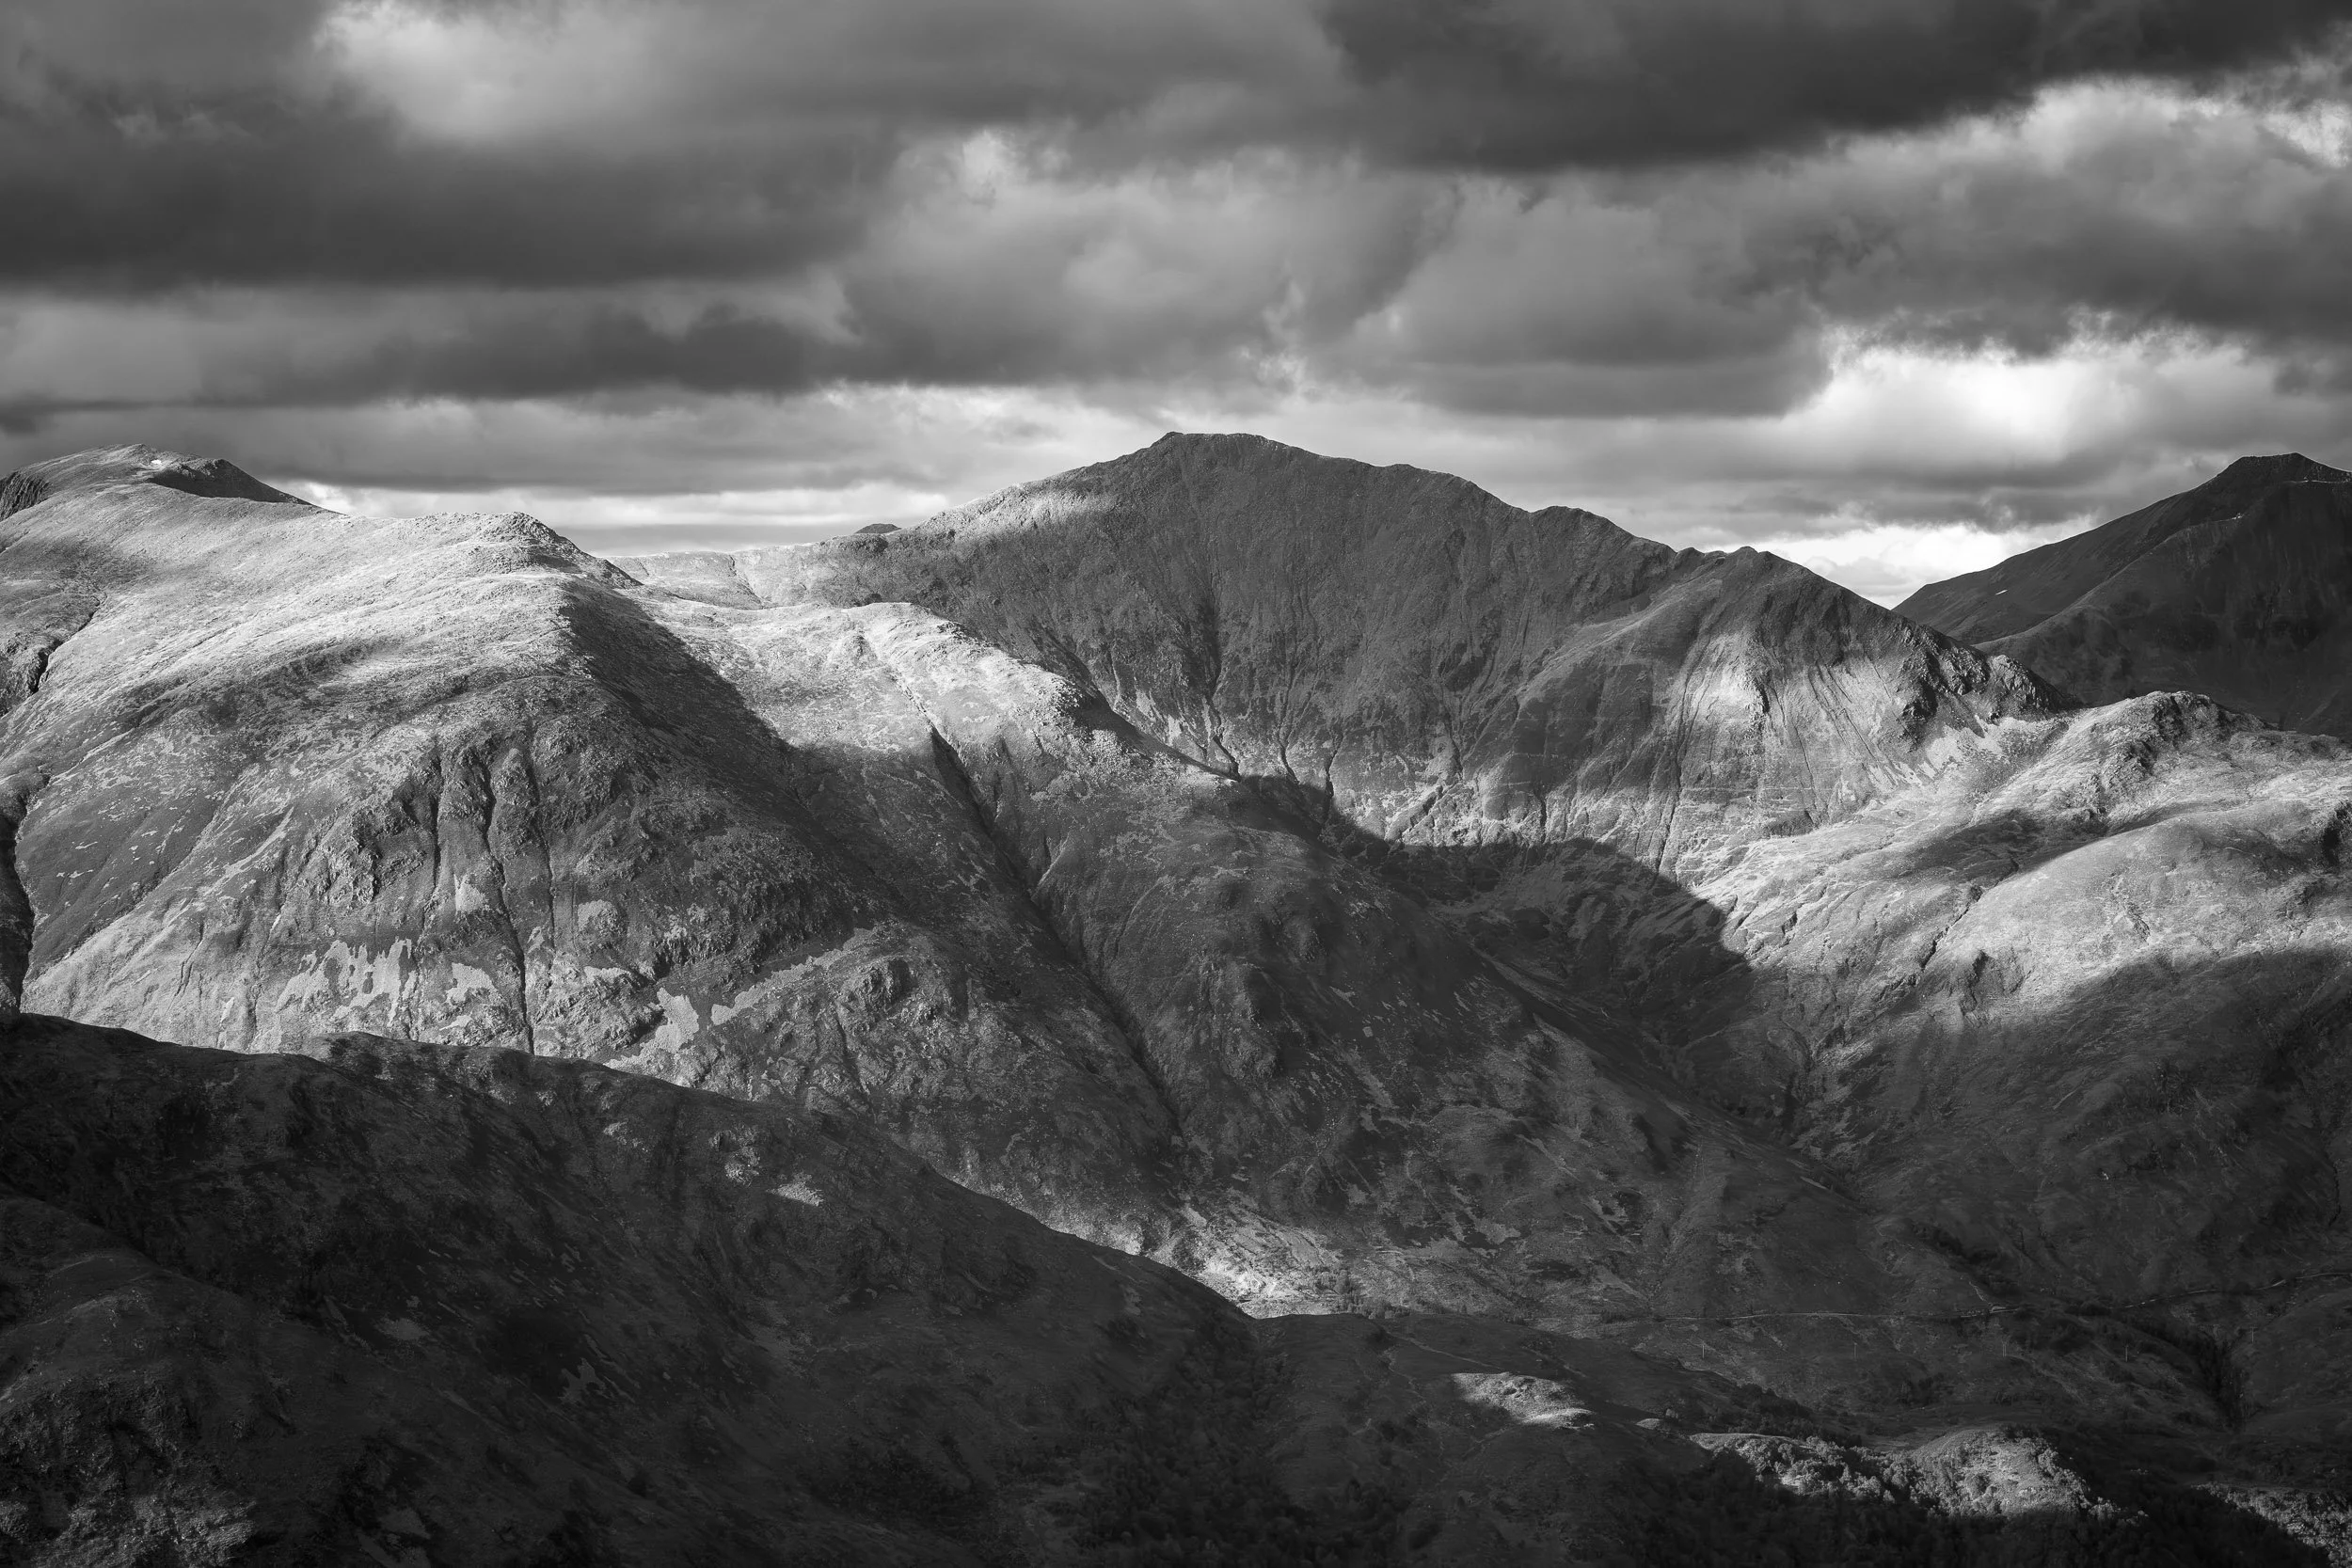
And the views did not disappoint. I could see for miles in every direction and even the summit of Ben Nevis stood clear on the horizon. With so much cloud and areas of light and shadow moving across the landscape, I immediately switched my Nikon Z8 to Deep Tone Monochrome, my favourite black and white camera profile, and began picking out compositions with my Nikkor 24-120mm f/4 lens.
My time on the summit wasn’t all about taking photographs though. I also took time to sit and admire the view, breathe in the fresh Highland air and simply relax. And, of course, enjoy a few snacks.
As I descended in the early evening light, the landscape became no less spectacular. I stopped several times to capture the view looking down Loch Linnhe, making the most of the constantly changing light.
As I arrived back at the car, I reflected on my adventure to the Pap of Glencoe. Although I had finally ticked this bucket list item off, I knew it would not be the last time I would ascend this magnificent Glencoe hill.
Loch Linnhe from the Pap, Glencoe, Scotland - Nikon Z8 with Nikkor Z 24-120mm f/4 S at 28mm, f/11, 1/250 sec at ISO 320.


Bite-Size Blog Post #64 - River Coe Waterfall
Just because a location is well photographed doesn’t mean it’s not worth returning to, especially when you have something specific in mind.
Yes, It’s That Waterfall
Over the last few weeks in Scotland I’ve been focusing, amongst other things, on capturing high contrast black and white photographs of waterfalls. The last two I’ve shared here are not widely photographed, which gives some scope to create something a little different.
This waterfall is the opposite. It’s one that a lot of people have photographed, myself included. Does that mean it’s not worth revisiting? Of course not. As I mentioned in my recent post about Kilchurn Castle, a honeypot location is popular for a reason. The challenge is not whether to photograph it, but how to create something that feels personal.
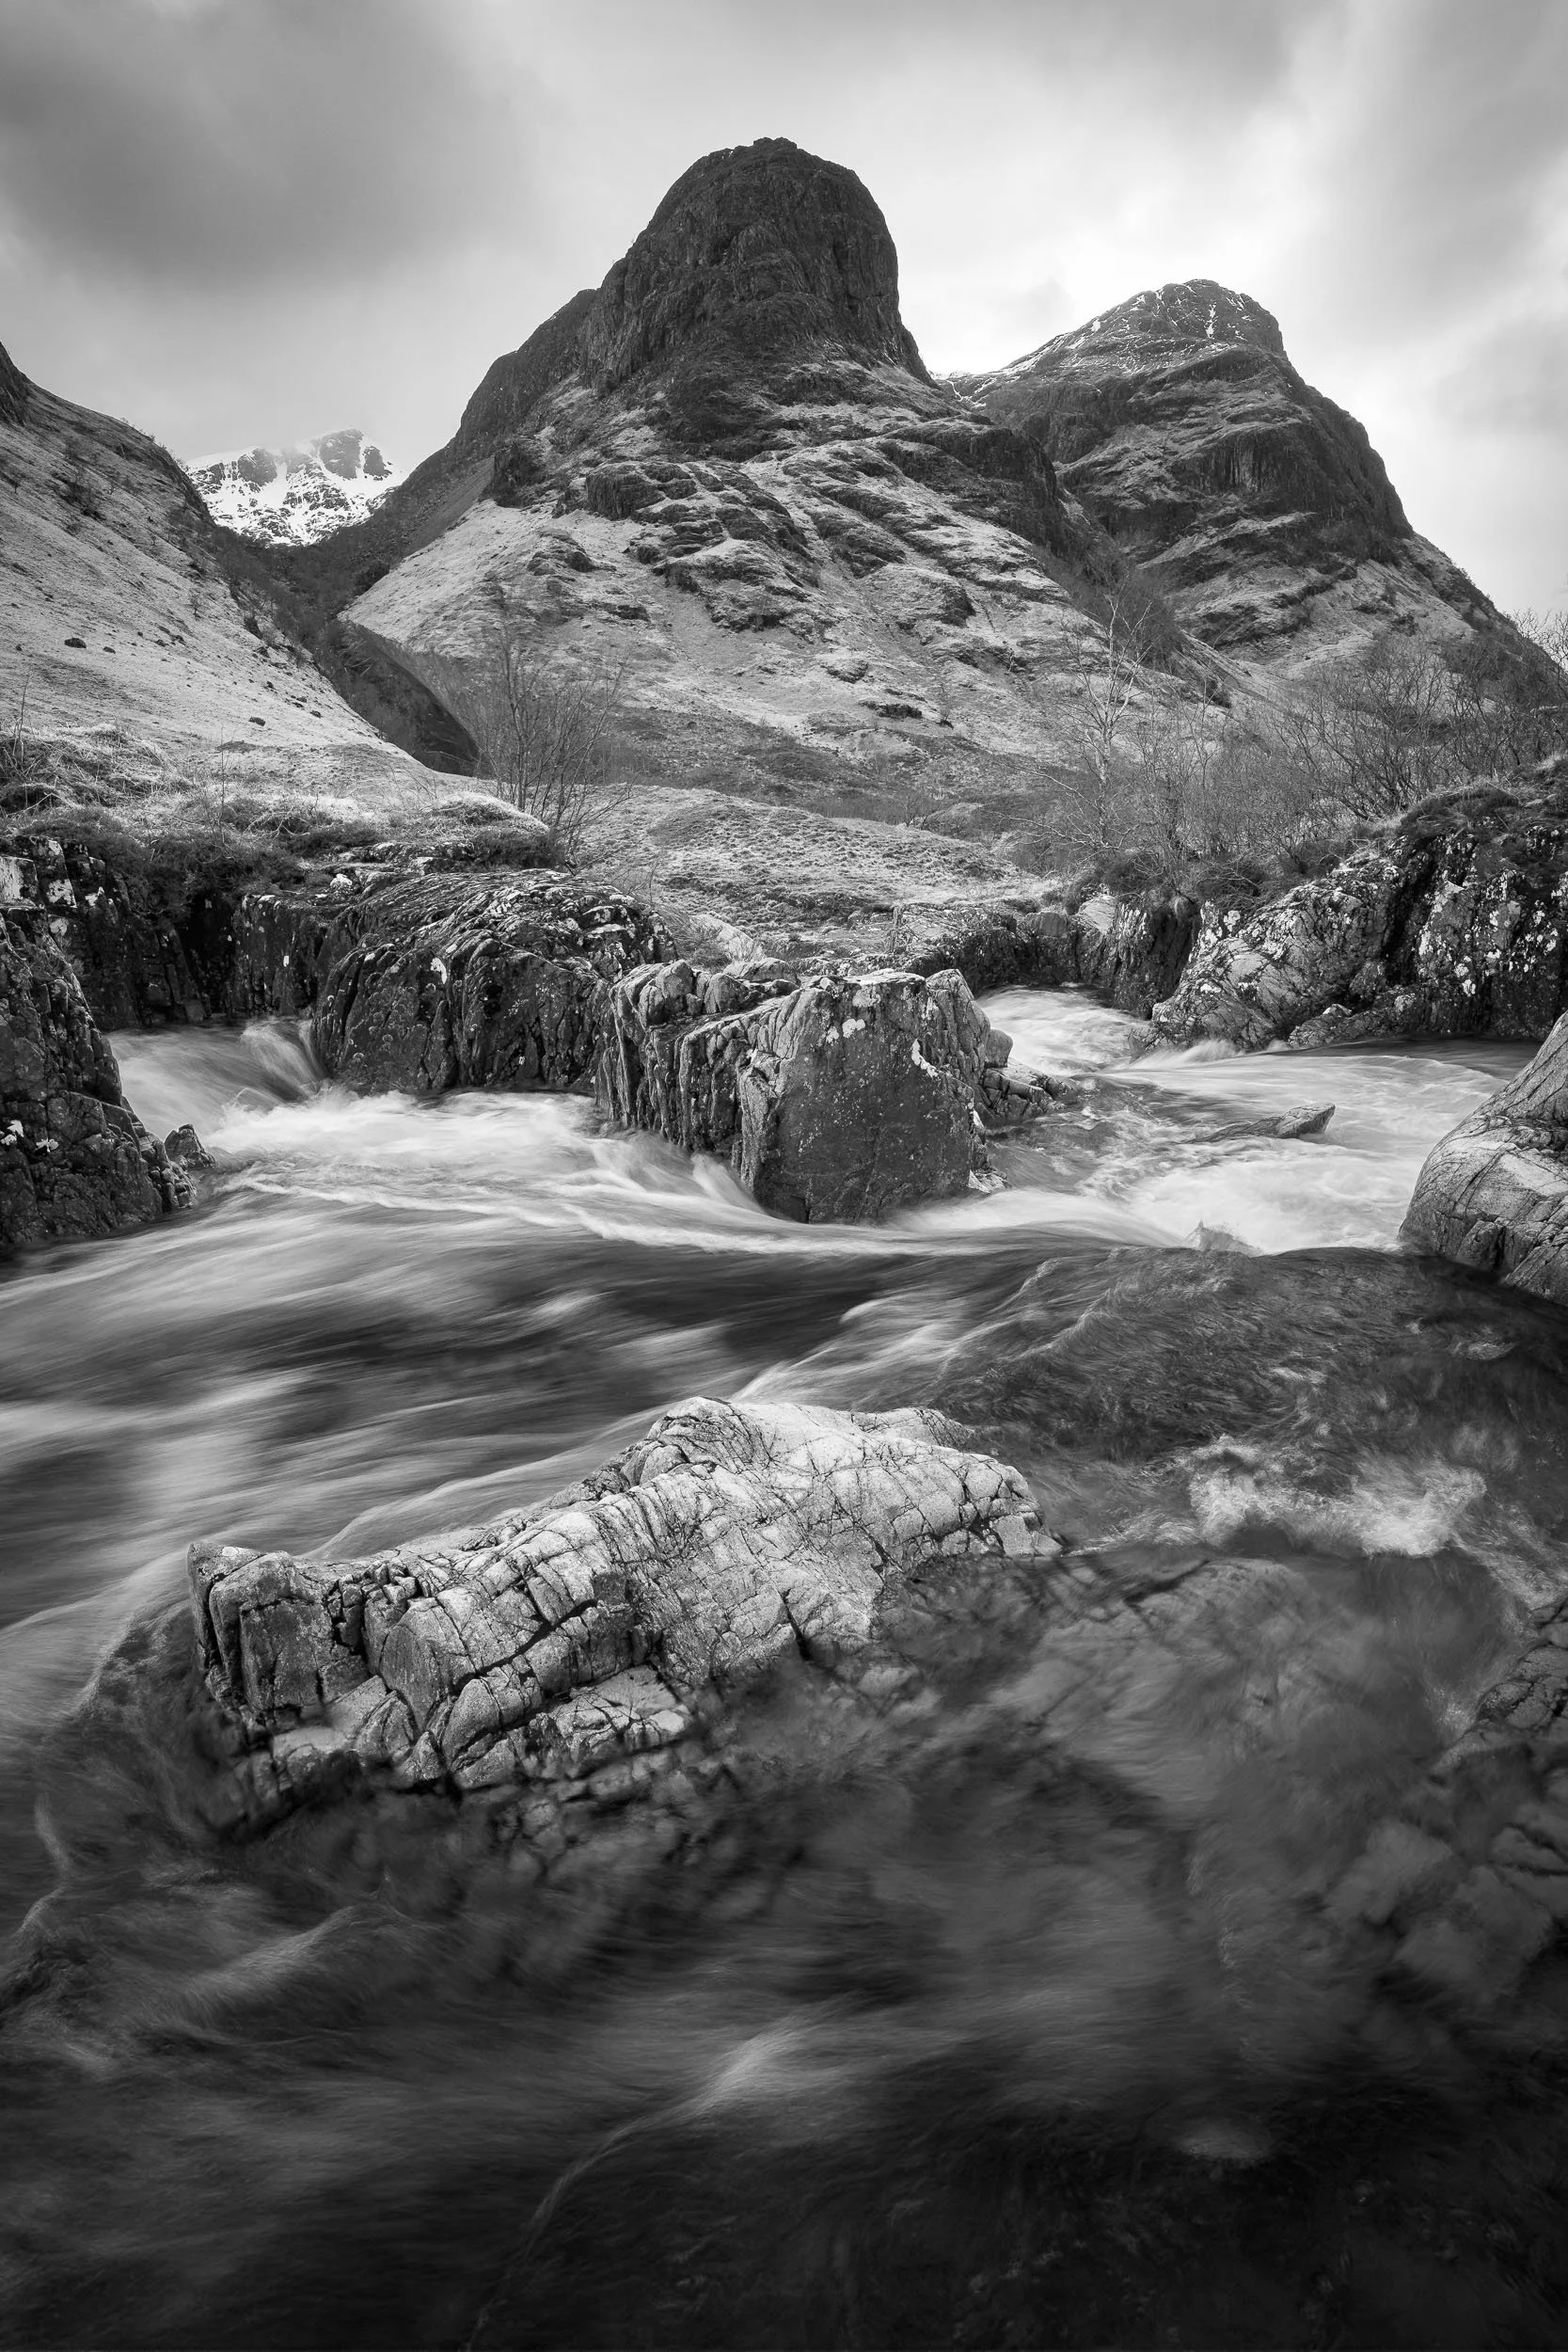
Standing beside the River Coe, looking at a scene that has been photographed countless times, I wasn’t searching for something completely new. I was looking to create an image that fits within my collection of high contrast black and white waterfalls from the Highlands. Not every photograph needs to stand alone as a masterpiece. Some simply need to play their part in a wider body of work.
Like many places in Glen Coe, this is somewhere I will return to. Conditions change and each visit brings a different opportunity. You never quite know when everything will come together.
Glen Coe Waterfall, Scotland - Nikon Z8 with Nikkor Z 14-30mm f/4 S at 21mm, f/13, 1/5 sec at ISO 64, Kase Filters CPL

A Little Bit of Glencoe
Back to the Homeland
I've returned to my homeland of Scotland a couple of times this year and each time I have, I made sure that I took my camera so that I could photograph of the beautiful Scottish landscape. Despite my best intentions though, I never captured any photographs. But how could I possibly go all the way to Scotland and not take any landscape photographs?
My primary reason for going to Scotland was to see family and friends, not to take photographs. So, when I was there and I was spending time with the people that are close to me, my motivation for early alarm calls and staying out late to take pictures evaporated. Dare I say, but there is more to life than photography!
However, I've just returned from another trip to Scotland, and despite this being another friends and family type visit, I was determined to get out and use my camera! Add in the fact that it was the height of autumn, and the colours would be at their best in the landscape, there was no way I was returning home without capturing at least one landscape photograph!
An Ascent of Beinn a' Chrùlaiste
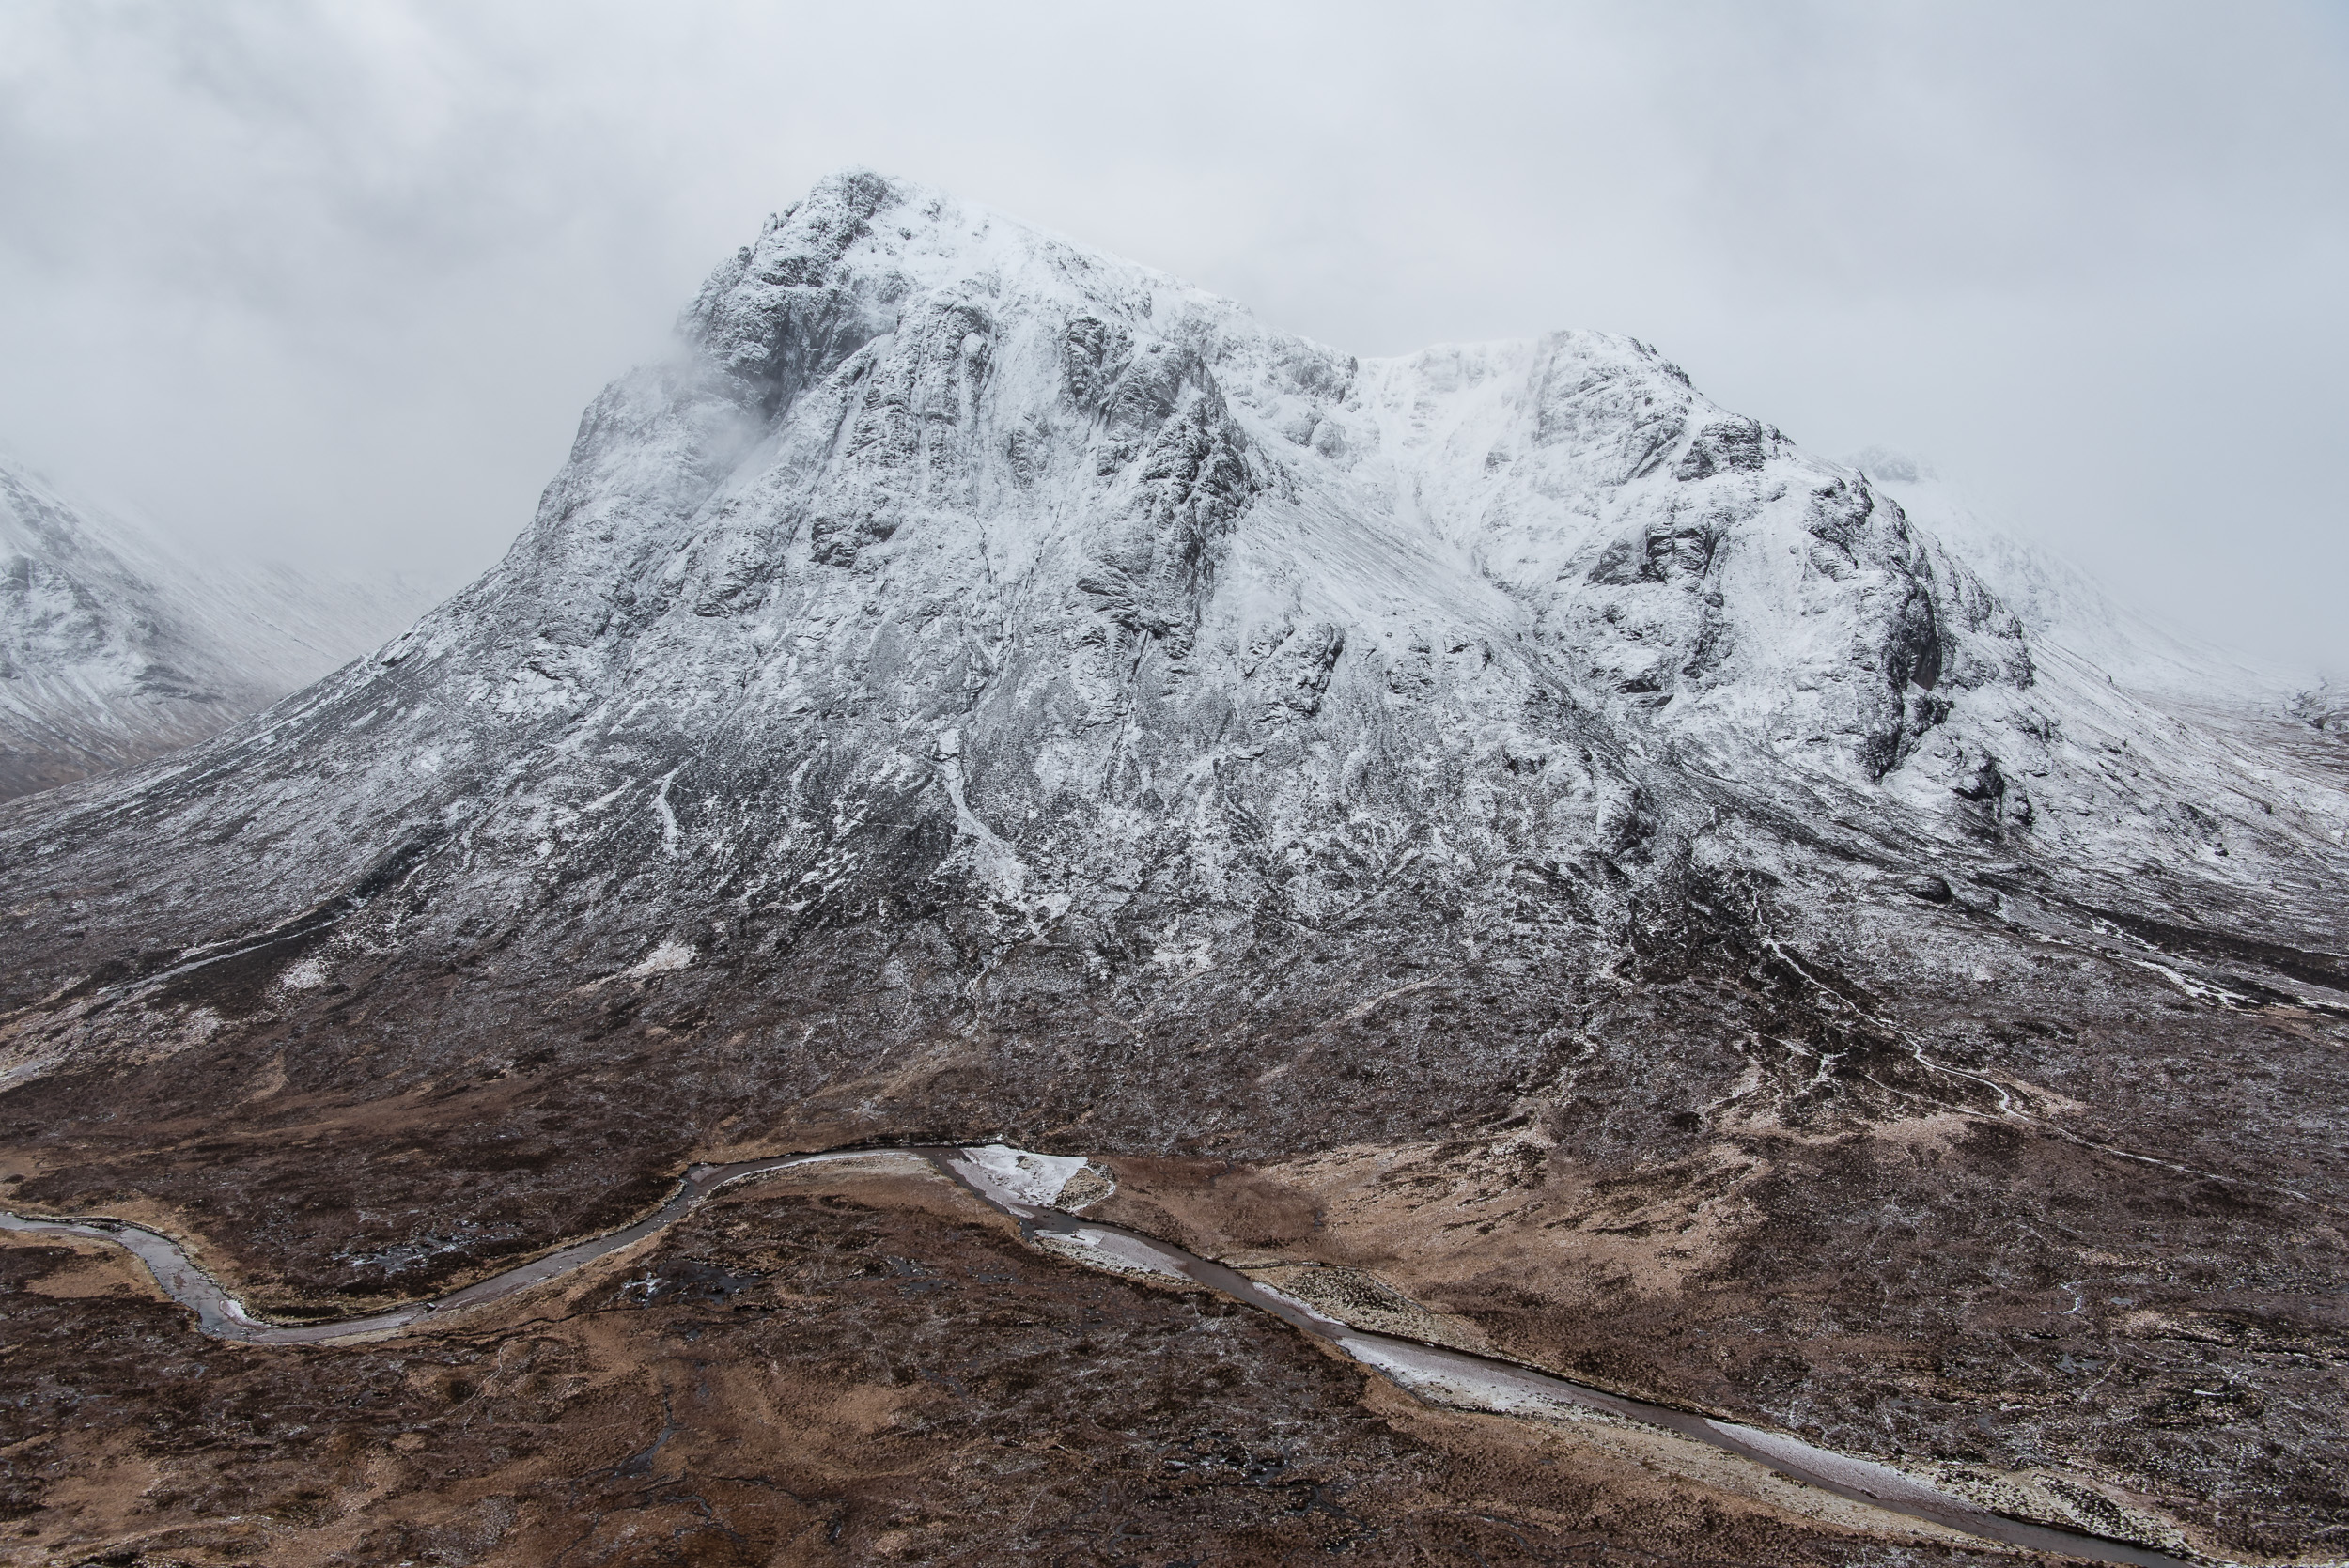
With Glencoe being only a 60 minute drive from my family home in Scotland, it became the obvious choice to go on a photography adventure. One of my all-time favourite Glencoe viewpoints is looking towards Stob Dearg (Buachaille Etive Mòr) from up on Beinn a' Chrùlaiste. You don't even need to get all the way to the summit to get a good viewpoint. By reaching Stob Beinn a' Chrùlaiste you can get a perfect side on view of Stob Dearg. It might be an all uphill walk in the dark, but to sit on that hill side and watch the sun come up over Glencoe is nothing short of magical.
As I said, it is one of my favourite viewpoints so I have photographed it before, but I've always felt I could get a better photograph, or at least a photograph with different weather conditions. Maybe even a temperature inversion!
Stob Dearg Sunrise, Glencoe, Scotland - Nikon Z8, Nikkor Z 24-120mm f/4 S at 29mm, f/11, 1.6 secs at ISO 64.
Alas, as you can see from my photograph I didn't get a cloud inversion. In fact, I didn't get much in the way of cloud at all. There was a blanket of very high level cloud that didn't add much to the scene and all it really did was stop the sky looking too blue. Other than that, the light was beautiful and the way it catches the mountain, and the autumnal colour of the ground is a sight I will never bore off. It's a composition I've captured before, but I'll happily keep going back and doing it again.
After spending a wonderful hour on the side of the hill, the light had become bright and harsh, so I felt there weren't many more opportunities to capture photographs. I had the choice of going back the way I ascended and to the car or continuing my walk to the summit of Beinn a' Chrùlaiste. As I'd never been to the summit, I thought this would be the perfect opportunity to do so. I'd get a nice walk, and I might find some compositions to come back to another morning.
After reaching the summit I descended down the eastern ridge, a route that I'd never done before. The highlight of the descent was hearing the roaring sounds of the stags. It was the height of the rutting season, and the noise of the stags could be heard everywhere. I even managed to spot one close to the Kinghouse Hotel.
After 13km of walking, my circular route took me back to the car feeling happy and content with my morning adventure in Glencoe.
Glencoe Lochan
A few days later I met up with a friend and fellow photographer who has a lot more experience of photographing Glencoe than me. She took me to a location I'd never been to before, Glencoe Lochan. While the light wasn't amazing, the water was calm, and autumn colours were beautiful.

Glencoe Lochan, Glencoe, Scotland - Nikon Z8, Nikkor Z 24-120mm f/4 S at 24mm, f/13, 1 secs at ISO 64.
This is by no means an amazing photograph, but I wanted to capture it so I could remind myself to return here next time I'm in the area.
River Coe
The afternoon weather in Glencoe had turned cloudy and wet, but the great thing about Glencoe is that even in the stormiest of conditions, you will likely find something to shoot. With the hope that there would be a gap in clouds rapidly fading, we decided to head down to the River Coe to see if we could make a composition featuring the river and the mountains. Even with the absence of light, the autumn colours of the landscape were striking.
It was late in the day when we got down to the river, and with so much cloud in the sky, the light levels were low. I admit that this did cause me to feel a little rushed and finding a balanced composition in a complex scene was tricky. The river has many twists, turns, pools, and waterfalls, and trying to place these effectively in a composition along with the trees and mountains, is something that requires time and exploration.

River Coe Rapids #1, Glencoe, Scotland - Nikon Z8, Nikkor Z 14-30mm f/4 S at 14mm, f/13, 0.5 secs at ISO 500.
I'm not complaining though. This is another part of Glencoe that I haven't explored before and just being there was exciting. It's another Glencoe location that I will revisit when I have more time, and I'm wearing a pair of wellies. I could easily spend a few hours (carefully) exploring this stretch of the River Coe.

River Coe Rapids #1, Glencoe, Scotland - Nikon Z8, Nikkor Z 14-30mm f/4 S at 14mm, f/13, 3 secs at ISO 400.
My time photographing Glencoe was short, but I loved it. I'm so glad I made the effort to tear myself away from my family and to head out with the camera. I photographed one of my favourite Glencoe locations and I found a couple of new ones. I had clear, calm weather one day, and wind and rain the other. But no matter the weather, Glencoe is still one of the most spectacular places in the country. No matter if I'm just enjoying a walk or taking landscape photographs, I will never get bored of it. I can't wait to go back.
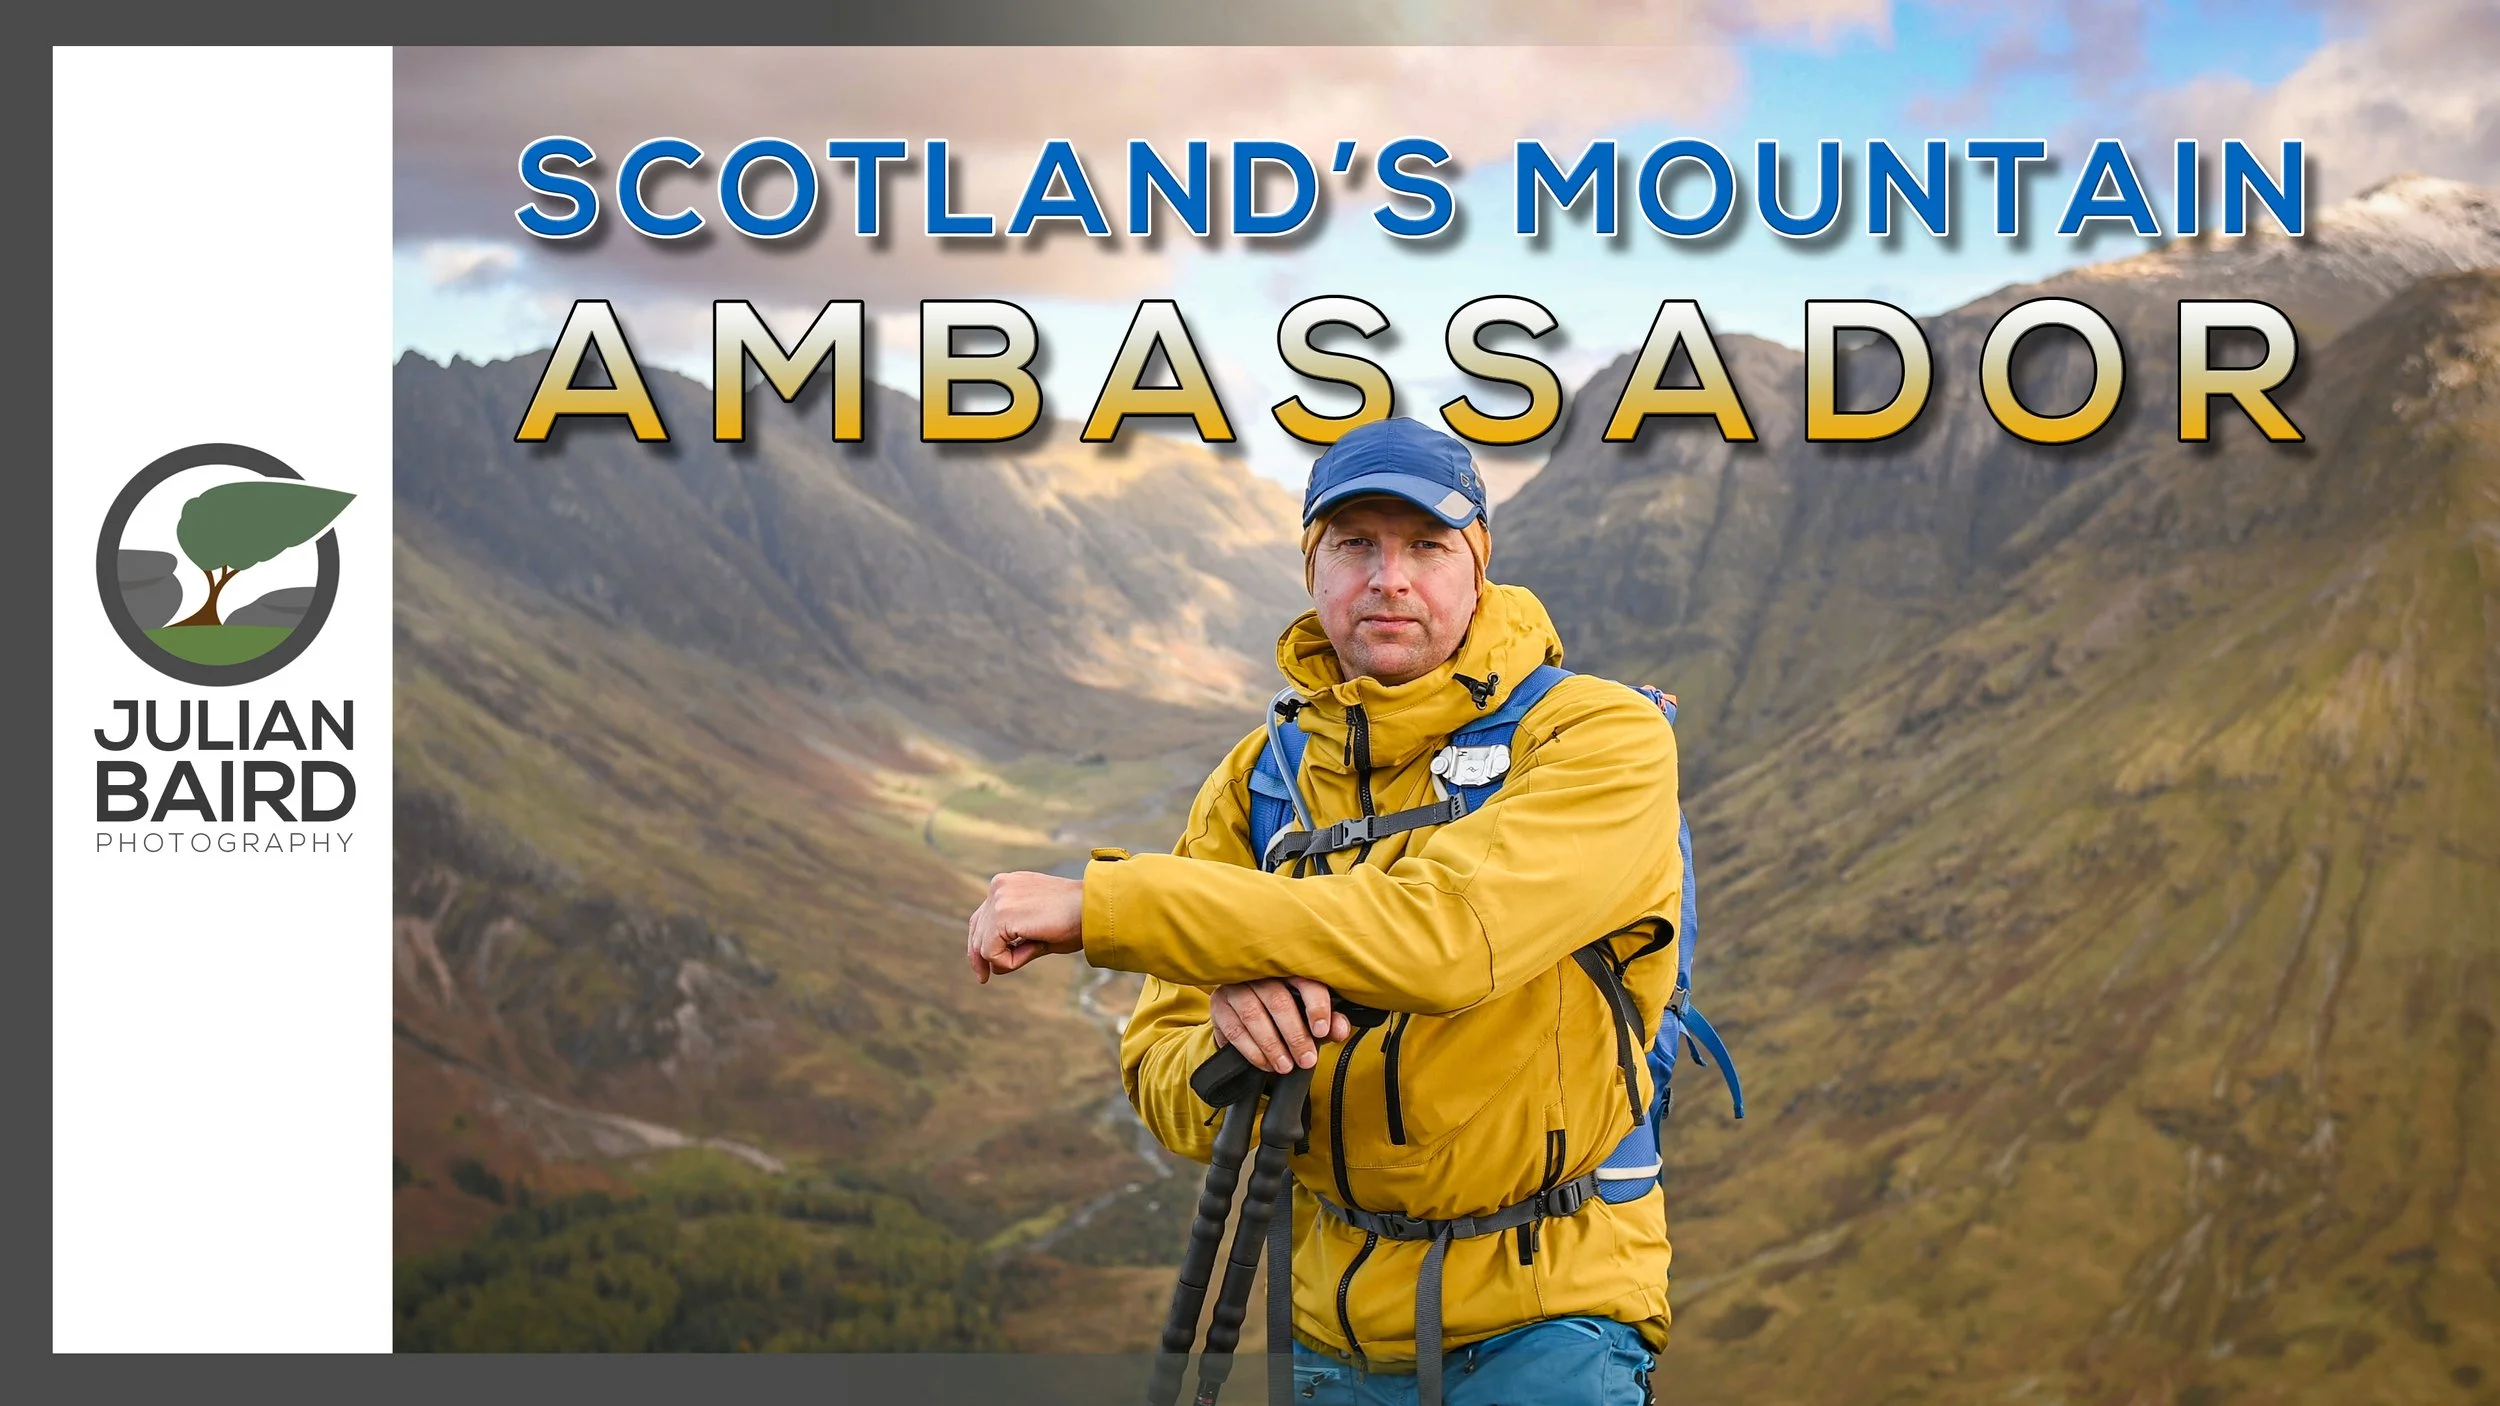
The Story of Scotland's Mountains - A Documentary
Murray Wilkie (AKA Scotland's Mountains) has been documenting his adventures in the Scottish mountains for over a decade. In this special documentary, I join Murray on one of his world-famous walks as he takes on a new route to discover one of Glencoe's finest viewpoints. Along the way I ask Murray about his passion for hillwalking, his photography, his life on YouTube, and most importantly, what his favourite mountain snack is!
A Journey to Glencoe's Finest Viewpoint with Murray Wilkie
The primary goal of the video content I produce is to share my passion for landscape photography. By sharing my adventures, I hope that my films inspire more photographers to head outdoors with their cameras to capture beautiful landscapes.
As well as providing inspiration, I also gain inspiration from other photographers and YouTube content creators. One of my favourite channels is Scotland’s Mountains. On the channel you’ll find Murray Wilkie hill walking and climbing the hills and mountains of Scotland. Not only is his content inspiring, but more sentimentally than that, it reminds me of home.
One of the things I like to do on my channel is to share the stories of the people that inspire me by making documentaries about them. You may have already seen my documentaries about Chris Sale and Nick Livesey. Though I don’t make documentaries very often, I am passionate about them, so you can imagine my excitement when Murray agreed that I could make one about him.
What you are about to watch is the result of that collaboration. I join Murray on one his world-famous walks, on a route he’s never walked before to (hopefully) find one of Glencoe’s finest viewpoints. Along the way I ask Murray about his passion for hillwalking, his photography, his life on YouTube, and most importantly, what his favourite mountain snack is!
Sit back, relax, and enjoy “Scotland’s Mountains - The Murray Wilkie Story”.
Murray’s Video of that Day
If you’d like to see the video Murray made of that day then check it out below. It’s well worth a watch!
Check out Murray's excellent Instagram feed - instagram.com/scotlandsmountains
Buy Gerry's book "Day Walks in Loch Lomond & the Trossachs" - https://amzn.to/3thXXLG
Glencoe Photos
As with any of the documentaries I produce, filming my subject is my primary focus. However, I did manage to find the time to take a photograph of the mighty fine view Murray guided me to.

Glencoe Valley from Meall Mor, Scotland - Nikon Z7, Nikkor Z 24-120mm f/4 S at 24mm, f/8, 1/60 sec at ISO 64.
Photographing Glencoe and Vallerret Base Layers
There are few better places to visit as a landscape photographer than Glencoe in Scotland. However, at this time of year, the temperatures can be low enough to make any unprepared photographer give up and go home. In this video, I will share the joy of landscape photography at one of Glencoe's most famous viewpoints and I also try out Vallerret's new range of merino wool base layers.
Scotland at Its Very Best
Photographers are attracted to Glencoe for all sorts of reasons. One of the biggest reasons is that there are so many amazing viewpoints that are easy to access. There are some great photographs to be captured from either your car or with just a short walk. However, for those photographers willing to be a little more adventurous there are almost limitless opportunities, especially if you chuck the variable weather into the mix.
One such viewpoint is an elevated view of Stob Dear (Buachaille Etive Mòr). It’s always been a favourite of mine and I find it hard not to photograph it if I’m visiting Glencoe. On my most recent visit, the forecast was predicting lots of fog, and I had high hopes of a temperature inversion, and even though this didn’t occur, it was still an amazing morning of photography.
Keeping Warm with Vallerret Base Layers
While it might have been a sunny day on Glencoe, it was far from warm. The lower temperatures did therefore give me the chance to share my thoughts on Vallerret’s new range of merino wool base layers. You will be familiar with Vallerret’s range of photography gloves, and I have previously featured them in my videos. I suffer from cold hands and for me, my photography gloves are as important as my camera. I’ve had a few trips out with the camera ruined because I’ve been cold and miserable.
With winter just around the corner, the release of these new base layers from Vallerret was good news to me and I was happy to put them through their paces during my adventures in Scotland. You can learn more about them and hear my thoughts on them in the video below.
If you’d like to purchase any of these base layers you can do so directly from Vallerret right here.
Landscape Photographs from Glencoe
Buachaille Etive Mor (Stob Dearg) at Sunrise, Glencoe, Scotland - Nikon Z7, Nikkor 14-30mm f/4 S at 21mm, f/11, 1/5 sec at ISO 64.
Glencoe Valley at Sunrise #1, Glencoe, Scotland - Nikon Z7, Nikkor 14-30mm f/4 S at 21mm, f/11, 1/5 sec at ISO 64.
Glencoe Valley at Sunrise #2, Glencoe, Scotland - Nikon Z7, Nikkor 14-30mm f/4 S at 14mm, f/11, 1/13 sec at ISO 64.
Vallerret Base Layers on Location
Those Vallerret base layers were warm enough and comfortable enough to allow me to take these on location photographs. I don’t think modelling is my strong point though. Perhaps I’ll stick to photography!

Vallerret Merino Wool Zip Jersey.

Vallerret Merino Wool Long Sleeve Tee

Should YOU Photograph the Honeypot Locations?
Is there any point in capturing your own images from the landscape photography honeypot locations? With so many images captured from these popular locations you could be forgiven for giving them a miss. In this blog post I head to Glencoe in Scotland to photograph one of its most popular viewpoints and discuss why I think everyone should shoot a honeypot location.
They Are Honeypot Locations for a Reason
This is going to be a bit of a short blog post. There are a couple of reasons for this. Firstly, most of what I want to say is said in the video to go with this post, so there’s little point repeating it all here. I’m also a little short in time because I’ve got lots of exciting content to work on that I want to get ready before the festive period really starts.
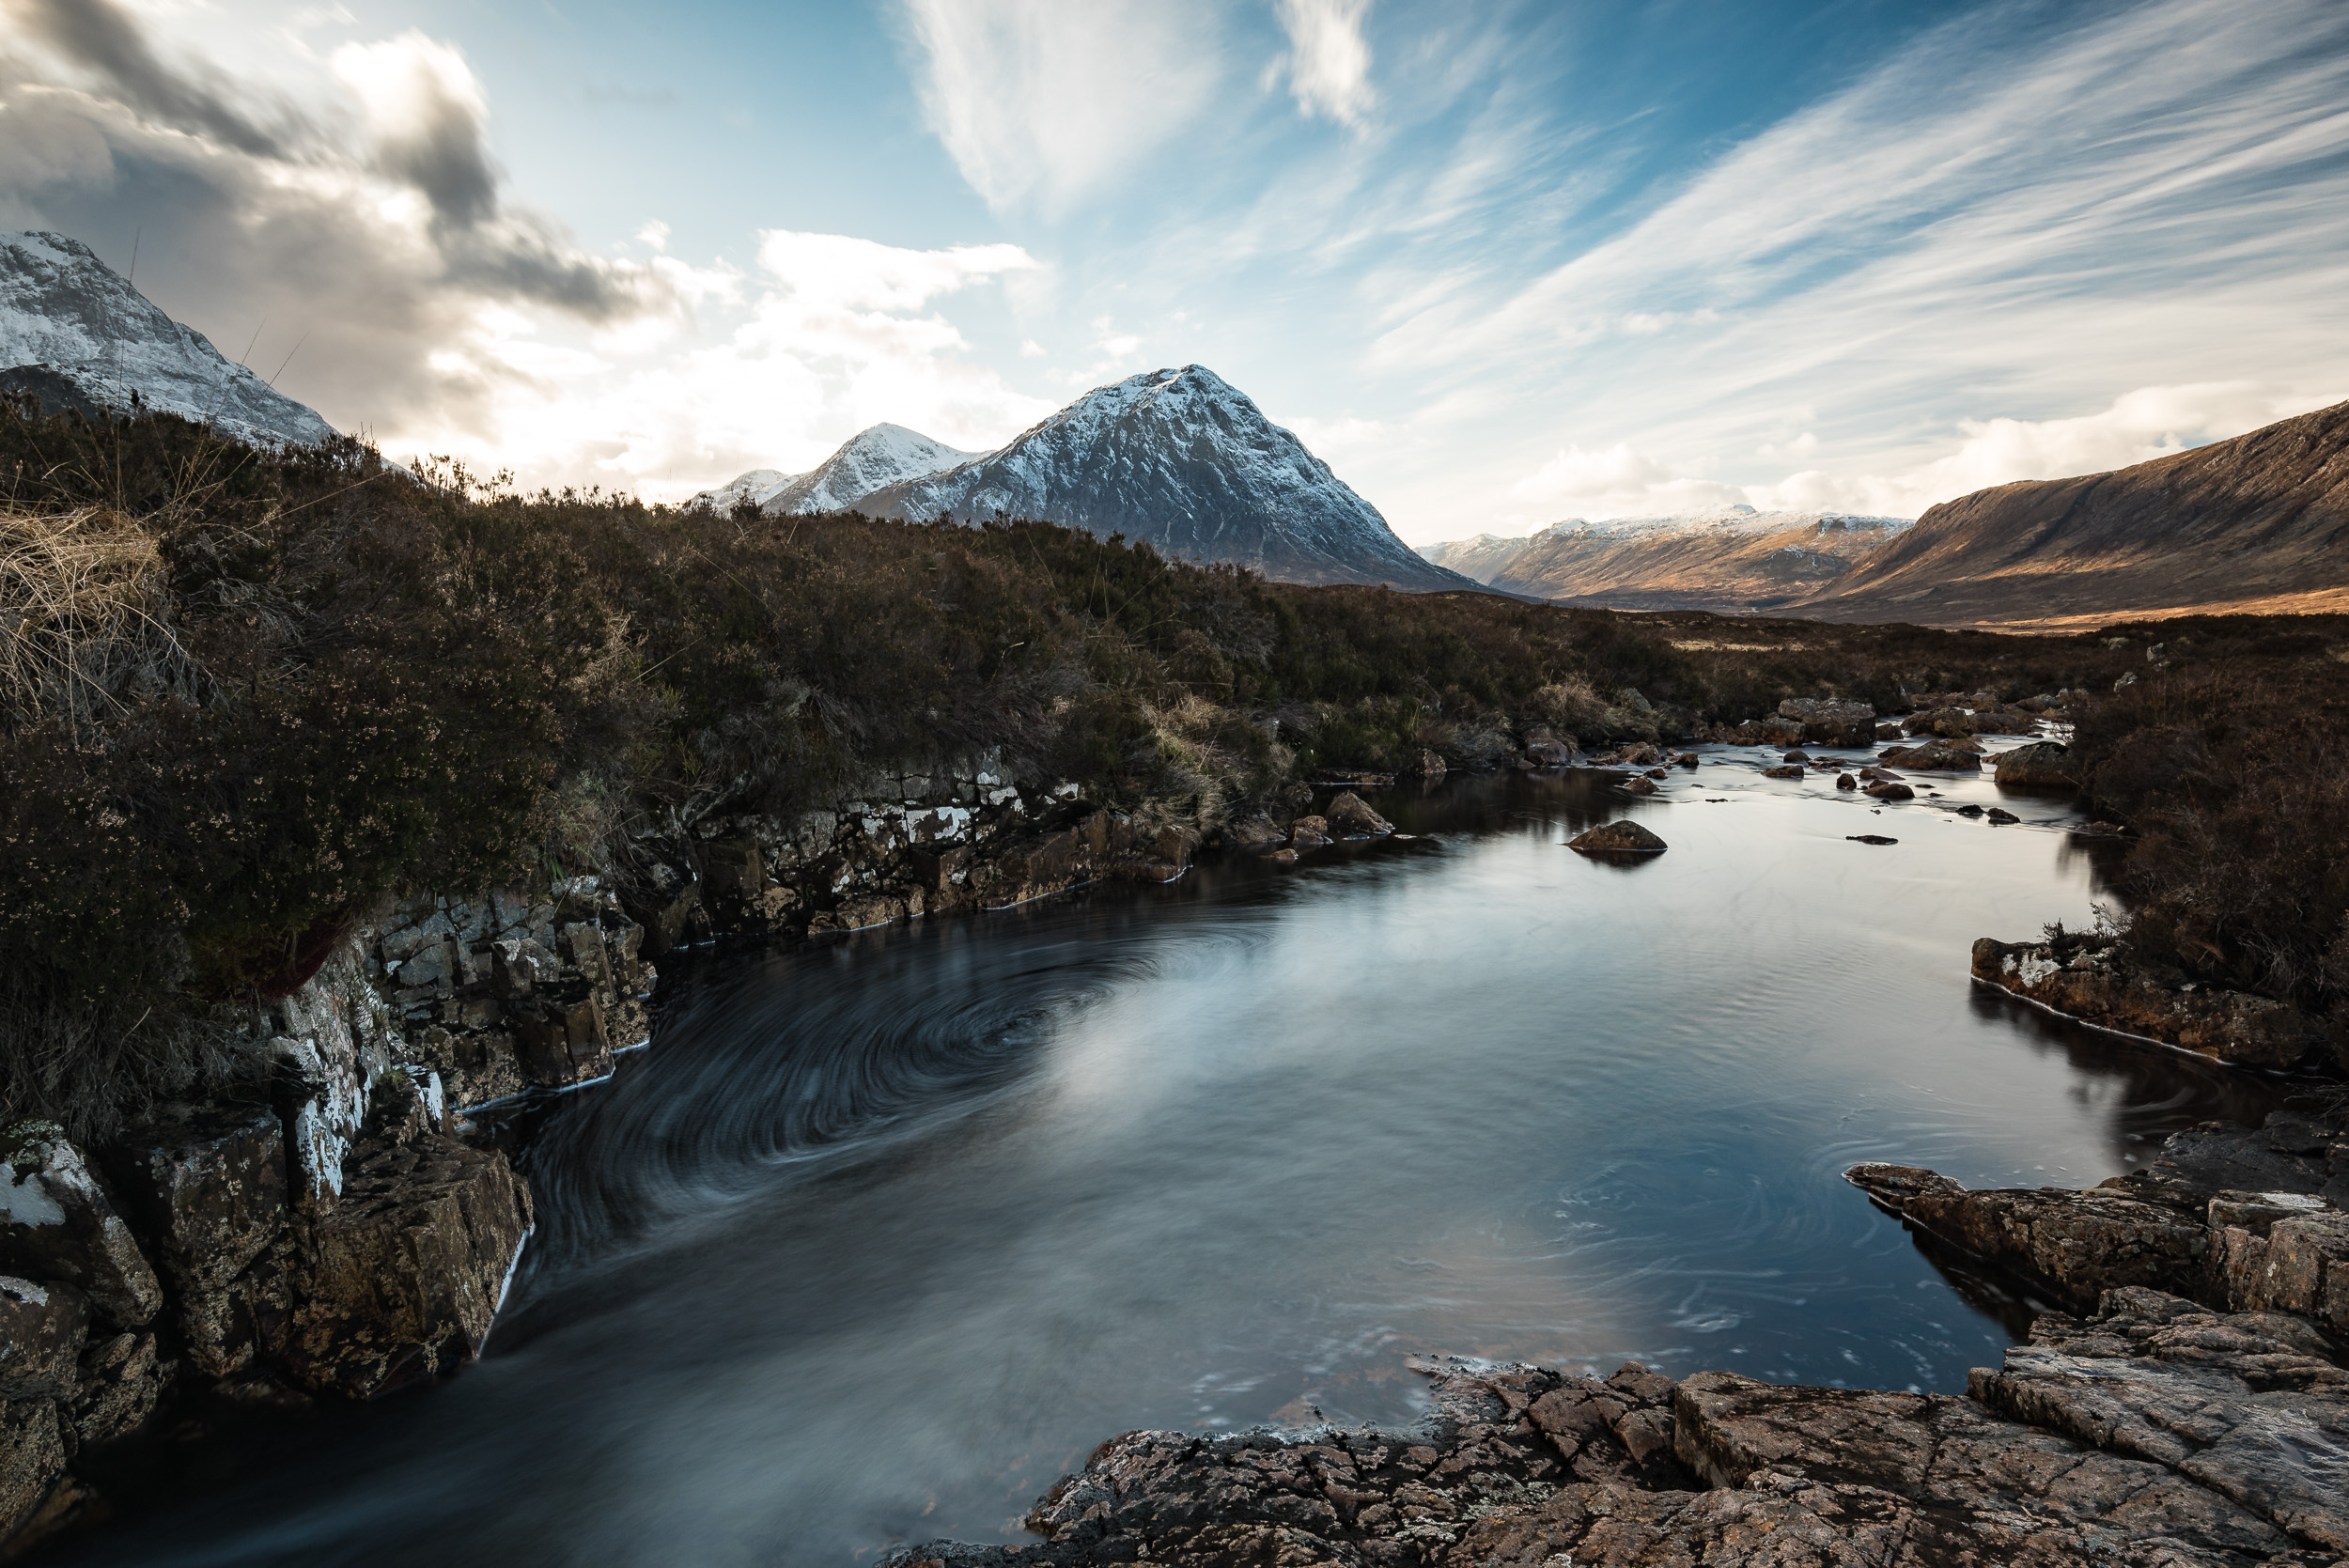
All that aside, I’ve been wanting to make this video for a while. My original plan was to shoot it down at Durdle Door but I never quite made it there this year. When I started making plans for my trip to Skye I knew I was going to stop off in Glencoe so I decided that I would make the video there. Glencoe is not short of a few honeypot locations but I settled on the viewpoint with the small waterfall (on the river Coupall) and Stob Dearg in the background. There can’t be that many of you that haven’t seen that viewpoint before!
It’s a stunning viewpoint and one that I can’t resist photographing every time I’m in Glencoe. These viewpoints aren’t called honeypot locations for no reason! However, in some circles, photographing these locations and viewpoints can be frowned upon. While it is true that getting something new from these locations can be tricky, I don’t think this is a reason to not shoot them.
If you want to know why I think you should shoot them, check out my video below:
I’m sure most of you have already shot a few honeypot locations and have enjoyed the experience of capturing your own images. If you haven’t though, I hope this video has inspired you to visit places like the Glencoe viewpoint in the video, or even Durdle Door.
Do you have a favourite honeypot location? Are there any honeypot locations you’d like to shoot? Let me know in the comments below.
One Location, Many Viewpoints
If you want to see the images from the video in a bit more detail you’ll find them below.
The River Coupall and Buachaille Etive Mor, Glencoe, Scotland - Nikon Z7, Nikkor 14-30mm f/4 at 22mm, f/13, 1 second at ISO 200, CPL and 3 stop ND.
River Coupall Falls, Glencoe, Scotland - Nikon Z7, Nikkor 14-30mm f/4 at 15mm, f/13, 1/8th at ISO 160, CPL.
The River Coupall and Stob Dearg, Glencoe, Scotland - Nikon Z7, Nikkor 14-30mm f/4 at 22mm, f/13, 4 seconds at ISO 160, CPL and 3 stop ND.

Glencoe Landscape Photography - A 5 Minute Photo Adventure
In this coffee break length video I head to the Three Sisters in Glencoe for a spot of landscape photography. Unfortunately the conditions were a little windy. Did that put me off? Of course not!
Short, Sweet, and Very Windy
When I go on a family holiday to Scotland I often make grand plans for some landscape photography adventures. The reality is that these plans rarely come to fruition and I have to scale things back. With the time I do have for photography I do try and cram in as much as possible.
This year I was on holiday not far from Glencoe so when my family suggested we head to there for a pub lunch at the Clachaig Inn. I thought there would be a great opportunity to finish the day with a little bit of landscape photography. With the family safely heading back home I decided to hit some of the photographic highlights of Glencoe. Unfortunately, the weather conditions were going to somewhat dampen my plans.
Well, I say dampen, but rain would have been very welcome. In all my excitement about photographing Glencoe I had forgotten that it hadn’t rained there in over a week. In fact, it had been hot and sunny all week. As most of my favourite spots for landscape photography in Glencoe involve water of some kind, this made things very challenging.
I wanted the video to cover three locations, but every location I visited looked horrible and dry. As it got closer to sunset I decided to head to a viewpoint that would allow me to capture an image of the Three Sisters. Unluckily for me though the weather had other ideas!
I do hope you enjoyed this short video. Do you have a favourite location in Glencoe? Have you ever taken photographs in very windy conditions? Let me know in the comments below.
Those Photographs
Here are the photographs you saw in the video.
Beinn Fhada and Gearr Aonach, Glencoe, Scotland - Nikon D850, Nikkor 16-35 mm f/4 VR at 25 mm, f/10. 1/8th sec at ISO 64.
Gearr Aonach, Glencoe, Scotland - Nikon D850, Nikkor 24-70 mm f/2.8 VR at 31 mm, f/13. 1/4th sec at ISO 64.
The Three Sisters - Beinn Fhada, Gearr Aonach, and Aonach Dubh, Glencoe, Scotland - Nikon D850, Nikkor 16-35 mm f/4 VR at 16 mm, f/13. 0.6 sec at ISO 64.
Looking Back
All this talk of Glencoe has made me think about the last time I made a video there, so I thought it would be a good time to share that video again:
Printing and Framing a Special Landscape Photograph
Some landscape photographs just need to be printed and hung on the wall. In this blog post, I take a very special image, print it, frame it, and give it a permanent place on my wall.
Success in Scottish Landscape Photographer of the Year
Entering big photography competitions can seem like a waste of time. Some of these competitions can attract 1000's of entries, sometimes even 10,000’s of entries . Getting shortlisted can seem like an achievement sometimes. How do you create a winning image though? There's no easy answer to that question. Judging, even in the same competition, can vary from year to year. Just look at the winning images from Landscape Photographer of Year since it started. It's really hard to "know" what the judges are looking for.
However, there is one thing I do know. If I don't enter I certainly won't win anything! There is also one piece of advice I can share , and it's a piece of advice given to me by a photographer and photography competition judge. He told me that if you think you have a strong image then keep entering it into competitions year after year. Even if it doesn't get placed in one competition, it might in another. It's also worth entering the same image in the same competition a different year.
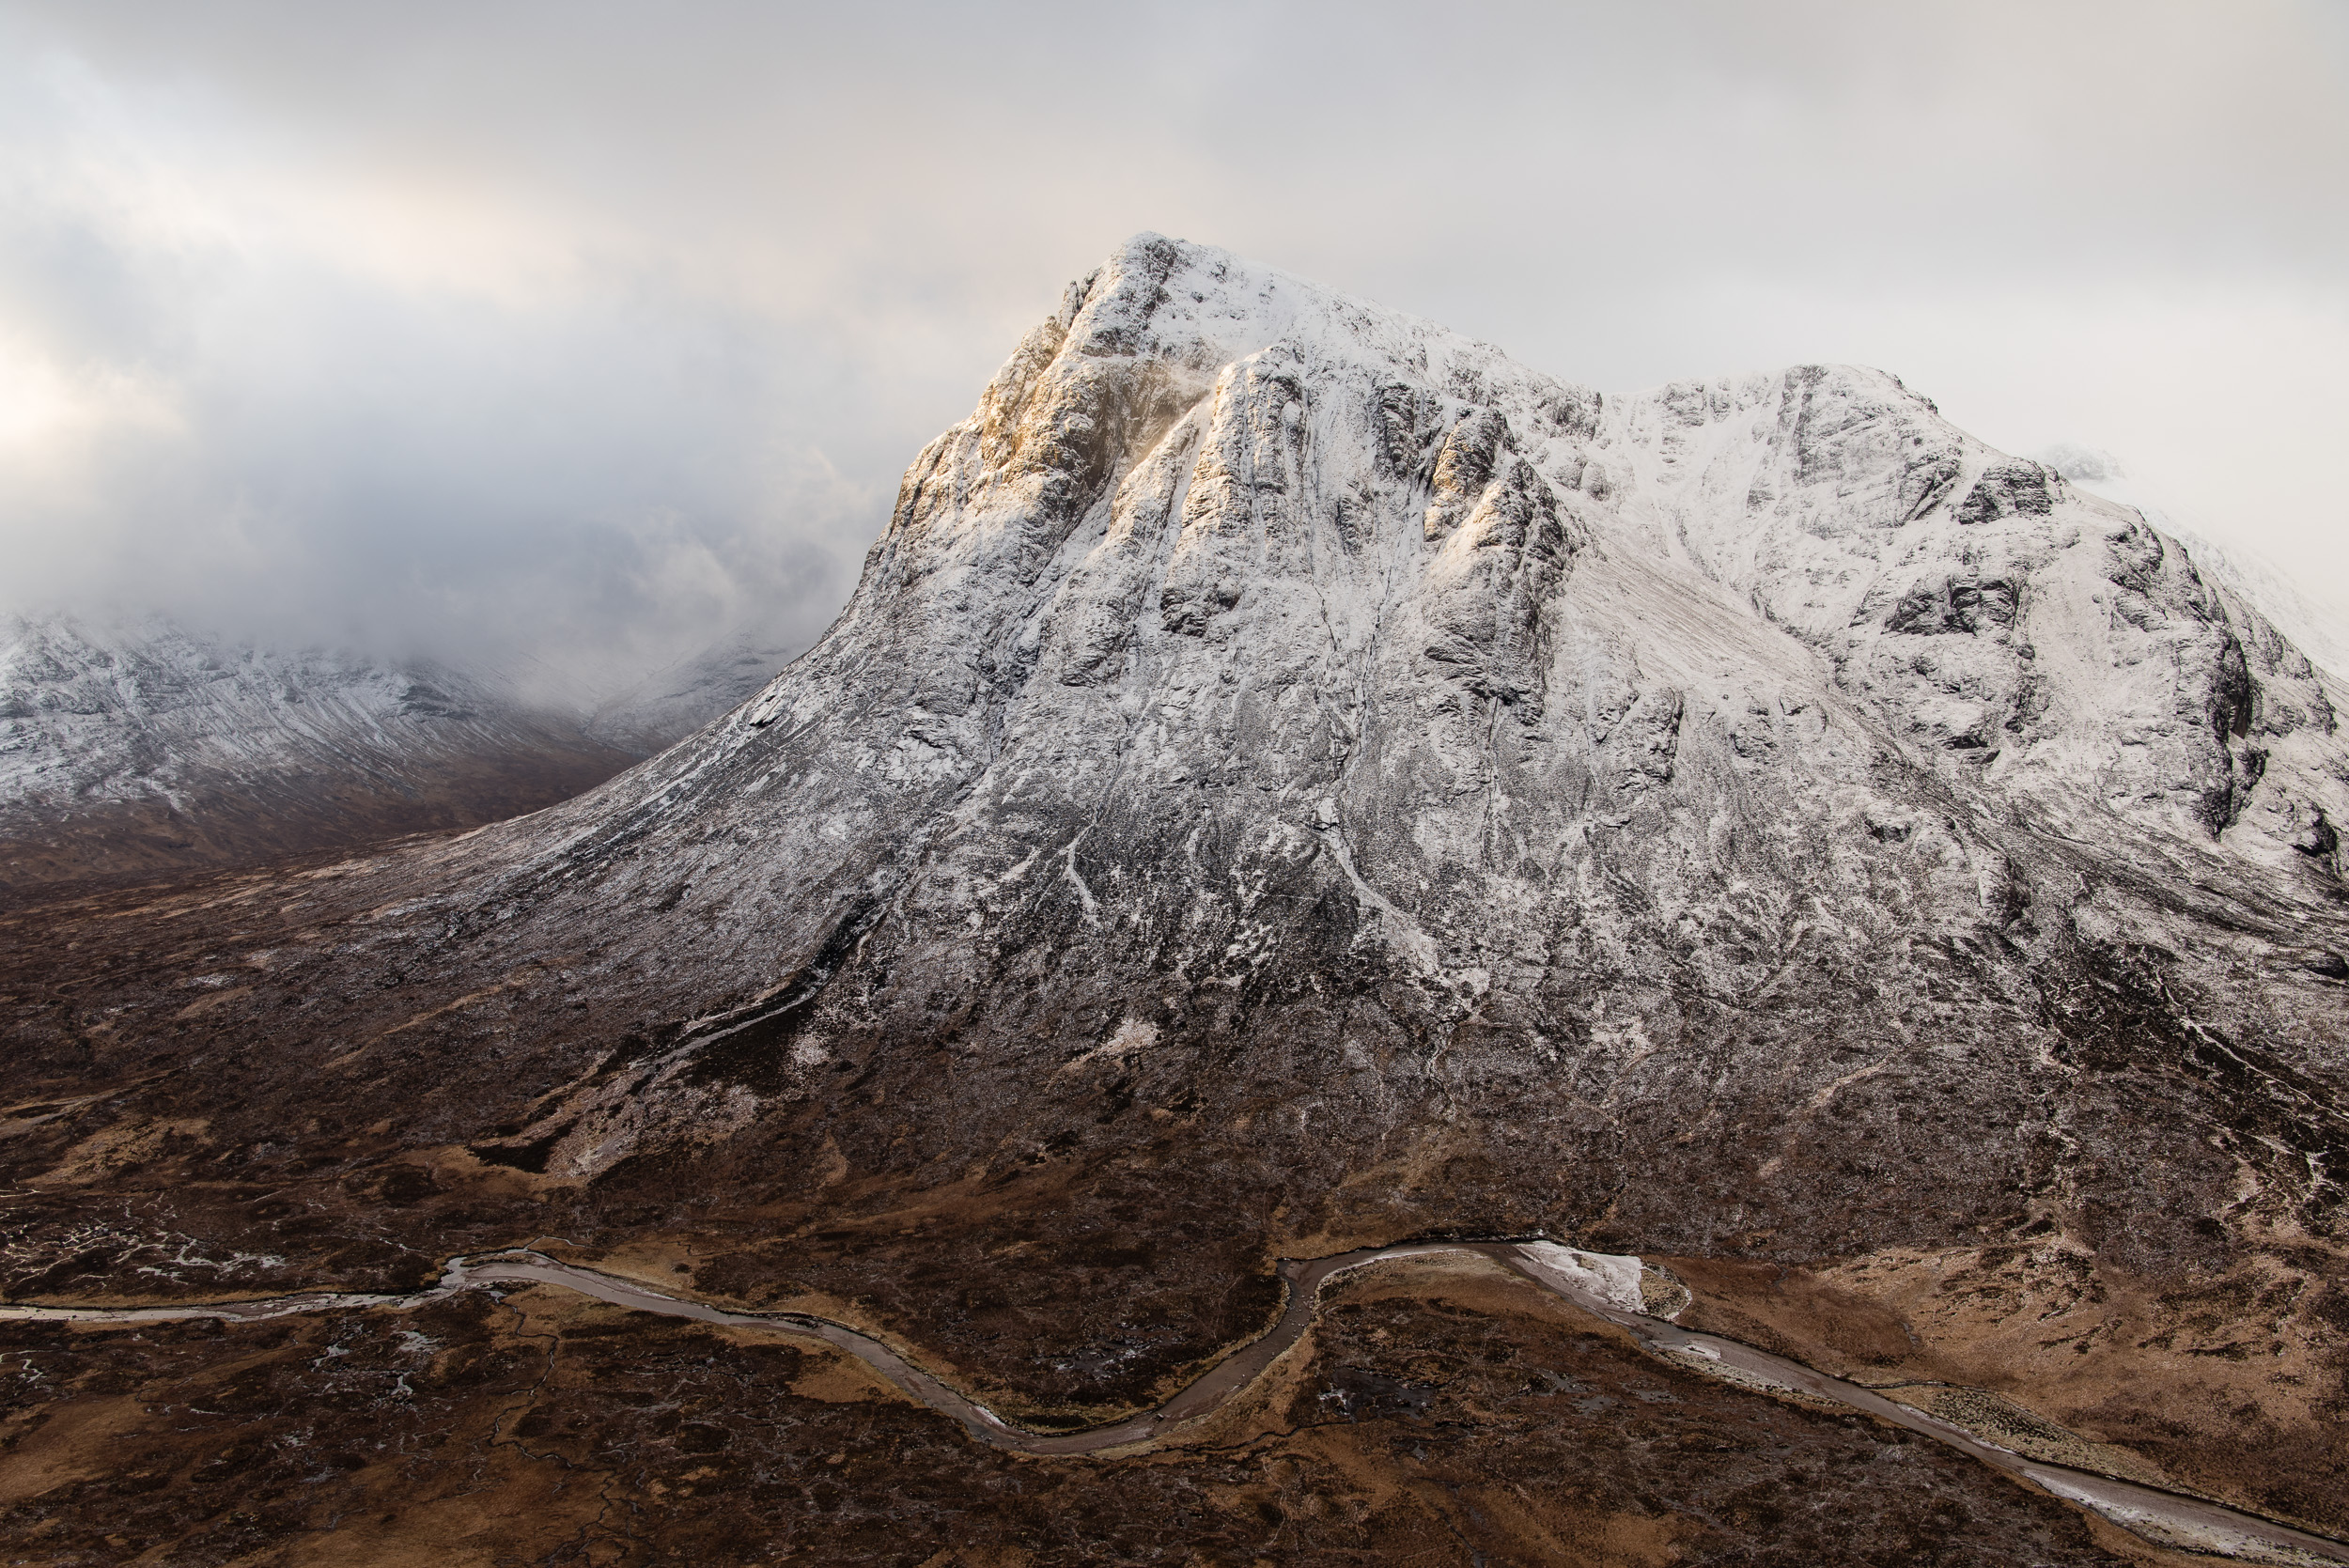
I've always remembered this bit of advice, so ever since I took the image of Stob Dearg (Buachaille Etive Mor) you see below, I've been entering it into competitions. This perseverance has finally paid off and the image has received a commended award in the Scottish Landscape Photographer of the Year competition. It's the 2nd time I've entered it into this competition, and 4th time in all competitions. So if you have a good image that you think could win an award, don't be put off by the first failure. Keep trying!!
First Light on Stob Dearg, Buachaille Etive Mor, Glencoe - Nikon D750, Nikkor 24-70 mm f/2.8 VR at 28 mm, f/11, 1/25th sec at ISO 100.
Printing and Framing
The image is one that I am immensely proud off and it brings back many happy memories of my adventure to Glencoe (which you can watch here). While it will be a real privilege to see it in the yearbook from the competition, I really wanted to make my own print of it, frame it, and give it a permanent place on my wall.
In the video below I show you how I went about printing the image, selecting a paper, framing it, and eventually hanging it on the wall.
If you are interested in doing something similar yourself, here are the products I used in the video:
Fotospeed Cotton 305 - https://www.fotospeed.com/Platinum-Cotton-305-Paper/groupproduct/2937/
Fotospeed Baryta 300 - https://www.fotospeed.com/Platinum-Baryta-300/groupproduct/1437/
Fotospeed Legacy Gloss 325 - https://www.fotospeed.com/NEW-Legacy-Gloss-325-Paper/groupproduct/3103/
Picture Frames Express - https://www.pictureframesexpress.co.uk/
Conservation Tape - https://www.pictureframesexpress.co.uk/picture-frame-supplies/tapes/74/
Picture Hanging Strips - https://amzn.to/2TWuE2l
I hope you enjoyed this video and blog post. Do you have any photography competition tips? How do you go about displaying your prints? Let me know in the comments below.

Glencoe - One Location, 3 Compositions
It’s almost impossible to drive through Glencoe and not want to stop to take some landscape photographs. In the blog this week I make an unscheduled stop in Glencoe and take 3 photographs from one location.
Glencoe
There are some locations for landscape photographers that are virtually impossible to drive through without stopping to take a photograph. In my mind, Glencoe is one such location. It is stunningly beautiful and impressive no matter the weather. I still have many happy memories of my last visit.
Check out this video of my last visit to Glencoe.
A few weeks ago I was heading up to Harris & Lewis for a week-long photography trip. With such an amazing destination one could be forgiven for trying to get there as soon as possible. However, when your route takes you through the heart of Glencoe there was no way I wasn’t going to take at least one photograph.
Fortunately for me, my journey from Devon would allow me to arrive in Glencoe for around sunset. With so many locations to pick from in Glencoe, what would I photograph?
Stob nan Cabar and Lochan na Fola
I first discovered the beauty of this location on a workshop I attended last year. Despite its grandeur, it’s not that well photographed and can be easily missed despite its roadside location. As I photographed it at dawn last time, I thought I would try it at dusk this time.
I wasn’t feeling any pressure to take an image so I spent a little more time experimenting with my composition. While I would normally only post one image from a location, I thought it would be interesting to show you the three variations I have.
Stob nan Cabar from Lochan na Fola (Vertical), Glencoe, Scotland - Nikon D850, Nikkor 16-35 mm f/4 at 16 mm, 0.8 seconds at ISO 64, f/13, Lee Filters Circular Polariser, ND Grad.
Stob nan Cabar from Lochan na Fola (Landscape), Glencoe, Scotland - Nikon D850, Nikkor 16-35 mm f/4 at 18 mm, 1.0 seconds at ISO 64, f/13, Lee Filters Circular Polariser, ND Grad.
Stob nan Cabar from Lochan na Fola (Panoramic), Glencoe, Scotland - Nikon D850, Nikkor 16-35 mm f/4 at 16 mm, 0.8 seconds at ISO 64, f/13, Lee Filters Circular Polariser. 8 Image panoramic stitch, cropped to 6:17.
All three images benefit from the beautiful autumnal colours of the ground, and just the right amount of cloud cover to get some light reflected from the setting sun. While I do like all three, I think it is perhaps the first image I prefer the most. Though this scene would typically be shot in landscape orientation, the portrait orientation of the first image works well.
There are a couple of things I like about the first image. First of all the reflection is larger, and clearer giving it more impact. I also like all the triangles in the image. There is, of course, the mountain and its reflection, but also from the cloud in the top right of the image which leads you back to the mountain.
It was a long drive from Devon to get to Glencoe so I only had time to shoot this one location, but what a location. It was unfortunately dark when I drove back through Glencoe, but even this brief opportunity to photograph it again means its right up near the top of my list of locations to photograph again.
So which image composition did you like best? What is your favourite Glencoe location to photograph? Let me know in the comments below.
P.S. Harris & Lewis
Oh, that Harris & Lewis trip I mentioned at the start of this blog…well…I hope to have a blog and video posted right here in a couple of weeks time.

My 5 Favourite Images of 2017 and How to Find Yours
In the blog this week I take a look at my 5 favourite images from 2017. I also tell you why you should find your 5 favourites and show you how.
The How and Why
At the end of each year, I like to look back at the photographs I have taken. This reminds me not only that I had some challenges with my photography, but also that I had some successes. By putting these successful photographs into an annual collection it helps focus my mind for the following year and gives me plenty of inspiration and encouragement.
In the video below I share with you the process of how I select my 5 favourite images so that you can do the same.
My 5 Favourite Images of 2017

As with my image review from last year, this review has given me a lot of inspiration to take through into 2018. I went out over 50 times with the camera in 2017 and drove over 6000 miles, and it was great to see all that effort wasn't wasted!
So which one of my 5 images was your favourite? Have you gone through a similar process as well? Let me know in the comments below.

Developing a Passion for Printing
In the vlog this week I expand my printing skills by printing a panoramic image on panoramic paper and then mounting it into a custom-made panoramic frame. I also take a look at some different paper types to try and see what impact each one has on an image.
Discovering the Joy of Printing
Back in April of this year, I wrote about how I purchased a new Canon Pixma Pro-10S printer while I was at The Photography Show in Birmingham. You can read why bought a printer and watch the video I made on my first experiences of printing, in my blog article Discovery the Joy of Printing.
Ever since then I've been printing my images. A lot. And I have to say it's been a lot of fun. I've enjoyed the experience of going out to make an image, post-processing it, and then creating a print at the end.
Developing a Passion for Printing
I have however been keeping things relatively simple. I've been using standard paper sizes, using Canon's Platinum Pro glossy paper. The results have been great. Prints match what is on the screen and the whole workflow is straightforward.
However, there any many different paper types from many different paper manufacturers, so I thought it was about time to expand my printing horizons. In the video below I take one of my favourite panoramic images and print it on some panoramic paper from Fotospeed, and then mount it in a custom frame from Picture Frames Direct. I also take another one of my favourite images of the year and print it on some different paper types.
These are the images I printed in the video.
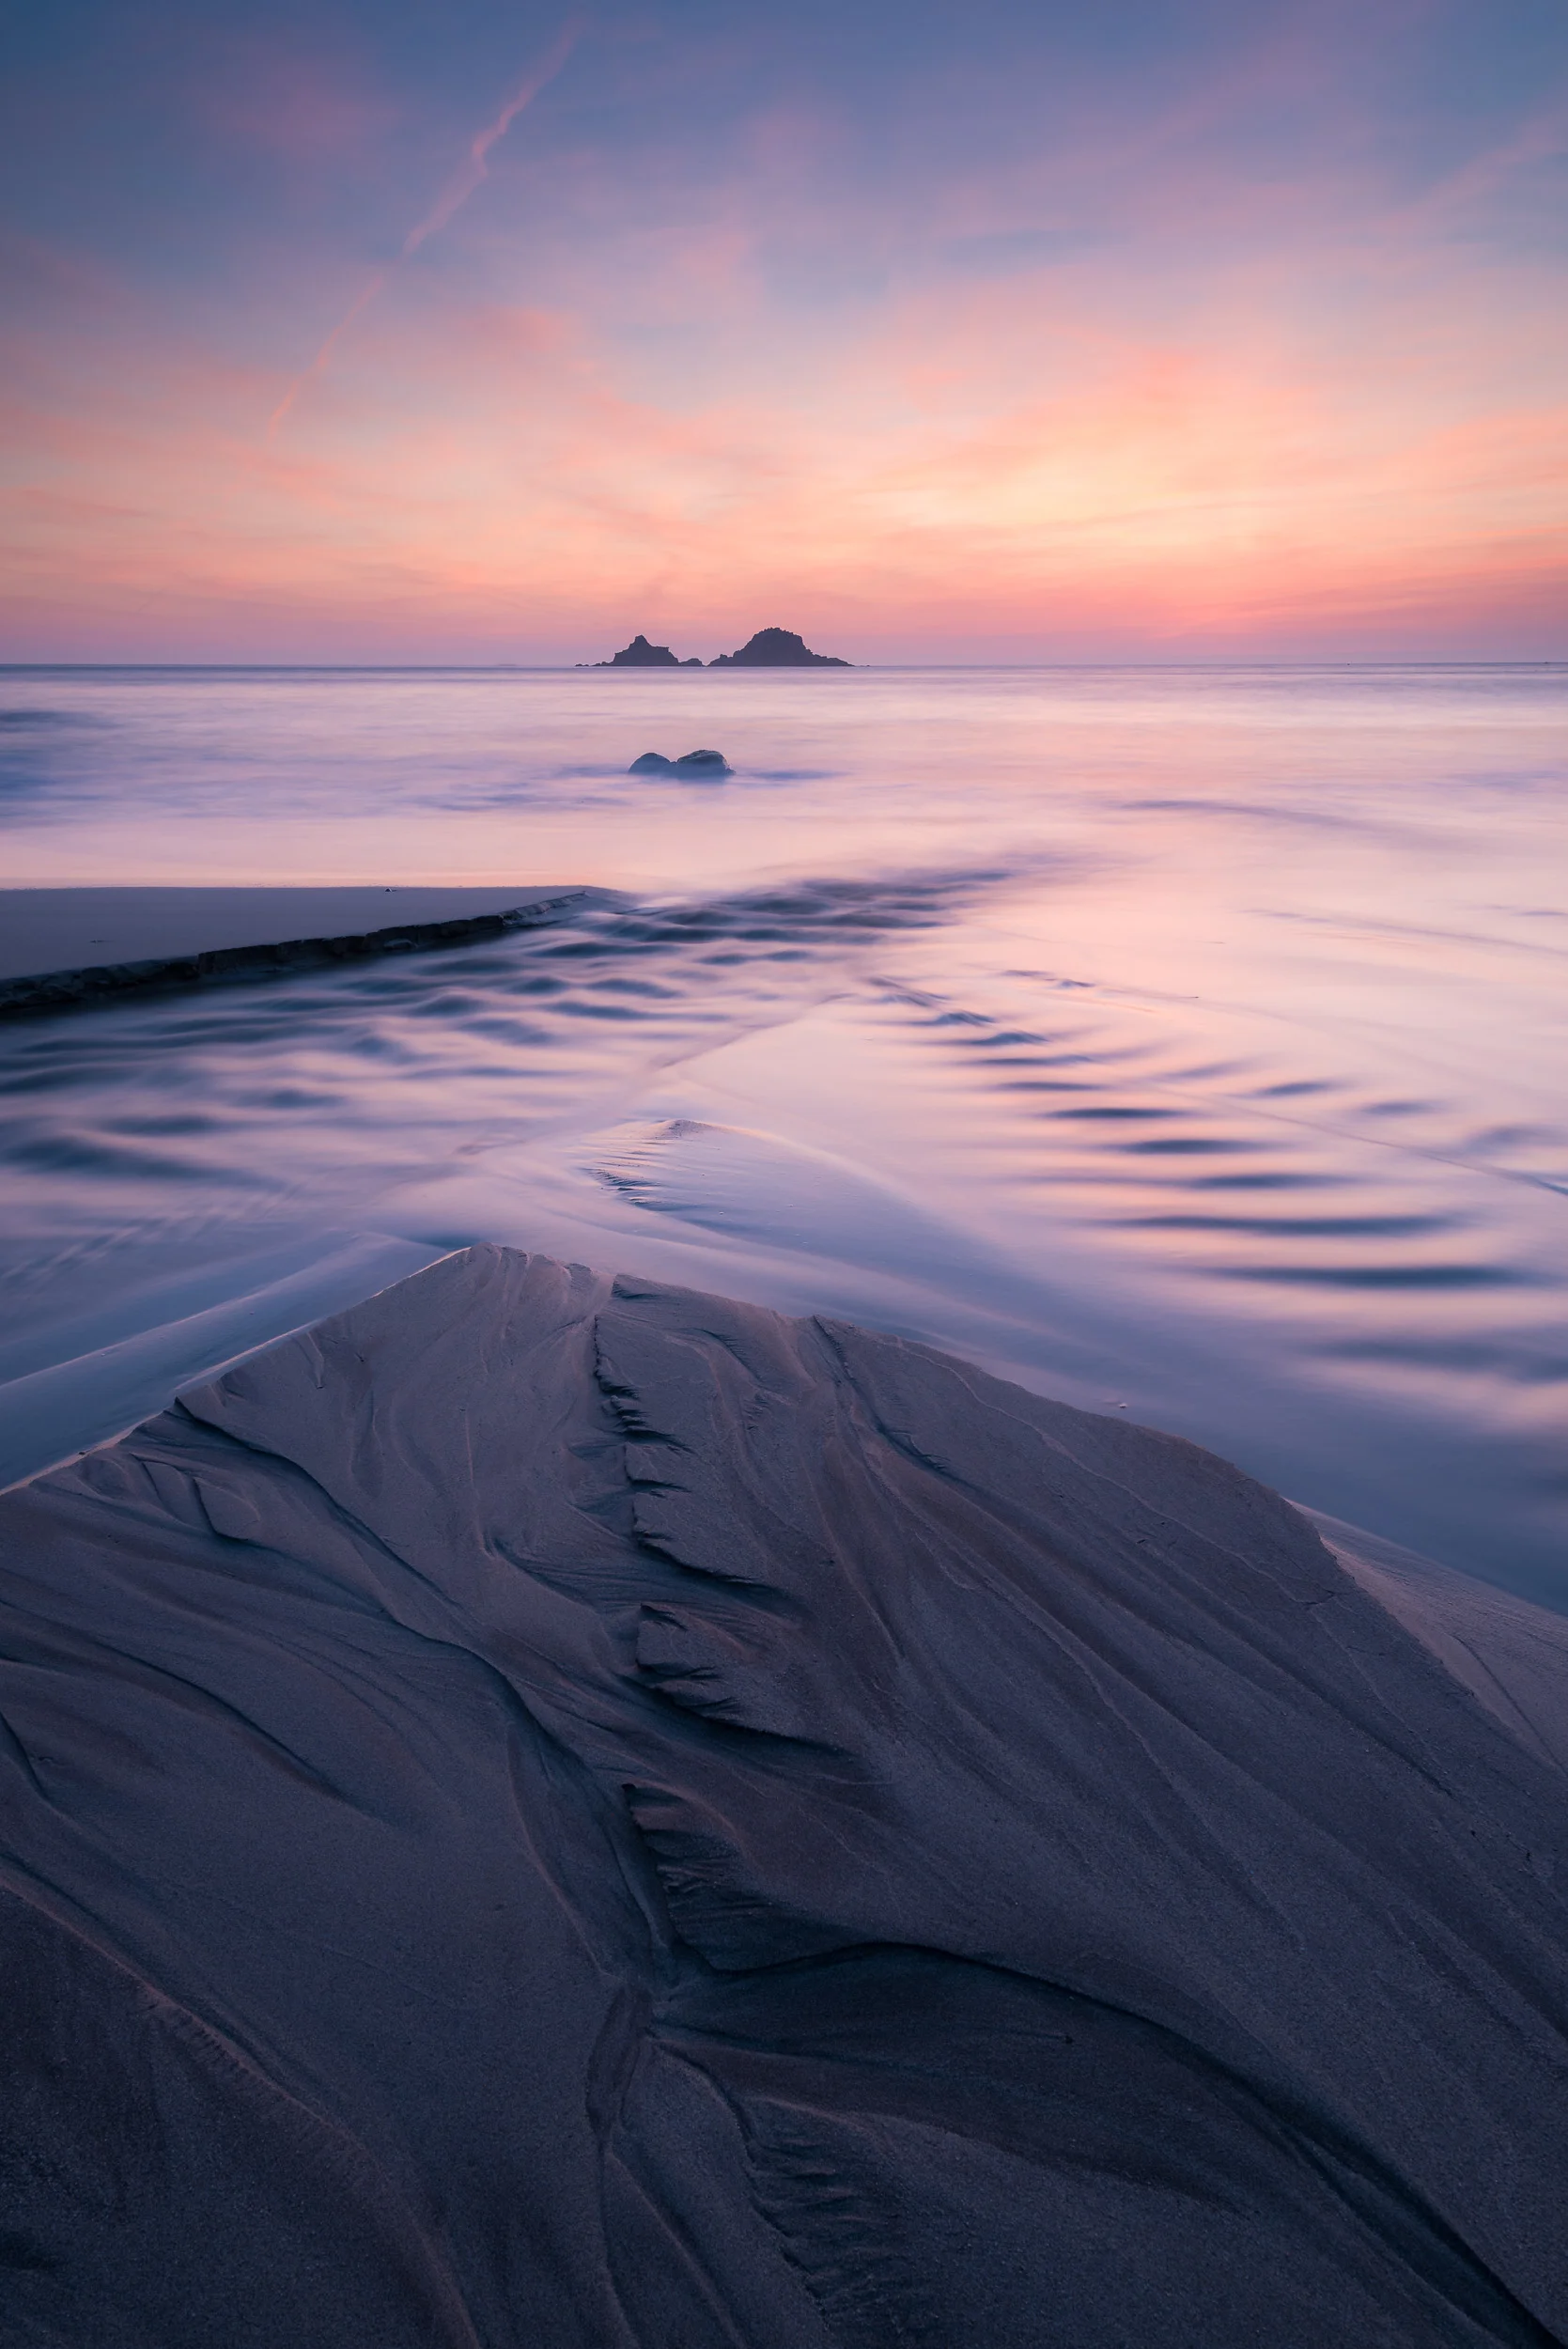
Nikon D750, Nikkor 24-70mm f/2.8 VR at 20mm, 1/3 sec at f/11, ISO 100, 7 image panorama.
Nikon D850, Nikkor 16-35mm f/4 @ 18mm, ISO 100, 5 sec @ f/13, Lee Filters circular polariser and ND grad.
Well, I hope you enjoyed my follow-up video on printing. As you can see I've still got a lot to learn, but I'm really enjoying the challenge. I get a great sense of satisfaction on owning the entire process from capture to print.
Have you recently taken up printing? Are you an experienced printer? Do you have any advice on printing? Let me know in the comments below.

Making the Print
In this blog post I tell you about my experience of printing, packing and posting my first print.
A Special Request
On the blog recently I told you about how I have discovered the joy of printing. Adding printing to my photography workflow is something I've been wanting to do for a while and since picking up my Canon Pixma Pro-10S I've very much enjoyed printing out my work.
As if by some happy coincidence a friend of mine who lives in Sweden asked me to create her a print of an image that I took while on a workshop in Glencoe. I was of course delighted by the request. What better way to put the printer to use than to create an A3+ print of this image for a friend.
Pass of Glencoe
As I live in the UK and she lives in Sweden, I would also need to learn how to package and ship my prints. Time to get to work!
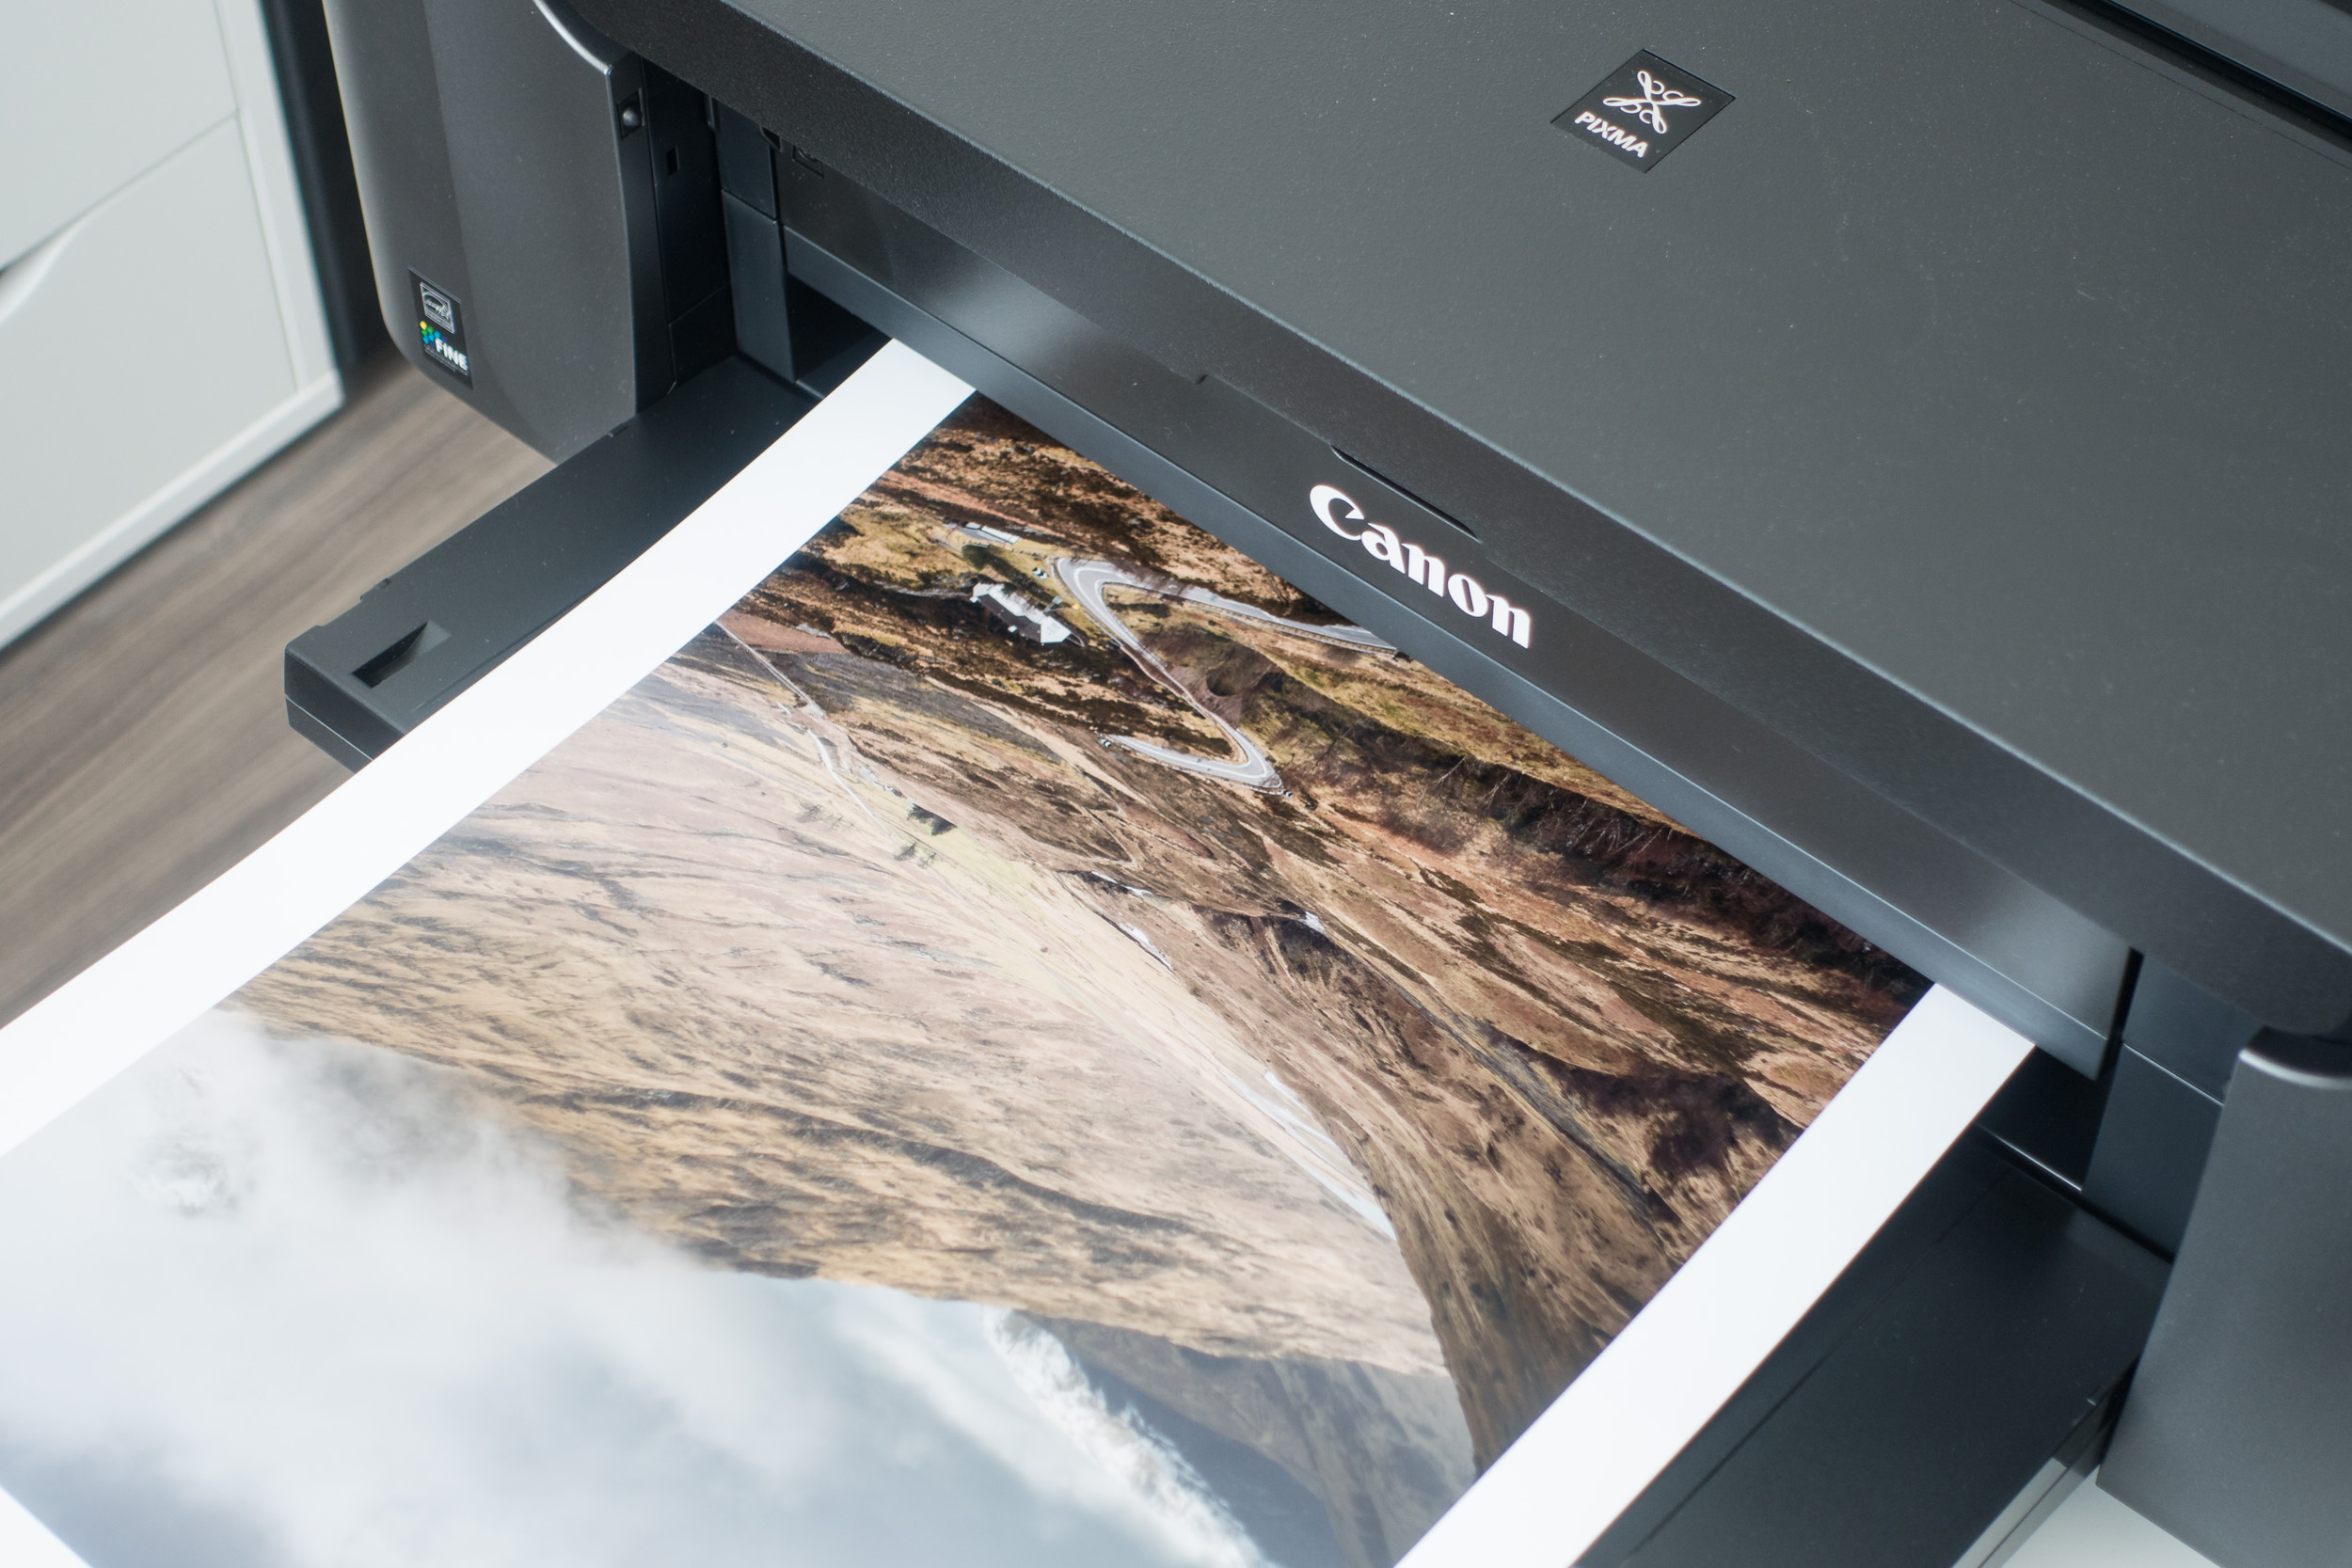
Printing the Image
As I said in my video Discovery the Joy of Printing, getting a high quality print from the Canon is fairly straight forward. By using the Canon Print Studio Pro software it was just a matter of setting the correct options:
Set media type to Photopaper Pro Platinum
Paper size to A3+
Set quality to high
Set "clear coat the entire image" - this ensures the entire image, even where no ink as been laid, has an even glossiness.
Set printer profile to match paper
Set layout to bordered - as requested by my friend
Set brightness to +15.
Canon Print Studio Pro - simple and straightfoward to use.
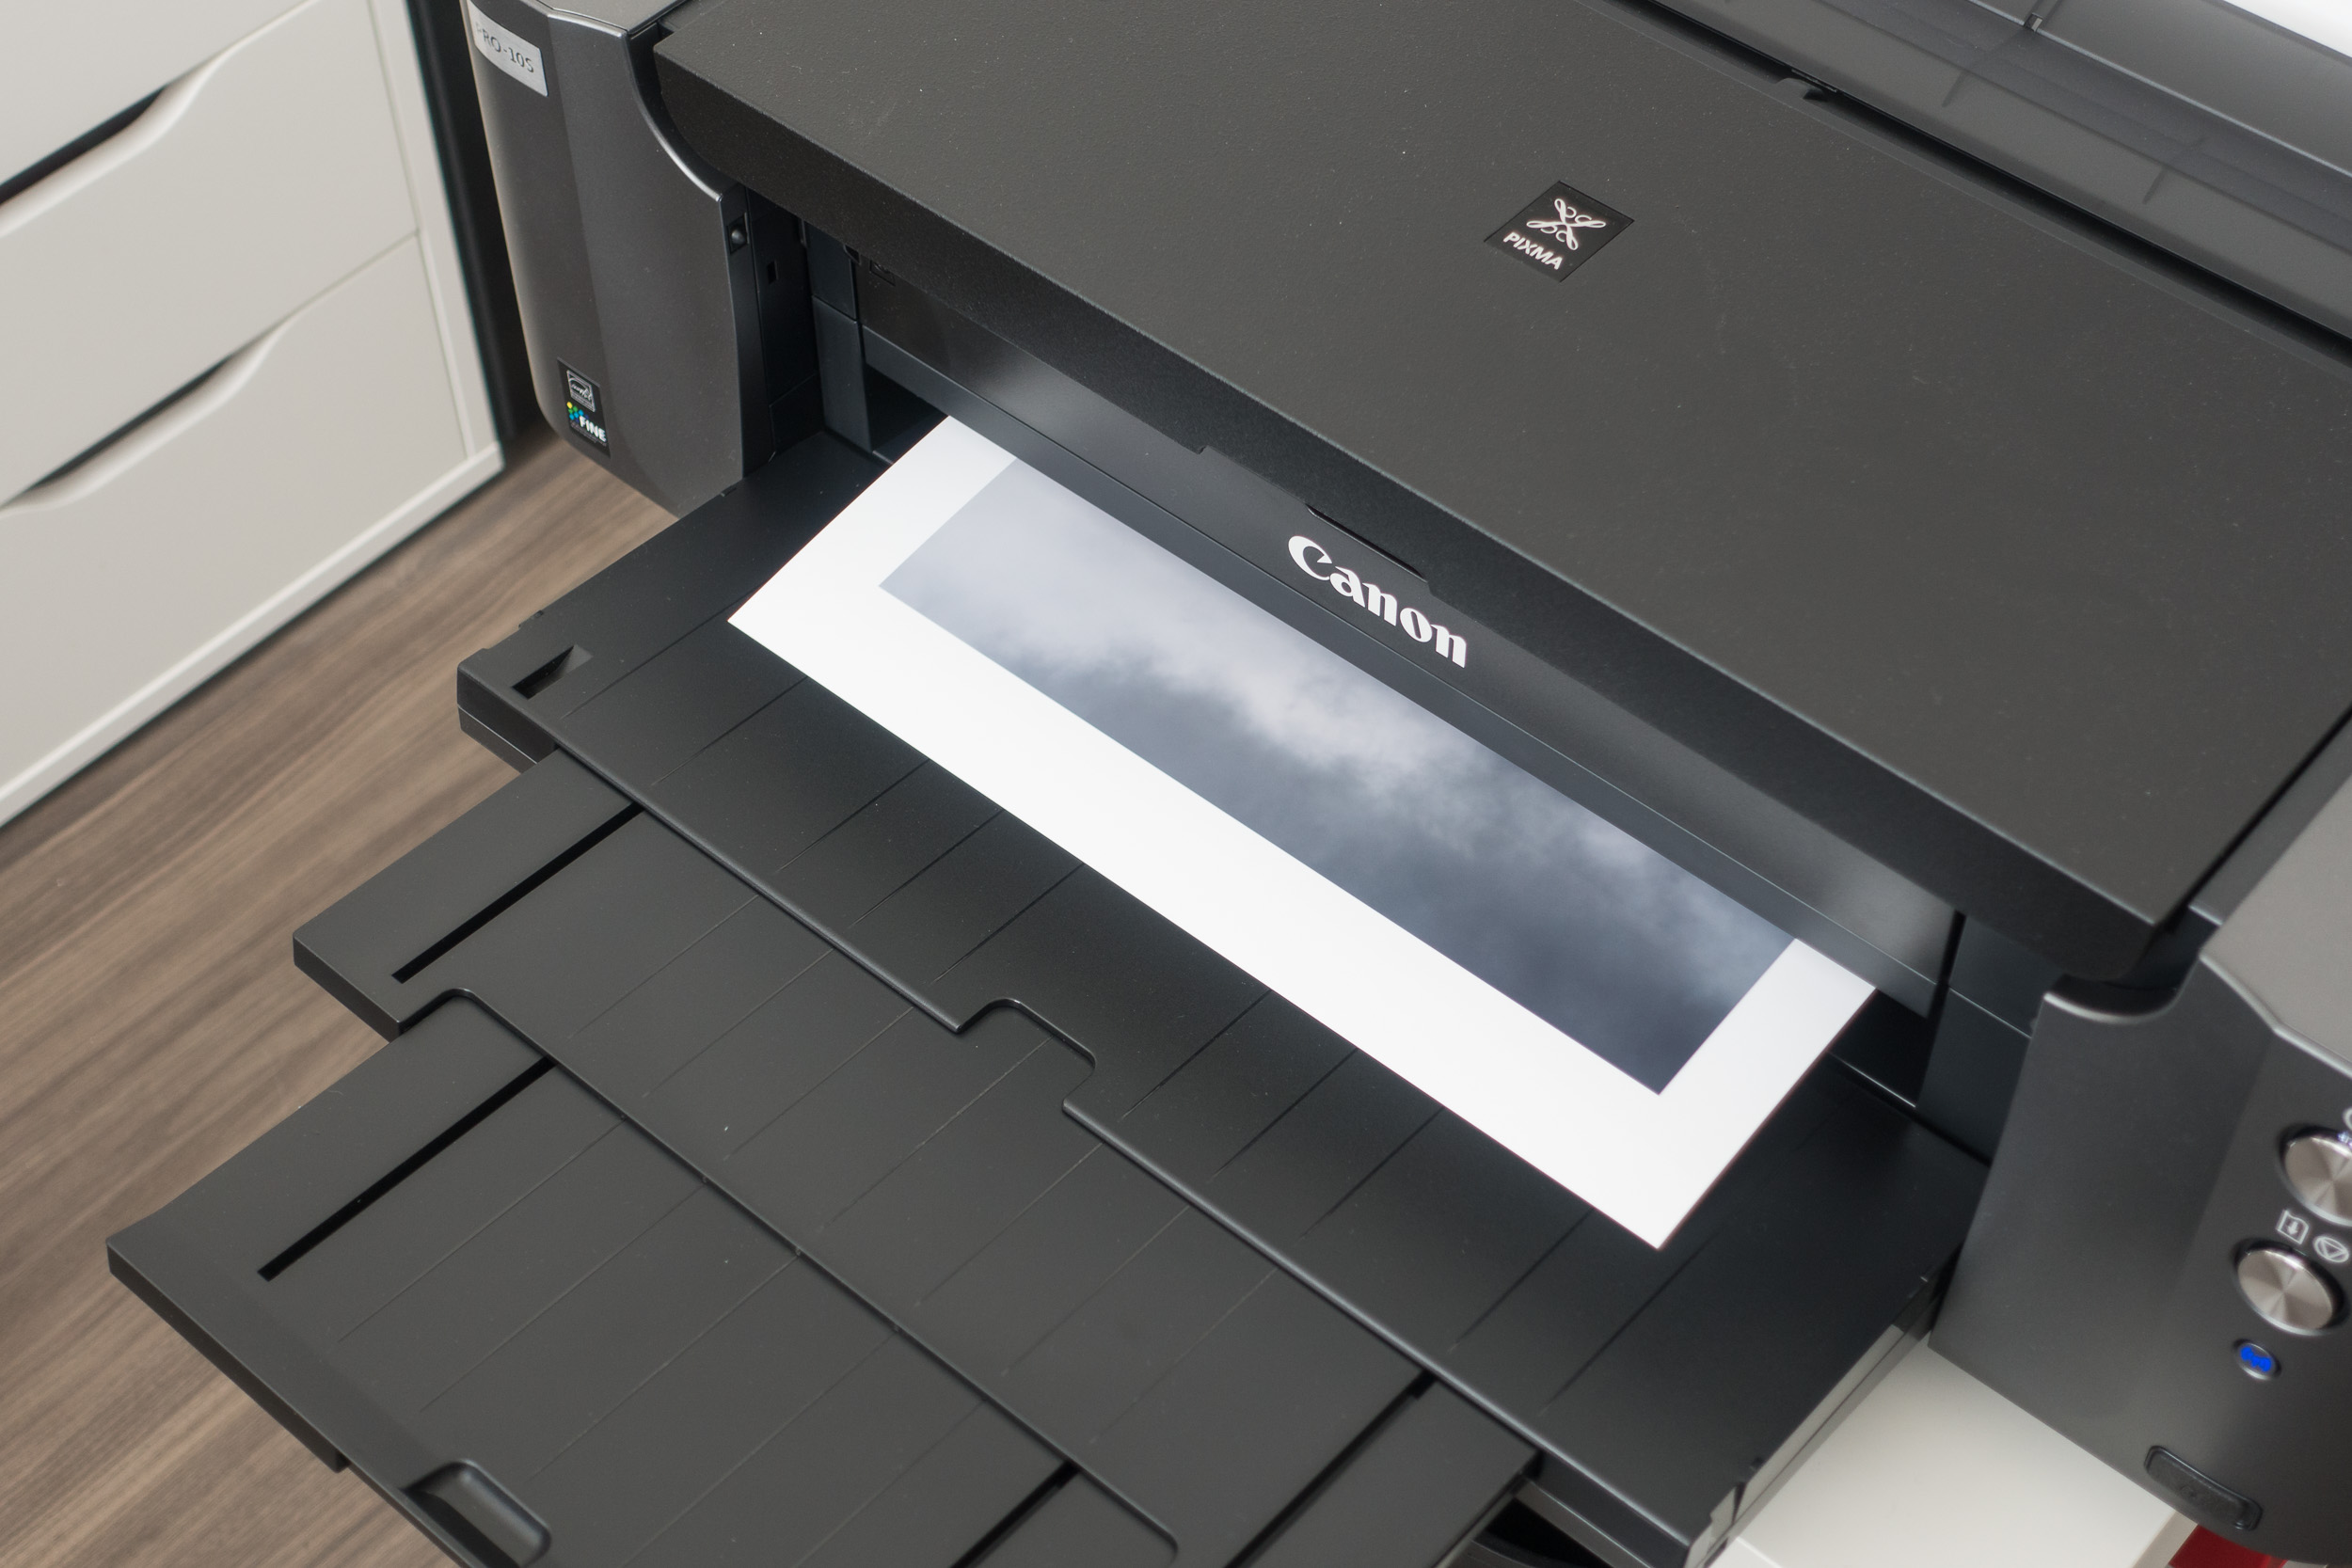
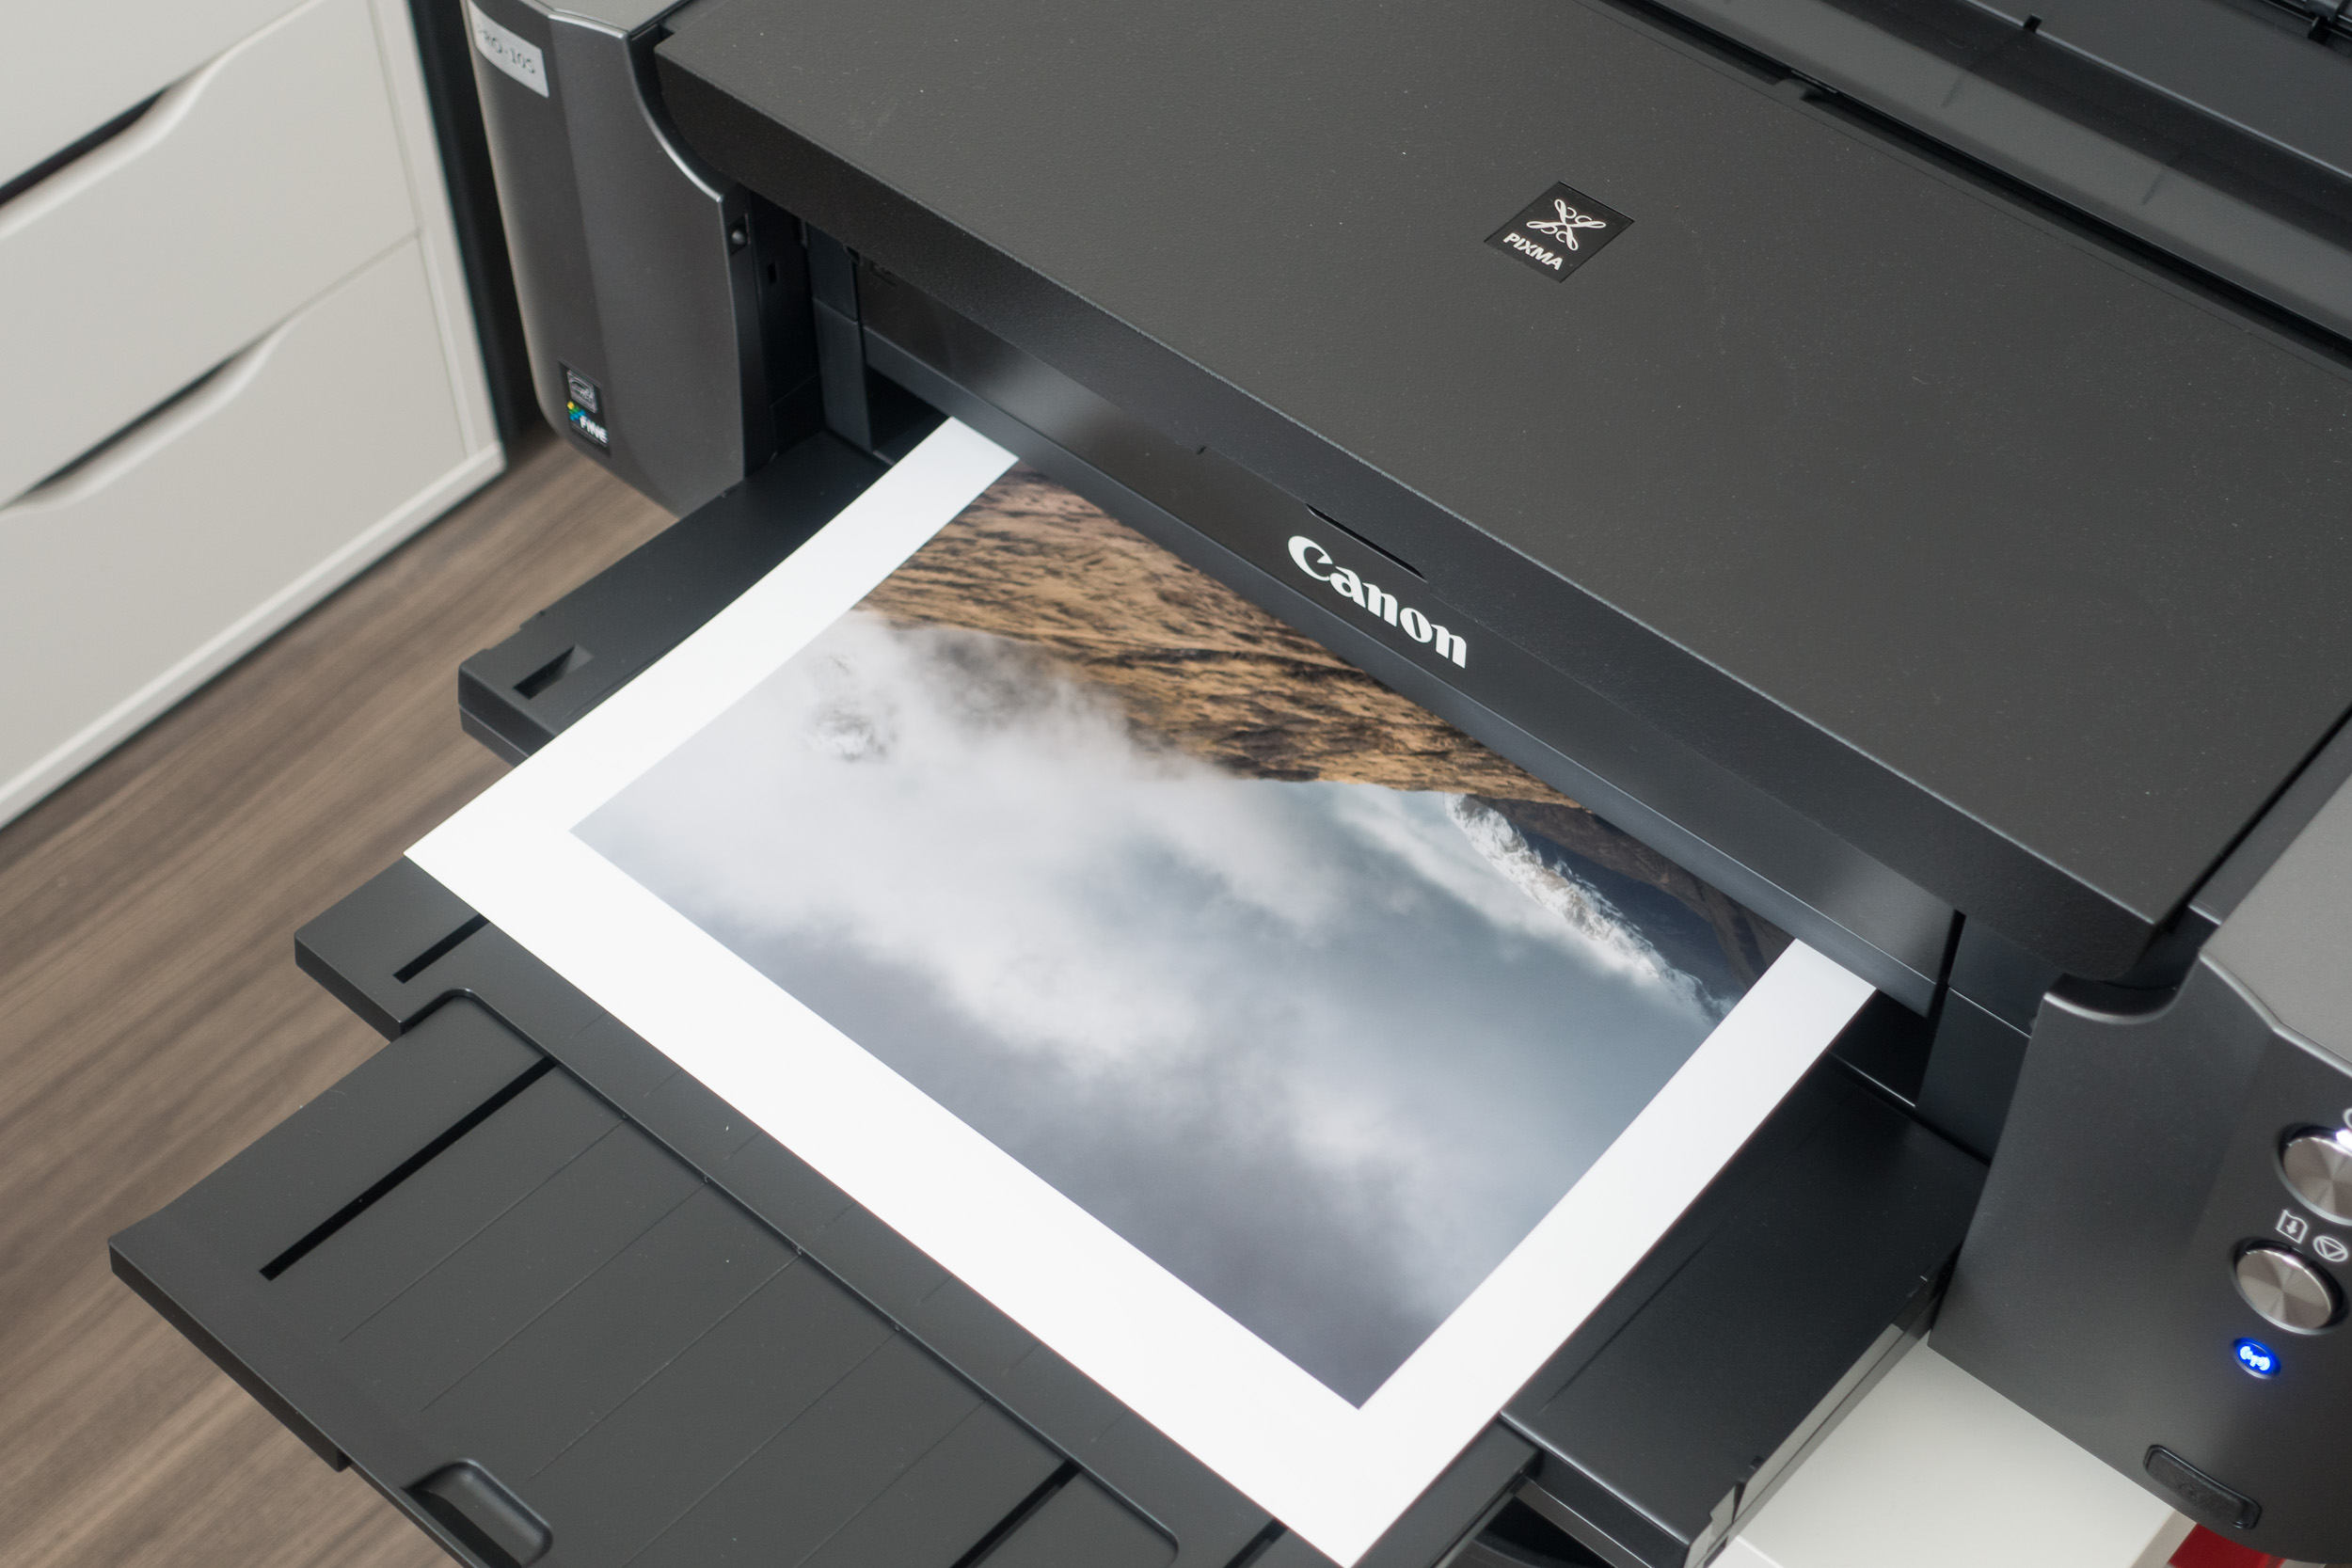
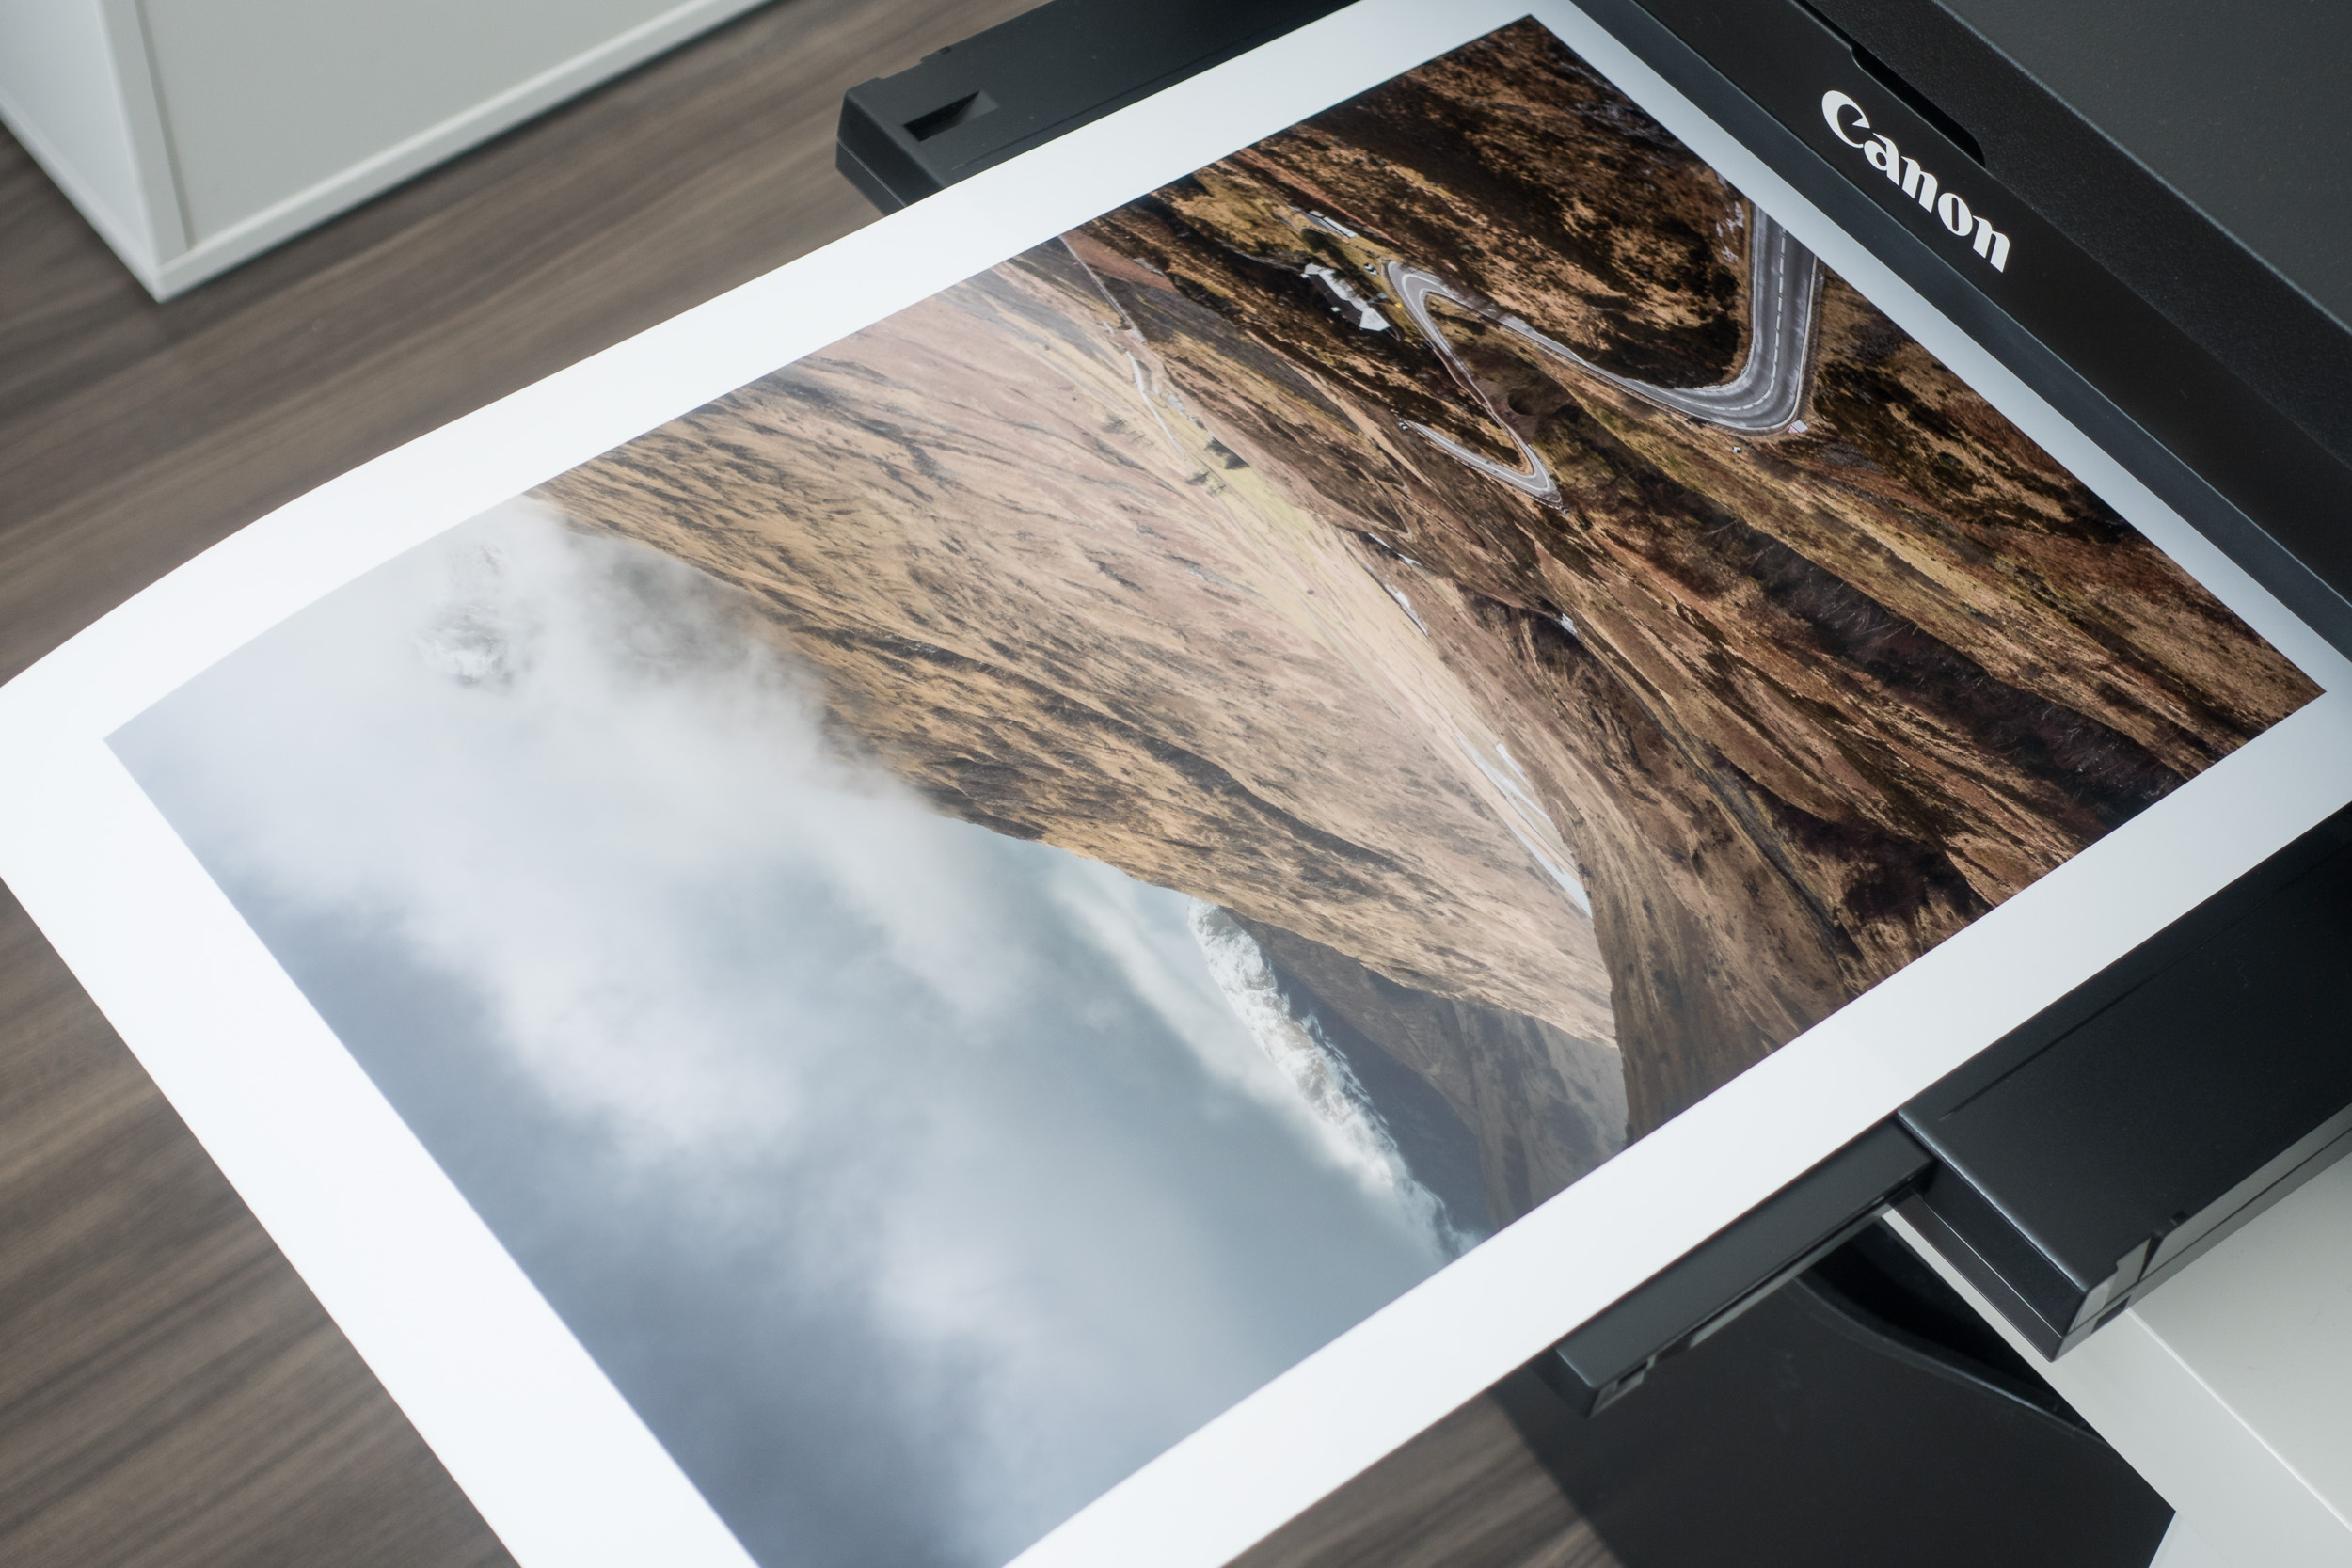
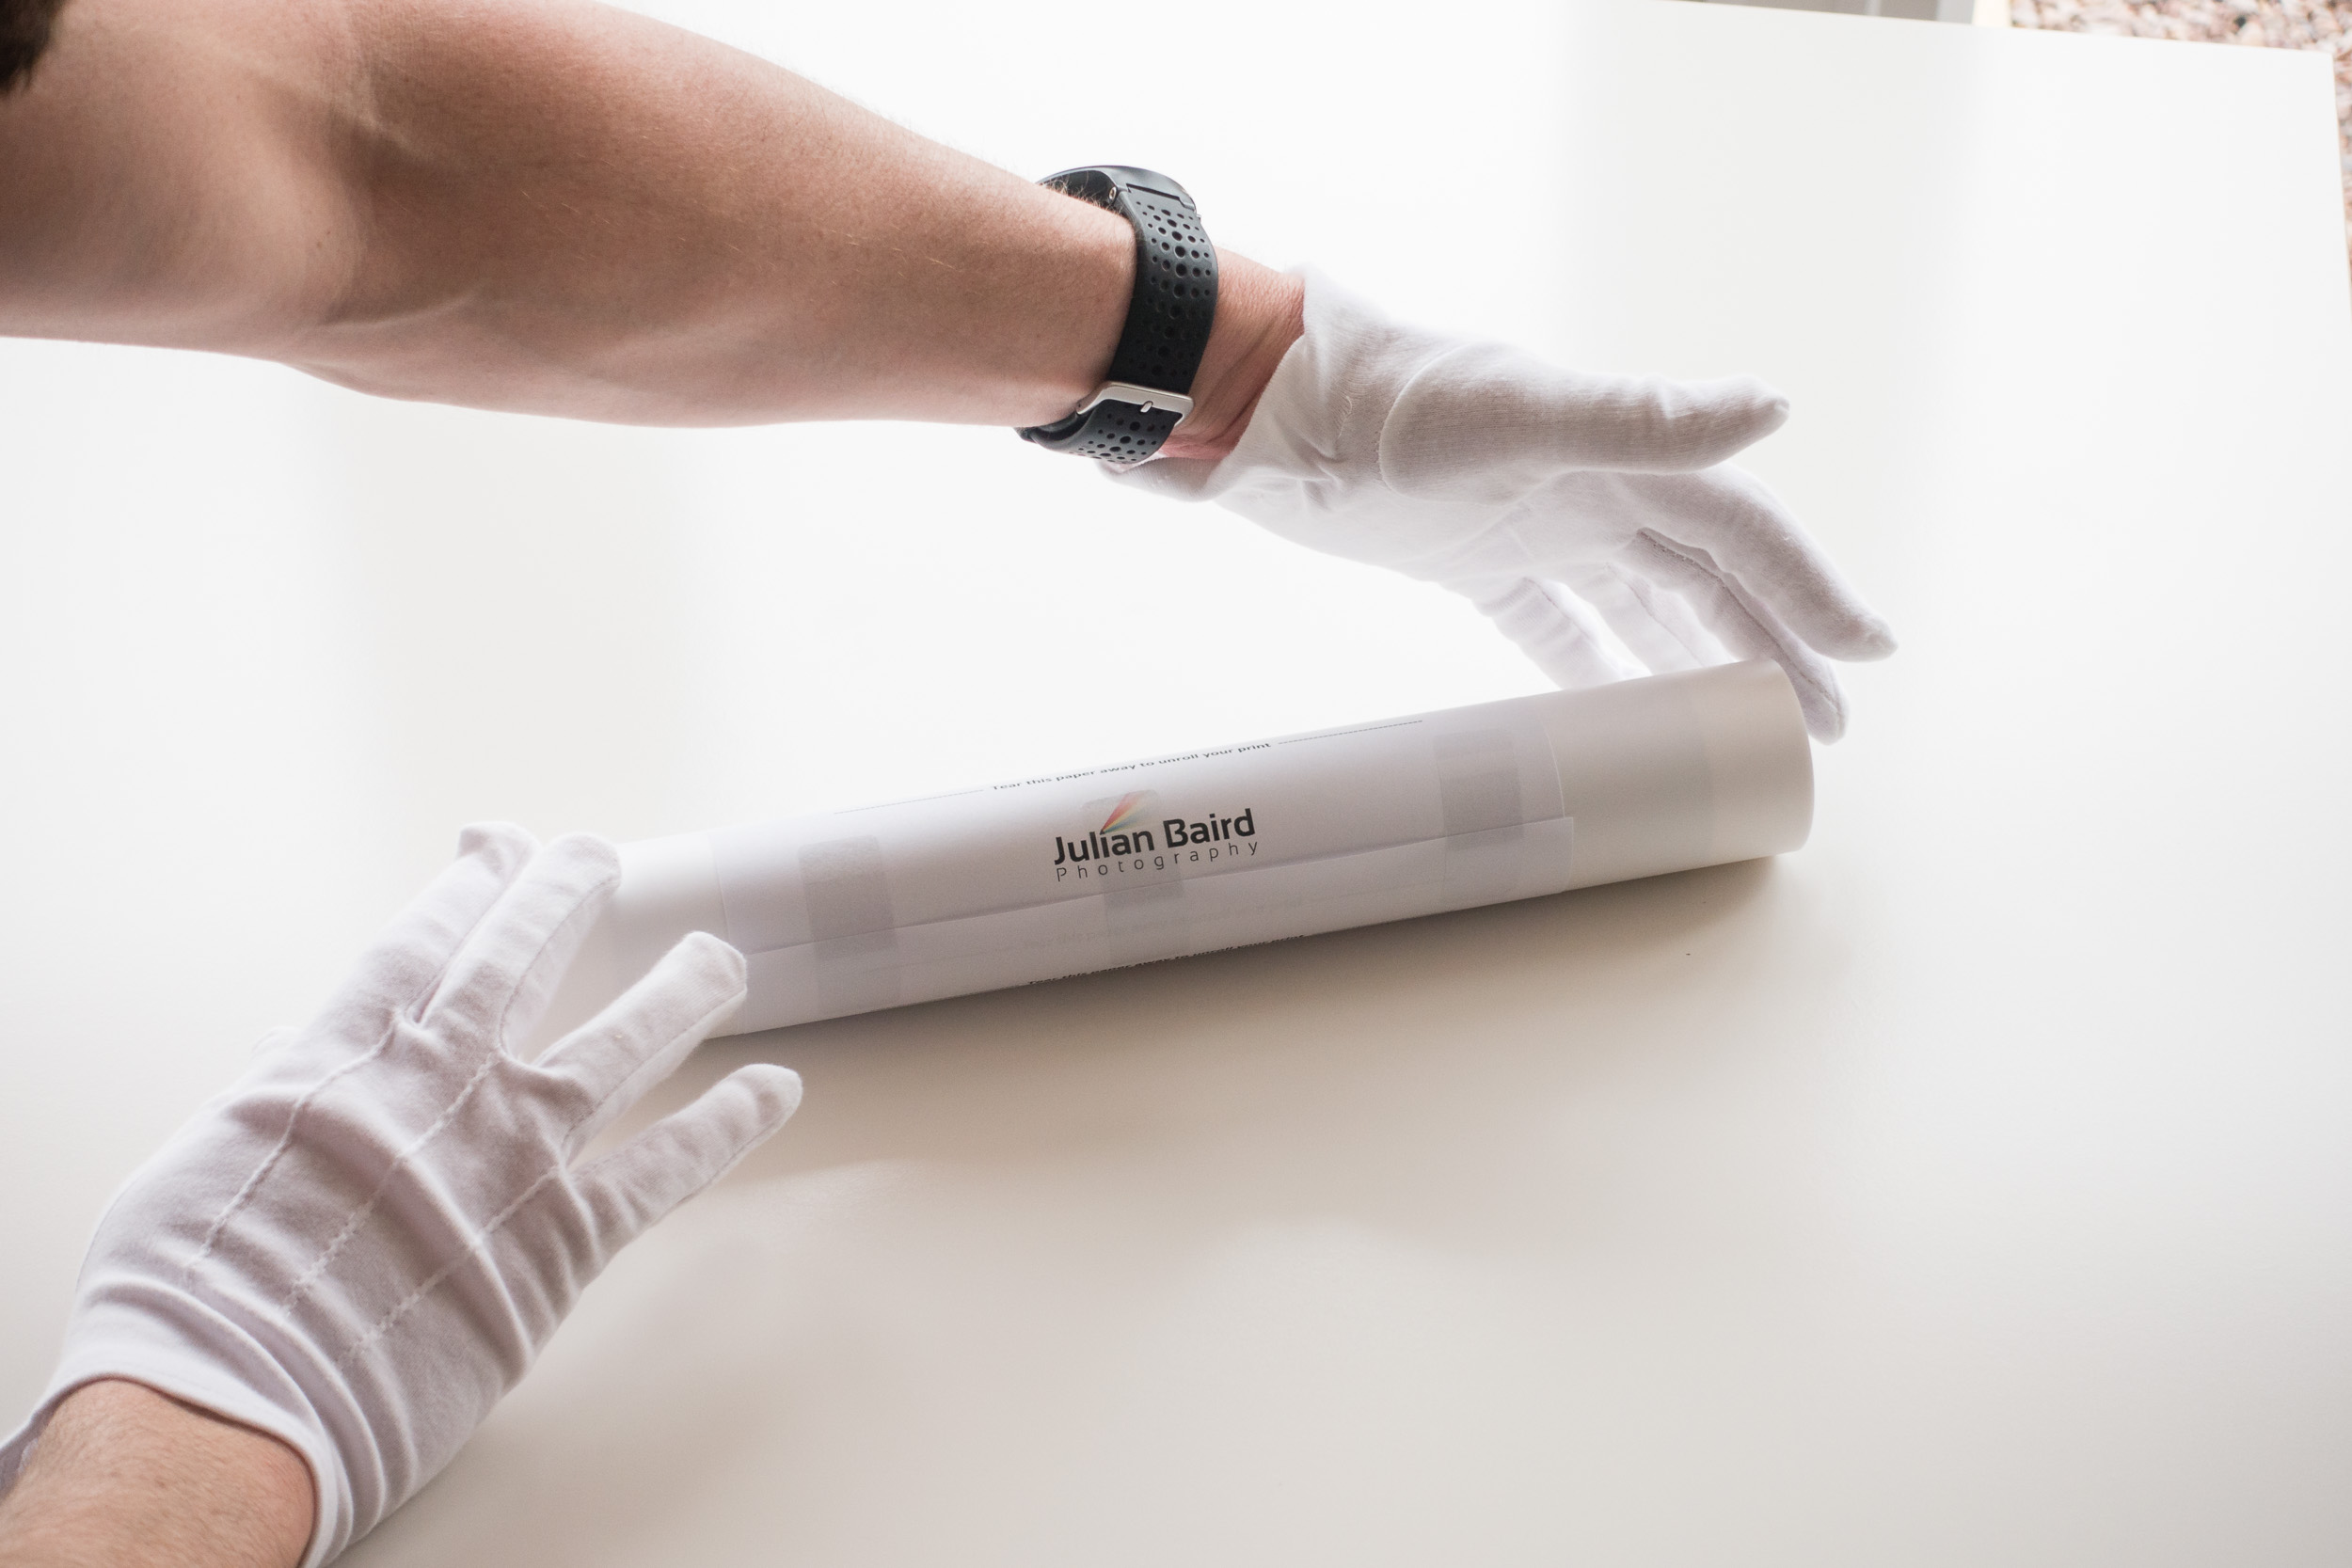
The next step is to load the A3+ paper into the rear tray. As you'll see in this image I am using white cotton gloves so I don't leave any residue from my fingers on the paper. I will use white gloves thoughout the process whenever I am touching the photo paper.

Then you just hit the Print button and wait for your image to take physical form!
Packing the Print
For this part of the process, I really have to thank Martin Bailey for his very informative and detailed blog post and video, Rolling Fine Art Prints for Shipping. Following Martin's workflow I got the following items:
Tracing paper - to put over the print to protect it when rolling. Martin used some Canon paper but tracing paper should be sufficient.
Tear away paper - this is used in the final stages of rolling and using sticky tabs holds the roll to the size you make. This stops the rolled print expanding once it is in the tube.
White gloves - to stop my fingers marking the print
Business card - with my contact details and website address
Bubble wrap bung - these are used at either end of the tube to stop the print banging off the ends when the tube is slightly longer that the print.
Shipping tube - as Martin pointed out you need to make sure its strong tube so it doesn't get crushed in transit.

Once I had everything I needed, I covered the print in tracing paper and then gently started the roll.
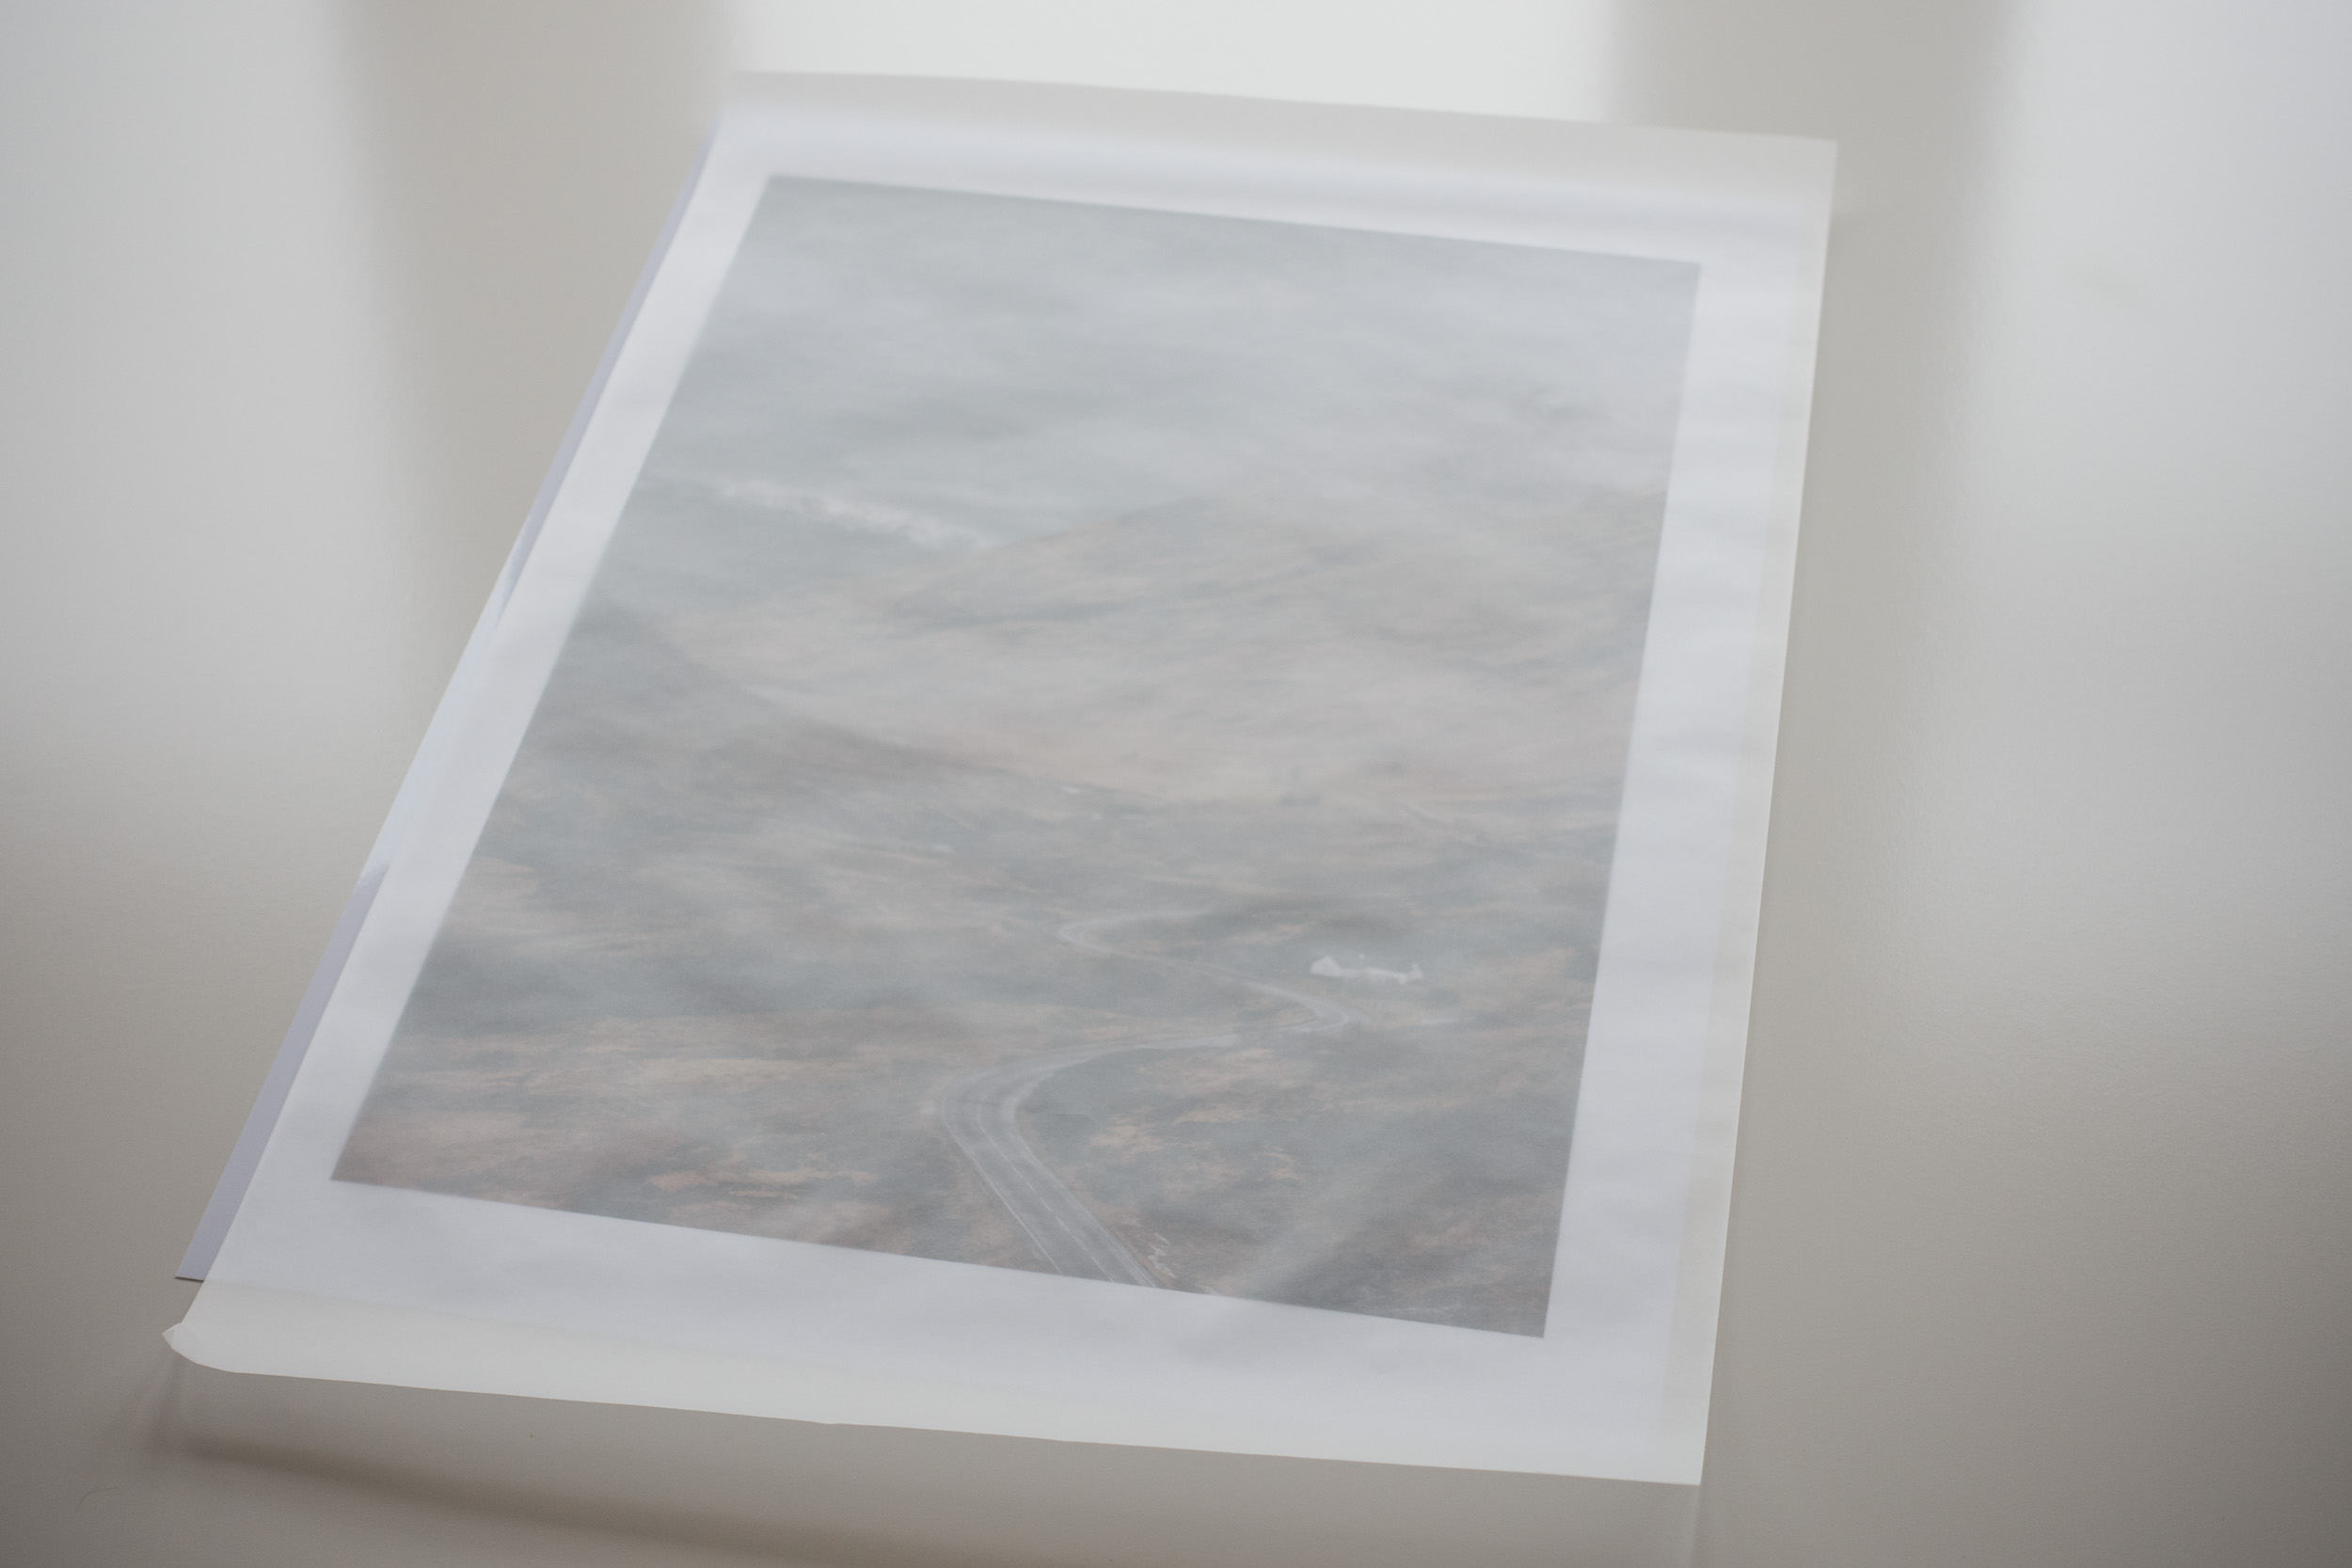
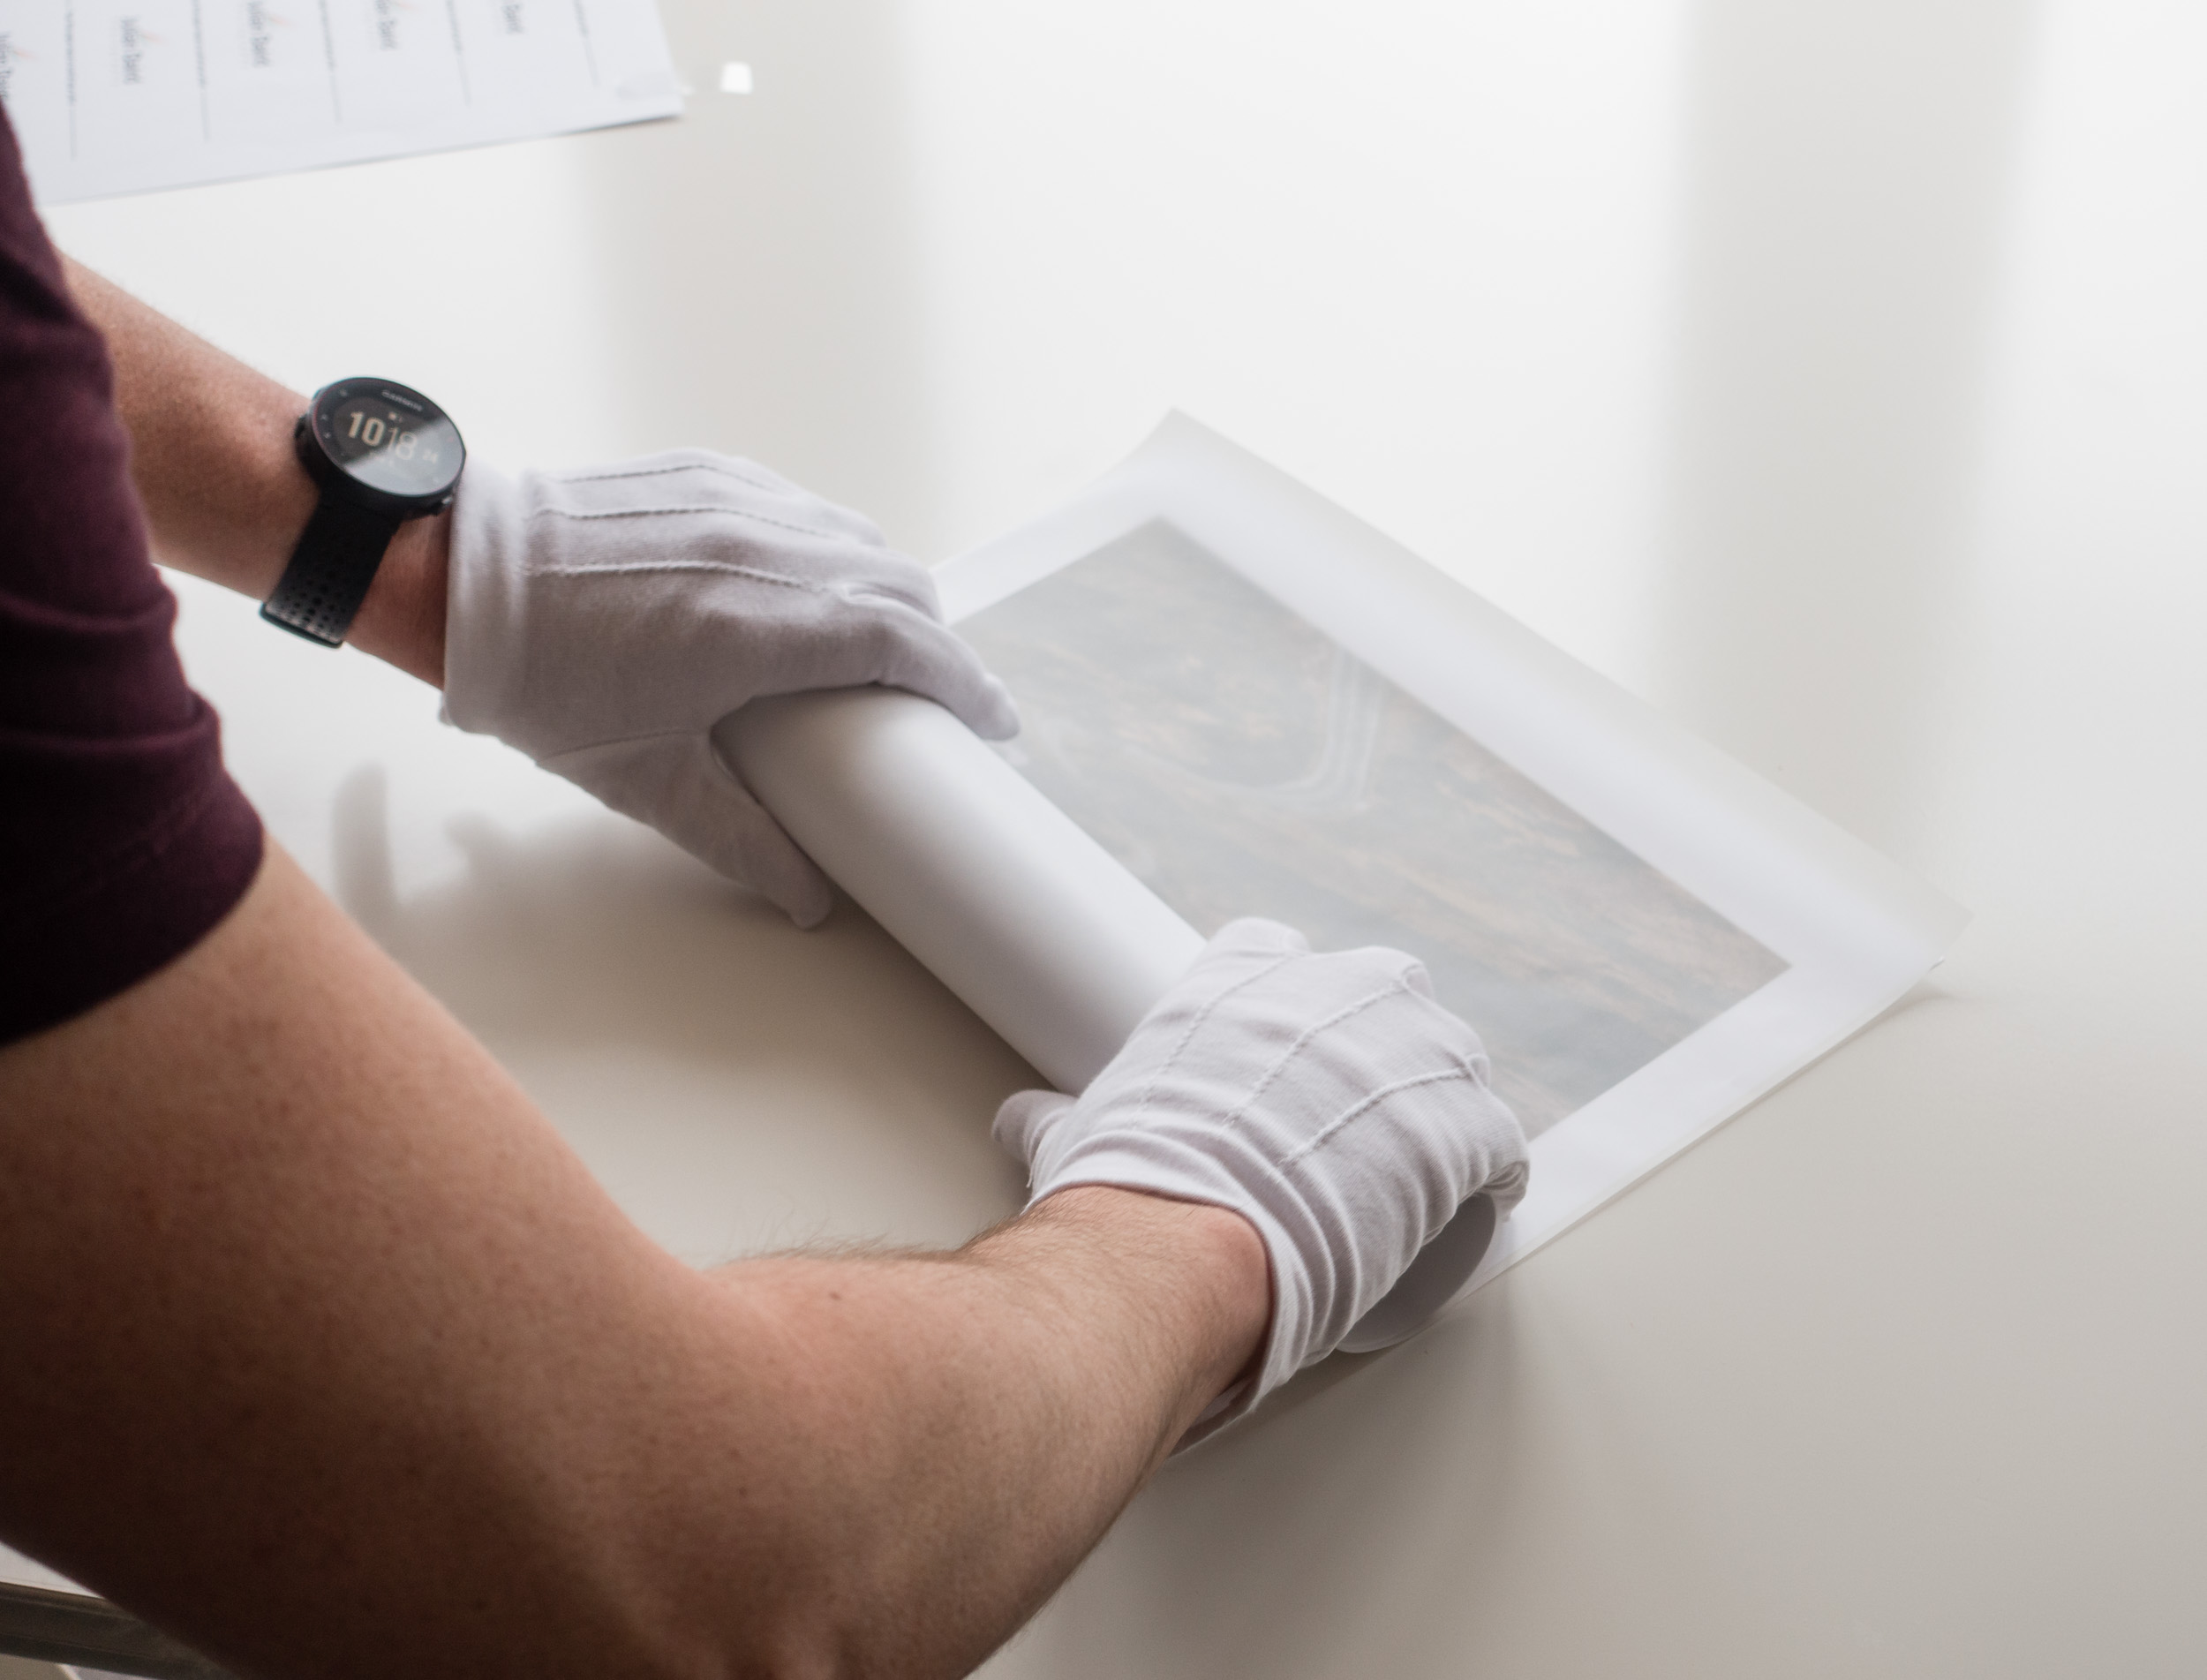
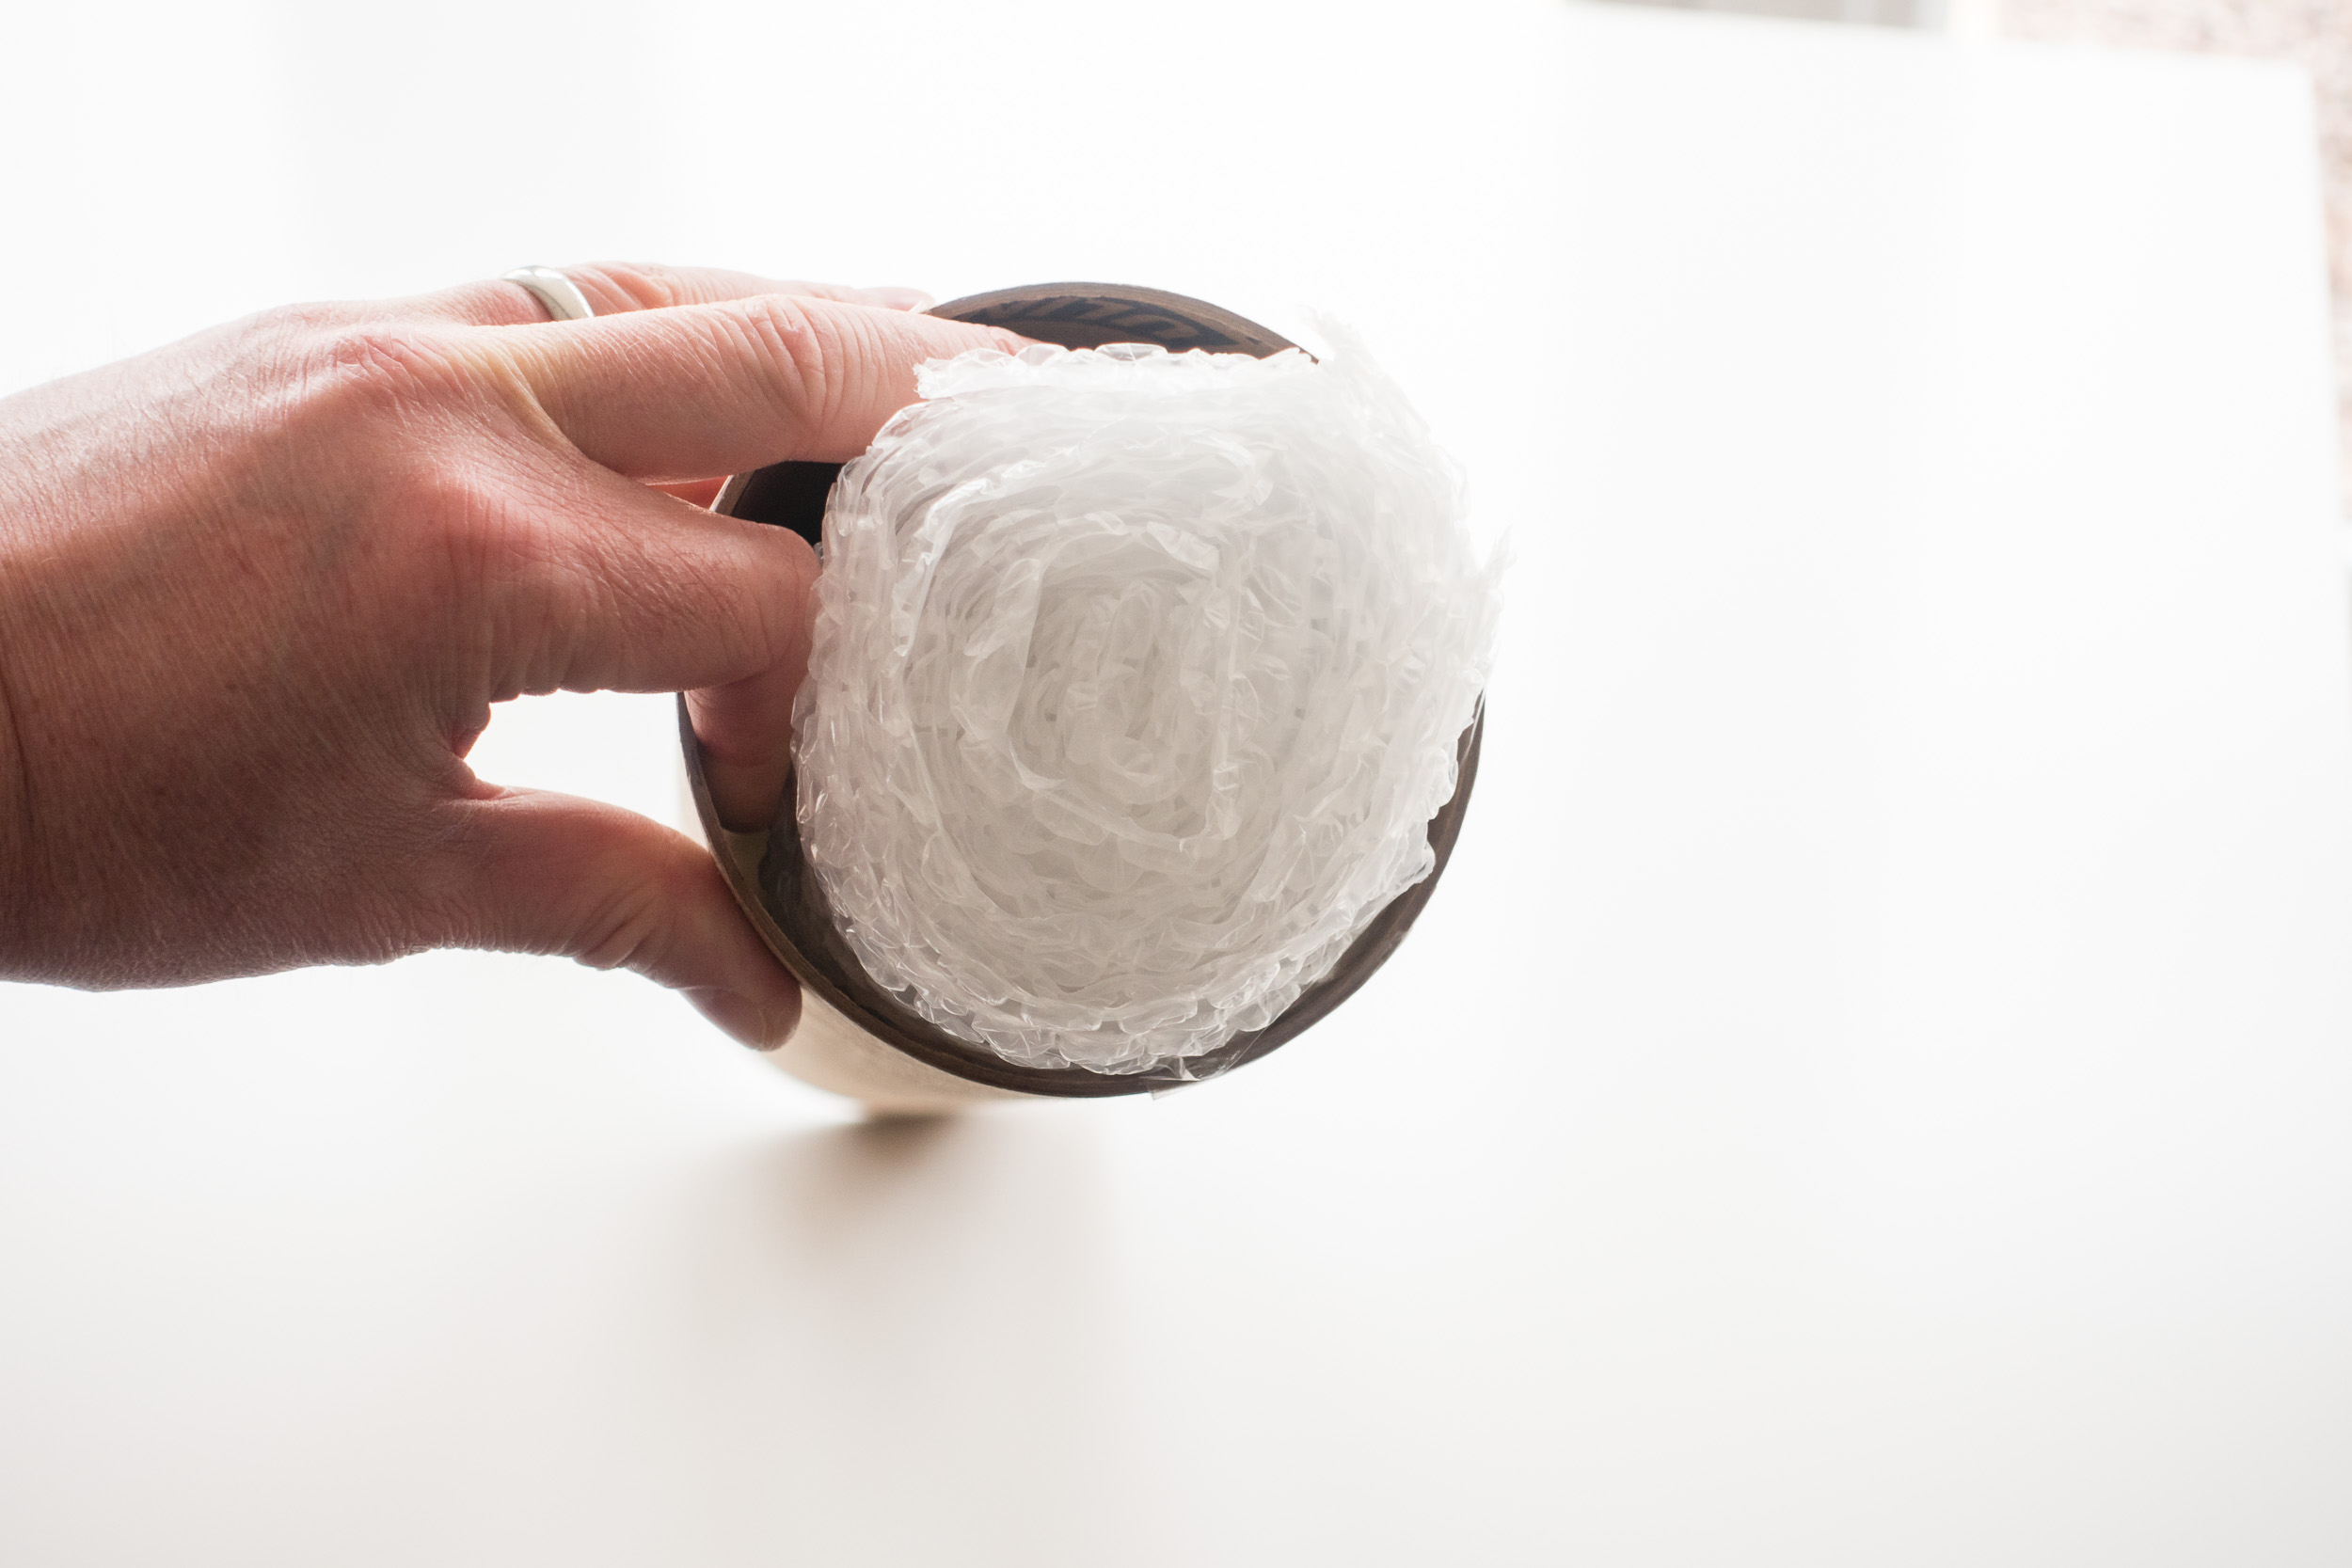
The rolling is the most difficult part of the process and you need to be careful not to damage the print, but after that, it's really just a matter of putting it in the tube along with one or two bubble wrap bungs and a business card.
Once the tube has been addressed and sealed it was off to the Post Office so the print could start its journey to Sweden!
Enjoying the Process
I suspect this whole process of printing and shipping isn't for everyone. After all, you can go to a printing lab online, upload your image and have it shipped directly to where you need it. However, for me at least, part of the enjoyment is doing it all myself. There is the satisfaction of owning the entire process from taking the image to printing it to shipping it. I like the fact that recipient of the print knows that I personally did all the work.
So do you print your own work? Do you sell and pakage your own prints? What personal touches do you put into the process? Let me know in the comments below.
Glencoe Adventure - Part 2, The Vlog
In this 2nd of two special Glencoe blog posts, I'll share with you my vlog of the 24hrs I spent in Glencoe before the workshop. It was a busy and tiring time but the effort I put in resulted in some special images!
Maximising your Time
Last week, in part 1 of my Glencoe Adventure blog, I shared with you the images and stories from my time at the Dawn 2 Dusk Glencoe photography workshop. This week, in part 2, I will be showing you what I got up to with the 24hrs I had between arriving in Glencoe and the start of the workshop.
I had booked the workshop more than 12 months in advance so I had plenty of time to organise and plan my trip. Though the workshop started at 1 pm, the risk of being delayed if I decided to travel up on the day was just too great. So the only option was to travel up the day before. Rather than opt for a mid-morning departure from Devon and arrive early evening in Glencoe, I decided that a very early start was in order.
If I left at 5 am and undertook the 520-mile journey, I could feasibly make Glencoe for about 3:30 pm, just in time to get some sunset pictures! I then also had the morning to do a dawn shoot, with perhaps some post-breakfast shooting and all before the start of the workshop. My plan had been hatched!
Rather than write about the 24 or so hours I had in Glencoe, I've documented my adventure in my latest vlog. Check out the video below, and if you haven't subscribed to my YouTube channel then what are you waiting for!
Needless to say, I did not regret that 4:30 am alarm call!
Image Gallery
The gallery below is a collection of the images that I took during my 24hr adventure in Glencoe. They are in the video but sometimes it's nice to see them in a bit more detail so click on an image to bring them up in a lightbox.


A Good Book to Pass the Time
The video is just a snapshot of my 24 hours before the workshop so here is a few stories that weren't in the video.
Firstly, while the journey from home to Glencoe took around 10 hours, it didn't feel like a very long drive. The principle reason for this is entertainment. I've been a long time subscriber to Audible and listening to a good audiobook is a great way to pass the time on those long car journeys. For the journey, I started a new book called Fear the Sky by Stephen Moss and read by R. C. Bray (who also read the other excellent sci-fi book The Martian). I had a feeling it was going to be good (as it was recommended by the same person that recommend The Martian to me), but I was engrossed from the moment the story started. Let's just say that I almost didn't want the journey to end!
Most landscape photographers drive a lot and if reading any of the Game of Thrones novels seems like an impossible task then why not pass the time with a good audio book.
Waders and Being Social
One of the shots that I wanted to get while I was there was a sunset shot of Stob Dearg (Buachaille Etive Mor) from the River Etive. To get the shot that I wanted I would need to wear a pair of waders (as inspired by this Thomas Heaton video). I borrowed my father-in-law's waders and put them in the boot of the car, unsure whether I would actually need them or not. When I arrived in the layby near my planned shooting location I felt a bit silly putting on waders to go out and take images. No one was about though so I set off on the short walk to the location where I would shoot.
However, as I approached the spot I could see another photographer there. This is generally not an issue and I'm always up for a bit of a chat but what would this person think if they saw me wearing waders to take photographs! Well, imagine my surprise when he also was wearing waders! All of a sudden it didn't feel that odd to be wearing a pair of waders to take photos.
The chap in question was Johnny Baird and we joked about what the odds would be that there would be two photographers named Baird, wearing waders, taking landscape photographs from the middle of the river that evening! Landscape photography can be a solitary pastime so it's nice sometimes when you meet a like-minded individual and you can chew the fat over photography while standing in the middle of a river!
Johnny has a wonderful portfolio of landscape images and I strongly suggest you check out his Facebook page.
A Missed Opportunity
After my epic early morning of photography shooting Stob Dearg from Beinn a'Chrulaiste I was hugely satisfied with my morning's work. After breakfast though I thought I go and see if there was anything else I could shoot before the workshop started in the afternoon. I also thought it would be a good chance to properly test out my latest addition to my kit bag, the DJI Mavic Pro.
One of the locations I visited was the spot where you can photograph Stob Dearg and the River Coupall. As this is such a hugely popular spot for landscape photographers I was not surprised to see another couple of photographers there already. I didn't want to spoil these photographers experience of the location so I did ask if they didn't mind if I flew the drone around the area. It wasn't a problem and as the drone is often a talking point we also got chatting about drones and photography in general.
The conditions at the location were also ideal for stills photography. The snowy peak of Stob Dearg was clearly visible, there was some cloud in the sky and plenty of water in the river. All I had to do was walk the very short distance back to the car and get my DSLR. Except I didn't. I already knew that we would be visiting this very location in a couple of days during the workshop so why would I bother shooting it now. After all, I'll get the same shot when I return.
Having grown up in Scotland I really should have known better. After all, Scotland is well known for having weather that produces all four seasons in one day. Sure enough, when I did return with the workshop group the conditions were totally different. One of the main focal points of that spot is the visibility of Stob Dearg but when I returned it was covered in cloud. Though I waited and waited for the cloud to clear it never completely cleared, leaving me regretting my rather silly decision of not shooting the scene when I was there earlier! Lesson learnt.
An Epic Adventure
Even if I'd only had those 24 hrs in Glencoe it would have been a worthwhile trip. As I said in the intro of the video it's important to go on an adventure every now again and push the boundaries of your landscape photography.
It took time and effort to get up Beinn a'Chrulaiste at dawn to get those shots of Stob Dearg but it was worth every step to have the pleasure and simplicity of shooting up there. The previous few weeks shooting in my local area hadn't been hugely successful and this trip to Glencoe gave my passion for landscape photography a well-needed boost.
So if you are struggling with what to do next with your landscape photography take a few days off work, grab your camera and go somewhere where you've never been before. It will be time and money well spent!
So when was the last time you went on an adventure with your photography? What's the furthest you've driven to get a photograph? Let me know in the comments below.

Glencoe Adventure - Part 1, The Workshop
In this first of two special Glencoe blog posts I'll share with you my images and stories from the Dawn 2 Dusk Glencoe workshop that I attended recently. It was a fantastic few days of photography. Though the weather was typically Scottish at times, the variable conditions resulted in some awesome images.
The Importance of Adventure
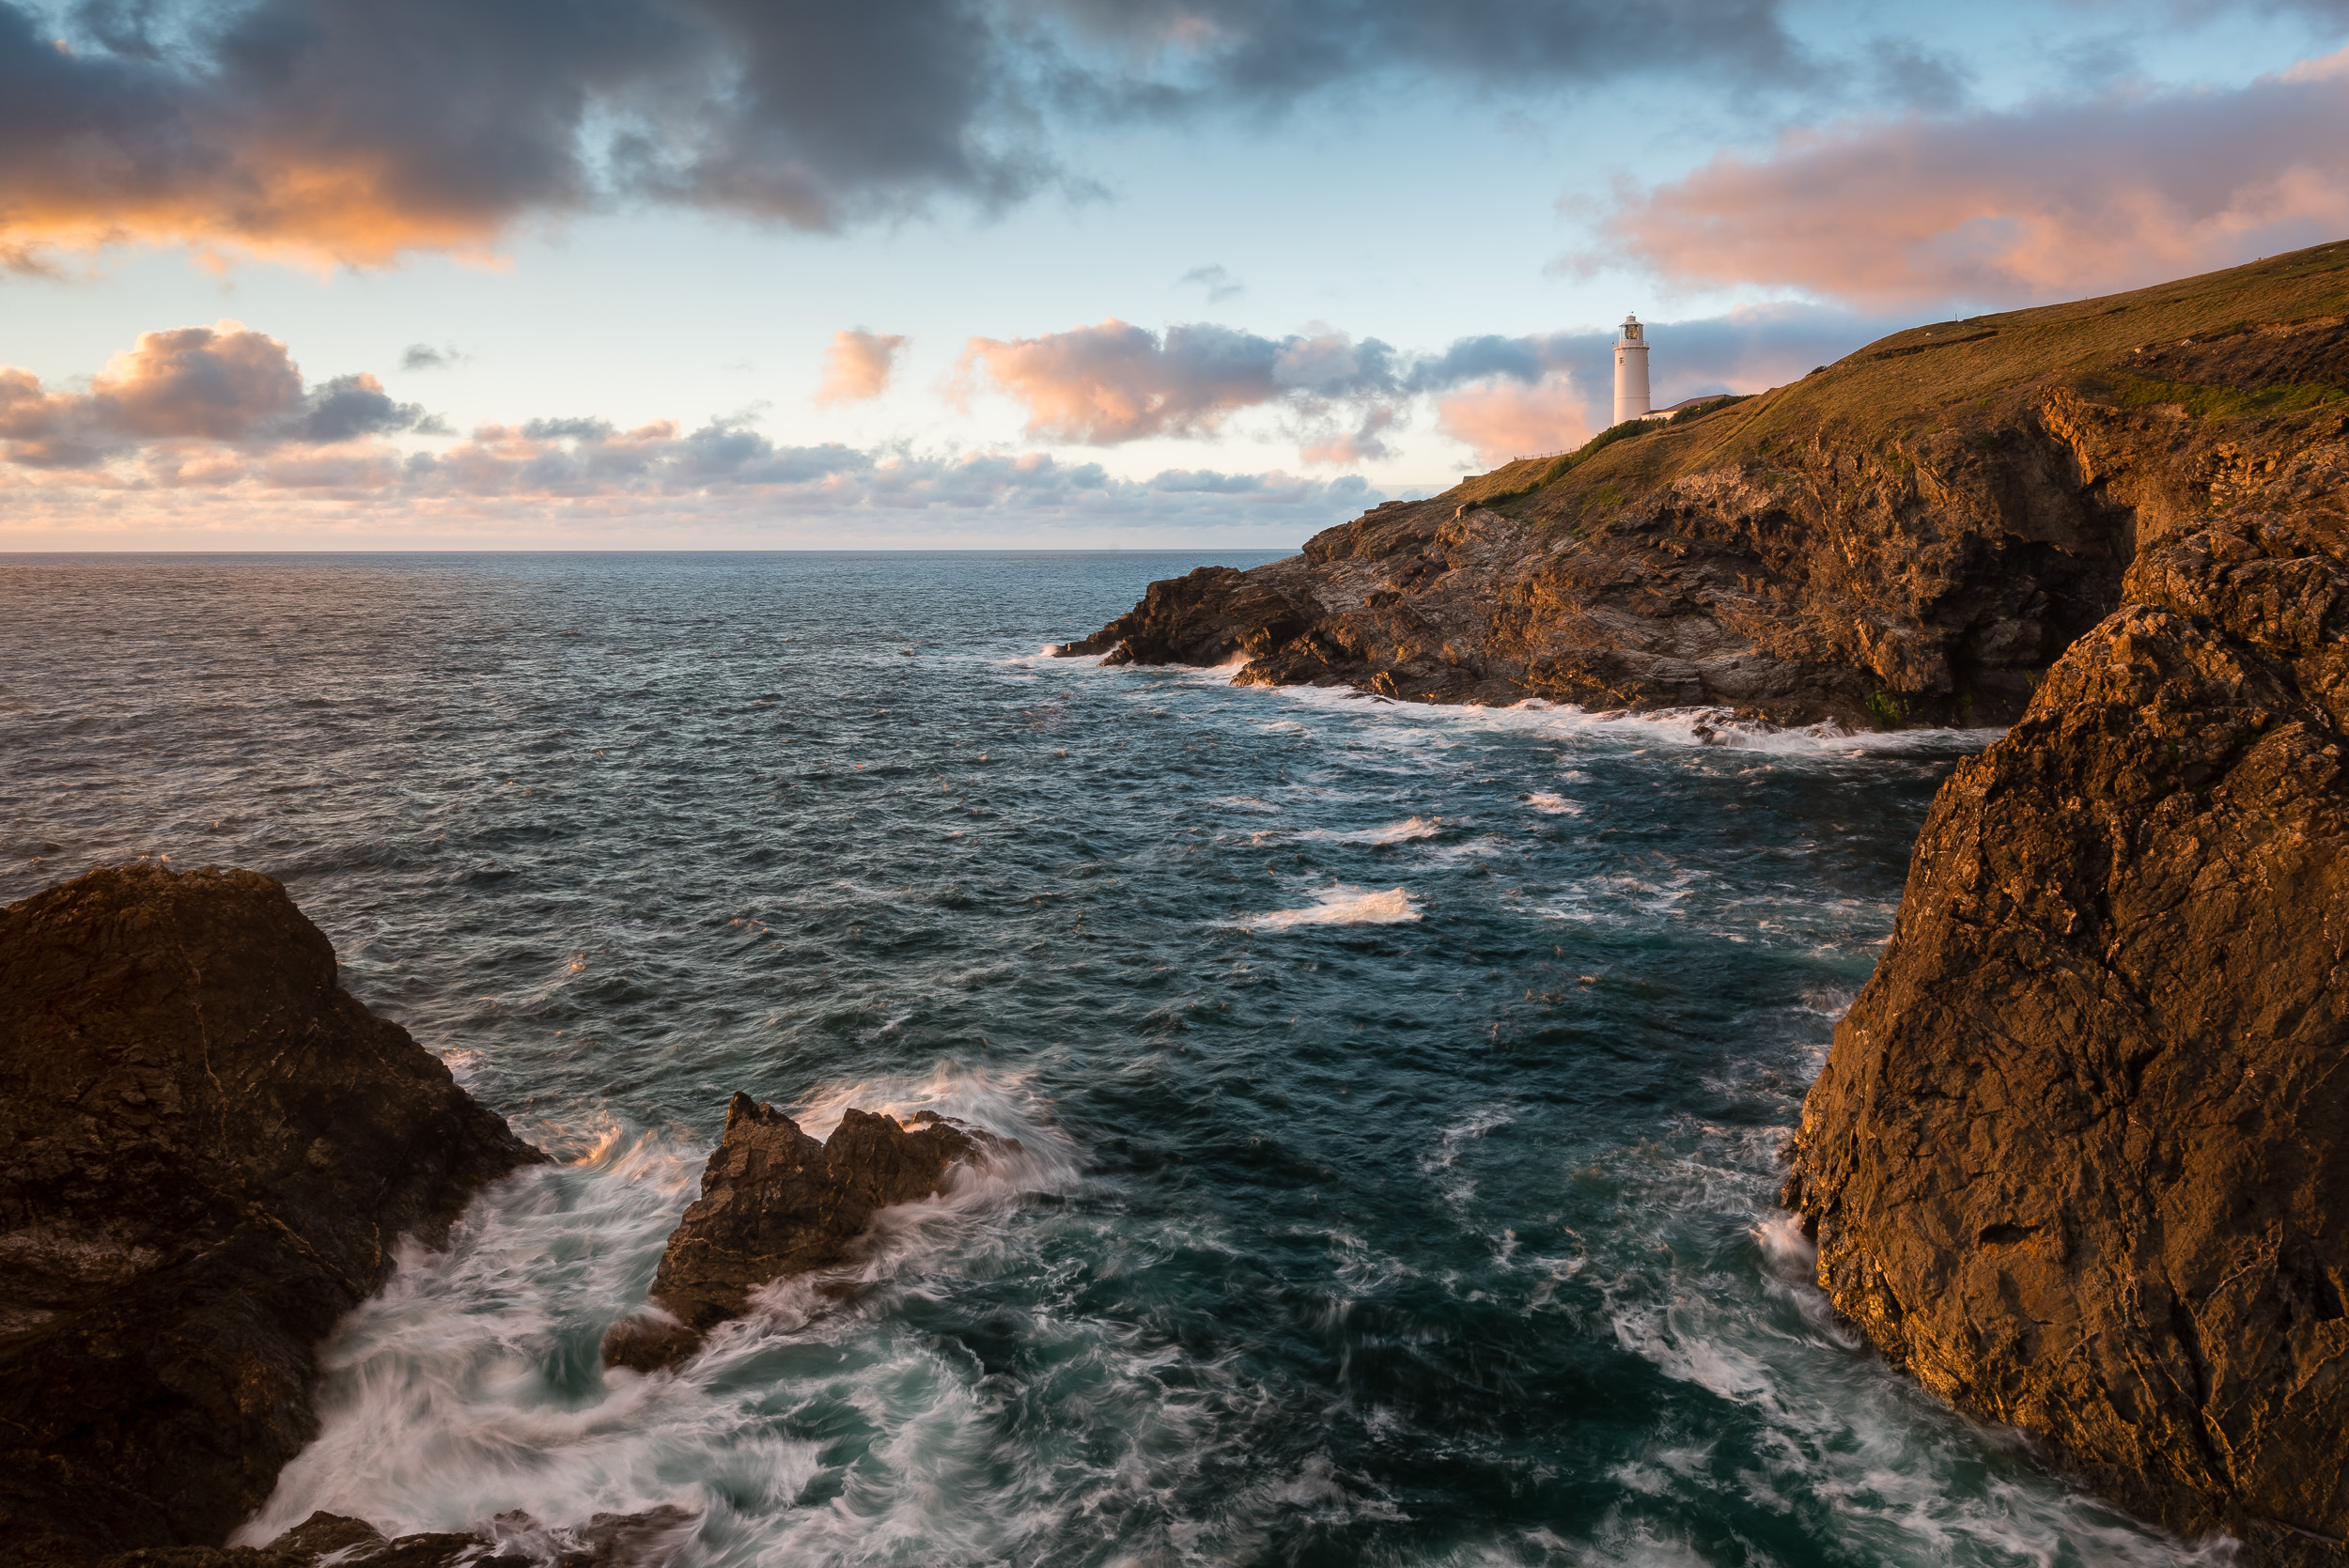
I have talked about the importance of practising the art of photography on this blog a number of times. For me, and I expect this is the same for many photographers, most of this practice will take place in your own back yard. Not literally of course, but most of the time you are out with a camera it will be in your local area. For me, this is Devon with the occasional visit across the border to Cornwall or Dorset.
While there are many benefits to shooting locally, such as time and familiarity, there is nothing quite like the challenge of pushing the boundaries of your photography by going on an adventure! Adventure means different things to different people, but for me, it's the excitement of travel, of meeting new people and of course photographing something new. All these elements can really push your photography in a way that you sometimes just can't get locally.
Though I have visited Glencoe a number of times and even grew up not far away, this will be my first time in the area as a dedicated photographer. So while the area might be familiar, the prospect of photographing it was exciting, to say the least. Well worth the 3 days off work (plus the weekend) and the 10 hours drive each way!
This week, in the first of two Glencoe blog posts, I will be sharing my memories, thoughts and photographs of the Dawn 2 Dusk Photography Glencoe photography workshop that I attended. Next week, in part 2, I will be sharing the images and video that I took with some of the extra time I had in Glencoe.
Why Workshops are Important
So why didn't I just spend all the time I had in Glencoe doing my own thing? Well, for me at least, workshops provide a number of unique benefits that I can't get by shooting on my own:
Practical and Artistic Development - Tuition is still a big part of my development as a landscape photographer and for the Glencoe workshop, I had access to two of the UK's leading landscape photographers, Ross Hoddinott and Adam Burton. Having access to this level of photographer not only helps with the artistic side of my photography but also with some of the more practical aspects of photography (read how later in the blog post).
Being Social - The life of a landscape photographer can be a solitary existence, especially if you favour early mornings like me. However, every now and again it's just good to be around like-minded individuals. Just by chatting during the day you can not only learn about how your photography looks to others, but also learn from their photography. At night, normally around the bar, it is a great chance to share those funny, odd, or disastrous trips out with the camera.
Local Knowledge - There is only so much planning and preparation you can do on the computer. In order to maximise time with the camera when you arrive at a new location, it's sometimes useful to have access to some local knowledge. For me, workshops provide me with an introduction to the photographic possibilities of an area and while I could do this myself I don't always have the extra time.
So now that we've talked about the importance of adventure and the value in workshops, let's get into the most important aspects of this adventure, the photographs!
Day 1: Castle Stalker
The 2.5-day workshop started with a briefing at our base of the Clachaig Inn just outside Glencoe village. Adam and Ross managed to suitably embarrass me by remembering my birthday with a chocolate cake and singing happy birthday! After the very sociable start of coffee and cake, we all headed down for a sunset shoot at Castle Stalker on Loch Linnhe.
Nikon D750, Nikkor 70-200mm f/2.8, @ 200mm, f/8, 1/60th second, ISO 100, Lee Filters ND Grad, 16:9 crop.
As you can see from the shot above, the descending sun illuminates the side of the castle rather nicely. I was hoping to get a similar shot to this with water surrounding the island, but as the tide came in the light became flat thanks to some heavy cloud where the sun was setting.
It was still a good start to the workshop and we all headed back to the hotel for some well-earned food and drinks.
Day 2: Lochan na Fola and Stob nan Cabar
As you might expect with a landscape photography workshop it was an early start to the 2nd day. Fortunately, the drive to our next location of Lochan na Fola wasn't far from our hotel so the alarm call wasn't too early.
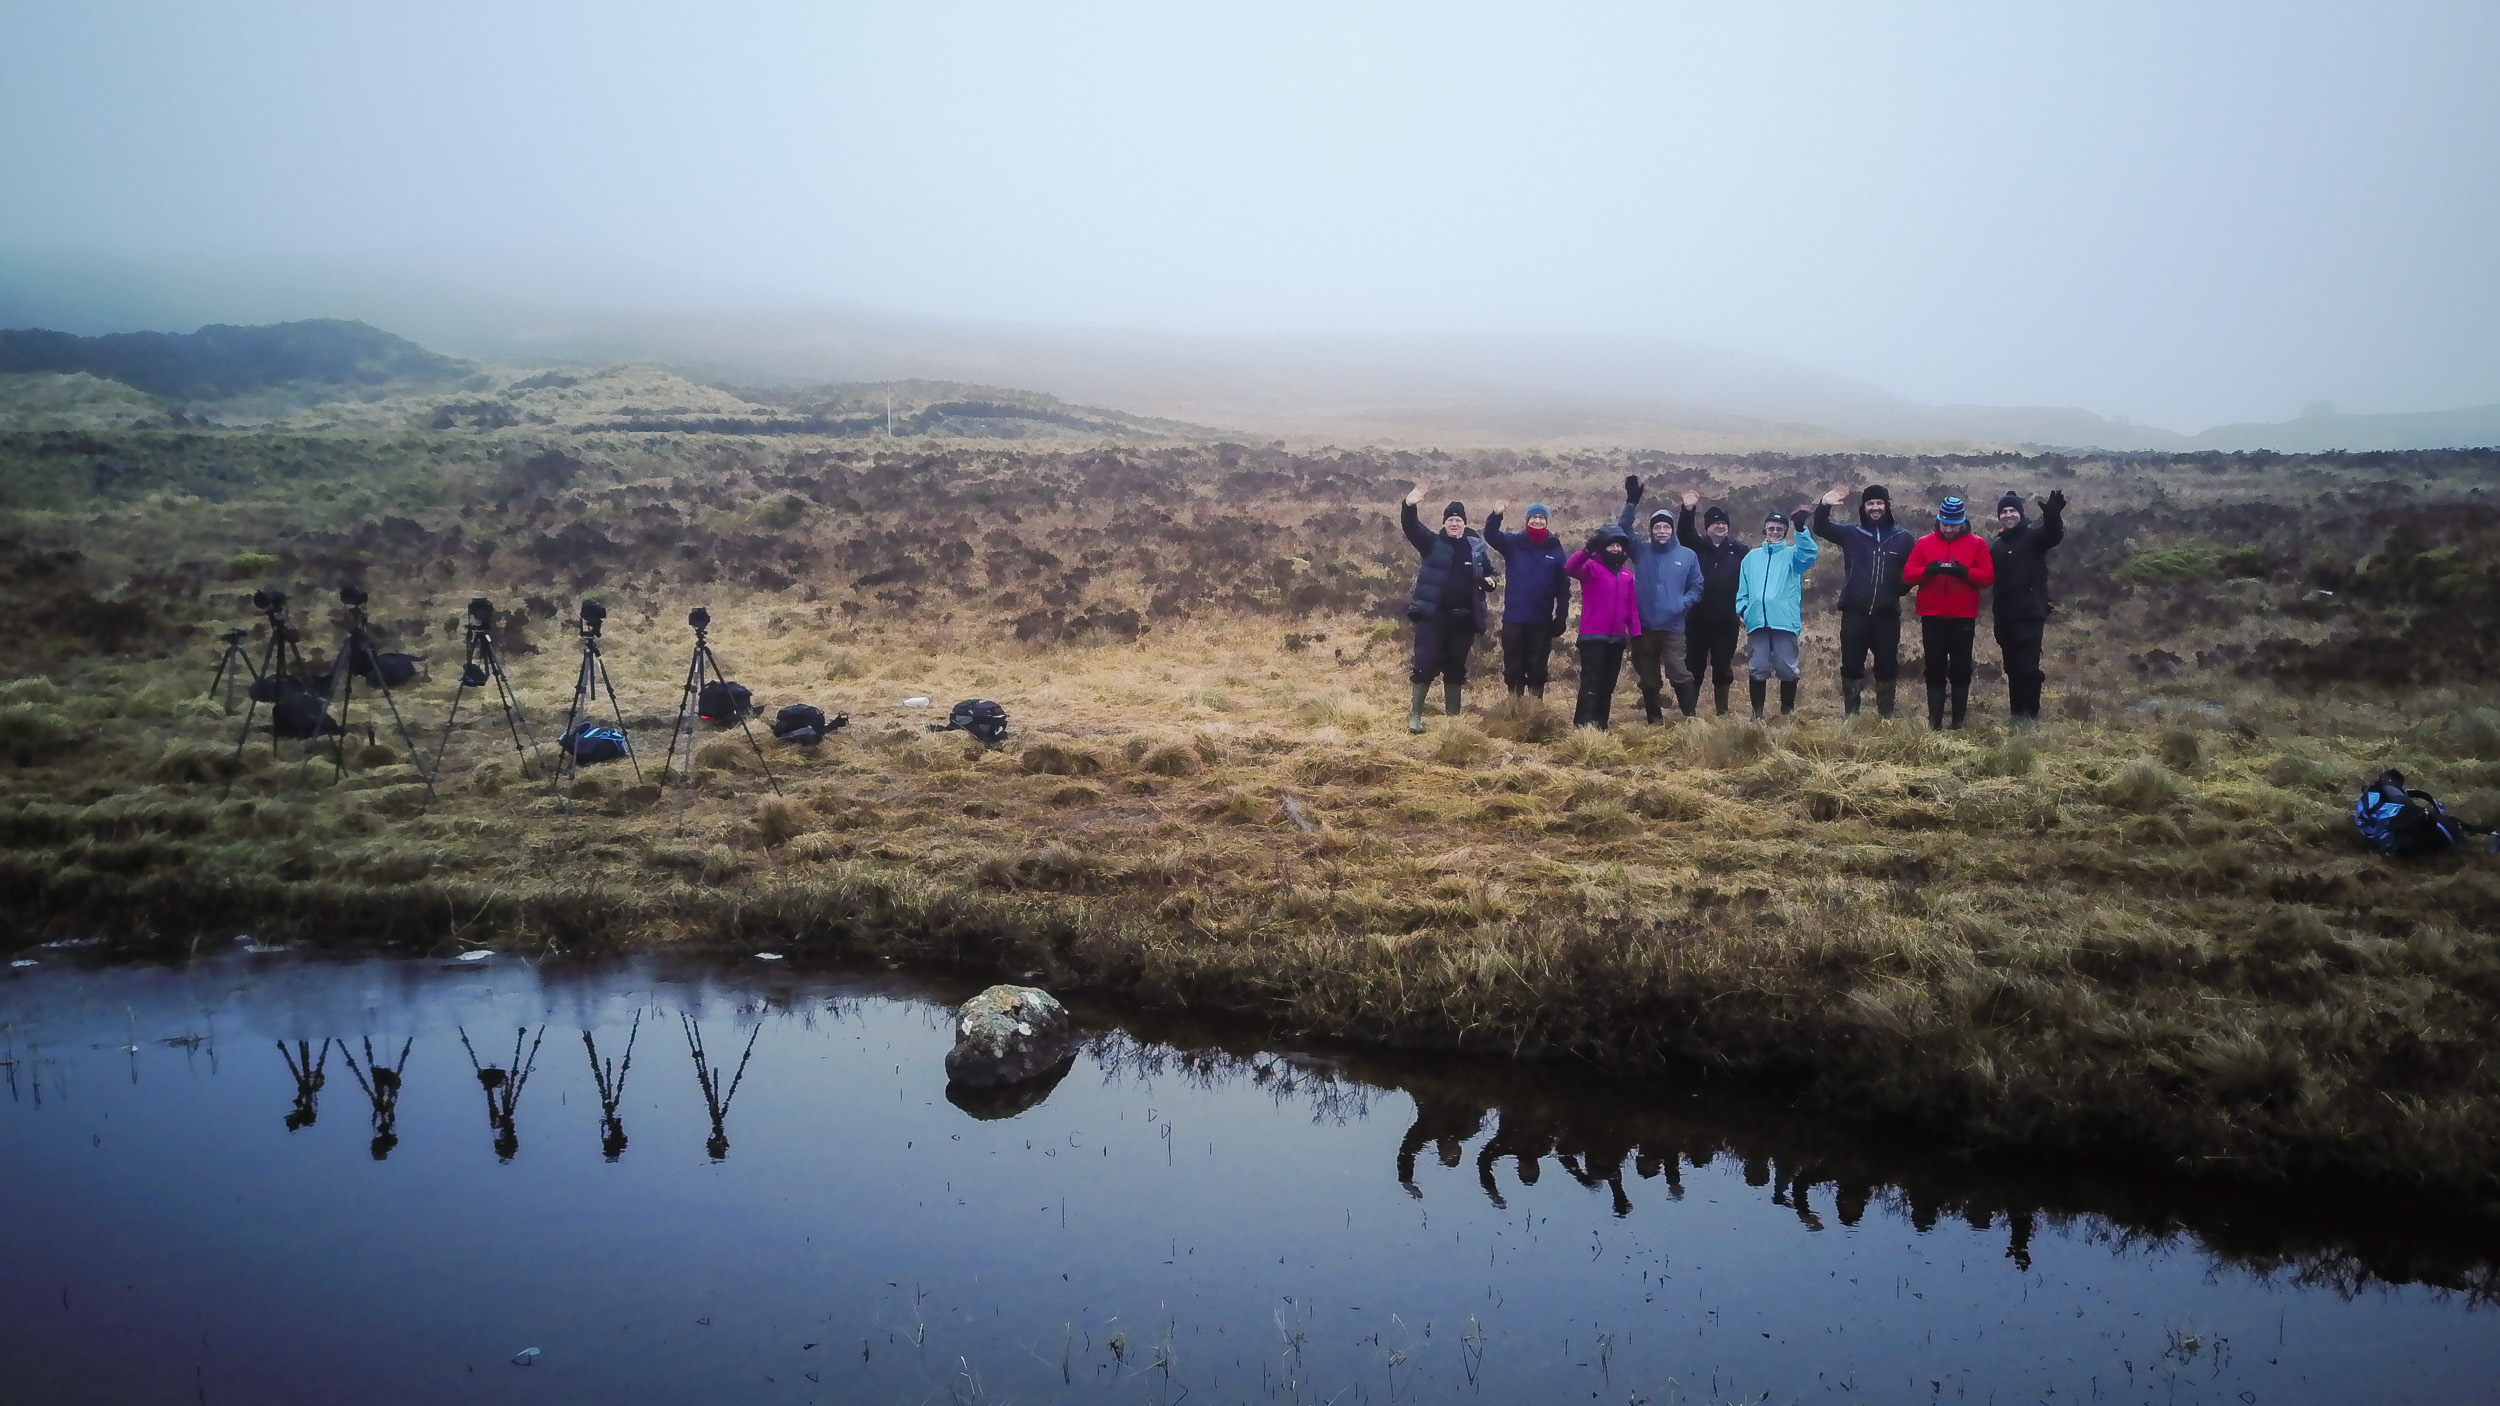
When we arrived at Lochan na Fola the water was beautifully still giving us some wonderful reflections of Stob nan Cabar. Just as we setup though some cloud rolled in blocking the view of the mountain. As we waited I decided to try out my new drone the DJI Mavic Pro. The arrival of the drone caused a bit of excitement amongst the group as I demonstrated some of its capabilities. While I couldn't get find a gap in the cloud to fly a little higher, I did get the chance to grab a quick group shot.
We didn't have to wait to long for the cloud to clear though and all of sudden it was battle stations as we were presented with some truly epic scenes!
Nikon D750, Nikkor 16-35mm f/4 @ 18mm, f/11, 1/20th second, ISO 100, Lee Filters Circular Polariser.
Nikon D750, Nikkor 16-35mm f/4 @ 26mm, f/11, 1/20th second, ISO 100, Lee Filters Circular Polariser.
I can't decide which of the two images above I like the most. Both of them greatly appeal to me with their near perfect reflections and frosty reeds in the chilly lochan. It would have been so easy just to go back to the hotel and have an early breakfast when the cloud came in, but everyone was glad they stuck it out.
Day 2: Lochan na h-Achlaise and Loch Ba
After a very successful morning and a big Scottish breakfast, we headed up to Lochan na h-Achlaise. Shooting around midday is always challenging though and coupled with the bright blue sky I did struggle a little bit to get some images.
However, by exploring along the shore line of Lochan na h-Achlaise I did find this interesting composition.
Nikon D750, Nikkor 24-70 f/2.8 @ 34mm, f/13, 30 seconds, ISO 100, Lee Filters Circular Polariser and Big Stopper.
Exploring just a little further I found this scene just off the road at Loch Ba. This is a more pleasing image thanks to the horseshoe arrangement of the foreground rocks and the reflection of the mountain in the water.
Nikon D750, Nikkor 24-70 f/2.8 @ 40mm, f/13, 2.5 seconds, ISO 100, Lee Filters Circular Polariser and Little Stopper.
I also had just enough time to try and capture a panorama of the area using my DJI Mavic Pro.
DJI Mavic Pro - 7 images stitched and processed in Lightroom.
Day 2: Blackrock Cottage
Blackrock Cottage is probably one of the most photographed locations on Glencoe, but it would have somehow seemed rude not to photograph it. After all, we were passing it on our way to get coffee from the cafe at the ski centre.
I rarely convert to black and white but in this case, the image seemed to work better without colour. The texture on the mountain (Buachaille Etive Mor) really stands out.
Nikon D750, Nikkor 24-70mm f/2.8 @ 62mm, f/11, 1/25th second, ISO 100.
Day 2: Glen Etive
Towards the end of day 2, we headed down the long and windy road of Glen Etive towards the head of Loch Etive. Here the stunning mountains reach right down into the sea loch and it's an ideal location for capturing the last light as it touches the tops of the mountains.
As I waited for the light I was still able to capture some striking images of the north east shore of Loch Etive.
Nikon D750, Nikkor 24-70mm f/2.8 @ 26mm, f/11, 198 seconds, ISO 100, Lee Filters Big Stopper, ND Grad and Circular Polariser.
As I've written on this blog before it's always important to see what is going on behind you. It appeared that the sun was shining on the mountains diretly behind me!
Nikon D750, Nikkor 70-200mm f/2.8 @ 150mm, f/8, 1/5th second, ISO 100, Lee Filters Big ND Grad.
In my hurry to get to the head of the loch to capture last night on the mountains I completely missed another great composition. It wasn't until I was heading back to the car that I found a few of my fellow photographers shooting this interesting scene.
Nikon D750, Nikkor 16-35mm f/4 @ 19mm, f/11, 20 seconds, ISO 100, Lee Filters Circular Polariser and ND Grad.
I had actually walked by this location in my hurry to get to the head of the loch. Perhaps I should have taken just a little more time to explore this area before settling into my chosen location.
Day 2 was certainly a busy one. Would day 3 be just as good?
Day 3: The Study
After the successes of day 2, the weather had a change of heart and went typically Scottish. Lots of low clouds, and lots of rain. Our initial plan was to do a pre-breakfast shoot of Buachaille Etive Mor. We would go down to the river Coupall to shoot the waterfalls with the mountain in the background. Only trouble was you couldn't see the mountain or anything really. Reluctantly we headed back for an early breakfast and discuss our next move.
With the weather forecast predicting a stop to the rain, our tutors suggested we shoot from The Study, a slightly elevated viewpoint with excellent views of the mountains (The Three Sisters). Sure enough, the rain stopped and we were back in business.
I don't often shoot panoramas but this viewpoint seemed like the ideal location to do so. Fortunately, Adam Burton was on hand to give me some excellent tuition on how to setup the tripod correctly and the best way to rotate the camera. Taking my new found knowledge I managed to capture this image of The Three Sisters.
Nikon D750, Nikkor 24-70mm f/2.8 @ 24mm, f/11, 1/100th second, 10 vertical images stiched and processed in Lightroom CC.
I then decided to opt for a much tighter composition giving me one of my favourite images from the workshop.
Nikon D750, Nikkor 70-200mm f/2.8 @ 90mm, f/11, 1/40th second, ISO 100, Lee Filters ND Grad.
Day 3: Stob Dearg and the River Coupall
There is no doubt that this location has been photographed a lot. However, that doesn't make it any less worth shooting. There are always new compositions to be had, different weather conditions to manage and personal style to put into an image.
The key element for this location is a visible Stob Dearg (Buachaille Etive Mor), something that was missing that afternoon. This made my decision a couple of days earlier not to photograph this very scene because "I'll be back in a couple of days", even more heartbreaking.
However, with probably an unjustified amount of optimism, I put on my wellington boots, got into the river and set up my shot. All I needed was for the cloud to clear from the mountain. So I waited, and waited, and waited. It came so very close to being completely clear, but as the sky darkened I knew it wasn't going to happen.
Though you can't see the whole of the mountain in this image, I still like the end result.
Nikon D750, Nikkor 16-35mm f/4 @ 19mm, f/13, 0.8 seconds, ISO 100, Lee Filters Circular Polariser and 0.3 ND Grad.
Though it had been a challenging day with the weather, it was still a successful day out with the camera.
Workshop Summary
At the start of this blog post, I mentioned the three things that I look for on a workshop; personal development as a photographer, social interaction, and local knowledge.
There is no doubt that my artistic eye has developed a little bit more and that I'm now better prepared to shoot panoramas. I also got to spend a couple of days with a great group of people who shared my passion for landscape photography. We all shared some great stories in the bar! And finally, thanks to some excellent planning and local knowledge, the weather and conditions rarely caused a problem with the flexible itinerary.
I've come away with some great images and some even better memories, so it was definitely worth a few days off work and a very long drive!
In Part 2...
In part 2 of my Glencoe Adventure blog post, I will tell you about the images I took during the spare 24 hrs I had before the workshop started, including a video of my very early and snowy ascent of Beinn a'Chrulaiste!