
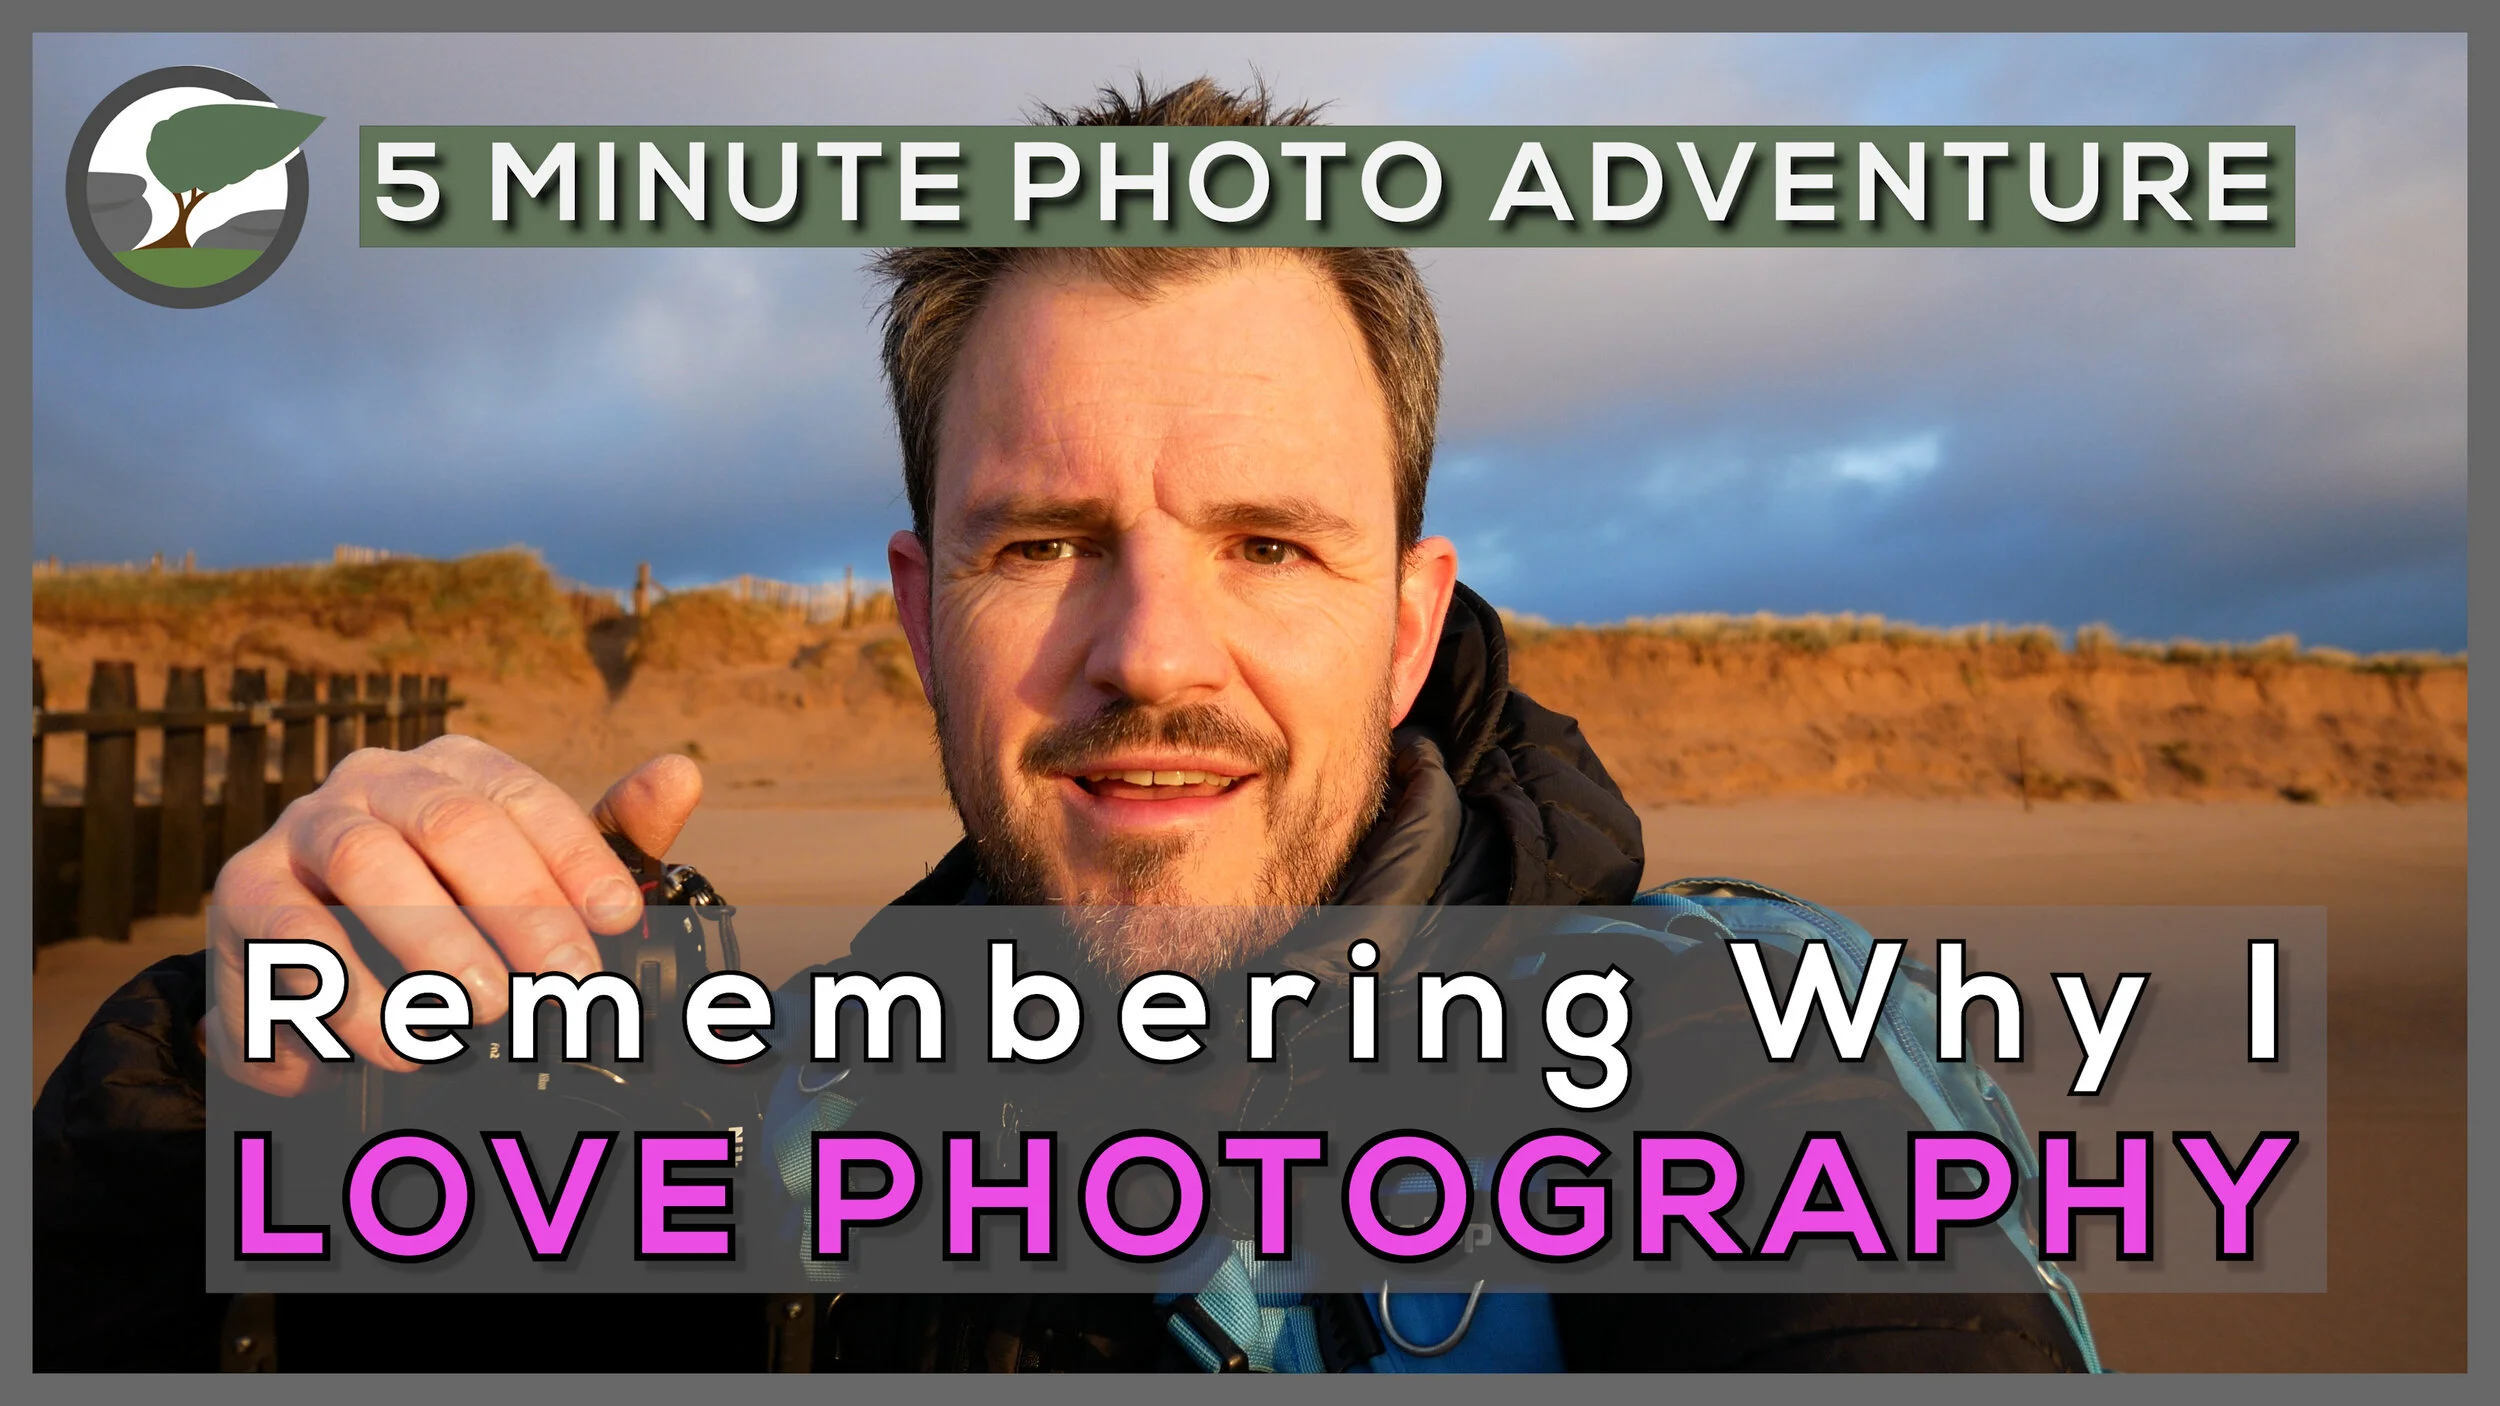
Remembering Why I Love Photography - Dawlish Warren
Grab yourself a cup of coffee because it's time for another 5 Minute Photo Adventure! In this episode, I head to Dawlish Warren where I reminded that it's always worth hanging on for just another 5 minutes. Even after all these years, landscape photography can still surprise and delight me.
Just Another 5 Minutes
Over the years I have produced fifteen 5 Minute Photo Adventure videos, but I’ve never made one from Dawlish Warren. This is a bit odd as it is the location, I photograph the most every year. You’ll find many blog posts on this website that feature Dawlish Warren, and it has been the location for many videos. However, I don’t think it’s ever been the primary feature of a video and it’s never featured in its own 5 Minute Photo Adventure.
A few weeks ago (14th March to be precise), I had a little spare time and after checking the weather forecast, I thought that a dawn shoot from Dawlish Warren might yield some nice results. This would also be the perfect opportunity to feature Dawlish Warren in a 5 Minute Photo Adventure.
I’m not going to write too much here about my time at Dawlish Warren because I’ll only be repeating what is in the video. The one thing I will say is that it pays to be patient. The conditions at the point of sunrise weren’t great and I wasn’t expecting to get any nice light. While I was enjoying my time on the beach, I was ready to call it a day on the photography.
Experience has taught me though that it is sometimes worth holding on a little longer past sunrise/sunset and that’s exactly what I did. Once the sun broke over the lower cloud I got some glorious light and I captured some of my favourite ever images from Dawlish Warren. Sure, a little more cloud in the higher reaches of the sky would have made the photos even better, but I cannot fault the experience of being there and having the opportunity to capture those images.
I really hope you enjoy my latest 5 Minute Photo Adventure from Dawlish Warren and if you scroll down a little further you’ll be able to see the images from the video in a bit more detail. Let me know which image is your favourite in the comments below.
The Photographs
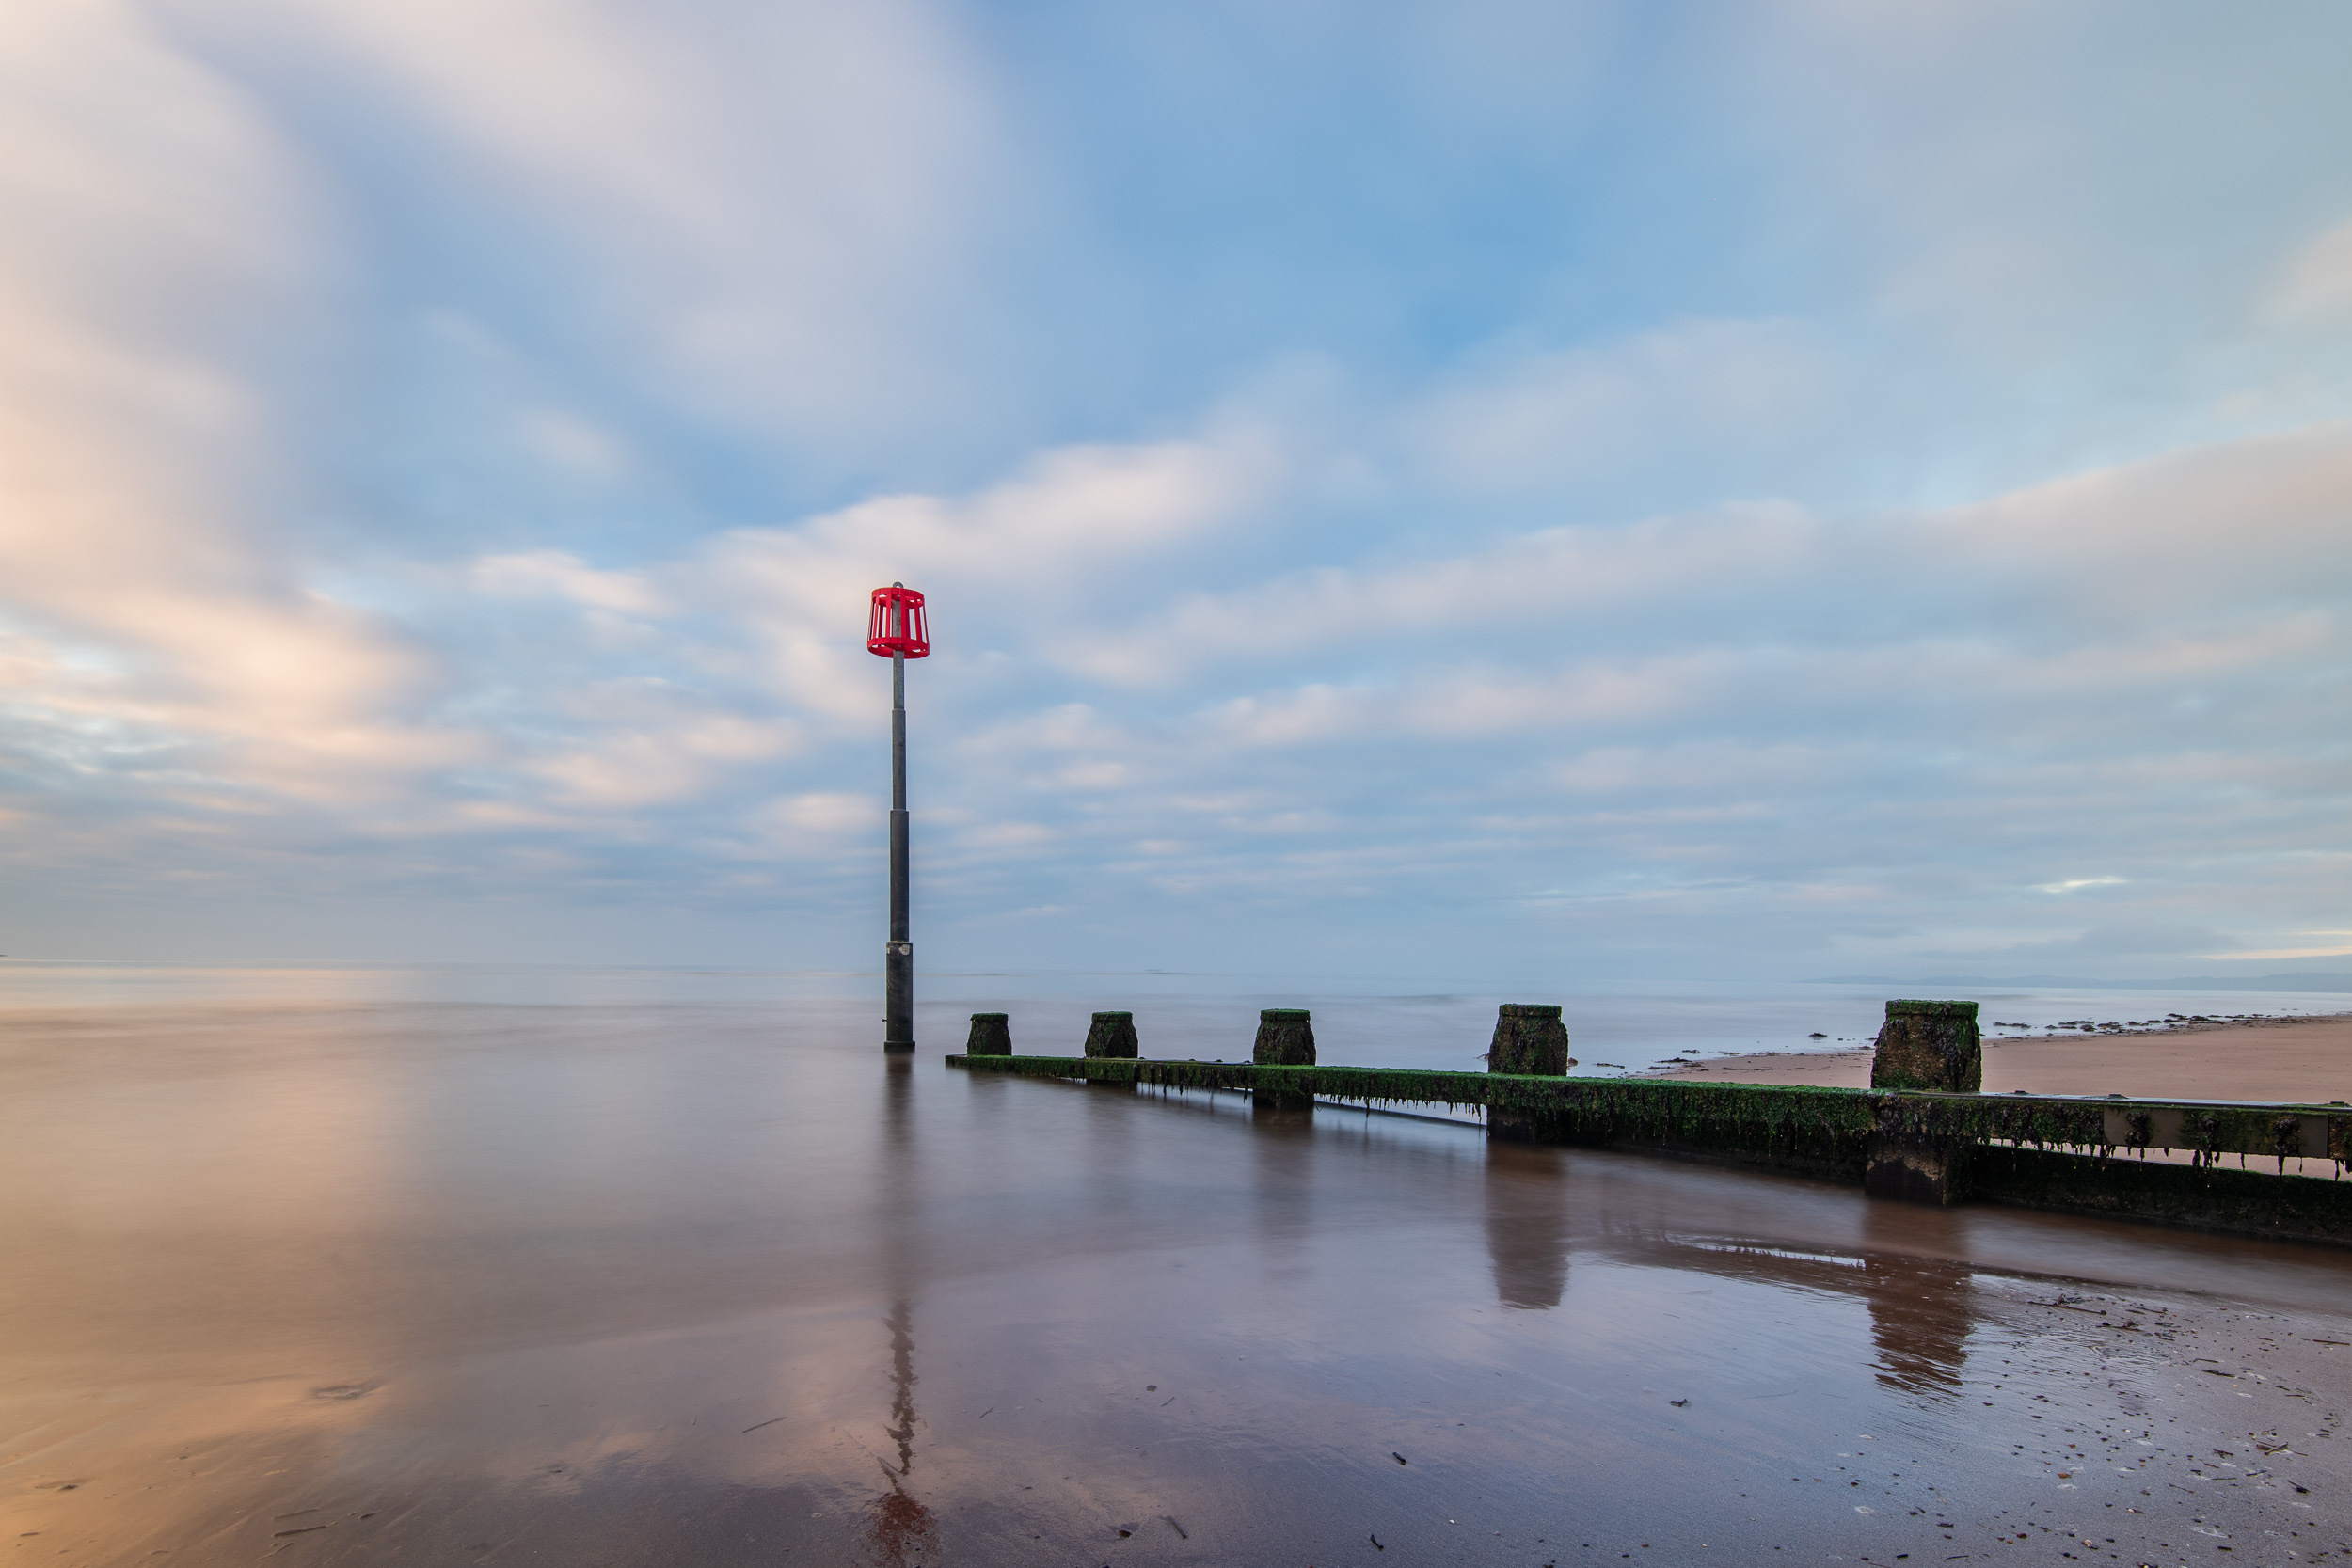
Dawlish Warren Sunrise #1, Devon - Nikon Z7, Nikkor 14-30m f/4 at 15mm, f/13, 5 secs at ISO 64, Kase K9 CPL.
Dawlish Warren Sunrise #2, Devon - Nikon Z7, Nikkor 14-30m f/4 at 19mm, f/13, 10 secs at ISO 64, Kase K9 CPL.
Dawlish Warren Sunrise #3, Devon - Nikon Z7, Nikkor 14-30m f/4 at 25mm, f/13, 8 secs at ISO 64, Kase K9 CPL.
Dawlish Warren Sunrise #1, Devon - Nikon Z7, Nikkor 14-30m f/4 at 20mm, f/13, 0.4 secs at ISO 64, Kase K9 CPL.
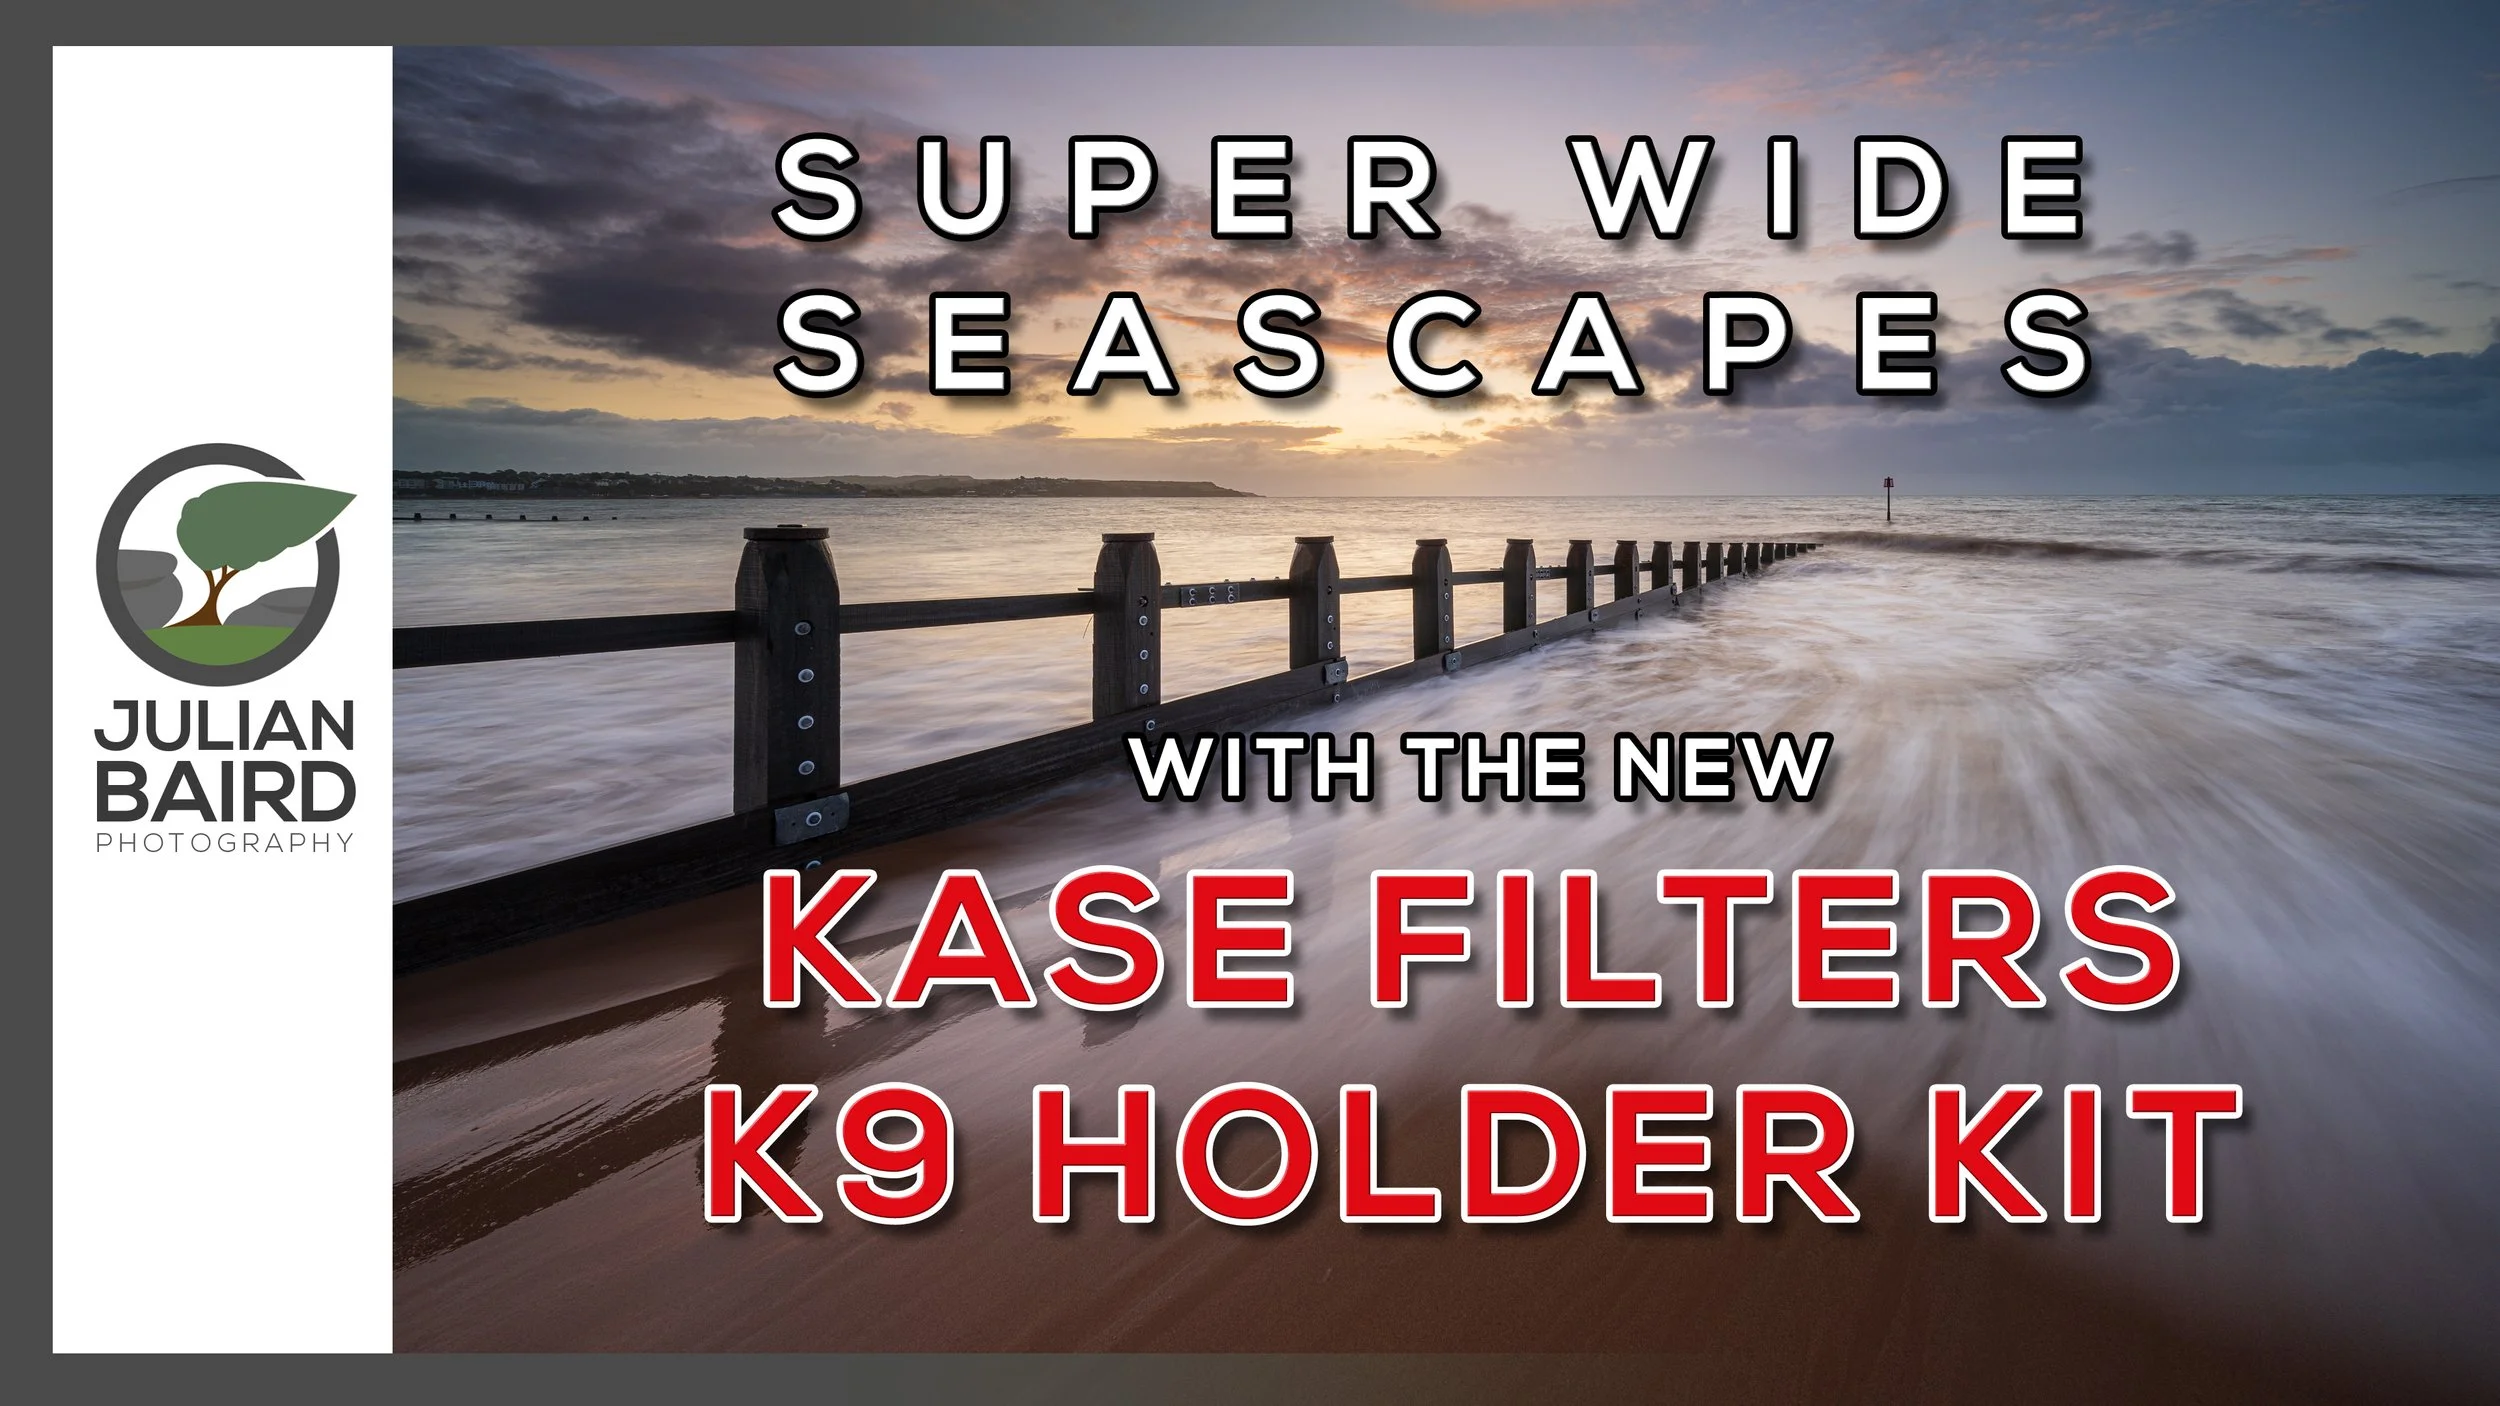
Super Wide Seascapes with the Kase Filters K9
In the blog this week I head out to one of my favourite coastal locations with the new Kase K9 filter holder and polariser to capture some super wide seascapes.
Switching to the Kase Filter System
Back in July I shared with you my thoughts on the Kase Filter system. I had made the switch from Lee Filters to Kase Filters back in late 2018, but I wanted to give them a proper test before I told you what I thought about them. If want to see that video and see the images of Boscastle harbour that I captured that beautiful summers evening then check out this blog post here.
Going from Kase K8 to the Kase K9 Filter Holder
As I said in that video, I was very happy with my Kase filter system including the K8 filter holder and slim polariser. I know nothing is perfect but I honestly didn't think there was room for improvement with the K8. That was all true until I picked up a Nikon Z7 with the Nikkor 14-30 mm f/4. With my previous wide angle lens, the Nikkor 16-35 mm f/4, you could happily shoot at 16 mm with the K8 and polariser with no vignetting. However, at 14 mm on the Nikkor 14-30 mm with the K8 and polariser, you could get a little bit of vignetting (the same applies for the Sony GM 16-35 mm.
So when the team at Kase Filters UK told me about the improvements they had made with the K9 and asked if I'd be interested in trying it out I jumped at the chance. I was keen to put this new K9 filter holder and polariser to the test but I needed a suitable location. Where could I shoot super wide angle images that need a polariser? Dawlish Warren beach of course!
Super Wide Seascapes
The removal of vignetting at 14 mm isn't the only improvement to the K9, there are a number of other minor, but very welcome improvements as well. If you want to know what they are, or if you should upgrade to the K9, then check out the video below:
When I got my Nikkor 14-30 mm f/4 lens I didn't think I'd notice that extra 2 mm or use it that often, but as it turns out I really appreciate it. Not only does it give me more creative options in certain scenarios, but the image quality and sharpness, particularly around the edges seems to be much improved over my trusty old 16-35 mm f/4. It's also good to know that I've also got a filter system that can make the most of those super wide angles and help me create images like this:
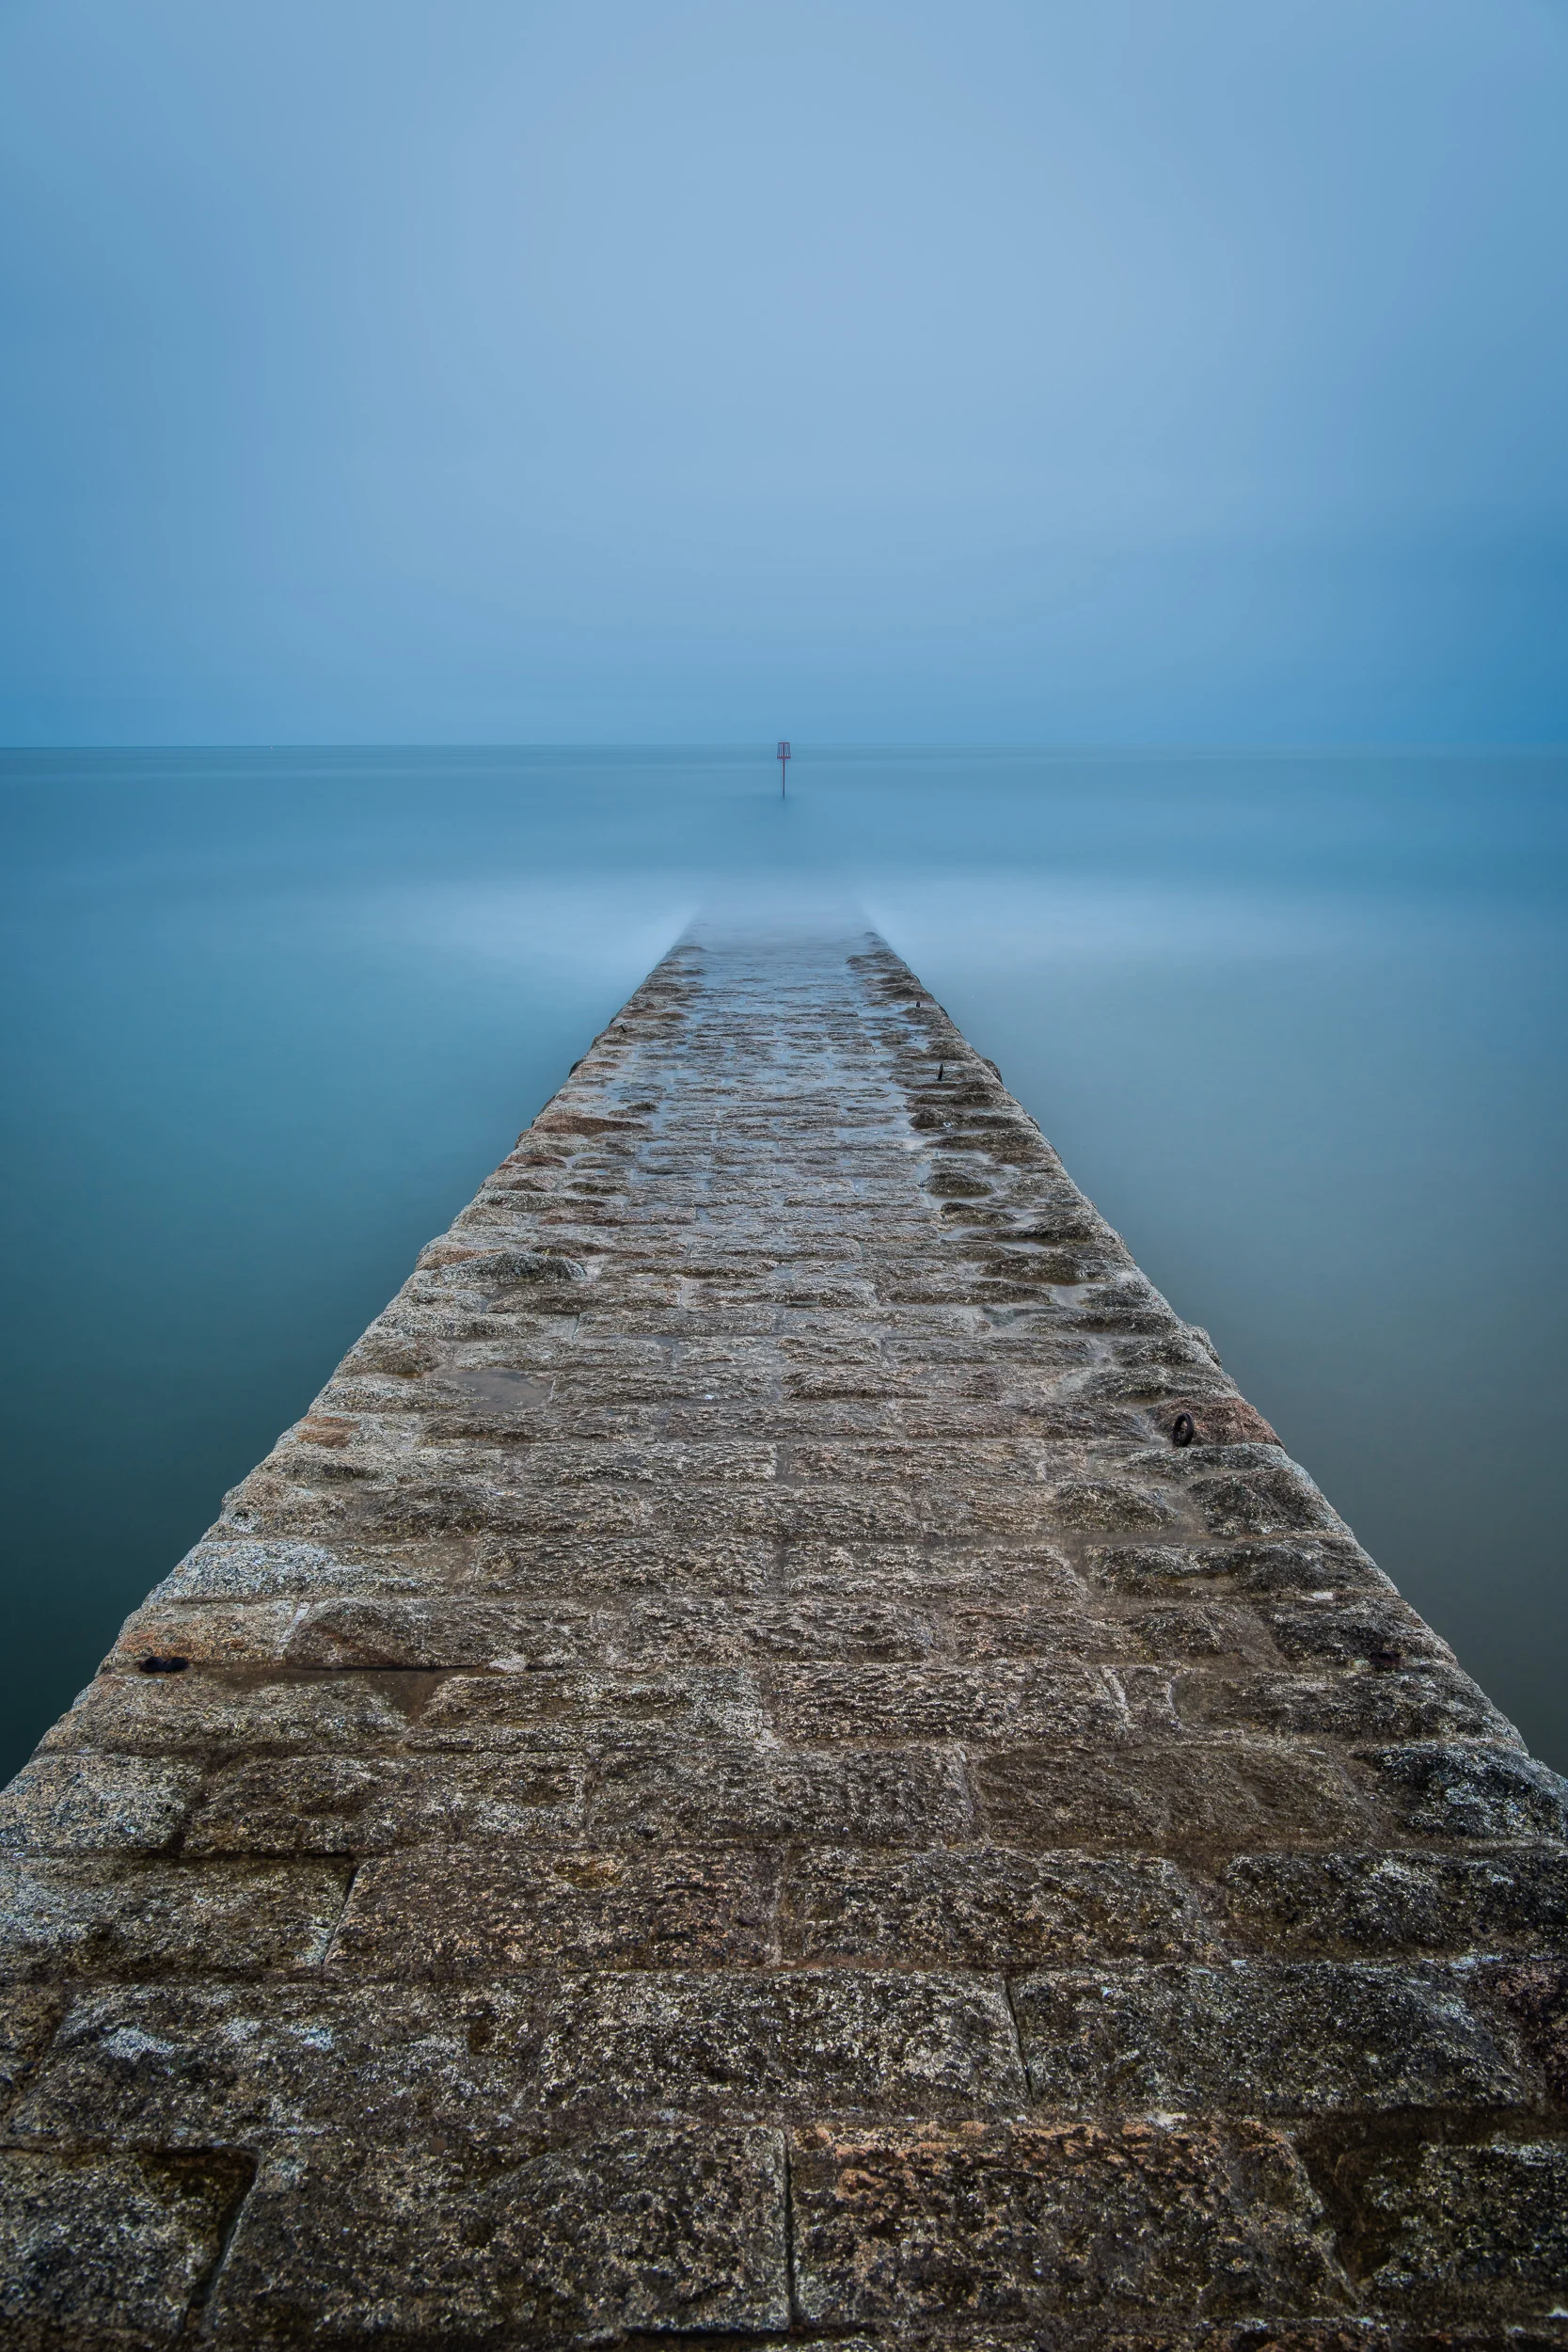
Dawlish Warren Sunrise #1, Devon - Nikon Z7 with Nikkor Z 14-30 mm f/4 at 14 mm, f/11, 1.6 sec at ISO 64, Kase Filters K9 holder, CPL, and ND grad.
Dawlish Warren Sunrise #2, Devon - Nikon Z7 with Nikkor Z 14-30 mm f/4 at 14 mm, f/13, 1 sec at ISO 64, Kase Filters K9 holder, CPL, and ND grad.
I hope enjoyed this quick look at the K9 and the images I captured that morning on Dawlish Warren. If you've got any questions about the Kase Filters system, the K9 or the images I captured let me know in the comments below.
A Quick Word on Moving to the Kase System

Since moving to the Kase Filters system a number of regular readers of the blog and viewers of my YouTube channel have asked about how easy it is to move from another filter system to Kase. Well, the good news is that if you are coming from another 100mm based system such as the Lee100 Filter System, most of your existing ND and ND grads should work just fine in the K9 or K8 holder.
The Lee Filters range of Stoppers, which have foam on the inner edge, need to be slotted in with the foam facing outwards (as shown in the image).
Kase circular polarisers (CPLs) are designed specifically for each of their filter holders so you probably won’t be able to use a CPL from another manufacturer. The good news is that the K8 and K9 filter holder kits come with the correct CPL for that holder.
I appreciate that changing filter systems can be costly and the need to gradually transition is an important one so I hope this information is useful for you. I would of course recommend you plan to replace your ND and ND grads with Kase equivalents as Kase filters have some useful benefits (which you can hear about in the video below).

Dawlish Warren - Three in a Row
Is there any benefit to going to the same location three times in a row? In the blog this week I find out.
Let me start off by apologising. I know this is now the third blog post in a row to feature Dawlish Warren but because of some not very interesting reasons, it's the only place I've managed to get out to photograph recently. I also have a special blog post from Dawlish Warren to share with you in a couple of weeks time as well! However, I will be mixing things up over the next few weeks. I've got one more blog post on a local location before I head to Scotland for a week of uninterrupted photography, so expect plenty of interesting blog posts, photos and videos from that trip!
After last weeks blog post from Dawlish Warren where I talked about becoming complacent with my compositions, I was determined to try a little harder this time out. I wasn't sure what to make of the weather forecast. One weather forecast was predicting dry conditions and high clouds, while another was saying overcast and showers Regardless of the weather I thought this was going to be my only opportunity to get out with the camera this week so I decided to go for it anyway.
I arrived at Dawlish Warren a little earlier than normal so I sat in my car and enjoyed the cup of coffee that I had bought from the petrol station on the way there. You simply can't beat the feeling of that first cup of coffee in the morning, so as I walked towards the beach I already had a bit of a skip in my step. As I walked along the beach and breathed in the sea air I decided that this was indeed a fantastic place to watch the start of a new day.
Caffeine highs aside the weather was actually a mix of the two forecasts. There were some great looking patches of sky and some big rain clouds kicking about. However, as is often the way, there was a big bank of thick cloud on the horizon where the sun was going to rise. No vibrant morning light for me. Though I knew I probably wasn't going to get any amazing pictures, I thought I would use the time constructively and work on some compositions. This is all good practice. I'd rather work out some new compositions during average light rather than when the conditions are amazing. Better to practice when there is less pressure.
So was this third consecutive trip the most productive? I'm not sure, so I'd be interested to hear your thoughts. Here is the image from this week, plus the other two from the previous weeks.


I personally don't have a favourite. They all have different qualities and minor issues. For me at least, it's only by looking at them all together do they deliver in a completely different way. While no one image is a stand out image, by shooting the same location in 3 slightly different ways under 3 slightly different weather conditions I have increased my working knowledge of this location. I can see from the photographs which style of image works for a certain combination of gryone and weather. This means I can be more effective and efficient for future visits. I can use my knowledge of the location to create a composition that is suited to whichever groyne I'm shooting and the weather. Hopefully, this will result in me capturing better images.
I said at the start of this blog post that I wanted to apologise for the 3rd Dawlish Warren blog post in a row, but by writing this very blog post I've gained a new perspective and that’s something that I didn't expect.
I'll see you next week when I promise you that the blog post won't be about Dawlish Warren.

From Dartmoor to Dawlish
In the blog this week, I head to Dartmoor to shoot sunset, and then the following day head to Dawlish Warren to shoot sunrise.
A Good Time of Year
Late September is a good time for landscape photography. Sunset isn’t too late, and sunrise isn’t too early. This means I can do both back to back without feeling like it just killed me. I still remember back in July this year when I photographed Daymark tower for sunset and then Start Point for sunrise. While I had a lot of fun with the friends that joined me, the late finish and very early start just about killed me.
When some welcome settled weather came in recently, I thought I would maximise my shooting opportunities and go out and photograph both sunset and sunrise. But where would I go?
Dusk at Dartmoor
As is normally the way, I was, of course a little short of time so I had to go somewhere local. Fortunately for me, I live near Dartmoor so I’m a little spoilt for locations on my doorstep. Though the weather was settled, it was looking like there would be little in the way of cloud.
I had a number of ideas of what to shoot including the view from Rippon Tor and Honeybag Tor, but the conditions just weren’t going to be right for those elevated viewpoints. I remembered that Haytor Rocks often gets the evening light so I decided to photograph it from Saddle Tor. By photographing from Saddle Tor I could position Haytor Rocks above the horizon and into the only real interesting part of the sky that evening.
Haytor Rocks at Dusk, Dartmoor, Devon - Nikon D850, Nikkor 24-70 mm f/2.8 at 62 mm, 1/3 sec at ISO 64, f/11. Lee Filters ND Grad, single image crop at 6:17.
The image I took is actually a panoramic crop from a single frame. My original composition had Haytor in the lower third of the frame with the rest of the frame being taken up by the sky. My original “big sky” shot might have worked a little better if there had been a bit more interest in the sky, but the lower band of haze in the sky was the only area to get colour. As it turned out, I rather like the panoramic crop so can be reasonably happy with the final output.
Dawn at Dawlish Warren
The morning weather forecast for the following day looked to have a bit more cloud so I decided to head to one of my favourite locations, Dawlish Warren. I tend not to visit Dawlish Warren during the summer months but now sunrise isn’t so early I decided it was time to visit my old friend.
Shooting at dawn is one of my favourite times of the day. There is a sense of excitement as the sun starts to rise and deliver some of its magical morning light. On this morning though, that display of golden light probably wasn’t going to happen. You can plan all you like, check tides, and look at weather forecasts, but if a bank of cloud happens to position itself in the wrong location, all that amazing light you were looking for can be lost.
It’s important to remember though that good morning light can occur 30 minutes before and after sunrise. Even though I didn’t get the best of the light as the sun approached the horizon, I’m glad I stuck around to capture this long exposure.
Into the Sea, Dawlish Warren, Devon - Nikon D850, Nikkor 24-70 mm f/2.8 at 48 mm, 339 seconds at ISO 64, f/11. Lee Filters Circular Polariser and ND Grad,
While this image was captured after sunrise, the long exposure helps capture what light there was and the calmness of the ocean that morning.
It’s always fascinating to see how other photographers interpret the same scene so I was really interested to see how Neil Burnell, who was with me that morning, shot the same scene. Check out his Instagram post to see his take on the beach that morning.
What is your favourite time of day to shoot? Do you use techniques like ICM or long exposures to create a sense of mood? Let me know in the comments below.

Dawn with Danks - A Mini Adventure with Gareth Danks
In the blog this week I share with you vlog I made when fellow photographer and YouTuber, Gareth Danks paid me a visit. We headed down to the south Devon coast for a bit a coastal photography and a chat.
Meeting Gareth Danks
I've been following Gareth Danks on YouTube for a while and we briefly met up at The Photography Show earlier this year. At the show, we discussed the idea of meeting up to do some photography but finding a date we could both do proved a little tricky.
As spring came around and the days got longer, the number of opportunities to get out with the camera also increased. So when Gareth announced he was going to be making a visit to Devon we thought it would be a great time to meet up. We agreed to shoot sunset on Thursday evening and then shoot sunrise the following day.
Our Adventures
The plan was set and the day soon came around. In the following videos, you can see exactly what we got up to.
The first and only video I made was of the Friday morning shoot at Dawlish Warren and Dawlish. You can see it here:
For an alternative take on the morning, check out Gareth's video from Friday morning:
And finally, if you want to see what we got up to on Thursday evening on Dartmoor, you can see Gareth's video here:
I hope you enjoyed all those videos. I think we both have a similar style when it comes to our vlogs so it was really easy to mix up the photography, shooting my video and appearing in his vlog. Though it was only a short meetup, it was a mini adventure to remember!
My Photographs
You will have seen my photographs from the Friday morning in the video, but as always I like to share them here on the blog as well.

Nikon D850, Nikkor 16-35 mm f/4 at 16mm, f/13, 240 secs at ISO 64, Lee Filters circular polariser and 10 stop ProGlass IRND.
Nikon D850, Nikkor 16-35 mm f/4 at 20mm, f/11, 80 secs at ISO 64, Lee Filters circular polariser, 2 stop hard edge grad and 10 stop ProGlass IRND.
I do hope you also watched Gareth's video. It's really interesting to see how another photographer shoots the same scene at the same time. It was beneficial for me as watching Gareth setup his compositions got me to think about my own compositions.
Do you meet up with other photographers? Do you find yourself learning from them or trying something new out? Let me know in the comments below.

Shoot, Print, Surprise!
In this blog I head to Dawlish Warren to shoot a video I'm calling Shoot, Print, Surprise! But what is the surprise? Well, you'll just have the watch the video to find out!
Back at Dawlish Warren
In my latest video, I headed to Dawlish Warren to shoot some dawn seascapes. For those of you who have been following my blog for a while now, you may well be wondering if that is the only location I've ever photographed! I admit it though, I do like going there to capture images.
There are two good reasons for this. Firstly, it's close to home for me. This means that during the winter months when my time is particularly short, it's nice and easy for me to get to. It also offers a variety of different compositions to suit different conditions. With 15 or so groynes of different styles, and long beach it works well with both high and low tides. So, you can virtually go there in any conditions and get an interesting image.
I've mapped out the 15 groynes in a custom google map. It's still a work in progress, but the custom map also has recent images of each groyne so you can see what they look like before you get there. You can view the map here, and you can see how to make your own map here.
Shoot, Print, Surprise!
So back to the topic of the video. Well, the title should give you a good idea of what the video is about. In the video, I head out to Dawlish Warren to capture some dawn seascape images and then I head home to print some of them off. But what is the surprise? Well, you'll just have to watch the video to find out!
Well, I do hope you enjoyed that video, and of course the surprise element. Did you enjoy the surprise? What are your thoughts on the surprise topic? Let me know in the comments below.
The Photographs
As always here are the photographs that were featured in the video.
Nikkor 16-35 mm f/4 @ 34 mm, f/11, 57 seconds at ISO 100, Lee Filters Circular Polariser, ND grad and 3 stop IRND.
Nikkor 16-35 mm f/4 @ 24 mm, f/11, 1.3 seconds at ISO 100, Lee Filters Circular Polariser, and ND grad.

Bad Weather Photography
In the blog this week I remember to "embrace the grey" and head out to Dawlish to get some photos in less than optimal conditions.
Time to Embrace the Grey
I once went on a Nikon School one day workshop with Jeremy Walker. I remember the weather not exactly being great but one thing stuck in my mind from that day. As Jeremy was laying out the plans for the day he already knew it was going to be an overcast day. His advice was to "embrace the grey".
I did just that with this photograph:
Banjo Pier, Swanage. Nikon D750, Nikkor 16-35mm f/4 at 28mm, f/11, 30 secs, ISO 100, Lee Filters Big Stopper.
Now I may have mentioned once or twice on the blog recently that the recent weather has been playing havoc with creativity. So when the weather forecast for the week was looking grim I decided enough was enough and I was going yet again embrace the grey!
I needed to find an appropriate location to make an image but when I remembered about the stone groynes at Dawlish my mind was set. So off I headed with a clear vision of what I wanted to capture.
Despite the weather. No hang on, because of the weather, I really enjoyed myself at Dawlish. It made me look at the location with different eyes.
Here's what I photographed:
Nikon D850, Nikkor 24-70mm f/2.8 VR at 31mm, ISO 64, 5 minutes at f/11, Lee Filters Circular Polariser and Big Stopper.
If you want to see how I went about capturing the image, here's a short video I shot while I was there...
So do you have a favourite bad weather location to take photographs? Is there really such thing as bad weather for photography? Let me know in the comments below.
PS.
On a little side note, I'm very happy to say that Adobe has now updated Lightroom to support the Nikon D850. This means I no longer have to convert the files to DNG format first. I can now import the NEF (raw) files straight from my memory card. I was so happy about this I posted a video on my YouTube channel.

Getting to Know Dawlish Warren Again
In the blog this week I tell you about a frustrating couple of weeks with my photography and I return to Dawlish Warren to see how the beach looks now the works have been completed.
Why Dawlish Warren Again?
Over the years I have photographed the beach a Dawlish Warren numerous times. I've written about it my blog a few times and it's featured on my YouTube channel a couple of times. So why do I keep going back here? The simple fact is that I love shooting there. Every time I go there the conditions are slightly different and so I get a slightly different shot.
It is also one of the closest photography locations I have to home. I'm no stranger to driving for over 90 minutes to get a shot in Cornwall, but Dawlish Warren is less 30 mins from home making it nice and easy to get to. It also works well as a sunrise location pretty well throughout the year. It doesn't seem to matter if it's a grey overcast morning or an epic sunrise, there always seems to be a shot to be had. So it's close to home, works well throughout the year and in varying weather conditions. What's not to like!
Desperation and Frustration
For those of you who have read my blog over the last couple of weeks, you'll know that I've recently moved from the Nikon D750 to the Nikon D850. This change in camera represents a step up in camera technology for me and when I made the decision to buy one (not a hard decision I might add), I made a commitment to make the most of my purchase.
So when the D850 arrived on my doorstep on the day of release I was very keen to get out with my latest bit of gear. However, the photography gods have not been kind to me since the arrival of the D850. Photography is a bit of an all-consuming passion for me but I still have to balance my desire to go out with the camera, work a full-time job and being a family man.
Over the last couple of weeks, the weather in Devon has been fairly unsettled. It's not that there hasn't been great weather for photography, it's just that it never seems to have been on the days when I'm free to go out and take pictures. It's not been a total disaster. I managed to create a D850 video and head out to Trebarwith Strand, but I've been desperate to get out way more than that!
That's it! I'm going out!
As my working week progressed and the days came and went without out any camera action I decided that I would go out at the weekend instead. When I checked the weather forecast for the weekend it was generally overcast with light showers. I was damned if I was going to let another weekend pass me by, so I was going to go out regardless of the weather.
I considered some woodland locations, but I thought I might leave those locations for a couple more weeks until the autumn colours really kick in. Then while I was scanning through my custom locations map <insert link> I remembered about good old Dawlish Warren! (If you haven't seen my video on creating a custom Google Map for you photo locations you really should - my map is always a great source of inspiration!).
Not only is Dawlish Warren a great location to shoot but I was also keen to see how the beach had changed since the end of the Beach Management Scheme works. When I visited there for my Summer Solstice video the beach was having a significant amount of work being done on it. Some of the groynes had been replaced and repaired, and more sand was being introduced to the beach areas.
Now the works have been completed I felt it was time to go and reacquaint myself with Dawlish Warren. I was fairly also sure I could get an image despite the forecasted cloud cover.
A New Dawlish Warren
So has there been a significant change in the beach? Here is the image I took so you can see for yourself.
Nikon D850, Nikkor 16-35mm f/4 @ 22mm, f/13, 90 seconds, ISO 64, Lee Filters Circular Polariser and ND Grad.
For those who know Dawlish Warren beach, it may look just the same but most of the groynes have been repaired and strengthened giving them a slightly different look when viewed up close. The woodwork looks fresher and the supporting poles are thicker. To casual beach walker they may look the same but having photographed them for so many years I think they could make for some interesting new photos.
With that in mind, I will be heading back to Dawlish Warren again to shoot one of my 5 Minute Photo Adventure videos there. Though I have featured Dawlish Warren in this video and this video I think it's time to make a dedicated video now that the beach works have been completed. Now that I can automatically GPS tag my images on the D850 I hope to also start logging some accurate location data so I know which groynes I have photographed and which groynes I haven't.
So have you photographed the groynes at Dawlish Warren beach before? Have you been there since the beach works have been completed? What are your thoughts on the updated groynes? Let me know in the comment below.

A Positive Start to 2017
On my first trip out with the camera for 2017, I visited one of my favourite locations, Dawlish Warren beach. While the conditions didn't produce inspiring results it was still an important trip out with the camera. Read why in this blog post.
Stay at Home or Risk It?
For me, 2016 was a good year for photography. I got out a lot with the camera and when I reviewed My 5 Favourite Images of 2016 I was very pleased with the results. However, when I went out and Said Goodbye to 2016 in Dorset, the results from my final shoot of the year weren't exactly epic.
One thing I don't do is the let the disappointment of the last shoot put me off the next. Especially when it was the weather or conditions that stifled my creativity. When 2017 came around I was soon looking for the next available slot to get out there with the camera. To say that I was keen would have been an understatement.
It was this keenness to get out there that largely overrode my better judgement of the weather forecast and just risk it. After all, weather forecasts can sometimes be pessimistic, and Dawlish Warren beach is just down the road. What else was I going to do? Sleep?
Being Optimistic
Despite the dubious weather forecast I headed off to Dawlish Warren beach, one of My 5 Favourite Landscape Photography Locations in Devon. Sunrise on the coast can often yield dramatic results, despite weather forecasts, so I drove there feeling optimistic.
However, even the strongest sense of optimism isn't enough to change the weather or light available. I did take a number of frames, adjusting composition and exposure times, but sometimes the magic just isn't there. I feel this image is probably the best of the morning.
Nikon D750, Nikkor 16-35 f/4 at 29mm, f/8, 205 seconds, ISO 100, Lee Filters polariser, Little Stopper and ND Grad. Processed in Lightroom CC (including 4:5 crop).
A Wasted Trip?
So you may ask me if it was a wasted trip? Should have I stayed in the warmth of my bed for an extra hour? Well, no, of course not. Regular readers of my blog will know often I talk about the value in Practising The Craft of Photography. Though the conditions weren't what I hoped for, I want to make sure that when the conditions are amazing I'm prepared!
Being prepared means a couple of things to me. Firstly, I need to know my equipment. Can I set up my camera correctly and even more importantly, can I adjust the settings quickly to support changes in light and conditions? I also need to have my "photographic brain" fully engaged and exercised. I took a small break from landscape photography last year and it was amazing how quickly I had become rusty with finding and setting up compositions.
So while the image isn't going to win me any awards, my time at Dawlish Warren was still time well spent. The camera was out of the bag and I was pushing buttons, moving dials, checking histograms and using filters. I was also thinking a lot about compositions. What will my image look like if I move up, or left a bit, what if I change my lens? I was exercising my brain in preparation for the day when I do get those epic conditions.
So how has your 2017 started? Have you been out with the camera? Let me know in the comments below.

Using the Super Stopper in Sidmouth
The Lee Filters Super Stopper isn't exactly a filter you would use every day but it does have its uses. Read about how and why I used for a shoot in Sidmouth in my this blog post.
Free At Last
In my last couple of blog posts I may have mentioned that I'm finding it difficult to adjust to the short winter days. Opportunities to get out with the camera seem to be few and far between. Last weekend was different though. I didn't have too much on and the weather was looking favourable for some landscape photography.
Sidmouth Inspiration
My first challenge was to find a suitable location that I could shoot. In reality it didn't take too long. My decision to shoot the coast at Sidmouth in South Devon was driven by two things. Firstly I was inspired to shoot there. I've spoken about the importance of inspiration before on my blog before and how useful it can be.
My inspiration to shoot Sidmouth came from two photographers, atmoorehead and Neil Burnell.. Both of them had been shooting the curling stone groyne at the east end of the beach. I liked the images they had created so I wanted to go there and put my own spin on the location.
Super Stopper Time
The 2nd reason for choosing Sidmouth was that it was a coastal location that would be ideal for testing out my recently purchased Lee Filters Super Stopper. I'm a big fan of Lee Filters and use the Little Stopper and Big Stoppers in a lot of my images. When the Super Stopper was first announced I have to admit that I didn't really see the point but after seeing some of the images produced by Mark Bauer with the Super Stopper I pulled the trigger and picked one up.
My original plan was to shoot some midday long exposures during a recent Lake District trip but given the challenging weather it wasn't really the best time to try out this 15 stop monster. However, as I was planning my trip to Sidmouth it soon became apparent that this could be the perfect time to give the Super Stopper a go. I would be arriving around 2.30pm when there is still plenty of light, the tide would be coming in, and the light from the west would be illuminating the groyne. My only slight concern was the lack of cloud in the sky. It was apparently going to be very clear but I could live without the perfect conditions!
Setting Up For a Very Long Exposure
When I arrived at my location in Sidmouth things were looking favourable. The sun, which was already relatively low in the sky, was illuminating the inward curve of the groyne rather nicely and the tide, which was due be high at 16:08, was already a good way up the beach. I was glad I had got there early as the area was busy with people and where I was going to shoot from was a bit of a one tripod only location.

Base image with no filters. (Image unprocessed).
So with my tripod out I got to work on my composition. I had originally thought I would go for a vertical composition but it soon became apparent to me that a horizontal composition would work best as it provided more room for the groyne to curl out into the sea and into some empty space. With my composition locked in I took my base image. My base image is the image I take with no filters so I can easily check it for sharpness and exposure. Being a coastal location I reached for my Lee Filters Polariser as this would not only take off some reflections from the surface of the sea but it also removed all the reflections from the groyne where the water had been splashing.

The addition of the polariser reduces the reflections on the groyne and brings out a little more detail in the sky. (Image unprocessed).
However, the addition of the polariser always lengthens the exposure by a few stops so I had lengthen my shutter speed from around 1/80 sec (at f//11) to 1/25. Though I was happy with the effect the polariser was giving I was already concerned about how long the exposure was going to be when I added the Super Stopper. Using the Lee Filters app on my phone I worked out that a 1/25 second base exposure with a Super Stopper would require a 21 minute exposure. For my first use of the filter I felt this might be too long, but a Big Stopper would only give me 40 second exposure (which was not long enough for the image I wanted)
I had two options. I could either open up the aperture or increase my ISO. While opening up the aperture would have decreased my exposure time, I would have lost the depth of field I was looking for so I increased my ISO to 400. This effectively gave me a Super Stopper exposure time of around 8 mins. Much more manageable.
The Results
With everything set I got to taking some really long exposures. I modified my composition a couple of times which meant going through the whole setup process again but using the Super Stopper was never going to be a fast process. I also had to gradually increase my exposure length as the amount of light decreased. However there is a certain sense of excitement with really long exposures. I was investing 8 to 10 minutes for each exposure and the sense of not knowing exactly how the image would look was exciting.
Final image (processed in Lightroom). Nikon D750, Nikkor 16-35mm f/4 at 26mm. 641 seconds at f/11, ISO 400.
A Small Critique
I'm very happy with the end result and it's the image I had envisioned when I started planning this shoot. However, it's not perfect. Though I was shooting at a time very close to high tide, it wasn't quite high enough. I would have liked there to have been no beach visible in the lower right side of the image. There was a high tide of 4.06m so on my next visit I will try and plan it for when it's a little higher.
However, tide height aside, all the other elements came together nicely. The time of day and time of year were perfect to allow the golden light of the sun to reflect of the west side of the groyne. It's very rare that everything is perfect so for a Sunday afternoon shoot I'm still very happy.
Why Not Just Use a Big Stopper?
You might be asking yourself why I didn't just wait for sunset and then use a Big Stopper. Why purposely shoot earlier so you can use a Super Stopper? Well, it all had to do with the light. As the sun set the quality of the light reflecting off the groyne was nowhere near as nice as it was 45 minutes before. In order to realise my vision of a long exposure I need to have that 15 stop ND filter. So yes, while it was a specific set of conditions that required the use of the Super Stopper, it would have been an image that would have either not been possible to get or would have been more difficult. The Super Stopper is probably never going to be a filter that I use a lot, but now that I have it and have seen how I can put it to use, I'm glad I have it.
So are you a fan of long exposures? Do you own the Super Stopper? Are your creative ideas driven by the location you are visiting or by a vision of the image you want to create? Let me know in the comments below.