

Lee Filters Little Stopper vs 6 Stop ProGlass IRND
In this blog post, I look at the differences between Lee Filters Little Stopper and their 6 stop ProGlass IRND. They are both 6 stop neutral density filters so what are the differences and which one should you buy?
Lee Filters
I'll be upfront with you. Ever since I bought my first filter set in 2007 (when I had a Nikon D80), I've only ever bought filters from Lee Filters. When I first started looking for a filter system, everything I read said that Lee Filters were the best. Pricey, but the best.
Over the years I've built up a reasonable size collection of filters from Lee. Up until now the only filter I have replaced was the original circular polariser for the new, slightly thinner landscape circular polariser. I've never had to replace a filter because of a fault and I still use the filters that I originally bought in 2007. So if you are looking for a comparison to filters from other manufacturers, I'm afraid this isn't it.
Goodbye Little Stopper and Big Stopper
With all that said I have just sold both my Little Stopper (6 stop ND) and Big Stopper (10 stop ND). These are filters I have used a LOT. So did I not need them anymore or did I buy ND filters from a different manufacturer? Of course not! All I have done is simply replace them with 6 stop and 10 stop ProGlass IRND filters from Lee Filters.
Apart from being more expensive than their Stopper equivalents how do these ProGlass IRND filters differ? Should you sell your Stopper filters and replace them? Do you need both Stopper and ProGlass IRND filters? In the video below I aim to answer all those questions!
Hello ProGlass IRND
As you'll have seen in the video my conclusions about whether these new ProGlass IRND filters are a must buy aren't clear-cut. It's difficult to give a general conclusion as everyone's needs and budgets are different. The fact that the ProGlass IRND filters don't actually replace the Stopper range also adds a little complexity to the decision.
So all I can really do is talk about my own decision to sell my Stopper filters and buy the ProGlass IRND filters. For me, it has very much been money well spent. I particularly like the lack of colour cast and vignetting. While both these can be corrected or enhanced in post-processing, I much prefer seeing a more neutral/accurate representation of the scene on the back of the camera at the time of capture. I also like the fact that calculated exposure times are far more accurate.
So have you bought any of the new ProGlass IRND filters? Would you consider replacing your Stopper filters? Do you use something other than Lee Filters? Let me know in the comments below.
Comparison Photographs
Here are the images from the video should you wish to take a closer look.
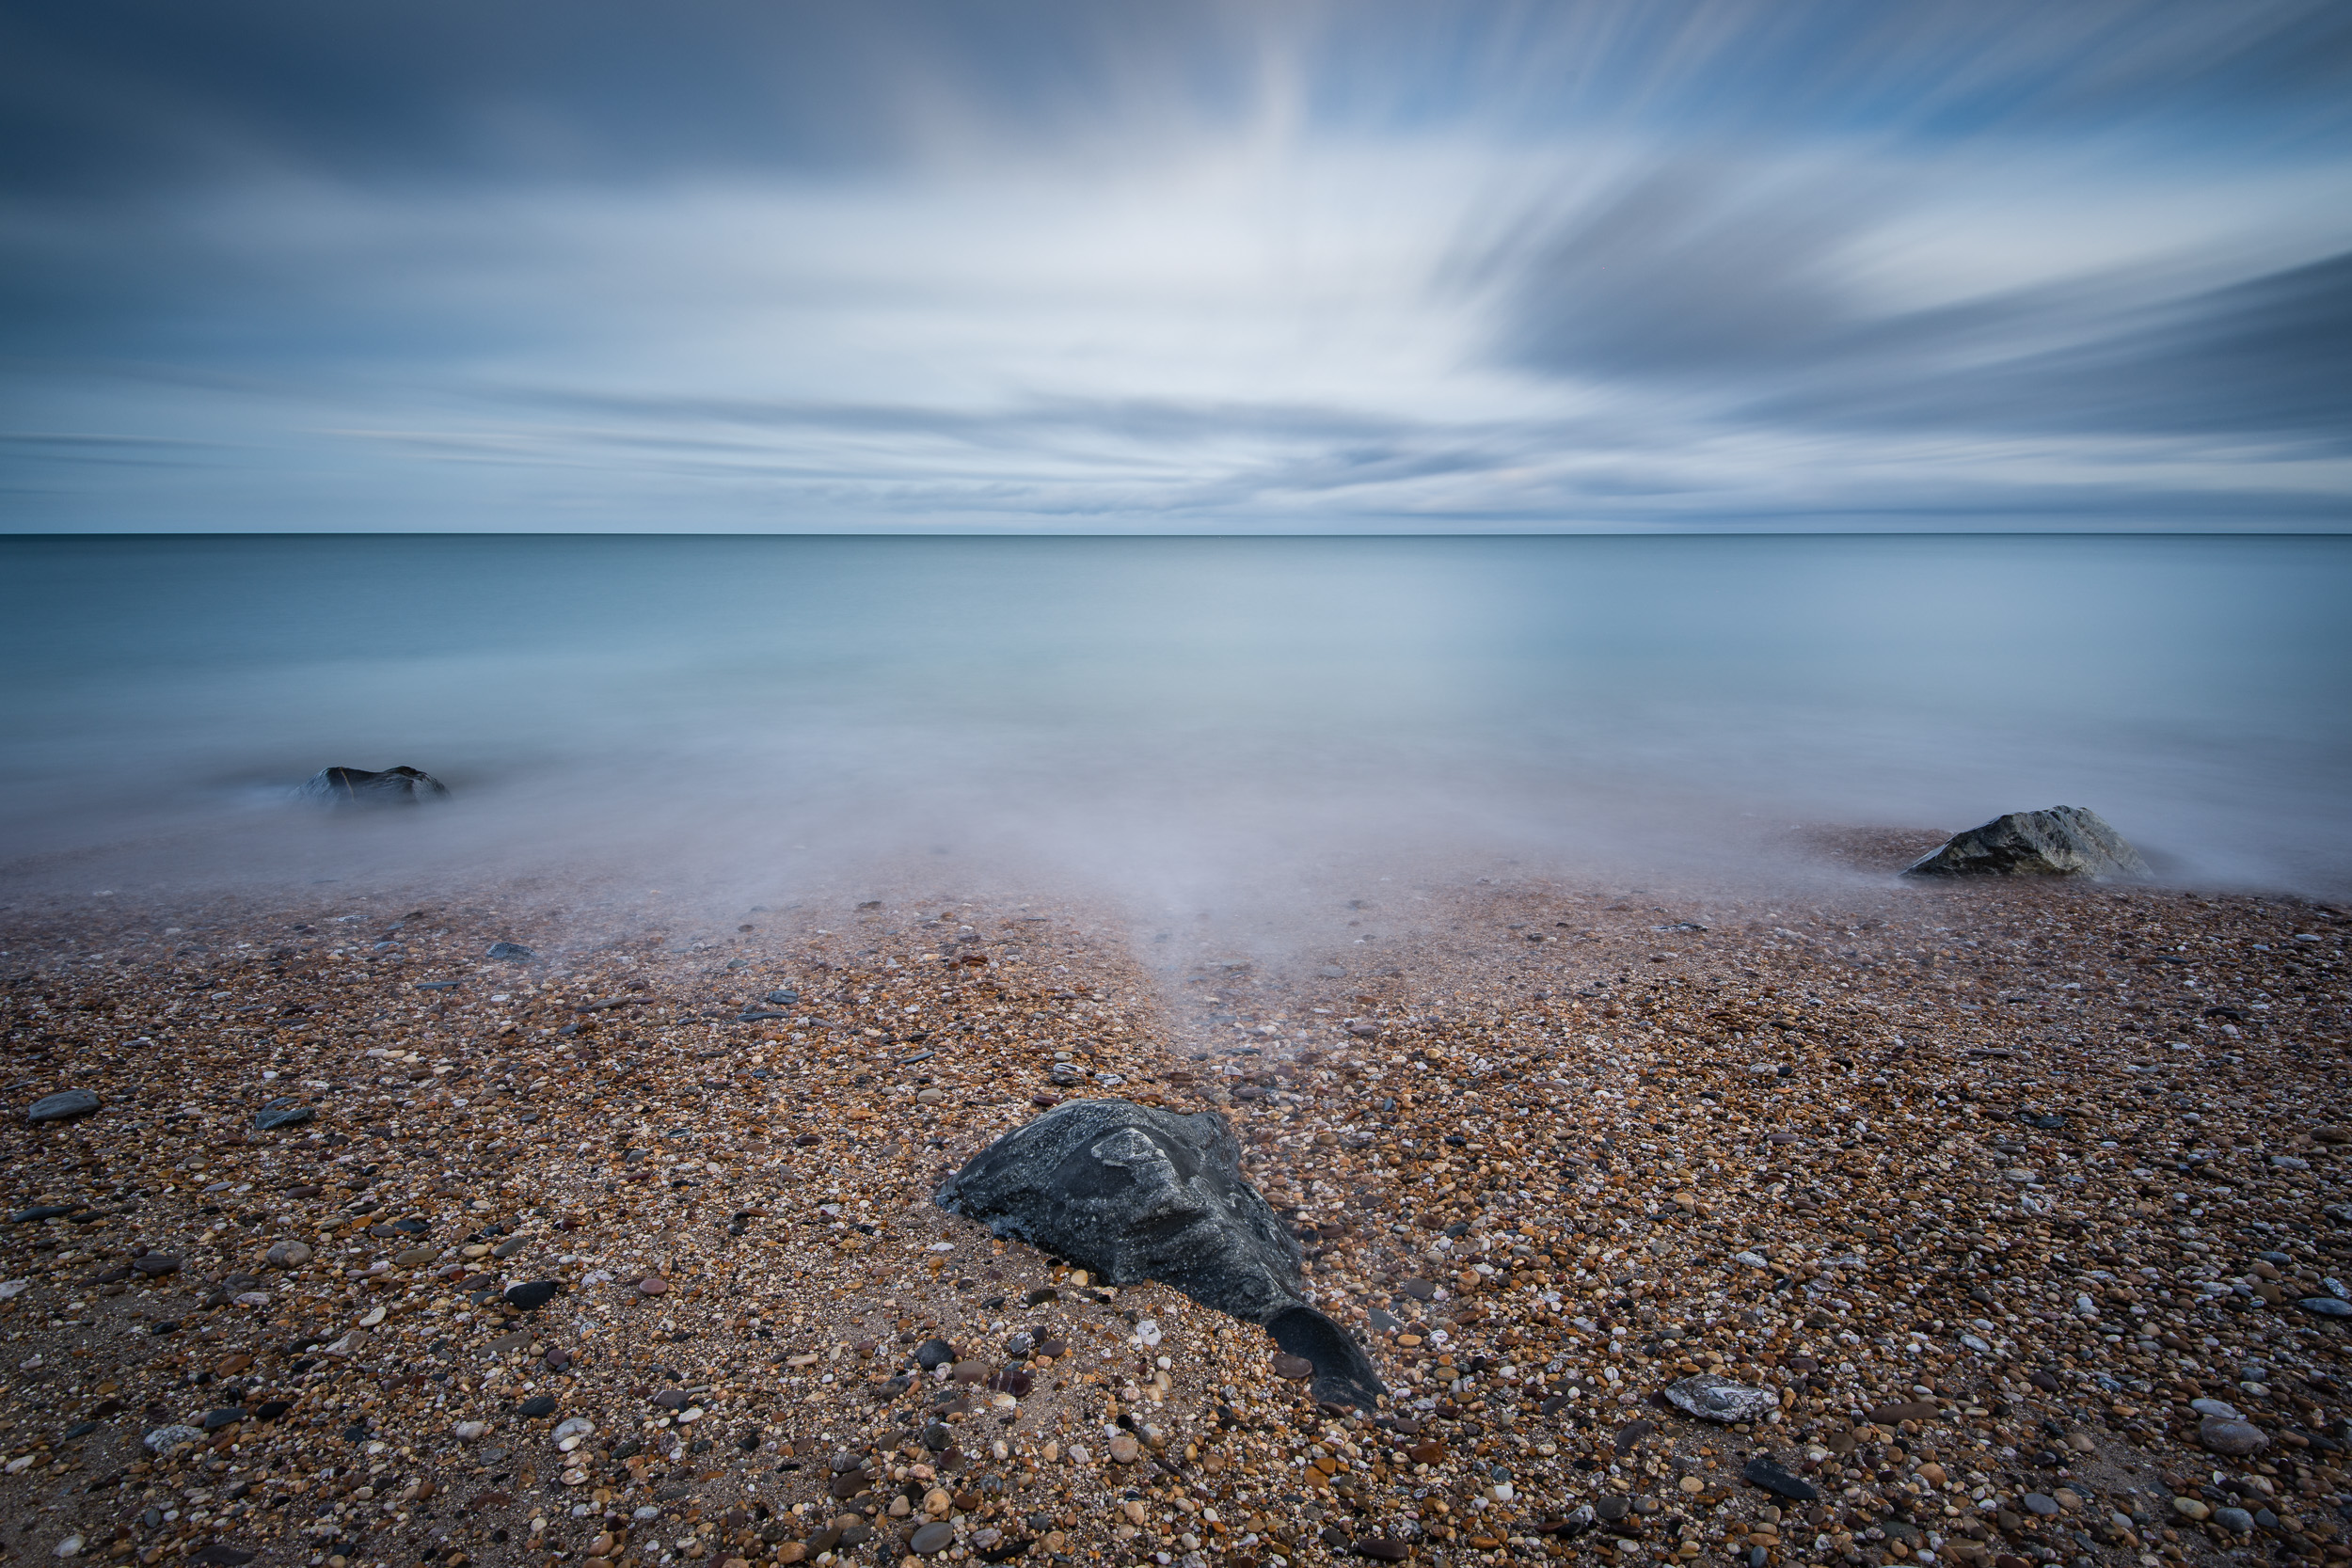
60 Second exposure with the Little Stopper. Unprocessed.
60 Second exposure with the 6 Stop IRND. Unprocessed.
60 Second exposure with the Little Stopper. Processed
60 Second exposure with the 6 Stop IRND Processed.

Winter Solstice Adventure
In the blog this week I share with you the highs and lows of landscape photography as I head out on winter solstice to capture some images.
The Longest Shortest Day
Back in June of 2017, I headed out with the camera to create some landscape images on the summer solstice. You can see the images I created that day along with the video I made by clicking here.
I really enjoyed that day so I knew that when winter solstice came along in December I was going to spend the day out with the camera. Being the shortest day of the year it shouldn't have been nearly as tiring as the summer solstice.
Unfortunately when winter solstice did come around the weather was grey and overcast. I had checked the weather forecast the night before and had planned my locations to suit the weather. I'm all for "embracing the grey", but a full day might well be a challenge too far even for me!
As with summer solstice, I spent the day capturing images and filming my experiences. It was definitely a tough day. Maybe I was tired, maybe I was feeling challenged, but one thing is for sure, it sure did feel like a long day. However, saying all that I did have some great experiences, and if you watch all the video you'll see something special happen right at the end.
Enjoy!
A Winter Solstice Gallery
As always I do hope you enjoyed watching my adventures. I tried to make the most of the weather conditions and the images I took that day both reflect my varying moods and the conditions I had to work with.
You'll have seen these images in the video, but here they are again in case you want a closer look.

Nikon D850, Nikkor 16-35 mm f/4 VR at 19 mm, 180 seconds at ISO 64, f/11, Lee Filters circular polariser and Big Stopper.
Nikon D850, Nikkor 16-35 mm f/4 VR at 19 mm, 180 seconds at ISO 64, f/11, Lee Filters circular polariser, ND grad and Big Stopper.

Nikon D850, Nikkor 16-35 mm f/4 VR at 18 mm, 180 seconds at ISO 64, f/13, Lee Filters circular polariser, ND grad and Big Stopper.

Nikon D850, Nikkor 16-35 mm f/4 VR at 18 mm, 8 seconds at ISO 64, f/13, Lee Filters circular polariser, ND grad and Little Stopper.
Nikon D850, Nikkor 16-35 mm f/4 VR at 17 mm, 4.8 seconds at ISO 64, f/13, Lee Filters circular polariser, ND grad and Little Stopper.
Well, I do hope you enjoyed those images and my winter solstice video. Did you head out for winter solstice? Have you had days where landscape photography has been both a joy and a drag? Let me know in the comments below.

Bedruthan Steps Photo Adventure
In the blog this week I share with you the story of my latest trip to Bedruthan Steps to photograph the coastal thrift. Not only will you see the images from that trip, but I also share with you my top tips for photographing Bedruthan Steps. And if that wasn't enough for you, I also share with you my latest 5 minute photo adventure video!
Why Shoot Bedruthan Steps
I have a great many locations on my custom Google map, many of which can be shot at any time of year. There are a few however that are best shot at particular times of the year. Bedruthan Steps on the north Cornish coast is one such location. It has plenty to offer the photographer with golden sand beaches (at low tide) and miles of dramatic Cornish coastline.
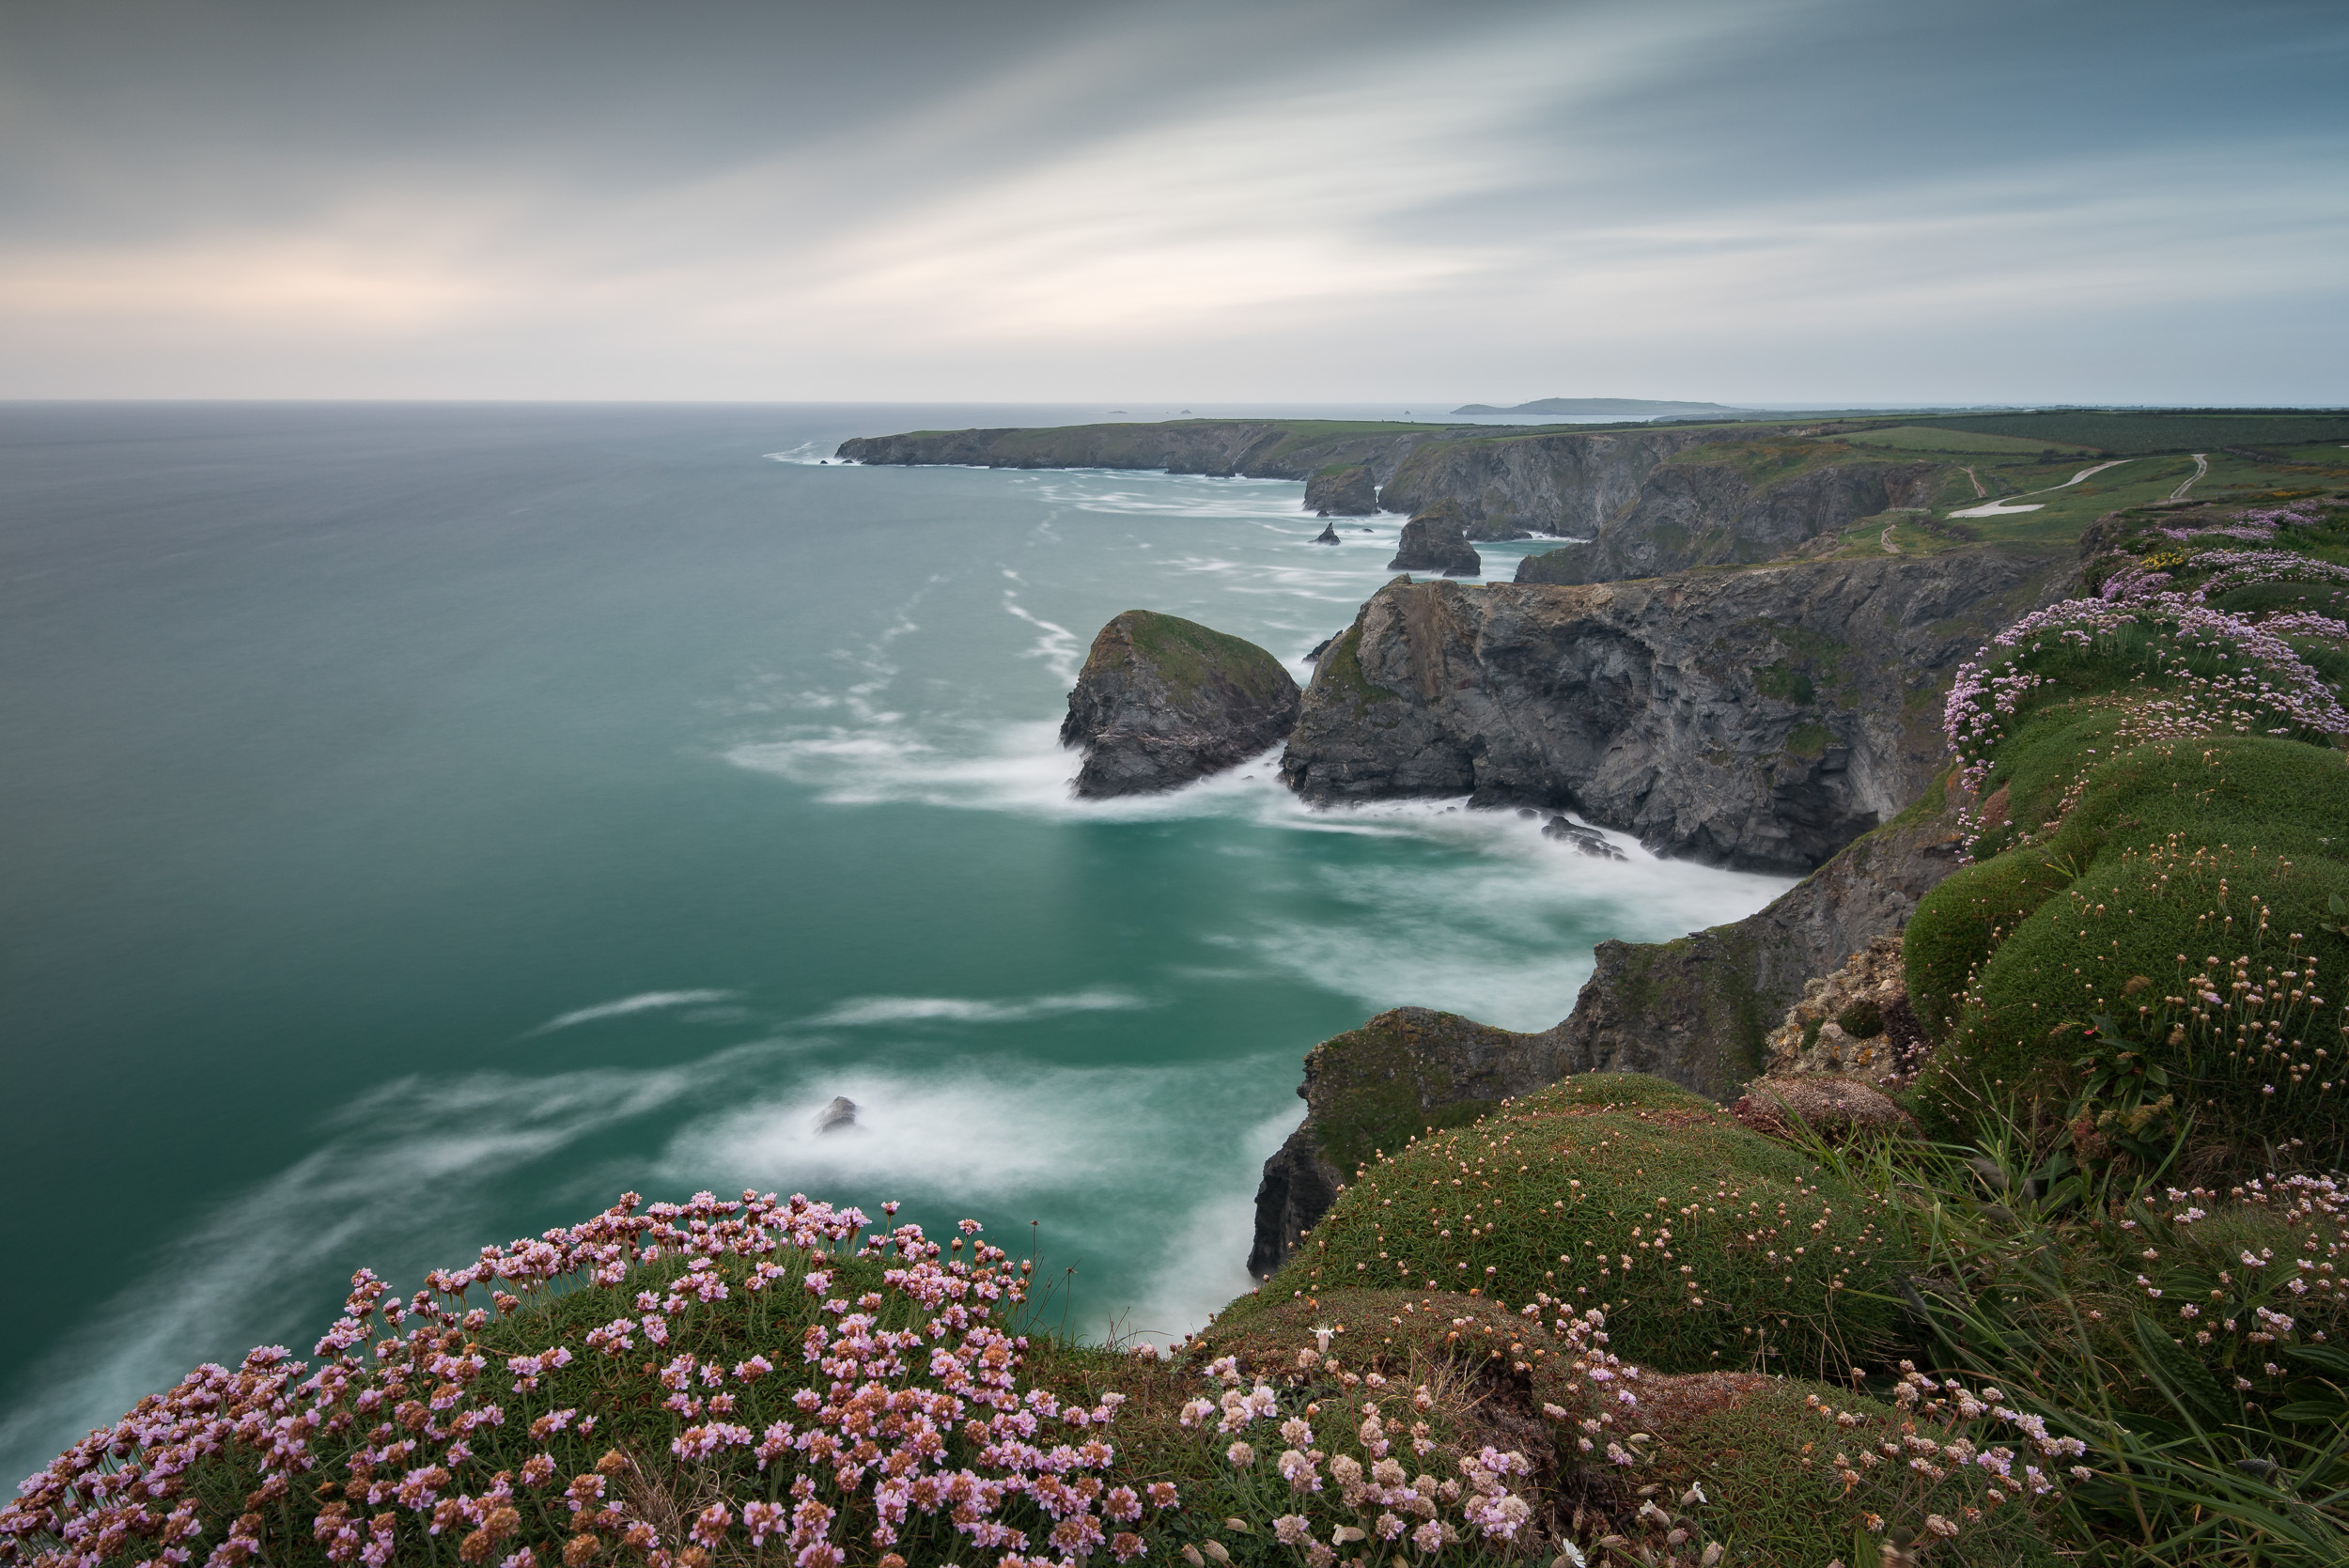
It's spring time though when Bedruthan Steps comes to life. Like many areas along the coast, springtime brings on the flowering of the thrift, a beautiful pink flower that likes to cling to the side of the coastal cliffs. If you can find a nice clump of thrift and you are lucky enough to get some great morning or evening light, you'll have everything you need to produce an amazing image.
While there a number of locations to shoot the thrift in Cornwall, my favourite place to shoot them is at Bedruthan Steps. There is nothing quite like seeing the thrift flowering all along those stunning coastal cliffs.
The Clock is Ticking
The thrift flowers in spring but it may only be in its prime for a couple of weeks. This unfortunately isn't exactly the same time every year so knowing when to go isn't easy. Bedruthan Steps is a 1 hr 40 minute drive so I want to be reasonably assured of good conditions if I go. I would also need to the good conditions to match up with a free evening for photography!
However, time was ticking for me. I had started to see some spectacular shots of the thrift at Bedruthan Steps on Instagram so I was starting to panic that I was going to miss the best of the thrift this year. Luck had not been with me. When I had a free evening the weather was rubbish, and when the weather was forecast was good I didn't have free time. I was getting frustrated!
As mid May rolled round I came to the conclusion that I would have to go now or forget about for this year. So with a dubious Sunday evening forecast I decided to put caution to the wind and go for it regardless of the conditions.
A 5 Minute Photo Adventure
As I announced in my recent blog post for Daymark Tower, I've started a new series of videos that aim to give the viewer an introduction to a location and inspire them to photograph it. So for the 2nd of my 5 Minute Photo Adventure videos I've created this video of Bedruthan Steps which I filmed on my recent trip there:
I hope you enjoyed that video and that it has indeed inspired you to visit Bedruthan Steps. If you want to see the images from the video in a bit more detail you'll find them below.

So if that has inspired you to visit Bedruthan Steps, here are my 3 top tips to help you make the most of your visit:
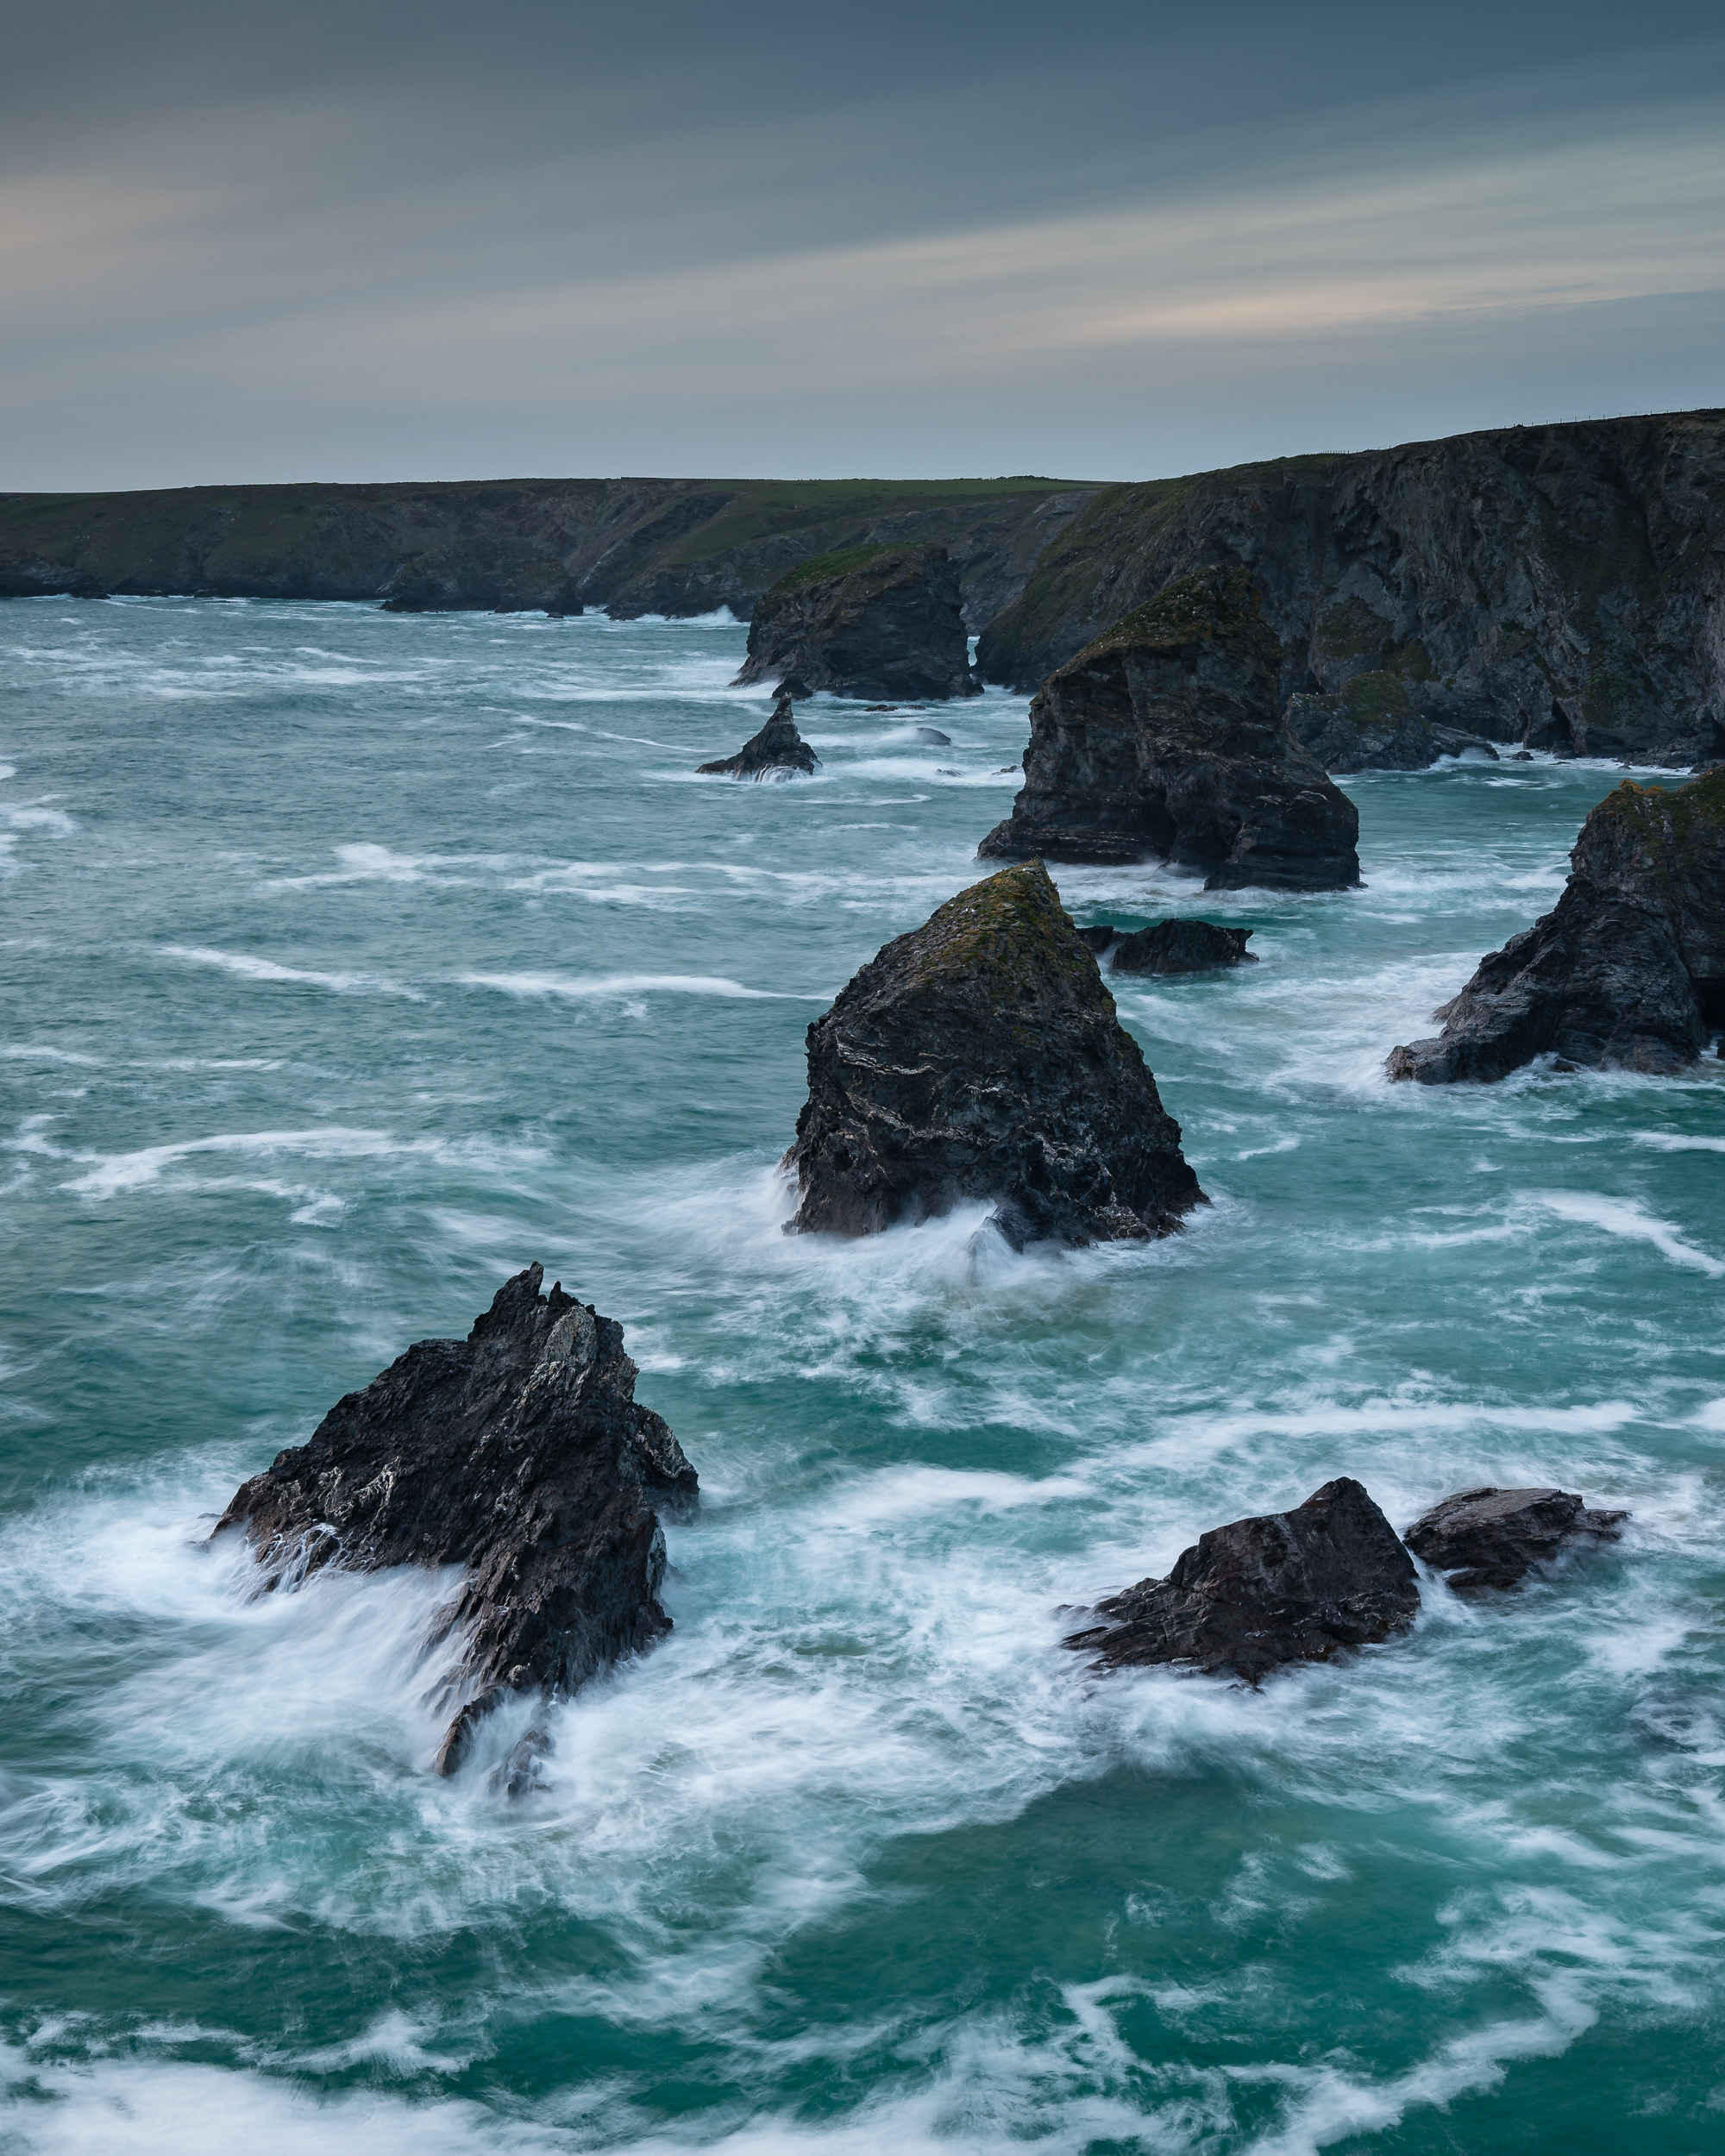
Lenses - Take a wide angle lens for shooting the thrift, but also take a medium telephoto (like a 24-70mm) and shoot and isolate some of those rocky sea stacks.
Walk the Walk - Though there are a couple of great viewpoints just a short walk from the National Trust car park, you'll find so much more by walking along the coast path. So give yourself sometime to explore the area. The beach at Bedruthan Steps is also worth checking out, but only at low tide and you don't mind the steep descent.
Be Careful - It should go without saying, but do be careful on the cliffs, especially when photographing the thrift. It's all too easy to get very close to the edge in search of some nice thrift, and if it's windy up there you don't want to loose your balance.
Though I was keen to get to Bedruthan Steps to photograph the thrift, it is a location I will visit at anytime of year. The coast line is beautiful and spectacular there and given the right like it can make for some epic photographs.
So have you visit Bedruthan Steps? Have you photographed thrift before? Let me know in the comments below.

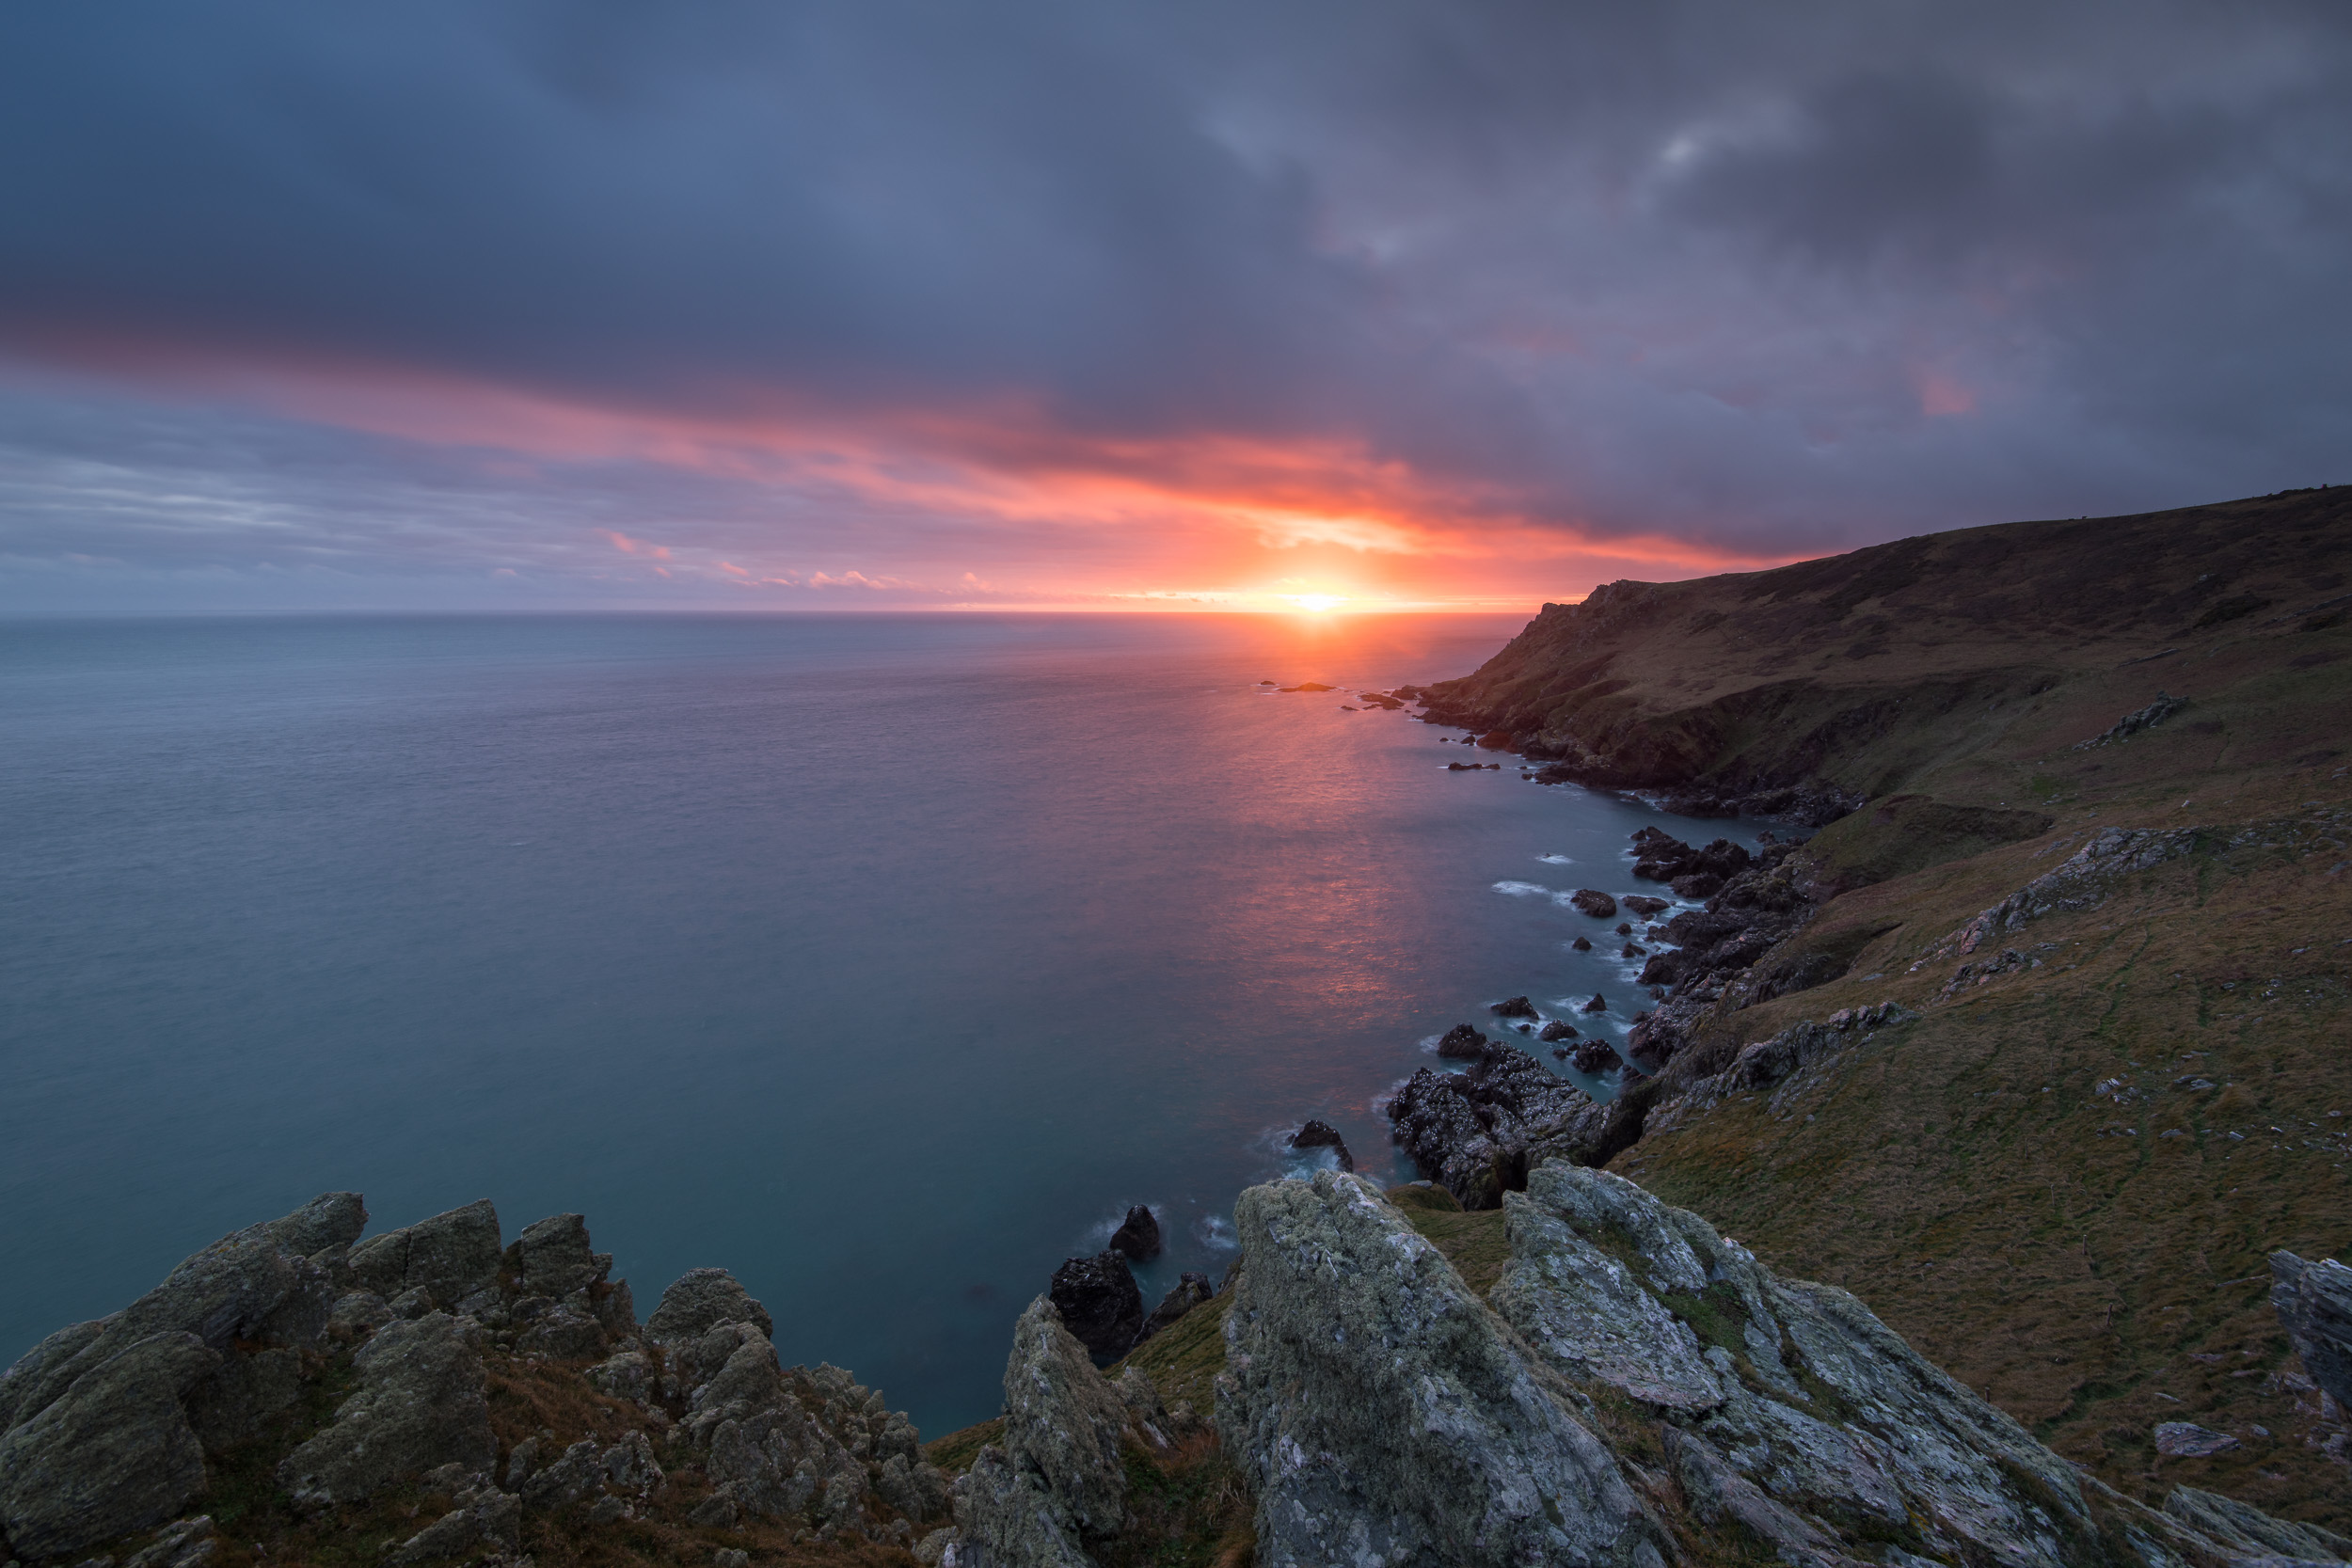
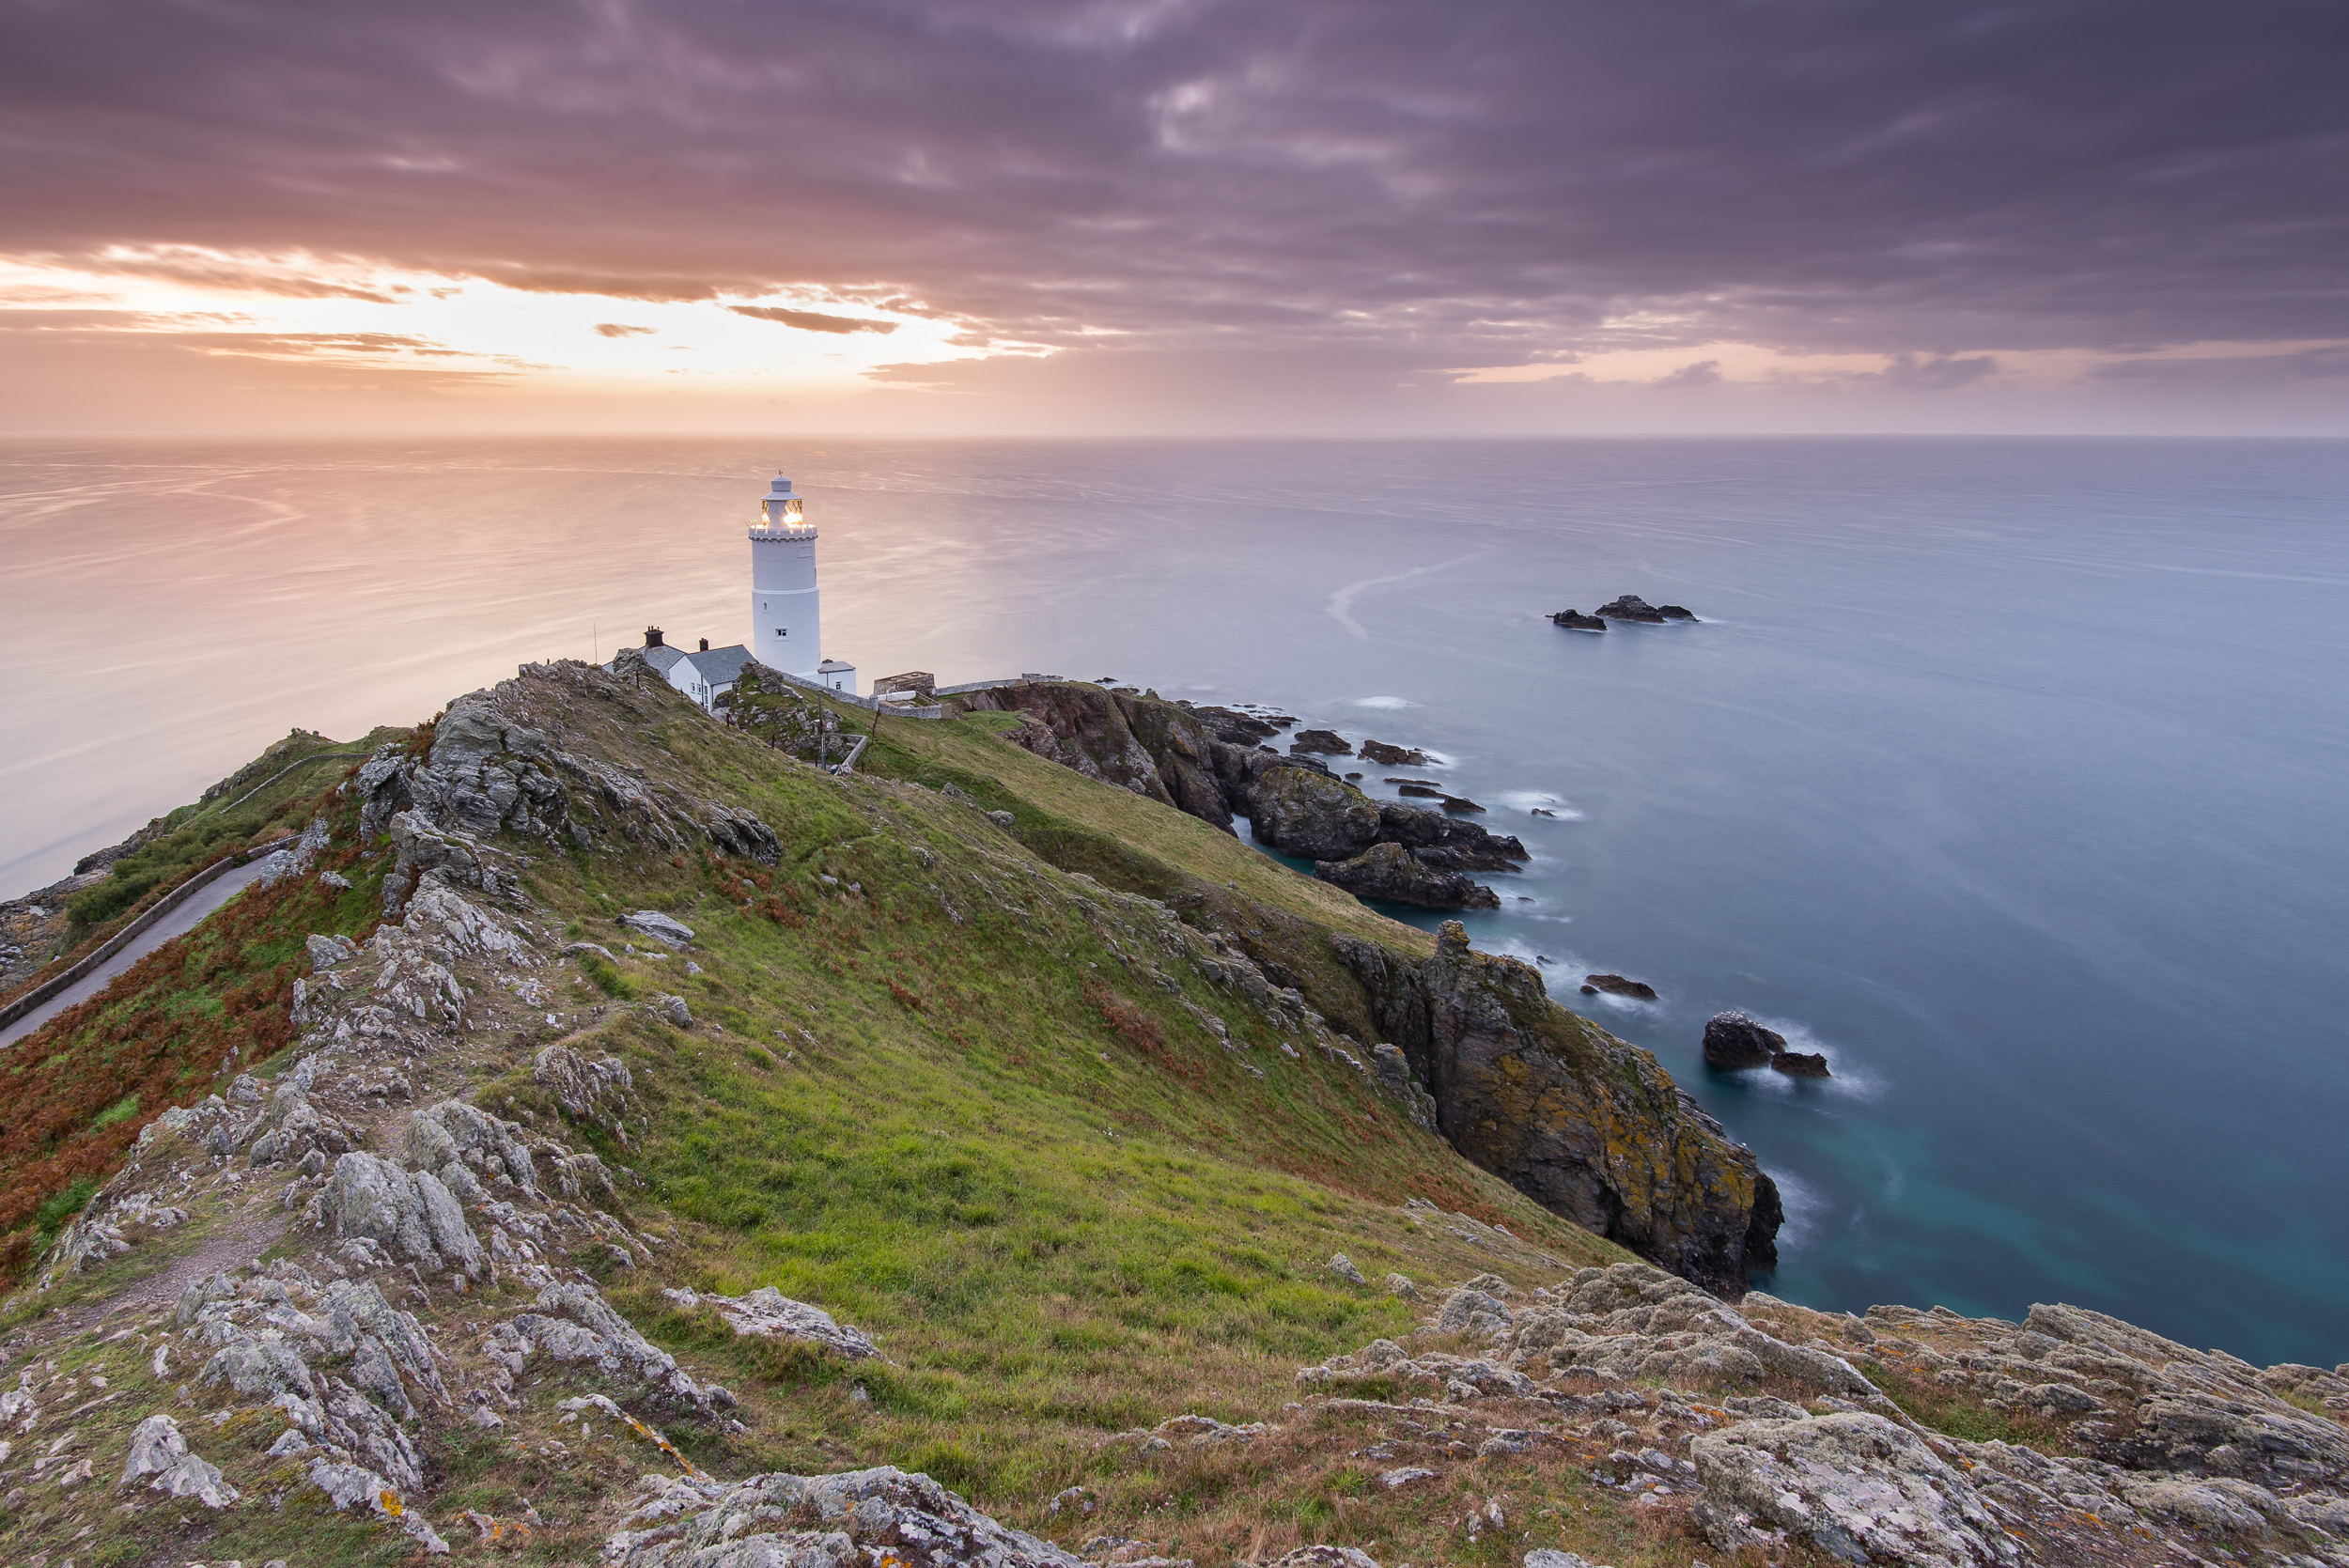
Storms, Sunset and Start Point
In this blog post I tell you about how a passing storm at Start Point in Devon forced me back to my car but in the end it added a new dramatic element to my composition.
Favourite Location, New Viewpoint
In my video Top 5 Locations in Devon to Shoot Landscape Photography I took you to Start Point on the south Devon coast. I've shot there numerous times and thanks to the coastal weather I've come away with a wide variety of images. All my visits to Start Point do have one thing in common, they have been shot at dawn and all, roughly speaking, from the same viewpoint.
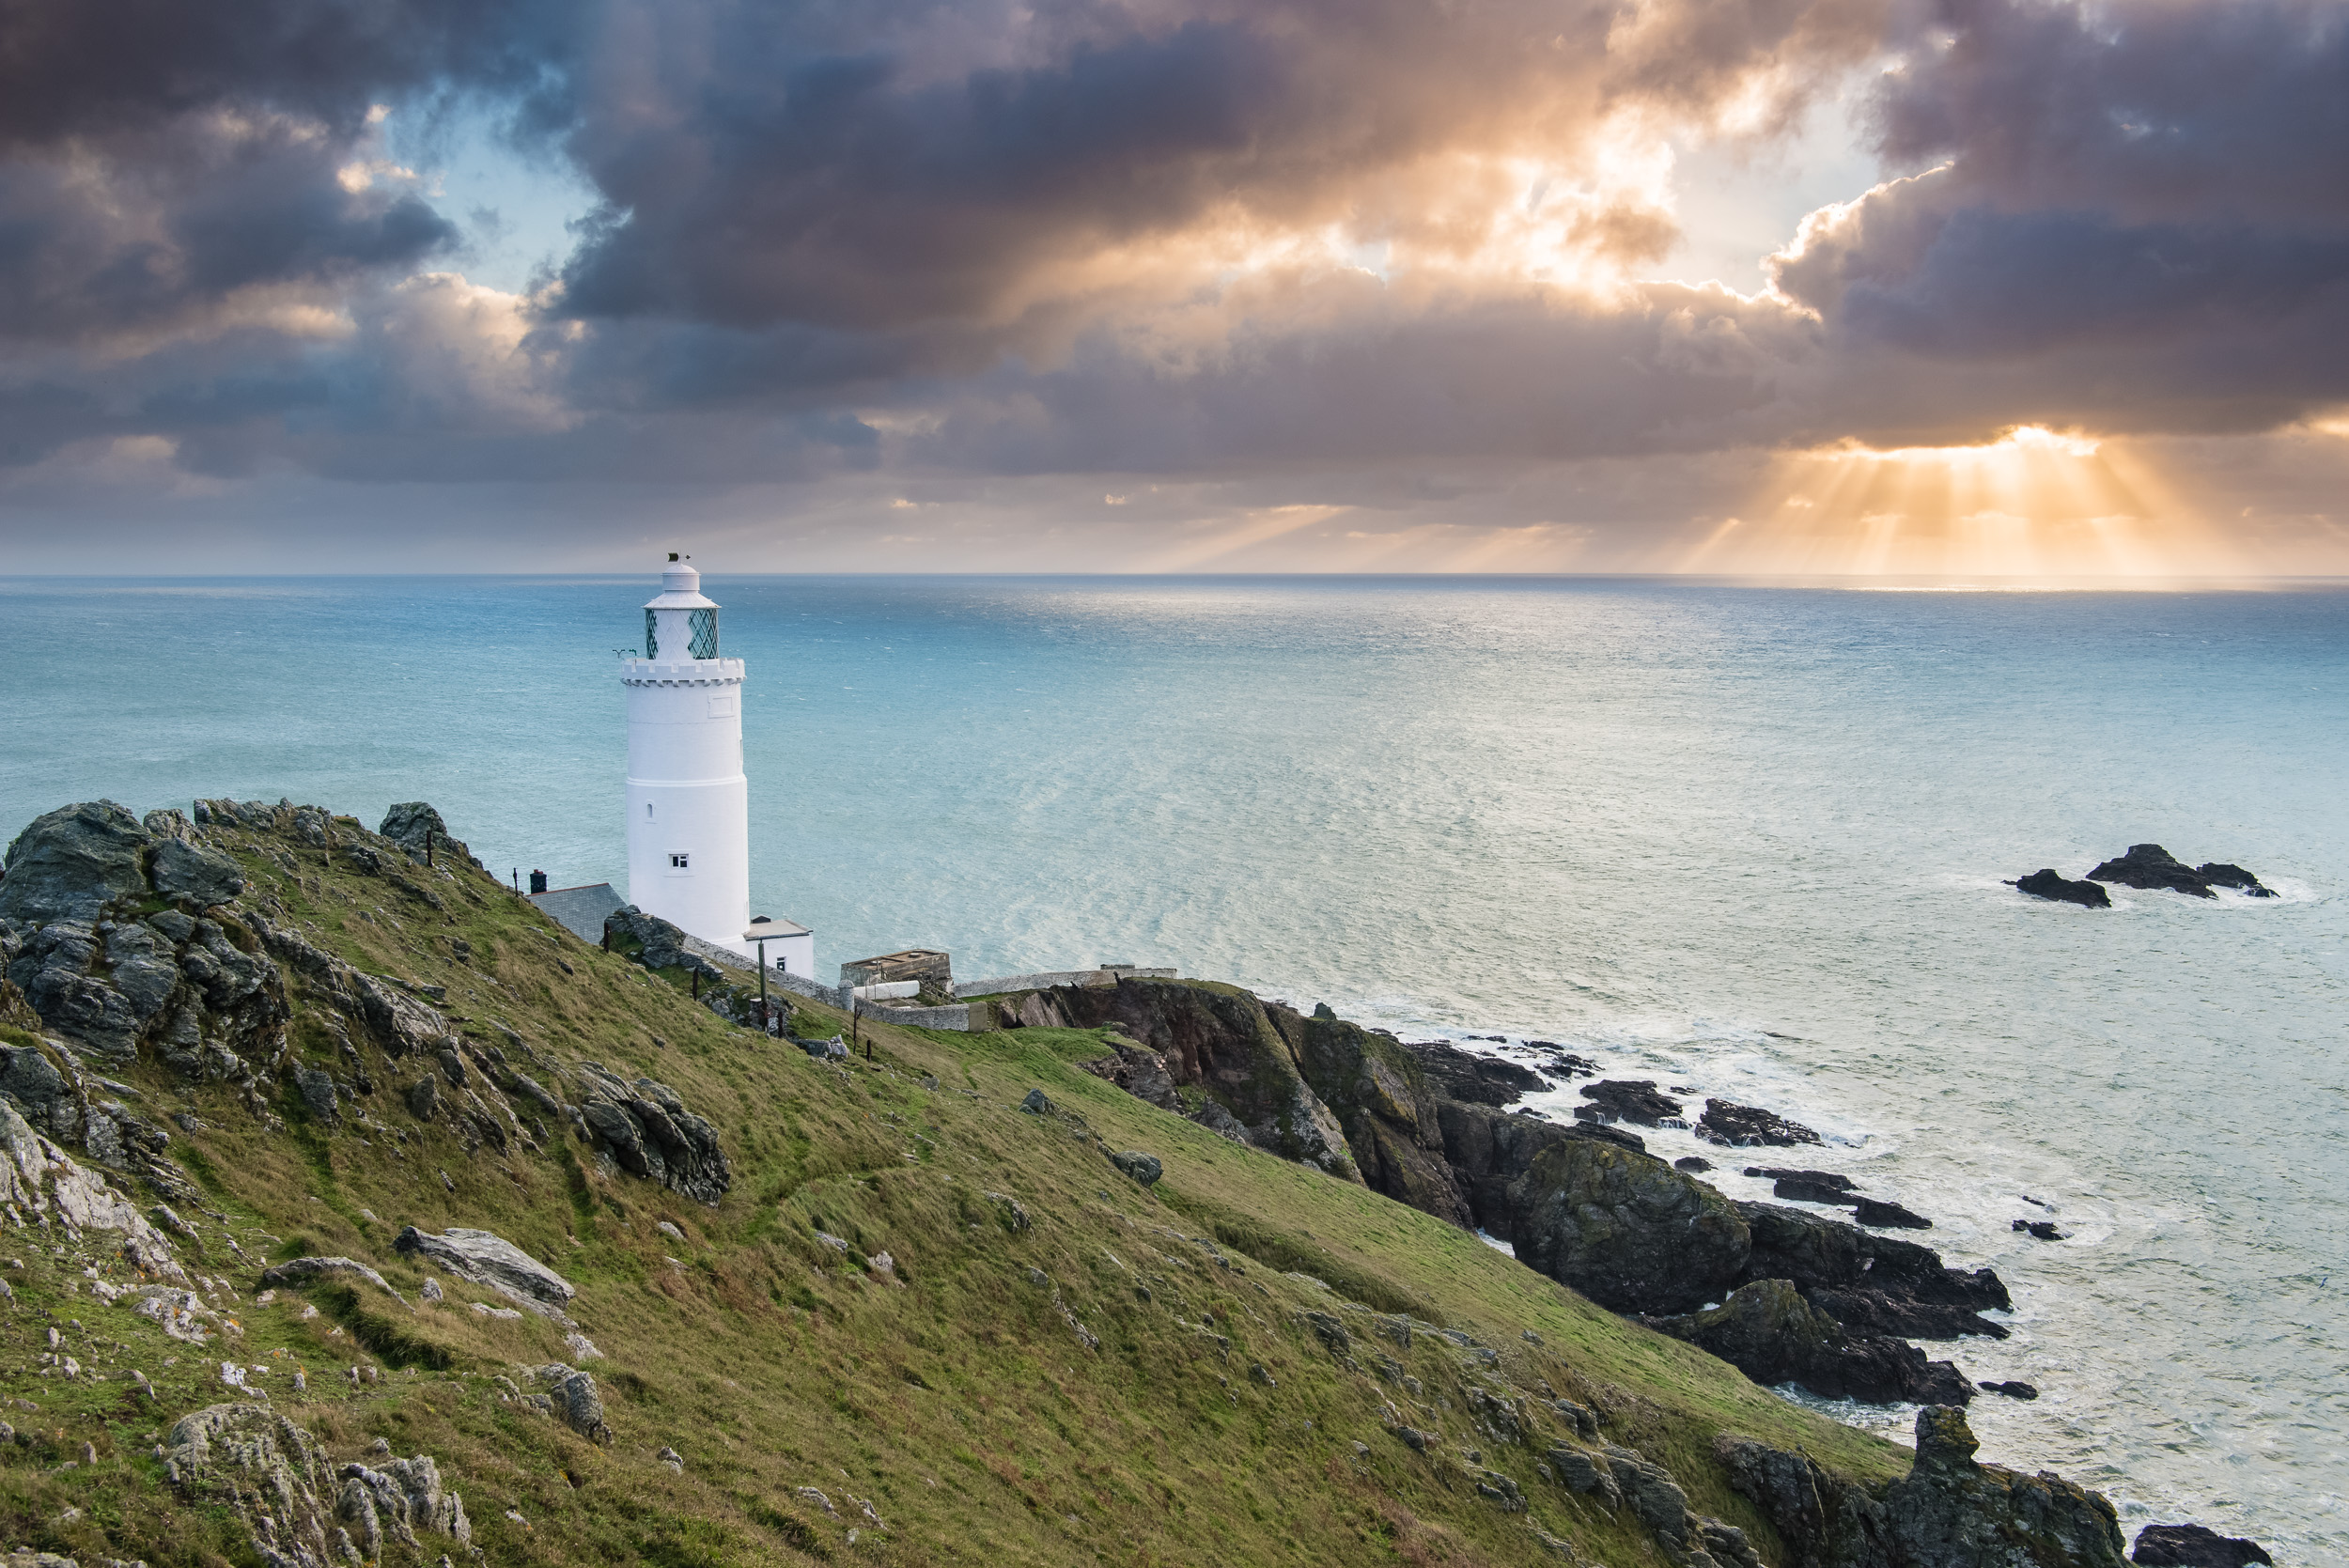
Just recently though I was inspired to shoot Start Point from a slightly different location. I've written about the power of inspiration on this blog before and how important it is to my development as a photography. However, it was a post by one of my favourite local photographers Matt Davis on Instagram that showed me a viewpoint that I hadn't considered before. It was still clearly Start Point, but you could see more of the rugged coastline and it was ideal for shooting at sunset. I had a plan!
Incoming!
It's about 1hr 15m drive from home to Start Point and while it's not that far as the crow flies, it does involve the navigation of a few of the smaller country roads that Devon has to offer so it often feels like a longer drive. With the weather forecast predicting cloud at different heights I felt the drive would be worth it for a great sunset and some drama in the sky.
Watching the storm approach from the west.
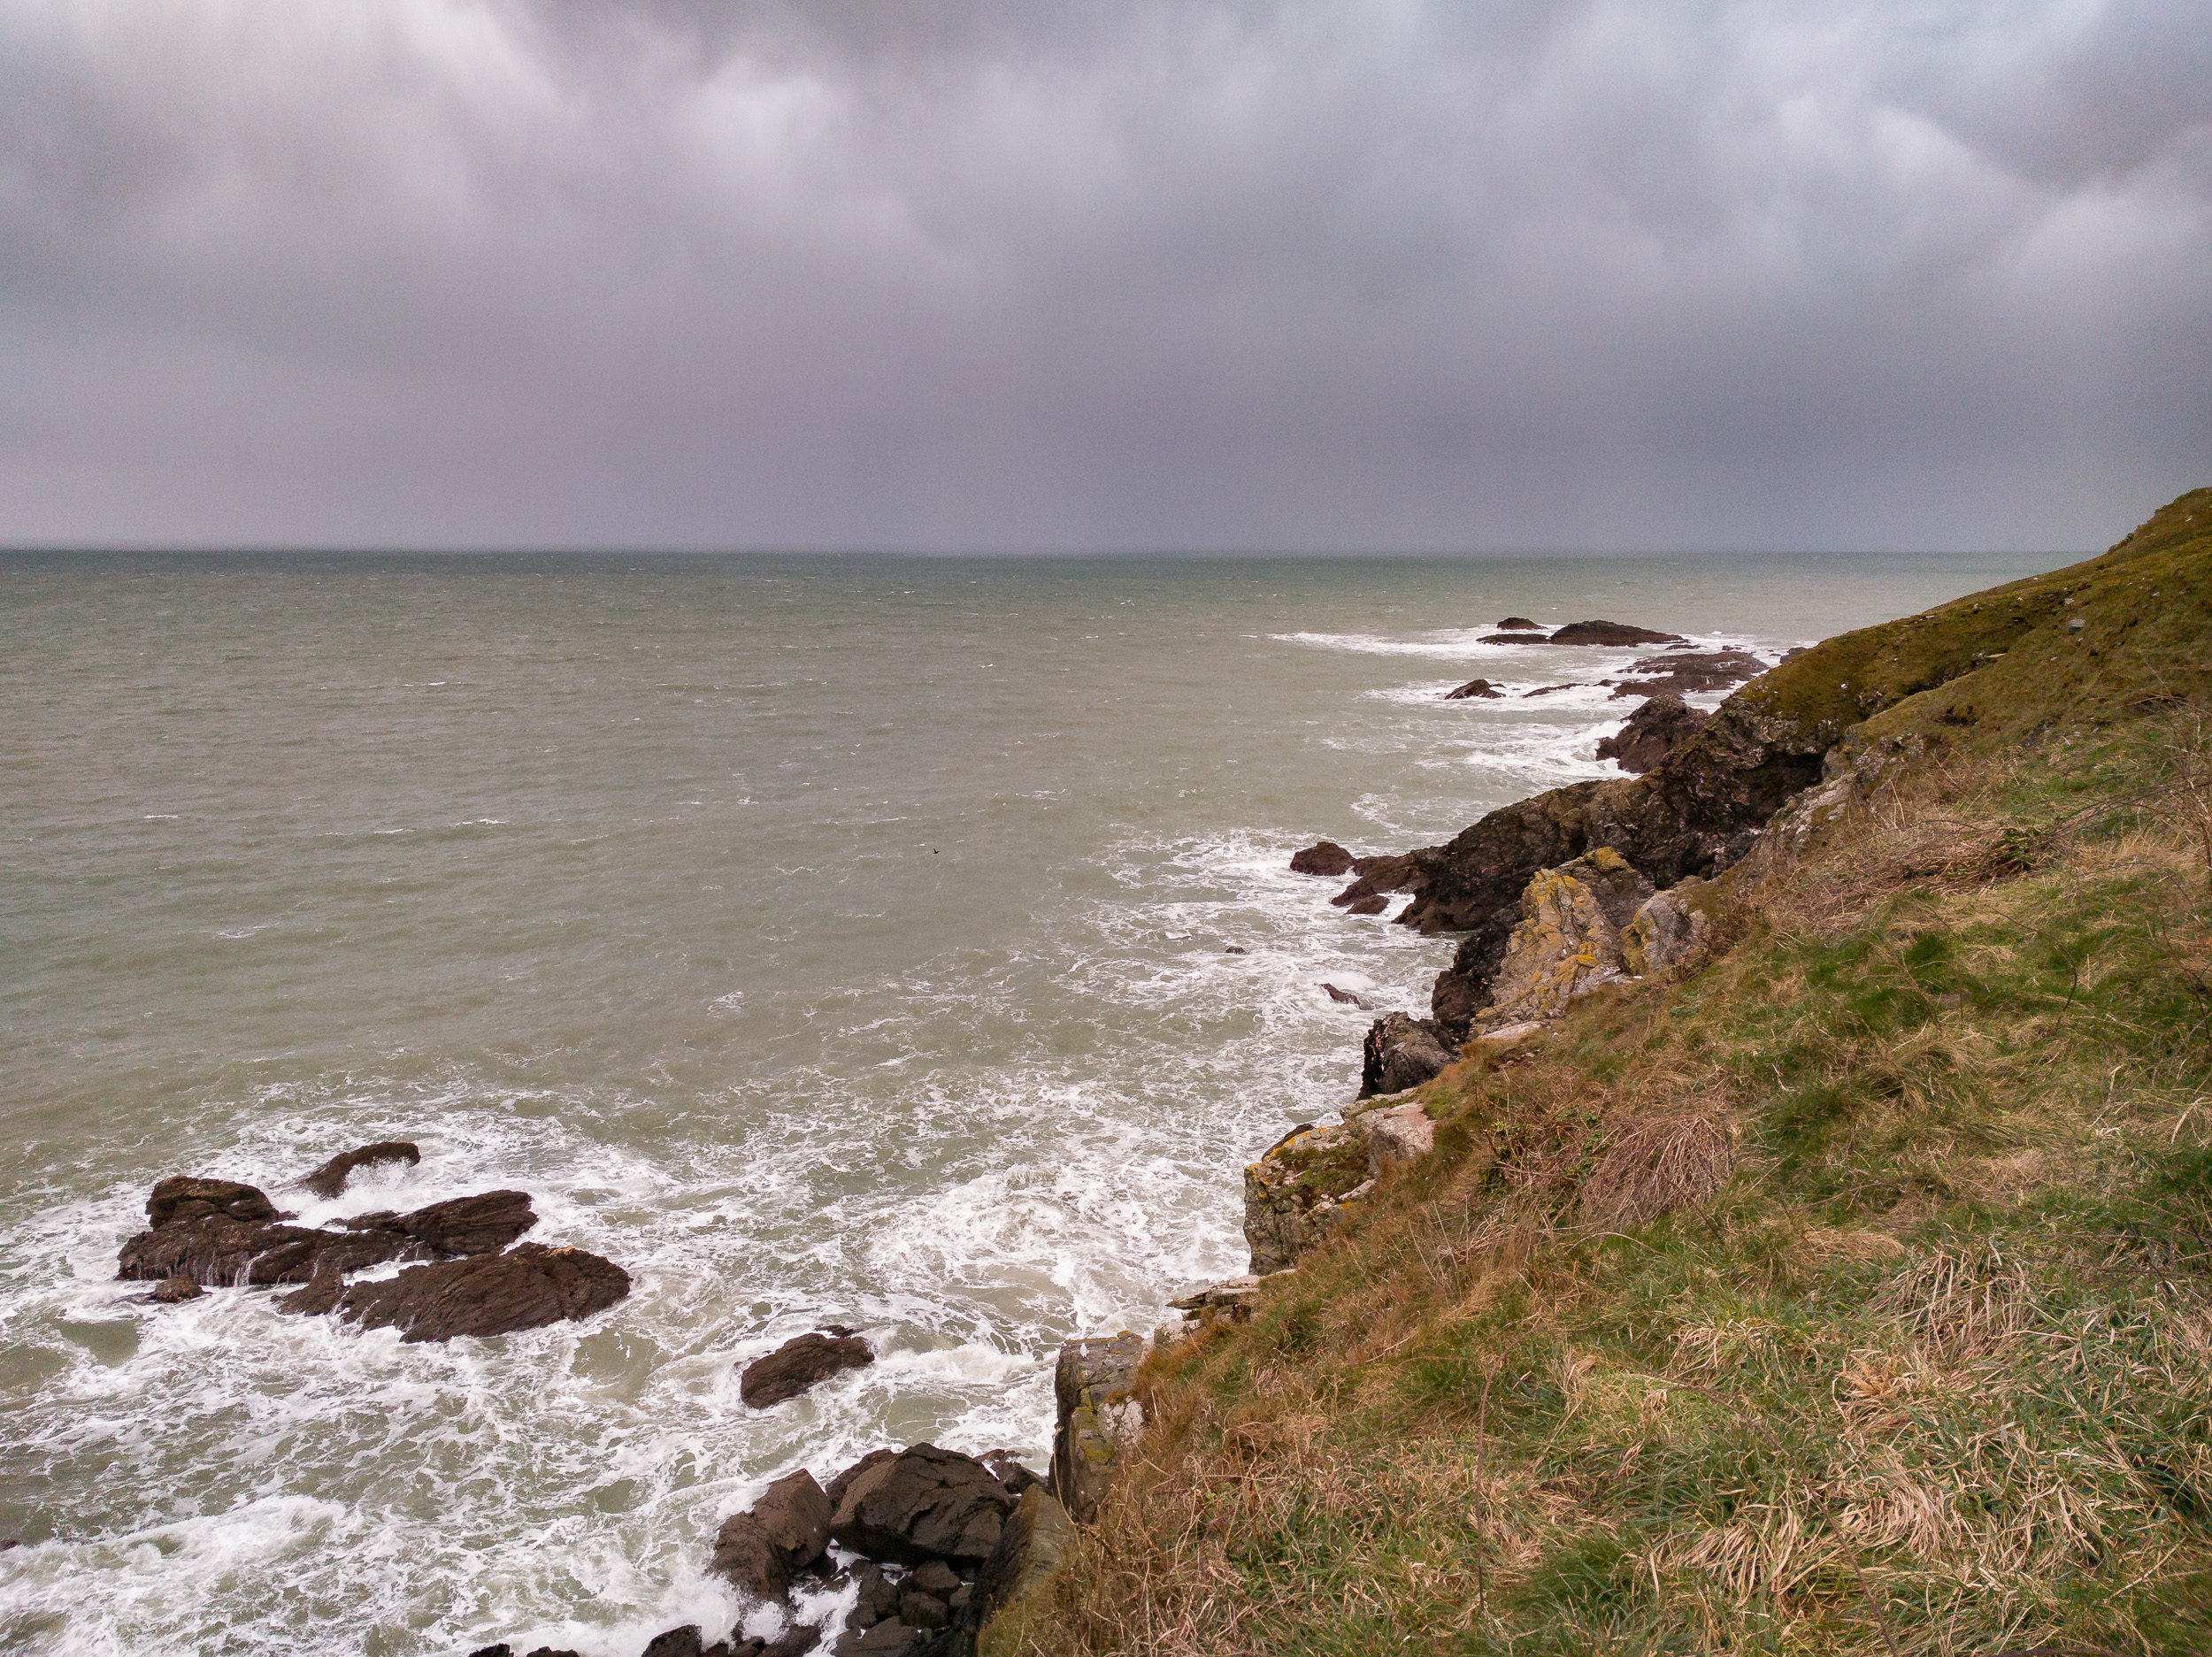
I arrived at the Start Point car park, got my bag, and headed down to the view point. As I looked west and out to sea I could see a very large rain shower coming my way. I knew from the forecast there might be the odd bit of rain but this looked a little more than just a shower. I stuck to my location, kept my camera in the bag, and waited. Firstly the wind picked up, then the rain started, and then the rain got very heavy!
Determined not to be put off though I decided to shelter on the other side of the ridge that runs down to Start Point lighthouse. It was a lot less windy by still wet. I got my phone out and checked my favourite rain app, Rain Today. All I could see over my location was a big, dark blue blob, indicating heavy rainfall. the good news was that it was only forecast to last 30 minutes, and once it had passed I would still have 30 minutes before sunset.
So I did the sensible thing and went back to the car, had a cup of coffee and ate some chocolate.
Run Julian, Run!
As I sat in my car drinking my coffee I could see what was going on in most directions. To the east, the direction the storm was going, it was looking very dark. To the west, it wasn't really looking much better. I was beginning to think I might not even take a single frame. Then the thunder and lightning started and it was at that point I was very happy to have made the decision to wait it out in the car.
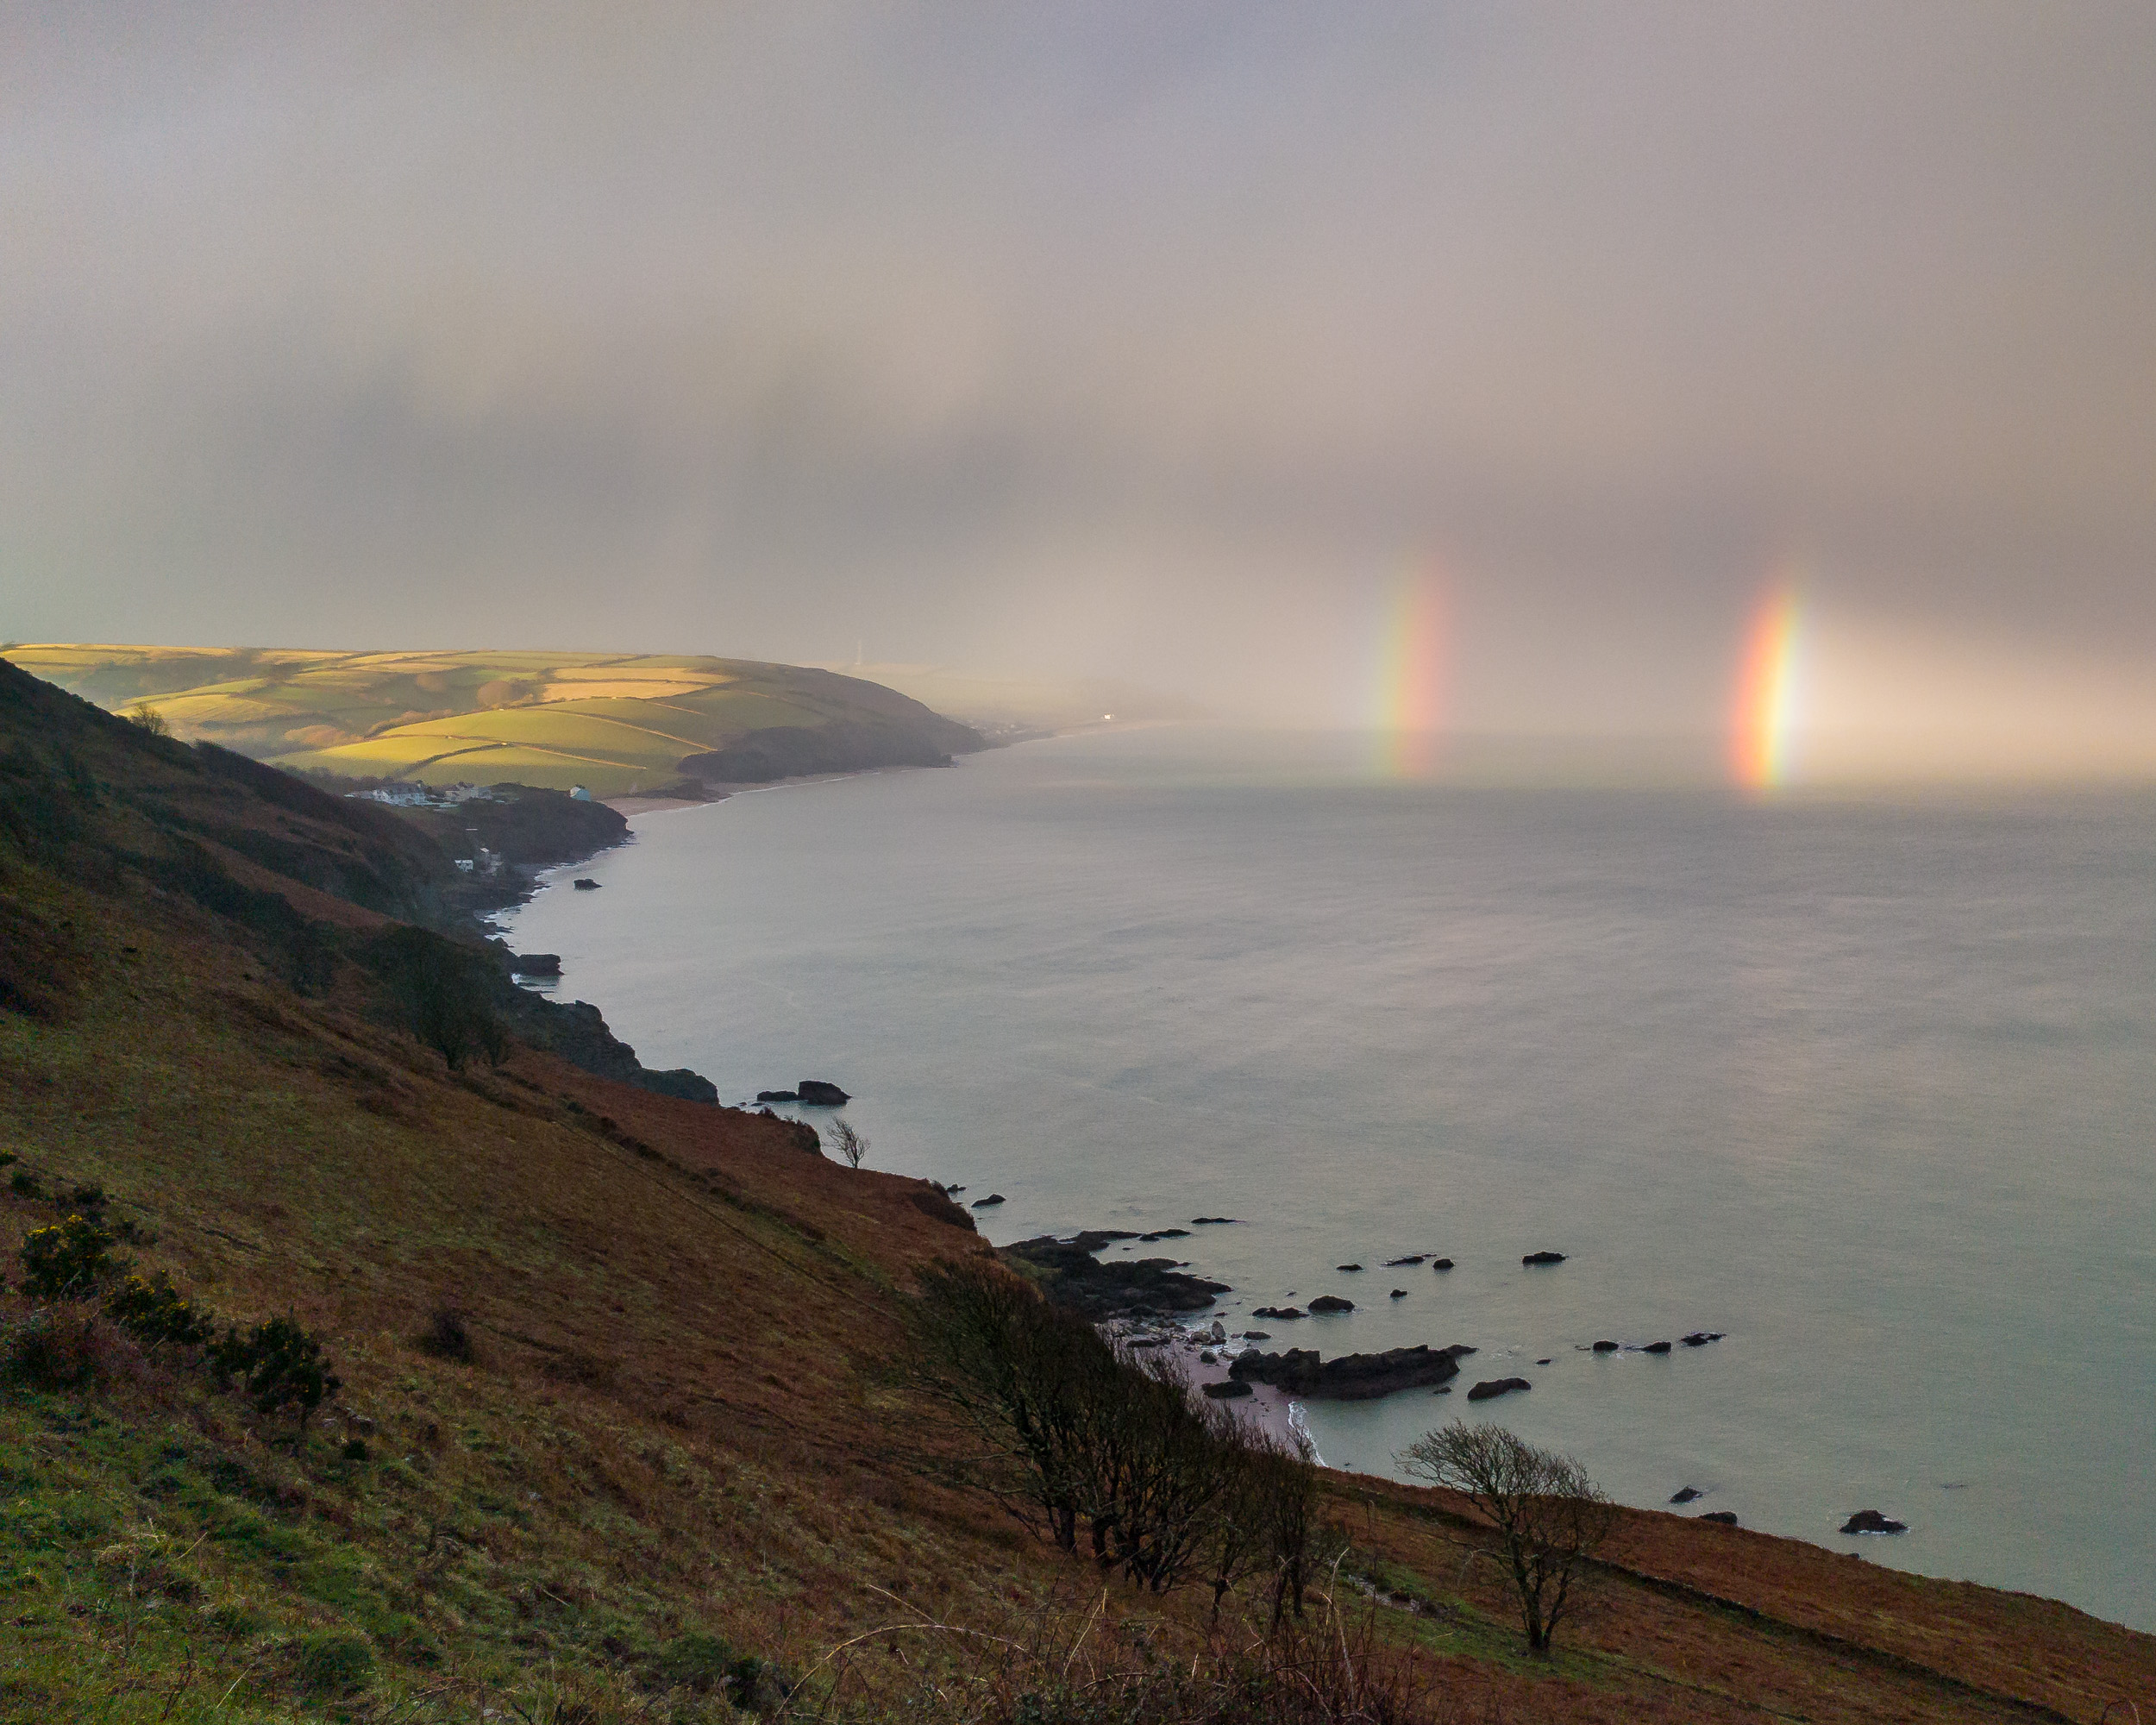
Spectacular conditions immediately after the storm had passed. I had to be quick just to grab this shot with the phone.
As forecast, I could eventually start to see a break in the cloud to the west. I waited to the rain had stopped and then I grabbed my stuff and went for it again. As soon as I got outside I spotted a double rainbow out to sea. It looked spectacular. Photographers often say you get some of the most dramatic conditions for photography just after a storm and from what I could see this was certainly the case.
I knew these conditions wouldn't last too long so I instinctively grabbed my phone and grabbed a shot. I then got to work getting my DSLR out and all the associated gear. As I feared, by the time I actually got all setup the best of the action had gone. Not to worry, I still had time to get back to my original viewpoint and shoot the lighthouse and dark sky, but I would have to run. Which isn't that easy with the amount of gear I had and the muddy ground but if I didn't get there in time I would only regret it.
Drama Everywhere
I got to my view point and frantically got to work getting my shot ready. There was still plenty of drama going on. The sky was still dark and brooding, and the rugged cliffs along Start Point were getting pounded by the sea. Over to my right (to the west) the clouds were breaking and the low sun was producing some lovely colours. That particular bit of action was still just out of frame, so while I had a long exposure running I grabbed a quick panorama with my mobile phone.
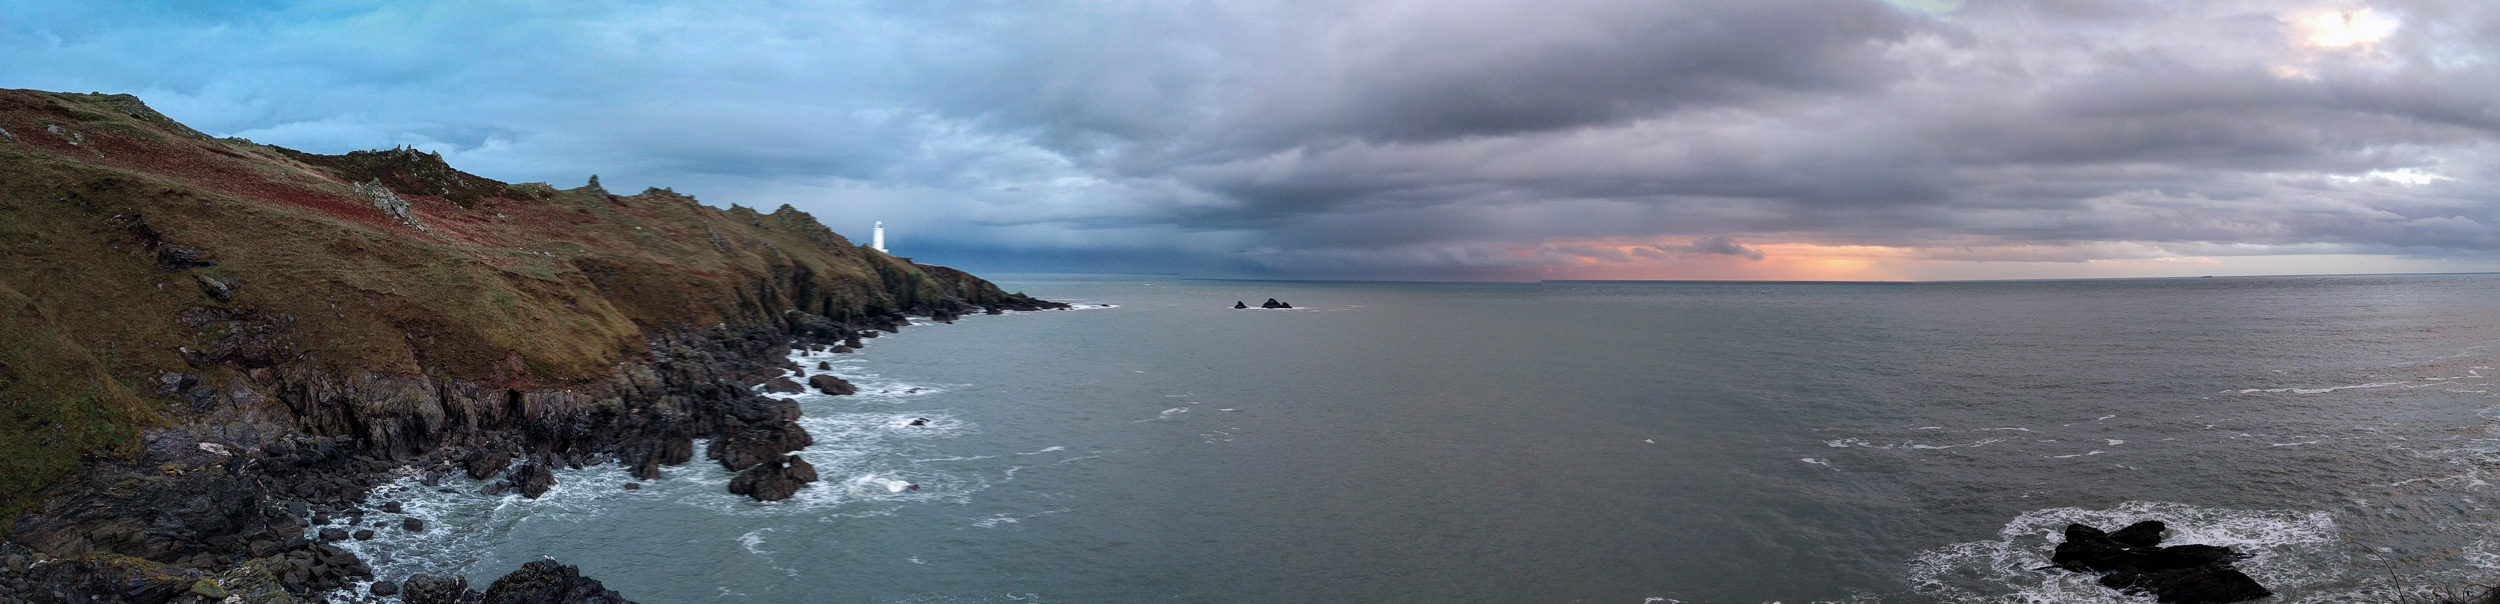
I managed to grab this quick panoramic using my Nexus 6p phone. It's not perfect but it shows the scene as it was.
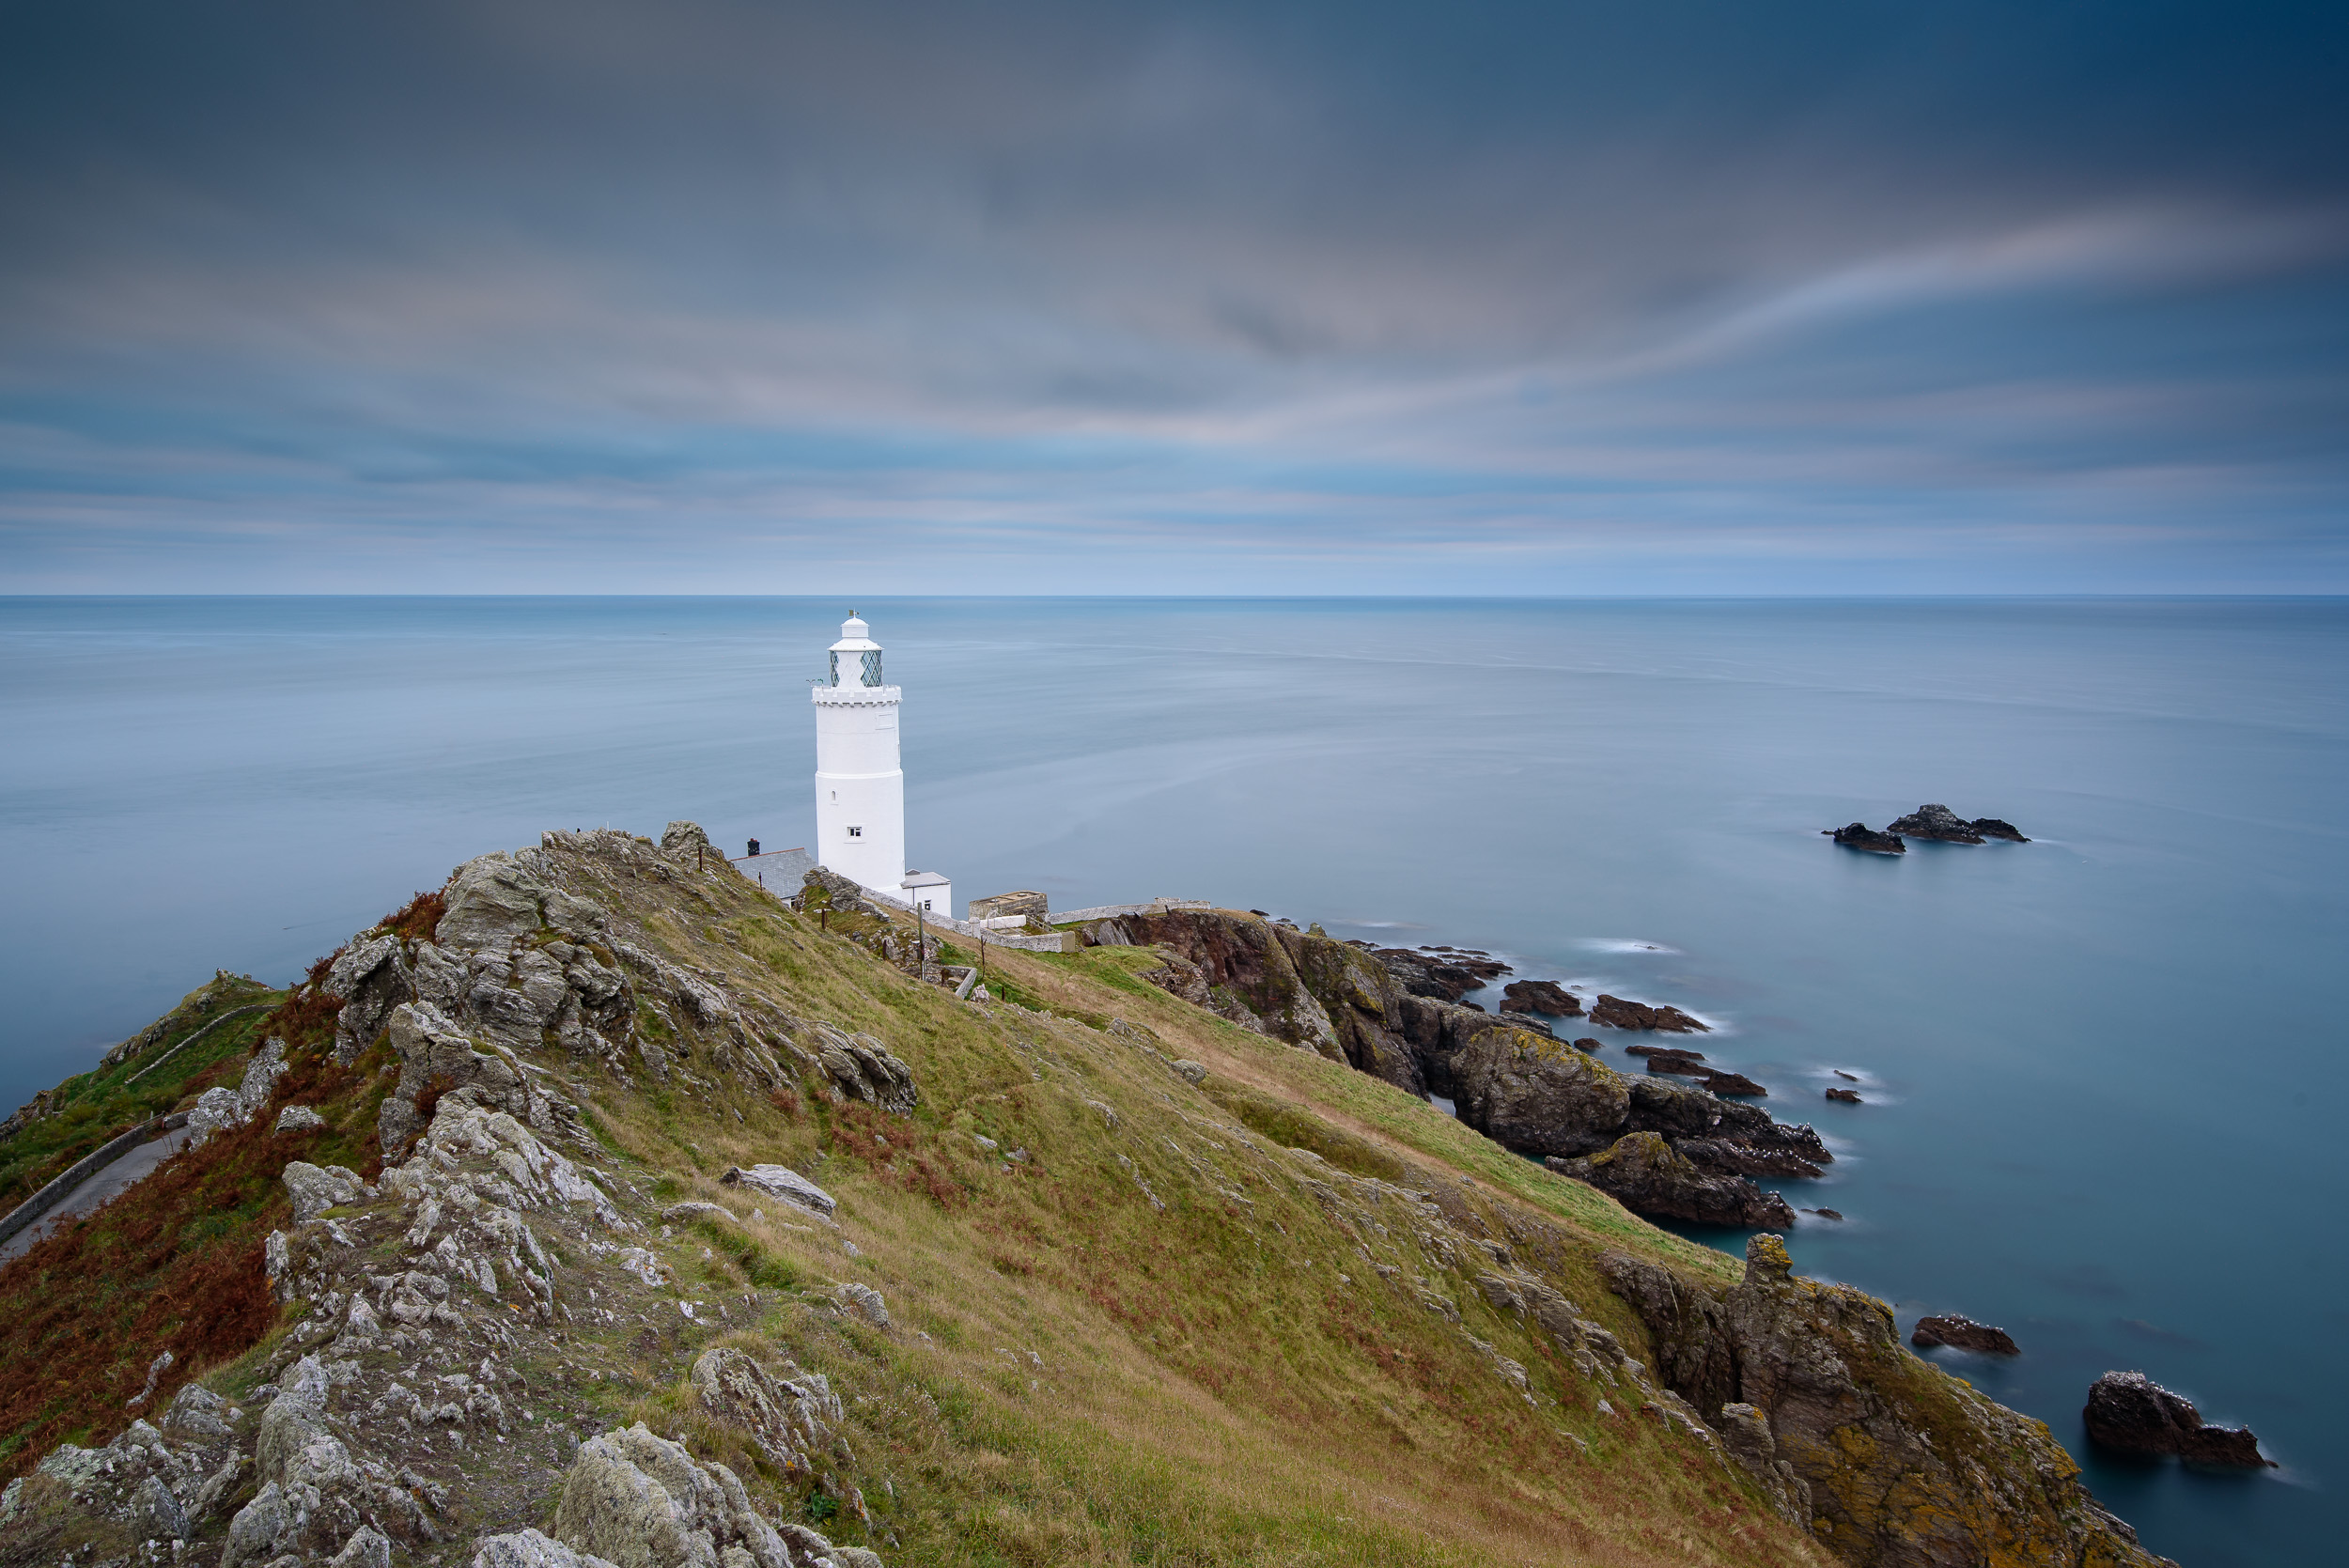
I kept shooting, varying my compositions slightly but the break in the cloud was just too far over to make for an interesting composition. In hindsight, I probably should have shot a panorama with the DSLR, but there was a lot going on and I didn't have much daylight left. However, I was still very happy with the moody shots I was getting like this one.
Nikon D750, Nikkor 24-70mm f/2.8 @ 40mm, f/11, 129 seconds, ISO 100, Lee Filters Circular Polariser, Lee Filters Little Stopper.
I Must Be Mad
I have to admit that when the rain really started to chuck it down and I went back to the car to wait it out, I did question my sanity. It was looking like it was going to be one of those days where not only do I not get a decent image, but I don't even get the camera out of the bag. However, having read so many times about how some of the best images were captured right after a storm I decided to hold out. And I'm so glad I did.
Perhaps the only thing I should have done would be to have left the car when I had started to see the sky clear, and not when the rain had stopped. This would have given me a bit more time to get back to my location and start shooting immediately after the storm had passed. However, given that I still wouldn't have been able to get a break in cloud or light from the setting sun into my scene I was pretty happy with the results.
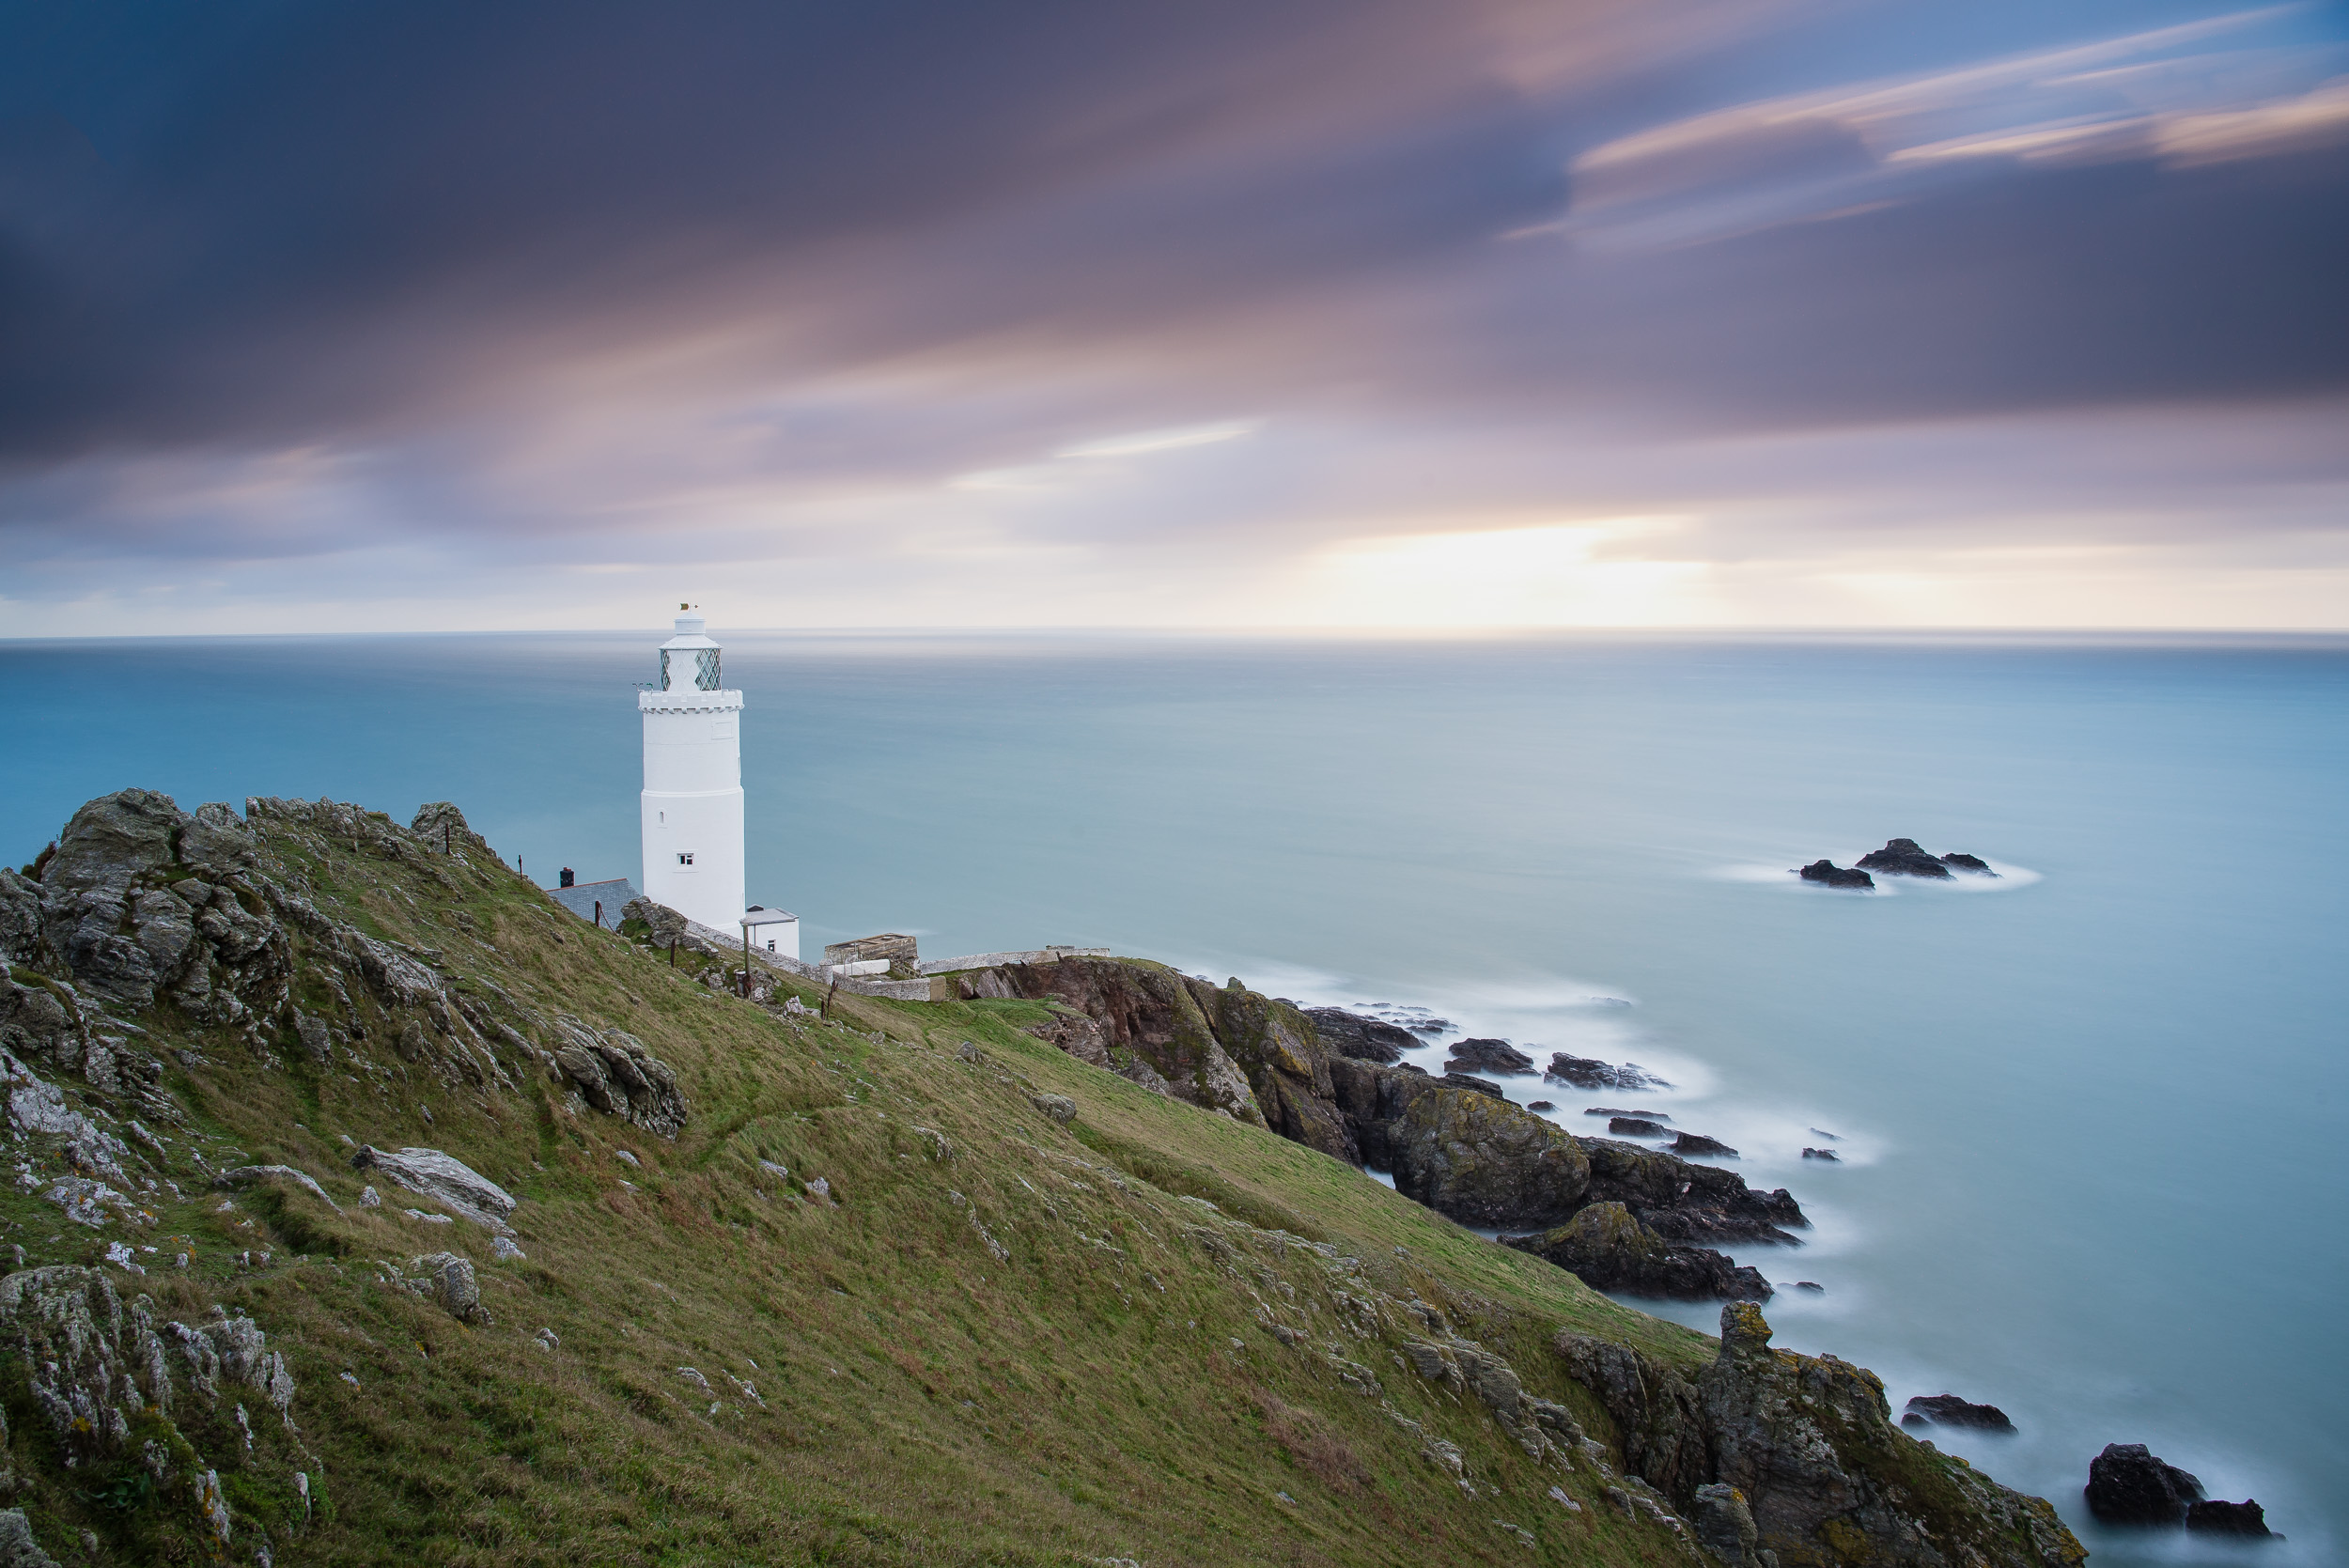
Nikon D750, Nikkor 24-70mm f/2.8 @ 27mm, f/9, 60 seconds, ISO 100, Lee Filters Circular Polariser, Lee Filters Little Stopper.
Have you ever stayed out in horrible weather only to be treated for your perseverance? Do you sometimes think that landscape photographers are a little mad? Let me know in the comments.

A Positive Start to 2017
On my first trip out with the camera for 2017, I visited one of my favourite locations, Dawlish Warren beach. While the conditions didn't produce inspiring results it was still an important trip out with the camera. Read why in this blog post.
Stay at Home or Risk It?
For me, 2016 was a good year for photography. I got out a lot with the camera and when I reviewed My 5 Favourite Images of 2016 I was very pleased with the results. However, when I went out and Said Goodbye to 2016 in Dorset, the results from my final shoot of the year weren't exactly epic.
One thing I don't do is the let the disappointment of the last shoot put me off the next. Especially when it was the weather or conditions that stifled my creativity. When 2017 came around I was soon looking for the next available slot to get out there with the camera. To say that I was keen would have been an understatement.
It was this keenness to get out there that largely overrode my better judgement of the weather forecast and just risk it. After all, weather forecasts can sometimes be pessimistic, and Dawlish Warren beach is just down the road. What else was I going to do? Sleep?
Being Optimistic
Despite the dubious weather forecast I headed off to Dawlish Warren beach, one of My 5 Favourite Landscape Photography Locations in Devon. Sunrise on the coast can often yield dramatic results, despite weather forecasts, so I drove there feeling optimistic.
However, even the strongest sense of optimism isn't enough to change the weather or light available. I did take a number of frames, adjusting composition and exposure times, but sometimes the magic just isn't there. I feel this image is probably the best of the morning.
Nikon D750, Nikkor 16-35 f/4 at 29mm, f/8, 205 seconds, ISO 100, Lee Filters polariser, Little Stopper and ND Grad. Processed in Lightroom CC (including 4:5 crop).
A Wasted Trip?
So you may ask me if it was a wasted trip? Should have I stayed in the warmth of my bed for an extra hour? Well, no, of course not. Regular readers of my blog will know often I talk about the value in Practising The Craft of Photography. Though the conditions weren't what I hoped for, I want to make sure that when the conditions are amazing I'm prepared!
Being prepared means a couple of things to me. Firstly, I need to know my equipment. Can I set up my camera correctly and even more importantly, can I adjust the settings quickly to support changes in light and conditions? I also need to have my "photographic brain" fully engaged and exercised. I took a small break from landscape photography last year and it was amazing how quickly I had become rusty with finding and setting up compositions.
So while the image isn't going to win me any awards, my time at Dawlish Warren was still time well spent. The camera was out of the bag and I was pushing buttons, moving dials, checking histograms and using filters. I was also thinking a lot about compositions. What will my image look like if I move up, or left a bit, what if I change my lens? I was exercising my brain in preparation for the day when I do get those epic conditions.
So how has your 2017 started? Have you been out with the camera? Let me know in the comments below.

Landscape Photography in the Lake District
In this blog post I write about my 2 day photographic adventure in the Lake District. Read about how despite the challenging weather I still came away with some great images and a sense of satisfaction.
Escape to the Lakes
When a photographer friend of mine invited me to spend a couple of days shooting the Lake District in the height of autumn I literally jumped at the chance. Over the last decade or so I had visited the Lake District a number of times with my family and enjoyed it immensely. After all if you like the outdoors there really isn't much not to like about the Lake District. This was going to be a different type of visit though. This visit was going to be all about photography and I couldn't wait!
The plan was to spend two full days shooting various locations around the Keswick area taking in tarns, lakes, hills and of course the odd jetty. Our only restriction was dates. Free time for photography has to fit in around family and work time, so when we picked our dates we were committed, no matter the weather.
November seemed to take an age to come round but when it did my levels of excitement had almost become palpable. I had packed my stuff two days prior to departure and when I did hit the road the 300+ mile journey flew by. I couldn't wait to get shooting but as I would soon find out, the Lake District weather was going to be typically British.
High Brandelhow Landing
It was a 5:30 am alarm call on the first day and despite the lack coffee I was in high spirits and ready to get shooting. Our first stop was High Brandlehow Landing, a pier on Derwentwater. It's a classic Lake District composition with a pier but it was an ideal location to get the photography brain into gear.
My first instinct was to shoot the pier vertically but I actually ended up preferring the horizontal version. Using the Little Stopper at ISO 100, f/11 gave a 2 minute exposure but I was loosing the detail in the sky. Setting the camera to ISO 200 gave me a one minute exposure maintaining some texture in the sky.
Stock Ghyll
Despite the sky being almost completely overcast it had been a reasonably successful start to the day. After breakfast though the weather turned rainy so we decided to head into the woodland at Ambleside and walk along Stock Ghyll.
Photographing Stock Ghyll was a real challenge as I spent most of the time clearing rain water from the camera. I found it difficult to concentrate on my composition. I later tried to shoot the waterfalls but couldn't really find a composition I liked.
Grasmere
After drying out over a pub lunch we took the short drive down to the southern end of the lake at Grasmere. Though it had stopped raining the weather remained resolutely overcast which was a shame as there was barely a breath of wind and the reflections were stunning.
Lovely reflections, just a shame about the light. This image is a 2:1 crop from the original frame.
Latrigg Fell
With a renewed sense of optimism on the morning of day 2 I headed down to the hotel lobby to meet my friend. Unfortunately he was taking shelter from the down pour of rain. Not to be put off we checked our respective weather forecast apps and agreed that an ascent of Latrigg Fell could be rewarded with some nice light come sunrise.
The weather at dawn was not great but we dug in and waited.
As time progressed some splashes of light started to appear on Cat Bells. This image is a 3:1 crop of a 9 vertical image panoramic stitch.
The dawn light struggled to get through the clouds but when it did it provided little moments of magic. This is 16:9 crop from the original frame.
Castlerigg Stone Circle
While ancient stone circles don't necessarily offer a lot of interest for me, the location of Castlerigg Stone Circle is still an interesting location to shoot. You don't necessarily need to include the stones in your compositions.
Bad weather can work in your favour as well. I just needed to wait for a break in the light which came and went in the space of seconds. You just have to stand there with the finger on the shutter....waiting....till you get that fleeting moment of light.
As I've written about before, its important to look around to see what else is happening. I was focused so much on getting the previous image that I almost missed this one.
Tarn Hows
After our trip to Castlerigg we headed up to Ashness Bridge. It was a short stop as no sooner had we got our cameras out it started to rain heavily. So as we approached the end of day 2 we decided that we might try and catch last light at Tarn Hows. The weather hadn't exactly been kind to us up to that point and unsurprisingly it didn't improve that much.
This scene just need a splash of light on the trees but it wasn't to be.
Cat Bells
I was due to make the long trip home the morning of the 3rd day, but I couldn't resist one more dawn shoot. My friend had hit the road at 4am to go home, so as I was on my own I decided I would make the 450m ascent of Cat Bells. Despite the the previous two days of poor weather, I remained optimistic as the weather forecast looked like it might produce some nice early morning light.
My vision for this image was to get some morning light break over the fell peaks (Robinson and Red Knot). I waited and waited but this was as good as it got.
As is often the case in the Lake District, the moments of good light are brief but wonderful. This image of Rigg Beck and Causey Pike is a 3:1 crop from a single frame.
I was on my way down from Cat Bells and looking forward to breakfast but sometimes you just have to stop and unpack all your gear again. The light on Lonscale Fell was too good to miss.
Fun but Challenging
There was no doubt that I was extremely excited about my trip to the Lake District. Having seen so many autumnal images of the area I was keen to produce my own spectacular images. However, as you can see from my images old mother nature had a different plan which mostly involved rain and overcast skies. Even when it was dry there was very little of that magical light that you want to really lift a scene. When it did rain I would just spend most of time trying to keep my gear and filters clear of water. This can be infuriating and doesn't leave much time for the creative side of photography.
So was the trip a failure? Of course not! Yes, it was challenging, difficult and sometimes frustrating but I was in the Lake District, in autumn, with my camera. Sure it would have been nice to have better weather but sometimes as a landscape photographer you have to work with what you get. As I write this blog and look back at the photographs there is a lot to be happy about. Those little breaks of light like I saw on Cat Bells, or the stormy sky over the trees at Castlerigg just goes to show that there is an image to capture in almost any weather condition.
For me landscape photography is also about the adventure, about being outdoors. This trip was an adventure and I managed to capture some dramatic images of the Lake District, so I'm calling my trip a success!
Do you have a bucket list of locations or areas you want to shoot? Have you turned up to a location and faced a few challenges? Is there any type of weather you wouldn't go out in? Let me know in the comments.
Remember to check out my Instagram and Flickr feeds so you can see even more of my images. See you next time!