
The Photographer's Guide Series by Ellen Bowness (Long Valley Books) - On My Bookshelf S03E08
Looking for new locations to inspire your landscape photography? Visiting a new area? Want to get the most out your photography trip? Location guidebooks can help answer these questions. In this episode of On My Bookshelf, I'm looking at The Photographer's Guide series of books.
On My Bookshelf on Location in Cornwall
Over the three years that I’ve been producing episodes of On My Bookshelf (OMBS) I’ve covered a wide range of photography books. While I shoot most episodes in the comfort of my home with a nice cup of coffee, there are some books that require a slightly different approach. One such category of book is the photography location guidebook.
When I decided to look at The Photographer’s Guide series of books, I knew that the video would need to include a segment filmed on location. Fortunately for me one of the titles in the series is called The Photographers Guide to Cornwall and the book had several locations I’d never been to. As much as I’d like to have visited one of the locations in the Iceland book, I’m afraid the OMBS budget doesn’t stretch that far!
In this episode of OMBS not only do I talk about the series of books, but I also visit one of the locations in the Cornwall book. There is no better way to test the quality of the information in a location guidebook than to visit the location!
I hope you enjoyed this on location episode of OMBS. I’ve included the photographs I captured on my visit to Rough Tor below, and if you want to pick any of the books in The Photographer’s Guide series of books then just click here.
Rough Tor Sunrise #1, Bodmin Moor, Cornwall - Nikon Z7, Nikkor 14-30mm f/4 at 22mm, f/11, 1/3rd sec at ISO 64, Kase Filters ND Grad.
Rough Tor Sunrise #2, Bodmin Moor, Cornwall - Nikon Z7, Nikkor 14-30mm f/4 at 14mm, f/16, 1/13th sec at ISO 64, Kase Filters ND Grad, two image exposure blend, custom crop ratio.
Rough Tor Sunrise #3, Bodmin Moor, Cornwall - Nikon Z7, Nikkor 14-30mm f/4 at 17mm, f/11, 1/3rd sec at ISO 64, Kase Filters ND Grad.

In Search of Stooks
Have you ever gone out on a shoot and then couldn't find the thing you went out to photograph? In this blog post I tell you about my search to find some stooks to photograph and how they appear to be more difficult to track down than Ithought.
So I suspect many of you are wondering what on earth is a stook? According to the dictionary it is a group of sheaves of grain stood on end in a field. They look like this:
Nikon D600, Nikkor 16-35mm f/4 @ 21mm, f/16, ISO 100, 0.6 secs. Taken 1st August 2013.
So now that we have clarified what a stook is and what they look like this blog post should make a lot more sense.
I last took a photo of a stook back in July 2014. Since then I've been away on holiday when the crops are harvested and the stooks created. However, I've always wanted to go back and shoot them again. They make for great photographs due to their location (typically in the rolling hills of Devon), their construction and that they are put into nice long lines. If you get some nice evening light on the field it can make for a lovely image.
This year I decided that I would really make the effort, despite an impending family holiday, to track some stooks down and photograph them. Stooks are created using traditional farming techniques so they aren't that common and finding them can be tricky. From my previous two years of shooting them I knew of at least two fields where they might be though.
Nikon D600, Nikkor 16-35mm f/4 @ 16mm, f/18, ISO 100, 0.5 secs. Taken 23rd July 2014.
Using my previous location knowledge I checked each of these locations once a week in July. No stooks though! Fortunately for me though the crops had not been harvested from those fields so there was still a chance that when I return from my holiday that there might be some stooks.
Fast forward a couple of weeks and I'm sorry to say that my most recent search for stooks has also drawn a blank! Strangely though the crops are still in the fields where I've known there to have been stooks before. I don't know if this is an indication that the farmer is no longer planning on making stooks in that field or that they are making them later than I've seen them before. The photos in this blog were all taken late July and early August, so it should be prime time for stooks!
Nikon D600, Nikkor 16-35mm f/4 @ 22mm, f/18, ISO 100, 1/3 sec. Taken 23rd July 2014.
Given that the crops are still in the fields I'm still hopeful that I will get a shot of them this year. In the mean time I'll just have to enjoy my previous images and hope that this year I will take even better images of this traditional way of stacking crops. I'll keep you posted!
Have you ever seen or photographed stooks? Have you ever had difficulty finding a subject that you wanted to photography? Let me know in the comments below.

Same Spot, Different Photo
In this blog post I discuss why I was back photographing Trevose Head again and how despite putting my tripod legs in almost exactly the same spot as before I ended up with a unique image.
The Perfect Location?
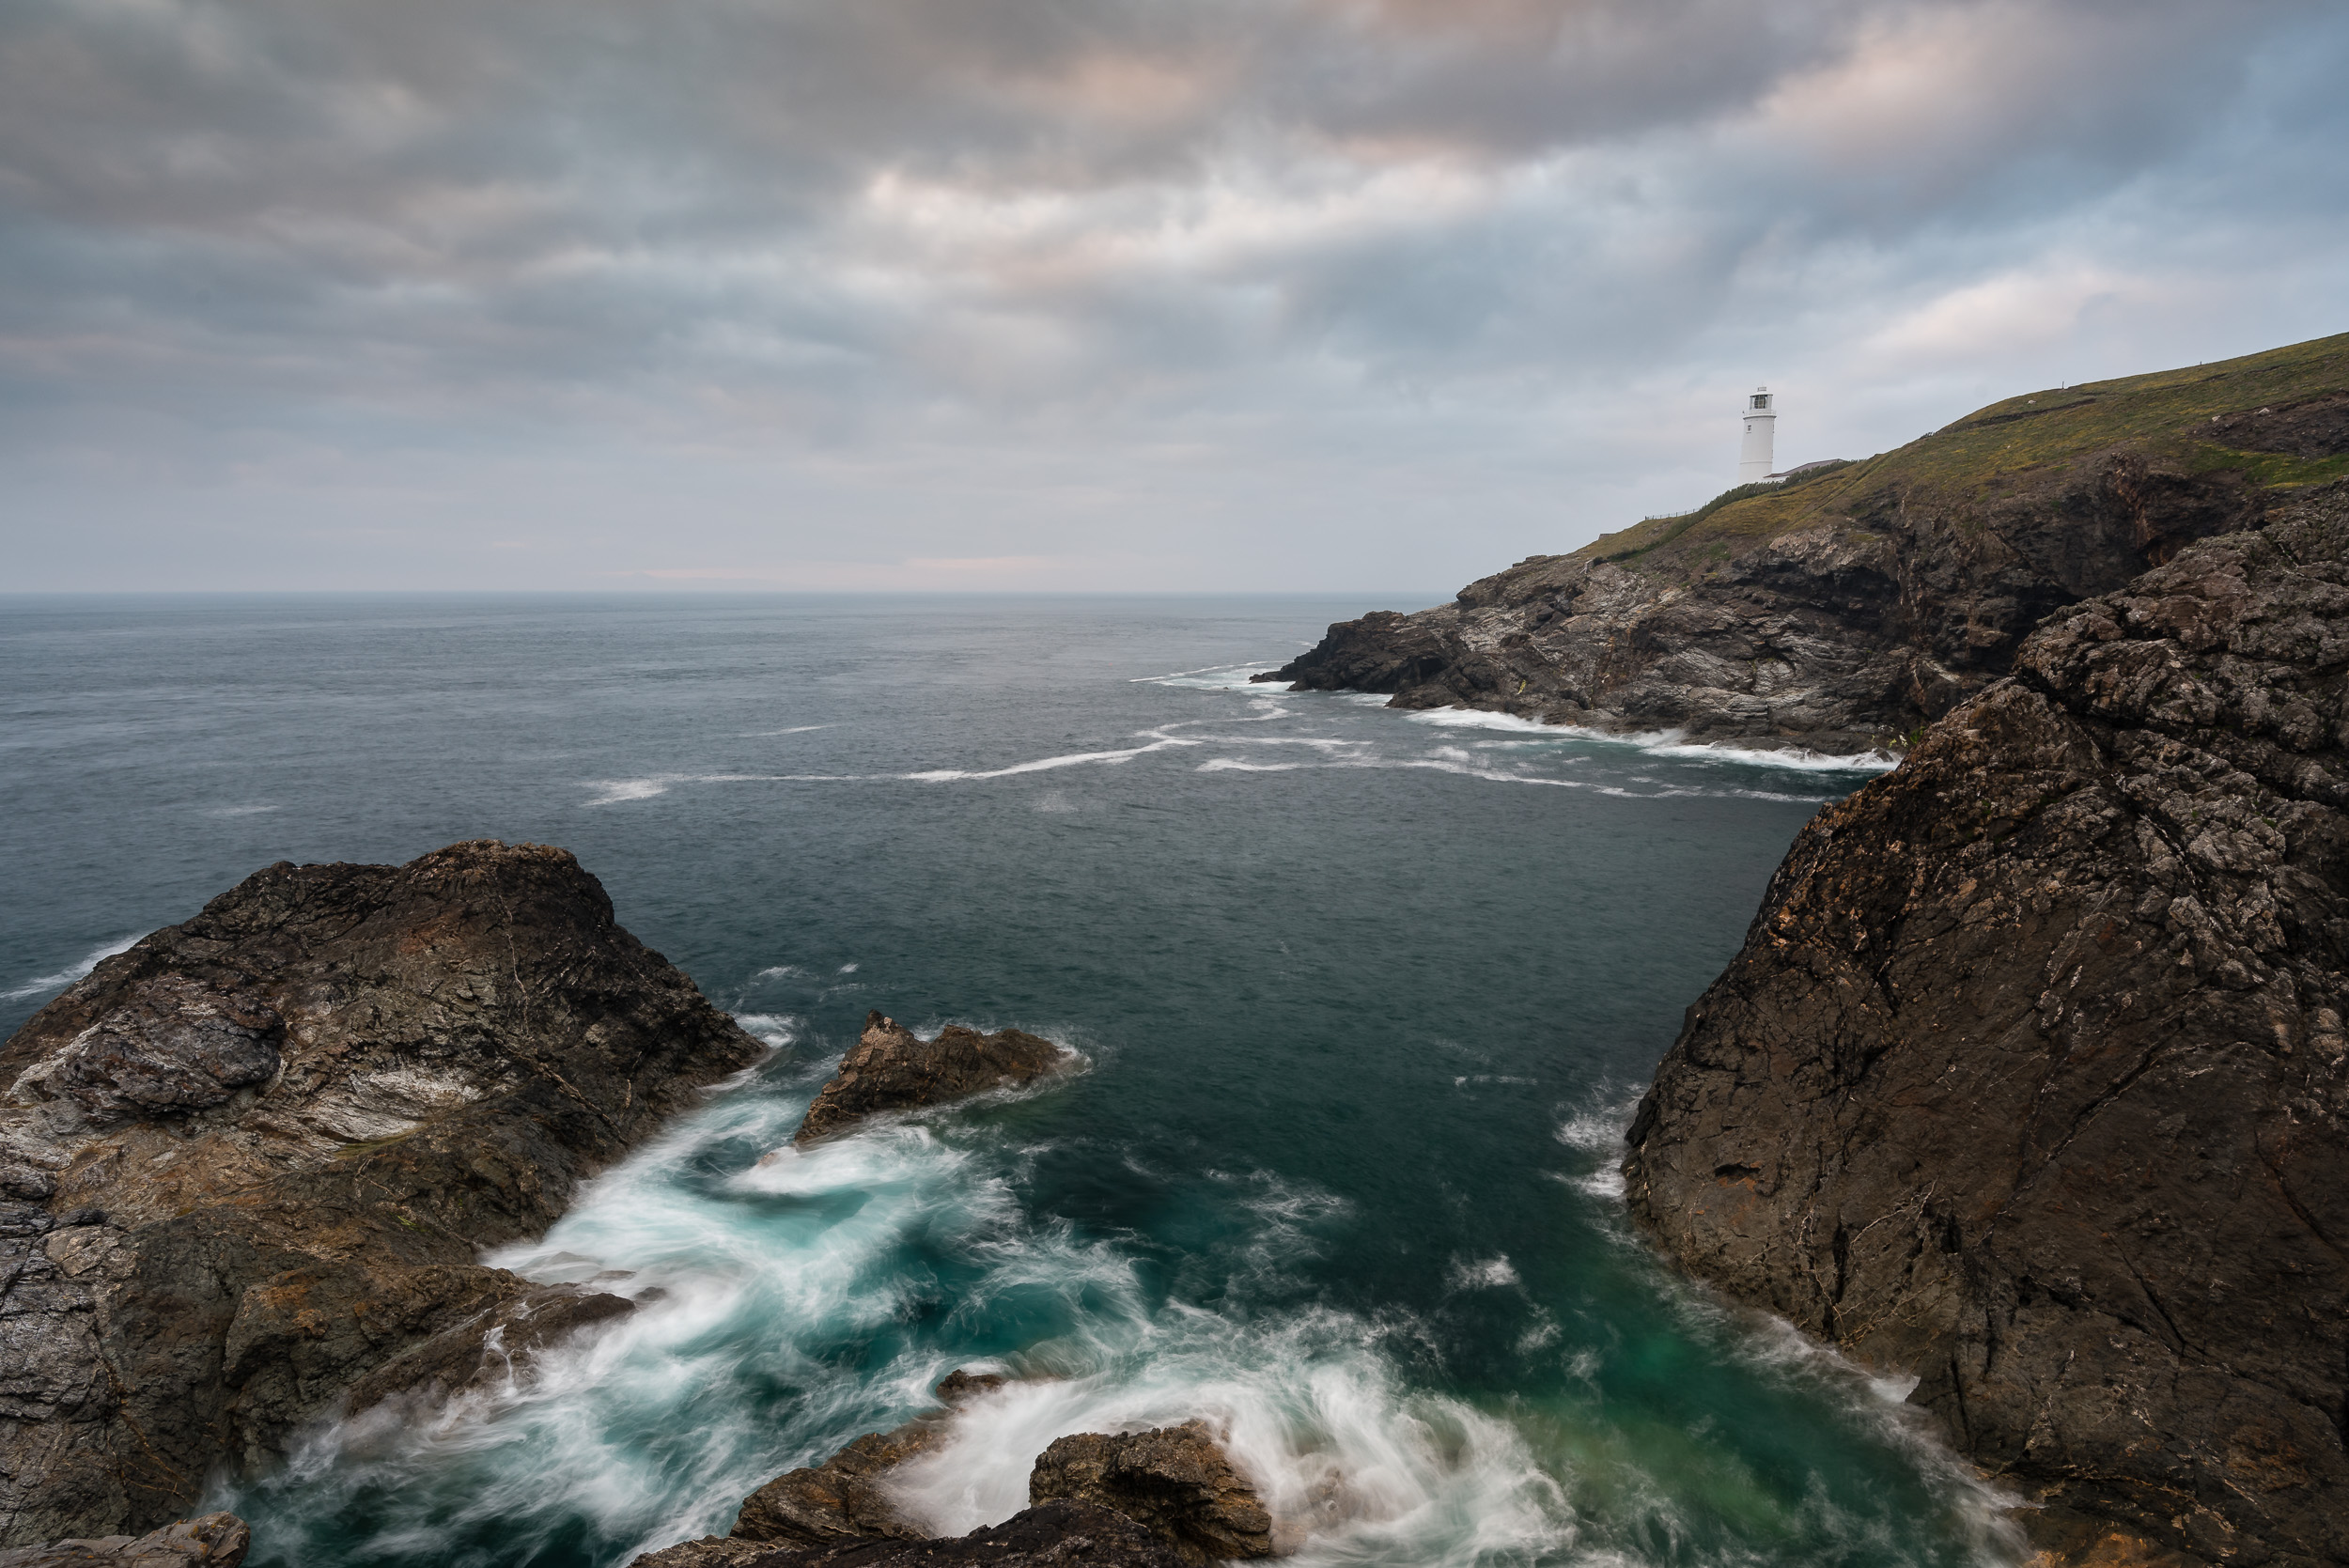
I like shooting at Trevose Head on the north Cornish coast. I never seem to leave that location without having taken a decent photograph. Sometimes I even leave there with a great photograph. I also just enjoy being there. It's an amazing bit of coastline with its lighthouse, rocky cliffs and crashing waves. It can get very windy, and salt spray on your equipment can be a challenge, but just being there and watching the sunset over the coast is a pleasure.
If you want to see what I'm talking about then you should check out my 5 Minute Photo Adventure video from Trevose Head.
But what makes Trevose Head so special? Why do I keep putting my tripod legs in the same spot? I think one of the great appeals with Trevose Head is that it works in a variety of weather conditions. It doesn't seem to matter if the weather is good or bad, overcast, windy, or even what season it is. Don't get me wrong. It's not the perfect location. No location is. However, if you can vary your technique and adjust your style to the conditions then it's one of those locations where you stand a good chance of making a decent image.
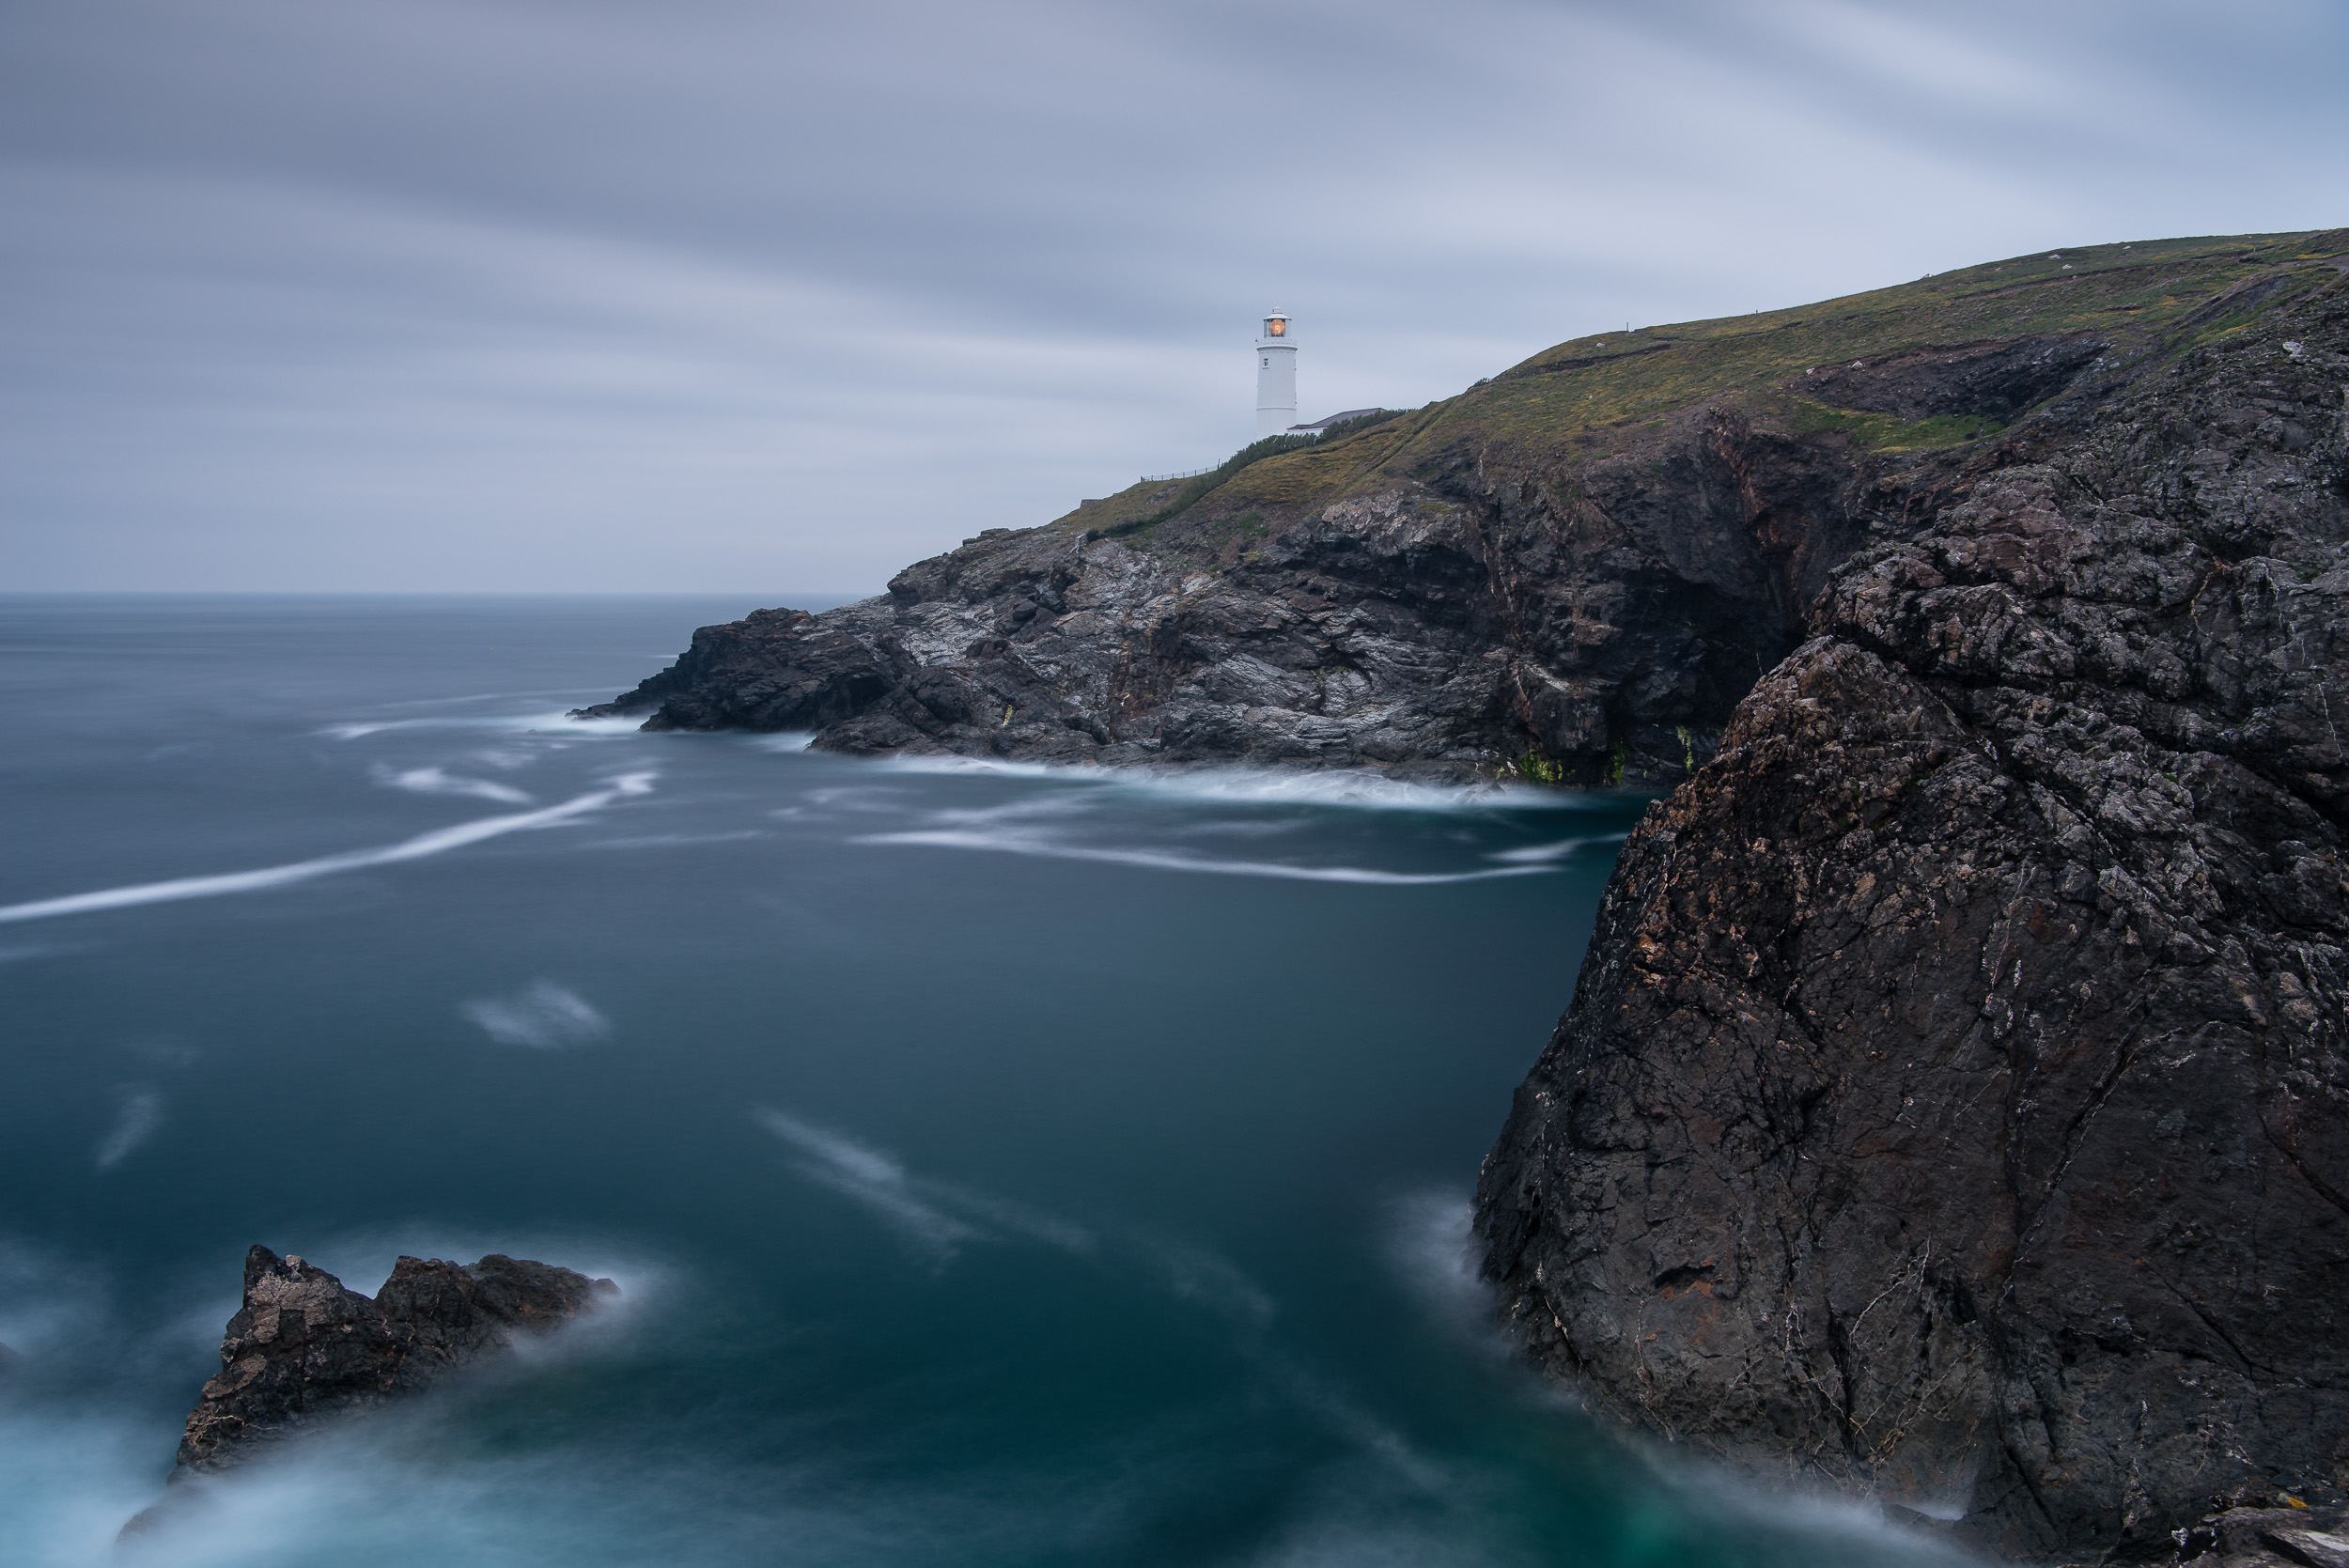
Here are some of my previous images from Trevose Head.
Whose Tripod Holes Are They?
I've just returned from another visit to Trevose Head and the image I captured there inspired me to write this blog post. Though I've previously captured some images that I'm really happy with from Trevose Head, I still thought I could capture something new. So when my friend asked me if I wanted to join him for an evening's shoot at Trevose Head there was only one answer.
It was going to be tough to get there before sunset though. The earliest I could leave home was 7 pm, and given that it is around a 90-minute drive that would only leave me about 40 minutes to jump out the car, make the short walk, setup, and capture something. But the weather forecast looked good and based on my previous experience from that location, I knew the journey would probably be worth it.
When I got there my friend had been shooting for a while and after a quick catch up, I got to work. For me, the best location to shoot Trevose Head is from Stincking Cove looking north east towards the lighthouse. Being a cliff top location there isn't a huge amount of room to move about, so my tripod legs were probably placed in the same spot as they usually are. However, even with my inability to move around a lot there is still plenty of variation to be had by shooting different focal lengths and exposure times.
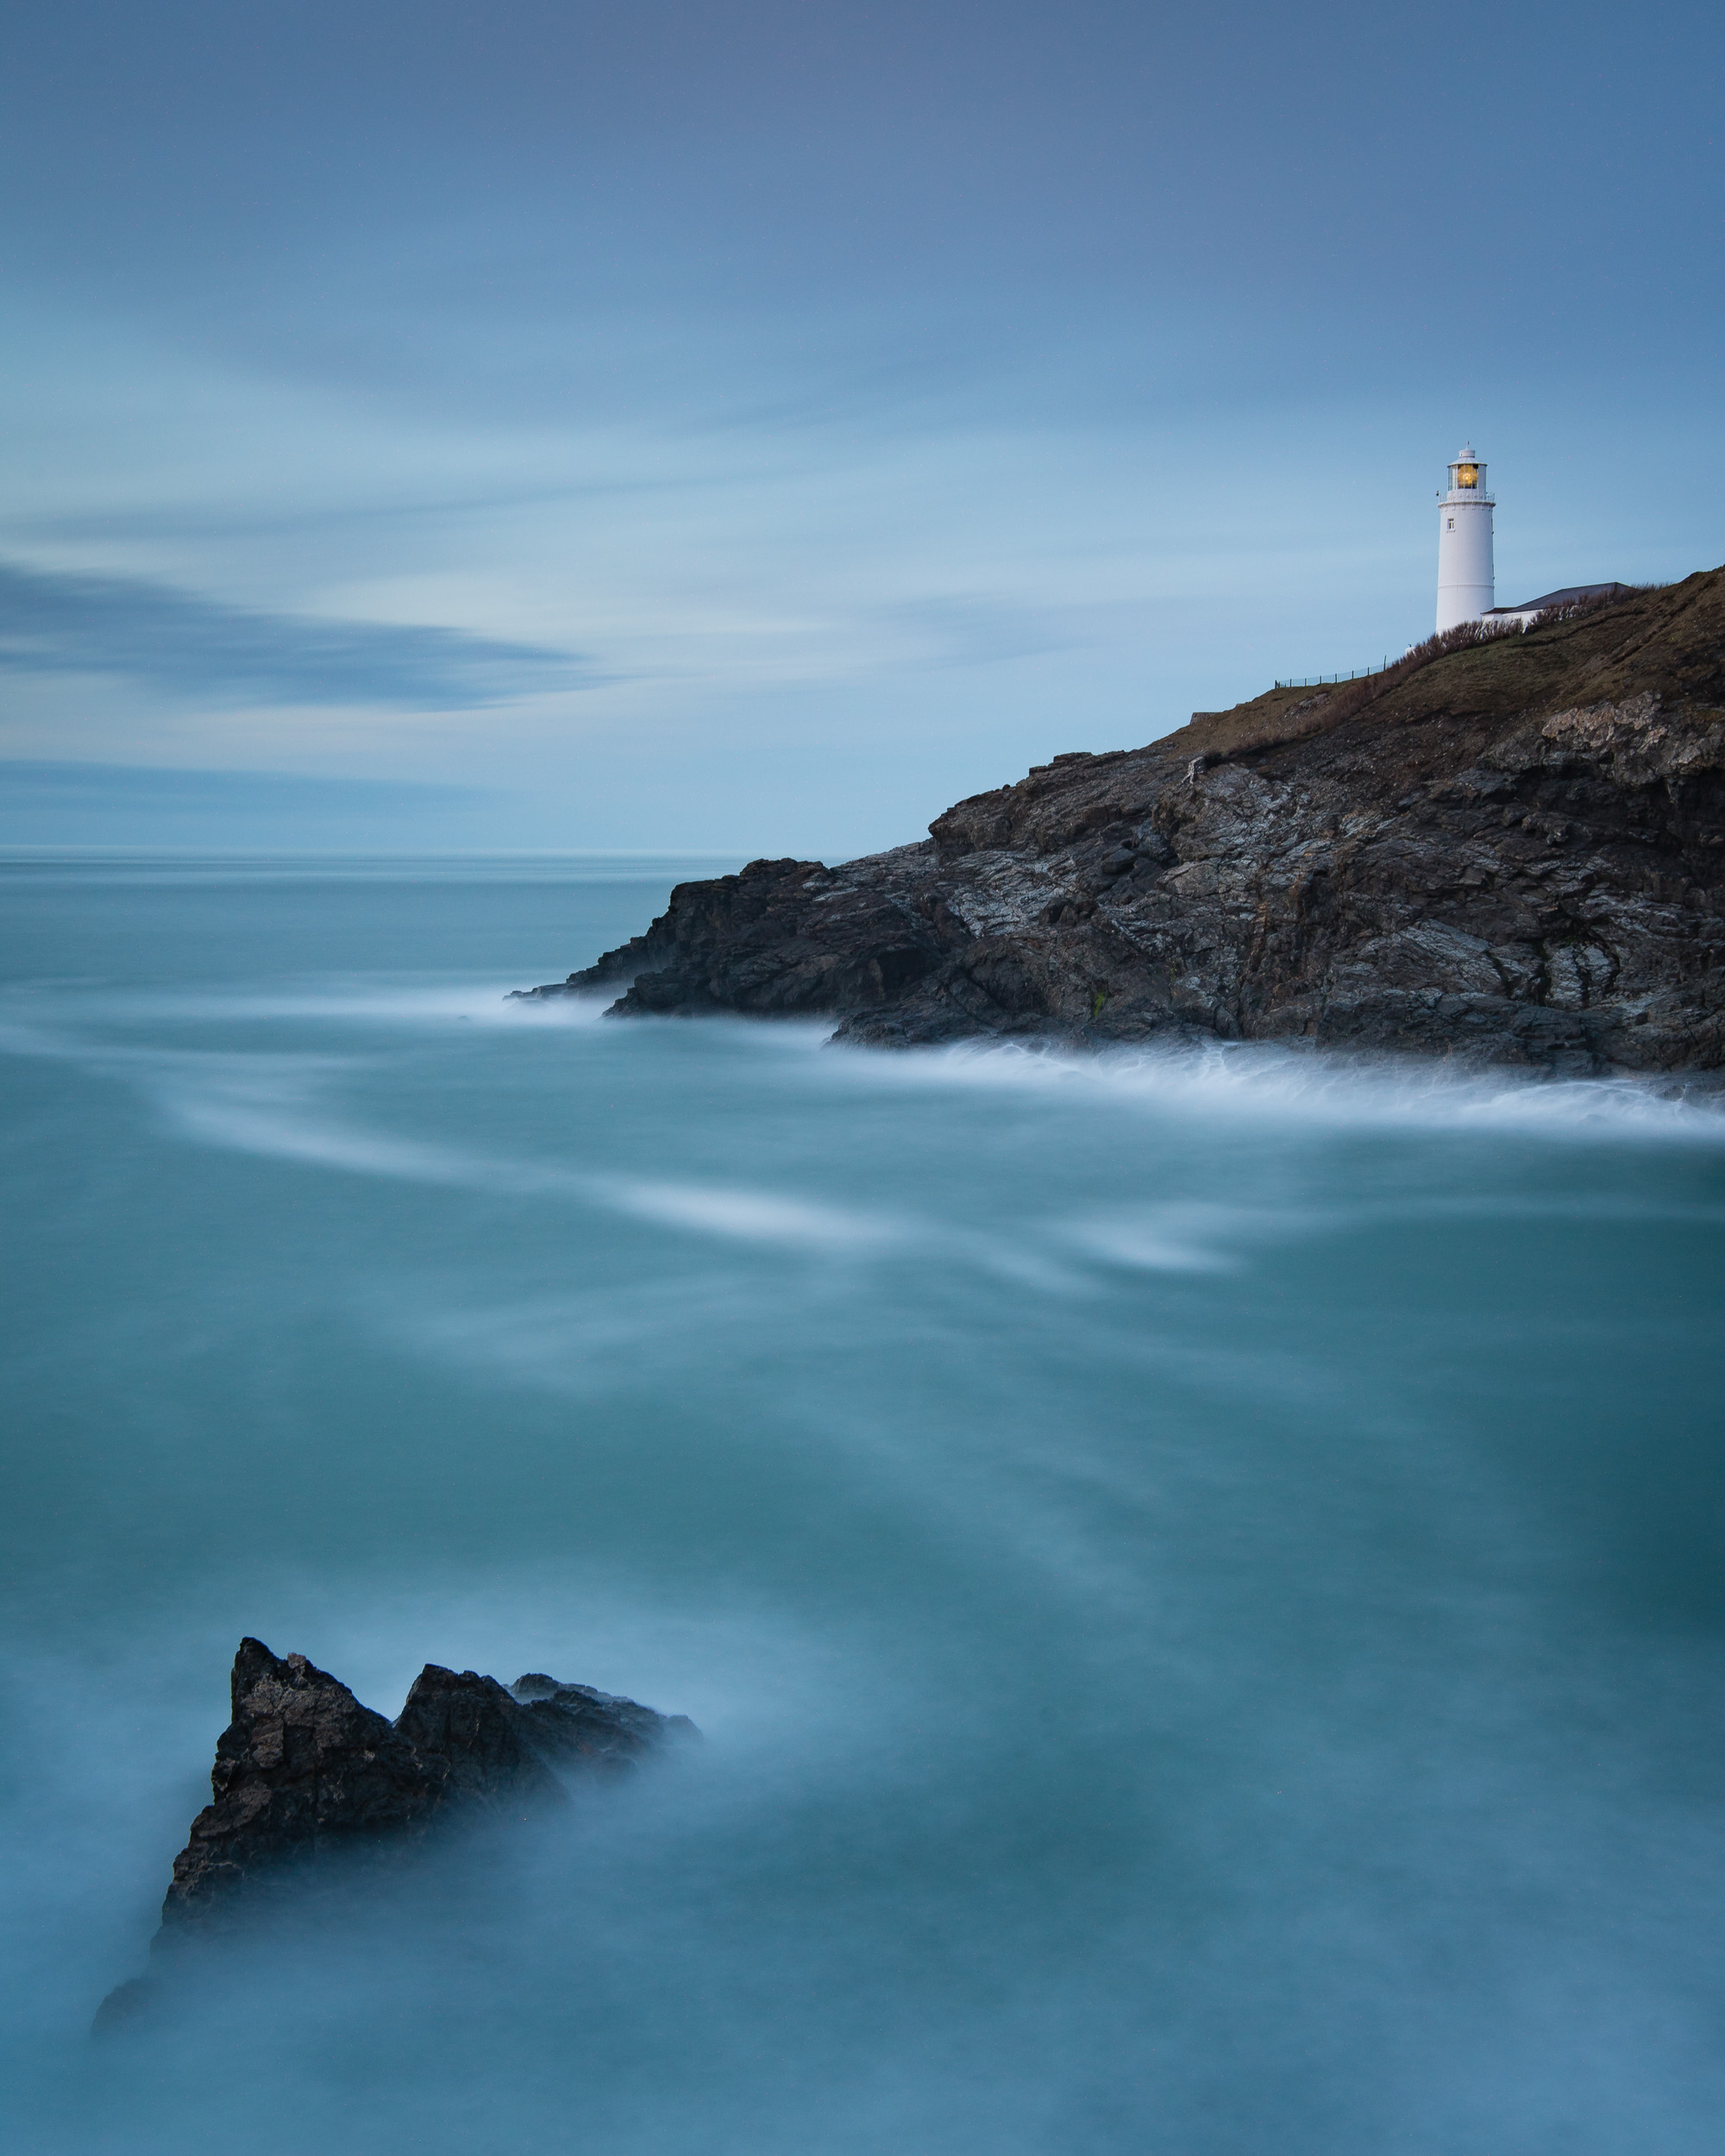
What made my image different this night was the light. Photographers, including myself, do talk about the "light" an awful lot, but hopefully in this image you can see what a difference the light can make:
Nikon D750, Nikkor 16-35mm f/4 @ 22mm, 0.5 sec, ISO 100, f/16, Lee Filters circular polariser, ND grad.
I'm not saying this image is necessarily any better than some of my other images taken from the same spot, but it is a very different image from my darker, moodier images that I've taken there previously. The light was only there for a few minutes but I love the way it reflects off the sea, the cliffs and the lighthouse. It just shows you that every visit to a location can be unique and therefore produce a unique image.
To ND or Not To ND
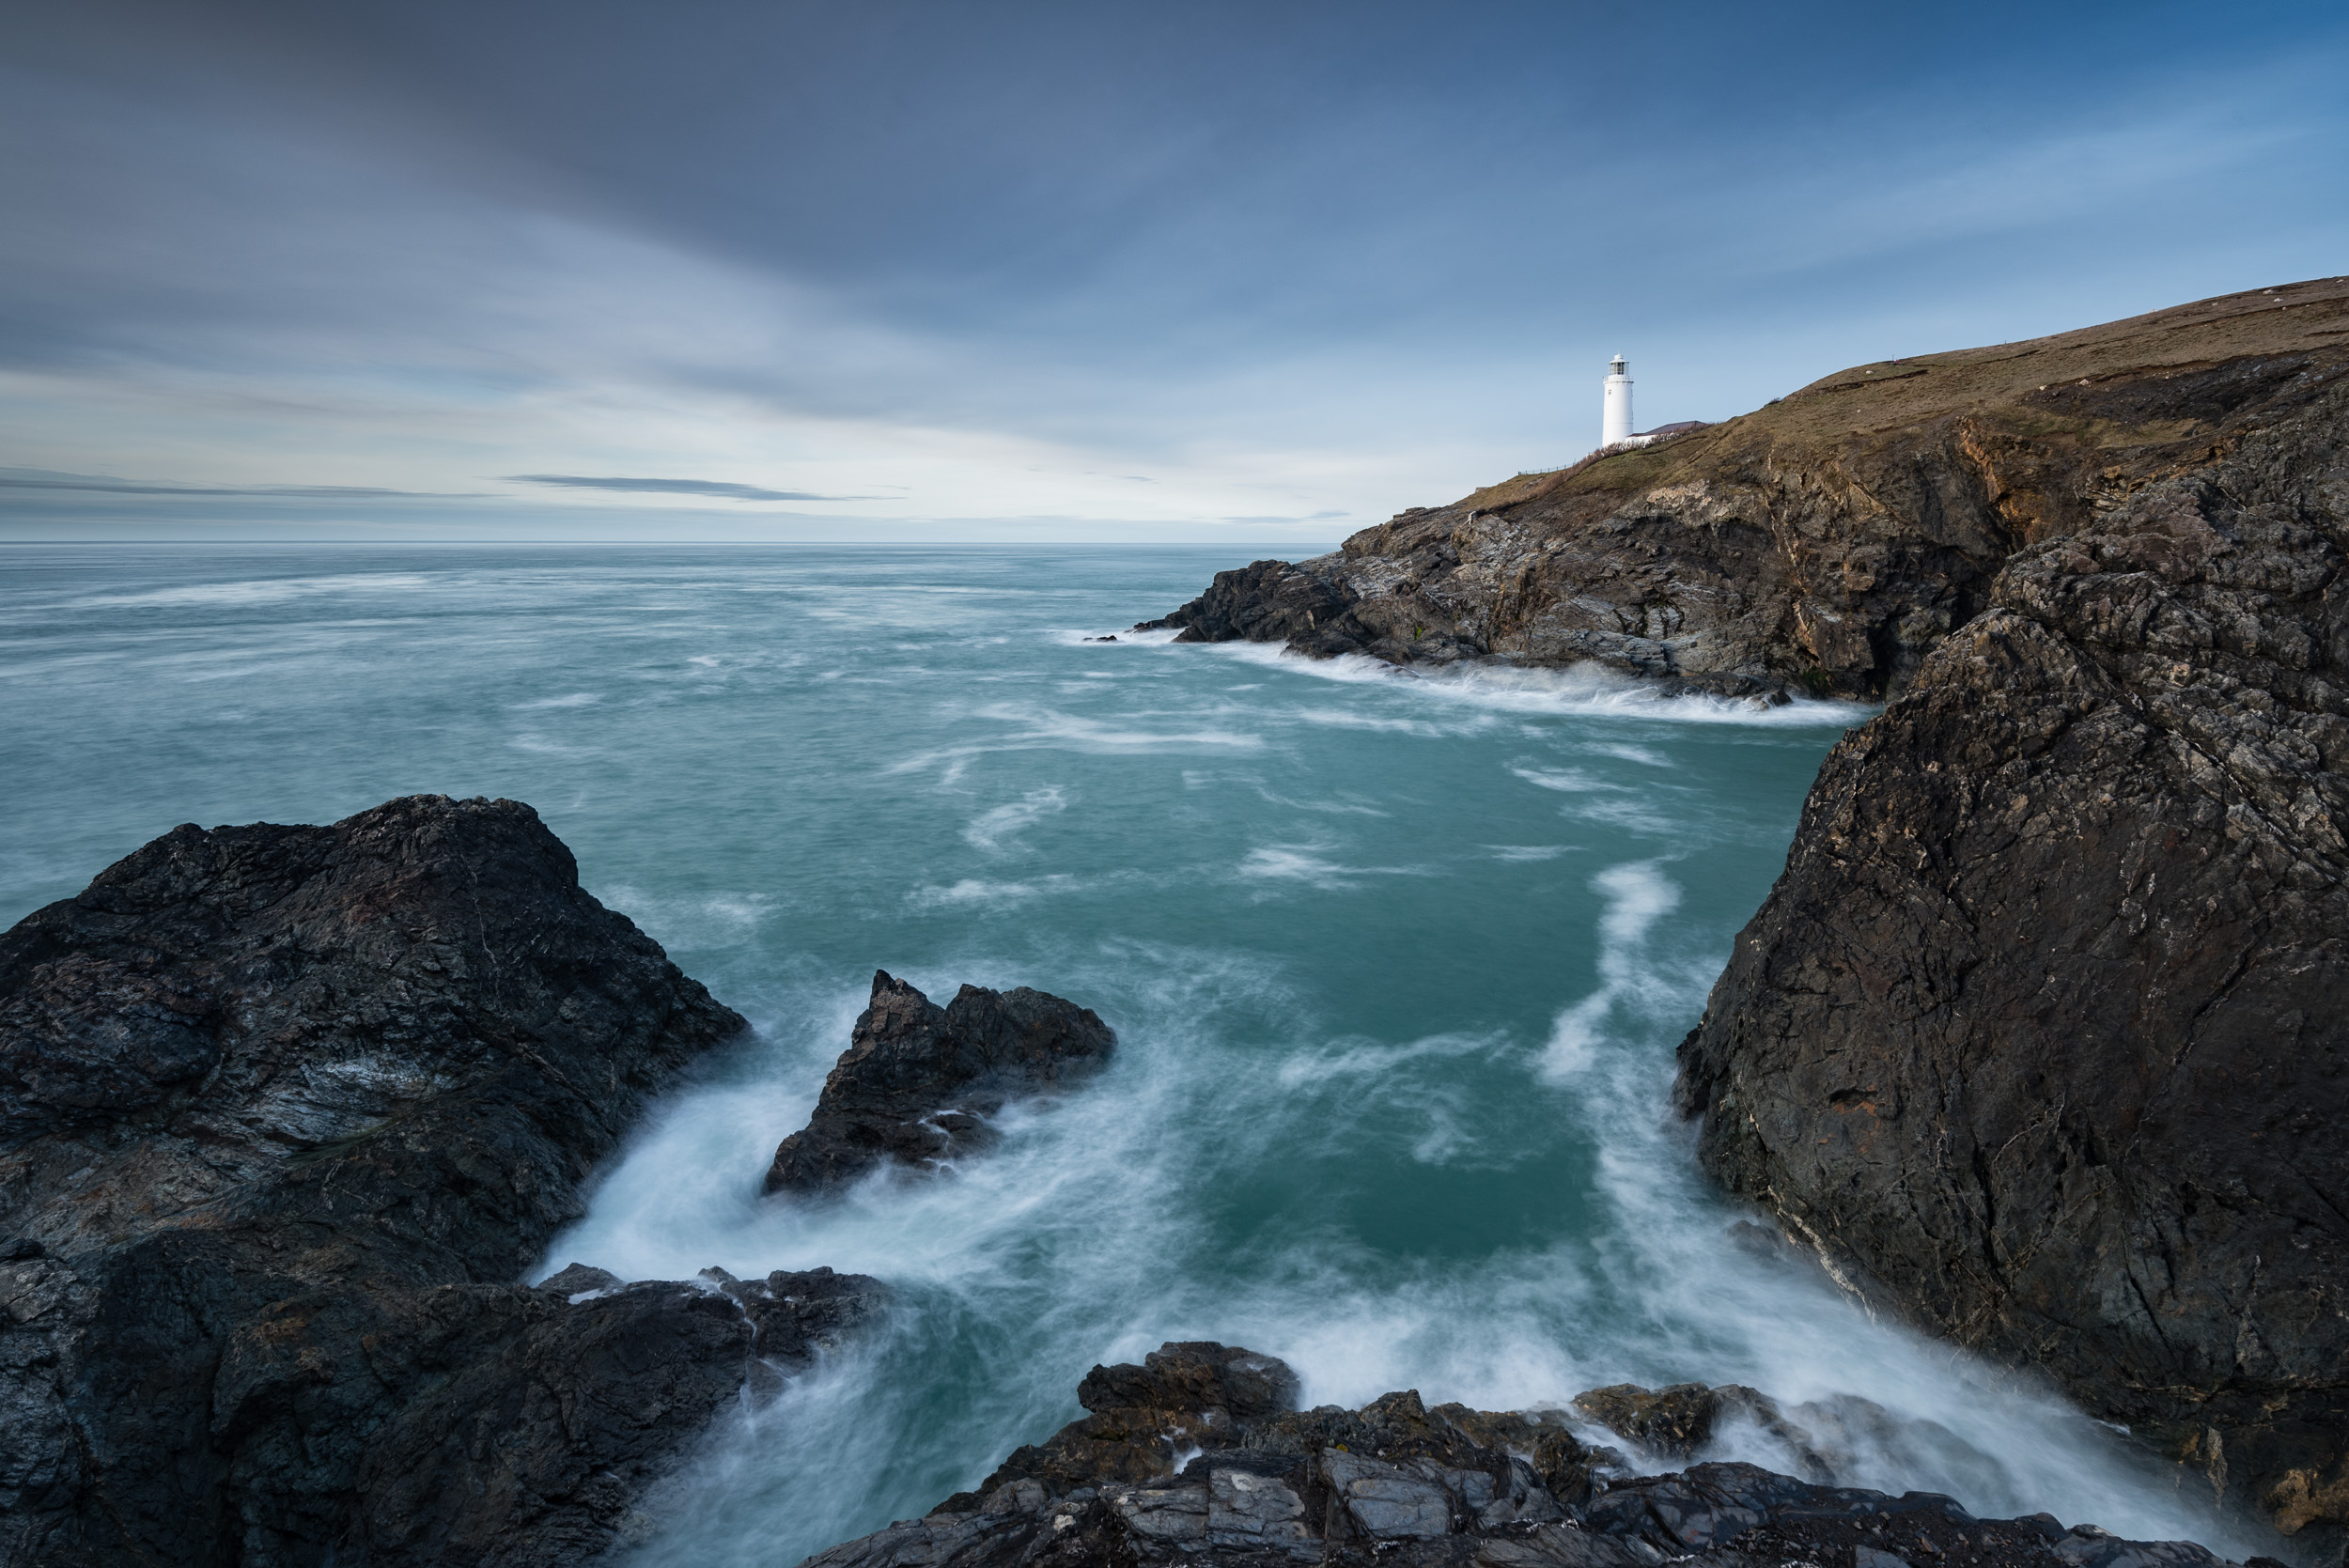
I'm a big fan of the ND filter. I use them a lot and you can see how I use them in this video. That doesn't mean I will use them in all my images though. I try to use them creatively if I think the image will benefit from a slightly longer exposure. I do tend to go for longer exposures for my seascapes as I like the resulting smooth water or the patterns that are painted by the moving water. You'll maybe have noticed though that the image I've just shared above isn't a long exposure. At the time I felt that smoothing out the water wouldn't be the right thing to do for the image I wanted to create. I liked the choppy water and the way the light reflected off the tops of the waves.
I did take a long exposure and while I am of course very happy with it, I still very much prefer the shorter exposure.
Nikon D750, Nikkor 16-35mm f/4 @ 22mm, 30 secs, ISO 100, f/16, Lee Filters circular polariser, ND grad.
Ignore Those Who Say...
All this talk of returning to a location to take the "same" picture reminds me of a Twitter post that I saw recently. I can't remember what it said exactly but it seemed to involve a number of photographers talking about a photograph of a few sets of tripod legs all crammed into the same spot. The general gist of the conversation was that these photographers lacked any original thought and were just copying each other or those that were there before them.
Though I didn't reply to the Twitter post, I couldn't have disagreed more for two reasons. Firstly, who's to say that just because a photograph has been taken from a spot before that another photographer can't take a similar image. If you are just starting out in photography I would actively encourage you to visit locations that you've seen in other peoples images. I even don't see any problem with trying to replicate the composition. It's often a good way of learning. If you have been inspired by an image you have seen then why not try your hand at that location.
I bring this topic up now because even though I have visited Trevose Head a few times and taken photos from the same spot, I get different results each time. So I would encourage you to put your tripod legs where my legs were and take the same photo. Your image will be unique and hopefully special to you.
The other reason I disagree with that Twitter post is that if you put two photographers in the same location at the same time you'll likely end up with two different images. An example of this was when I met a very nice photographer called Johnny Baird during a trip up to Scotland to photograph Glencoe. We both stood in the middle of the River Coupall, photographing Buachaille Etive Mor at sunset and despite the close proximity of our tripod legs, we shot very different images. Just because we were in the same location at the same time, how we choose to interpret the scene, choice of equipment and setup all meant we ended up with different images.
Don't let anyone tell you that a location has been overshot or that you must find a unique location for your photograph to be worth anything. So next time you're in Dorset, go to some of its most iconic locations such a Durdle Door and join the dozen other photographers that will be there and get your very own image.
Do you have a location that always delivers results for you? Did you prefer the long or short exposure that I took? What are your thoughts on visiting well shot or iconic locations? Let me know in the comments below.

Getting to Know Colmer's Hill
In this blog post I tell about my 3rd visit to Colmer's Hill and how despite the experience of the previous 2 visits I still have a lot to learn about this fantastic Dorset location.
Third Time Lucky?
On paper Colmer's Hill is a relatively straightforward location to shoot. Its conical shape makes it stand out from the rest of the landscape luring the photographer into some obvious but pleasing compositions. However, as I've just learnt the most obvious composition isn't always the best.
My most recent visit to Colmer's Hill is my third this year. The previous two visits had largely been unsuccessful but I was putting both those visits down as exploratory shoots while I looked for the optimal position. On my third visit, I decided that I would opt to shoot the hill from a less elevated viewpoint so that the top of the hill would be above the horizon. On my previous visits, I had adopted a position on top of the hill opposite Colmer's Hill. This drops the top of the hill below the horizon which, based on the images I've seen, work best when mist surrounds the hill leaving just the peak visible, similar to this image I took on my first visit in January of 2017.
The weather forecast for my most recent visit wasn't for any mist but it did show signs that the high-level cloud could be well illuminated by the rising sun. These predicted conditions together with the plan but of shooting from a lower elevation I thought would provide me with the best chance of getting a good photo. With my plan decided I set the alarm for 04:30!
On my arrival at Quarr Lane at 05:45 the conditions were already looking promising so I quickly headed to my chosen spot. Sure enough, the top of Colmer's Hill was placed nicely above the horizon and I was sure I know had the best spot. So I started to set up my camera and waited for the cloud and light show to start. And start it did. Just not where I wanted it to be. Sure there was sufficient cloud above the top of the hill but the real action was happening just 45 degrees to my right.
Not Quite the Right Spot
The most glorious show of pink clouds was happening just above the spot where the rising sun was. As a personal preference, I don't shoot straight into the sun so I had positioned myself so that it would be excluded from the frame. It seemed like a good plan at the time, after all, the good colour in the sky is not often limited to a single spot. However if I had selected a more northerly position, so the sun was rising directly behind the hill, I would have been able to include the dramatic clouds in my composition.
However, landscape photography is a combination of luck, planning and experience. I had done my planning and luck I can't really control but having little more experience at the location may have allowed me to assess the conditions more effectively and possibly change the spot I was shooting from. It would have been a bit of a walk and might have needed a brisk run but it probably would have been worth it.
However the morning wasn't wasted as I still got out with the camera, enjoyed a lovely sunrise and managed to get this pleasing image.
Nikon D750, Nikkor 70-200mm f/2.8 @ 70mm, f/11, 1/13 sec, ISO 100, Lee Filters ND 0.9 soft grad.
Understanding Your Location
So what did I learn from this trip out with the camera? Well, despite the experience of my previous two visits, and planning for the third, I found that I still had plenty to learn about shooting Colmer's Hill. As I described in my previous blog article, Perseverance - Photographing Bowerman's Nose, it can take many, many trips to a location before you really get to know it and get an image that is worthy of the location. In some cases, you might never really know a location and it will continue to throw you a surprise or two. To be honest, that's probably a good thing though.
Even though I've been there three times I will certainly be going back again. Each time I go though I will understand the location a bit better and I will be able to make the necessary adjustments to increase the likely hood of success.
My Top 3 Tips for Colmer's Hill
So if you fancy a trip to Colmer's Hill, and why wouldn't you, here are my three top tips:
Take a long lens. You'll want something in the range of 24-70mm, but if you have it take a 70-200mm (or something can reach past 100mm).
Explore. You can shoot Colmer's Hill from a number of spots, covering a range of elevations and distance. You might need to go a few times to understand which spots work best and when.
Check Weather and Direction of Light. Colmer's Hill is both a sunrise and sunset location, and it works in a variety of weathers. Choose your spot(s) based on the conditions, but be prepared to change them.
If you'd like to see more of Colmer's Hill why not check out my 5 Minute Photo Adventure video that I shot while I was there. You can see how I created the images above and give you an idea of what it's like to shoot there.
So have you shot Colmer's Hill before? Do you have a favourite spot to shoot it from? Do you have a favourite location that you've visited many times but you still feel you are getting to know it? Let me know in the comments below.
Location Scouting in the Teign Valley
In this video blog post I head out to Fingle Bridge and the Teign valley to scout out some locations for an autumn themed shoot.
The Importance of Scouting
The time I spend with the camera is precious. I have a full time job and a family that keeps me really busy so when I do get out I like to make the most of it. Sometimes I just go out to practice with my camera (see my blog post on practicing) or I'll go out to scout out a location. For me scouting out a location can be a really good use of time. For locations such as the upper Teign valley near Fingle Bridge in Devon, having a number of spots already picked out means that when the golden hour comes I'm only worrying about composition and not finding a good location.
In this short video I take you on a recent trip to the upper Teign Valley where I spend some time walking the path looking for locations that I can use for some autumnal shots that I want to take there. I'm travelling light with my Sony RX100M4 and a Manfrotto BeFree Carbon tripod but it allows me to quickly take shots from locations as I move along the valley.
Here's the video:
Mission Successful?
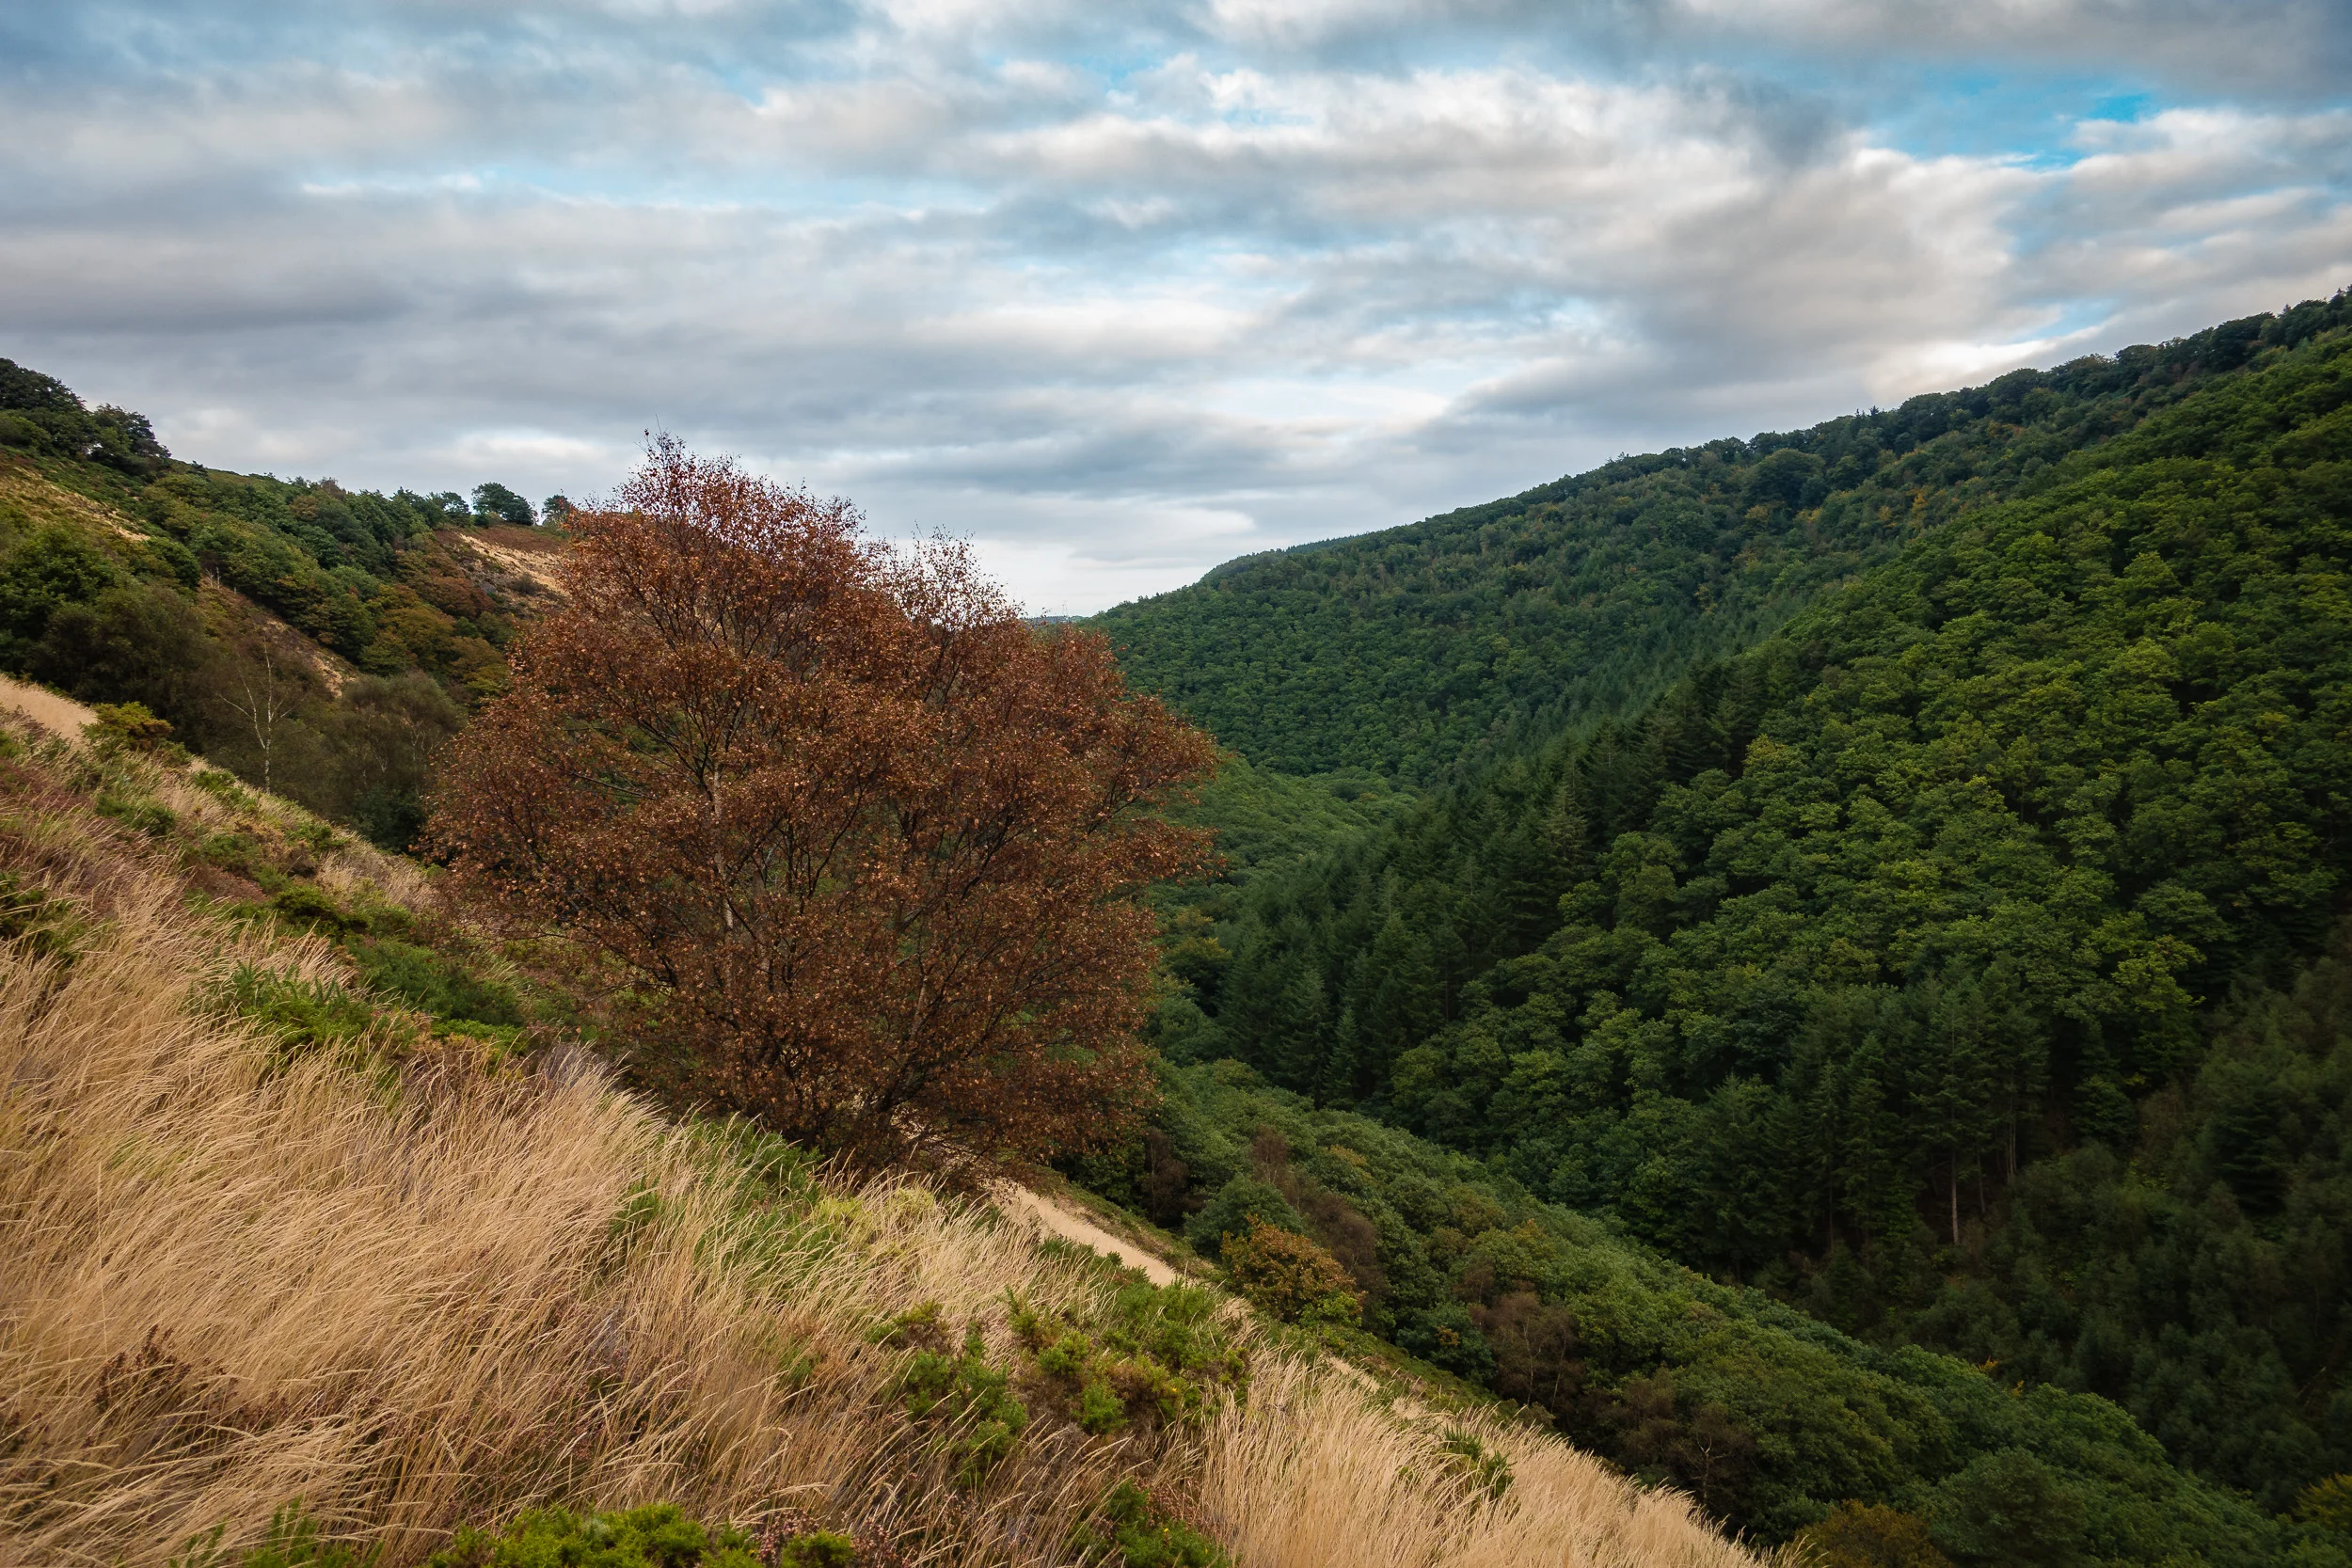
Here are the images that I took from the locations I scouted:


Now I'll be the first to admit that these aren't award winning images. The composition was setup up quickly and the light not exactly at its best but it does give me some really good ideas on where I want to shoot when I do go up there when the autumnal colours are in there full glory.
I also originally had this location down as a sunrise only location but because of this scouting exercise I'm fairly sure I could get images at either end of the day. So was it worth while? Well yes. Anytime with the camera is good but I feel more prepared to shoot this particular location now.
Do You Scout?
Do you spend time scouting out the locations you want to shoot? Or do you just turn up and see what takes your eye? Let me know in the comments.

Remember to Look Around
It's all to easy to concentrate on the scene in front of you, but as I discovered there can be a lot going on just behind you.
Photographing An Old Friend
I don't know about you but I have a few places on my location map that are easy to get to and provide a variety of angles to shoot from. So when the weather forecast for last Tuesday was a bit 50/50 for a good sunset I thought I'd go somewhere I know so that if it fails to be spectacular I won't have spent a significant amount of effort getting there.
How I saw the scene last year.
Heading down to my target location of Emsworthy Rocks just down from Haytor I was still confident that I was going to get a good shot. I decided to shoot the rocks and tree from a position that I hadn't used before. My plan was to have my back to the setting sun so that the tree and rocks would be bathed in golden light. There wasn't going to be much going on in the sky so I positioned the main elements higher up in the frame leaving some of the ground rock formations in the foreground.
Playing the Waiting Game
I went through all my normal checks for exposure and sharpness and then waited with the remote release for that magic moment where the colour would bath my subject in glorious golden light.
This is the scene I came to shoot but the light and sky just weren't what I wanted.
Well some time passed and I had shot a few frames but the scene just lacked a bit of punch. In my focus on the scene in front of me I'd failed to look to see what else was going on. It's all too easy to go out with a singular focus on what you want to achieve but this can sometimes mean you'll miss something a bit more special. I was convinced that my target scene would come good. However I casually turned 90 degrees to my right and was presented with a much more interesting scene. The light on the rocks was much more pleasing and the sky had a bit more interest about it.
Change of Plans
On the same spot as the last image but 90 degrees to the right.
I pondered if I should go to the hassle of changing my composition and moving my tripod (which had taken bit of setup to balance on the rock I was perched on). I knew I would regret it if I didn't at least try so I repositioned the tripod, got a Lee Filters ND 0.9 medium grad out and shot a few frames of this new scene.
I did go back to shooting a few frames of my original composition but I already knew that I'd grabbed the best shot I was going to get that night. So what did I learn from this particular adventure? Don't get too focused on one scene or shooting a particular direction. The landscape, particularly the wilds of Dartmoor, are wide open spaces and the light can look very different simply by looking a different direction from the same point. I was committed to getting the image in my head but I almost missed a much better one.
Have you had a similar experience? Have you looked round to find a much better shot or do you remain focused on what is in front of you? Let me know in the comments.