

Bite-Size Blog Post #37 - Dawlish
In this blog post I head to Dawlish to photograph something a little different but I'm not sure of the results.
And now for something completely different…
Over the last couple of years, I've spent a lot of time photographing Dartmoor. It feels like the only thing I've been photographing! Looking back at the list of blog posts I've published recently it's probably a fair assessment. Apart from the odd deviation, it’s all been Dartmoor, Dartmoor, Dartmoor!
Despite my need for a change of scenery I decided the best place for me to photograph with my next block of available free time would be Dartmoor! After such a good run photographing the heather on Dartmoor, I wanted to push my luck and go for one more shoot. However, while driving to Dartmoor I could clearly see the that the conditions weren't the same as what the weather forecast had predicated. The sky was looking very overcast. Glancing over to the coast however, there were patches of blue sky. A change of plan was needed!
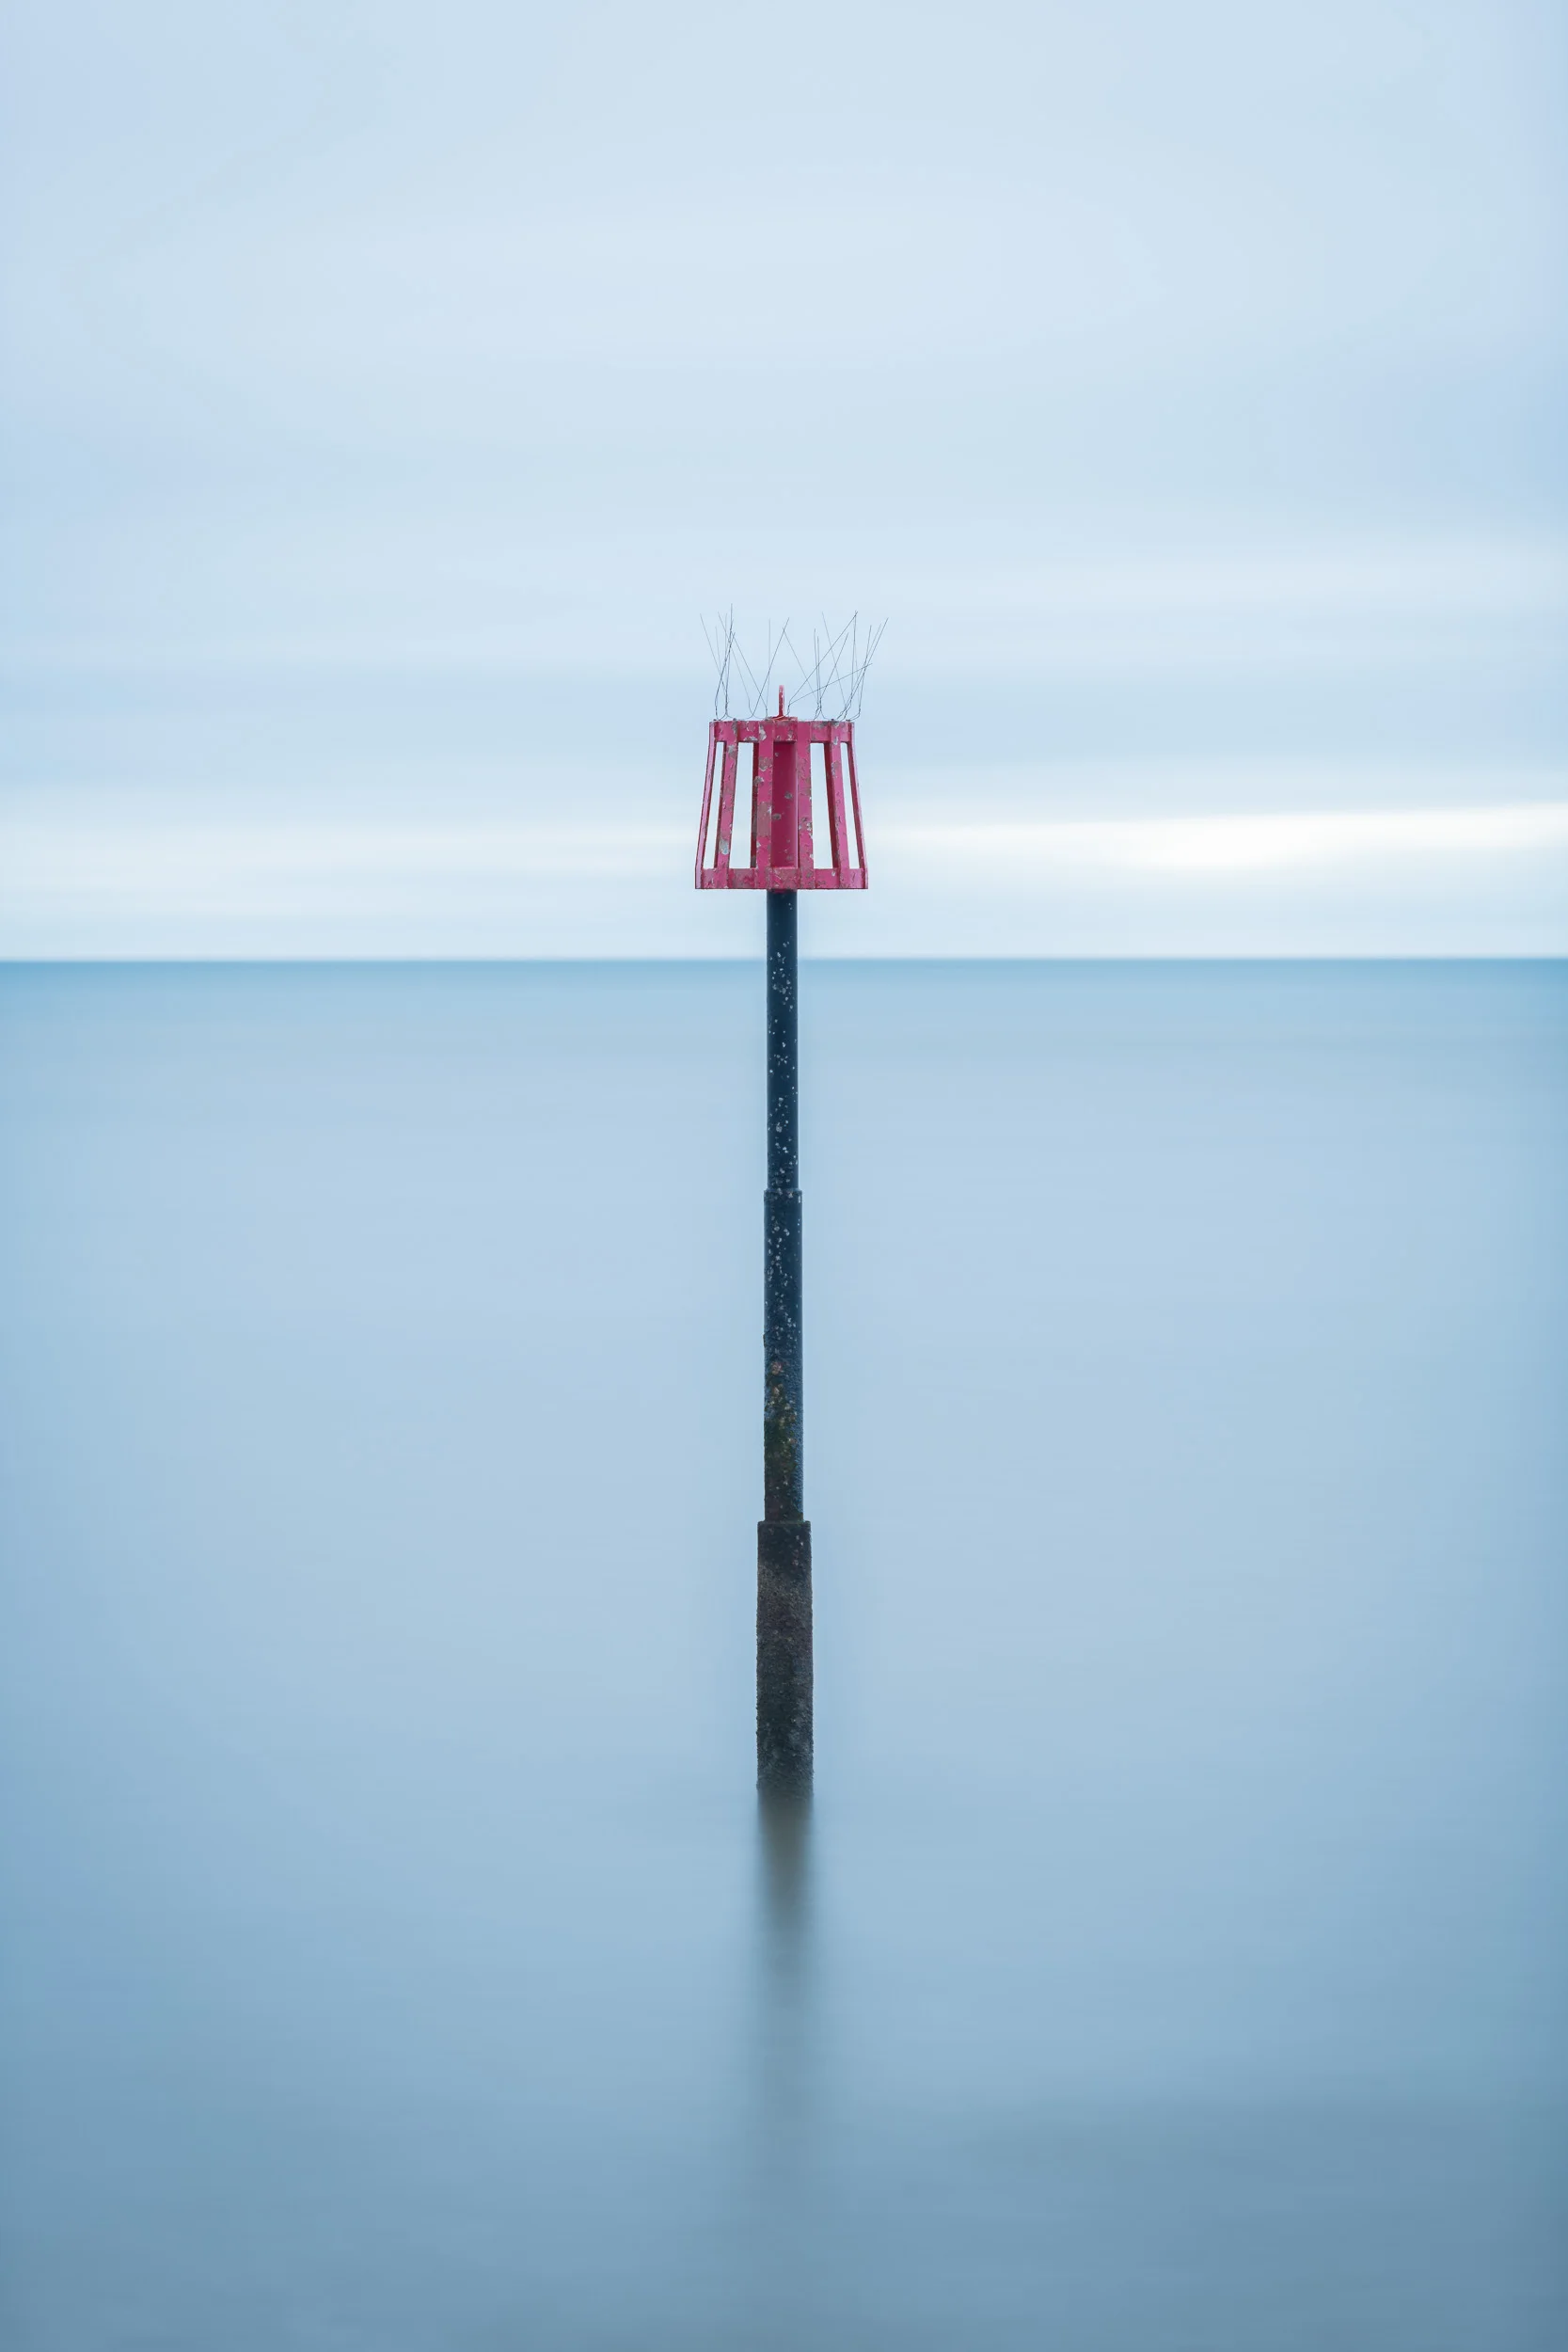
It was already too late to go anywhere too far away like Dorset or Cornwall, so after pulling over to check my map, I settled on Dawlish. I had spotted a large stone groyne last time I was there, and I remember thinking it might make for a good long exposure photograph. I knew the tide was high, but as with any sunset shot there's always a risk that you get there to find the groyne populated with people or anglers.
I needn't have worried as to my surprise it was free of people, so I quickly got to work and captured this photograph.
Dawlish Groyne, South West Coast Path, Devon - Nikon Z8 with Nikkor Z 24-120mm f/4 S at 24mm, f/13, 15 secs at ISO 64, Kase Filters CPL and ND Grad.
Looking at the photograph now, I'm not convinced it works though. I like the tones, the cloud cover and the simplicity of the image. However, I think my main issue is that while the horizon is completely level, the groyne doesn’t appear level in the frame. There’s one simple reason for this and that's because it's not actually level. Well, not at that point on the groyne anyway. It does level of a bit further down, but that would require me to shot it at a lower tide. (Which would also allow the red marker post at the end to be larger in frame).
I think the groyne being unlevel unbalances the composition in a composition where I feel balance is everything. It's also possible that this view simply doesn't work as a photograph. Just because it's a simple composition, and a long exposure, doesn’t make it good. Time will tell. I'll look at it again in a few months and I'll either think it does work, or I wish I hadn't bothered. Well, that’s not true. I'm glad I tried something different. It's important that I did and perhaps I need to do so more often.
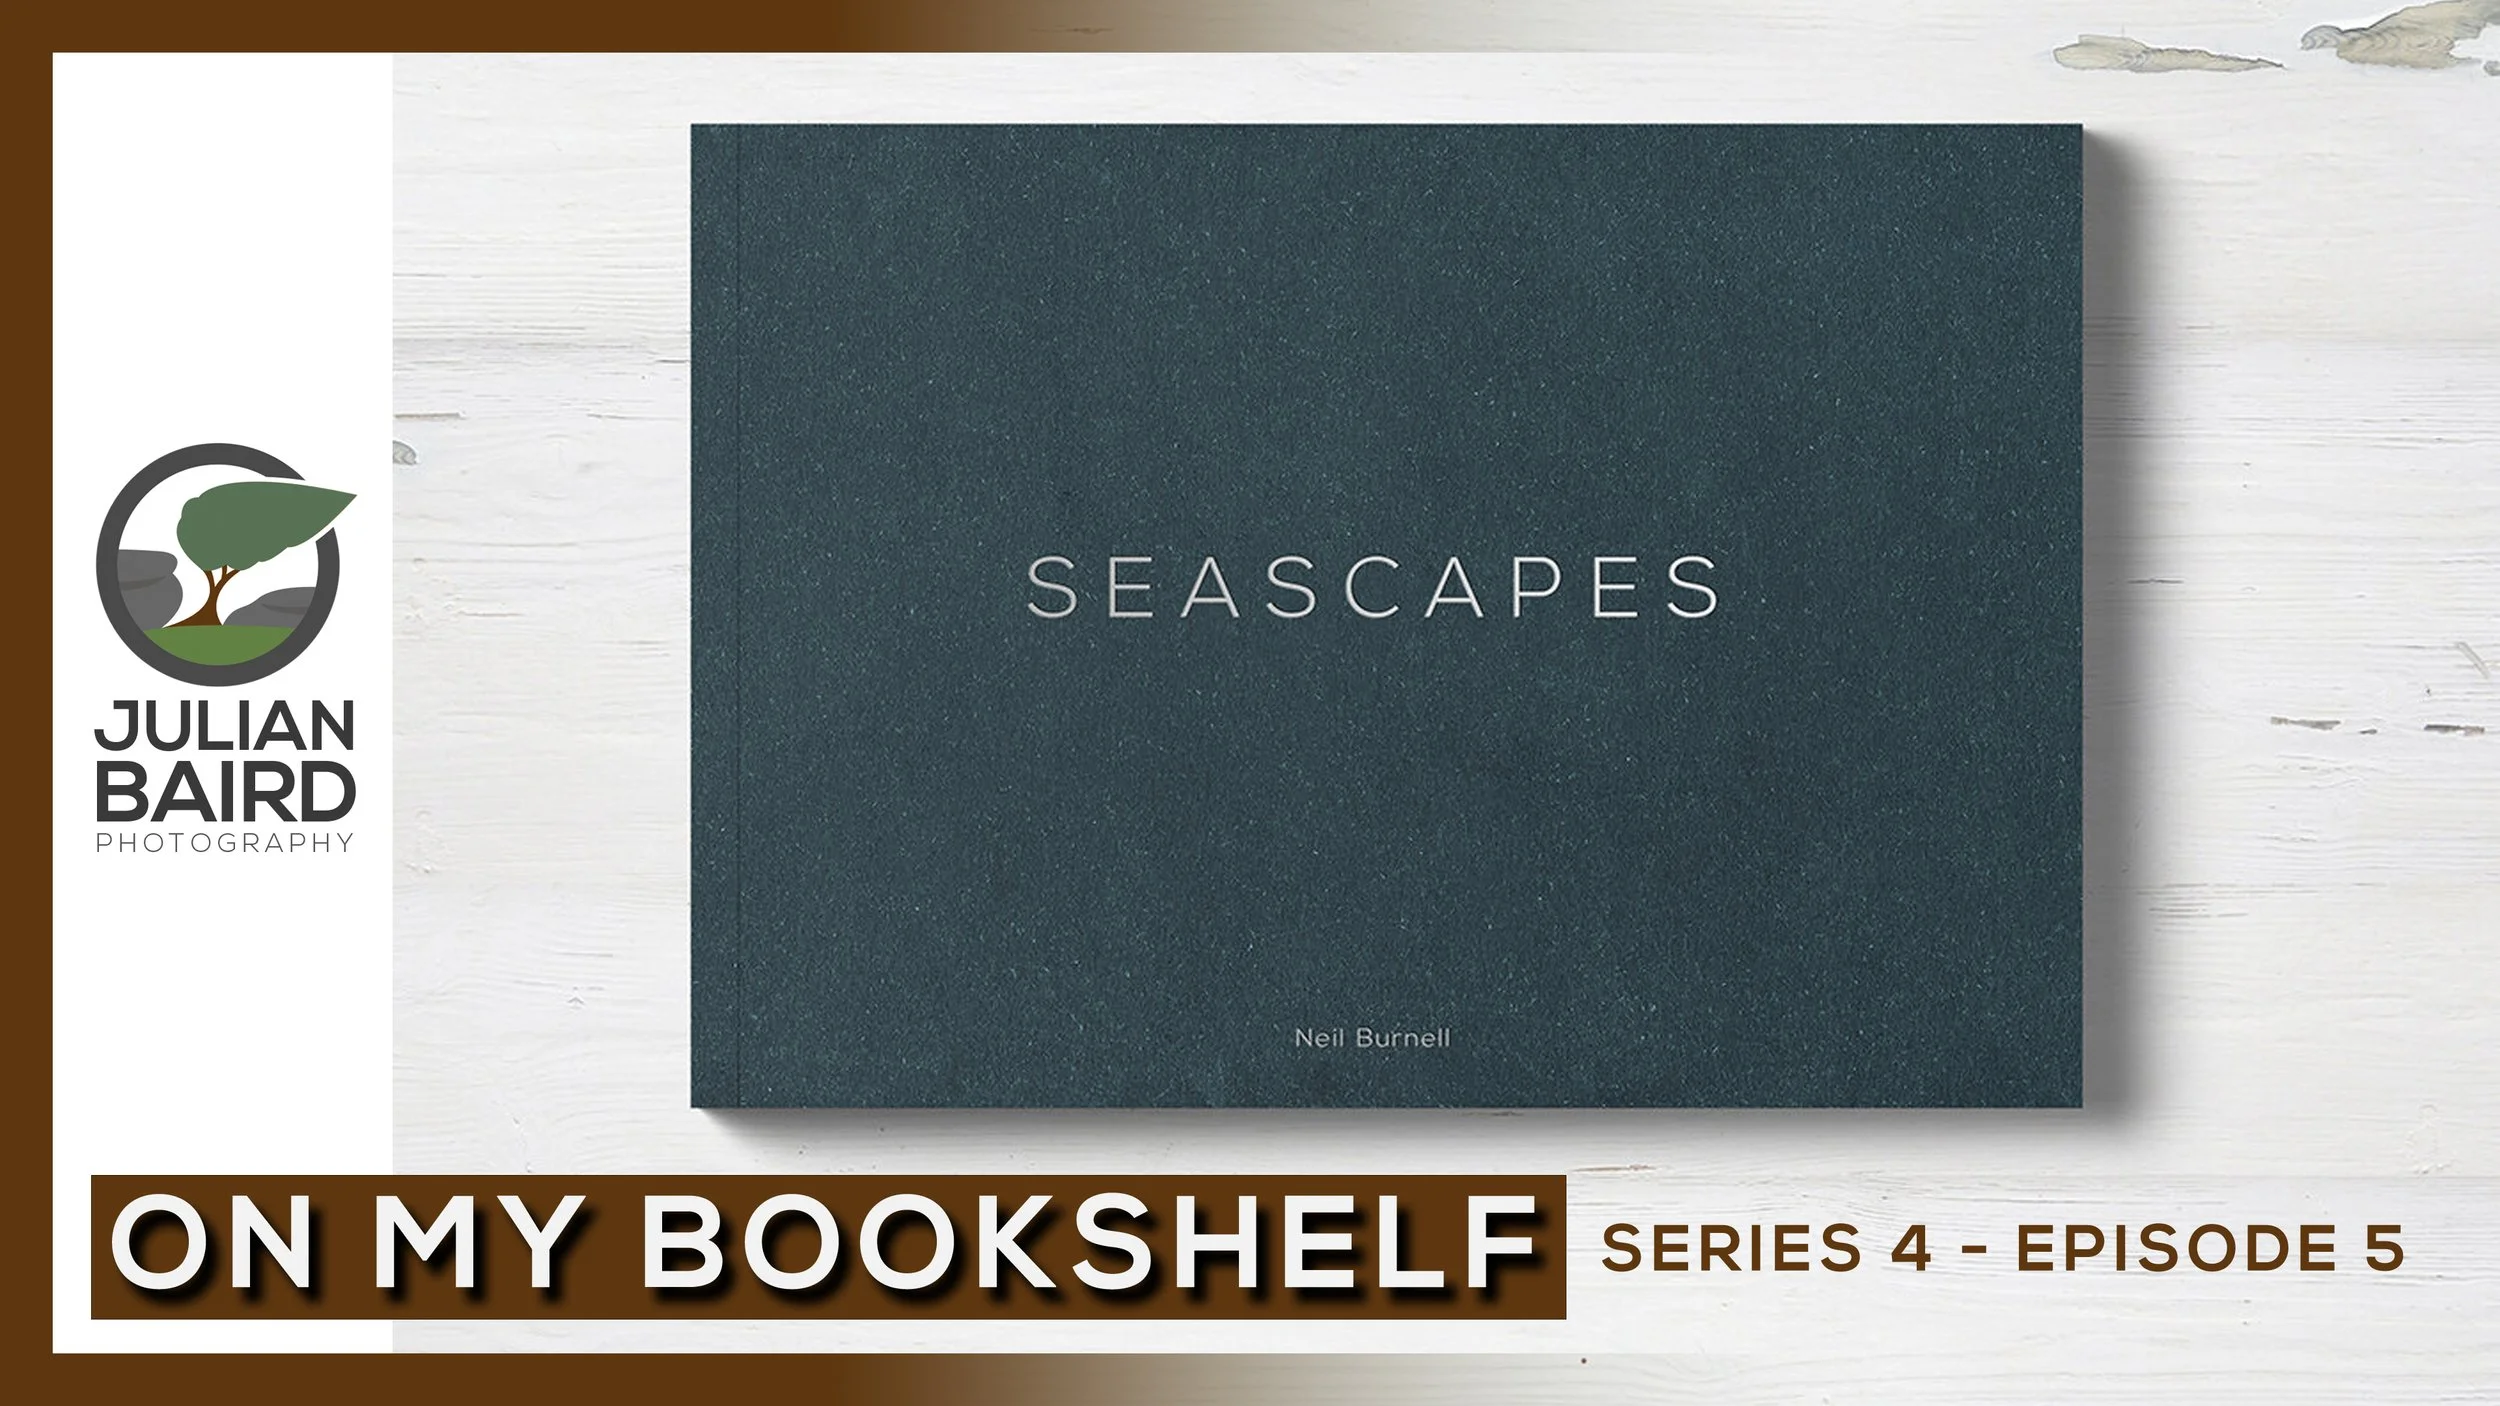
Seascapes by Neil Burnell - On My Bookshelf S04E05
In this episode of On My Bookshelf, I look at Seascapes by Neil Burnell, a collection of long exposure and fine art coastal photographs.
From Woodlands to Coastlines
Last year I published an episode of On My Bookshelf in which I talked about Neil Burnell’s previous book, Mystical. I thought it was a stunning collection of woodland photographs. So, when Neil announced that he was producing a book focusing on his coastal photography, I jumped straight in and pre-ordered a copy.
That was a little while ago now, but this has allowed me to spend some quality time looking through Seascapes before bringing you this latest episode of On My Bookshelf.
If you’d like to pick up a copy of Seascapes, you can do so directly from Neil’s website here.

Bite-Size Blog Post #16 - Thurlestone
After some encourage from a friend, I finally make a long overdue trip to Thurlestone to capture some long exposure seascapes.
Thurlestone - Finally!
I’ve had the coastline around Thurlestone on my list of places to photograph for a long time. While Thurlestone isn’t particularly far away, like most places in the South Hams it’s a bit of a pain to get to. I’m happy to drive twice as far to some locations in Cornwall, but those narrow, twisty roads in the South Hams always makes the journey seem a little more of an effort.
So, when a friend and fellow photographer asked if I wanted to join him one evening for a spot of seascape photography at Thurlestone, I jumped at the chance! To hell with the twisty roads. Chat and photography would make it all worthwhile.
Thurlestone Sunset #1, South West Coast Path, Devon - Nikon Z7, Nikkor 24-200 f/4-6.3 at 36mm, f/8, 30 secs at ISO 64, Kase Filters CPL and ND.
When we arrived at the beach, I could instantly see the appeal of this location and I could understand why my friend frequented it. Due to the lack of cloud cover and the direction of the light, I had to wait till the sun was nearly set before I started capturing images I was happy with.
Thurlestone Sunset #2, South West Coast Path, Devon - Nikon Z7, Nikkor 14-30mm f/4 at 16mm, f/11, 3 secs at ISO 64, Kase Filters CPL.
I’m not normally that keen on clear skies but the light was producing some lovely tones and pastel shades of colour in the sky. The main element in the compositions is of course the rocky outcrops which offered me plenty of different ways to shoot the scene.
Thurlestone Sunset #3, South West Coast Path, Devon - Nikon Z7, Nikkor 14-30mm f/4 at 18mm, f/8, 15 secs at ISO 64, Kase Filters CPL and ND.
As is often the case when you visit a location for the first time you spend a lot of time changing composition, changing lenses, swapping out filters and moving to different parts of the beach. It was an exciting evening, but I also remember not being that excited by my photographs when I viewed them on the camera. It wasn’t until I got home, and I processed some of the images I took later in the evening that I realised I had some photographs I was happy with.
Thurlestone Sunset #4, South West Coast Path, Devon - Nikon Z7, Nikkor 14-30mm f/4 at 15mm, f/8, 25 secs at ISO 64, Kase Filters CPL and ND.
Now that I’ve been to Thurlestone, I will most definitely be making a return.!

Bite-Size Blog Post #11 - No More Sandymouth
For the last time this year (probably), I head to Sandymouth to see if I can finally kick start a project I’m working on.
What Is It About Sandymouth Anyway?
It’s not unusual for me to write about a location I’ve visited before but what makes this post about Sandymouth different is that it is the 3rd one in a relatively brief period of time. While I was happy with the images I shared in blog posts Bite-Size Blog Post #3 - Sandymouth and Bite-Size Blog Post #10 - More Sandymouth I still had the need to return.
My return to Sandymouth for a 3rd time was nothing to do with a lack of inspiration or imagination but the desire to start a new photography project. I’ve had the idea for the project for a long time now but have failed to find a location that will give me what I’m looking for. Though I had visited Sandymouth a couple of years before it was the 1st of my recent visits that potentially gave me what I was looking for.
Charged and inspired I returned for a 2nd visit only to find I had completely misjudged the tides. I still managed to capture images I was happy with but not what I needed. I, therefore, planned for a 3rd and final visit. I say final because sunset times were getting earlier and soon I wouldn’t have time to make the 90-minute drive to Sandymouth before I lost the light.
I was full of optimism for my 3rd visit but I already knew it was going to be very tight with the tide height for the shots I wanted. Unfortunately for me, I had pushed my luck too far and the tide was still a little too high to allow me to capture the shots I needed before it was dark.
I’m not saying the trip was a right off. Far from it! I got some images I was pretty happy with. They just weren’t what I needed for my project. You might be wondering what the project is? Well, I’ll tell you all about it very soon….hopefully.
Into the Blue #1. Sandymouth Beach, Cornwall - Nikon Z7, Nikkor 14-30mm f/4 at 15mm, f/13, 1 second at ISO 64, Kase Filters circular polariser and ND grad.
Into the Blue #2. Sandymouth Beach, Cornwall - Nikon Z7, Nikkor 14-30mm f/4 at 18mm, f/13, 6 seconds at ISO 64, Kase Filters circular polariser and ND grad.
Into the Blue #3. Sandymouth Beach, Cornwall - Nikon Z7, Nikkor 14-30mm f/4 at 17mm, f/13, 13 seconds at ISO 64, Kase Filters circular polariser and ND grad.

Not Every Photograph Needs to be a Masterpiece
As a landscape photographer I'd like every shoot to result in a portfolio class image, but this is an unrealistic expectation. Sometimes you just need to take joy in the experience of capturing an image and learning from it.
Embrace the Grey Once Again!
I’ve made several videos on the theme on embracing the grey and because I live in an area where overcast days aren’t exactly unheard of it might not surprise you that I’ve decided to do another one. For me, the key to a successful shoot in grey and overcast conditions is to find the right subject (as I discussed in this video).
There’s been a location near to home that I’ve been wanting to photograph for a while and that’s the Philip Lucette Light near Teignmouth. I found out about this interesting location from an image I saw from Neil Burnell and a video from Lynne Luxon-Jones. It looked like an interesting subject to photograph and I thought it would make for a great #EmbracetheGrey subject.
In the video below you can follow me along as I photograph this location for the very first time. I also show you how I edit the image to give me a specific look and feel, and I of course make a print of the image. I also discuss in the video the importance of just going out to take pictures, and not to worry about every shot being a masterpiece. After all, we should love the art of taking a picture first and foremost.
Enjoy!
Philip Lucette Light #2, Shaldon, Devon - Nikon Z7, Nikkor 24-200mm f/4-6.3 at 48mm, f/8, 214 seconds at ISO 64, Kase Filters CPL and 10 Stop ND

Bite-Size Blog Post #10 - More Sandymouth
Eager to return to Sandymouth to start a photography project I get another difficult lesson on understanding tides.
A Tide Table Is Not Enough
Back in August, I wrote about my experience of not appreciating how high a high tide was at Sandymouth Beach. With most of the beach cut off because of the high tide, I was lucky to get the photographs I did. When I recently decided to return to Sandymouth beach to start a photography project I was keen not to repeat my previous mistakes.
While I captured images of the rocks on that last visit, I was eager to get images of the sandy part of the beach this time. I have shot this part of the beach before and the images I captured of the sand patterns and pools had inspired me to return.
I already knew that to get photographs of the sand it would need to be a low tide. What I hadn’t appreciated was how low it needed to be. If I’d done a simple check of the historical tide data from my last shoot of the sand, I would have noticed how low the tide needed to be.
When I arrived at Sandymouth I was surprised to see that the sandy part of the beach was already covered in water! The low tide I had looked up wasn’t that low for Sandymouth. As the tide was coming in the situation wasn’t going to change in my favour either. I was going to have to switch tactics. I decided that I would instead shoot the rocks that I’d shot previously. However, the tide was a bit far out for that!
So, it was back to square one for me and I had to do a little bit of exploring to see what else I could find. You can see the photographs I did manage to capture below. More important than the photographs was the lesson I learnt.
Tide tables only tell half the story. The tide at beaches like Sandymouth has a huge reach. When they are out, they are miles out and when they are in it can be up to the cliffs. From all my experiences of shooting at Sandymouth I have learnt that I need specific tide heights for specific subjects. Knowing if the tide is going in or out isn’t enough.
Next time I visit, I will pick a time where the tide is going to support my creative vision!
Sandymouth Rock Channels #1, Cornwall - Nikon Z7, Nikkor 14-30mm f/4 at 17mm, f/11, 0.5 seconds at ISO 64, Kase K9 CPL and ND Grad.
Sandymouth Rock Channels #2, Cornwall - Nikon Z7, Nikkor 14-30mm f/4 at 14mm, f/11, 3.0 seconds at ISO 64, Kase K9 CPL and ND Grad.
Sandymouth Rock Channels #3, Cornwall - Nikon Z7, Nikkor 14-30mm f/4 at 17mm, f/9, 1 seconds at ISO 200, Kase K9 CPL and ND Grad.

Bite-Size Blog Post #6 - Dartmouth Sea Stacks
In this bite-sized blog post, I head to the coast near Dartmouth in Devon to check out a sea stack.
Long Exposure Seascapes
Unusually this summer I’ve spent a lot more time photographing Dartmoor than the coast. The summer month not only brings better conditions, but the extended hours of daylight allow me to travel further afield to places like Cornwall. I just love photographing the Cornish coast as you can see from all these blog posts.
I think lockdown knocked me out of my normal yearly routine and so I’ve spent more time closer to home which in turn means I’ve been spending more time up on Dartmoor. However, the coast is never far from my thoughts, so I decided that a visit to my local coastline was long overdue.
There is a sea stack near Dartmouth that I’ve been eager to revisit for some time now. I believe it needs a specific set of conditions to make the most of it. A high tide is one of them and while on this visit the tide was high, the weather was calm and the skies blue.
I knew I wasn’t going to come away with any photographs that I was going to get excited about so this trip was very much another reconnaissance mission to check out compositions. Despite this being my 2nd or 3rd visit, I still struggled to find a composition I am happy with. Maybe the calm conditions weren’t helping, or I simply need to work harder at getting the composition right.
So, while these photographs aren’t anything amazing, I’m happy to share them with you. After all, not every trip out with the camera results in a portfolio image. Some trips out with the camera are all about preparation for the next trip.

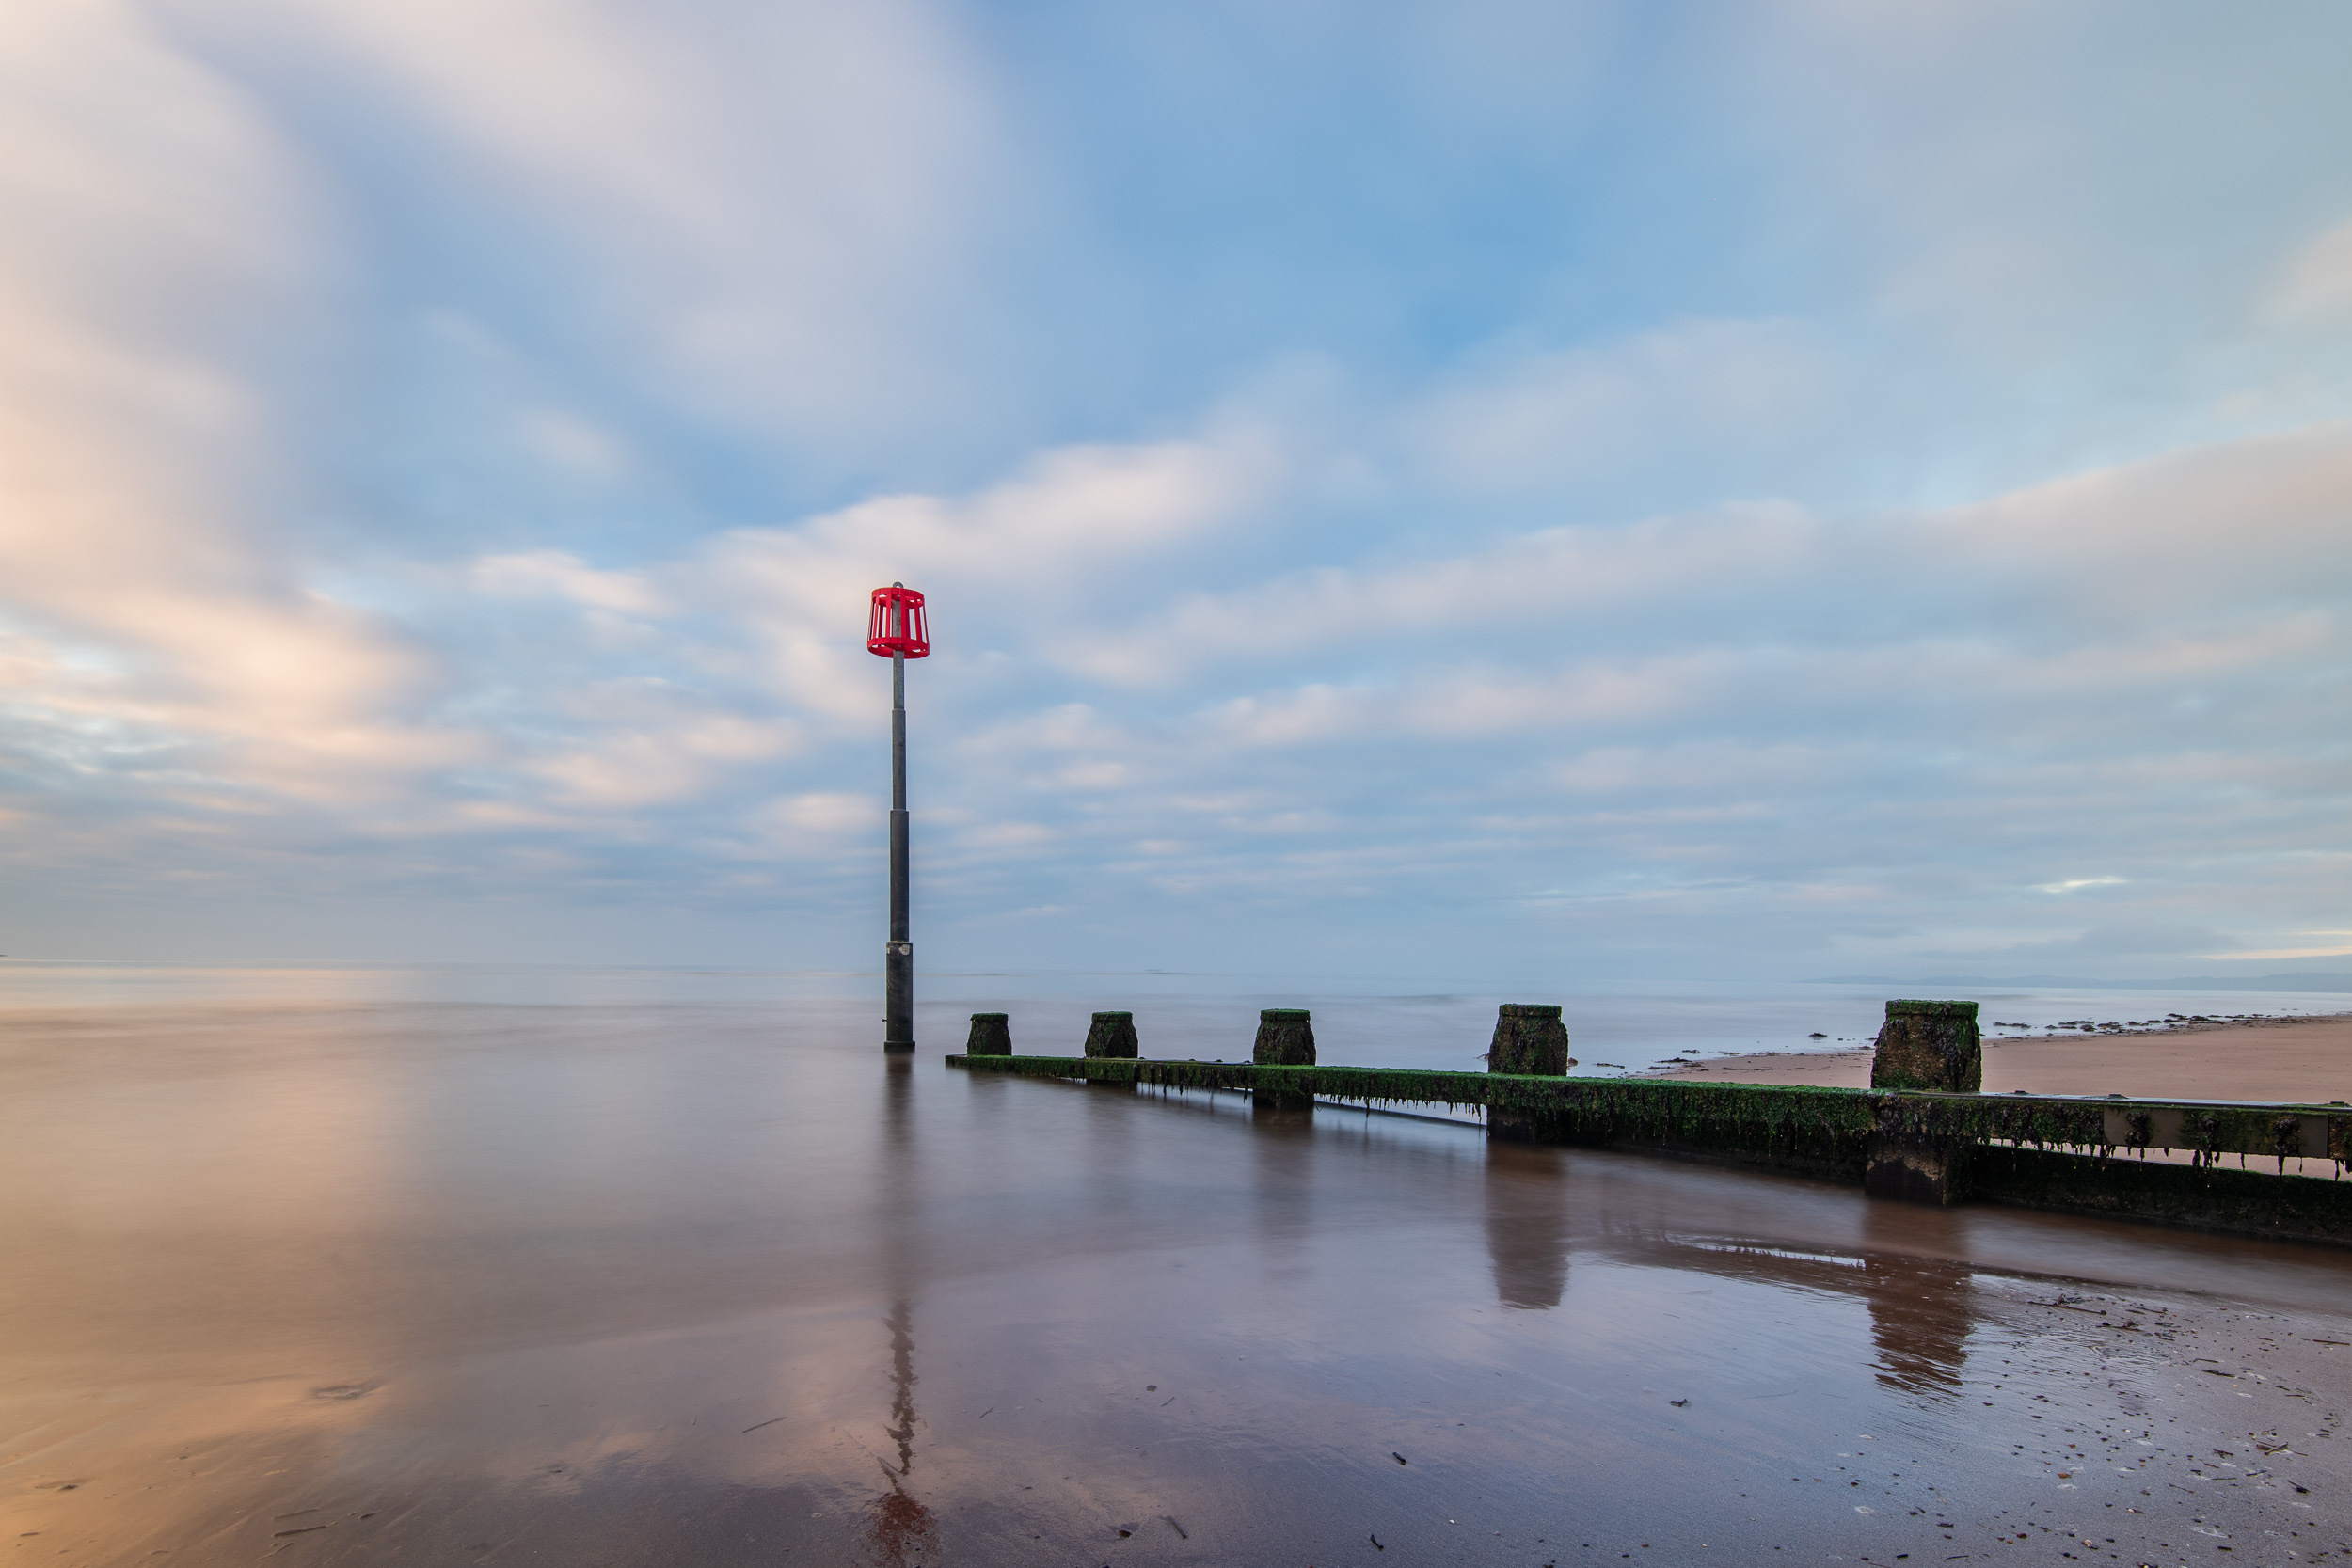
Dawlish Warren - Three in a Row
Is there any benefit to going to the same location three times in a row? In the blog this week I find out.
Let me start off by apologising. I know this is now the third blog post in a row to feature Dawlish Warren but because of some not very interesting reasons, it's the only place I've managed to get out to photograph recently. I also have a special blog post from Dawlish Warren to share with you in a couple of weeks time as well! However, I will be mixing things up over the next few weeks. I've got one more blog post on a local location before I head to Scotland for a week of uninterrupted photography, so expect plenty of interesting blog posts, photos and videos from that trip!
After last weeks blog post from Dawlish Warren where I talked about becoming complacent with my compositions, I was determined to try a little harder this time out. I wasn't sure what to make of the weather forecast. One weather forecast was predicting dry conditions and high clouds, while another was saying overcast and showers Regardless of the weather I thought this was going to be my only opportunity to get out with the camera this week so I decided to go for it anyway.
I arrived at Dawlish Warren a little earlier than normal so I sat in my car and enjoyed the cup of coffee that I had bought from the petrol station on the way there. You simply can't beat the feeling of that first cup of coffee in the morning, so as I walked towards the beach I already had a bit of a skip in my step. As I walked along the beach and breathed in the sea air I decided that this was indeed a fantastic place to watch the start of a new day.
Caffeine highs aside the weather was actually a mix of the two forecasts. There were some great looking patches of sky and some big rain clouds kicking about. However, as is often the way, there was a big bank of thick cloud on the horizon where the sun was going to rise. No vibrant morning light for me. Though I knew I probably wasn't going to get any amazing pictures, I thought I would use the time constructively and work on some compositions. This is all good practice. I'd rather work out some new compositions during average light rather than when the conditions are amazing. Better to practice when there is less pressure.
So was this third consecutive trip the most productive? I'm not sure, so I'd be interested to hear your thoughts. Here is the image from this week, plus the other two from the previous weeks.


I personally don't have a favourite. They all have different qualities and minor issues. For me at least, it's only by looking at them all together do they deliver in a completely different way. While no one image is a stand out image, by shooting the same location in 3 slightly different ways under 3 slightly different weather conditions I have increased my working knowledge of this location. I can see from the photographs which style of image works for a certain combination of gryone and weather. This means I can be more effective and efficient for future visits. I can use my knowledge of the location to create a composition that is suited to whichever groyne I'm shooting and the weather. Hopefully, this will result in me capturing better images.
I said at the start of this blog post that I wanted to apologise for the 3rd Dawlish Warren blog post in a row, but by writing this very blog post I've gained a new perspective and that’s something that I didn't expect.
I'll see you next week when I promise you that the blog post won't be about Dawlish Warren.

Does Familiarity Breed Complacency?
I’m no stranger to photographing Dawlish Warren, but is that familiarity gradually leading to poorer images?
Under Normal Circumstances
Under normal circumstances I wouldn’t have bothered heading to Dawlish Warren last Friday. I had already been there the week before, and with the weather forecast not exactly predicting spectacular conditions, I wouldn’t have normally visited this location again. However, these weren’t normal circumstances. My friend and newly turned professional photographer, Chris Sale, was in the area and he was keen to visit the beach at Dawlish Warren.
Chris was staying in Cornwall for a week to immerse himself in photography and see his mum. This was also going to be an excellent opportunity for us to catch up and do a little photography. Unfortunately for us the weather was pretty poor all week. The one evening I was able to meet up with Chris the weather was particularly poor.
We had decided to meet at Trebarwith Strand, a wonderful coastal location to photograph, but the wind was howling. While stormy weather can sometimes be used to great effect, this wasn’t one of those evenings. The wind had churned up the sea into a mass of white water and foam. Only a mad person would have ventured down onto the beach and the view from the cliffs wasn’t exactly inspiring. In the end I didn’t take any photographs so we went to the pub and had a very nice pizza.
With Trebarwith a right off, we committed ourselves to a dawn shoot. Chris had always wanted to photograph the beach at Dawlish Warren so we decided to head there on Friday morning. Unfortunately, yet again, the weather forecast was poor. High winds, lots of cloud and the potential for rain didn’t fill me with enthusiasm. I did however want to head out on another shoot with Chris and go out for a spot of breakfast, so I thought it was worth a punt.
More Chat than Photography
Arriving at Dawlish Warren the conditions were slightly better than forecast but still not particularity inspiring. I already knew I probably wasn’t going to get a better shot than last week. No worries though, Chris was with me and the banter was flowing.
Even after many years of photographing Dawlish Warren, it is still a place that excites me, but sometimes when I feel I can’t get a better or a different image than previous visits then I do perhaps get a little lazy with my photography. That familiarity with a location can sometimes make me a bit complacent.
While I do like the image I captured that morning, I think I could have taken a better shot if I’d focused a little more on what I was doing and the conditions I had to work with.
Into the Void, Dawlish Warren, Devon - Nikon Z7 with Nikkor Z 14-30 mm f/4 at 29 mm, f/8, 224 sec at ISO 64, Kase Filters K8 holder, CPL, and 10 stop ND.
So what exactly do I feel is wrong with the photograph? While I like the long exposure, the slightly desaturated colour palette, and the way the groyne fades into the sea, I’m not that happy with the location in the frame where the groyne appears in the photograph. For me at least, I think the right-hand side of the groyne needs to be more prominent and perhaps start further down in the frame. This probably would have been best achieved by moving closer to the groyne and perhaps turning to face it more directly.
I could change the relative position of the groyne in this image through a crop but I would lose a lot of the sea in the foreground. The best option of course is just to get it right in camera in the first place!
While I like the image, it definitely has room for improvement. Perhaps if I’d been a little less complacent and was focusing more on all the elements of the composition, I might have made a slightly different but improved image. Photography is a constant journey of learning, and this trip to Dawlish Warren has taught me not to be so complacent or lazy with composition, even when I don’t think I can improve on previous images.
Do you agree with my critique? Do you sometimes get complacent when photographing your favourite locations? Let me know in the comments below.

Creative Exploration
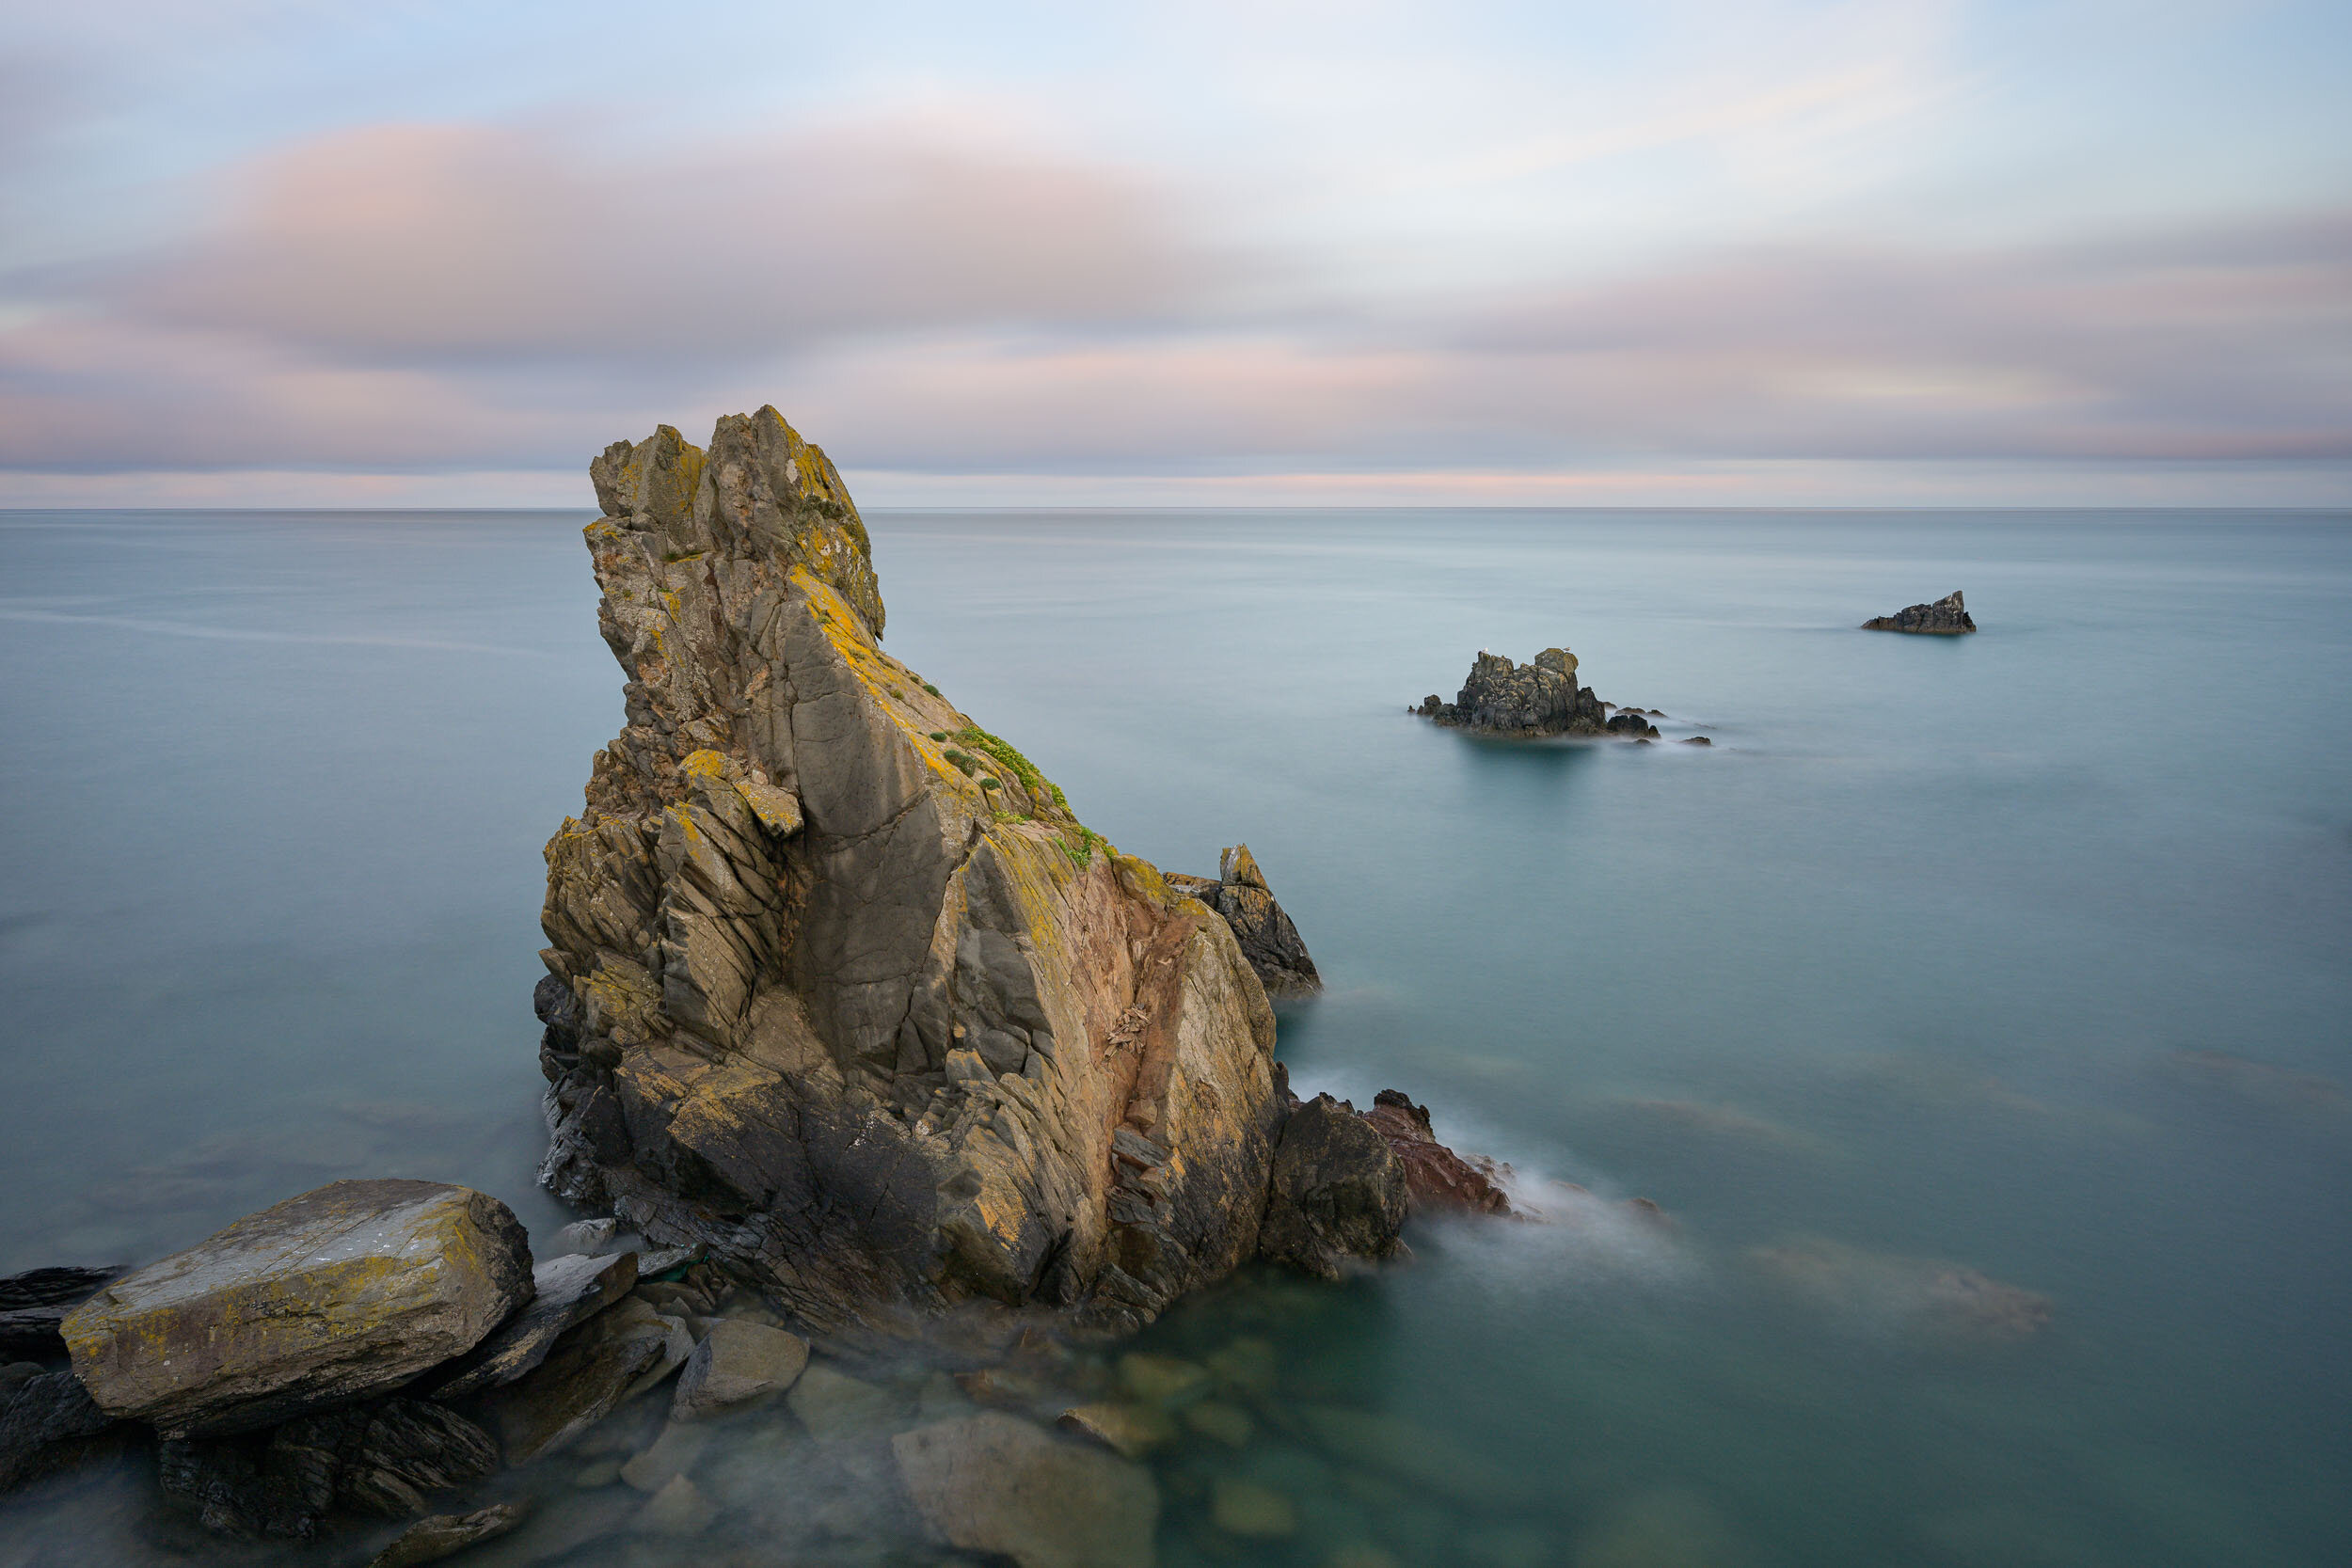
In the blog this week I head off to the south Devon coast to not only explore a new area but also to try a slightly different style of long exposure photography.
Creative Inspiration
My landscape photography is a constantly evolving thing and what I look for in my photographs changes over time. Some of this change comes as I discover my personal style but it also comes from being inspired by the work of other photographers. Recently one such source of inspiration has been the work of fellow local photographer Neil Burnell. You may remember me highlighting Neil's work on a blog post last year where I took a look at his book Seascapes.
Neil, who recently won Amateur Photographer of the Year, is best known for his long exposure and minimalistic photography. As someone who takes long exposure photographs myself, I find Neil's work compelling and he has a very distinctive style. Neil's ethereal and minimalistic style is very different from my style of long exposures with big views. It's not only the processing style of his images that I find fascinating but also his choice of locations.
Exploration
As I mentioned earlier, Neil is a local photographer living only a few miles down the coast (well, as the crow flies that is!). Much of his long exposure coastal work is taken on the south Devon coast but unlike my work from the same area, it's not easily identifiable as being so.
Looking at Neil's work from the south Devon coast I realised that I really needed to explore the nooks and crannies of this part of the coastline a lot more. While locations like Start Point and Dawlish Warren are firm favourites of mine, there was obviously a whole other world out there to discover on my local coastline. So that's exactly what I decided to do one evening.
Going Minimal
Some of south Devon's coastal locations like the aforementioned Dawlish Warren and Start Point are nice and easy to access, while others require a reasonable amount of effort to get to. The location I decided to go and shoot was one of the latter. I'd seen photographs of this location before but it took a little bit of effort to work out where exactly it was and how to get there.
I also knew that I would probably be taking long exposure images but I also knew that this location would also suit a much more minimalistic type of image akin to the images that Neil takes. So this trip out with the camera would not only be an opportunity to do some exploration of a new location but to also explore my creativity.
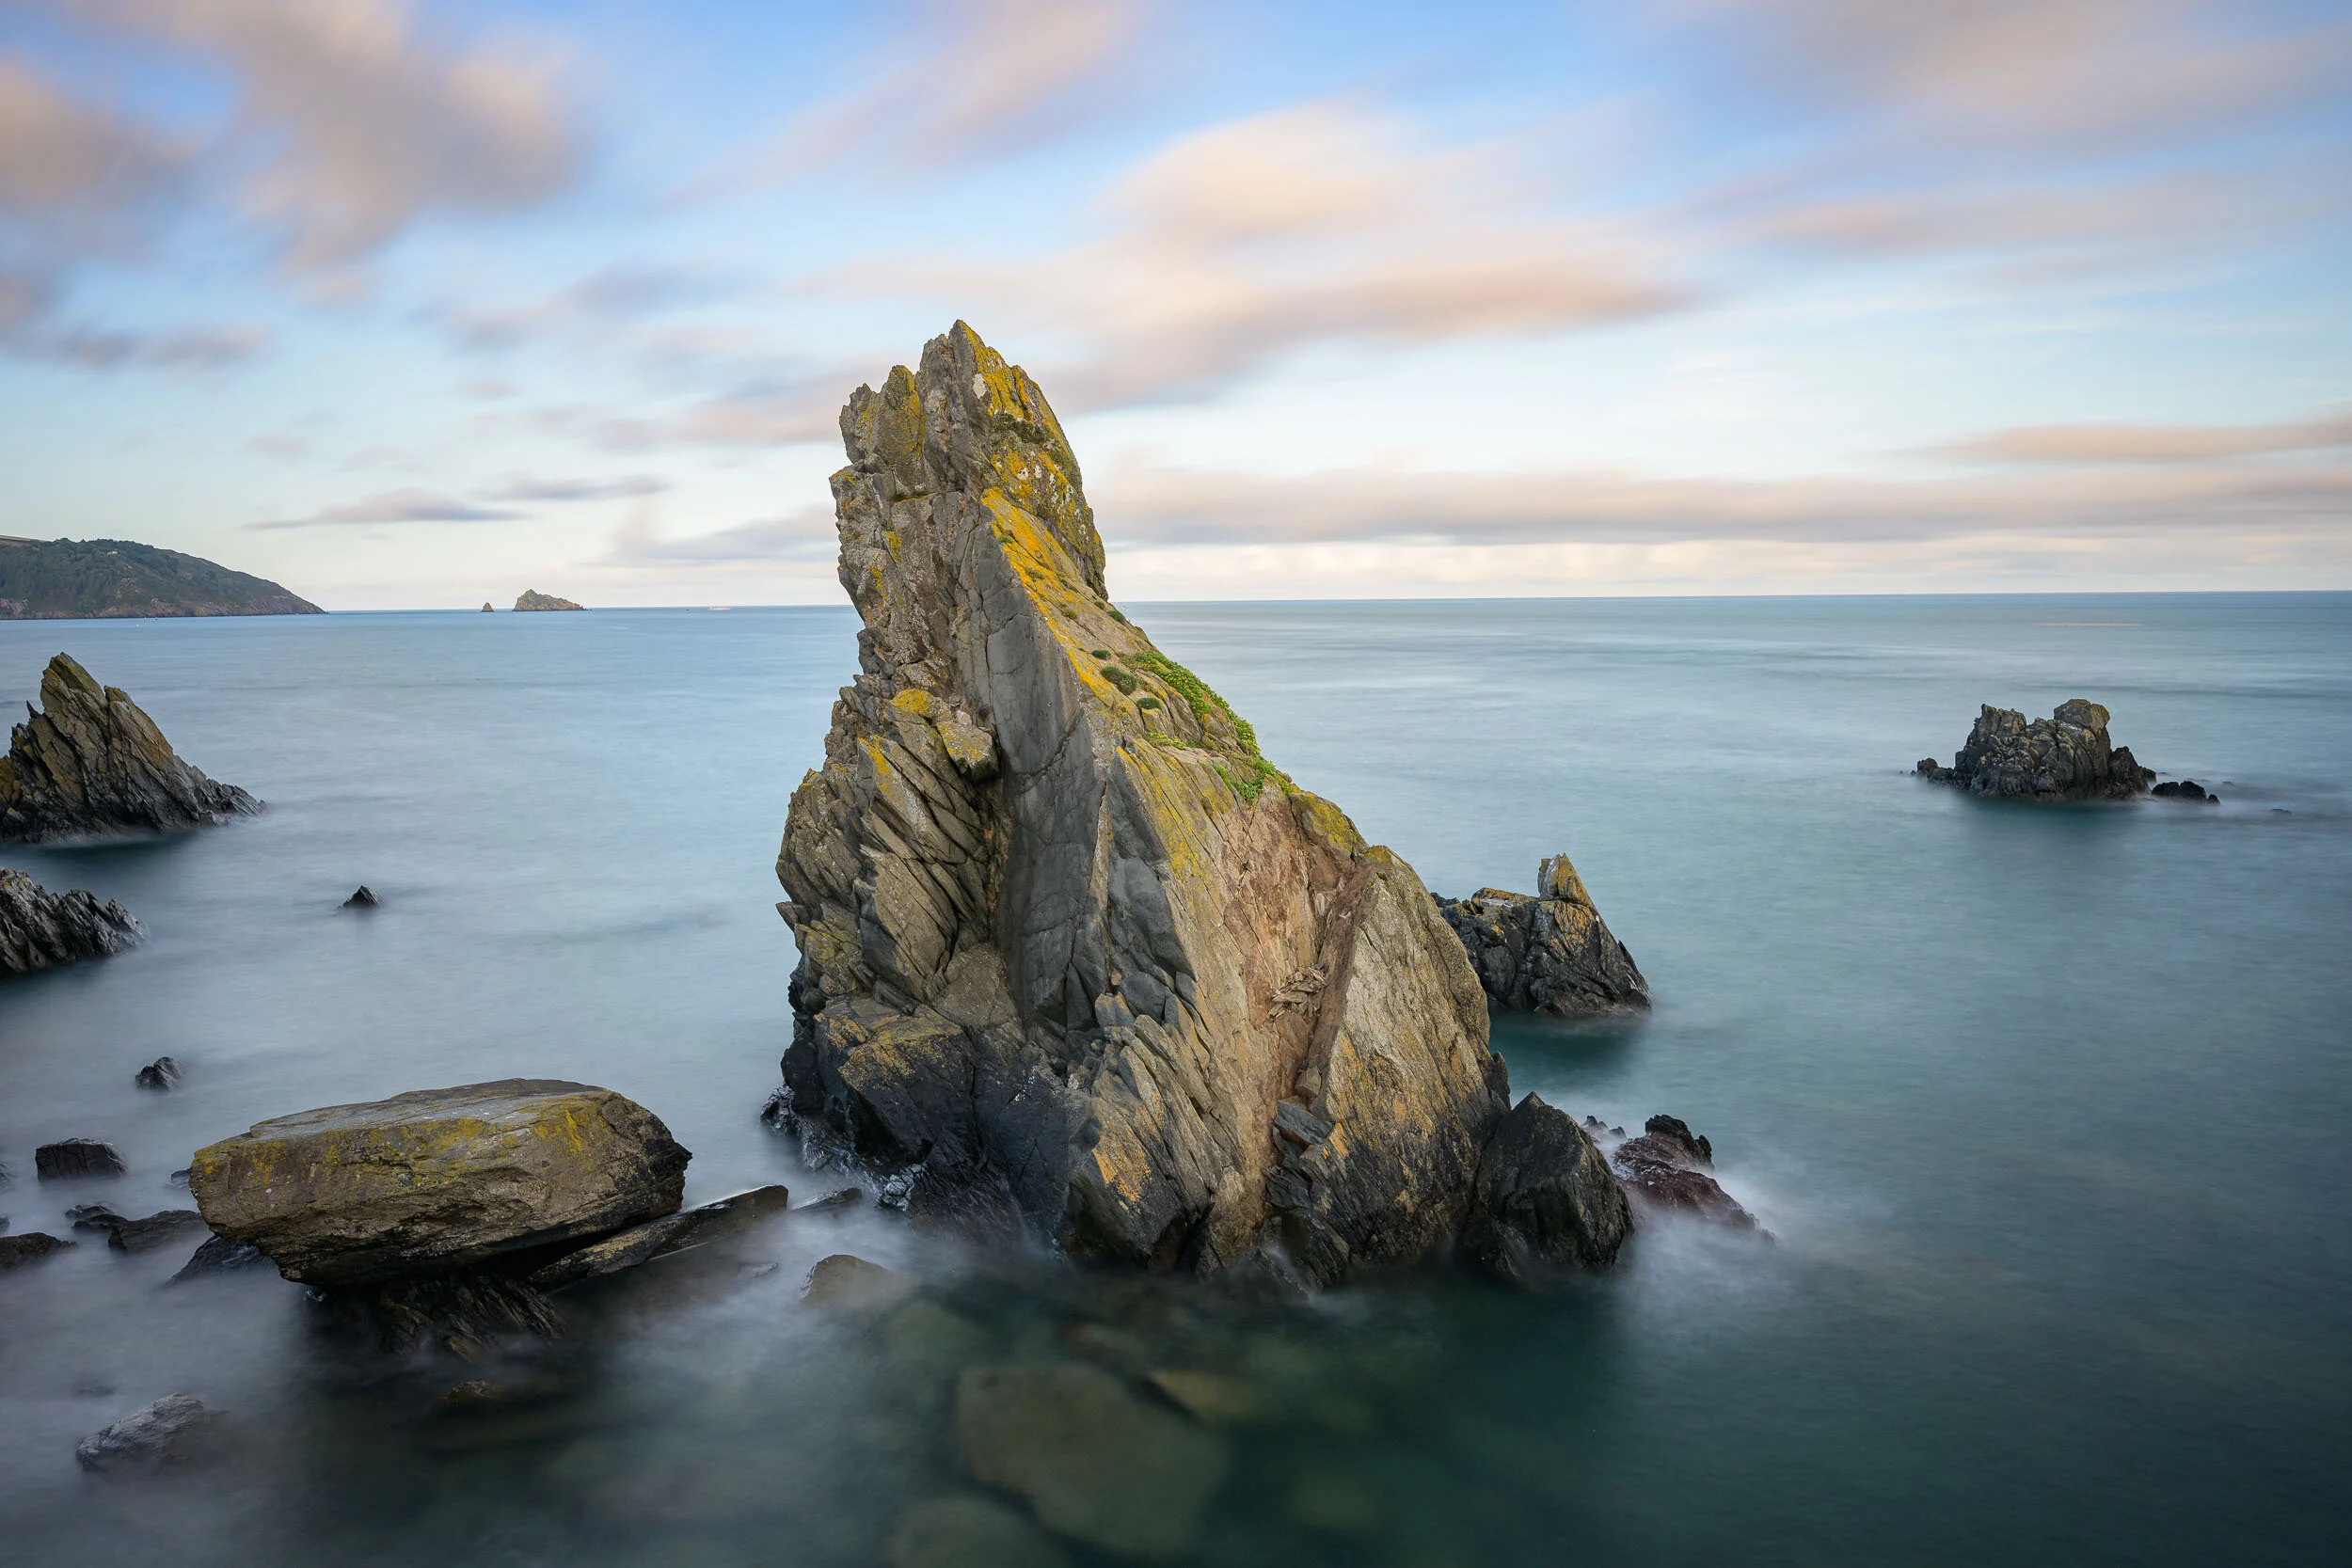
Treacherous #1, Devon - Nikon D850, Nikkor 24-70 mm f/2.8 at 70mm, f/11, 100 seconds at ISO 64
Arriving at the location I could see where the inspiration for some of Neil's work came from. Rather than go straight for the wide angle lens I opted for a longer focal length lens and go to searching for compositions that might make for some interesting long exposure, minimalistic images.
Some photographs look like they are easy to create, and one might be mistaken into thinking that minimalistic long exposures would fall into that category. I was certainly under no illusions that this was the case and my experience of capturing those images only reinforced that. The location was certainly inspiring with the jagged rocks of the cliffs and the small rocky islands, but actually picking out a composition was tricky. Even when I spotted a composition, there was the very real challenge of getting into a spot to set up your tripod. There was no doubt that this location has some treacherous areas and I had to be very careful where I was standing and where I placed my tripod.
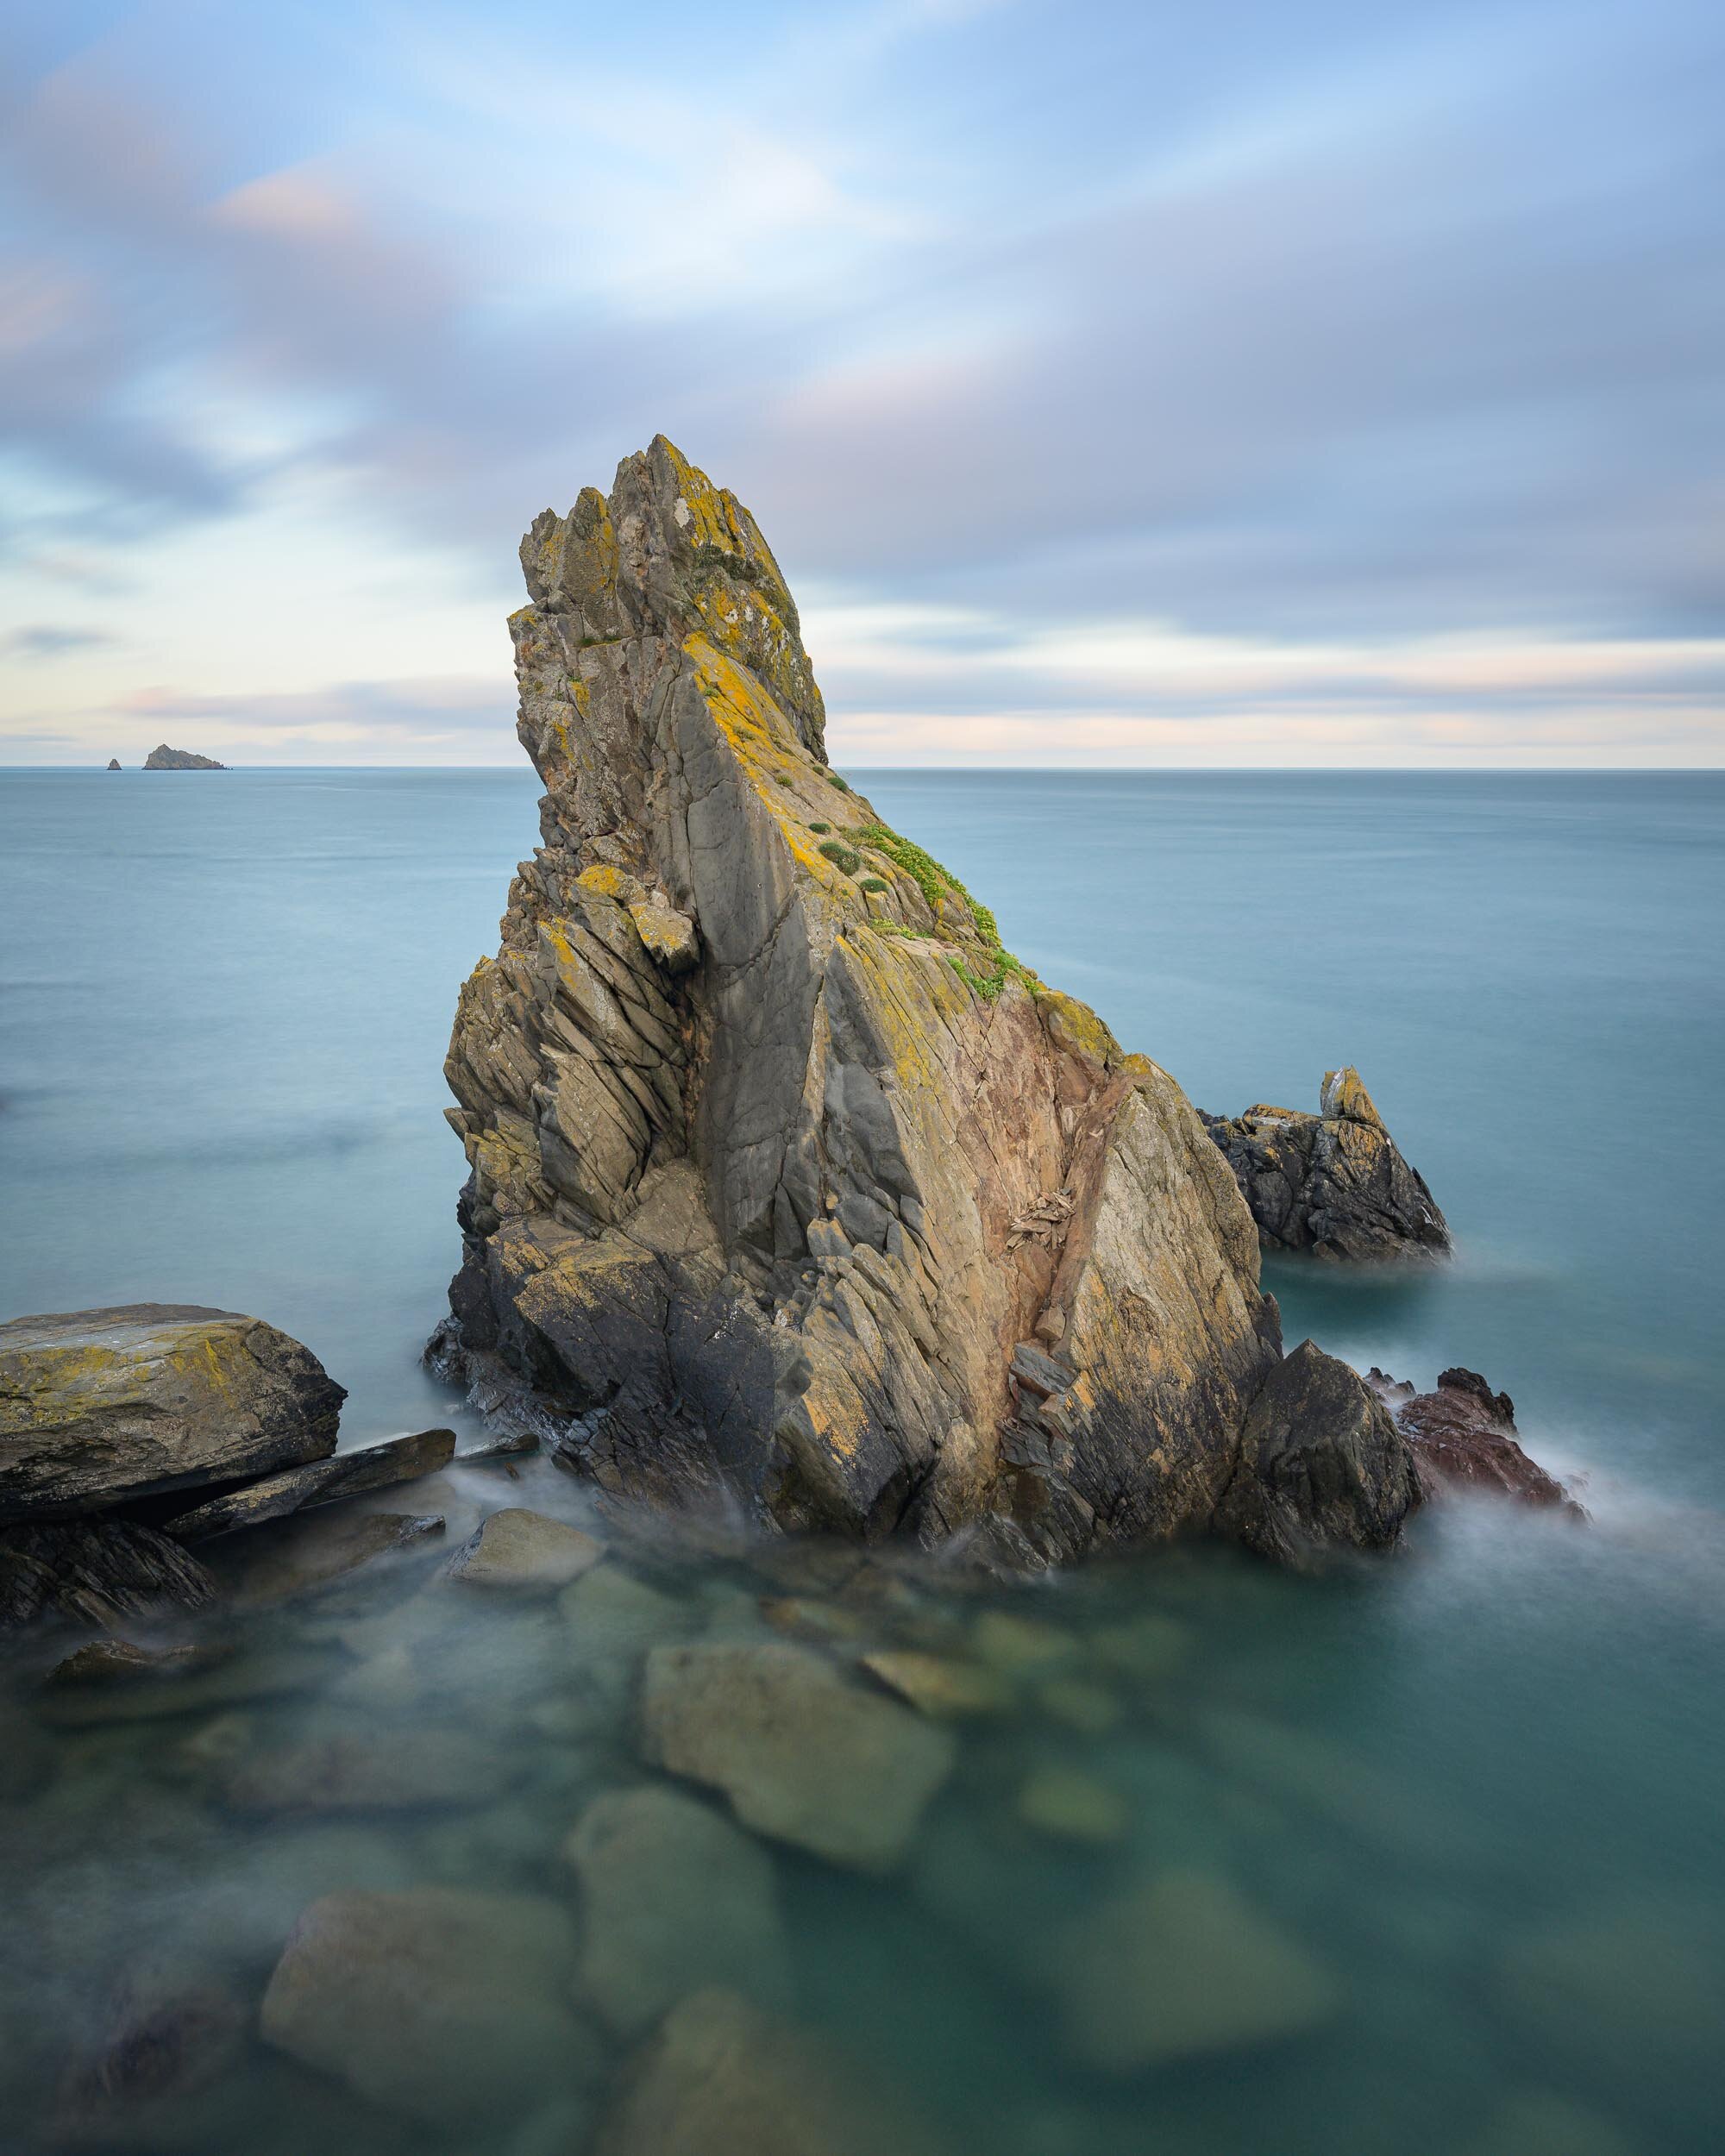
Treacherous #2, Devon - Nikon D850, Nikkor 24-70 mm f/2.8 at 40mm, f/8, 200 seconds at ISO 64
Challenges aside though, the whole experience was a lot of fun. Exploring a new location and trying something a little different with my photography was very rewarding. I've got a long way to go before I become proficient in this style of photography but that doesn't take away from the enjoyment of the experience. I really enjoyed sitting about and soaking up the scene while I waited for my exposures to complete. I even had seal pop it's head up a couple of times to say hello!
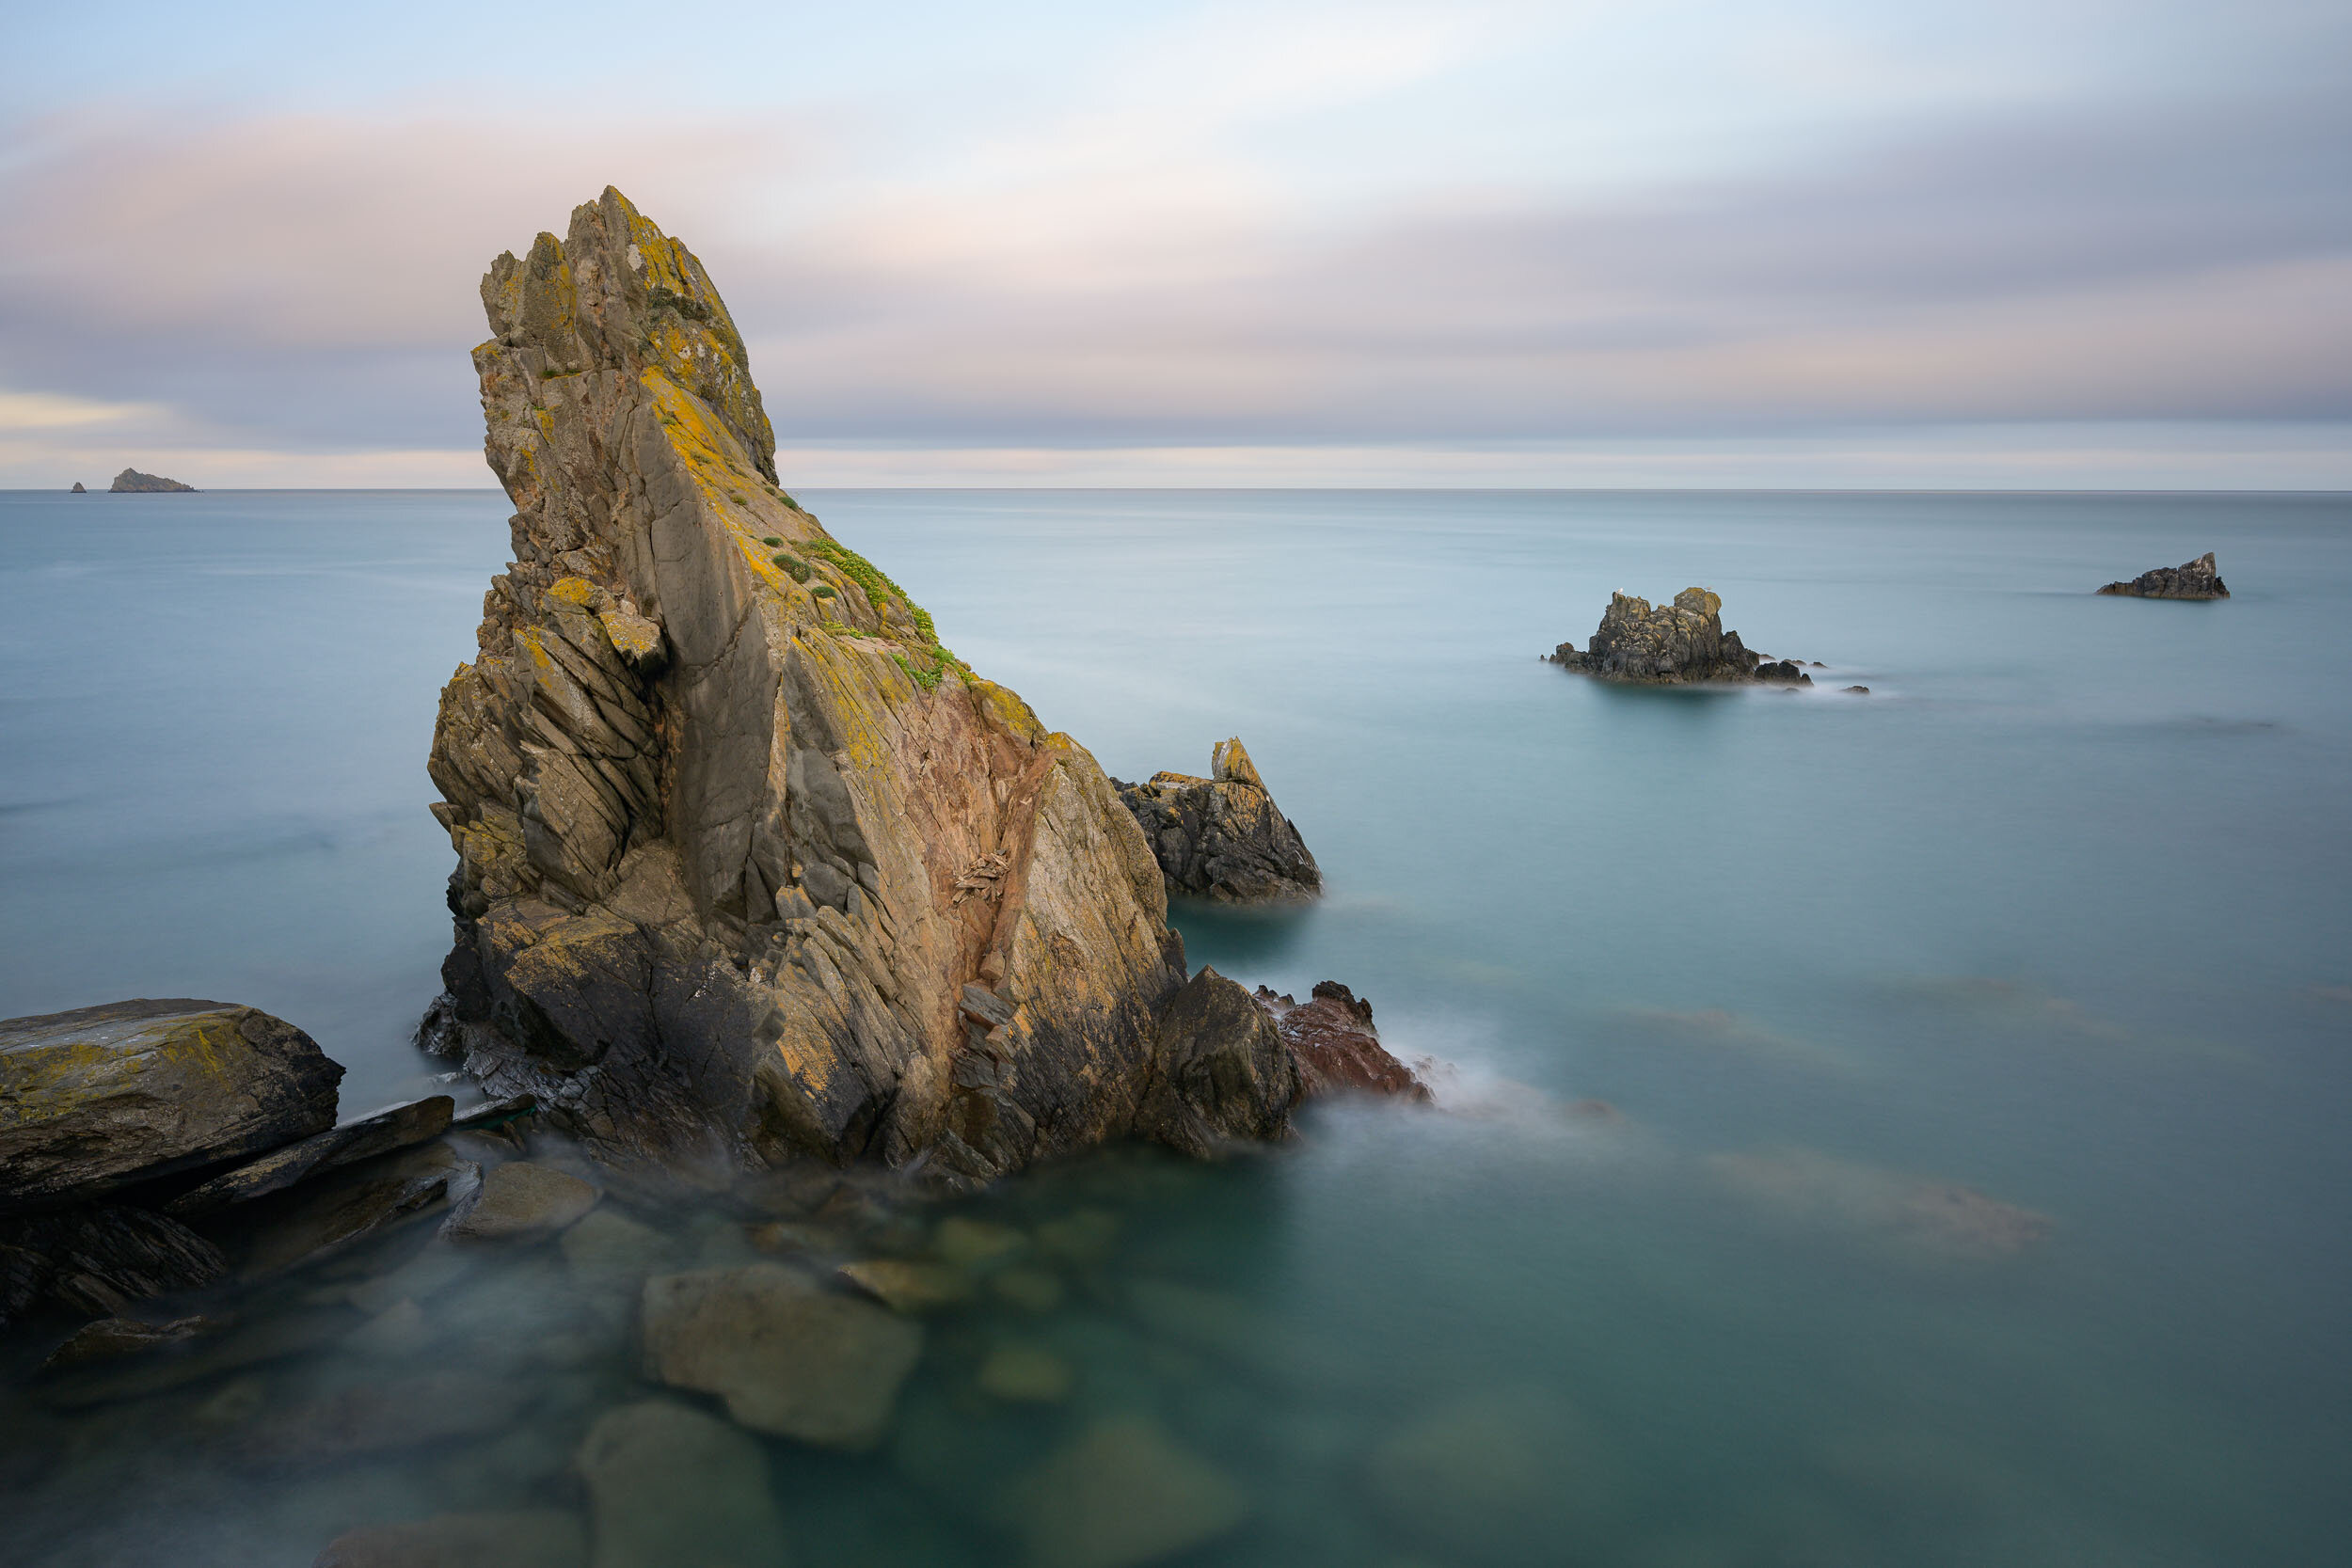
Treacherous #3, Devon - Nikon D850, Nikkor 24-70 mm f/2.8 at 70mm, f/8, 240 seconds at ISO 64
I also enjoyed the post-processing of the images. My normal post-processing technique is fairly straight forward and involves reducing the highlights, increasing texture and clarity, but I enjoyed experimenting with selectively increasing highlights and reducing clarity and texture in these images. Overall it was time very well spent and this is definitely a style of photography I want to develop. It was also a great reminder that I need to get out and explore a bit more!!
Do you have a personal style? How do you go about developing it? Have you been inspired by the work of others to try something a little different? Let me know in the comments below.

A Stormy Sunday at Start Point
In this blog post I head to Start Point on the south Devon coast to capture some landscape photographs during some stormy weather.
Risk vs Reward
As the crow flies, Start Point in Devon isn’t that far from home. Thanks to some narrow, twisty Devon roads though, the journey there can take up to an hour and a half each way. For that reason, I tend to only visit the location if I think I’m going to get a good photo.
Spectacular sunrises work well at Start Point so I’m always looking at which direction the sun is rising from and what the cloud cover will be before I commit to a trip to one of my favourite lighthouses on the South West Coast Path. The weather forecast for my most recent trip was a little different though. Heavy rain showers and thick cloud were forecast, but it was also forecast to start clearing around sunrise.
This could lead to some spectacular and dramatic weather conditions if everything happens at the right time. Would the risk of travelling all that way reward me with some spectacular landscape photographs?
Stormy Weather Landscape Photography
Despite the 5 am alarm calling causing my brain to become a little muddled when talking to the camera, I did manage to record my South West Coast Path adventure at Start Point. So sit back, relax, keep warm, and join me at Start Point for a spot of landscape photography!
I hope you enjoyed watching my little adventure to Start Point. Which image was your favourite? Have you been to Start Point before? Do you like capturing landscape images during stormy weather? Let me in the comments below.
My Landscape Photographs from Start Point
If you’d like to see the photographs from the video in a bit more detail, here they are.
Breaking Light at Start Point, Devon - Nikon D850, Nikkor 16-35 mm f/4 at 18 mm, f/13, 2 seconds at ISO 64, polariser, ND grad.
Calm in the Storm at Start Point, Devon - Nikon D850, Nikkor 16-35 mm f/4 at 18 mm, f/13, 81 seconds at ISO 64, polariser, ND grad, 6 stop ND.
Start Point Swirls, Devon - Nikon D850, Nikkor 16-35 mm f/4 at 22 mm, f/13, 60 seconds at ISO 64, polariser, ND grad, 6 stop ND.
A Stormy Dawn at Start Point Lighthouse, Devon - Nikon D850, Nikkor 16-35 mm f/4 at 22 mm, f/13, 1.3 seconds at ISO 64, polariser, ND grad.

A New Vision of The Cobb
In the blog this week I tell you about my most recent visit to Lyme Regis in Dorset to capture landscape images of The Cobb, and how an overcast morning changed the way I view this iconic location.
Weather Obsession
I have to admit it, I'm obsessed with the weather. More specifically, the weather forecast. But what landscape photographer isn't slightly obsessed by the weather. I'm constantly checking the forecast and looking for the best place to visit with the limited about of time that I have for my landscape photography.
After a few days of frankly terrible weather, it was going to take some pretty awful conditions to stop me heading out with the camera. After much head scratching over the weather forecast I thought the best place to go would be The Cobb at Lyme Regis in Dorset.
It was a bit of a risk to go there given the predicted cloud cover. Either side of sunrise it was forecasting 100% cloud cover, but around sunrise itself, the cloud cover could drop to around 50%. Combined with the direction of the rising sun, I was hoping to capture an image similar to this one I'd taken a while back.
The Cobb vs The Sea, Lyme Regis, Dorset - Nikon D750, Nikkor 16-35 mm f/4 at 22 mm, f/13, 0.6 secs at ISO 100, Lee Filters ND Grad.
Choose Life, Choose The Cobb
Before I carry on, I've just remembered that I created one of my 5 Minute Photo Adventure videos from The Cobb, so if you want to see what it looks like, then check out the video below. You can also read the blog article for that video here.
Anyway, back to the story of my most recent visit. When I arrived in Lyme Regis, the weather was as forecast and cloud coverage looked to be 100%. As I walked from the car and approached The Cobb I could see that I wasn't the only photographer that high hopes for capturing a good image that morning.
As I setup my camera and took my first few shots, I suddenly changed my mind on the type of shot that I wanted. Rather than trying to repeat the type of shot I showed you earlier, I decided the image below was the style of image I wanted to capture that morning.
A New Vision of The Cobb, Lyme Regis, Dorset - Nikon D850, Nikkor 16-35 mm f/4 at 24 mm, f/13, 30 secs at ISO 64.
The calm waters, overcast sky, the colour of the water and long exposure all add up to a very different, but still pleasing image. Normally I like to capture the drama of the sea at The Cobb, but that morning called for something different.
As soon as I saw the image on the back on the screen on my D850 I realised that I had been missing out on some creative compositions at this location. I would definitely have to visit when the conditions were like this again.
After a short while, a break in the cloud started appearing in the distance, and the mood of the scene changed. Normally I'm happy when the cloud starts breaking up, but in this instance, I wanted the cloud cover to stay at 100%! With the gap in the cloud, the serenity and calmness of the scene was broken.
It was an interesting morning for me. My previous visits to The Cobb had gradually embedded into my mind the type of image I should capture there. This visit broke all that and I left with a renewed sense of excitement about returning to The Cobb on the next grey and overcast day!
Have you had a similar experience? Have you had your perception of a favourite location changed by weather? Let me know in the comments below.

GREAT Landscape Photography Locations on Harris and Lewis
Looking for a new bucket list location for your landscape photography? In the blog this week, I share with you some of the amazing locations I discovered while photographing two of the Outer Hebrides most famous locations, Harris and Lewis.
Harris and Lewis - Photography Bucket List Locations
I can’t remember when the Isle of Harris and the Isle of Lewis made it onto my bucket list of landscape photography locations. I’m not entirely sure what inspired me to want to go there. Maybe it was a Thomas Heaton video from Harris or seeing some holiday photographs from my sister.
Maybe it wasn’t just one thing, but rather it came through a gradual consumption of media and photographs from this most stunning Scottish location. No matter how it made it on to my list, I had decided that early on in 2018 that I was committed to making the long journey back into my homeland and onwards to the Outer Hebrides.
Immersing Myself in Photography
Time is precious and the amount of time I can normally commit to just doing landscape photography is limited. Things would be different on this trip though. Where my longest landscape photography adventures had normally been limited to a long weekend, this trip would see me commit 9 days. Nine whole days of landscape photography!
Actually, it was going to be nearer to 5 days. From Devon, it’s a two-day drive there and a two day drive back. It is over 650 miles one way, and you also need to get a ferry for part of the journey. That aside, 5 days is way more than I normally get to allocate to my passion. Besides, the journey wouldn’t be so long as I had a mate coming long with me. Plenty of time to catch up and chat.
I also set myself some clear priorities. This trip was going to be all about my photography. The weather gods hadn’t been kind to me in 2018 and I felt I wasn’t taking the images I knew I could. This trip was going to change that and I was going immerse myself in landscape photography.
With the decision to immerse myself in stills photography, I also made the decision not to make creating content for my YouTube channel a priority. The stills photography would be the top priority. My goal for the trip was to capture great landscape images. However, I do love creating content for my YouTube channel so I wasn’t going to go all the way to Harris and Lewis and not film anything.
The Journey Up
Our plan was to get as far as Glencoe on the first day. With a bit of luck, we’d get there before sunset and grab some shots. Fortunately for us, we did and you can see the results in the blog post Glencoe - One Location, 3 Compositions.
Our luck the next day soon ran out though. Not only was the weather not suitable for any sort of landscape photography, but the winds had picked up to gale force and it looked like the ferry crossing would be cancelled. Well, it appeared as if the captain of the boat wasn’t going to let a thing like the wind stop him from sailing, so we eventually left Uig at 9 pm. There wasn’t going to be a sunset shoot on Harris that day, but we were at least going to be making the crossing that evening.
Now the Story Really Starts
It was dark when we arrived in Tarbert, and it was dark when the alarm went off the next day for the first of our sunrise shoots. Having seen nothing of Harris so far we set off in the dark and headed to Luskentyre beach. This is the point where I move the storytelling from the blog to the vlog.
Photographs, Locations and Information
You will have noticed in the video that I didn’t talk about some of the locations we visited. I only showed the photographs. As I said earlier though, I really wanted this trip to be about immersing myself in my photography and not having to worry about talking to the camera.
So you have a more complete picture (excuse the pun) of my trip to Harris and Lewis, the next few sections of this blog post will feature all the images you saw in the video, along with the camera settings, and where they were taken. I hope you will find this information useful and the photographs inspiring.
If you are looking for a bit more inspiration, and more details on some of the locations I visited, be sure to check out Dougie Cunningham's excellent book Photographing Scotland.
Luskentyre Beach #1
No visit to Harris would be complete without going to Luskentyre. I found the photography here so inspiring that I photographed it almost every day.
North Harris from Luskentyre Beach, Isle of Harris - Nikon D850, Nikkor 16-35 mm f/4 at 19 mm, f/13, 3 seconds at ISO 200, Lee Filters Circular Polariser and ND Grad.
Pull of the Tide at Luskentyre Beach, Isle of Harris - Nikon D850, Nikkor 16-35 mm f/4 at 19 mm, f/13, 2 seconds at ISO 64, Lee Filters Circular Polariser and ND Grad.
Dunes of Luskentyre Beach #2, Isle of Harris - Nikon D850, Nikkor 16-35 mm f/4 at 20 mm, f/13, 1/5th second at ISO 64, Lee Filters Circular Polariser and ND Grad.
Northton Saltings
This interesting location is easy to access as it is right beside the road. Take some wellies though!
Stormy Saltings, Isle of Harris - Nikon D850, Nikkor 16-35 mm f/4 at 16 mm, f/13, 15 seconds at ISO 64, Lee Filters Circular Polariser, IRND and ND Grad.
The S in Saltings, Isle of Harris - Nikon D850, Nikkor 16-35 mm f/4 at 35 mm, f/13, 15 seconds at ISO 64, Lee Filters Circular Polariser, IRND and ND Grad.
Northon Saltings from Above, Isle of Harris - DJI Mavic Pro, 1/100th second at ISO 126, 26 mm at f/2.2.
Traigh Mheilein
Not the easiest beach to get to, but worth the walk.
Traigh Mheilein, Isle of Harris - Nikon D850, Nikkor 24-70 mm f/2.8 VR at 32 mm, f/13, 62 seconds at ISO 64, Lee Filters Circular Polariser, IRND and ND Grad.
Stac a' Phris
A spectacular coastline made even more impressive with the Stac a' Phris sea arch.
Turbulent Water at Stac a' Phris, Isle of Lewis - Nikon D850, Nikkor 16-35 mm f/4 at 18 mm, f/11, 1 seconds at ISO 64, Lee Filters Circular Polariser and ND Grad.
Stac a' Phris, Isle of Lewis - Nikon D850, Nikkor 16-35 mm f/4 at 20 mm, f/11, 2 seconds at ISO 64, Lee Filters Circular Polariser and ND Grad.
Sunset at Stac a' Phris, Isle of Lewis - Nikon D850, Nikkor 16-35 mm f/4 at 21 mm, f/11, 5 seconds at ISO 64, Lee Filters Circular Polariser and ND Grad.
Luskentyre Beach #2
The 2nd visit proved even more amazing than the first!
Sunrise at Luskentyre Dunes, Isle of Harris - Nikon D850, Nikkor 16-35 mm f/4 at 18 mm, f/13, 1 second at ISO 100, Lee Filters Circular ND Grad.
Sky Fire at Luskentyre, Isle of Harris - Nikon D850, Nikkor 16-35 mm f/4 at 18 mm, f/13, 0.6 seconds at ISO 100, Lee Filters Circular ND Grad, single image crop at 6:17.
Mangurstadh Stacks
Another dramatic coastal location on the Isle of Lewis.
Mangurstadh Stacks, Isle of Lewis - Nikon D850, Nikkor 24-70 mm f/2.8 VR at 52 mm, f/11, 119 seconds at ISO 64, Lee Filters Circular Polariser, IRND and ND Grad.
Tràigh Scarasta
There are so many beaches to photograph on Harris, but if you like patterns in your sand this one is well worth a visit.
Tràigh Scarasta, Isle of Harris - Nikon D850, Nikkor 16-35 mm f/4 at 19 mm, f/13, 69 seconds at ISO 64, Lee Filters Circular Polariser and ND Grad.
Tràigh Scarasta (ICM), Isle of Harris - Nikon D850, Nikkor 16-35 mm f/4 at 24 mm, f/22, 1/4 second at ISO 64, Lee Filters Circular Polariser and ND Grad.
Tràigh Sheileboist
I know it’s another beach, but even in the wildest of conditions it’s possible to get an image at one of the many golden beaches on Harris.
Tràigh Sheileboist, Isle of Harris - Nikon D850, Nikkor 16-35 mm f/4 at 26 mm, f/13, 30 seconds at ISO 64, Lee Filters Circular Polariser and ND Grad. Single image crop at 6:17
Luskentyre Beach #3
Last of the Luskentyre images…promise! (It was such an amazing location!)
Tranquility at Luskentyre, Isle of Harris - Nikon D850, Nikkor 16-35 mm f/4 at 19 mm, f/13, 3 seconds at ISO 64, Lee Filters Circular Polariser, ND and ND Grad.
Sand, Wind and Time, Luskentyre, Isle of Harris - Nikon D850, Nikkor 16-35 mm f/4 at 25 mm, f/13, 25 seconds at ISO 64, Lee Filters Circular Polariser, ND and ND Grad.
The Pastel Shades of Luskentyre, Luskentyre, Isle of Harris - Nikon D850, Nikkor 16-35 mm f/4 at 18 mm, f/13, 144 seconds at ISO 400, Lee Filters Circular Polariser, ND and ND Grad.
Luskentyre Beach Panorama, Isle of Harris - DJI Mavic Pro, 1/50th second at ISO 161, 26 mm at f/2.2, 9 image stitch cropped at 6:17.
A Tearful Goodbye
After 5 whole days of photography, it was sadly time to go home. We were really rather lucky with the conditions we got. The Outer Hebrides aren’t exactly known for settled weather but we managed to make it out every day with the camera. Some days were definitely more challenging than others, but even in wild conditions this magical place had something to offer.
As for the trip home ,that was similar to the trip up. The ferry was delayed due to bad weather so no chance of a sunset shoot back on the mainland, and the conditions the following morning were flat grey and overcast. As we headed down the M6 past the Lake District I didn’t even feel bad for passing it by as I had memory cards full of amazing images and video.
I do hope this blog post and video has given you a sense of not only what my adventure was like, but also what it is like to photograph Harris and Lewis. It truly is one of the most amazing landscapes I’ve ever photographed. From its dramatic coastal locations, grand mountains and open moorland, it never failed to surprise me. There was a real sense of awe. I grew up in the highlands of Scotland and now live in Devon so I know a good landscape, but Harris and Lewis were something special.
Are you planning a trip to the Outer Hebrides? Which photograph or locations was your favourite? What locations are on your bucket list? Let me know in the comments.

Discovering Prawle Point and Gammon Head
In the blog this week I head out to Gammon Head and Prawle Point on the South West Coast Path in Devon to explore a new location and to try something I don’t do very often!
Exploring New Landscape Photography Locations
I have to admit that I think one of my weaknesses with my photography is allocating enough time to go out and find new locations. It's not that I've got any shortage of inspiration. My custom Google map is awash with locations not visited. It's just that I always seem to be short of time, so I think I tend to go to locations that I know to try and increase the chances of getting a good image.
Recently I have been trying to do a little more exploring as you might have seen in my Froward Point and My Photography is Not a Priority blog posts. However, sometimes the best way to find something new is to head out with someone. So when I met up with fellow local photographer Neil Burnell recently, I asked him to suggest a location that we could photograph. You may remember Neil's work from a recent episode of On My Bookshelf where I took a look at his rather excellent book, Seascapes. You can see that video here.
Great Gammon Head
Neil knows the south Devon coast extremely well and given the weather and tide conditions he suggested we try photographing around the Prawle Point area. I've visited Prawle Point a couple of times with the family so I knew of the coastline there, but I'd never taken the time to explore it properly so I was excited to see what I could discover.
Neil suggested I take a look at Gammon Head, so while he did some IR photography I took a walk along the South West Coast Path. My instinct was to get up high, but as I ascended Gammon Head, I noticed an interesting rocky outcrop (Ball Rock I believe) down on the waters edge. There was no path down to the waters edge, and while it wasn't very steep, the descent was made difficult due to the thick vegetation.
When I finally made it down there I realised how exposed and hidden this part of the coastline was. If I was to have an accident I would have no chance of been spotted by someone walking the main path and with no mobile phone signal, I wouldn't be able to call for help. I decided that if I visit this location again I wouldn't do so on my own.
All that said, I was down there now and it was time to take some photographs. The light was fading fast by this point so I had to work fast.
My gut feeling for shots at these types of locations is to go with a long exposure, but as you can see below, an exposure of just 0.5 seconds can produce pleasing results. The wider view of the sea looks a bit messy, but I really like the texture of the water around the rocks.
The Rocks at Gammon Head #1, Devon - Nikon D850, Nikkor 16-35 mm f/4 at 24 mm, 0.5 seconds at ISO 64, f/13, Lee Filters Circular Polariser.
Below is the same image but with a 6 stop IR ND filter from Lee. This has given me a 30-second exposure which has resulted in the image I originally had in mind. However, I'm a bit torn between this image and the version before it. Which one do you prefer?
The Rocks at Gammon Head #2, Devon - Nikon D850, Nikkor 16-35 mm f/4 at 24 mm, 30 seconds at ISO 64, f/13, Lee Filters Circular Polariser and 6 Stop IR ND.
So while the first two images are pleasing enough, I wanted to fine-tune my composition. This is can be rather tricky when your down on a bit of coastline like this. Just stepping to right can mean a swim in the sea! I think I prefer the composition below as the furthest away rock now sits just above the horizon, rather than on it.
The Rocks at Gammon Head #3, Devon - Nikon D850, Nikkor 24-70 mm f/2.8 VR at 24 mm, 30 seconds at ISO 64, f/13, Lee Filters Circular Polariser and 6 Stop IR ND.
Ideally, I would have liked for that furthest away rock to not only have separation from the horizon but from the mass of rock to its left. But as I mentioned earlier, that would have meant walking on water!
For the final composition at Gammon Head, I headed down as close to the waters edge as I could and decided to take a vertical image.
The Rocks at Gammon Head #4, Devon - Nikon D850, Nikkor 24-70 mm f/2.8 VR at 27 mm, 30 seconds at ISO 64, f/13, Lee Filters Circular Polariser and 6 Stop IR ND.
I wouldn't normally publish so many similar images in the same blog post, but I wanted to share with you what I was doing and why. Hopefully, you found it interesting. Moving around a scene just a little can yield very different photographs.
Stars at Prawle Point
One of the other benefits of shooting with someone else is that you may find yourself photographing something a little different. As the sunset, the clouds started to clear so we decided to head up to the coastguard lookout at Prawle Point. Neil suggested this would make for an ideal location for some night sky photography.
I am in no way a night sky / astro photographer. I've done a bit of reading on the subject so I understand some of the basics around camera setup. I have even taken the odd night sky photograph, but nothing really serious. So capturing an image of this location in the dark was going to be a challenge. This challenge became even more obvious as I watched Neil set up his camera and take photographs like it was the middle of the day!
Anyway, I was having fun and I wasn't not going to let a thing like experience put me off having a go! So while the image below is not going to win any awards, I rather like it. I have to admit that there was a little luck involved in getting the shot. I couldn't really see very much, making focusing on anything difficult. I did have a head torch, but the beam wasn't strong enough to light the building, so I either guessed it or get Neil to use his head torch. Composition in the dark wasn't exactly easy either!
A Stary Night at Prawle Point Coastguard Lookout, Devon - Nikon D850, Nikkor 16-35 mm f/4 at 16 mm, 15 seconds at ISO 1600, f/14.
Every year I promise myself that this will be the year that I get into astrophotography. I find the night sky fascinating, and now that I've got a little extra motivation, maybe this is the time I follow through on my promise.
I really enjoyed my time at Prawle Point and Gammon Head. It was really good to explore somewhere new and to try out something a little different. I was glad I didn't just head out to somewhere I knew and played it safe!
So which of my Gammon Head shots do you prefer? Do you do any astrophotography? How much time to do you spend just exploring new locations? Let me know in the comments below.

Creating Coastal, Long Exposure, Panoramic Images with the Nikon D850
Have you ever taken a coastal, long exposure, panoramic image before? Well, that's just what I did in my latest video. Sometimes you need to see a scene a little differently to get inspired in a big way.
Getting Inspired
Over the years I've visited Froward Point on the south Devon coast a few times. Despite many attempts I've never really captured an image from that location that I'd really been happy with. In fact, I'd just about given up on it as a location.
However, after being inspired by the work of another local photographer, I thought Froward Point might be worth another visit. This time though, I would leave most of my gear behind, travel light, and wander along the coast path a bit more. Rather than go back to the same spot I always end up going to, I would see what other viewpoints there might be.
Sure enough, as I walked along the coast path I got to see a view of rocks near Froward Point in a totally new way! My creative brain got all excited by the new compositions that I could make photographs from. For me, the scene instantly said that this coastal image would be a long exposure, and would be best suited to the panoramic format. I even thought it would work best on a grey and overcast day.
With a clear vision of what I wanted to photograph, I just needed to return at the right time when I had the weather conditions were right and the tide was high. Here is what happened when I did finally return:
As you'll have seen this video was a bit longer than normal, but I wanted to take you through my thought process, how I set up the camera, and how I eventually captured then printed the final image.
So have you ever captured a coastal, long exposure, panoramic image before? What photography techniques have you combined before? Let me know in the comments below.
The Photographs
A Coastal Long Exposure Panorama - Froward Point, Devon: Nikon D850, Nikkor 70-200 mm f/2.8 at 70 mm, 20 secs at f/11, ISO 64, Lee Filters Circular Polariser. 5 Image stitch.
On an Island - Froward Point, Devon: Nikon D850, Nikkor 24-70 mm f/2.8 at 58 mm, 105 secs at f/6.3, ISO 64, Lee Filters Circular Polariser. 5 Image stitch.
Islands in the Blue - Froward Point, Devon: Nikon D850, Nikkor 24-70 mm f/2.8 at 29 mm, 40 secs at f/11, ISO 64, Lee Filters Circular Polariser.

Dawn with Danks - A Mini Adventure with Gareth Danks
In the blog this week I share with you vlog I made when fellow photographer and YouTuber, Gareth Danks paid me a visit. We headed down to the south Devon coast for a bit a coastal photography and a chat.
Meeting Gareth Danks
I've been following Gareth Danks on YouTube for a while and we briefly met up at The Photography Show earlier this year. At the show, we discussed the idea of meeting up to do some photography but finding a date we could both do proved a little tricky.
As spring came around and the days got longer, the number of opportunities to get out with the camera also increased. So when Gareth announced he was going to be making a visit to Devon we thought it would be a great time to meet up. We agreed to shoot sunset on Thursday evening and then shoot sunrise the following day.
Our Adventures
The plan was set and the day soon came around. In the following videos, you can see exactly what we got up to.
The first and only video I made was of the Friday morning shoot at Dawlish Warren and Dawlish. You can see it here:
For an alternative take on the morning, check out Gareth's video from Friday morning:
And finally, if you want to see what we got up to on Thursday evening on Dartmoor, you can see Gareth's video here:
I hope you enjoyed all those videos. I think we both have a similar style when it comes to our vlogs so it was really easy to mix up the photography, shooting my video and appearing in his vlog. Though it was only a short meetup, it was a mini adventure to remember!
My Photographs
You will have seen my photographs from the Friday morning in the video, but as always I like to share them here on the blog as well.

Nikon D850, Nikkor 16-35 mm f/4 at 16mm, f/13, 240 secs at ISO 64, Lee Filters circular polariser and 10 stop ProGlass IRND.
Nikon D850, Nikkor 16-35 mm f/4 at 20mm, f/11, 80 secs at ISO 64, Lee Filters circular polariser, 2 stop hard edge grad and 10 stop ProGlass IRND.
I do hope you also watched Gareth's video. It's really interesting to see how another photographer shoots the same scene at the same time. It was beneficial for me as watching Gareth setup his compositions got me to think about my own compositions.
Do you meet up with other photographers? Do you find yourself learning from them or trying something new out? Let me know in the comments below.

Lee Filters Little Stopper vs 6 Stop ProGlass IRND
In this blog post, I look at the differences between Lee Filters Little Stopper and their 6 stop ProGlass IRND. They are both 6 stop neutral density filters so what are the differences and which one should you buy?
Lee Filters
I'll be upfront with you. Ever since I bought my first filter set in 2007 (when I had a Nikon D80), I've only ever bought filters from Lee Filters. When I first started looking for a filter system, everything I read said that Lee Filters were the best. Pricey, but the best.
Over the years I've built up a reasonable size collection of filters from Lee. Up until now the only filter I have replaced was the original circular polariser for the new, slightly thinner landscape circular polariser. I've never had to replace a filter because of a fault and I still use the filters that I originally bought in 2007. So if you are looking for a comparison to filters from other manufacturers, I'm afraid this isn't it.
Goodbye Little Stopper and Big Stopper
With all that said I have just sold both my Little Stopper (6 stop ND) and Big Stopper (10 stop ND). These are filters I have used a LOT. So did I not need them anymore or did I buy ND filters from a different manufacturer? Of course not! All I have done is simply replace them with 6 stop and 10 stop ProGlass IRND filters from Lee Filters.
Apart from being more expensive than their Stopper equivalents how do these ProGlass IRND filters differ? Should you sell your Stopper filters and replace them? Do you need both Stopper and ProGlass IRND filters? In the video below I aim to answer all those questions!
Hello ProGlass IRND
As you'll have seen in the video my conclusions about whether these new ProGlass IRND filters are a must buy aren't clear-cut. It's difficult to give a general conclusion as everyone's needs and budgets are different. The fact that the ProGlass IRND filters don't actually replace the Stopper range also adds a little complexity to the decision.
So all I can really do is talk about my own decision to sell my Stopper filters and buy the ProGlass IRND filters. For me, it has very much been money well spent. I particularly like the lack of colour cast and vignetting. While both these can be corrected or enhanced in post-processing, I much prefer seeing a more neutral/accurate representation of the scene on the back of the camera at the time of capture. I also like the fact that calculated exposure times are far more accurate.
So have you bought any of the new ProGlass IRND filters? Would you consider replacing your Stopper filters? Do you use something other than Lee Filters? Let me know in the comments below.
Comparison Photographs
Here are the images from the video should you wish to take a closer look.
60 Second exposure with the Little Stopper. Unprocessed.
60 Second exposure with the 6 Stop IRND. Unprocessed.
60 Second exposure with the Little Stopper. Processed
60 Second exposure with the 6 Stop IRND Processed.
Seascapes by Neil Burnell - Kozu Books - Landscape Editions Volume 11 - On My Bookshelf S01E04
In the latest episode of On My Bookshelf, I take a look a book called Seascapes, a collection of fine art long exposure images by Neil Burnell. Should this book have a place on your bookshelf?
Great Things Can Come In Small Packages
I've been following the work of Neil Burnell for some time now. Not only does he shoot my local area but the images he creates from these locations are simply stunning. I like to shoot long exposure images myself, but the fine art long exposure images that he creates are another level altogether.
So when I found out that Neil was doing a 2nd edition of his very popular Seascapes book, I ordered one immediately. When this small, but perfectly formed book arrived, I was instantly captivated by how good the images looked in print. I knew I had a book packed full of inspirational photographs.
But is this a book for you? Well, let's take a look.
I do hope you enjoyed this episode of On My Bookshelf and if you want to pick up a copy of this fantastic book then you can buy directly from Kozu Books by clicking here.
But be warned this is a limited edition book so you'll need to hurry! If you do miss out you can check out Neil's work and see all his social media links on his website.

Long Lens Landscape Photography
In the blog this week I share with you my long lens landscape photography video. It was all inspired by my fellow landscape photographer Chris Sale who set me the challenge of capturing three long lens landscapes.
The Wide View
If I take a look at my Lightroom catalogue the most commonly used lens I have is without a doubt the Nikkor 16-35 mm f/4 VR. This is hardly surprising given that it was the first full frame lens I bought and that I love shooting my landscapes wide.
About 18 months ago I bought a used Nikkor 70-200 mm f/2.8 VR. I purchased it after renting one a few times to help with my live music photography when I was shooting at bigger events. I soon discovered though that I could use it for my landscape work as well.
Since then, I have shot landscape images with the 70-200 mm but I probably don't use it as much as I should have. So when fellow landscape photographer and YouTuber Chris Sale set me the challenge of shooting 3 images with my 70-200 mm I really had to get my creative brain into gear.
As we are both YouTubers I also set Chris the challenge of creating some wide angle landscape images. You can see how we both got on in the video below:
Well, I hoped you enjoyed watching that video. For me, it was a really good experience. It actually got me to think a little differently! It's opened my eyes a little more to creating landscape images with a longer lens, and I'm sure the 70-200 mm will be making a more regular appearance in my camera back.
Do you have a favourite lens? Do you prefer to shoot wide or tight? Or do you mix it up depending on the scene? Let me know in the comments below.
The Long Lens Images
In case you want to have a closer look at the images featured in the video here they are:
Nikon D850, Nikkor 70-200 mm f/2.8 at 112 mm, 0.6 seconds at ISO 64, f/11.

Nikon D850, Nikkor 70-200 mm f/2.8 at 100 mm, 0.6 seconds at ISO 64, f/11. This didn't actually make it to the video, but I do really like it!

Nikon D850, Nikkor 70-200 mm f/2.8 at 70 mm, 1/6th second at ISO 64, f/11.
Nikon D850, Nikkor 70-200 mm f/2.8 at 135 mm, 75 seconds at ISO 64, f/2.8, Lee Filters Big Stopper and 3 stop ND.

A Day Out in Dorset
In this blog post, I tell you about the day I spent photographing some of Dorset's finest coastal locations.
Dorset
Though Dorset is the county next door to where I live, I really don't spend enough time there photographing it. I do love to shoot The Cobb in Lyme Regis, and I have been known to photograph Colmer's Hill on the odd occasion, but I really should spend more time in Dorset exploring further afield.
So when my friends over at Dawn 2 Dusk Photography announced that they were running a special long exposure one day workshop in Dorset, I signed up immediately. It sounded so good that I even convinced my father-in-law to dust off his camera and join me.
I've written about the advantages of attending workshops before when I attended another Dawn 2 Dusk workshop in Glencoe earlier this year. This one would be no different. There would be some excellent tuition on hand, it would be well organised, there's always a great bunch of photographers to get to know, and we would, of course, visit some of Dorset's most iconic coastal locations.
West Lulworth
As the workshop wouldn't start until 9 am in Swanage, I thought I would try and make the most of the day by fitting in a nearby dawn shoot. As sunrise was relatively late on I couldn't be too far away from Swanage, so I decided to go West Lulworth and try my hand at shooting Lulworth Cove.

I will need to explore the cove in more detail if I'm to get the shot I'm looking for.
Upon arriving at West Lulworth it soon became apparent that shooting the cove in its entirety wasn't going to be as easy as I thought it might be. From my shooting location along the western edge of the cove, even with a 16mm lens, I wasn't able to find a spot from where I could get everything in that I wanted. Obviously, this would be a location that I would need to revisit when I had more time to explore.
I did find a nice composition down at the shoreline of the cove though. While I like the composition of the photo below, I think it lacks good light and a bit of colour from the rising sun. The sky was very clear that morning except the point where the sun was rising where there was a blanket of cloud. By the time the sun was rising above the cloud I really had to make a move to Swanage or I'd be late for the start of the workshop!
Nikon D850, Nikkor 16-35mm f/4 at 22mm, f/11, 25 secs at ISO 64, Lee Filters circular polariser.
Swanage
After the workshop briefing at 9 am, some witty banter, and some much-needed coffee, the workshop group headed out to photograph both the new pier and old pier at Swanage. Unfortunately, I was unable to make the most out of these locations. Though I got some excellent advice on how to shoot the old pier, I found the clear blue skies not to my taste and I didn't really get any images that I was happy with.
However, getting great images from every location isn't my goal, nor is it ever realistic. I did, however, leave happy knowing that I'd learnt something about composition (there's always something to learn about composition) and that I'd enjoyed meeting some new people.
We then moved down onto the beach where we had the opportunity to shoot some groynes, and banjo jetty (which I have shot before). On the advice of one of the instructors, I headed further down the beach to photograph one of the groyne markers beside a small river that fed into the sea. This was a good shout as I managed to get my first good image of the day. It would have been unlikely that I would have found this spot myself so this was another bonus of being on the workshop.
Nikon D850, Nikkor 16-35mm f/4 at 17mm, f/11, 390 secs at ISO 64, Lee Filters Super Stopper.
Kimmeridge
We then all moved onto Kimmeridge where we had a quick picnic lunch and a bit more chat. I had visited Kimmeridge before on a workshop but it was the middle of the day with clear skies so I was really hoping that this visit would be different. There was some cloud in the distant sky and with sunset only a couple of hours away, I was hoping my luck would be in.
As it turned out we didn't get much in the way of action in the sky, but we did get some really nice spots of light on the rocky shore. I've always thought the rocky shore at Kimmeridge was interesting, but the addition of some interesting lighting really got me thinking about the possibilities at this location.
These are two of my favourite shots of the afternoon. I really like the composition, the textures and patterns on the rock, and just a hint of light from the setting sun. These could have been amazing shots if there had been some more interest in the sky. But let's face it, us landscape photographers are rarely completely happy with the conditions!
Nikon D850, Nikkor 16-35mm f/4 at 26mm, f/11, 90 secs at ISO 64, Lee Filters circular polariser and Big Stopper.
Nikon D850, Nikkor 16-35mm f/4 at 21mm, f/13, 30 secs at ISO 64, Lee Filters circular polariser and Little Stopper.

Afterwards, we walked back along the beach to another really interesting spot. In this image you'll see how the rocky ledge creates a nice leading line through the image. It was late on when I took this image so there was very little in the way of light. However, I think with a good sky those pools of water could provide some really interesting reflections.
Overall both myself and my father-in-law had a great time. Though I struggled to create images that I was satisfied within the morning, the two images I created at Kimmeridge more than made up for it. I also picked up some useful compositional tips and, as always, I really enjoyed the social element of the workshop.
Anytime anyone asks me about workshops I always recommend Dawn 2 Dusk Photography, and attending their Dorset long exposure one day workshop is yet another reason why that recommendation remains.
So what are your favourite Dorset locations? Have you been on any workshops recently? Let me know in the comments below.