
Keep Calm and Embrace the Grey
Big sunrises, amazing light, and epic skies. These are just some of the elements that have helped shape some of my best landscape photographs. But what do you do when you don't have those things? What if the conditions are grey, overcast and still?
It’s All About the Light
Over the years some of my best photos have been shaped by the light. I’m always seeking the type of light that will lift my compositions from looking a little dull and flat into something with texture, dimension and contrast. Don’t get me wrong, I’m not saying that you can’t get good images in flatter light, but the images that I like creating often require good light to make them a little more special.
Winter in the UK can be a challenging time for photography. The weather can be rather unsettled and grey flat days tend to be the norm rather than the exception. With so much overcast weather I decided it was once again time to #EmbraceTheGrey and I knew just the place to go.
Right Subject for the Conditions
Back in December 2018, I had visited The Cobb and the image that I captured changed the way I viewed that location. Rather than a location I would only visit when the waves were big and the sky glorious, I really wanted to capture a photograph when it was all still, flat and overcast. I almost got what I was looking for on that visit but I actually wanted it to be even more overcast! I wanted it to be even greyer!
For some time now I’ve been hoping to get those very conditions so I could make the photograph that I had in my mind’s eye. When a recent weather forecast predicted the conditions I was looking for, I thought it was finally time to head back to The Cobb.
In my latest video below I will share with you the experience of going back to The Cobb to try and capture the image I had envisioned all those months ago. I’ll also show you how I post-processed it and how I printed it.
I do hope you enjoyed the video. Though I’ll always be chasing that glorious light, hopefully, this video has shown you that having a subject or location that you can embrace the grey with is not only useful but can also lead to some very pleasing images.
Do you have a favourite location where you #EmbraceTheGrey? Let me know in the comments below.
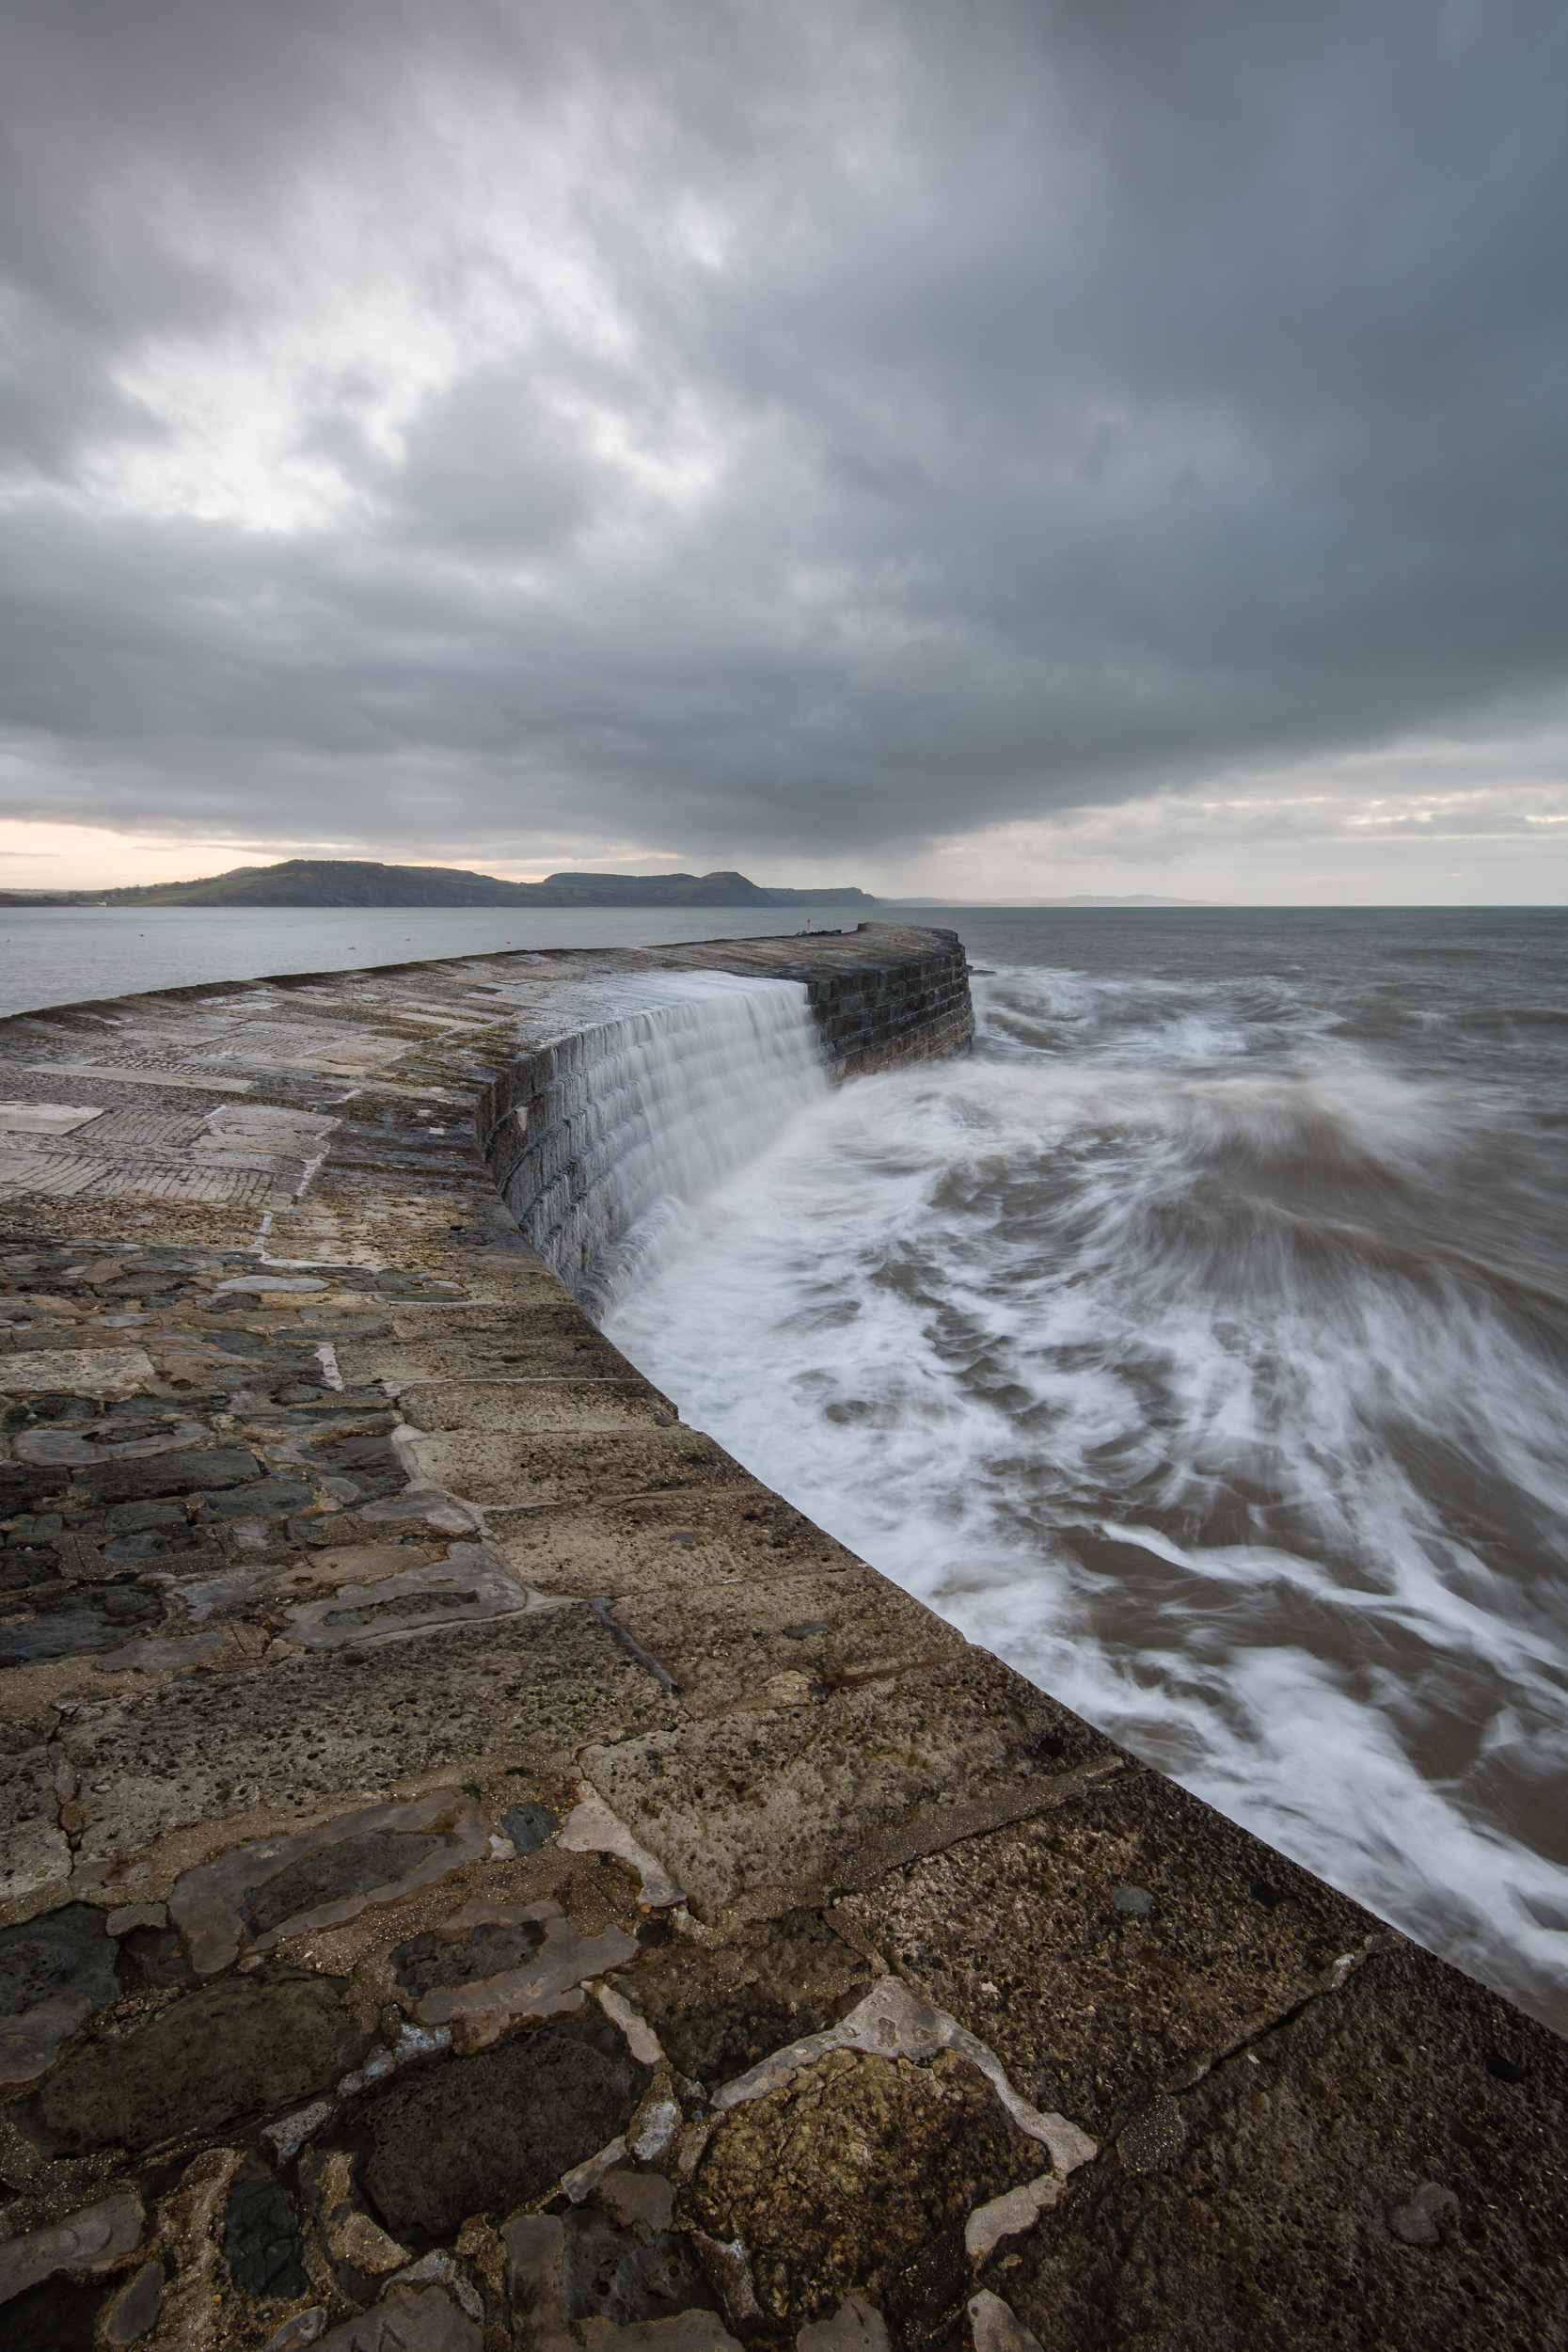
And finally, here is that image you saw me capture, print and frame.
Embracing the Grey at The Cobb, Lyme Regis, Dorset - Nikon Z7, Nikkor 14-30mm f/4 at 16mm, f/13, 182 seconds at ISO 64, Kase Filters CPL and 6 Stop ND
Printing Notes
In case you didn’t catch everything in the video, here is what I used to print the image:
Printer - Canon Pixma Pro-10s (http://amzn.to/2Anrcj7)
Software - Edited in Lightroom and printed using Canon Print Studio Pro
Paper - Fotospeed’s Legacy Gloss 325 with custom ICC profile (https://www.fotospeed.com/Legacy-325/groupproduct/3103/) - one of my favourite papers!
Frame - Picture Frames Express (https://www.pictureframesexpress.co.uk/)

A New Vision of The Cobb
In the blog this week I tell you about my most recent visit to Lyme Regis in Dorset to capture landscape images of The Cobb, and how an overcast morning changed the way I view this iconic location.
Weather Obsession
I have to admit it, I'm obsessed with the weather. More specifically, the weather forecast. But what landscape photographer isn't slightly obsessed by the weather. I'm constantly checking the forecast and looking for the best place to visit with the limited about of time that I have for my landscape photography.
After a few days of frankly terrible weather, it was going to take some pretty awful conditions to stop me heading out with the camera. After much head scratching over the weather forecast I thought the best place to go would be The Cobb at Lyme Regis in Dorset.
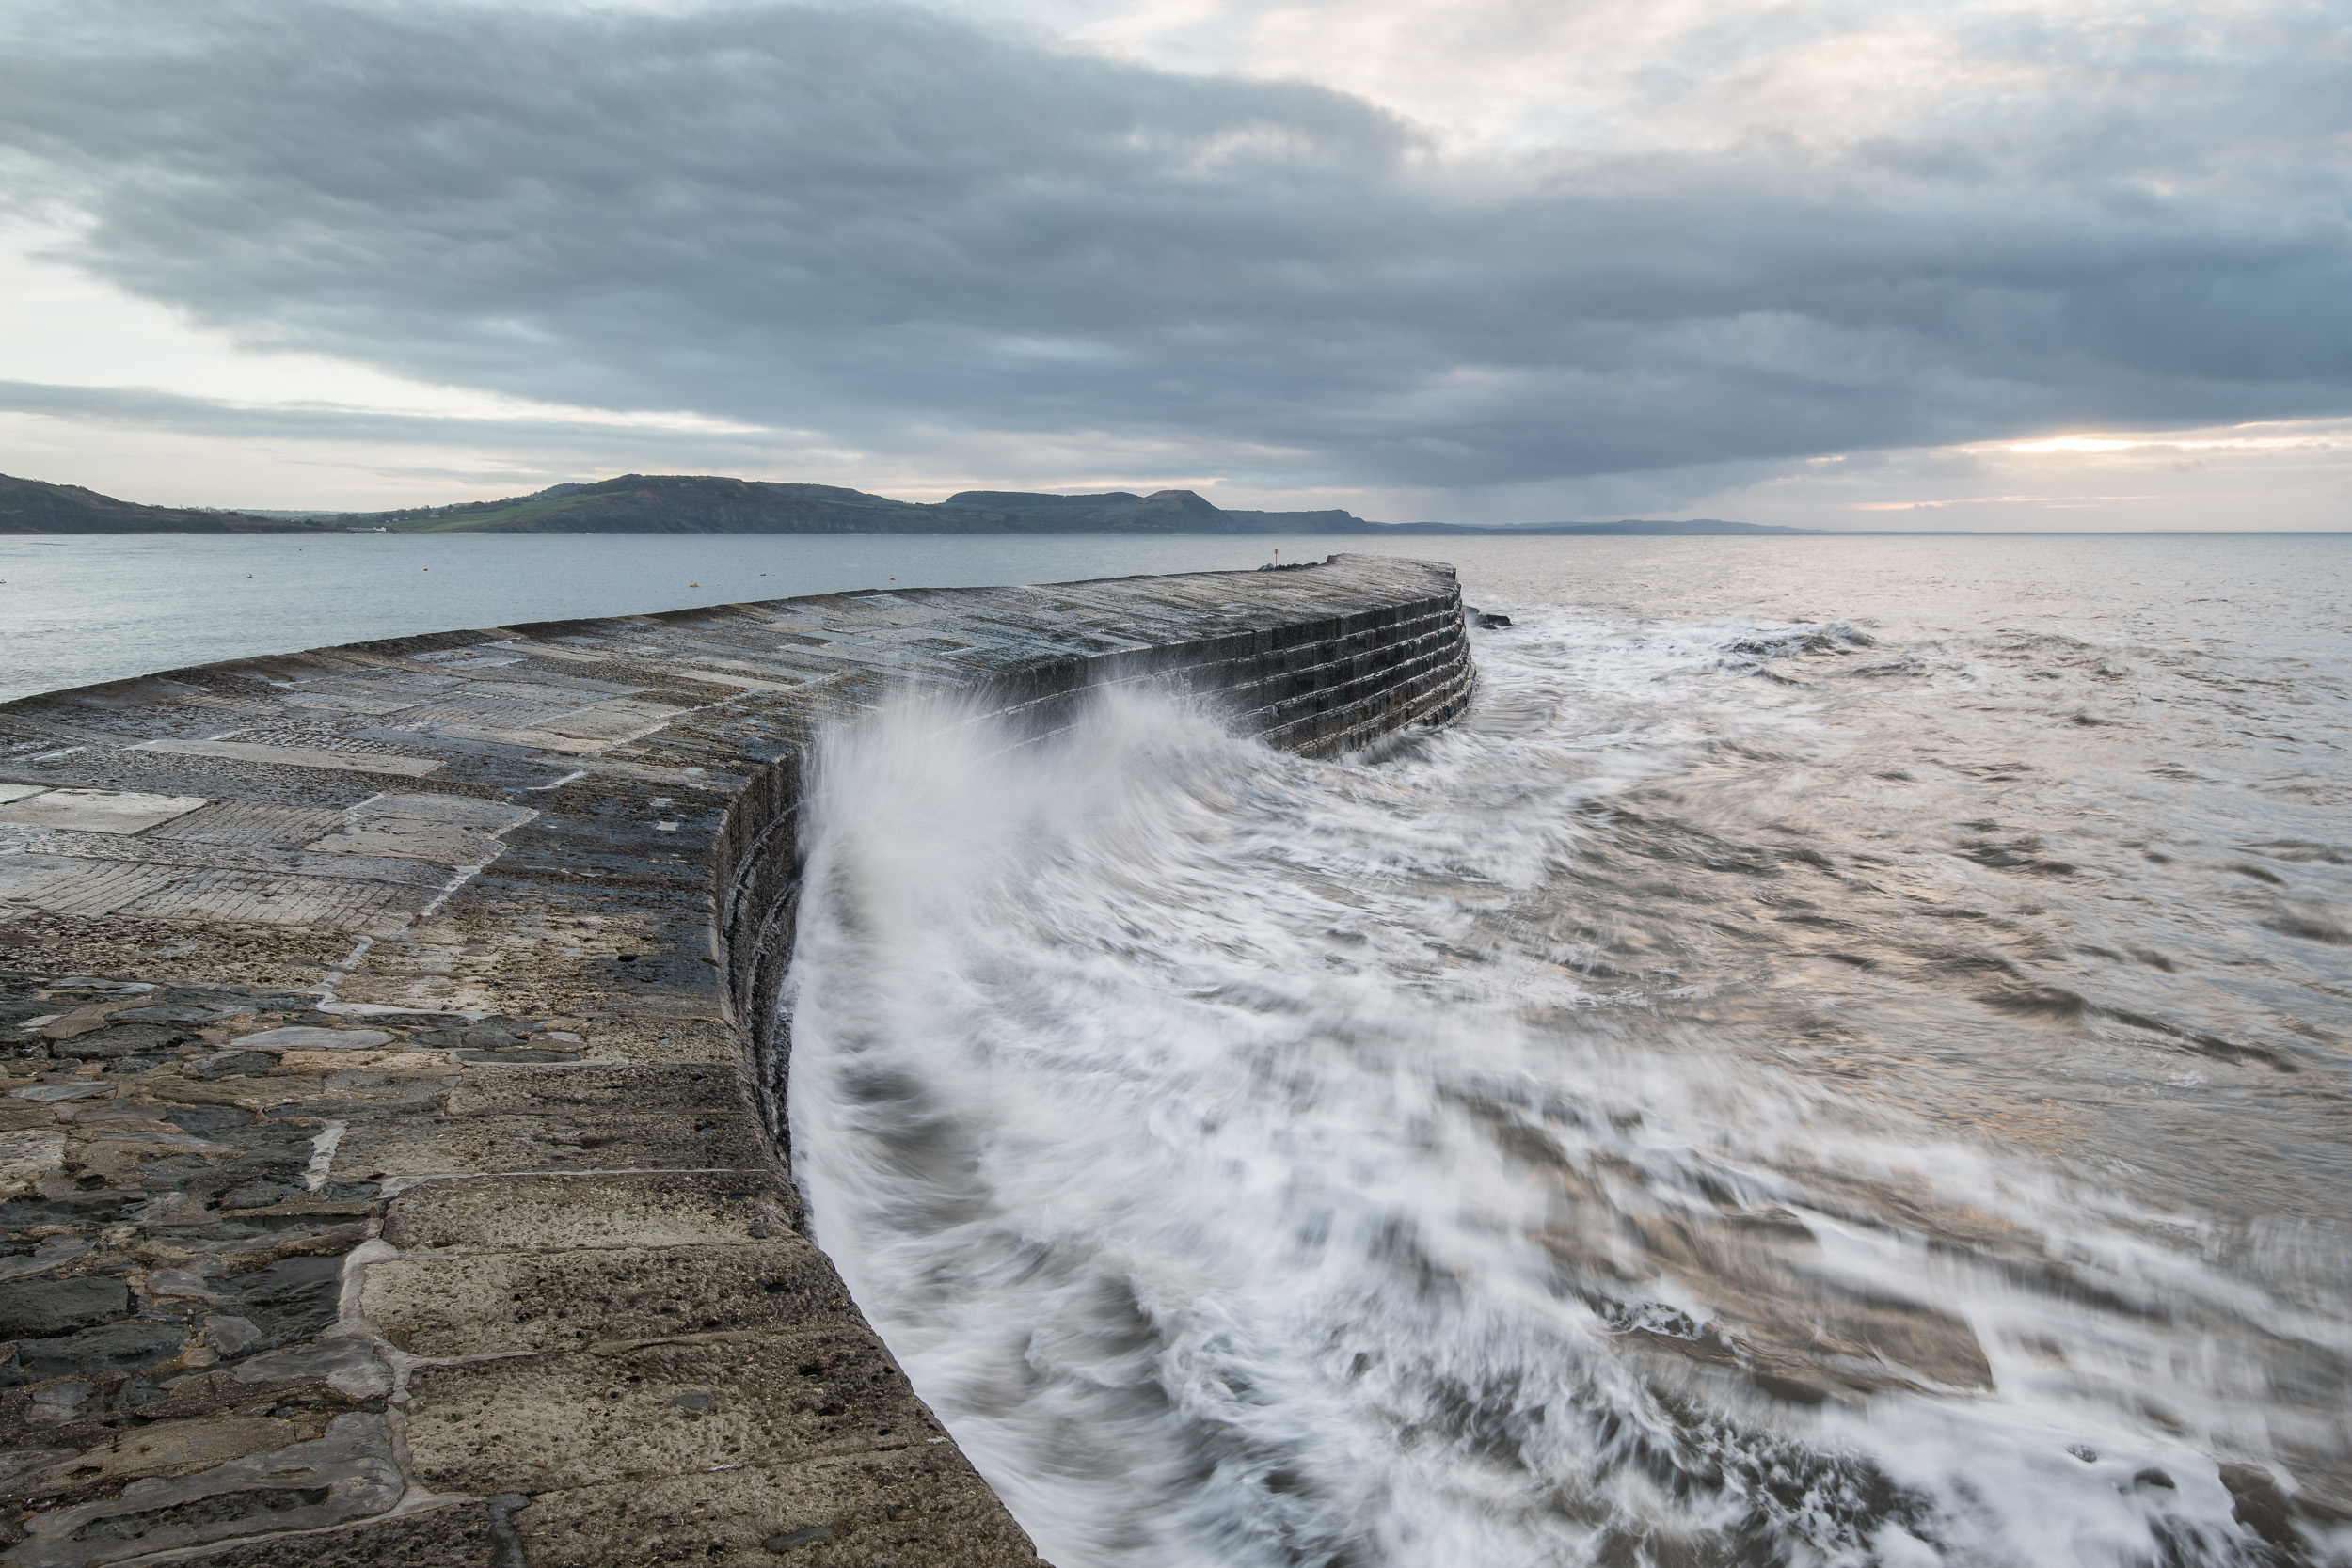
It was a bit of a risk to go there given the predicted cloud cover. Either side of sunrise it was forecasting 100% cloud cover, but around sunrise itself, the cloud cover could drop to around 50%. Combined with the direction of the rising sun, I was hoping to capture an image similar to this one I'd taken a while back.
The Cobb vs The Sea, Lyme Regis, Dorset - Nikon D750, Nikkor 16-35 mm f/4 at 22 mm, f/13, 0.6 secs at ISO 100, Lee Filters ND Grad.
Choose Life, Choose The Cobb
Before I carry on, I've just remembered that I created one of my 5 Minute Photo Adventure videos from The Cobb, so if you want to see what it looks like, then check out the video below. You can also read the blog article for that video here.
Anyway, back to the story of my most recent visit. When I arrived in Lyme Regis, the weather was as forecast and cloud coverage looked to be 100%. As I walked from the car and approached The Cobb I could see that I wasn't the only photographer that high hopes for capturing a good image that morning.
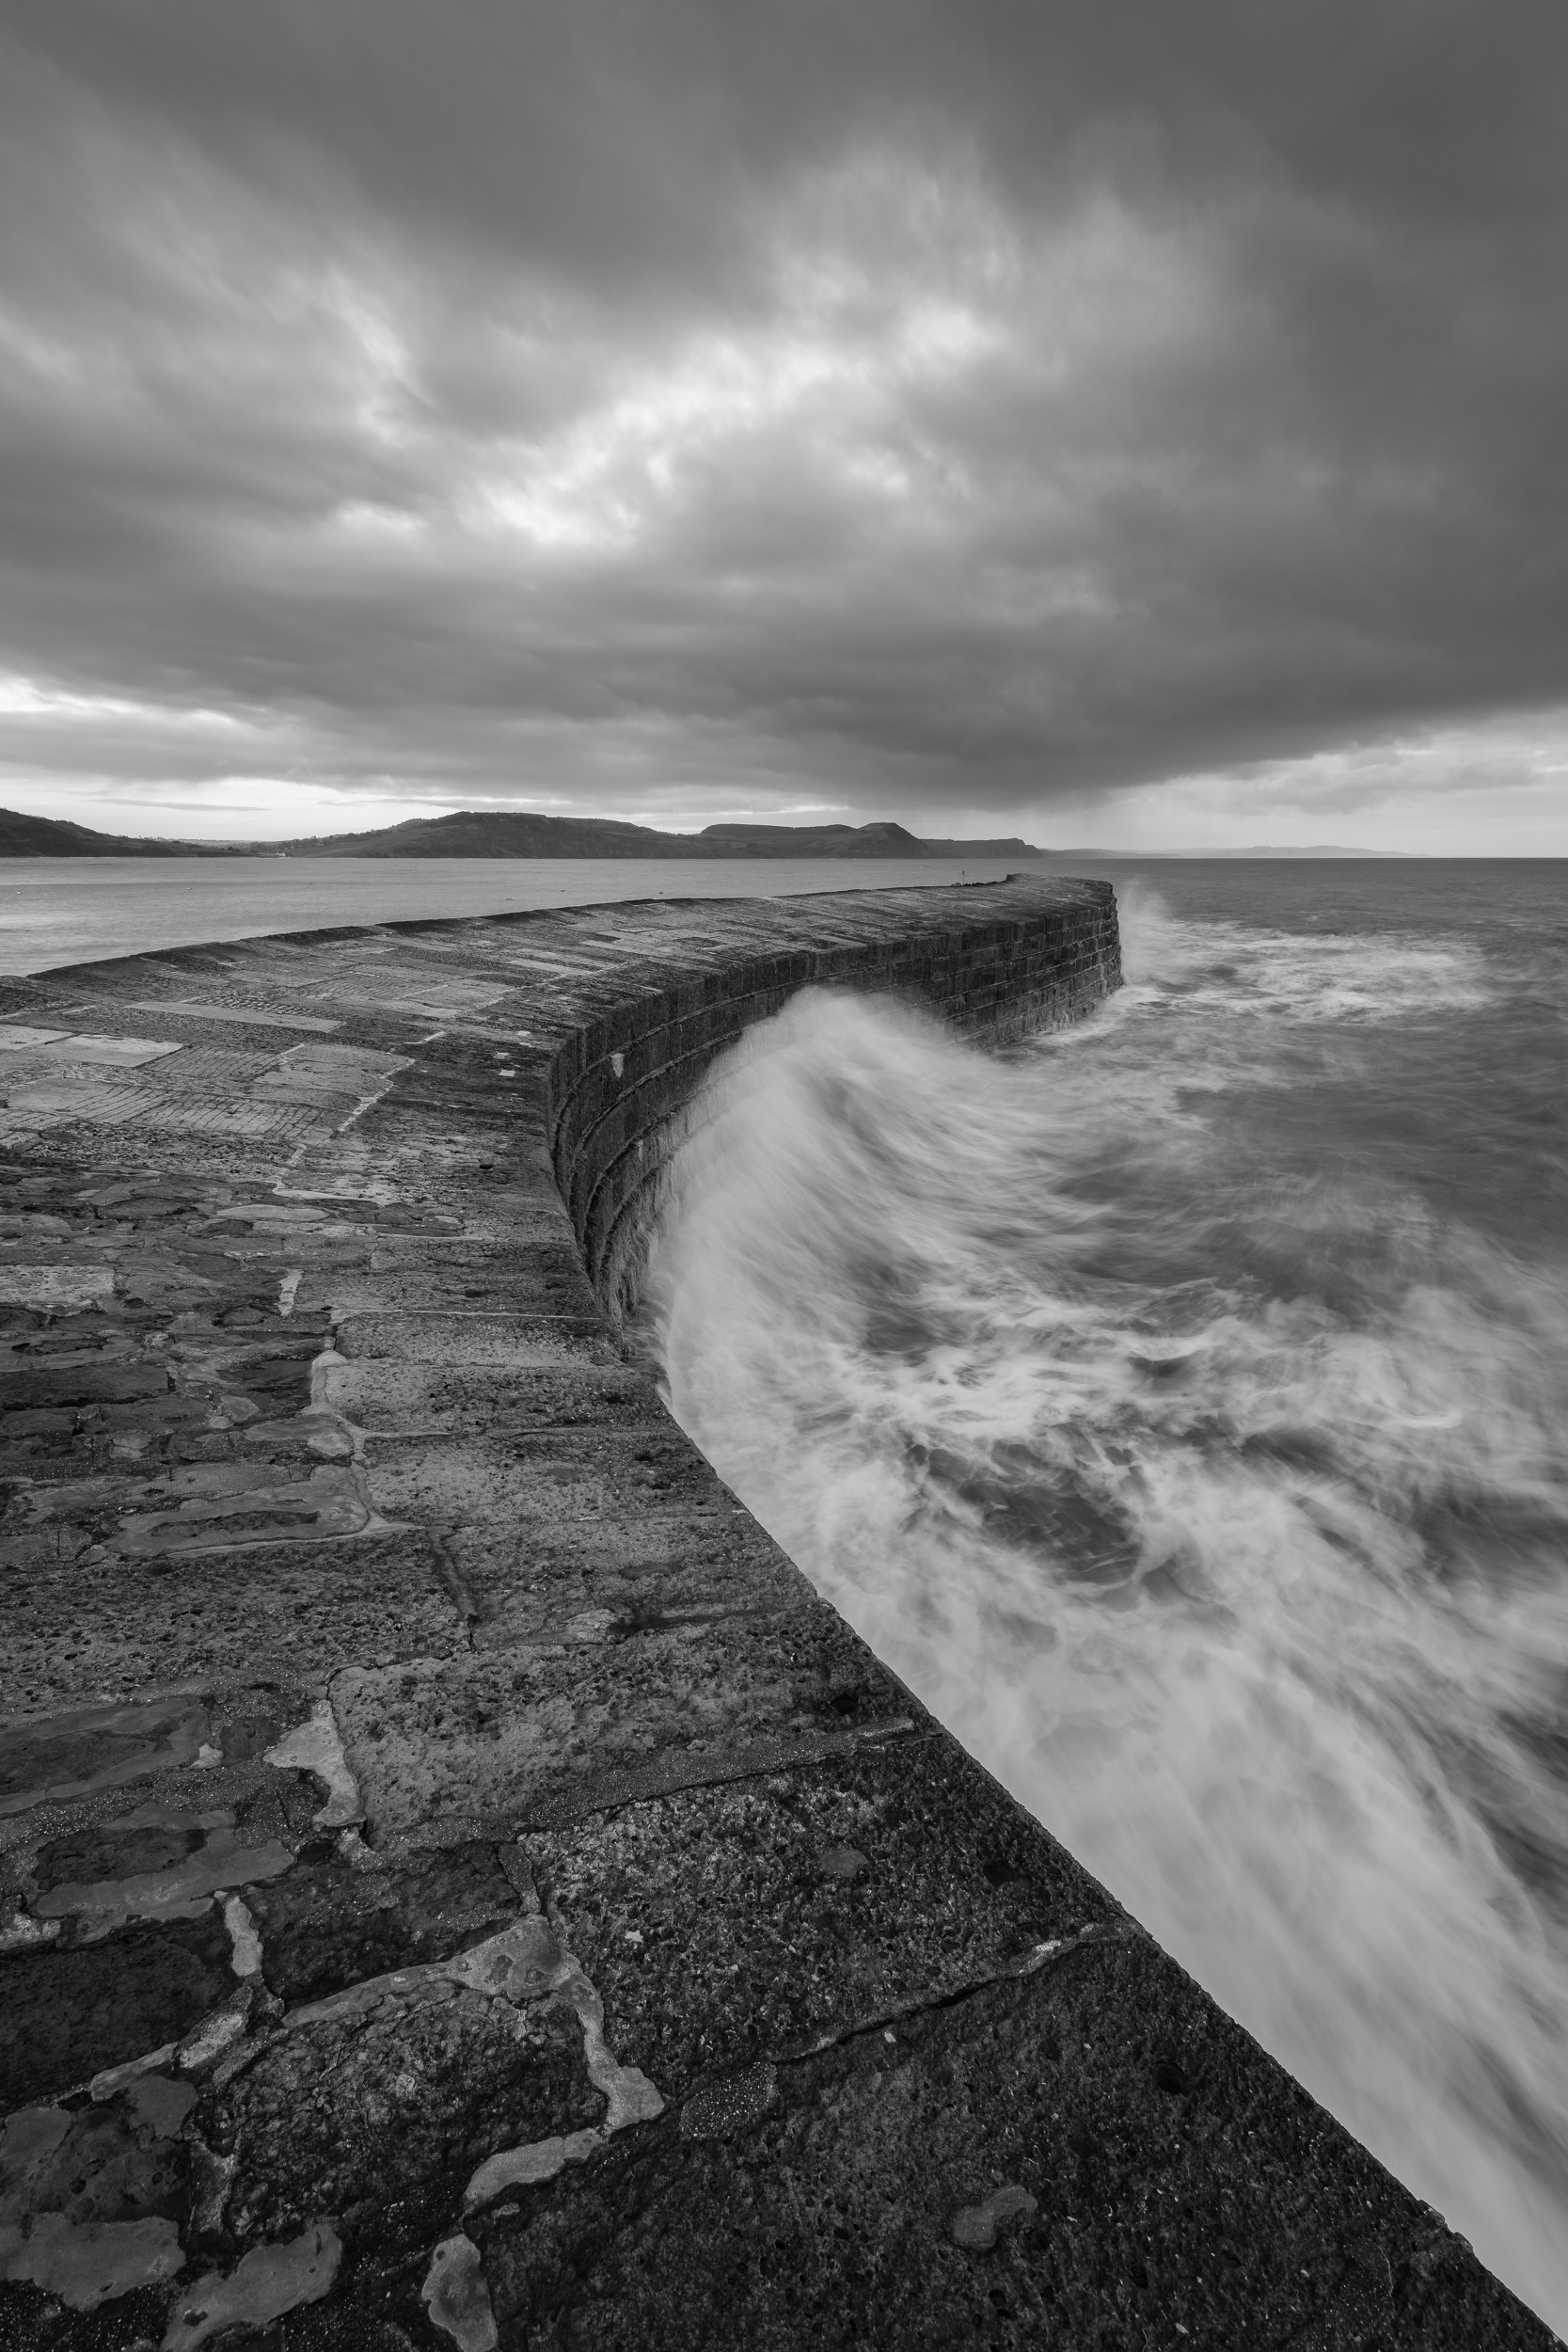
As I setup my camera and took my first few shots, I suddenly changed my mind on the type of shot that I wanted. Rather than trying to repeat the type of shot I showed you earlier, I decided the image below was the style of image I wanted to capture that morning.
A New Vision of The Cobb, Lyme Regis, Dorset - Nikon D850, Nikkor 16-35 mm f/4 at 24 mm, f/13, 30 secs at ISO 64.
The calm waters, overcast sky, the colour of the water and long exposure all add up to a very different, but still pleasing image. Normally I like to capture the drama of the sea at The Cobb, but that morning called for something different.
As soon as I saw the image on the back on the screen on my D850 I realised that I had been missing out on some creative compositions at this location. I would definitely have to visit when the conditions were like this again.
After a short while, a break in the cloud started appearing in the distance, and the mood of the scene changed. Normally I'm happy when the cloud starts breaking up, but in this instance, I wanted the cloud cover to stay at 100%! With the gap in the cloud, the serenity and calmness of the scene was broken.
It was an interesting morning for me. My previous visits to The Cobb had gradually embedded into my mind the type of image I should capture there. This visit broke all that and I left with a renewed sense of excitement about returning to The Cobb on the next grey and overcast day!
Have you had a similar experience? Have you had your perception of a favourite location changed by weather? Let me know in the comments below.

Photographing The Cobb in Dorset: A 5 Minute Photo Adventure
In the blog this week I head to Lyme Regis in Dorset to photograph The Cobb. You can also watch one of my 5 Minute Photo Adventure videos so you can see how I captured the images featured in this blog.
Finally...A Break in the Weather
After what feels like an age, the weather forecasts finally started to show some better weather. January had been a challenging month for my photography. It was the normal combination of lack of time and poor weather, that resulted in not a lot of photography. For anyone who has read my blog for long enough, you'll know that January has historically always been a challenge for me.
It's not just the photography I've been missing, but also going out there and creating new videos for my YouTube channel.
Off to The Cobb
One of the locations that I've always wanted to make a video from is The Cobb in Lyme Regis. It's one of my favourite locations to shoot coastal images. I did actually try and make a video there last year, but I failed to prepare my gear properly. You can read all about that trip here.
So when the weather, and importantly the tide looked good for a dawn shoot at The Cobb I was super excited to finally make one of my 5 Minute Photo Adventure videos there. Here is the result:
I do hope you enjoyed that video and it has inspired you to photograph The Cobb. It's such a great location to photograph if you like shooting seascapes. Just remember to get there early in the morning (it can get busy with photographers), and watch out for those crashing waves!
Have you photographed The Cobb before? What is your favourite coastal location? Let me know in the comments below.
The Photographs
Here are the photographs you saw in the video, plus a couple of extras.
Nikon D850, Nikkor 16-35mm f/4 @ 19mm, f/13, 2.5 seconds at ISO 64, Lee Filters Circular Polariser and ND Grad.
Nikon D850, Nikkor 16-35mm f/4 @ 22mm, f/11, 1/8th second at ISO 64, Lee Filters Circular Polariser and ND Grad.
Nikon D850, Nikkor 24-70mm f/2.8 VR @ 65mm, f/8, 60 seconds at ISO 64, Lee Filters Circular Polariser.
And finally...
Just a word of caution when visiting The Cobb...
Shooting into the Sun at The Cobb
In the blog this week I head off to The Cobb in Dorset to try out the new Lee Filters Reverse ND filter.
I Have a Confession
As a landscape photographer, I have to be prepared to shoot in a wide range of conditions. I like to think that I'm pretty adaptable and can deal with most things. However, there is one scenario that I have to admit to always trying to avoid.
The simple fact is that I don't like shooting straight into the sun. As my most common shooting times are dawn and dusk, this can be a problem at certain locations at certain times of the year. When the sun is just above the horizon at the start or the end of the day, it can be really tricky to control the exposure.
Many photographers get around this issue by bracketing their exposures, but I'm not one for spending much time on post-processing. So when Lee Filters announced they had released a Reverse ND Filter I thought this might be the perfect way help me control my exposures in those situations that I had previously avoided.
Some Bad News

A Super Stopper should not look like this.
Before I start to share with you my initial experiences with the reverse ND grad, I have some bad news about one of my other filters. I'm very sorry to report that Lee Filters Super Stopper has been shattered. The purchase of the reverse ND grad was my 11th Lee filter, so I decided that I would remove the Super Stopper from my filter pouch to make room for the reverse ND grad.
Unfortunately, the Super Stopper appears to have received a knock at some point and shattered. This is the first Lee filter I have lost due to damage. I'm not sure how this has happened. I keep all my filters in a Lee Filters pouch which is then kept in a heavily padded area of my bag. Still, something has happened and the Supper Stopper is no more.
RIP Super Stopper.
One of my Super Stopper images. It was featured in Outdoor Photography magazine (issue August 2017).
The Reverse ND Grad
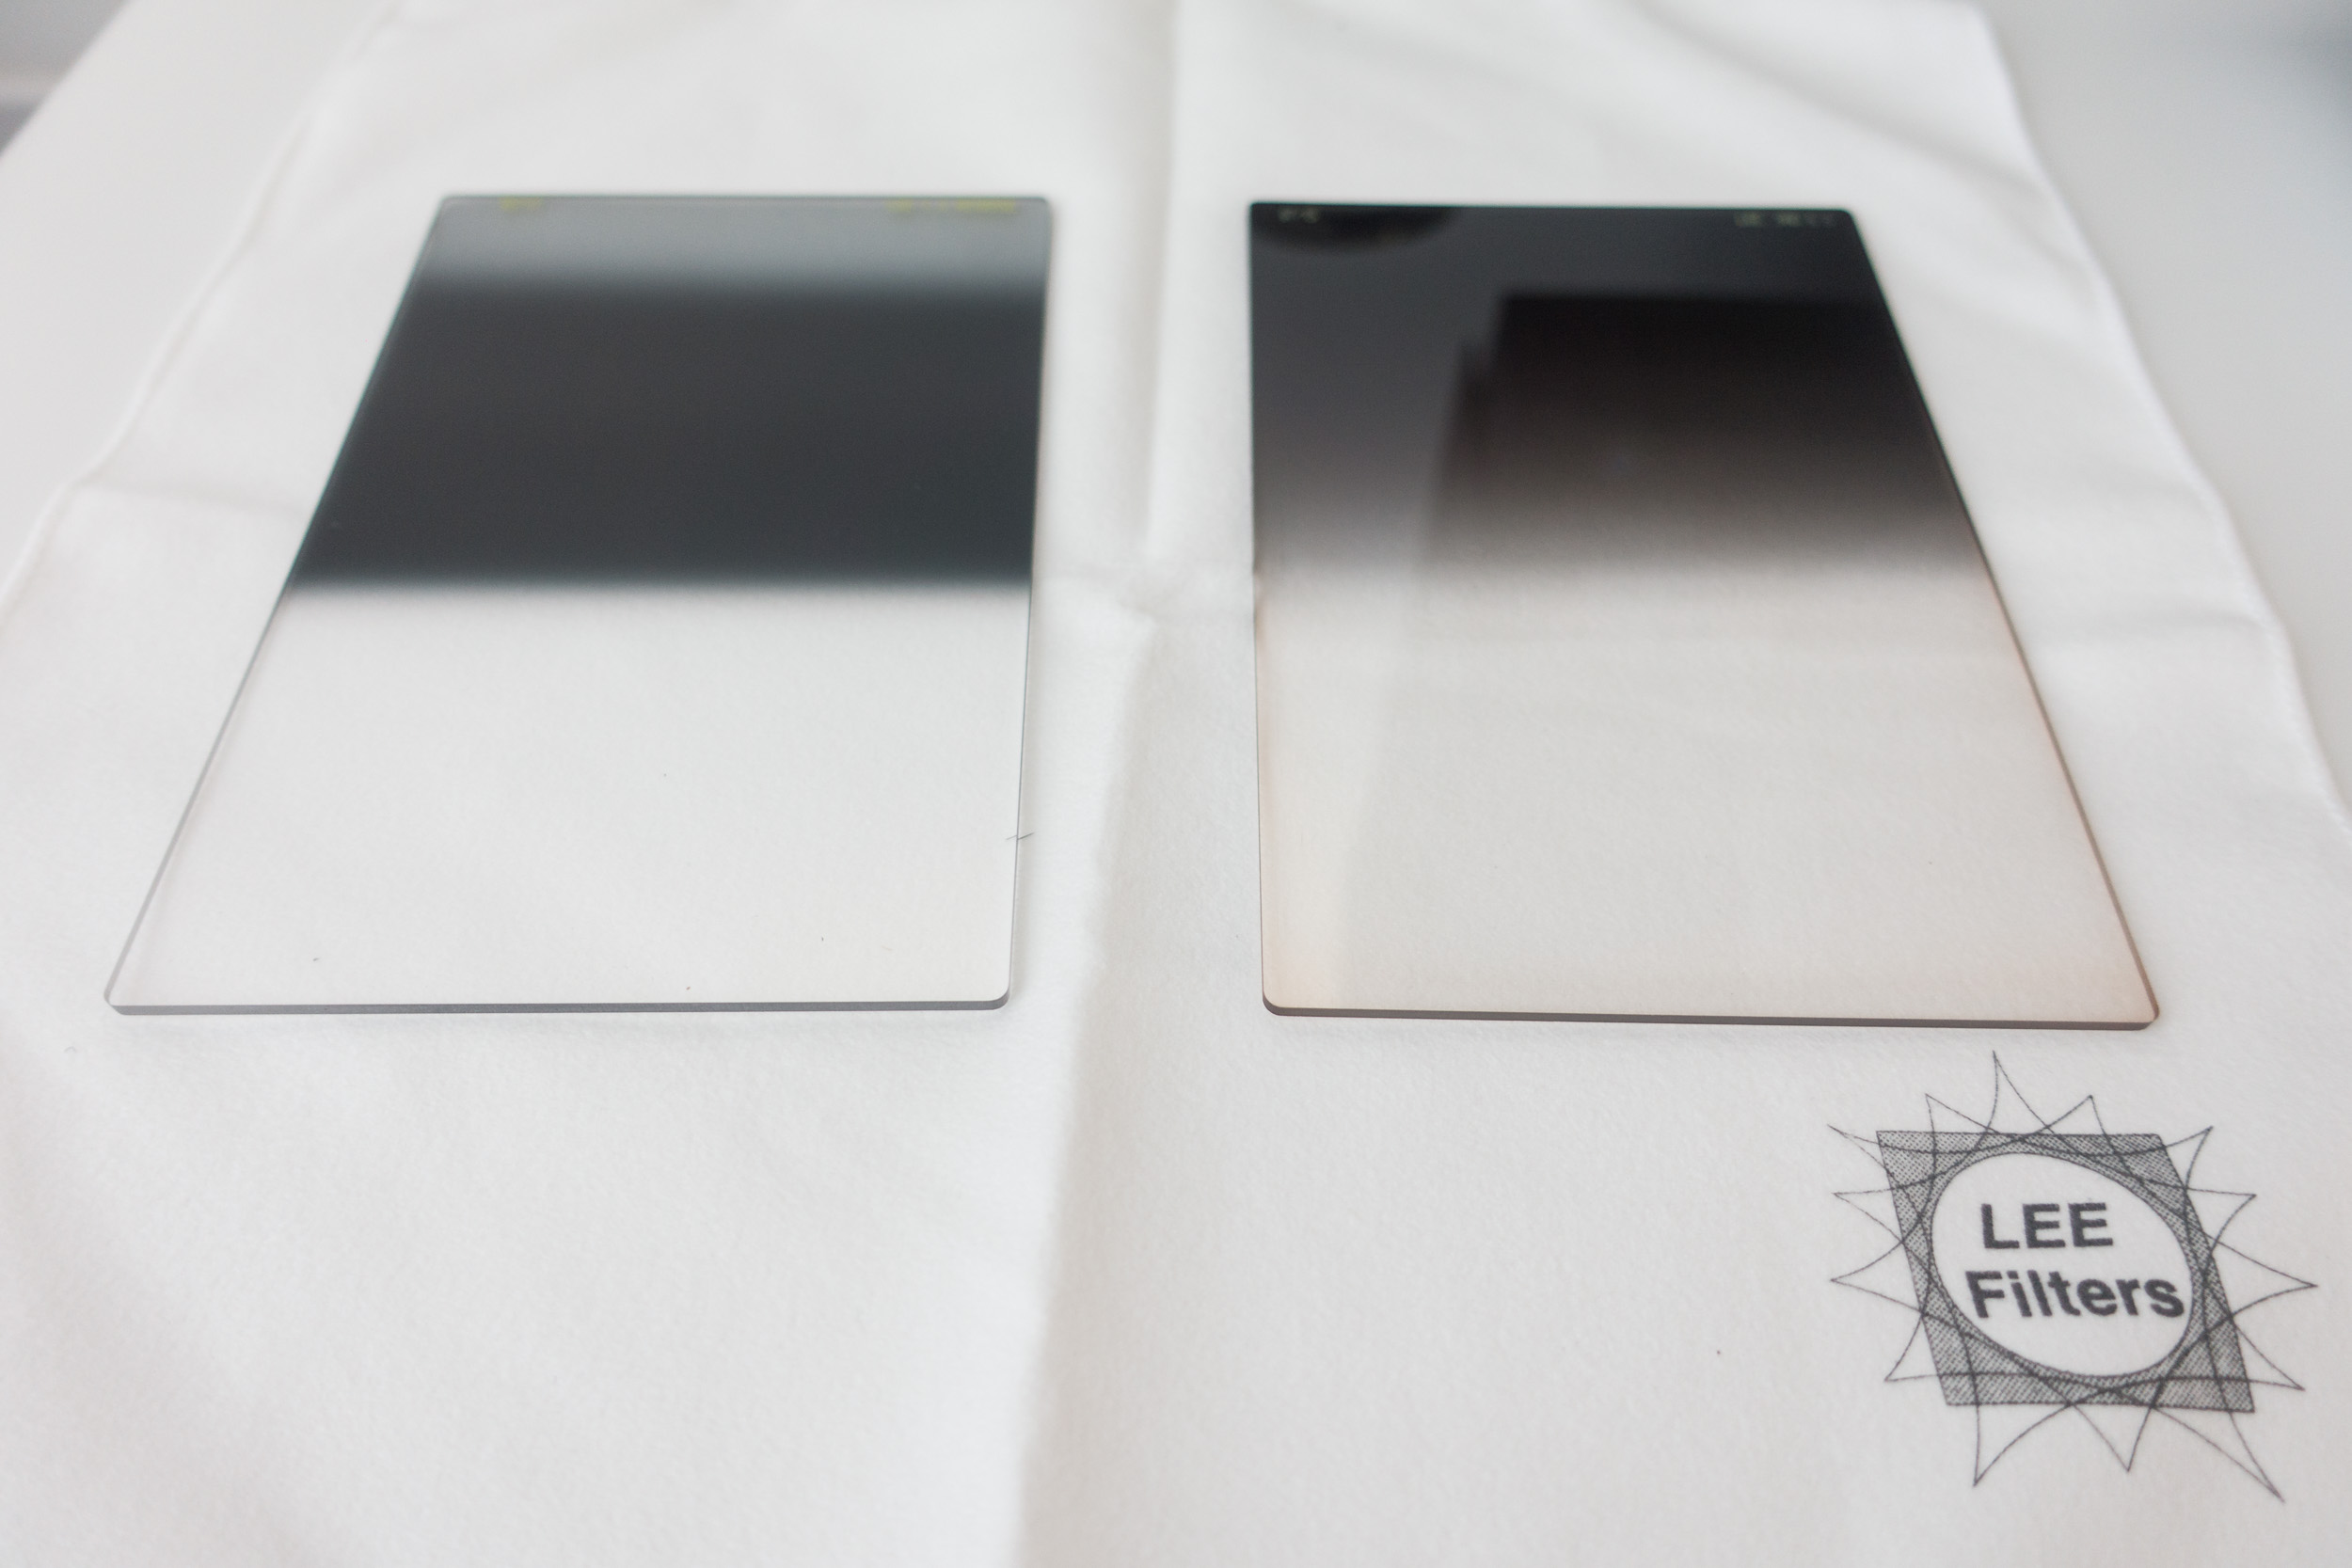
Reverse ND on the left and standard ND grad on the right.
Some of you may be asking what on earth is a reverse ND grad. Perhaps the best way to tell you is to show you.
As you can see from the image above, a standard ND grad is darker at the top and gradually gets lighter the further down the filter you get. However, with the reverse ND grad, the darkest area starts in the middle of the filter, and it gradually gets lighter towards the top of the filter. This allows you to place the darkest area of the filter where you need it most, just above the horizon where the sun is.
At The Cobb
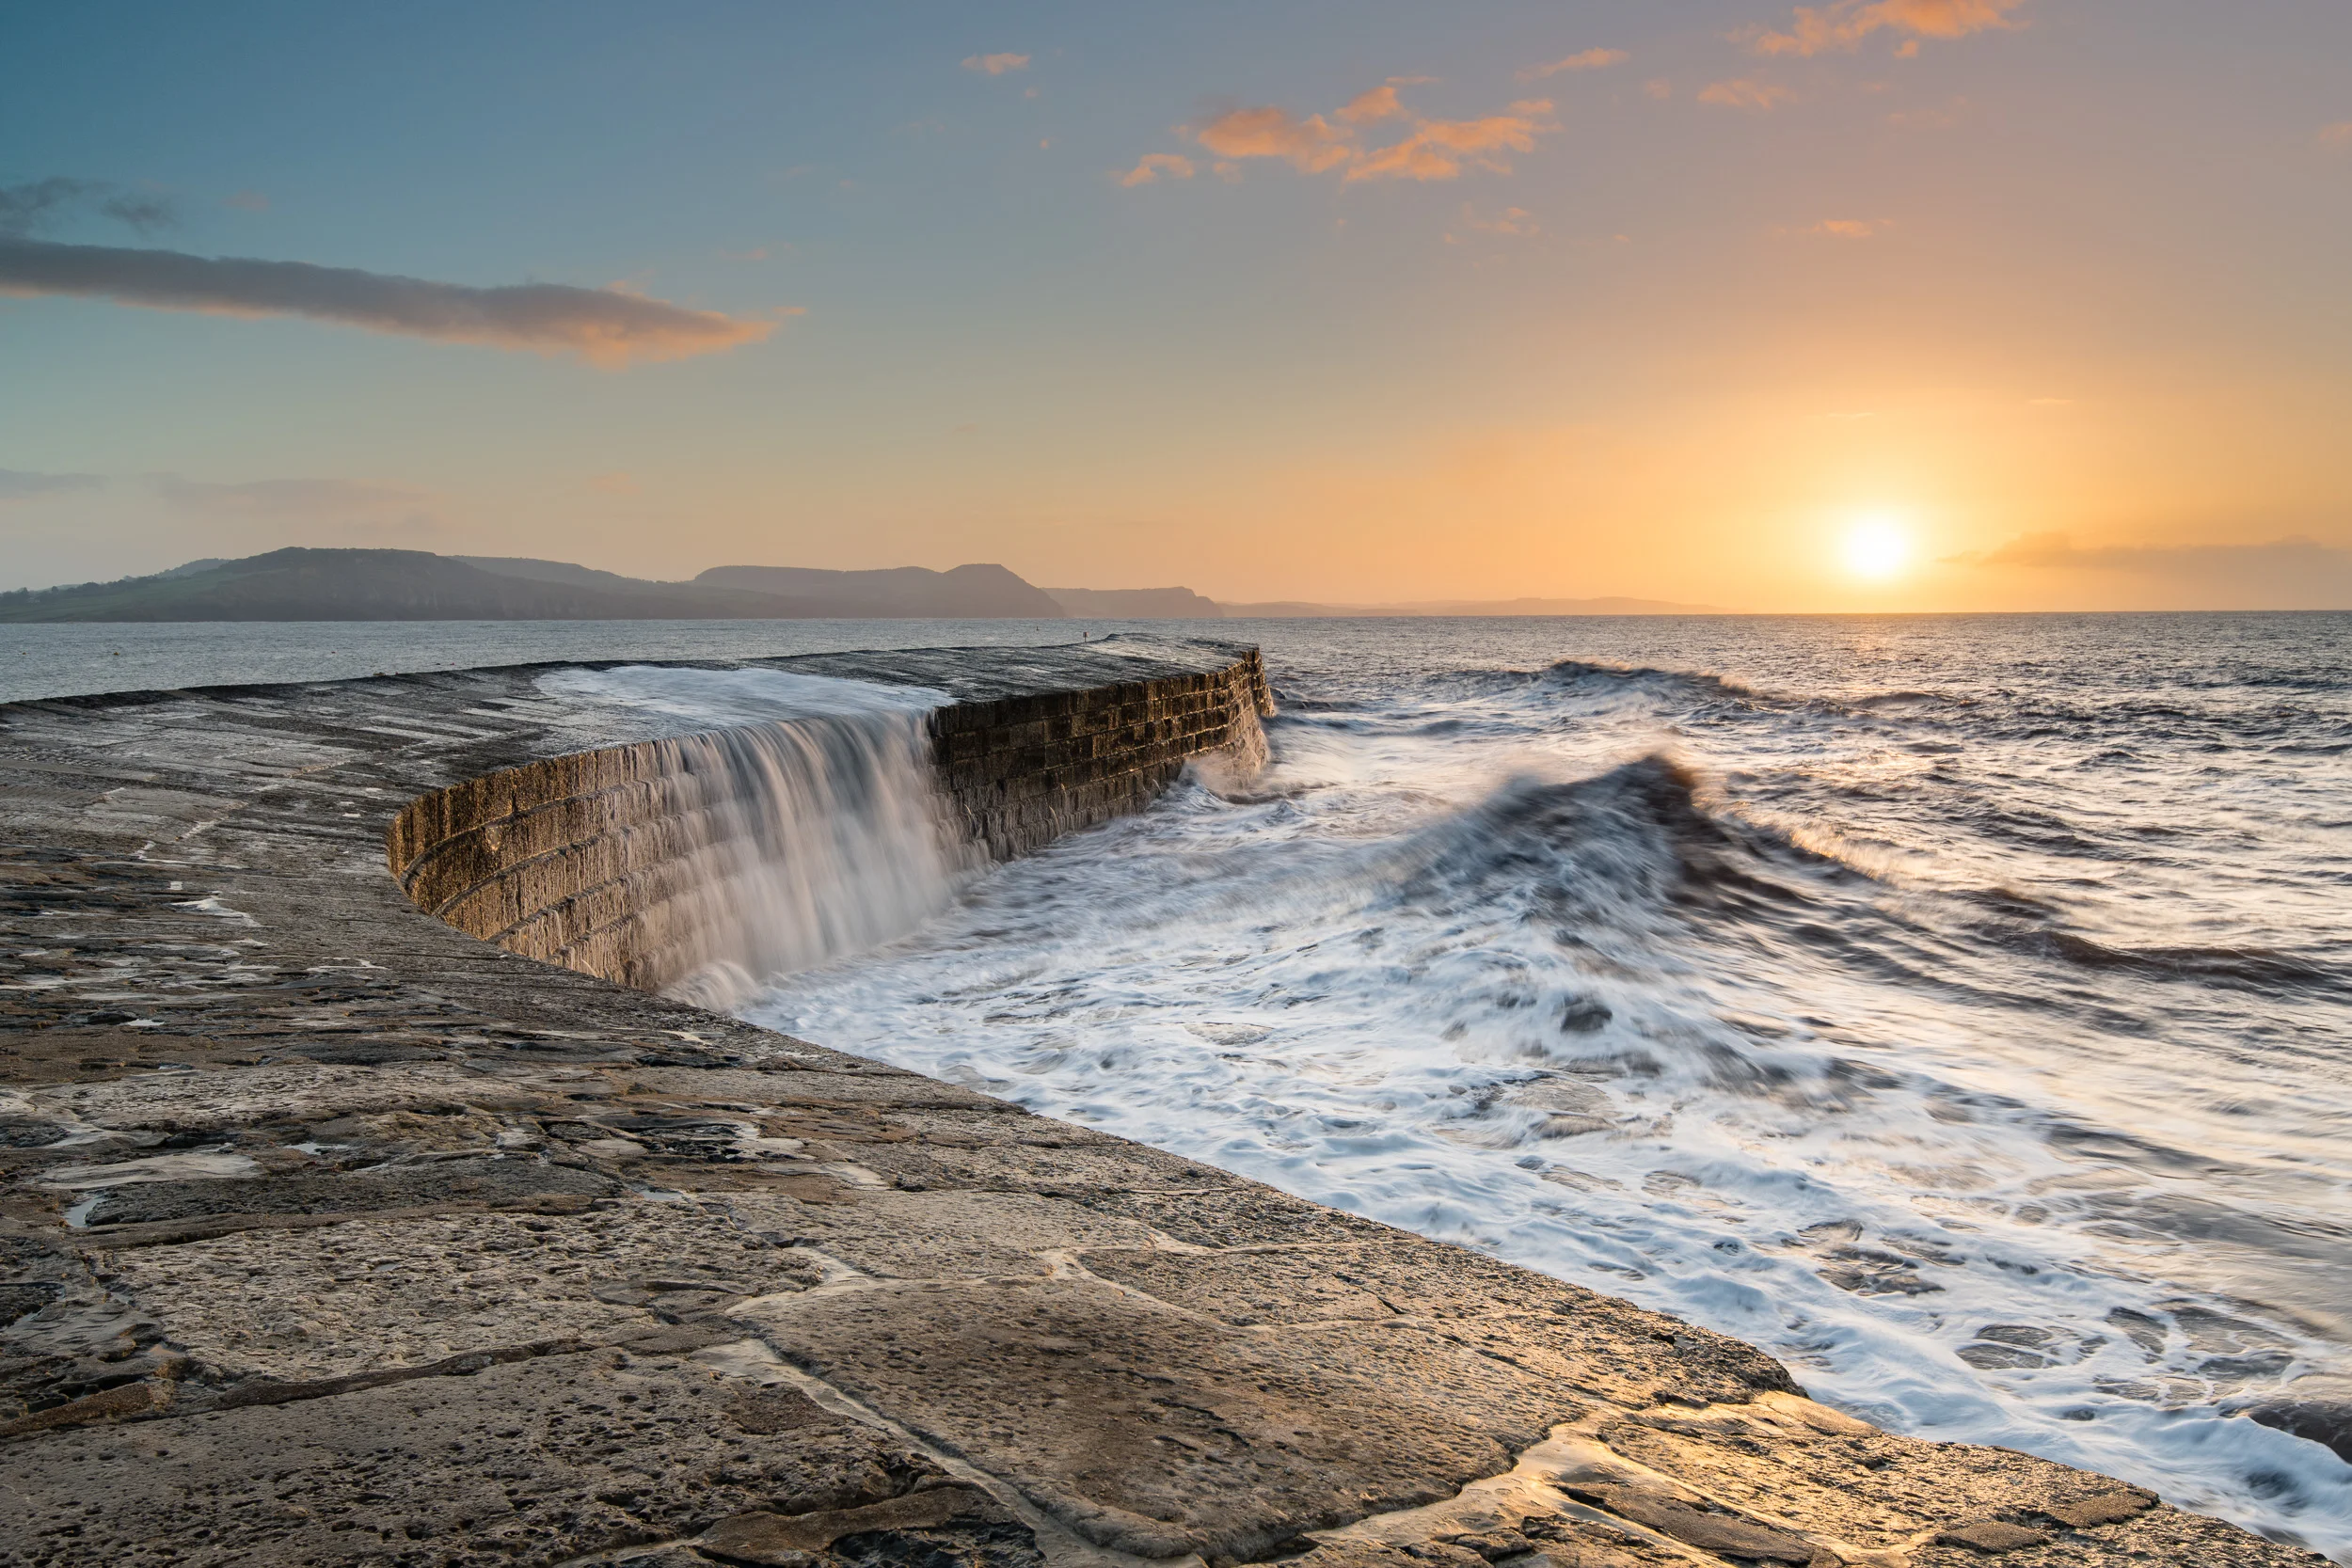
I had been looking for the right location and waiting for the right conditions to try out my 4 stop reverse ND grad for a few weeks. Finally, an opportunity presented itself one morning at The Cobb in Lyme Regis, Dorset. I often wait for January time to visit The Cobb as this is the best time for the rising sun to illuminate the side of this stone pier. However, with clear skies forecast and the sun rising from the end of The Cobb I thought this would be the time to try my new filter.
The light was pretty flat at the start of the sunrise that morning. As I waited for the sun to pop over the horizon I spent a bit of time talking to the 3 other photographers that were also there that morning. As always, I very much enjoy having a chat to my fellow togs. One of those photographers was Anna Stowe. she has a wonderful portfolio of images and I would strongly recommend you follow her Facebook page.
When the sun did rise though I immediately added the 4 stop reverse ND grad to the polariser that was already on the camera. Here are some of the images I took:


The reverse ND grad did exactly the job I wanted it to do. As I took each image I was checking the histogram and was happy not to see any blown highlights. One thing I have noticed is that I did shoot those images at 28mm, which is tighter than the recommend 24mm or wider that Lee Filters say the filter should be used at. This is probably the reason I did spot much graduation towards the top of the image. I will need to remember this next time I use it.
Like a lot of my filters, the reverse ND grad won't be used all the time but it is still a filter that I am very happy to have in my bag. Finally, I can have confidence that when I shoot into the sun I can capture as much of the dynamic range of the seen in a single frame and instantly see results on the back of my camera.
So have you tried the reverse ND grad yet? What technique do you use when shooting into the sun? Let me know in the comments below.