

Discovering Prawle Point and Gammon Head
In the blog this week I head out to Gammon Head and Prawle Point on the South West Coast Path in Devon to explore a new location and to try something I don’t do very often!
Exploring New Landscape Photography Locations
I have to admit that I think one of my weaknesses with my photography is allocating enough time to go out and find new locations. It's not that I've got any shortage of inspiration. My custom Google map is awash with locations not visited. It's just that I always seem to be short of time, so I think I tend to go to locations that I know to try and increase the chances of getting a good image.
Recently I have been trying to do a little more exploring as you might have seen in my Froward Point and My Photography is Not a Priority blog posts. However, sometimes the best way to find something new is to head out with someone. So when I met up with fellow local photographer Neil Burnell recently, I asked him to suggest a location that we could photograph. You may remember Neil's work from a recent episode of On My Bookshelf where I took a look at his rather excellent book, Seascapes. You can see that video here.
Great Gammon Head
Neil knows the south Devon coast extremely well and given the weather and tide conditions he suggested we try photographing around the Prawle Point area. I've visited Prawle Point a couple of times with the family so I knew of the coastline there, but I'd never taken the time to explore it properly so I was excited to see what I could discover.
Neil suggested I take a look at Gammon Head, so while he did some IR photography I took a walk along the South West Coast Path. My instinct was to get up high, but as I ascended Gammon Head, I noticed an interesting rocky outcrop (Ball Rock I believe) down on the waters edge. There was no path down to the waters edge, and while it wasn't very steep, the descent was made difficult due to the thick vegetation.
When I finally made it down there I realised how exposed and hidden this part of the coastline was. If I was to have an accident I would have no chance of been spotted by someone walking the main path and with no mobile phone signal, I wouldn't be able to call for help. I decided that if I visit this location again I wouldn't do so on my own.
All that said, I was down there now and it was time to take some photographs. The light was fading fast by this point so I had to work fast.
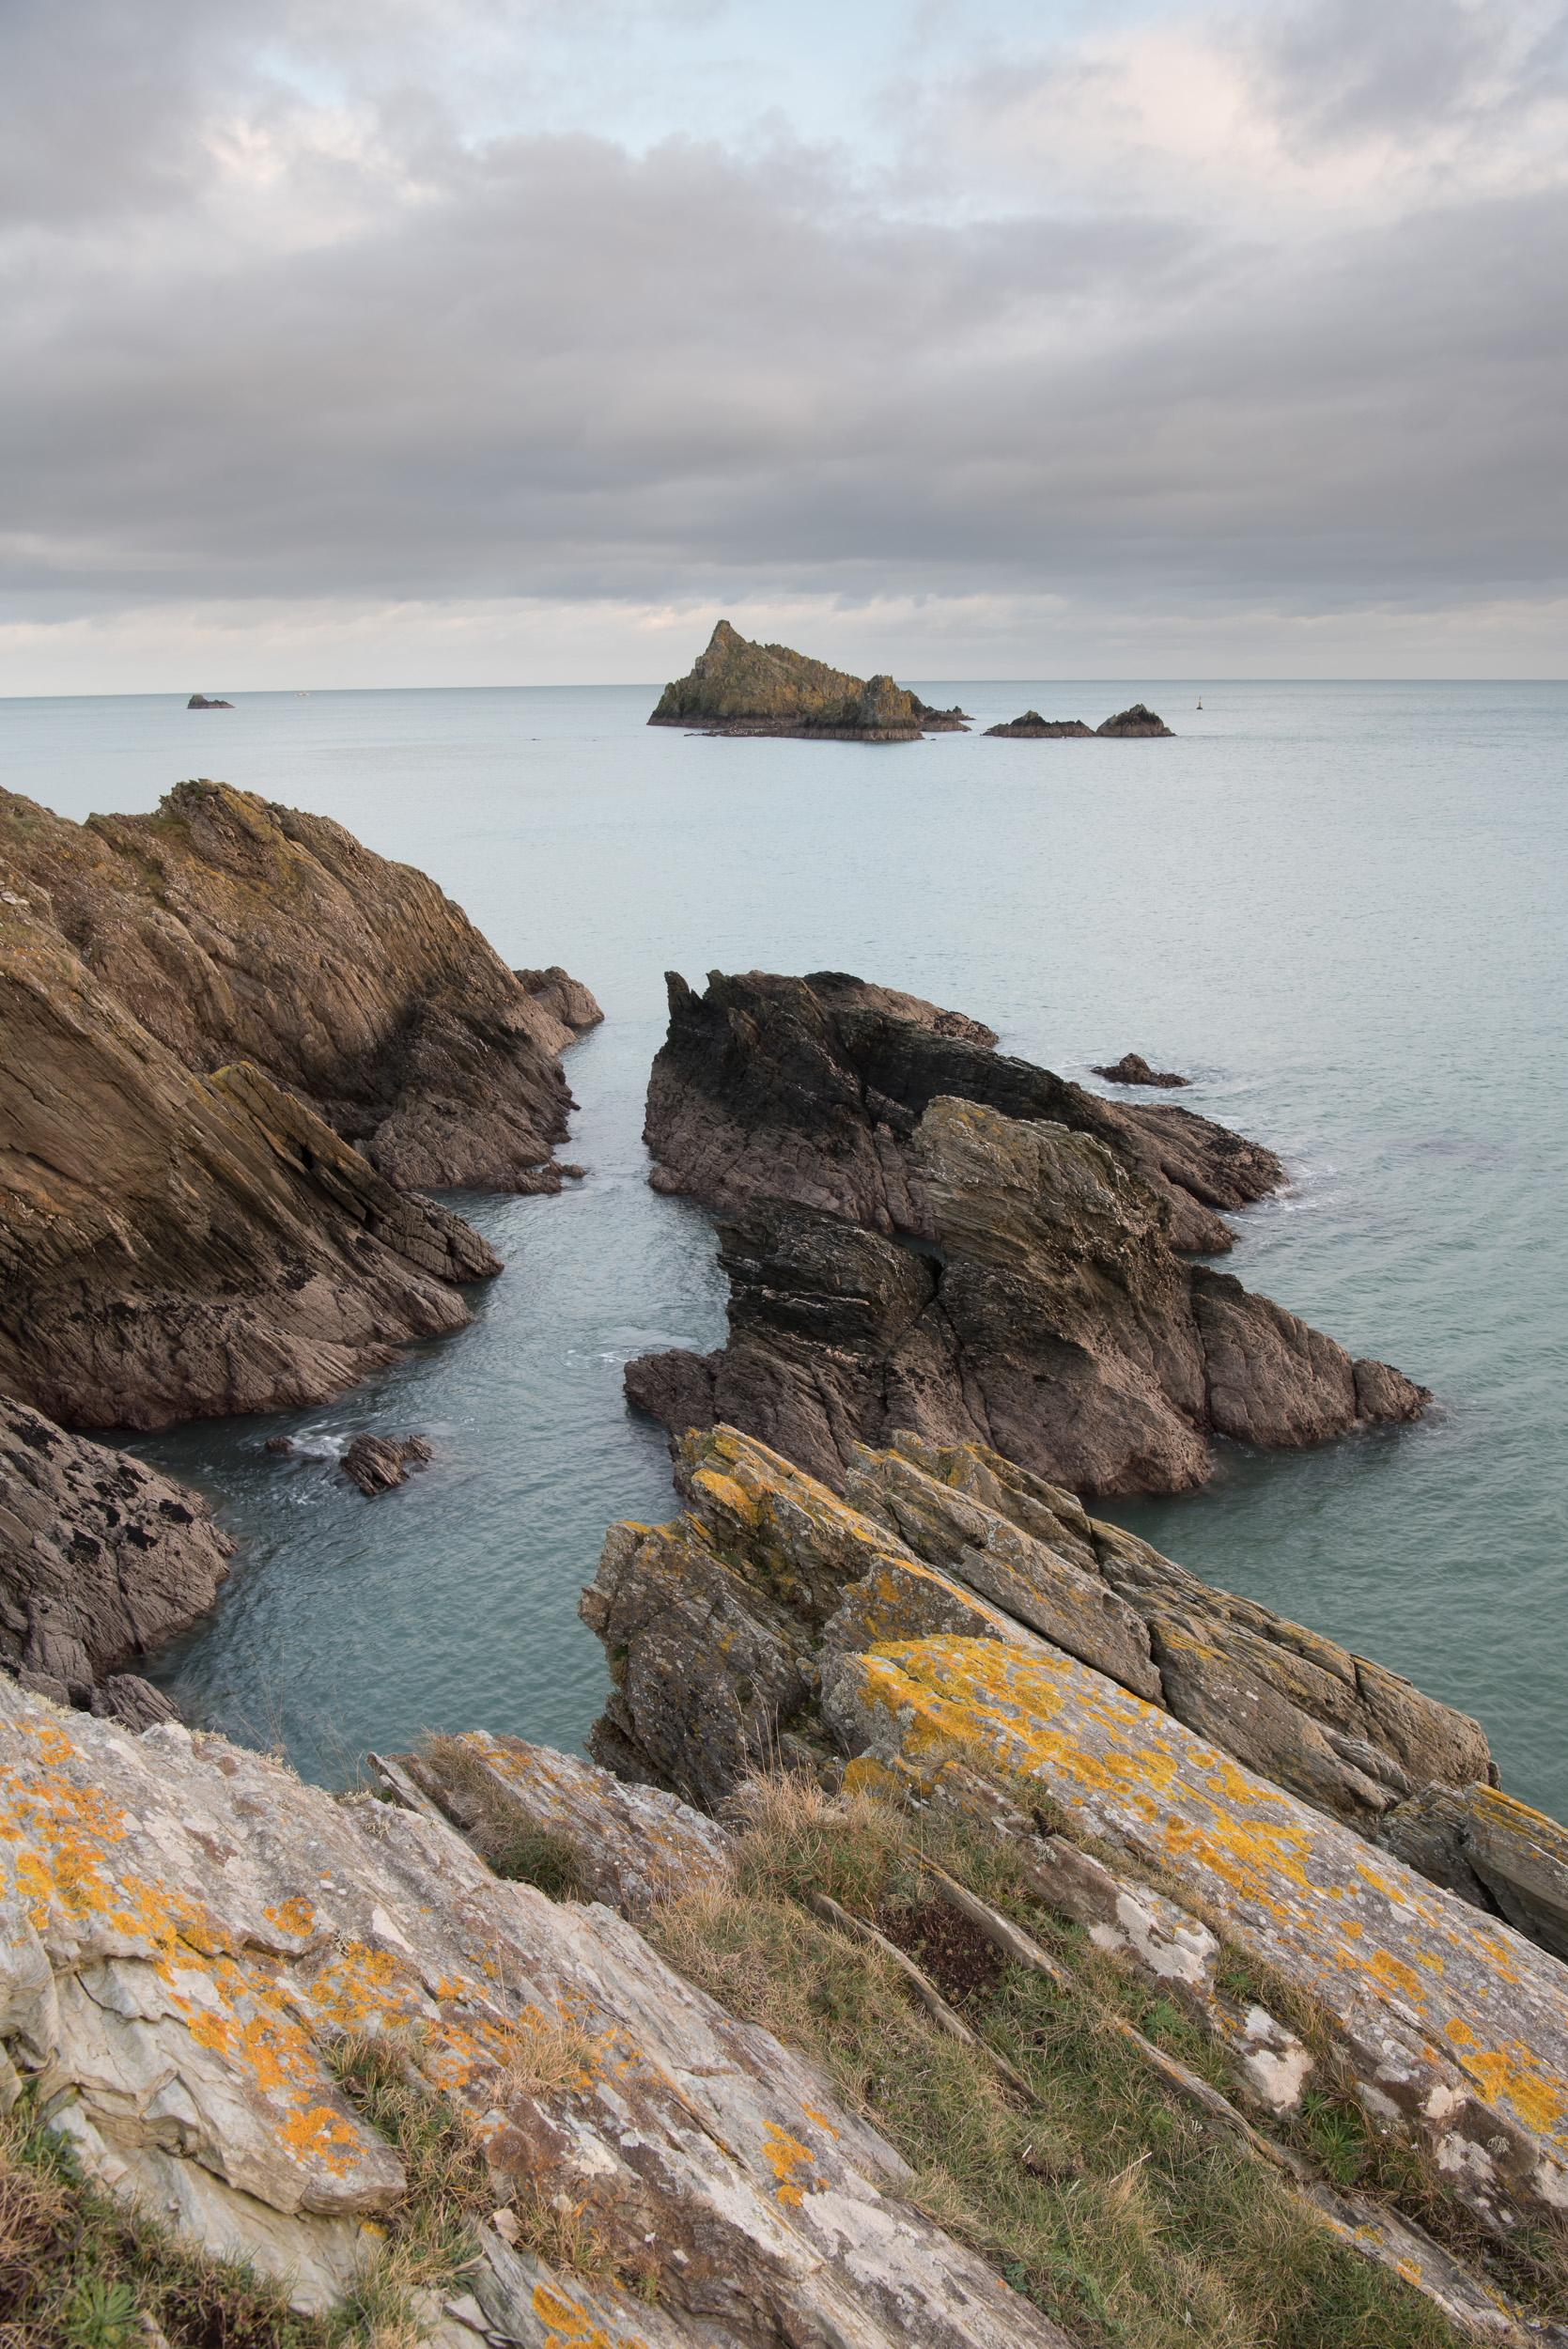
My gut feeling for shots at these types of locations is to go with a long exposure, but as you can see below, an exposure of just 0.5 seconds can produce pleasing results. The wider view of the sea looks a bit messy, but I really like the texture of the water around the rocks.
The Rocks at Gammon Head #1, Devon - Nikon D850, Nikkor 16-35 mm f/4 at 24 mm, 0.5 seconds at ISO 64, f/13, Lee Filters Circular Polariser.
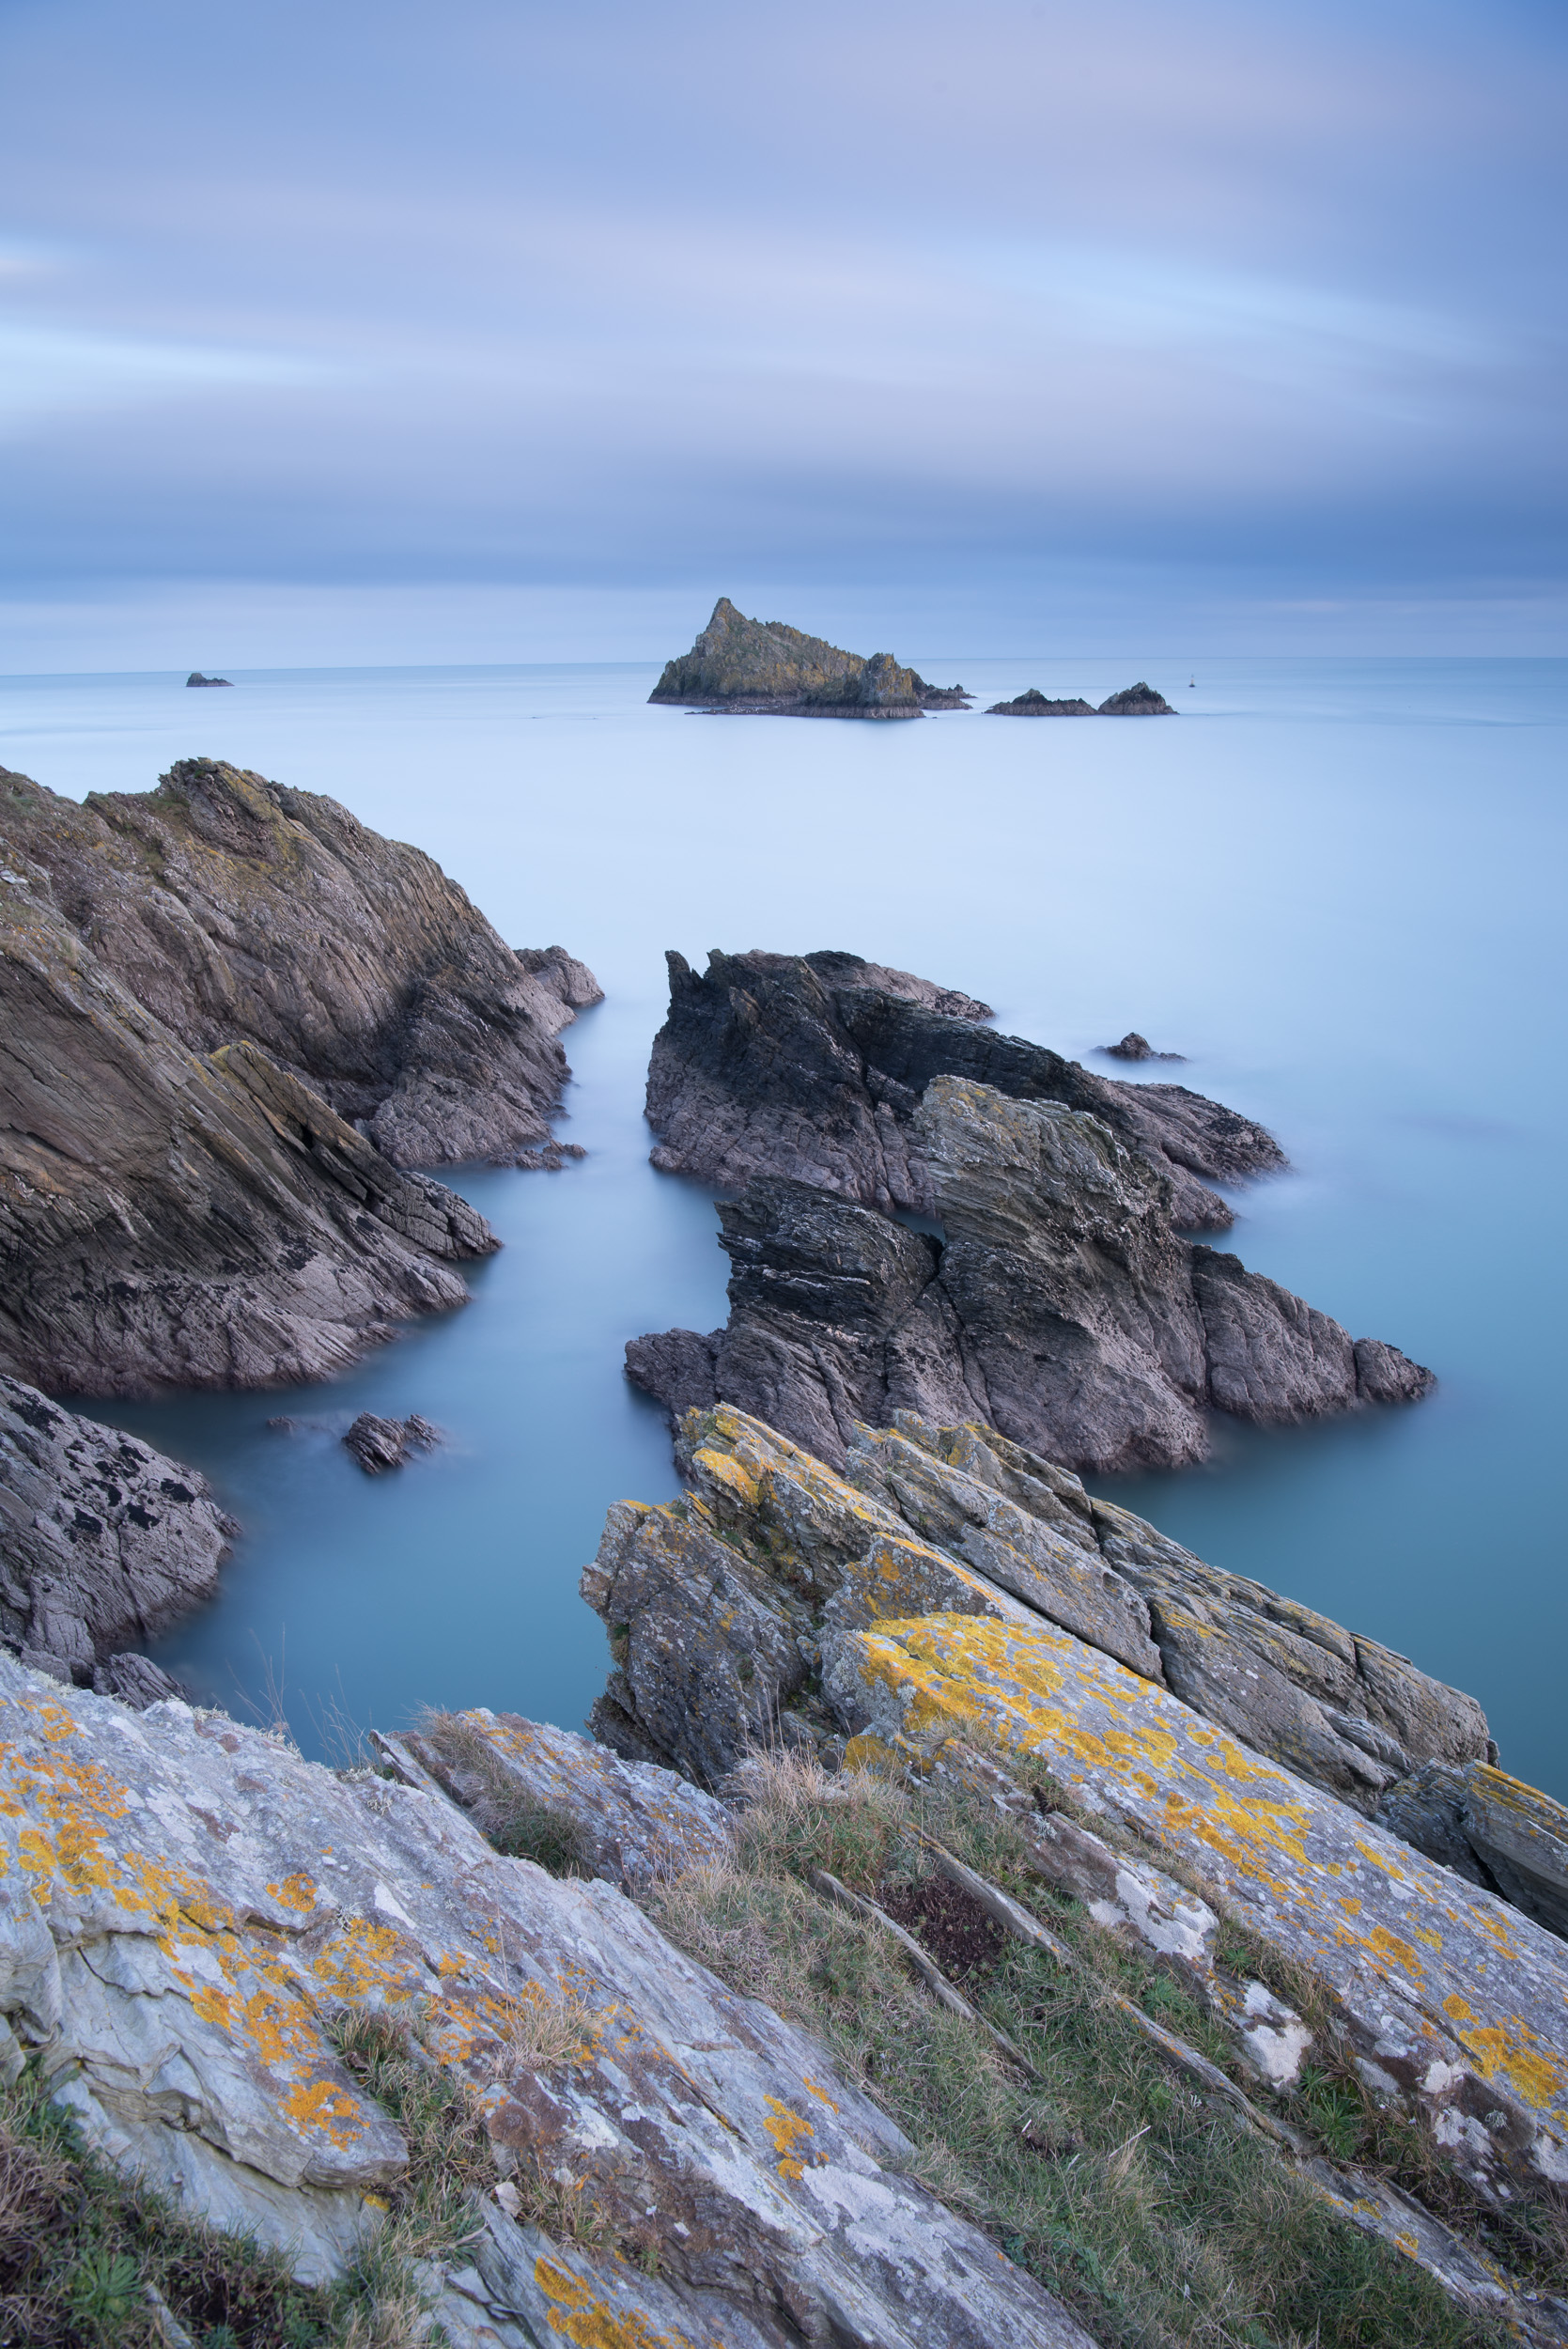
Below is the same image but with a 6 stop IR ND filter from Lee. This has given me a 30-second exposure which has resulted in the image I originally had in mind. However, I'm a bit torn between this image and the version before it. Which one do you prefer?
The Rocks at Gammon Head #2, Devon - Nikon D850, Nikkor 16-35 mm f/4 at 24 mm, 30 seconds at ISO 64, f/13, Lee Filters Circular Polariser and 6 Stop IR ND.
So while the first two images are pleasing enough, I wanted to fine-tune my composition. This is can be rather tricky when your down on a bit of coastline like this. Just stepping to right can mean a swim in the sea! I think I prefer the composition below as the furthest away rock now sits just above the horizon, rather than on it.
The Rocks at Gammon Head #3, Devon - Nikon D850, Nikkor 24-70 mm f/2.8 VR at 24 mm, 30 seconds at ISO 64, f/13, Lee Filters Circular Polariser and 6 Stop IR ND.
Ideally, I would have liked for that furthest away rock to not only have separation from the horizon but from the mass of rock to its left. But as I mentioned earlier, that would have meant walking on water!
For the final composition at Gammon Head, I headed down as close to the waters edge as I could and decided to take a vertical image.
The Rocks at Gammon Head #4, Devon - Nikon D850, Nikkor 24-70 mm f/2.8 VR at 27 mm, 30 seconds at ISO 64, f/13, Lee Filters Circular Polariser and 6 Stop IR ND.
I wouldn't normally publish so many similar images in the same blog post, but I wanted to share with you what I was doing and why. Hopefully, you found it interesting. Moving around a scene just a little can yield very different photographs.
Stars at Prawle Point
One of the other benefits of shooting with someone else is that you may find yourself photographing something a little different. As the sunset, the clouds started to clear so we decided to head up to the coastguard lookout at Prawle Point. Neil suggested this would make for an ideal location for some night sky photography.
I am in no way a night sky / astro photographer. I've done a bit of reading on the subject so I understand some of the basics around camera setup. I have even taken the odd night sky photograph, but nothing really serious. So capturing an image of this location in the dark was going to be a challenge. This challenge became even more obvious as I watched Neil set up his camera and take photographs like it was the middle of the day!
Anyway, I was having fun and I wasn't not going to let a thing like experience put me off having a go! So while the image below is not going to win any awards, I rather like it. I have to admit that there was a little luck involved in getting the shot. I couldn't really see very much, making focusing on anything difficult. I did have a head torch, but the beam wasn't strong enough to light the building, so I either guessed it or get Neil to use his head torch. Composition in the dark wasn't exactly easy either!
A Stary Night at Prawle Point Coastguard Lookout, Devon - Nikon D850, Nikkor 16-35 mm f/4 at 16 mm, 15 seconds at ISO 1600, f/14.
Every year I promise myself that this will be the year that I get into astrophotography. I find the night sky fascinating, and now that I've got a little extra motivation, maybe this is the time I follow through on my promise.
I really enjoyed my time at Prawle Point and Gammon Head. It was really good to explore somewhere new and to try out something a little different. I was glad I didn't just head out to somewhere I knew and played it safe!
So which of my Gammon Head shots do you prefer? Do you do any astrophotography? How much time to do you spend just exploring new locations? Let me know in the comments below.

Lee Filters Little Stopper vs 6 Stop ProGlass IRND
In this blog post, I look at the differences between Lee Filters Little Stopper and their 6 stop ProGlass IRND. They are both 6 stop neutral density filters so what are the differences and which one should you buy?
Lee Filters
I'll be upfront with you. Ever since I bought my first filter set in 2007 (when I had a Nikon D80), I've only ever bought filters from Lee Filters. When I first started looking for a filter system, everything I read said that Lee Filters were the best. Pricey, but the best.
Over the years I've built up a reasonable size collection of filters from Lee. Up until now the only filter I have replaced was the original circular polariser for the new, slightly thinner landscape circular polariser. I've never had to replace a filter because of a fault and I still use the filters that I originally bought in 2007. So if you are looking for a comparison to filters from other manufacturers, I'm afraid this isn't it.
Goodbye Little Stopper and Big Stopper
With all that said I have just sold both my Little Stopper (6 stop ND) and Big Stopper (10 stop ND). These are filters I have used a LOT. So did I not need them anymore or did I buy ND filters from a different manufacturer? Of course not! All I have done is simply replace them with 6 stop and 10 stop ProGlass IRND filters from Lee Filters.
Apart from being more expensive than their Stopper equivalents how do these ProGlass IRND filters differ? Should you sell your Stopper filters and replace them? Do you need both Stopper and ProGlass IRND filters? In the video below I aim to answer all those questions!
Hello ProGlass IRND
As you'll have seen in the video my conclusions about whether these new ProGlass IRND filters are a must buy aren't clear-cut. It's difficult to give a general conclusion as everyone's needs and budgets are different. The fact that the ProGlass IRND filters don't actually replace the Stopper range also adds a little complexity to the decision.
So all I can really do is talk about my own decision to sell my Stopper filters and buy the ProGlass IRND filters. For me, it has very much been money well spent. I particularly like the lack of colour cast and vignetting. While both these can be corrected or enhanced in post-processing, I much prefer seeing a more neutral/accurate representation of the scene on the back of the camera at the time of capture. I also like the fact that calculated exposure times are far more accurate.
So have you bought any of the new ProGlass IRND filters? Would you consider replacing your Stopper filters? Do you use something other than Lee Filters? Let me know in the comments below.
Comparison Photographs
Here are the images from the video should you wish to take a closer look.
60 Second exposure with the Little Stopper. Unprocessed.
60 Second exposure with the 6 Stop IRND. Unprocessed.
60 Second exposure with the Little Stopper. Processed
60 Second exposure with the 6 Stop IRND Processed.

My Field Guide to Using ND Filters
In this blog post and video I take you out on a shoot to Froward Point in South Devon to take you through my workflow when using Neutral Density (ND Filters). It doesn't matter what strength of ND filter or even who makes it, my process is the same. Read the blog post and watch the video to find out more!
Control
Modern cameras are wonderful and amazing bits of technology. They allow us to turn our creative visions into beautiful images that we can connect with. We have a lot of control. We can change shutter speed, aperture, focus, ISO, and position, all with the aim of capturing that moment. One thing we can't control is mother nature and so sometimes we need a little extra help "control the light".
This image required an exposure time of 72 seconds. Generally speaking it would not have been possible to get an exposure of this length without an ND filter.
This is where filters come in. Now, there are such a dizzying array of filters available it would be slightly foolish of me to try and cover them all here, so I'm going to concentrate on the use of ND (Neutral Density) filters or to be more specific how I use ND filters.
Though I use ND filters in my landscape work, it is probably in my seascape work that I will use them the most. They allow me to creatively control how the water looks in the image. It could be that I want to lengthen the exposure to 1 or 2 seconds to show the path of a wave, or even 3 or 4 minutes to smooth out the texture of a choppy sea. Sometimes you just can't get exposures times like that just with the camera alone.
The Process
I have a range of ND filters in my bag, all made my Lee Filters (my filter manufacturer of choice). I have a 3 stop, 6 stop (Little Stopper), 10 stop (Big Stopper), and 15 stop (Super Stopper). The Super Stopper is a recent addition to my kit bag and you can read how I got on with it on my first trip out with it here.
No matter which ND filter I use, the setup and execution process I go through is the same. To show you what my process is I've created in this field guide video which takes you through my process while out on a shoot.
To recap from my video the process I follow is:
Composition - first things first, I need to have a composition. Get this right first!
Base image - take a shot with no filters. Check composition again, image sharpness and exposure. If needed adjust, shoot and check again.
Add other filters - if needed, add ND graduated filters or a polariser. Shoot the image again and do all the same checks.
Add ND filter - finally, add ND filter of choice and take the image. Do all the same checks again.

Once processed the final image looks like this:
Final image. Nikon D750, Nikkor 24-70mm f/2.8 VR @ 28mm, f/13, 202 seconds, ISO 100, Lee Filters ND 0.6 (2 stop) graduated filter, Lee Filters Big Stopper (10 stop ND), cable release.
I hope the reading about my process for using ND filters has been useful. Do you follow the follow the same process? Do you do things a little differently? Are ND filters part of your creative workflow? Are you considering getting some ND filters? Please let me know in the comments below.

Not All Shoots Are Successful Shoots
In this blog I discuss the challenges of shooting on a beach and I give my own image a critique.
The Best Laid Plans
As a photographer you always want to put your best images out there. If you practice enough your technique will improve and your style develop, hopefully resulting in a gradual but noticeable improvement to your images. While this is generally true, it doesn't necessarily mean that every trip out with the camera will result in an image that was better than the last one. When I started this blog one of my key goals was to discuss my success and my failures. As I said in my first blog post, landscape photography isn't all about 5 star images captured on epic international trips.
In this blog post I'm going to take you through one of my less successful trips out with the camera. I had it all planned out. I would finish work bang on time, drive to West Bay in Dorset, and photograph the sea and evening light as it gloriously reflected off sea and cliffs. Well, that was my vision anyway. I went through all my normal planning steps, weather, cloud, tide, bearing of sunset and it all looked good.
Challenging Conditions
I've visited West Bay a couple of times, but never to photograph it. The east beach there, recently made more famous by the TV series Broadchurch, is long and sandy with dramatic cliffs running as far as the eye can see. However, when I arrived the reality of actually shooting there became apparent.
Firstly was the tide. After checking the tide tables I knew it was coming in, but what you can't tell from the tables is how long of a reach those waves have. The waves weren't tall, but their reach up the beach was long. Now I don't mind getting my feet wet, but it becomes really difficult to frame your shot if your camera sinks a little with each wave. If I moved further away from the waves I lost a lot of the sea in the frame. Normally this would be less of an issue if the beach has a natural curve.
The other challenge was the weather. While it wasn't raining nor the wind as strong as I expected it to be, the light was very flat. The forecast had indicated lots of high cloud and no low cloud. This I hoped would give me a spectacular evening sky to add to my composition. However, there was a lot of low cloud and the chances of there being any evening light bouncing off the cliff seemed very unlikely.
Change of Plan
Spare time to do photography is at a premium for me. While I like to do some location scouting when I can, it's not always possible, and so sometimes I just have to wing it. So with the very real sense that I might have just wasted a 2 hour round trip in the car, I put my thinking hat on and tried to think of a different composition. This approach of looking around and not getting focused on one thing had worked well on a recent trip to Dartmoor, so I picked up my tripod and got walking.
It wasn't long before I had the idea of doing a long exposure of the beach, looking straight out to see, and including a few well-placed rocks or stones in the foreground. This composition would probably deliver better results. I would have better visibility of the waves and the quality of the light was less of a dependency.
An Ever Changing Beach
Though I had a new vision on what my photograph would be my challenges weren't over. I would find an interesting composition, setup, grab a frame, maybe two at the most, and then a wave would come in wash my composition away! Even some of the larger stones in my composition weren't big enough to resist the pull of the waves. So this left me with very little time to grab a frame for each composition I found along the beach. I had to make sure the camera was level, focused, and correctly exposed in very short time or I might not get another go at it.
After only a few compositions the light had faded and I decided to take my very sandy tripod and wet feet back home for a nice meal and glass of wine.
Critiquing My Own Image
I only took a handful of frames that evening but here is the image that I think turned out the best.
Nikon D750 with Nikon 16-35mm f/4, 1.3 secs, f11 at 20mm, Lee Filters Polariser and 3 Stop ND
Now I'll be the first to admit this isn't an image for my portfolio. Though I like the mood and style of the image it does have a number of issues. If I'd had more time at the location I might have worked out these issues but as I said at the start of the blog, not all shoots are successful shoots.
The main issues I have with the image are around the rocks I have used in the foreground. The rock in the lower right of the frame for me is just a little too close to the edge of frame. I would like to have had just a little bit more space as there is with the rock on the left.. Given a bit more time between waves, I might have setup my tripod in a slightly different location to give me that space.
While the image roughly follows the rule of thirds, it doesn't follow the rule of odds. Now, I know that these rules are more like guidelines, but quite often they do make sense and I do think following the rule of odds in this scene would have helped with the overall composition.
Rocks at Porth Nanven - Nikon D750, Nikon 16-34 f/4 at f/16, 1.6 secs at 20mm.
I learnt about the rule of odds in the book, The Art of Landscape Photography by Mark Bauer and Ross Hoddinott (it's a fantastic book and well worth picking up). In the book Ross and Mark discuss how having an odd number of objects helps create visual stability or symmetry.
In this image I took of Porth Naven a couple of years ago you can see how I've composed with three rocks in the foreground. The balance and implied triangle in this image is something I would have liked to have seen in my West Bay image.
Always Good to Be Out With The Camera
Despite the fact that my shoes are still drying off and I had to strip down my tripod to get rid of the sand, I still felt it was time well spent with the camera. I'm also not going to win any awards for the image, but that really isn't the point. I was outdoors with my camera on a beautiful beach taking images and for a person that spends most his time sitting at a desk it's just nice be outside. Yes, conditions were challenging but it's through these challenges that you learn to progress as a photographer.
Actually I'm going to change my mind, it was a successful shoot. Just successful in a different way.
So what do you think of the image? How would you have shot the scene? Have you got any tips for photographing beach scenes? Please let me know in the comments.