
Shooting into the Sun at The Cobb
In the blog this week I head off to The Cobb in Dorset to try out the new Lee Filters Reverse ND filter.
I Have a Confession
As a landscape photographer, I have to be prepared to shoot in a wide range of conditions. I like to think that I'm pretty adaptable and can deal with most things. However, there is one scenario that I have to admit to always trying to avoid.
The simple fact is that I don't like shooting straight into the sun. As my most common shooting times are dawn and dusk, this can be a problem at certain locations at certain times of the year. When the sun is just above the horizon at the start or the end of the day, it can be really tricky to control the exposure.
Many photographers get around this issue by bracketing their exposures, but I'm not one for spending much time on post-processing. So when Lee Filters announced they had released a Reverse ND Filter I thought this might be the perfect way help me control my exposures in those situations that I had previously avoided.
Some Bad News

A Super Stopper should not look like this.
Before I start to share with you my initial experiences with the reverse ND grad, I have some bad news about one of my other filters. I'm very sorry to report that Lee Filters Super Stopper has been shattered. The purchase of the reverse ND grad was my 11th Lee filter, so I decided that I would remove the Super Stopper from my filter pouch to make room for the reverse ND grad.
Unfortunately, the Super Stopper appears to have received a knock at some point and shattered. This is the first Lee filter I have lost due to damage. I'm not sure how this has happened. I keep all my filters in a Lee Filters pouch which is then kept in a heavily padded area of my bag. Still, something has happened and the Supper Stopper is no more.
RIP Super Stopper.
One of my Super Stopper images. It was featured in Outdoor Photography magazine (issue August 2017).
The Reverse ND Grad
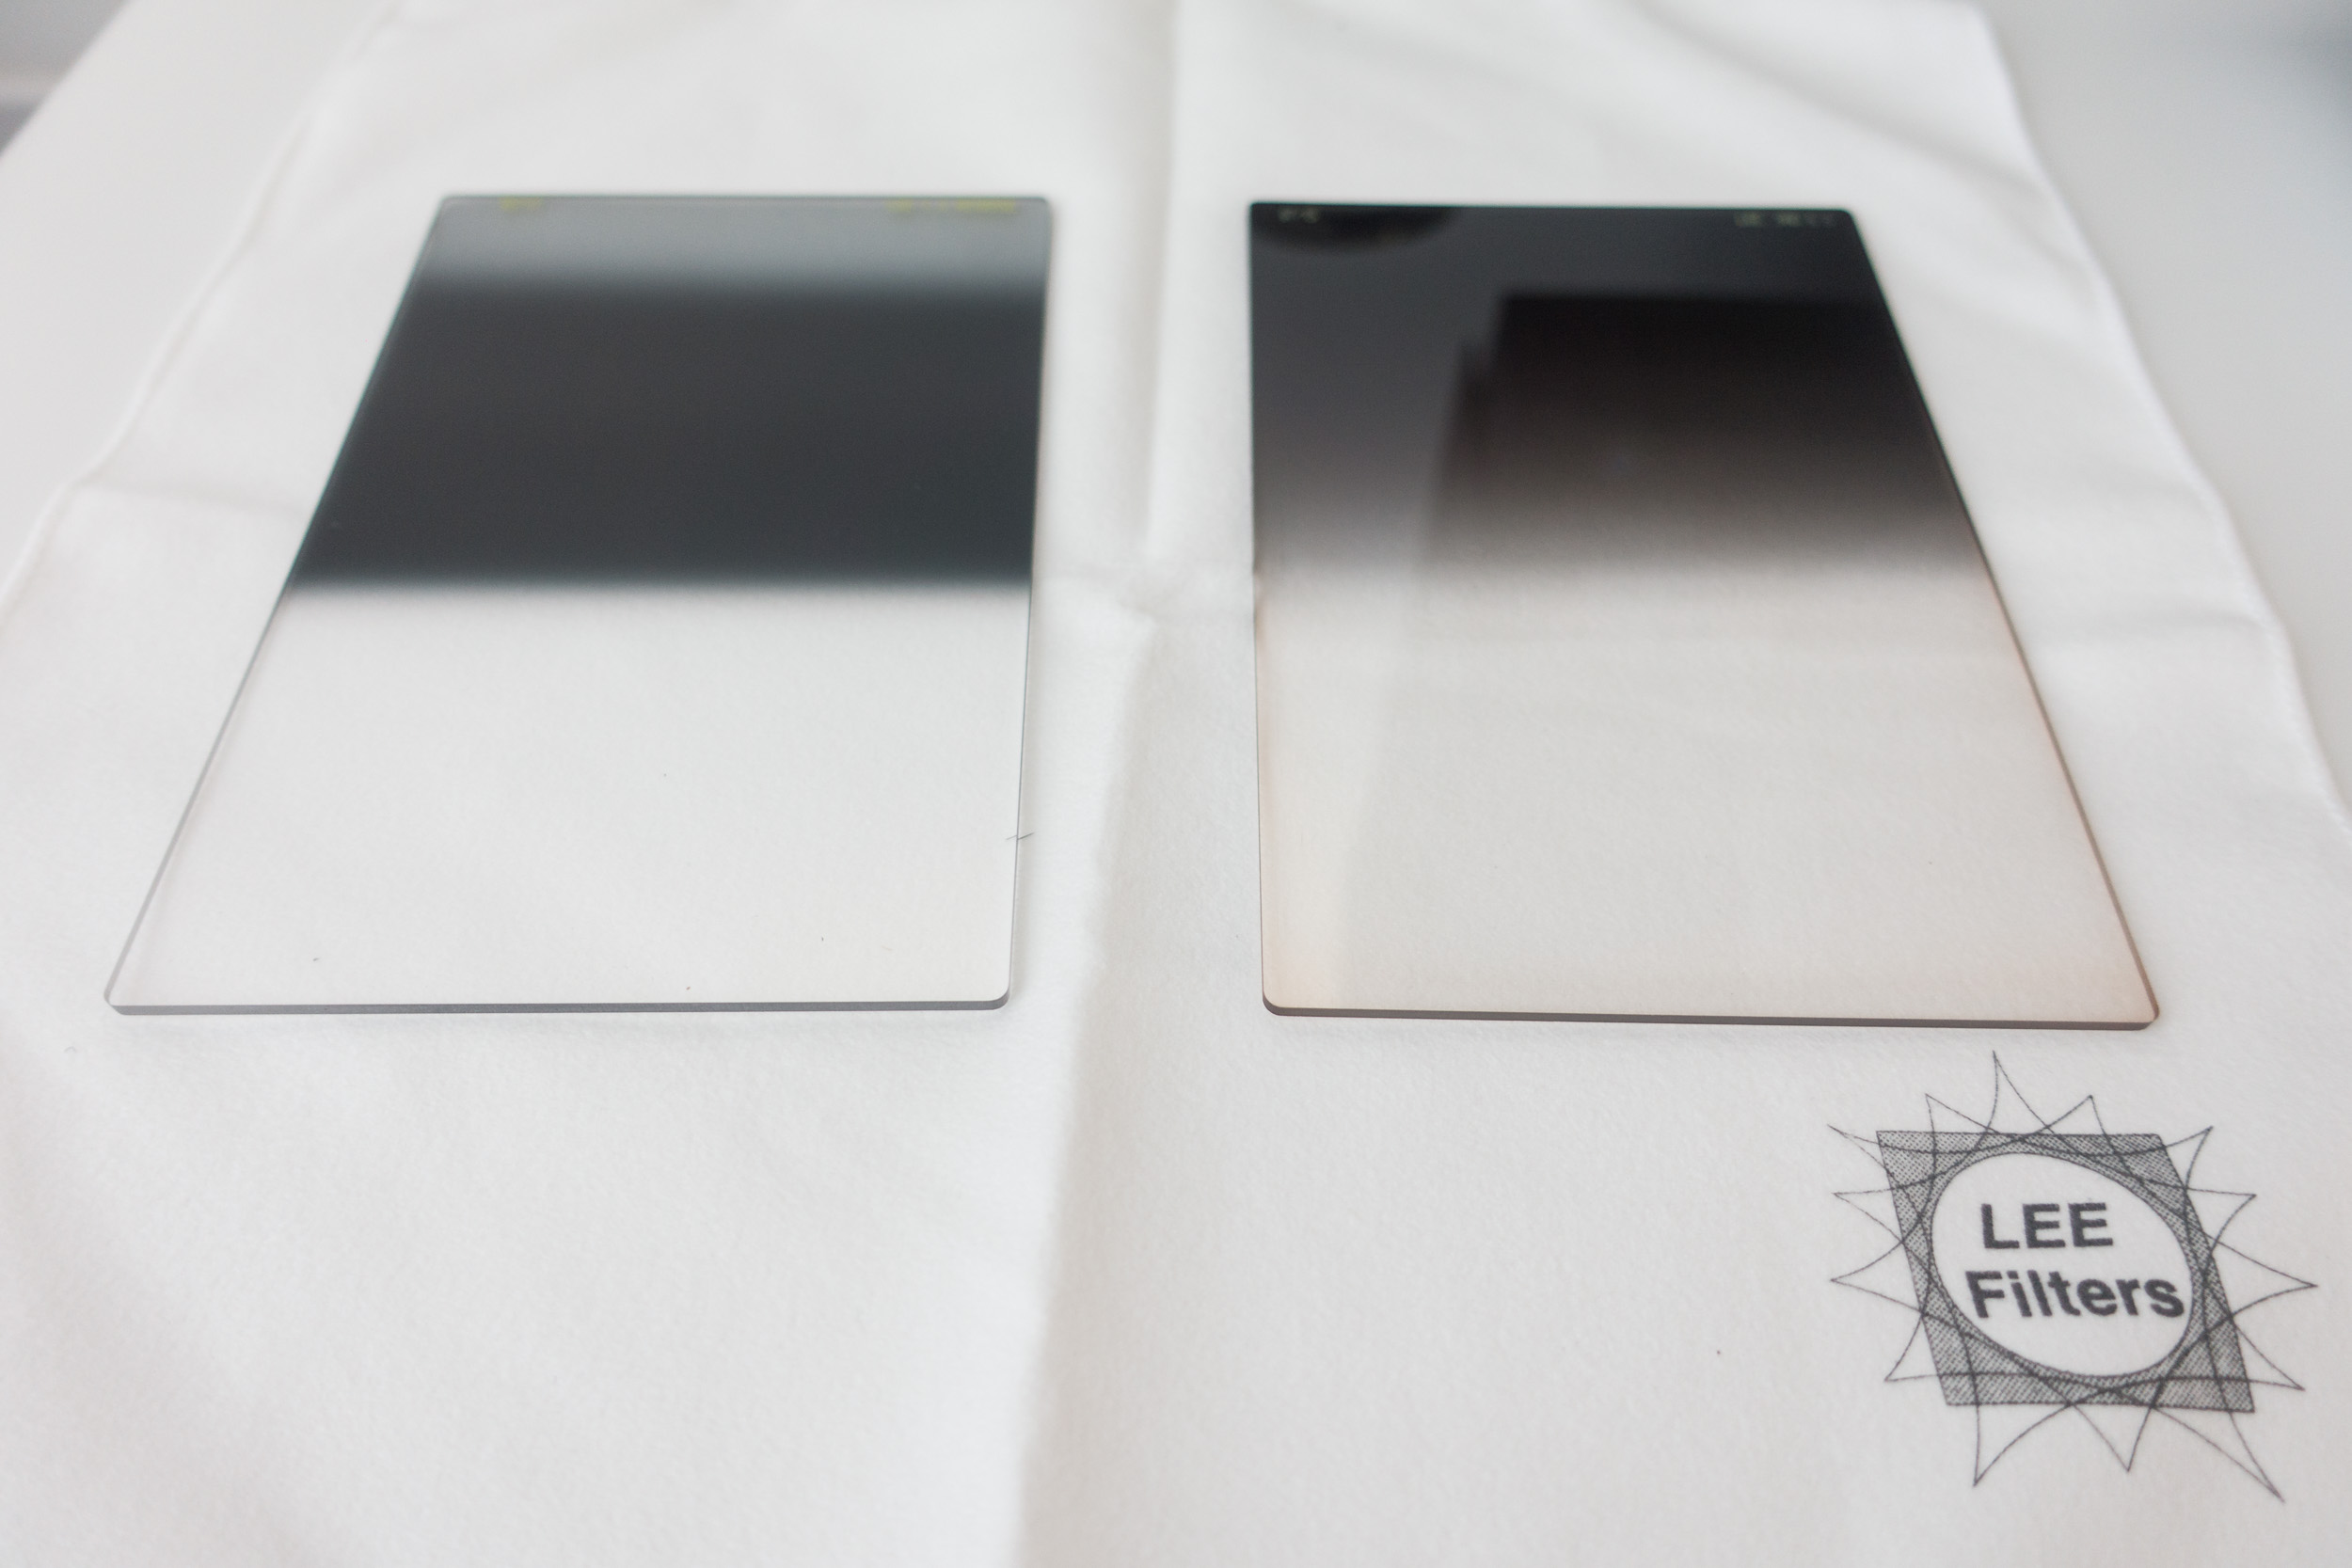
Reverse ND on the left and standard ND grad on the right.
Some of you may be asking what on earth is a reverse ND grad. Perhaps the best way to tell you is to show you.
As you can see from the image above, a standard ND grad is darker at the top and gradually gets lighter the further down the filter you get. However, with the reverse ND grad, the darkest area starts in the middle of the filter, and it gradually gets lighter towards the top of the filter. This allows you to place the darkest area of the filter where you need it most, just above the horizon where the sun is.
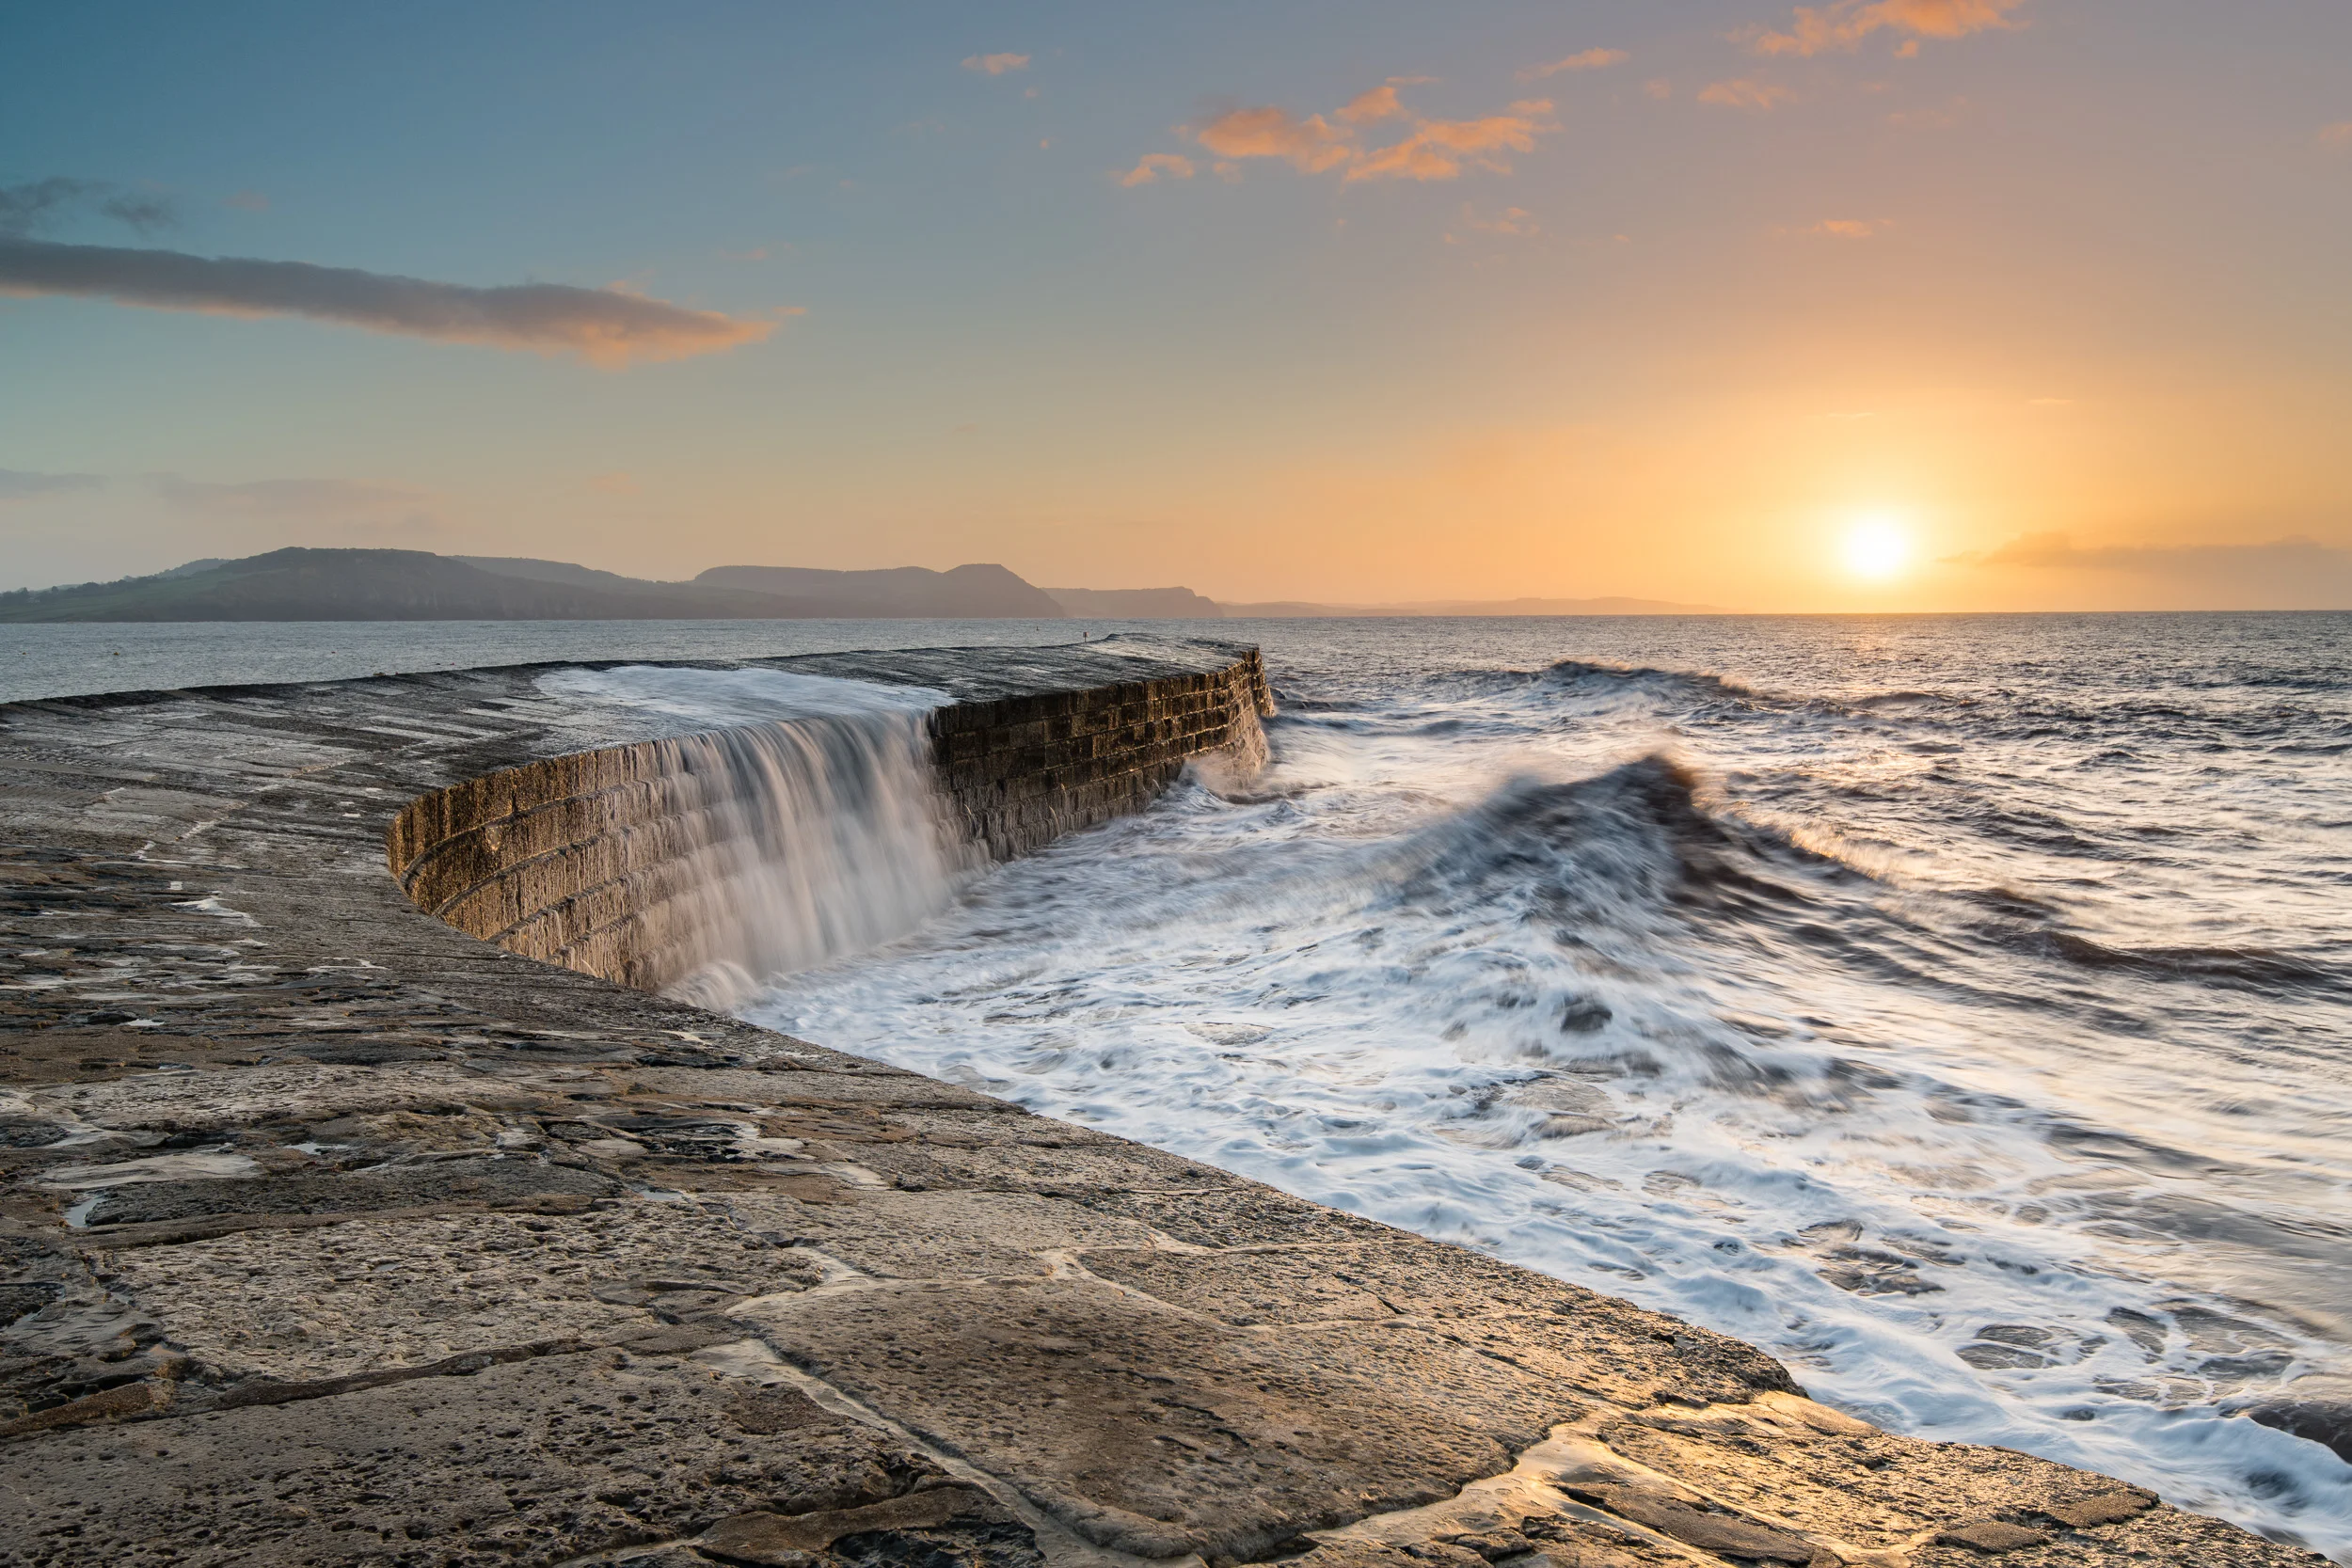
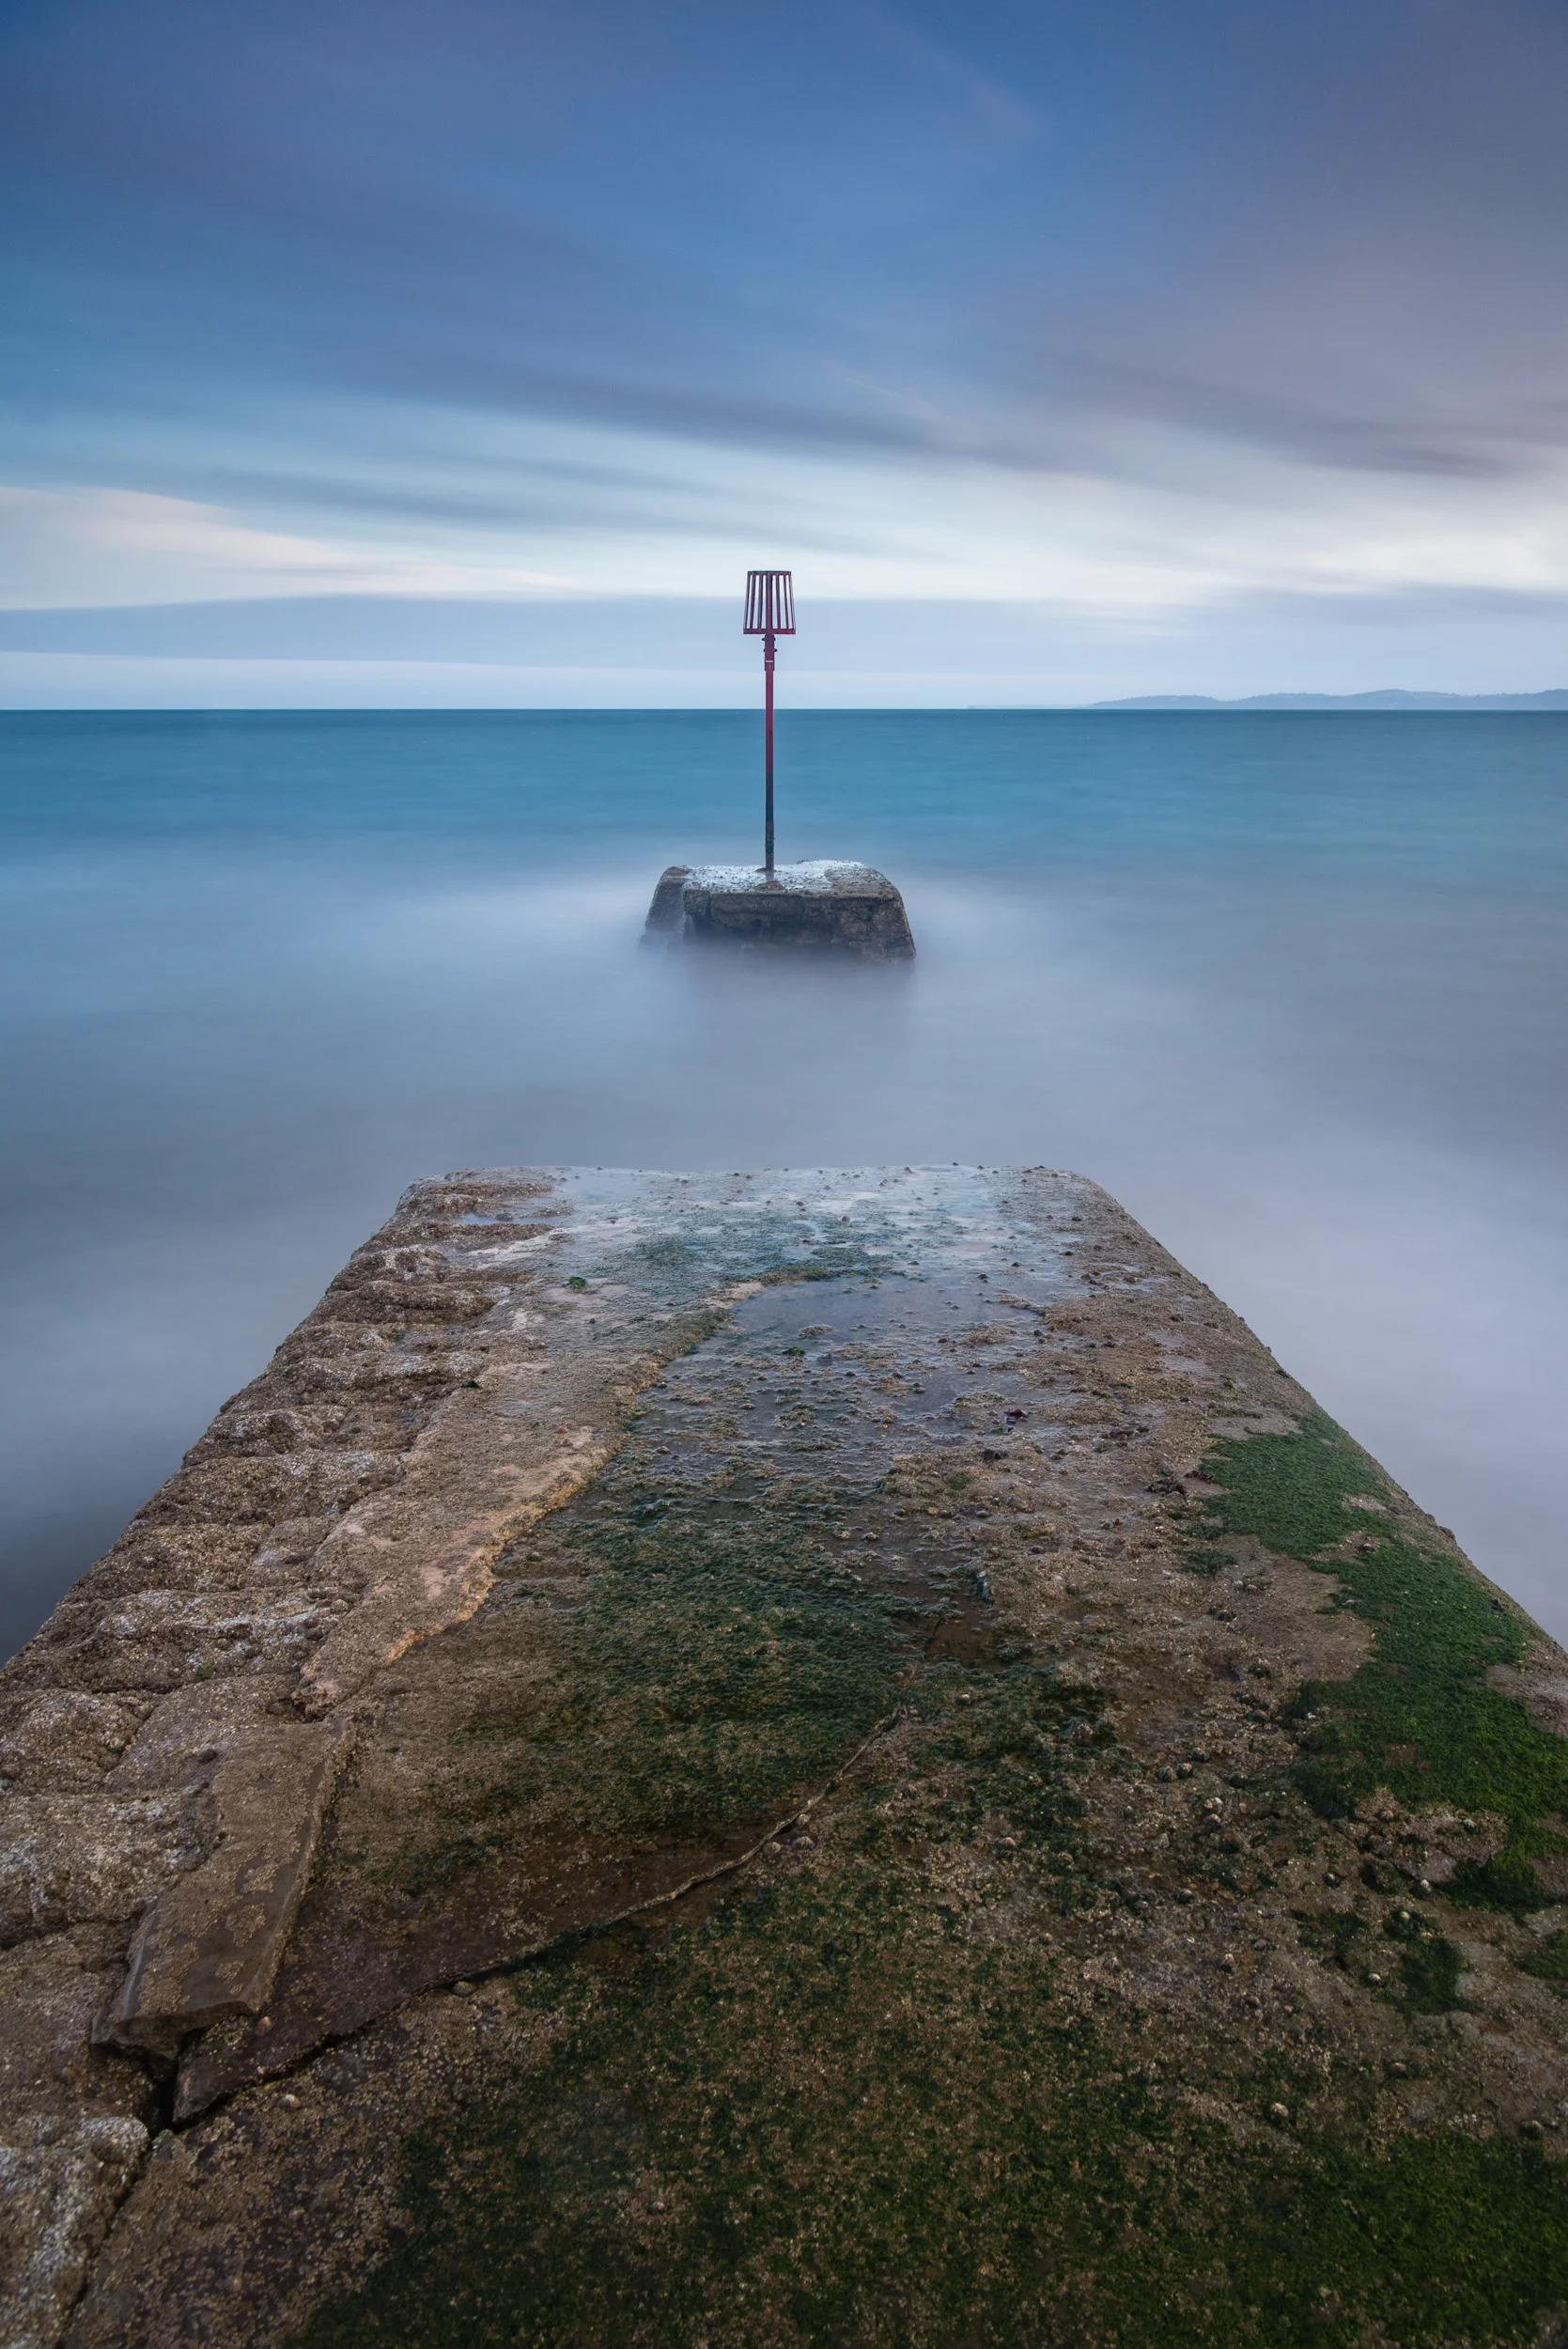
At The Cobb
I had been looking for the right location and waiting for the right conditions to try out my 4 stop reverse ND grad for a few weeks. Finally, an opportunity presented itself one morning at The Cobb in Lyme Regis, Dorset. I often wait for January time to visit The Cobb as this is the best time for the rising sun to illuminate the side of this stone pier. However, with clear skies forecast and the sun rising from the end of The Cobb I thought this would be the time to try my new filter.
The light was pretty flat at the start of the sunrise that morning. As I waited for the sun to pop over the horizon I spent a bit of time talking to the 3 other photographers that were also there that morning. As always, I very much enjoy having a chat to my fellow togs. One of those photographers was Anna Stowe. she has a wonderful portfolio of images and I would strongly recommend you follow her Facebook page.
When the sun did rise though I immediately added the 4 stop reverse ND grad to the polariser that was already on the camera. Here are some of the images I took:


The reverse ND grad did exactly the job I wanted it to do. As I took each image I was checking the histogram and was happy not to see any blown highlights. One thing I have noticed is that I did shoot those images at 28mm, which is tighter than the recommend 24mm or wider that Lee Filters say the filter should be used at. This is probably the reason I did spot much graduation towards the top of the image. I will need to remember this next time I use it.
Like a lot of my filters, the reverse ND grad won't be used all the time but it is still a filter that I am very happy to have in my bag. Finally, I can have confidence that when I shoot into the sun I can capture as much of the dynamic range of the seen in a single frame and instantly see results on the back of my camera.
So have you tried the reverse ND grad yet? What technique do you use when shooting into the sun? Let me know in the comments below.

My Field Guide to Using ND Filters
In this blog post and video I take you out on a shoot to Froward Point in South Devon to take you through my workflow when using Neutral Density (ND Filters). It doesn't matter what strength of ND filter or even who makes it, my process is the same. Read the blog post and watch the video to find out more!
Control
Modern cameras are wonderful and amazing bits of technology. They allow us to turn our creative visions into beautiful images that we can connect with. We have a lot of control. We can change shutter speed, aperture, focus, ISO, and position, all with the aim of capturing that moment. One thing we can't control is mother nature and so sometimes we need a little extra help "control the light".
This image required an exposure time of 72 seconds. Generally speaking it would not have been possible to get an exposure of this length without an ND filter.
This is where filters come in. Now, there are such a dizzying array of filters available it would be slightly foolish of me to try and cover them all here, so I'm going to concentrate on the use of ND (Neutral Density) filters or to be more specific how I use ND filters.
Though I use ND filters in my landscape work, it is probably in my seascape work that I will use them the most. They allow me to creatively control how the water looks in the image. It could be that I want to lengthen the exposure to 1 or 2 seconds to show the path of a wave, or even 3 or 4 minutes to smooth out the texture of a choppy sea. Sometimes you just can't get exposures times like that just with the camera alone.
The Process
I have a range of ND filters in my bag, all made my Lee Filters (my filter manufacturer of choice). I have a 3 stop, 6 stop (Little Stopper), 10 stop (Big Stopper), and 15 stop (Super Stopper). The Super Stopper is a recent addition to my kit bag and you can read how I got on with it on my first trip out with it here.
No matter which ND filter I use, the setup and execution process I go through is the same. To show you what my process is I've created in this field guide video which takes you through my process while out on a shoot.
To recap from my video the process I follow is:
Composition - first things first, I need to have a composition. Get this right first!
Base image - take a shot with no filters. Check composition again, image sharpness and exposure. If needed adjust, shoot and check again.
Add other filters - if needed, add ND graduated filters or a polariser. Shoot the image again and do all the same checks.
Add ND filter - finally, add ND filter of choice and take the image. Do all the same checks again.

Once processed the final image looks like this:
Final image. Nikon D750, Nikkor 24-70mm f/2.8 VR @ 28mm, f/13, 202 seconds, ISO 100, Lee Filters ND 0.6 (2 stop) graduated filter, Lee Filters Big Stopper (10 stop ND), cable release.
I hope the reading about my process for using ND filters has been useful. Do you follow the follow the same process? Do you do things a little differently? Are ND filters part of your creative workflow? Are you considering getting some ND filters? Please let me know in the comments below.
Planning a Landscape Shoot at Dawlish Warren
In this video blog post I show you some of the planning tools I use to help increase the chances of a succesfull trip out with the camera. After that I take you on a trip to shoot seascapes at Dawlish Warren to see if all the planning was worth it!
Plan, Plan, Plan
I like a plan. Plans are good. Plans don't always go to plan, but I like having one none the less. As a private pilot I definitely like to have a plan when I head out to the skies. And though photography is arguably less risky than flying I still want my trips out with the camera to be worthwhile and successful. After all, there is no point in heading out for sunrise only to arrive at your location as the sun comes up. This has happened to me before and trust me, after the hour and half it took me to get there it was a painful lesson.
So to prevent missed sunrises, badly timed tides, and gale force winds, I like to plan my shoots so I can maximise my chances of success. In this video I will use:
These are the tools I use the most and I've found them to be very effective and accurate in the past. So let's see them in action along with my shoot down at Dawlish Warren beach:
Success
As you can see from the video, I had a successful trip and I've come away with an image I was very happy with. By checking out what the conditions were going to be like before I headed out I could be reasonably confident that my image would meet my vision for that location.
Not as calm as it looks. Nikon D750, Nikon 24-70 f/2.8 VR, 195 secs at f/11, Lee Filters ND Grad, Polariser, and Big Stopper. Processed in Lightroom CC.
Audio Quality
As I mentioned in the video, though the photography went well I had a few problems with the video. When I had the camera facing into the wind I lost all the audio of my voice over the wind noise so I had to ditch a lot of the clips. Being a landscape photographer this won't be the last time I will have to deal with this issue so I have purchased a Rode smartLav+ external mic (and some added furs for extra noise reduction). Though I will have to sync up the audio in post using Premiere Pro CC (my Sony RX100 M4 doesn't have a mic input), the improvement in audio quality will be worth it. So expect to hear my dulcet tones much improved in the next video!
Do you plan?
So do you plan your trips out with the camera? Or do you chuck the camera in the car and go for it? Let me know in the comments. And if you have a couple of minutes please like and share this blog post. Till next time....