

Fingle Bridge
In the blog this week I head to Fingle Bridge on Dartmoor to shoot some autumnal woodlands but some unexpected weather causes a change of plan.
Discovering Fingle Bridge on Dartmoor
I first learnt about the woodlands around Fingle Bridge on Dartmoor in Outdoor Photography magazine in their Locations Guide section (one of my favourite features in the magazine). I can't remember which issue it was in, but I do remember seeing the photograph and then putting the location straight onto my custom Google map.
This was a couple of years ago and since then I've only been back a couple of times, and generally without much success. I filmed one of my earliest YouTube videos there, so if you want to see how much I've improved my videos you can check that video out here.
Remembering Fingle Bridge
My original plan for the morning was to head up to the open moorland of Dartmoor and perhaps shoot Great Mis Tor or Great Staple Tor. The problem with that plan was the weather forecast. The morning sky was going to be largely clear with no cloud. Without some interest in the sky, I wasn't sure it would be worth photographing those Dartmoor locations.
I wasn't however, going to pass up the opportunity to get out with the camera just because of a clear blue sky. A quick scan of my custom Google map and I remembered all about Fingle Bridge. Perfect I thought! I could shoot the woodlands from the top of the valley for sunrise and then head down into the woodland as it gets lighter.
Misty Dartmoor
Arriving at Fingle Bridge it was still dark with only a hint of light from the sun. With sunrise still at least an hour away, I put on my head torch and started the walk up the Hunters Path. It was an interesting walk through the dark woodlands. When I pointed my head torch into the woodland I could several pairs of eyes staring back at me. I assumed they were deer and not some sort of wild beast or cat that prowls Dartmoor!
As I approached the top of the valley and got above the tree line I could see the valley and woodland stretch out before me. In the distance towards Hunters Tor I thought I could make out some low lying mist. We all know how attracted to mist landscape photographers, and I'm no different, so I decided to go an investigate.
Hunter's Tor is at the other end of the valley from Fingle Bridge so it was further than I had planned on walking. I'd given myself plenty of time that morning though so was able to extend my walk without missing sunrise.
Being Indecisive
Arriving at Hunter's Tor I could see a beautiful blanket of mist to the west. There were two small problems though. Firstly, it wasn't covering the woodland, and secondly, it was very thick and you couldn't actually see much of the land below.
It was at this point I got a little indecisive. I thought I could hang about Hunter's Tor and wait for it clear a little, or I could head back along the valley and shoot the mist from further away, or revert back to my original plan. I decided to head back along the valley.
By the time I got halfway back along the valley path the mist had started to clear, so I decided to head back to Hunter's Tor! Even though the sun hadn't risen, the mist was clearing fast so I had to run! Back at Hunter's Tor, I decided to make the most of the frosty conditions and mist, and captured these images:
Hunter's Tor on a Frosty Morning, Dartmoor, Devon - Nikon D850, Nikkor 16-35 mm f/4 at 16 mm, f/13, 15 seconds at ISO 64, Lee Filters ND Grad.
Frosty Fingle, Dartmoor, Devon - Nikon D850, Nikkor 16-35 mm f/4 at 22 mm, f/8, 0.8 seconds at ISO 64, Lee Filters ND Grad, focus stacked image.
Autumnal Colours along the River Teign
After capturing those images I decided that I would head back down to Fingle Bridge and maybe capture some shots of the River Teign. As I packed up and started the walk back I bumped into local photographer Neil Porter. I hadn't met Neil before but I was aware of his excellent work and we soon got chatting.
Neil offered me a lift back to Fingle Bridge which I gratefully accepted. The heated seats in his car were very welcome after standing on that frosty tor for an hour!
Arriving at Fingle Bridge we headed along the river and into the woodland to find the autumnal colours looking glorious. Neil has a lot of experience in shooting this area and he informed me that the colours would get even better over the next week or so. I made a mental note that I would need to come back to Fingle Bridge again very soon.
Autumn at the River Teign, Dartmoor, Devon - Nikon D850, Nikkor 24-70 mm f/2.8 VR at 42 mm, f/11, 3 seconds at ISO 64, Lee Filters Circular Polariser and ND Grad.
Soon after capturing that image we started to see a few more photographers arrive. Happy with what I got, and with the need to get home, I left Neil and the other photographers to carry on shooting this beautiful autumnal location.
New Dartmoor Video
I hope you enjoyed the photographs from this location. If you did you might be pleased to know that I also did some filming while I was taking those images. The video from Fingle Bridge will feature in a Dartmoor video that I'm currently producing. I'm not sure when it will be out, but stay tuned to the blog, and be sure to subscribe to my YouTube channel.
Have you photographed Fingle Bridge before? What is your favourite autumnal location? Let me know in the comments below.

Gurnard's Head
In the blog this week I head down to Cornwall again to check out a new location, Gurnard's Head.
Back to Cornwall
For me, the spring and summer months are the time to visit and photograph Cornwall. It's not that I think these are the best seasons to photograph Cornwall, it's just that the longer days means it's more practical to get there for sunset.
Now that the autumn season is upon us I can already sense a chill in the air and the days are getting noticeably shorter. Soon the clocks will change and the opportunities to get to Cornwall will be very much reduced. So while it is still reasonably practical for me, I'm trying to get to Cornwall as much as I can.
Gurnard's Head
One of the great things about my custom Google map is that I should never be short of locations to visit. My map contains a huge number of pins, and a lot of them I haven't even visited. Many of these unvisited pins are locations that I discovered from magazines or social media channels.
For this trip out with the camera, I was looking for somewhere new to photograph down on the north-west coast. A quick look at my custom Google map revealed a location that I had pinned some time ago, Gurnard's Head.
From the text I had added to the pin I could see that I had discovered this location in an issue of Outdoor Photography magazine. Fortunately, I have been buying digital copies of this excellent magazine for a number of years now so it was an easy task to bring up the issue on my computer and get a feel for this location again.
Windy Cornwall
One of the reasons I was heading to the north-east coast of Cornwall was it was one of the few areas of Cornwall that had a forecast that could help yield a good photograph. As with a few of my recent trips to Cornwall though, it was still going to be a bit of a punt if it would work out or not.
After a 2 hour drive to get to my location I made the short walk down to Gurnard's Head. It soon struck me how windy it was. While the sky was relatively clear, and the sun was out, the wind was very strong. Even stronger than my recent visit to Wheal Coates tin mine.
Normally the wind isn't too much of a problem, but it was almost certainly going to be too strong for any long exposure. The wind was coming straight in from the sea so I wouldn't be able to shield the camera either. However, I could at least stand up so no excuses for not taking a couple of pictures!
Gurnard's Head Sunset #1, Cornwall - Nikon D850, Nikkor 16-35 mm f/4 at 32 mm, 0.4 secs at ISO 64, f/13, Lee Filters ND Grad.
Gurnard's Head Sunset #2, Cornwall - Nikon D850, Nikkor 16-35 mm f/4 at 16 mm, 0.4 secs at ISO 64, f/13, Lee Filters ND Grad.
I really enjoyed my time at Gurnard's Head (despite the wind). One observation I did make is that the area around the headland is covered in heather and if I visit there again I'll do so at the start of August. I can imagine Gurnard's Head is a sea of purple at the right time of year.
Despite the strong winds, I was happy to have explored this new location (something I'm trying to do more of). Unfortunately, the predicted cloud cover never transpired that evening (it was painfully beautiful a few miles further east), but sometimes it's the experience of being outdoors that's important.
So have you been to Gurnard's Head before? Which of my two images did you prefer? Let me know in the comments below.

Daymark Tower
In the blog this week I share with you my video on shooting Daymark Tower on the South Devon coast. You can also read my top 3 tips on shooting at this fantastic location.
A Brief History
I started this blog back August 2016 and shortly after that, I posted my first video over on my YouTube channel. When I made that first video it was just something I wanted to do and I didn't really have a plan for growing and developing a YouTube channel.
However, after posting a few more videos I realised that I enjoyed the process of creating video content so I decided to keep it going. I then started getting some positive feedback and my subscriber count grew. I've always been committed to my website and blog, but I now also wanted to develop and grow my YouTube channel. Soon I had a long list of video content that I wanted to shoot.
I remain committed to my blog which is my primary output channel for my landscape photography stories and as long as I'm out taking pictures I normally have something to write about. Creating video is a different ball game though and while I have some grand ideas and themes for my videos, producing them takes time, so the rate of delivery is going be slower than the blog.
A New Video Series
So this brings us nicely onto this video I've just made on shooting Daymark Tower. I decided to shoot it as I've just had the following image used in Outdoor Photography this month (issue 208, June 2017, page 55).
I thought it would be useful if I shot a brief video on the location so other photographers could get a better idea of what the location is like before they visited it. It's only a short video and unlike most of my other forthcoming videos it will be about one location only so it will be quicker to produce. So this video marks the start of what I will hope will be a series of short videos that introduce photographers to locations they may not have visited before. A little dose of inspiration!
My website and my blog will always be my home and I will continue to produce regular content there as I have done before, but by producing more frequent video content I hope to share my landscape photography journey with an even wider audience.
The Daymark Tower
So onto my first location in this new series, The Daymark Tower.
I hope you enjoyed that video and that it's given you a better idea of what it is like to shoot there. Here is the final image I captured there in a bit more detail:
Nikon D750, Nikkor 24-70 mm VR f/2.8 @ 45 mm, f/13, ISO 100, 1/15 sec, 4:5 crop.
Unfortunately I didn't get the light I was after to produce a really stunning shot but hopefully, you've seen enough from my images and the video that you too will be inspired to visit this great location. If you do decide to go, here are my top 3 tips for shooting the Daymark Tower:
Shadows - While shooting at sunset will work at most times of the year you will be casting a long shadow if it is behind you. So if you want to include the path in your composition, check which direction the sun is setting so your shadow isn't cast along the path. Something which I failed to check in my planning for this video!
Wide Angle Correction - If you are shooting with a wide angle lens be aware that the tower may be distorted in the frame. This is generally easy to correct in post production, but it normally involves the image being cropped. So be sure to include some extra room around your composition so you don't lose anything critical when the image is corrected and cropped. Though I spend 99% of post processing life in Lightroom, I found the wide angle correction feature in Photoshop to be much better at correcting the distortions in the tower.
Timing - My preferred time of year to shoot Daymark Tower is when the crops are approaching harvest. I shot the video a little early which still works very well, but by around, mid-May the crops swaying in a gentle breeze looks very nice indeed.
I hope you enjoyed reading about and looking at the Daymark Tower. Hopefully by the time you read this I will have already shot the video for the 2nd location. I should also be well on my way to shooting some of those bigger videos that I have planned. If you want to know when those videos are published you can of course subscribe to my YouTube channel or you can follow me on the Instagram, Twitter, Facebook, Flickr and Google Plus where I will also post notifications when new video content is posted up. The video and additional content will always be available here on the blog as well.
Do you include man-made elements in your landscape photography? Are there are any locations in the South West that you would like me to make a short video on? Let me know in the comments below.

Discovering the Joy of Printing
In my this blog post and video I tell you why I have decided to start printing my work and what it was like to print my first A3 image using a Canon Pixma Pro-10s printer.
Why Print?
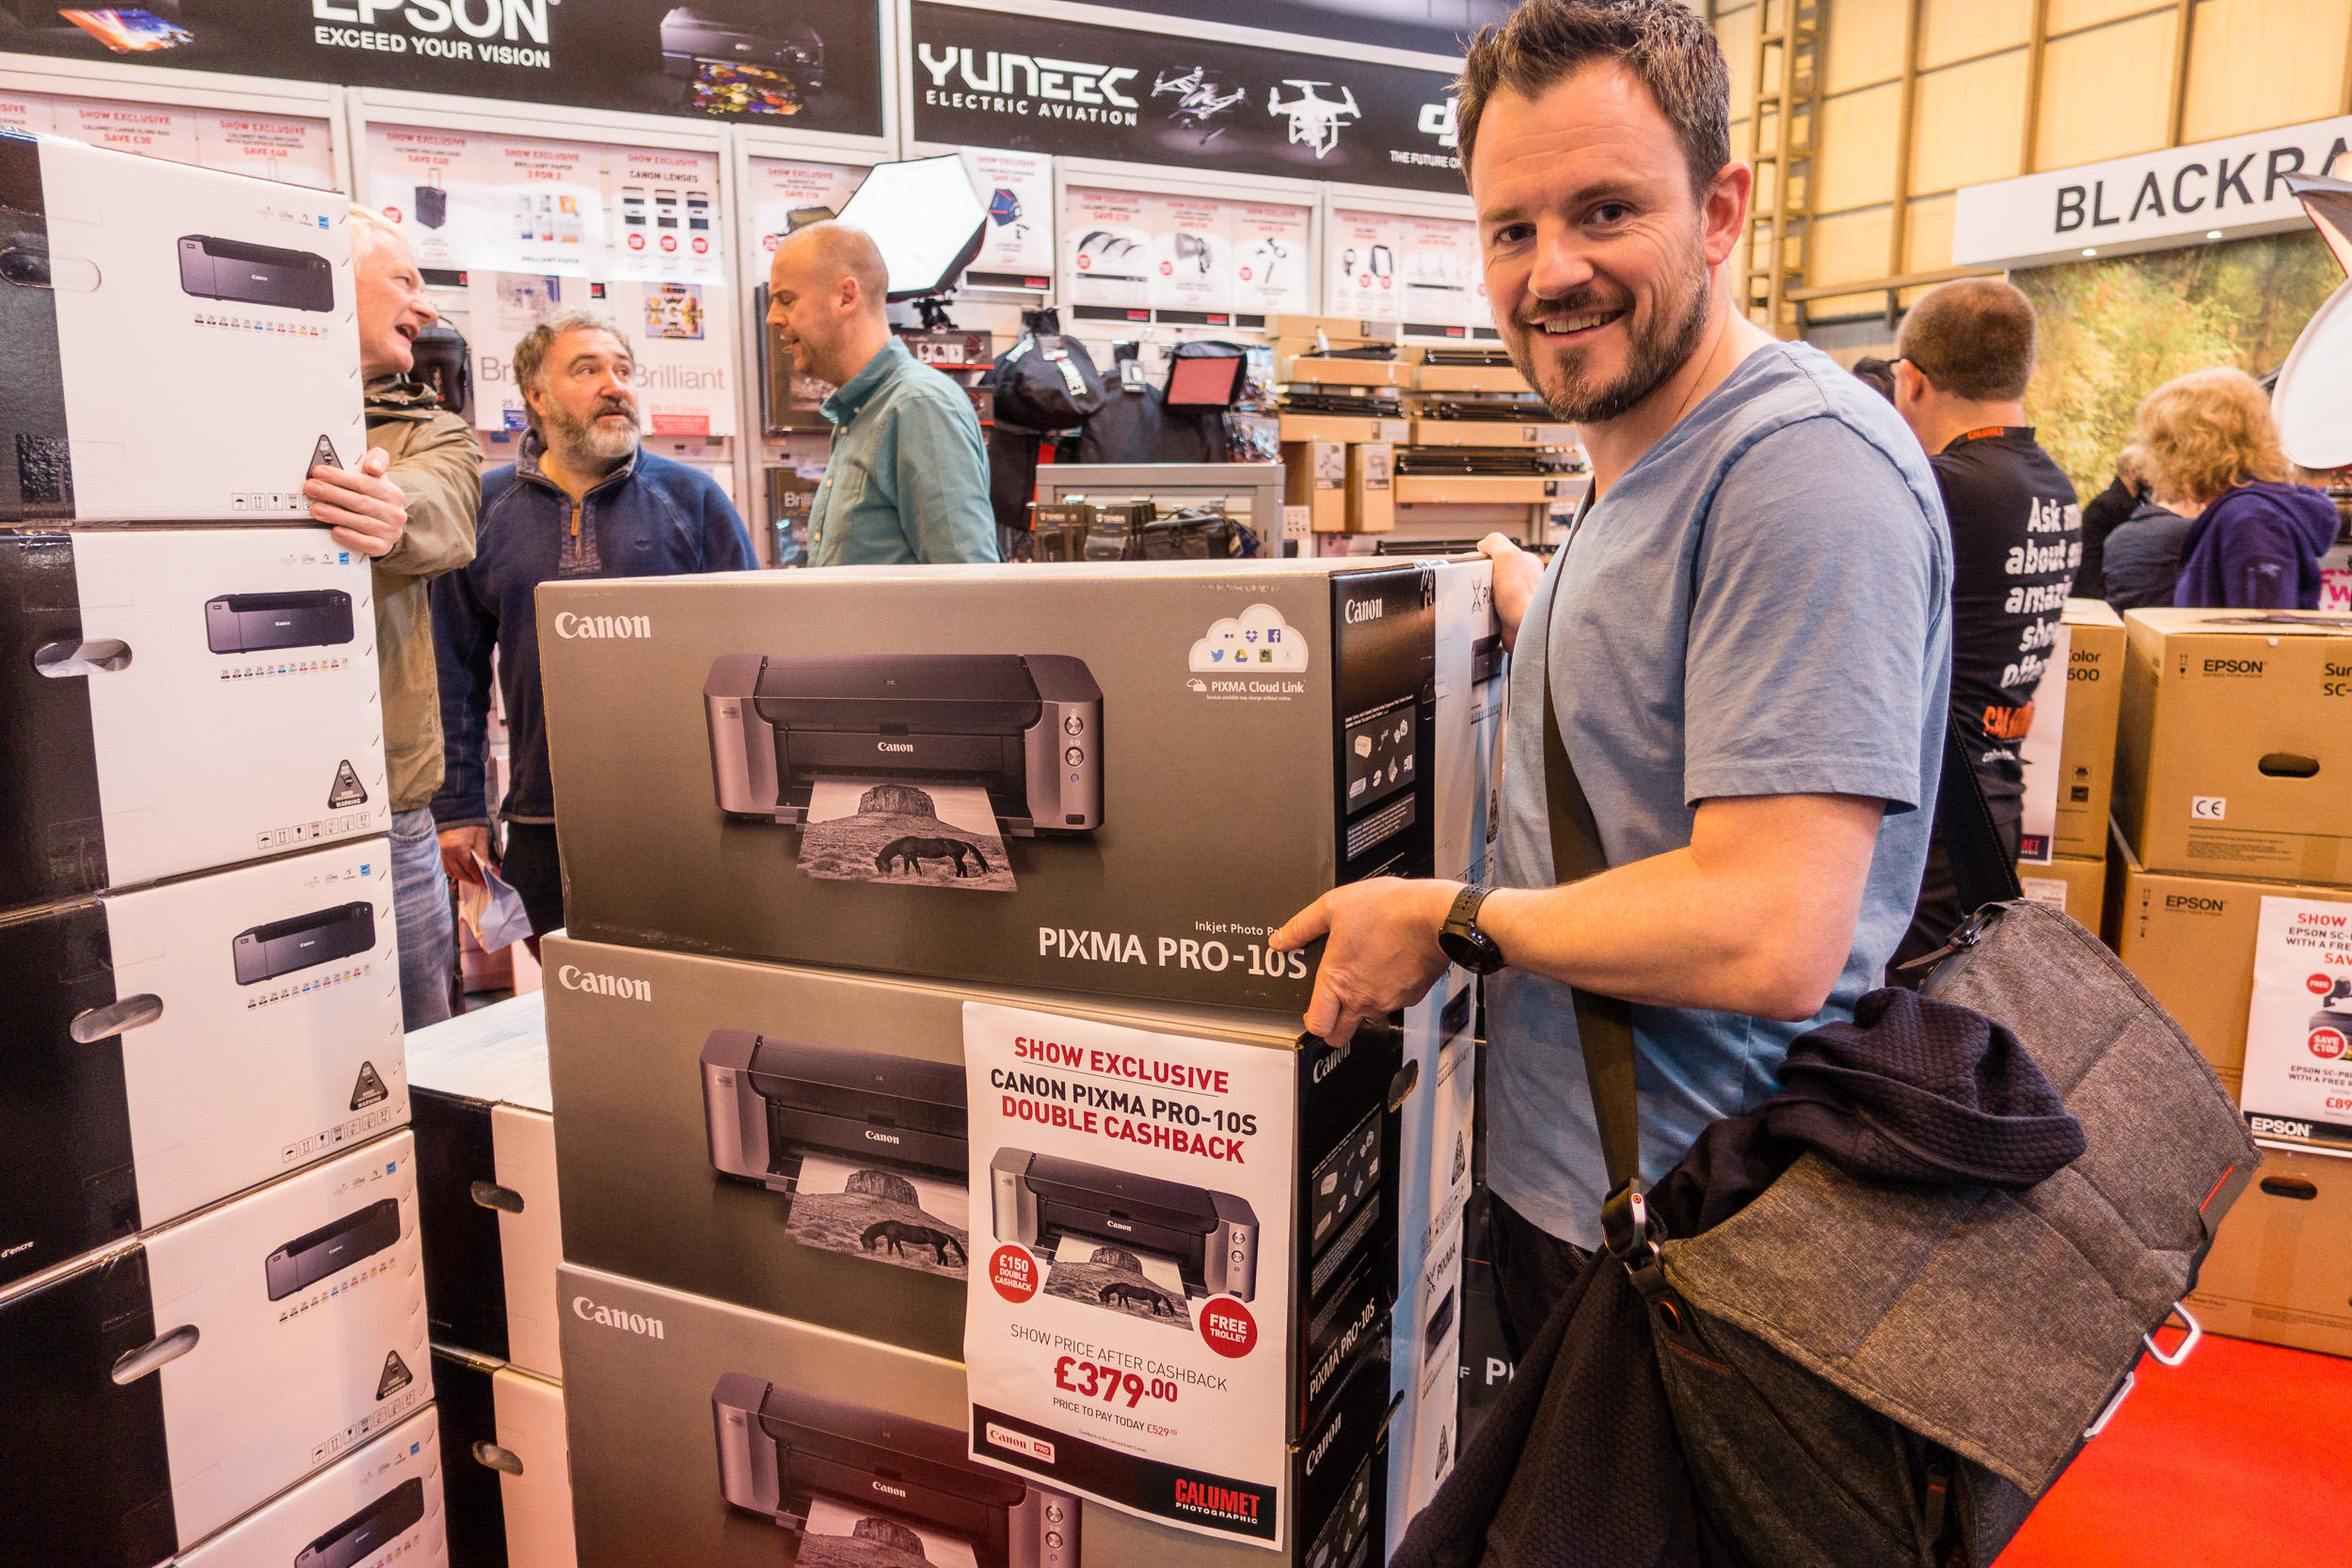
I was at The Photography Show at the Birmingham NEC a few weeks ago and while I was there I picked up a Canon Pixma Pro-10S printer. Every year I hope to pick up a bargain from the show and this year was no different. When I saw that Canon was offering double cash back on their range of Pixma Pro printers I went straight to the Calumet stand and grabbed myself Pro-10S.

Though this may sound like a spontaneous decision, it was not. For at least a year now I've wanted to extend my workflow to include printing. There are a couple of reasons for this decision. Firstly, seeing some of my images printed in Outdoor Photography magazine has made me realise how wonderful it is to see one of your images in print.
I have also been influenced by a couple of photographers that I follow online that are big proponents of printing, Martin Bailey and David duChemin. Martin wrote and excellent ebook on printing Making the Print and David has an excellent video on Ideas for Living With Your Photographs.
I wanted to live with my work a bit more. Why should my images gather dust in a digital archive? I want to see what my images looked like in physical form.
Printing at Home
So why would I go to all the hassle of printing at home? Why not just send the images to a lab and have a professional do it? This is a valid question but for me, half the fun is the process of the print. There is a sense of excitement as the printer slowly prints out one of your images. The anticipation of seeing the final result. Printing is the last step in a complete end to end photography workflow that starts with capture and ends in print.
This isn't to say that I wouldn't use a lab. Labs are great, especially if you need an unusually large print, need framing or need to print on other materials. But for me, I want that tangible experience of doing the print myself and hanging it on my wall.
What about the cost? Isn't printing at home expensive? I'll be absolutely honest with you, I have not concerned myself with how much each print will cost. That's not to say that I don't care, it's just that the cost per page isn't something that has influenced either my decision to print at home or the decision to buy this specific printer.
I've always owned Canon printers and my current office printer is a Canon so I was very comfortable with my decision to buy the Canon Pixma Pro-10S. Also, given the volumes of printing that I was going to do, I could treat myself to an A3 print every now again. Compared with all the other money I have spent on photography over the years, the cost of a print seems a small price to pay to further my enjoyment and experience of photography.
My First Print
I was excited to make my first print with my Canon Pixma Pro-10S. One of the first things I needed to do was to get some paper. There is a dizzying range of paper types and sizes out there. I thought I would make my life easy to start with by selecting from Canon's own range of pro papers. After watching David Noton's videos on A guide to Fine Art and Photo Printing and Fine Art and Photo Printing I knew the Canon paper types would already have the relevant ICC profiles installed which should make my first print easier. He also made some good suggestion on which paper types to use.
So I got onto Amazon.co.uk and ordered some Canon Pro Platinum A4 and A3+ glossy paper. I was ready to start printing. If you want to see how I got on with my first print, from setup to final output, I've made a short video of my experience.
Impressive, Fun and Simple
To say that I was impressed by the output would be an understatement! The accuracy of the print compared to what I saw on the monitor was remarkable. The colours, tones and contrast all looked amazing on the glossy A3 paper. My black and white image from my Live Music portfolio was also stunning with the printer producing a punchy and detailed print.


I was also pleased how simple it was to make a successful print. I was already calibrating my monitor but I was worried that I might have to extend that to include printing, but Getting an accurate print was no more difficult than selecting the correct paper type in the Canon Print Studio Pro.
However, almost as important as the quality and simplicity of the process was that it was fun. There really was something very special about watching one of your favourite images gradually appear from the printer. When I held up that first print to the light I realised that I had definitely made the right decision to get into printing. The whole experience of looking at your images in print is so vastly different from seeing them on a monitor, even one as good as my Eizo monitor. Printing now as a permanent home in my photography workflow and I can't wait to print more of my images.
So do you print your work? Do you print at home or use a lab? Let me know in the comments below.

My Top 5 Tips to Improving Your Landscape Photography
In this blog post I share with you my latest video in which I tell you what my top 5 tips are to improving your landscape photography.
Tips for Landscape Photographers
I've been shooting landscapes since I got my first DSLR back in 2006. However, it's probably only in the last few years that I've started to really progress as a landscape photographer.
In this vlog, I share with you the 5 things I think will help you improve your landscape photography. This is a personal list, and not even necessarily the only 5 things you should do. It's just 5 things that I did that had a direct impact on my landscape photography. Hopefully, some of them will work for you also!

In Summary
I explain the tips in the video, but for those of you who are currently unable to watch the video, the tips are:
Practice - Make sure you practice your photography. Practice lots!
Be Inspired - Have plenty of sources of inspiration!
Get Involved - Go on a workshop or enter for a magazine feature!
Get Sharing - Share your work or enter a competition!
Adventure - Get out there and go on a photography adventure!
And there is a bonus tip, but you'll just have to watch the video for that one!
So do you have any tips you want to share? What things did you do to improve your skills as a photographer? Which of my tips are you going to follow? Let me know in the comments below.

Magazine Submissions - Seeing Your Images in Print
Is this blog post I chat about seeing one of my images printed in Outdoor Photography magazine and how this inspires and motivates me to work harder at my photography.
Outdoor Photography Magazine
In Outdoor Photography magazine this month (Issue 211, November 2016), on page 110, you will find one of my images :
Without any shame or modesty, this makes me very happy. I'm happy for two reasons. Firstly, Outdoor Photography magazine is my favourite photography magazine. I've been a reader for many years and the quality of the content and the magazine itself is brilliant. Every month I look forward to my issue arriving so I can sit down with a nicecup of coffee and get inspired!
The other reason for my happiness is that it's one of my favourite images of 2016 and it is wonderful to see it in print. I'm ashamed to say that I don't print my work. For some the photographic process isn't complete until you have printed your work. The more I think about it, and the more times I actually see my work in print, the more I'm convinced that this is the truth. I'm going to start printing at home soon, but that story is a tale for another blog post.
Back to magazine though. Seeing one of your favourite images in a well printed magazine like Outdoor Photography is very satisfying. For those that already print their work it's a very tactile experience holding your image in your hand rather than pixel peeping on your monitor.
Inspiration and Motivation
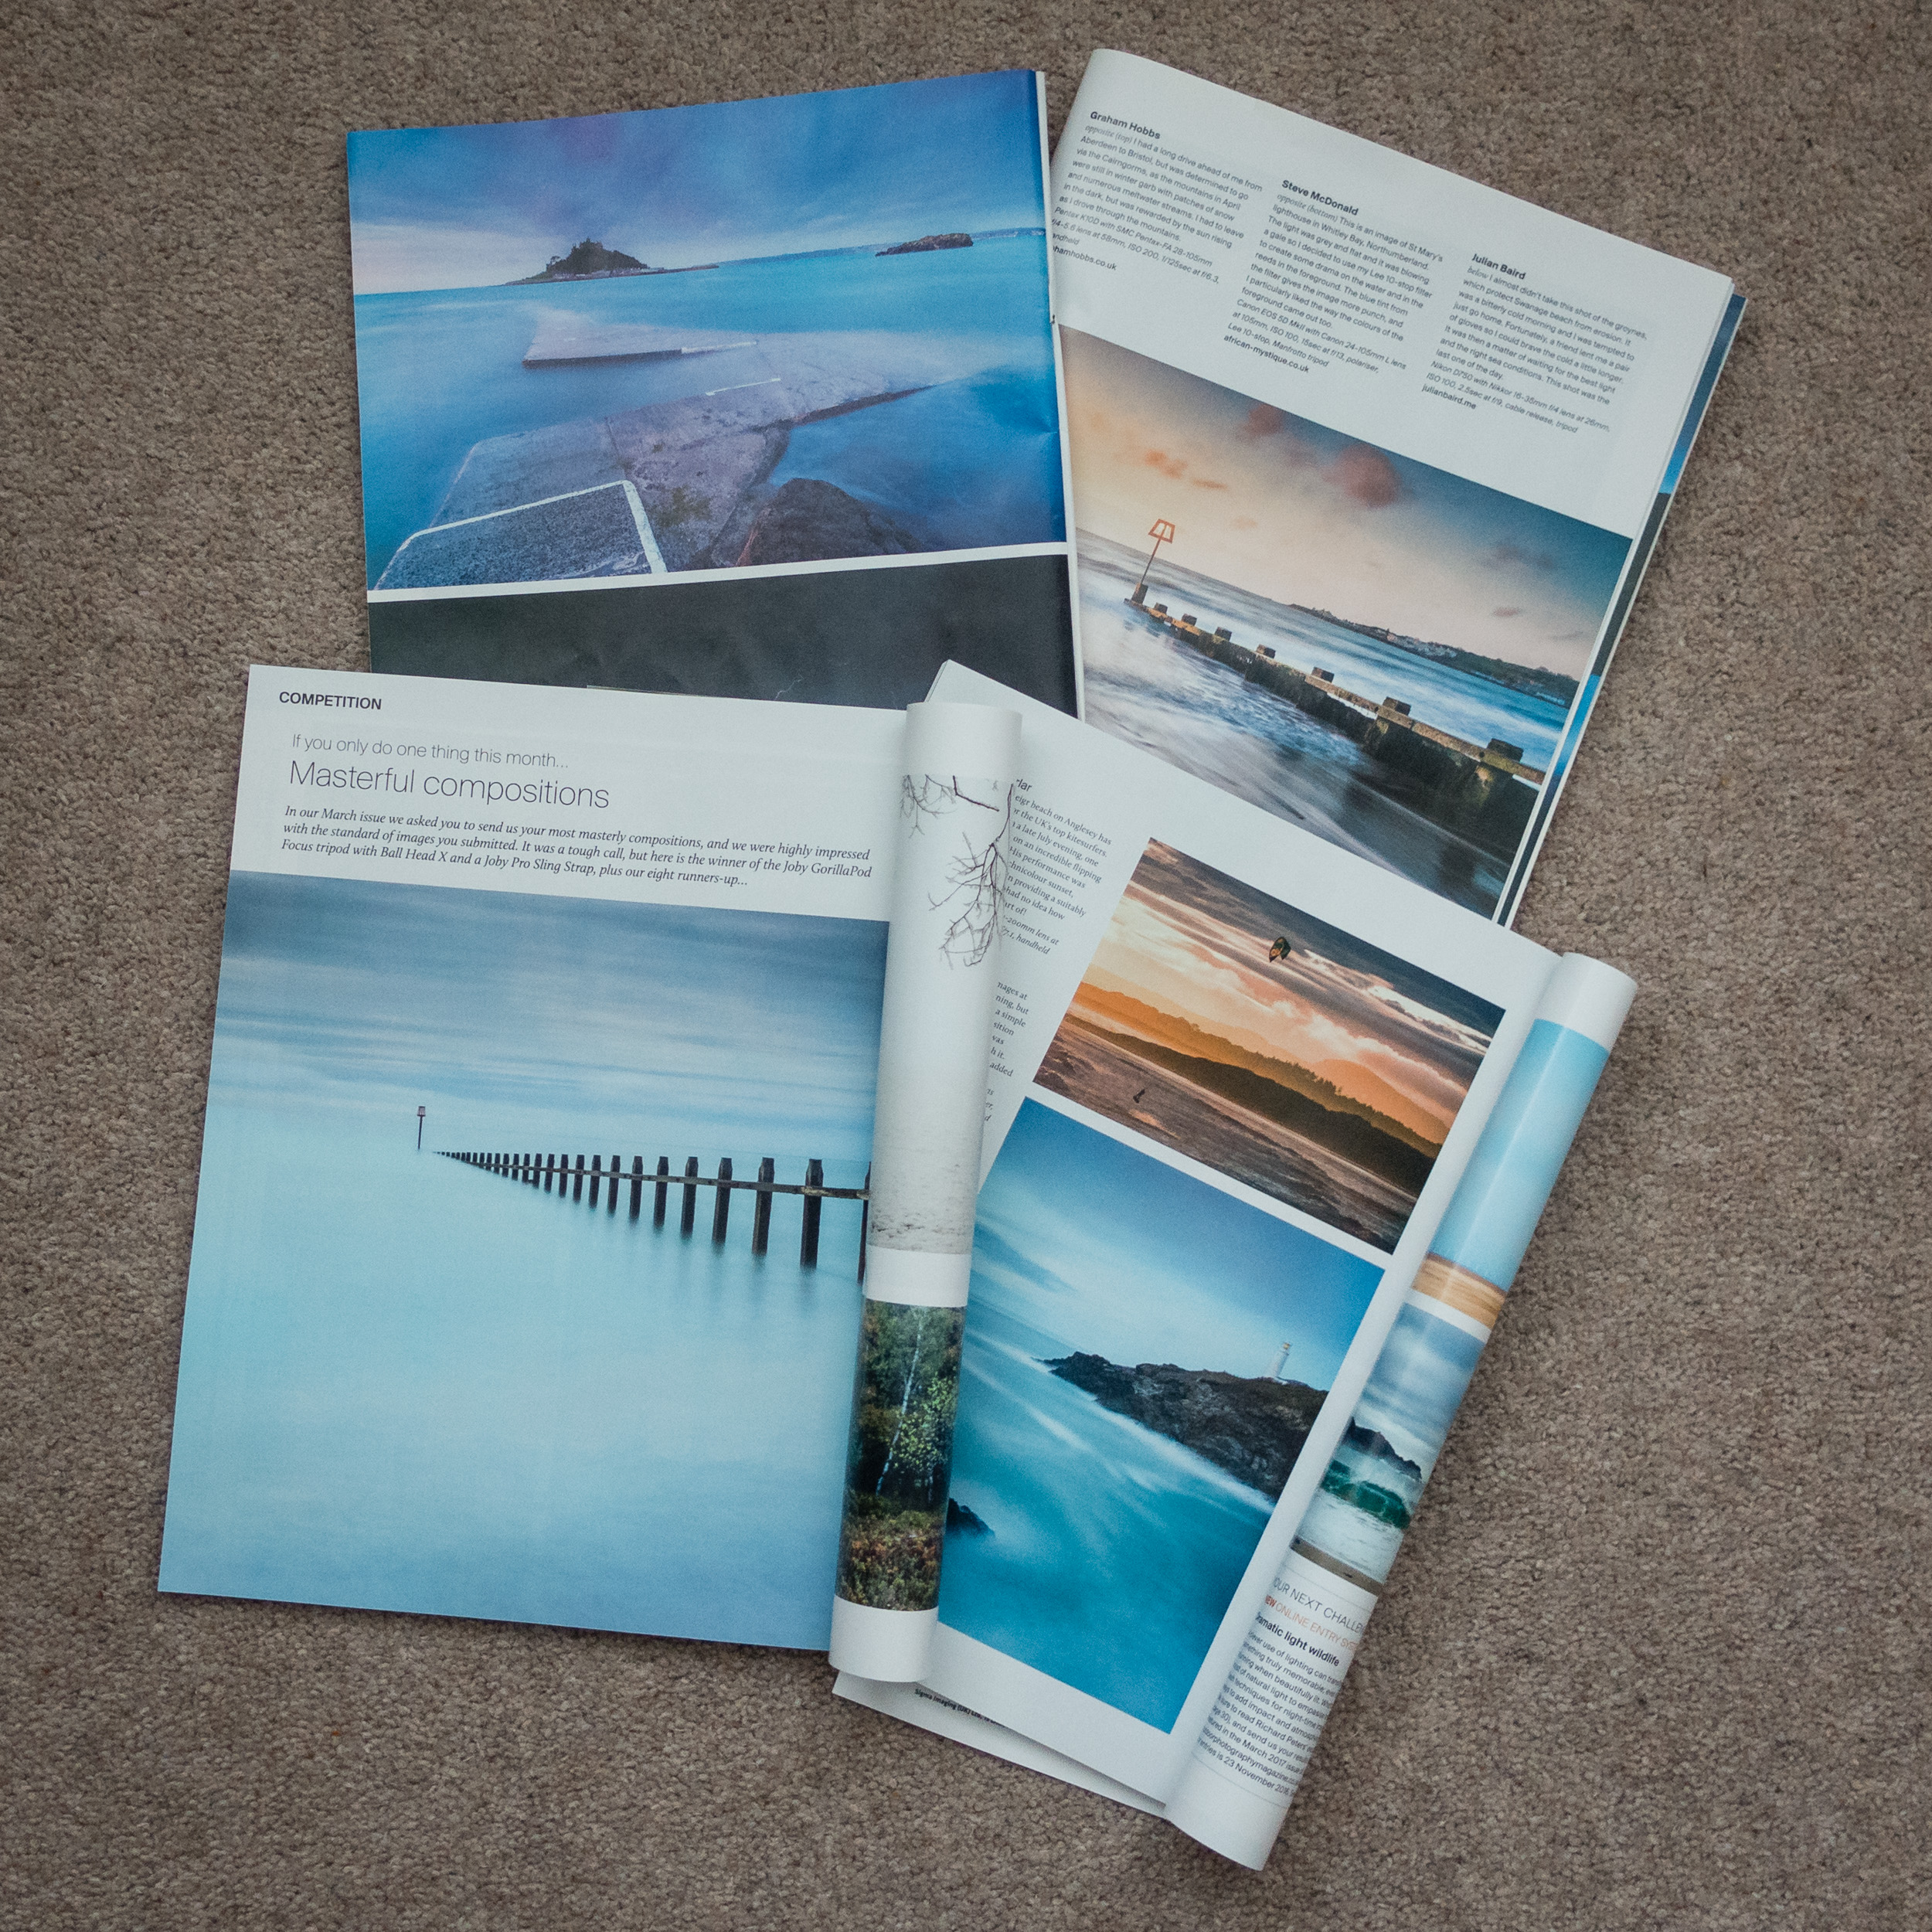
The image above is in the magazines "If you only do one thing this month…" feature. Each month the magazine sets a new challenge and readers submit their best images that meet that brief. I find these monthly themes a great source of motivation and inspiration. So much so that I do try and regularly submit images. Though there is a prize for the monthly winner, I don't enter to win a prize, I enter for the satisfaction of being featured in print. It's much the same motivation that drives me to enter other photographic competitions.
Though I didn't win the competition this month, I did win "Masterful Compositions" in issue 206 (July 2016, page 106) with this image:
I was also featured in issue 194 (August 2015, page 109) with this "Natural Light" image from Swanage:
In issue 192 (June 2015, Page 110) I also had my first image printed in the magazine with this "Low Light Landscapes" image of St Michaels Mount:
St Michael's Mount - Nikon D750, Nikon 16-35mm f/4, 19mm, 30 seconds at f/13, ISO 100
Why Submit?
Now, for some of you this post might all seem very self-congratulatory. And to a certain extent it is. I'm very proud to have a 4th image in Outdoor Photography magazine. What is more to the point though is how seeing that very first image in the magazine has driven me even more to improve my photography. Submitting your images to a competition, even a monthly magazine competition, sets you up with the risk of failure. But I need to take that risk, and no matter the outcome I will use my success and failure to continually drive my desire to improve.
So should you submit your images to magazines? Well that would be up to you. What works or drives me will likely be different for you. All I can say is that seeing my first image in a magazine gave me confidence that I was going in the right direction and made me want to work even harder at the art of photography.
Have you ever had an image published in a magazine or a book? Did it bring you any further success? Do you print your own work? Let me know in the comments.

The Pain and Joy of Photography Competitions
Do you enter photography competitions? Do they bring pain or joy? Let's discuss!
Measuring Success
There are many ways to try and measure the success of your photography. You can post your images on social media sites such as Flickr, Instagram or even Facebook and see how likes you get. If you are a full time photographer you can measure your success by how well your business is doing.
I measure the progression of my photography skills in two ways. Firstly I have my images regularly critiqued by a professional photographer (see my post on Tuition and Mentoring). This provides invaluable and detailed feedback on my images that I can use to further develop my skills. The other way I measure progression is through my success (or failure) in photography competitions. For me having my work recognised in competition provides some sort of validation for my photography. Some people may consider this shallow or vain, but for me photography competitions have often been a great source of inspiration and being placed in one of the more prestigious competitions would be a great source of pride and joy.
Entering Competitions
One of my entries in LPOTY 2015.
It's only recently that I've actually started entering images into competitions. Though I've always I wanted to enter I probably lacked some of the commitment to achieve this in the past (see my bog post on Practising the Craft of Photography). Over the last couple of years I've put a significant amount of effort into being placed in Landscape Photographer of the Year (LPOTY). I fully appreciate that going from entering no competitions at all to being successful in LPOTY is a bit of a jump but for me LPOTY is the pinnacle in landscape photography competitions. So I'm aiming high that's for sure but seeing an image printed the LPOTY book would be for me at least, a dream come true.
The good thing about having such a lofty goal is that it has driven me to get out more with my camera and improve my photography. In 2015 I entered a number of images into LPOTY but failed to have any shortlisted. At the time I was gutted not to have progressed anywhere. I had put a significant amount of effort and passion into those images, and the rejection was painful.
Rejection and Motivation
This image was shortlisted in OPOTY 2016 but it unfortunately didn't make it any further. It was however published in Outdoor Photography magazine (issue 206).
However, I use that pain as a way to motivate myself even more! I decided to submit some of my images in the Outdoor Photographer of Year competition (OPOTY) in 2015. One of my images was shortlisted for the competition but that was as far as it went. The image did go onto win the monthly competition in Outdoor Photography magazine which was a huge confidence booster. I love Outdoor Photography magazine so seeing my image in print there was really pleasing.
So for the 12 months following the end of LPOTY 2015 I worked hard at my photography. I was out shooting more than ever and I undertook more 1-2-1 tuition days with my mentor (see blog post on Tuition and Mentoring). By the time LPOTY 2016 had come around I had already had a few images in Outdoor Photography magazine published and I had won a local photography competition.
One of my entries in LPOTY 2016.
When I entered my images for LPOTY 2016 I was more confident and was excited about the possibility of being shortlisted. The excitement was unfortunately short-lived as I soon got that email that had caused me so much pain last year. But I'm not letting it get me down. After all, who knows what the judges are really looking for? It's not to say that I necessarily had a bad image it might be that it didn't appeal to that particular judge at that particular time. Art competitions are fickle things so some of my entries from previous years will be submitted again. They might just strike a chord with someone else.
I invest a lot of time into these photography competitions and while rejection is painful, that just makes me try even harder the following year. I'm already hard at work for my OPOTY 2016 portfolio and of course my LPOTY 2017 portfolio. If I do ever get placed in one of these prestigious competitions it will be joyful day. Of course with such a singular goal what would I aim for after that? I'll just have a cross that bridge when I come to it but for now I will live with the pain and joy that competitions bring.
So how do you feel about photography competitions? Are they a painful or joyful experience? Are they a measure of success or just fickle things where luck is a factor? Let me know your thoughts.

The Benefits of Tuition and Mentoring
Tuition and mentoring has had a massive impact on my photography. Read more about this part of my photographic journey in this blog post.
In the beginning...
One of my early landscape images taken in Glen Coe in 2008.
I bought my first DSLR in 2006 when I purchased a Nikon D80. Previous to that I had a Minolta DiMAGE A1 so this was a big step up for me. It was at this point that I started to want to learn more about the craft of photography. So as many people do I went to my the nearest newsagent and picked up a photography magazine. And so started a journey of several years of reading a lot about photography.
The problem was I wasn't actually taking that many pictures. Sure I was inspired by what I was reading and saw, but despite having considerably more free time back then I didn't practice the craft of photography as much. (Read my blog post on Practicing the Craft of Photography). I also wasn't that focused on a specific genre of photography. Most photography magazines have a broad range of articles from portraits to macro so I would often spend time trying these things out. Don't get me wrong, I did go out with my camera, but looking back I don't think I was trying hard enough to really learn about photography.
Changing My Approach
This changed back in 2013, when I decided to go full frame and buy a Nikon D600. I promised myself that if I was going to invest all this money in a camera (and lenses!) I was for sure going to learn how to improve my photography. By this stage though I was fairly sure that my heart lay with landscape photography.
Some early lessons about composition with David Nightingale.
I decided that the best way to make progress was to actually go out and shoot more, and to engage the services of a professional for some 1-2-1 tuition. At the time I was following the work of Blackpool based photographer David Nightingale and so I booked a whole weekend of tuition and got to work on improving my photography. The weekend went well and it was a bit of an eye opener for me. Firstly, I actually didn't know as much about my camera as I thought. While I knew some of my composition skills were lacking, I thought I knew my camera well but this wasn't really the case! It all goes back to practicing the art of photography, something I hadn't been very good at!
Up till this point I had wondered if it were actually possible to teach someone about composition and how to make a beautiful photograph. As many of my previous photographs had been average at best, I was beginning to think that you couldn't really learn an art, you had to have a natural talent for it to start with. While many people do find creating art easy, for me I had to learn about it. Fortunately David reassured me that I could learn the art of photography. So for that reason alone that weekend was a success.
Making Progress
A year later I had kept to my promise of going out more with my camera. I was still bound by my work and family commitments but I was at least using my spare time to go out and shoot. In 2014 I went on a Dawn 2 Dusk Photography workshop on Dartmoor where not only did I have a lot of fun with some like minded photographers but I also learnt a considerable amount about landscape photography. On the workshop I also met Ross Hoddinott, one of the tutors. I had been looking for a local tutor to help with my learning journey and Ross seemed the ideal person.
Learning about timing and waiting for the light on a 1-2-1 with Ross.
A few months later I met Ross for a 1-2-1 session and in that one day I probably learnt more about composition that I had done since I purchased my first DSLR 2006. Not only did I become inspired from that session but I also became more confident with my photography. Since that first 1-2-1 session with Ross I have regularly met with Ross for further 1-2-1s and portfolio reviews and this has had a significant impact on my photography. Each session I learn something new. Sometimes it's a really small change in how I might compose an image, but it often has a big impact.
So this brings me to the point of this blog post. If you are struggling with your photography or you've reached a plateau then I can strongly recommend that you find a tutor or mentor to help with your photography. Find someone close to home or who's work you respect. Most photographers offer some kind of tuition on a 1-2-1 basis now. Or if that seems a little much as a first step try a photography workshop such as those offered by Dawn 2 Dusk Photography.
We spend so much money on gear (something I'm definitely guilty off) but the one thing that has had the biggest impact on my photography is the time I've spent with a professional photographer. No matter what stage you are at with your photography journey I believe a little mentoring and tuition can be very beneficial. Of course I still read photography magazines, Outdoor Photography being my personal favourite, but when it comes to developing as a photographer 1-2-1s for me are invaluable.
Do you have a photography mentor or favourite tutor? What do you think of 1-2-1 days with professional photographers? Let me know your thoughts.