

Not Every Photograph Needs to be a Masterpiece
As a landscape photographer I'd like every shoot to result in a portfolio class image, but this is an unrealistic expectation. Sometimes you just need to take joy in the experience of capturing an image and learning from it.
Embrace the Grey Once Again!
I’ve made several videos on the theme on embracing the grey and because I live in an area where overcast days aren’t exactly unheard of it might not surprise you that I’ve decided to do another one. For me, the key to a successful shoot in grey and overcast conditions is to find the right subject (as I discussed in this video).
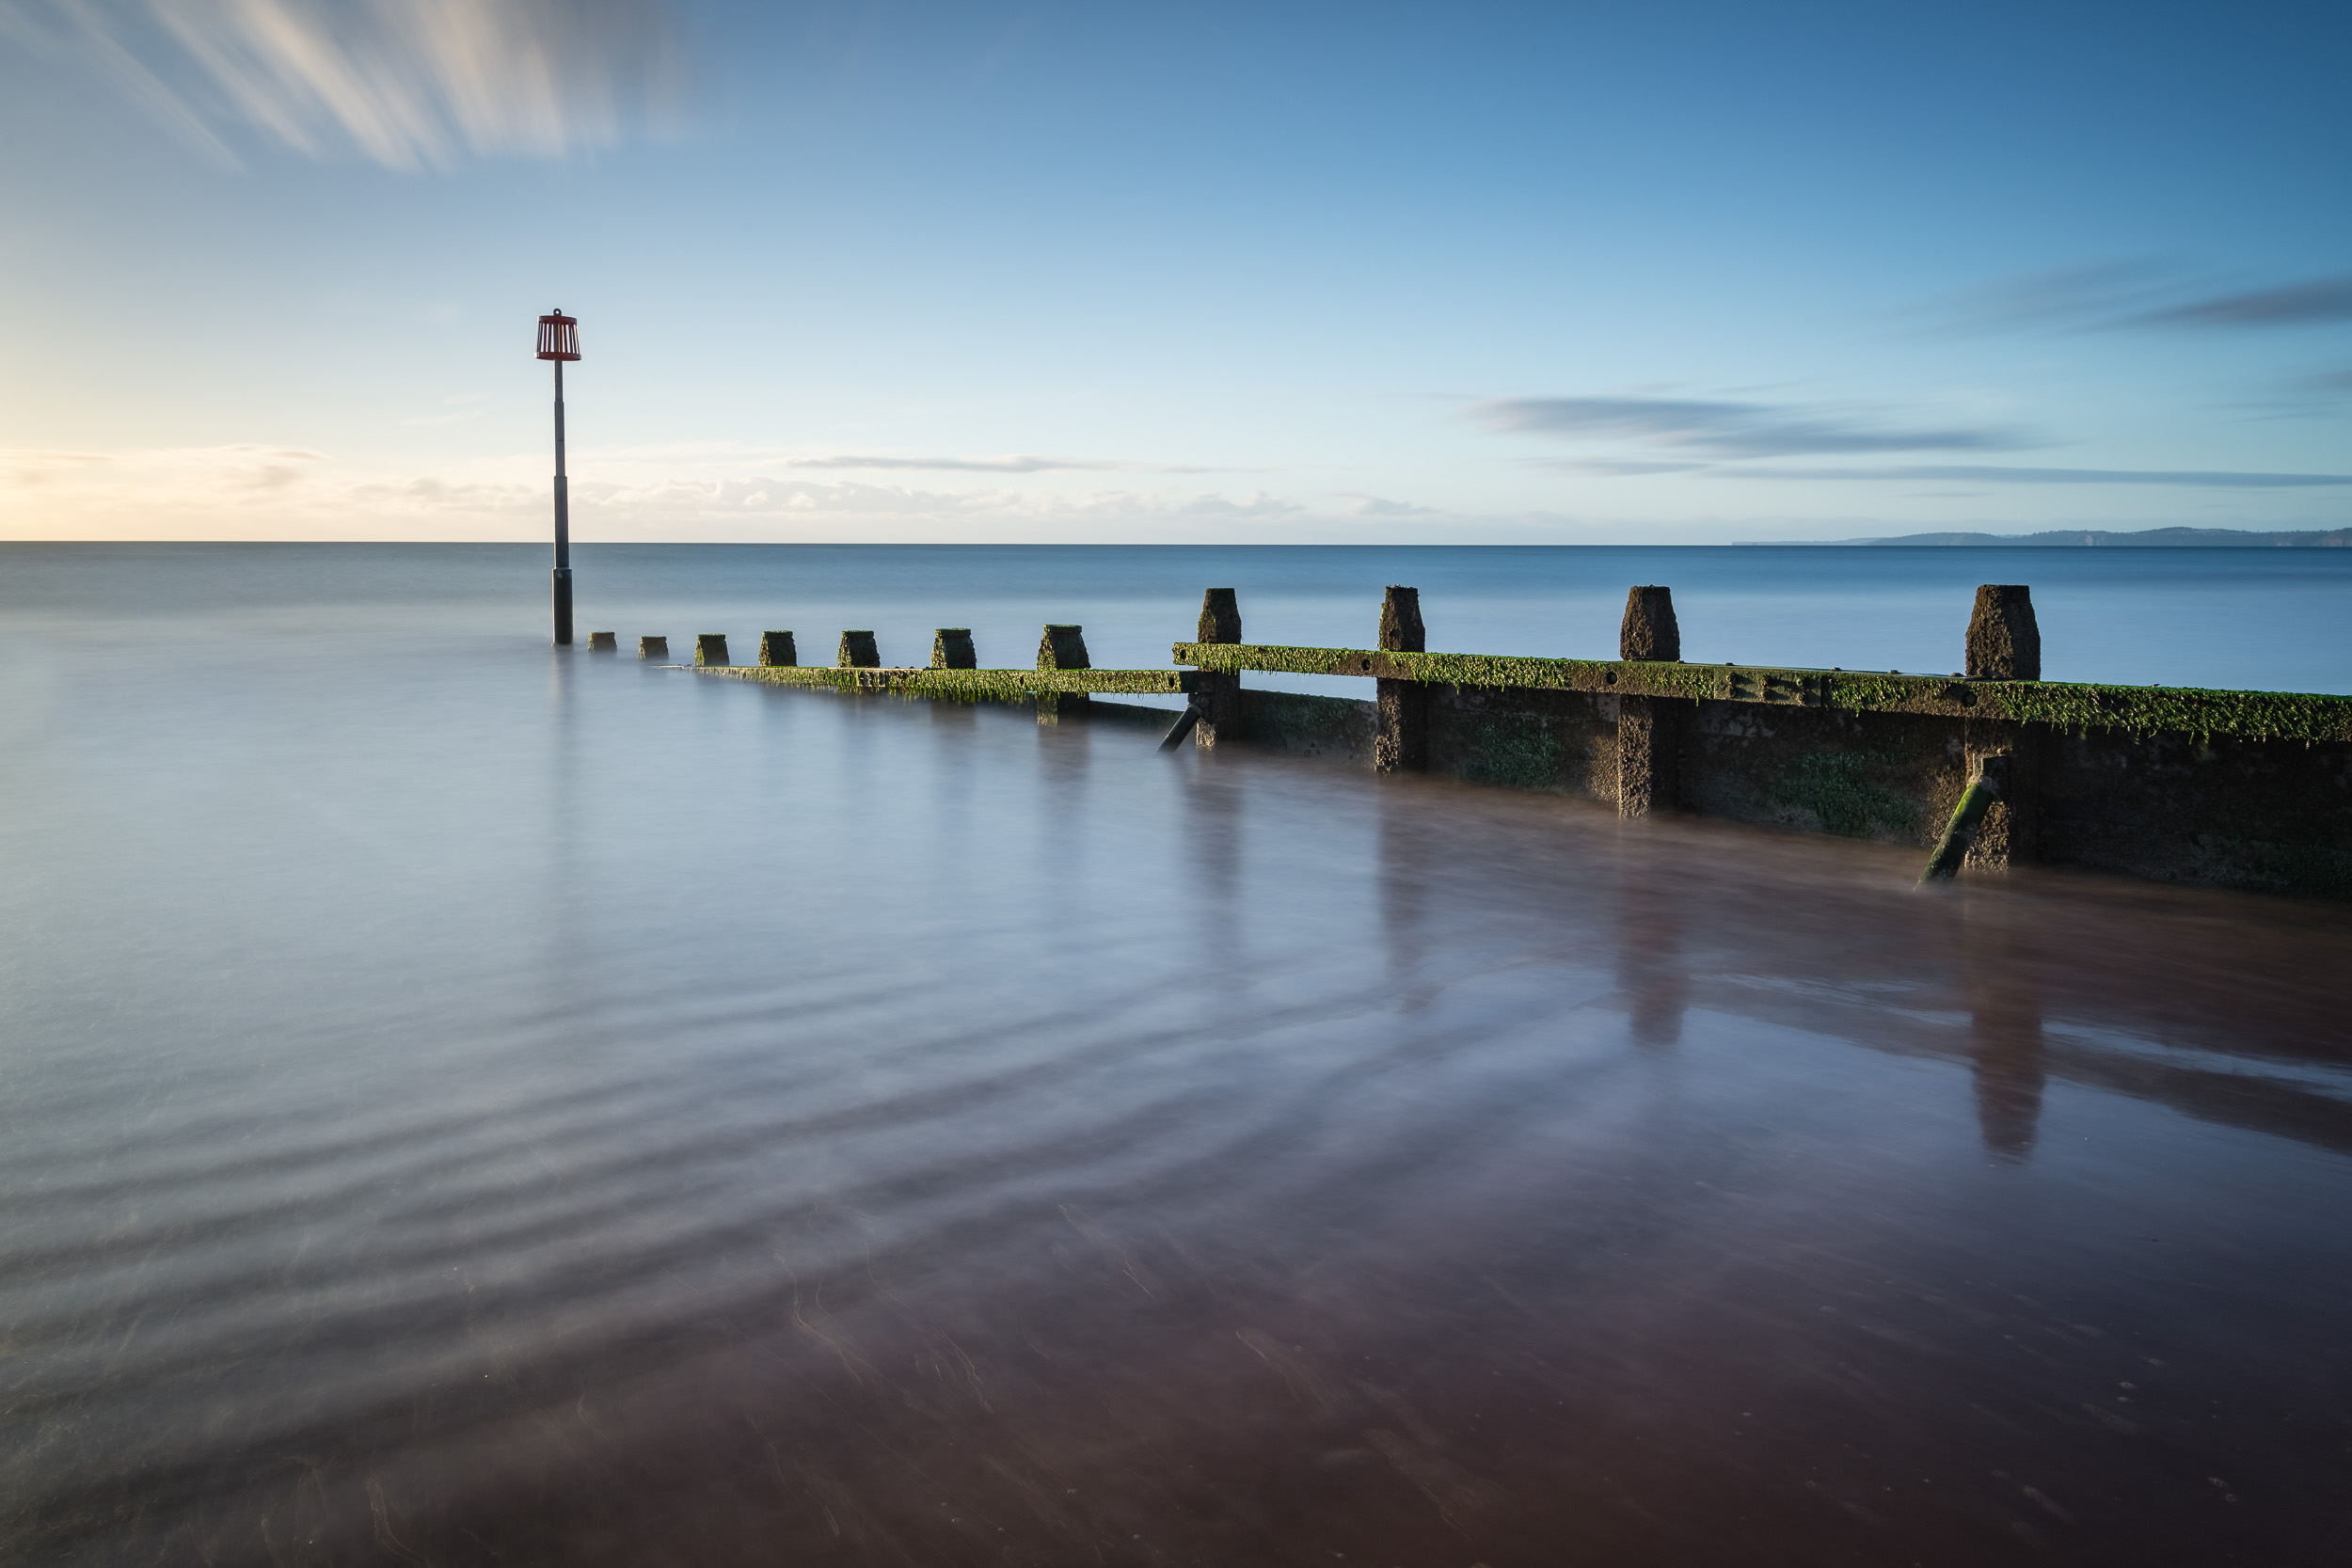
There’s been a location near to home that I’ve been wanting to photograph for a while and that’s the Philip Lucette Light near Teignmouth. I found out about this interesting location from an image I saw from Neil Burnell and a video from Lynne Luxon-Jones. It looked like an interesting subject to photograph and I thought it would make for a great #EmbracetheGrey subject.
In the video below you can follow me along as I photograph this location for the very first time. I also show you how I edit the image to give me a specific look and feel, and I of course make a print of the image. I also discuss in the video the importance of just going out to take pictures, and not to worry about every shot being a masterpiece. After all, we should love the art of taking a picture first and foremost.
Enjoy!
Philip Lucette Light #2, Shaldon, Devon - Nikon Z7, Nikkor 24-200mm f/4-6.3 at 48mm, f/8, 214 seconds at ISO 64, Kase Filters CPL and 10 Stop ND

Bite-Size Blog Post #5 - Two Tors
In the blog this week I visit Dartmoor to photograph one of my regular locations and to photograph somewhere new.
Two Tors
Thanks to the weather, the long days and the company of a good friend I managed to make a few trips to photograph Cornwall. I love shooting the Cornish coast. There’s just so much variety and there always seems to be somewhere new to discover and photograph.
As much as I love Cornwall, I don’t want to completely ignore my local area. In this bite-size blog post, I’m going to share with you some of the photographs I’ve been capturing from Dartmoor. There is a panoramic image from a new location, Bell Tor, and a couple of images from an old favourite, Belstone Tor.
My eyes have been opened to Bell Tor, and the surrounding area and I hope to make a video from this location soon. It has a lot of potential and I’m excited about the possibility of sharing it with you in a bit more detail. In the meantime, though please enjoy the photographs I captured.
Bell Tor
Bell Tor Panorama, Dartmoor, Devon - Nikon Z7, Nikkor Z 14-30mm f/4 at 19mm, f/8, 1/20th sec at ISO 64, 8 image panorama cropped at 6:17.
Belstone Tor
Belstone Tor Sunset #4, Dartmoor, Devon - Nikon Z7, Nikkor Z 14-30mm f/4 at 14mm, f/13, 0.6 sec at ISO 64.
Belstone Tor Sunset #2, Dartmoor, Devon - Nikon Z7, Nikkor Z 14-30mm f/4 at 18mm, f/13, 1.3 sec at ISO 64.
Belstone Tor Sunset #3, Dartmoor, Devon - Nikon Z7, Nikkor Z 14-30mm f/4 at 22mm, f/13, 1.6 sec at ISO 64.

Just One Image
Sometimes you only have time to take one image. Sometimes that’s all you need.
Too Clear, Too Cloudy
In landscape photography there is one thing more than anything else that annoys me and that is the weather. It’s an element I have no control of and it seems that I spend more time checking forecasts than I actually do taking photographs. With shooting time at a premium I’m always keen to make the most of what time I do have by going to locations where the conditions will be optimal. Over the years I’ve discovered this is very difficult. On the plus side it does make those times when it all does come together even more satisfying.
Summer normally brings better weather and more importantly longer days so more opportunities for photography. However, the summer weather recently has been a bit of a mixed bag. It’s either been overcast and dull, or bright blue skies. I know some people can do wonders with their photography in clear conditions but I just don’t get on with it (unless I’m chilling out with a glass of wine). What I really want for my photograph at this time of year is somewhere between cloud and clear. It’s not much to ask is it.
The other night I was faced with another clear sky evening. I had the choice of staying in and being grumpy or heading out to do some exploring instead. As I was keen to discover some new locations I decided on the latter and head out anyway.
Middle Dartmoor
I had a quick look at my custom Google Map and saw a pin against Mel Tor in the middle of Dartmoor so that seemed as good a place as any to head out to. I wasn’t expecting to get any images, but I thought I’d better take my camera anyway. When I arrived at the car park I was presented with some beautiful, panoramic views of Dartmoor.
It was only a short walk to Mel Tor and while I didn’t think there was a photograph to be had there that evening I have made a note to return there for autumn because of the big wide views of the woodland below.
I then had the option of taking a look at Sharp Tor but time was getting on and I rather fancied taking a panoramic image of that view I had seen earlier. I wanted to get a better angle and elevation for the panoramic view though so I jumped in the car and drove towards Corndon Tor.
All You Need Is One Image
By the time I got to the summit the light was starting to fade. Although the sun hadn’t reached the horizon yet I knew the surrounding hills would start casting big shadows so I had to get to work quickly. I set up my tripod, took a test shot (to check for focus and exposure) and then took a series of images for my panoramic photograph.
By the time I’d done that the light was gone. I literally had time to take that panoramic image and that was it. Considering I didn’t think I’d take any images, or any decent images that evening I was pretty happy with the result!
Sometimes all you need is one image. It could be the first image you take, the last image you take, or indeed the only image you take.
Dartmoor from Corndon Down, Devon - Nikon D850, Nikkor 70-200 f/2.8 at 98mm, f/8, 1/5th second at ISO 64, 13 image stitched panoramic cropped to 16:7.

Is It Time to Ditch the Nikon D850?
In this blog post I ponder the idea of going to a mirrorless camera system.
Goodbye D850, Hello Mirrorless?
Some people consider the Nikon D850 the best DSLR there currently is. This might well be true, but cameras with a flapping mirror (DSLRs) are a dying bred. Mirrorless cameras have been on the rise for some time now and at some point I expect the DSLR to go the same way as the film camera.
There are many reasons why mirrorless cameras are better. They generally have better tech in them such as a wider spread of AF points and EVFs. While you could say that mirrorless cameras are technically superior, does that mean if you still own a DSLR that you should be looking to get rid of it as soon as possible and replace it with a mirrorless camera?
We all know that a camera doesn’t make a poor photographer great, but the correct choice of camera can make the process of capturing an image easier or more enjoyable. This is one of the reasons why I upgraded from my D750 to the D850. There was nothing wrong with my D750, it’s just that the D850 had some features that I wanted that ultimately improved my process of capturing images.
I’m now at the stage where I am seriously considering moving to a mirrorless system. Not because there is anything wrong with my D850, it’s just that some of that new mirrorless tech could improve my process of capturing images.
So is it time to ditch the Nikon D850? Let’s find out.
It’s a Matter of When Not If
For me, the move away from the Nikon D850 to the Nikon Z camera system is a matter of when not if. I’m not in a hurry though. After all, my current gear is hardly causing me issues. But, I do believe the Z system will offer me more. A better wide angle zoom in the 14-30 mm f/4, and that all important EVF. Unless I have a change in circumstances, I expect to have, at least in part, moved over the Z system in 2019.
If for some reason that doesn’t happen. I’ll still be capturing wonderful images with my trusty Nikon D850.
Are you considering changing from a DSLR to a mirrorless system? Do you already have a mirrorless camera? Do you have a Nikon Z camera? Let me know in the comments below.
Those Landscape Photographs from Dartmoor
If you want to take a closer look at those images I captured in video from Great Staple Tor, you can check them out below.
A Wintry Dawn on Great Staple Tor, Dartmoor, Devon - Nikon D850, Nikkor 16-35 mm f/4 at 25 mm, f/11, 1/4th sec at ISO 64.
Roos Tor and Great Mis Tor Panorama from Great Mis Tor, Dartmoor, Devon - Nikon D850, Nikkor 24-70 mm f/2.8 VR at 70 mm, f/11, 1/40th sec at ISO 64, 11 stitch panorama.
A Dusting of Snow on Great Staple Tor, Dartmoor, Devon - Nikon D850, Nikkor 16-35 mm f/4 at 21 mm, f/13, 1/6th sec at ISO 64.

Rippon Tor
The weather conditions on Dartmoor can change rapidly so sometimes it's worth hanging about to see if things improve. In the blog this week you can find out if my patience was rewarded when I recently visited Rippon Tor to capture some landscape images.
Big Blue Skies
The weather recently has been a bit of a mixed bag. Some days it's been grey, overcast and frankly a bit miserable. Not that you can't do landscape photography in bad weather, but it can limit your options. At the opposite end of the weather scale is the clear blue sky days. This type of weather is rather pleasant in the winter, but I don't find it inspires my landscape photography.
As I was checking the local forecast on my favourite weather service one evening all I could see was clear blue skies for the following day. It certainly didn't look like optimal conditions for a bit of landscape photography but I'm not one to pass up an opportunity to get out with my D850. As the weather forecast was largely the same for South West as a whole, I decided there was little point in travelling any further than my local area. But where could I go? Dartmoor of course!
Rippon Tor, Dartmoor
My preference when shooting the open moorland of Dartmoor is to have interesting skies. As this was not going to be the case for this shoot, I decided I would get myself to an elevated position. One of the closest high points for me is Rippon Tor at 473m. While definitely not the highest point on Dartmoor, it still offers impressive views of the Haytor area. Even though clear skies were forecast, the elevated viewpoint can help you take advantage of any distance haze in the sky. This can light up nicely in the right conditions and provide some nice interest in the sky when shooting with a long lens.
When I woke the following morning and left the house I could see clear skies and the stars above so it was looking like the forecast was going to be fairly accurate. As I headed up to Dartmoor things started to look very different. By the time I'd reached the car park for Rippon Tor, things looked very cloudy indeed!
It was pretty windy at the top of Rippon Tor, but that was to be expected. What wasn't expected was the amount of cloud. It was that fast moving type of cloud that always looks like it's about to clear but never seems to. Things didn't look much clearer down towards the coast where the sun was going to rise. Not one to be put off I thought it was worth hanging about to see if things would improve.
Just 5 Minutes More
Your enthusiasm can wear off quickly when it's cold and windy on Dartmoor. As the time for sunrise passed and it didn't look like things were going to improve, I was ready to give up and head home for a coffee. No sooner had I zipped up my bag though, the sky started to clear and the sun peaked up over the cloud and started bathing the scene in the soft morning light. I quickly unpacked the camera and took this shot.
Dawn on Rippon Tor, Dartmoor, Devon - Nikon D850, Nikkor 24-70 mm f/2.8 VR at 29 mm, f/11, 1/4 second at ISO 64, Lee Filters Circular Polariser.
In retrospect, I didn't really take enough time to arrange my composition. I think the image would have worked a little better with a slightly more elevated view of the foreground. However, time was very much against me. Though the sun had just risen above the cloud, sunrise itself was a good 15 minutes earlier, and so the light was already getting harsher. I had to work fast to make the most of that lovely morning light on the side of the tor and on the undulations of the ground.
Now that I was back in the mood for taking some landscape photographs I decided I would capture a panorama. On a recent trip Fingle Bridge I met up with fellow landscape photographer Neil Porter and he recommended to me a relatively inexpensive levelling head. This great bit of kit would greatly simplify the process of levelling my camera in preparation for capturing a panoramic image.
The View from Rippon Tor (Panorama), Dartmoor, Devon - Nikon D850, Nikkor 24-70 mm f/2.8 VR at 52 mm, f/11, 1/10th second at ISO 64, Lee Filters Circular Polariser, 9 image stitch cropped at 6:17.
Shortly after capturing that image the weather conditions had improved markedly and in need of a cup of coffee, I decided that I'd had the best of the morning light. As I walked down from the tor I kept thinking about how upset I would have been with myself if I'd been in the car driving home only to see the conditions improve from the road. I was lucky that I hadn't packed up 10 minutes earlier!
How long do you wait before you give up waiting for the weather to change? Has your patience paid off and you've captured an amazing image? Let me know in the comments below.

GREAT Landscape Photography Locations on Harris and Lewis
Looking for a new bucket list location for your landscape photography? In the blog this week, I share with you some of the amazing locations I discovered while photographing two of the Outer Hebrides most famous locations, Harris and Lewis.
Harris and Lewis - Photography Bucket List Locations
I can’t remember when the Isle of Harris and the Isle of Lewis made it onto my bucket list of landscape photography locations. I’m not entirely sure what inspired me to want to go there. Maybe it was a Thomas Heaton video from Harris or seeing some holiday photographs from my sister.
Maybe it wasn’t just one thing, but rather it came through a gradual consumption of media and photographs from this most stunning Scottish location. No matter how it made it on to my list, I had decided that early on in 2018 that I was committed to making the long journey back into my homeland and onwards to the Outer Hebrides.
Immersing Myself in Photography
Time is precious and the amount of time I can normally commit to just doing landscape photography is limited. Things would be different on this trip though. Where my longest landscape photography adventures had normally been limited to a long weekend, this trip would see me commit 9 days. Nine whole days of landscape photography!
Actually, it was going to be nearer to 5 days. From Devon, it’s a two-day drive there and a two day drive back. It is over 650 miles one way, and you also need to get a ferry for part of the journey. That aside, 5 days is way more than I normally get to allocate to my passion. Besides, the journey wouldn’t be so long as I had a mate coming long with me. Plenty of time to catch up and chat.
I also set myself some clear priorities. This trip was going to be all about my photography. The weather gods hadn’t been kind to me in 2018 and I felt I wasn’t taking the images I knew I could. This trip was going to change that and I was going immerse myself in landscape photography.
With the decision to immerse myself in stills photography, I also made the decision not to make creating content for my YouTube channel a priority. The stills photography would be the top priority. My goal for the trip was to capture great landscape images. However, I do love creating content for my YouTube channel so I wasn’t going to go all the way to Harris and Lewis and not film anything.
The Journey Up
Our plan was to get as far as Glencoe on the first day. With a bit of luck, we’d get there before sunset and grab some shots. Fortunately for us, we did and you can see the results in the blog post Glencoe - One Location, 3 Compositions.
Our luck the next day soon ran out though. Not only was the weather not suitable for any sort of landscape photography, but the winds had picked up to gale force and it looked like the ferry crossing would be cancelled. Well, it appeared as if the captain of the boat wasn’t going to let a thing like the wind stop him from sailing, so we eventually left Uig at 9 pm. There wasn’t going to be a sunset shoot on Harris that day, but we were at least going to be making the crossing that evening.
Now the Story Really Starts
It was dark when we arrived in Tarbert, and it was dark when the alarm went off the next day for the first of our sunrise shoots. Having seen nothing of Harris so far we set off in the dark and headed to Luskentyre beach. This is the point where I move the storytelling from the blog to the vlog.
Photographs, Locations and Information
You will have noticed in the video that I didn’t talk about some of the locations we visited. I only showed the photographs. As I said earlier though, I really wanted this trip to be about immersing myself in my photography and not having to worry about talking to the camera.
So you have a more complete picture (excuse the pun) of my trip to Harris and Lewis, the next few sections of this blog post will feature all the images you saw in the video, along with the camera settings, and where they were taken. I hope you will find this information useful and the photographs inspiring.
If you are looking for a bit more inspiration, and more details on some of the locations I visited, be sure to check out Dougie Cunningham's excellent book Photographing Scotland.
Luskentyre Beach #1
No visit to Harris would be complete without going to Luskentyre. I found the photography here so inspiring that I photographed it almost every day.
North Harris from Luskentyre Beach, Isle of Harris - Nikon D850, Nikkor 16-35 mm f/4 at 19 mm, f/13, 3 seconds at ISO 200, Lee Filters Circular Polariser and ND Grad.
Pull of the Tide at Luskentyre Beach, Isle of Harris - Nikon D850, Nikkor 16-35 mm f/4 at 19 mm, f/13, 2 seconds at ISO 64, Lee Filters Circular Polariser and ND Grad.
Dunes of Luskentyre Beach #2, Isle of Harris - Nikon D850, Nikkor 16-35 mm f/4 at 20 mm, f/13, 1/5th second at ISO 64, Lee Filters Circular Polariser and ND Grad.
Northton Saltings
This interesting location is easy to access as it is right beside the road. Take some wellies though!
Stormy Saltings, Isle of Harris - Nikon D850, Nikkor 16-35 mm f/4 at 16 mm, f/13, 15 seconds at ISO 64, Lee Filters Circular Polariser, IRND and ND Grad.
The S in Saltings, Isle of Harris - Nikon D850, Nikkor 16-35 mm f/4 at 35 mm, f/13, 15 seconds at ISO 64, Lee Filters Circular Polariser, IRND and ND Grad.
Northon Saltings from Above, Isle of Harris - DJI Mavic Pro, 1/100th second at ISO 126, 26 mm at f/2.2.
Traigh Mheilein
Not the easiest beach to get to, but worth the walk.
Traigh Mheilein, Isle of Harris - Nikon D850, Nikkor 24-70 mm f/2.8 VR at 32 mm, f/13, 62 seconds at ISO 64, Lee Filters Circular Polariser, IRND and ND Grad.
Stac a' Phris
A spectacular coastline made even more impressive with the Stac a' Phris sea arch.
Turbulent Water at Stac a' Phris, Isle of Lewis - Nikon D850, Nikkor 16-35 mm f/4 at 18 mm, f/11, 1 seconds at ISO 64, Lee Filters Circular Polariser and ND Grad.
Stac a' Phris, Isle of Lewis - Nikon D850, Nikkor 16-35 mm f/4 at 20 mm, f/11, 2 seconds at ISO 64, Lee Filters Circular Polariser and ND Grad.
Sunset at Stac a' Phris, Isle of Lewis - Nikon D850, Nikkor 16-35 mm f/4 at 21 mm, f/11, 5 seconds at ISO 64, Lee Filters Circular Polariser and ND Grad.
Luskentyre Beach #2
The 2nd visit proved even more amazing than the first!
Sunrise at Luskentyre Dunes, Isle of Harris - Nikon D850, Nikkor 16-35 mm f/4 at 18 mm, f/13, 1 second at ISO 100, Lee Filters Circular ND Grad.
Sky Fire at Luskentyre, Isle of Harris - Nikon D850, Nikkor 16-35 mm f/4 at 18 mm, f/13, 0.6 seconds at ISO 100, Lee Filters Circular ND Grad, single image crop at 6:17.
Mangurstadh Stacks
Another dramatic coastal location on the Isle of Lewis.
Mangurstadh Stacks, Isle of Lewis - Nikon D850, Nikkor 24-70 mm f/2.8 VR at 52 mm, f/11, 119 seconds at ISO 64, Lee Filters Circular Polariser, IRND and ND Grad.
Tràigh Scarasta
There are so many beaches to photograph on Harris, but if you like patterns in your sand this one is well worth a visit.
Tràigh Scarasta, Isle of Harris - Nikon D850, Nikkor 16-35 mm f/4 at 19 mm, f/13, 69 seconds at ISO 64, Lee Filters Circular Polariser and ND Grad.
Tràigh Scarasta (ICM), Isle of Harris - Nikon D850, Nikkor 16-35 mm f/4 at 24 mm, f/22, 1/4 second at ISO 64, Lee Filters Circular Polariser and ND Grad.
Tràigh Sheileboist
I know it’s another beach, but even in the wildest of conditions it’s possible to get an image at one of the many golden beaches on Harris.
Tràigh Sheileboist, Isle of Harris - Nikon D850, Nikkor 16-35 mm f/4 at 26 mm, f/13, 30 seconds at ISO 64, Lee Filters Circular Polariser and ND Grad. Single image crop at 6:17
Luskentyre Beach #3
Last of the Luskentyre images…promise! (It was such an amazing location!)
Tranquility at Luskentyre, Isle of Harris - Nikon D850, Nikkor 16-35 mm f/4 at 19 mm, f/13, 3 seconds at ISO 64, Lee Filters Circular Polariser, ND and ND Grad.
Sand, Wind and Time, Luskentyre, Isle of Harris - Nikon D850, Nikkor 16-35 mm f/4 at 25 mm, f/13, 25 seconds at ISO 64, Lee Filters Circular Polariser, ND and ND Grad.
The Pastel Shades of Luskentyre, Luskentyre, Isle of Harris - Nikon D850, Nikkor 16-35 mm f/4 at 18 mm, f/13, 144 seconds at ISO 400, Lee Filters Circular Polariser, ND and ND Grad.
Luskentyre Beach Panorama, Isle of Harris - DJI Mavic Pro, 1/50th second at ISO 161, 26 mm at f/2.2, 9 image stitch cropped at 6:17.
A Tearful Goodbye
After 5 whole days of photography, it was sadly time to go home. We were really rather lucky with the conditions we got. The Outer Hebrides aren’t exactly known for settled weather but we managed to make it out every day with the camera. Some days were definitely more challenging than others, but even in wild conditions this magical place had something to offer.
As for the trip home ,that was similar to the trip up. The ferry was delayed due to bad weather so no chance of a sunset shoot back on the mainland, and the conditions the following morning were flat grey and overcast. As we headed down the M6 past the Lake District I didn’t even feel bad for passing it by as I had memory cards full of amazing images and video.
I do hope this blog post and video has given you a sense of not only what my adventure was like, but also what it is like to photograph Harris and Lewis. It truly is one of the most amazing landscapes I’ve ever photographed. From its dramatic coastal locations, grand mountains and open moorland, it never failed to surprise me. There was a real sense of awe. I grew up in the highlands of Scotland and now live in Devon so I know a good landscape, but Harris and Lewis were something special.
Are you planning a trip to the Outer Hebrides? Which photograph or locations was your favourite? What locations are on your bucket list? Let me know in the comments.

Drones, Landscape Photography, and Holidays
Is the drone the perfect camera for the landscape photographer on holiday? I think so and in the blog this week I tell you why.
Relax, I’m on Holiday
When I go on holiday with my family, I really try and forget about landscape photography for a bit. But, the trouble with being a landscape photographer is that your brain is wired a particular way. For example, it is literally impossible for me to watch a nice sunset without a part of me wishing I was photographing it.
Fortunately for me, my desire to get up really in the morning diminishes when I'm on holiday, and a cheeky glass of wine in the afternoon means that I can't just jump into the car and head out to take pictures. But this does mean that I do actually enjoy my holiday, relax and have fun with my family.
Talking about balancing photography and family, there is a very good article on Nature TTL’s website called The Delicate Balance of Photography and Family Life, which is well worth a read.
Always Have One Eye on the Weather
Another odd by-product of being a landscape photographer is that I like to check the weather forecast. A lot. And in detail. Even though I was on holiday, and I had no plans to take any landscape photographs, I couldn’t help but to check the weather forecast on my favourite website yr.no. As I drank a glass one evening I checked the weather forecast for the next day and noticed something interesting.
The weather that caught my interest was the possibility of mist or fog. How did I know that there was a chance of mist? After reading the excellent book From Dawn to Dusk - Mastering the Light in Landscape Photography I had learned that mist can occur when the outside air temperature is close to the dew point, and wind speed is very low. These were the very conditions that were forecast for the next day.
However, even with such interesting conditions forecast, I didn't really have the motivation to get up, go out and find something to shoot early the next morning. I was in full holiday mode.
Misty Mornings
When I woke up the next morning and looked out the window, all I could see was mist. This was all very exciting but it was all a bit late to go anywhere. I was just about to get the coffee on the go when I had a bright idea. What did the landscape look like from above? Well, that's an easy question to answer when you have a drone.
With the coffee brewing away I sent the drone up into the air, just a few feet from my door. Though forward visibility wasn't great, vertical visibility was a lot better and I could clearly see the drone just above me. After a short ascent, I could see mist covering the landscape. It looked amazing! I just knew there was a photograph to be had from my elevated viewpoint. There was just a little too much mist at this point to make an interesting photography, so I brought the drone down and had a coffee.
A short while later I sent the drone back up and captured this image:
Trees in the Dawn Mist - DJI Mavic Pro, 1/1000th sec at f/2.2, ISO 100, 6 image stich cropped at 6:17.
The Perfect Camera for the Landscape Photographer on Holiday
I don't capture a lot of still images with the drone but that's twice now that I've used it to capture a landscape image on holiday (you can see the first one here). I've now come to two conclusions. Firstly, the drone really is a great addition to my landscape photography kit bag. There is no practical way I could have captured that image without the drone. That little bit of elevation the drone gave me opened up a whole new view on the landscape allowing me to capture an image which showed how the mist was covering the landscape.
The other conclusion I came to was that I think the drone may be the perfect camera for the landscape photographer on holiday. Why? Well, it allows you to take photographs without even leaving the comfort of your holiday home! I don't need to sneak off early in the morning or stay sober past 4 pm. Even the kids find it interesting. As long as I'm in a location where it's possible to fly and there is a composition to be made, I can scratch that landscape photography itch.
I know some photographers do manage to indulge their passion for landscape photography while on holiday, but I find it rather tricky, and would actually prefer not to spend large amounts of my holiday time out taking photos. This is why the drone is so useful. It's fun, accessible, doesn't require me to go out for hours, and I can do it from wherever I'm staying.
Do you separate yourself from photography while on holiday? Do you take landscape photographs with a drone? Let me know in the comments below.
Bonus Video
I also captured a 360-degree video of the misty landscape. Enjoy!

Creating Coastal, Long Exposure, Panoramic Images with the Nikon D850
Have you ever taken a coastal, long exposure, panoramic image before? Well, that's just what I did in my latest video. Sometimes you need to see a scene a little differently to get inspired in a big way.
Getting Inspired
Over the years I've visited Froward Point on the south Devon coast a few times. Despite many attempts I've never really captured an image from that location that I'd really been happy with. In fact, I'd just about given up on it as a location.
However, after being inspired by the work of another local photographer, I thought Froward Point might be worth another visit. This time though, I would leave most of my gear behind, travel light, and wander along the coast path a bit more. Rather than go back to the same spot I always end up going to, I would see what other viewpoints there might be.
Sure enough, as I walked along the coast path I got to see a view of rocks near Froward Point in a totally new way! My creative brain got all excited by the new compositions that I could make photographs from. For me, the scene instantly said that this coastal image would be a long exposure, and would be best suited to the panoramic format. I even thought it would work best on a grey and overcast day.
With a clear vision of what I wanted to photograph, I just needed to return at the right time when I had the weather conditions were right and the tide was high. Here is what happened when I did finally return:
As you'll have seen this video was a bit longer than normal, but I wanted to take you through my thought process, how I set up the camera, and how I eventually captured then printed the final image.
So have you ever captured a coastal, long exposure, panoramic image before? What photography techniques have you combined before? Let me know in the comments below.
The Photographs
A Coastal Long Exposure Panorama - Froward Point, Devon: Nikon D850, Nikkor 70-200 mm f/2.8 at 70 mm, 20 secs at f/11, ISO 64, Lee Filters Circular Polariser. 5 Image stitch.
On an Island - Froward Point, Devon: Nikon D850, Nikkor 24-70 mm f/2.8 at 58 mm, 105 secs at f/6.3, ISO 64, Lee Filters Circular Polariser. 5 Image stitch.
Islands in the Blue - Froward Point, Devon: Nikon D850, Nikkor 24-70 mm f/2.8 at 29 mm, 40 secs at f/11, ISO 64, Lee Filters Circular Polariser.

Can You Print Images Captured from a Drone?
In the blog this week I look at printing images that were captured using a drone. Is there sufficient resolution and quality to justify making a print?
Capturing a Panoramic Image with a Drone
I'm a big fan of drones. I think they are an amazing bit of technology. Though I've taken still photos with my drone before, it is the video features that I use the most. The aerial footage you can insert into a vlog really helps tell the story of the location.
A few weeks ago though I published a video called Creating Panoramic Images of Glen Etive with a Drone. In the video, I used the drone to capture a big panoramic image of the Loch Etive area where I was staying on holiday. It was an image that I couldn't have captured if it wasn't for the drone.
Can You Print an Image Captured from a Drone
When the video was published a few people asked the question about how the image looked in print. After all, the camera sensor in a drone like the DJI Mavic Pro is nowhere as advanced as the sensor in my D850. However, does that mean that the images from a drone aren't worth printing?
As I'd never printed an image captured on one of my drones before I thought it would be a good time to find out. So, can you print an image captured from a drone? Let's find out.
As you saw in the video, it was more of a question of is their sufficient quality from a drone image to justify making a print. I think the answer is definitely yes. As long as the image is well composed and has good light, there is more than enough detail in the DNG files captured on a DJI Mavic Pro to justify making a print.
In the video, you also saw me try out a paper that I haven't used before. It was the Fotospeed Smooth Cotton 300. I really like this paper and this was my first time making a large print on a matt paper. You can really feel the weight of the paper and the surface has a real feel of quality about it. I think I'll need to try a few more prints using some of the matt papers I have in my Fotospeed Matt Smooth Test Pack.
So do you own a drone? Do you take still images with it? Have you ever printed a drone image? Let me know in the comments below.
Loch Etive Panorama - Taynuilt, Argyll: DJI Mavic Pro, 1/125th sec at f/2.2, ISO 100, 26mm (35mm equiv'), stitched from 9 DNG files
Some of the links used in this article are Amazon affiliate links. By buying through the links I may receive a commission for the sale. This has no effect on the price for you.

Creating Panoramic Images of Glen Etive with a Drone: A 5 Minute Photo Adventure
In this blog post, I share with you the story, photographs and video of how I went about creating some aerial panoramic images with my DJI Mavic Pro drone.
Over the last couple of weeks, I have told you about my recent photography adventures to the Dalveen Pass, and to Kilchurn Castle. To be honest, given both these adventures were undertaken while on a family holiday I thought I was doing really well. After all, I was supposed to be spending time with my family.
Beinn Duirinnis
Landscape photograph aside one of the things I was most looking forward to doing while visiting Scotland was getting up into the hills. Or to be more precise the mountains! I love Devon. It's a beautiful county but I do miss walking the hills and mountains of the Scottish highlands.
When I suggested to my brother-in-law that maybe we should climb a Munro while I was visiting he couldn't have said yes fast enough. However, there was one slight problem. Despite it being April, there was still a lot of snow on the upper slopes of the higher mountains. Unfortunately, my skills as a hill walker don't include snow so we had to revisit our plan.
Almost directly opposite to where I was staying is a hill called Beinn Duirinnis. At only 550 m this was much more likely to be snow free. However, it would deliver magnificent views of north up Loch Etive towards Glen Etive. This was highlighted in Jager Scot's video and I thought a trip up this mountain might mean another chance for some landscape photography.
Unfortunately for me, Mother Nature hadn't finished delivering snow to Scotland, and an unexpected overnight dumping of snow meant that even Beinn Duirinnis became out of reach. Another plan was needed!
Landscape Photography from Your Back Garden
With almost every local mountain out with my skill set, I decided I would try something a little different. I had been playing with the drone a few days taking some panoramic images of the surrounding landscape. This got me thinking. Perhaps I could do some landscape photography without even leaving home and maybe produce a video to go with it!
With all the extra snow on the hills, I decided to send the drone up and see what I could capture. Here is how I got on:
As you saw, a drone can really open up some new creative options. It would have been impossible to capture those images without a drone. While I haven't used the drone that much for stills photography, this really did open my eyes again to the possibilities that this amazing bit of technology can offer.
Do you have an amazing view from your garden? Do you use a drone for stills photography? Let me know in the comments below.
Those Images
Here are those panoramic images you saw in the video. Enjoy!
This is the image I shot the evening I made the video. DJI Mavic Pro, 1/125th sec at f/2.2, ISO 100, 26mm (35mm equiv'), stitched from 11 DNG files.
I took this image a few days before I shot the video. I much prefer the light in this one. DJI Mavic Pro, 1/125th sec at f/2.2, ISO 100, 26mm (35mm equiv'), stitched from 9 DNG files.

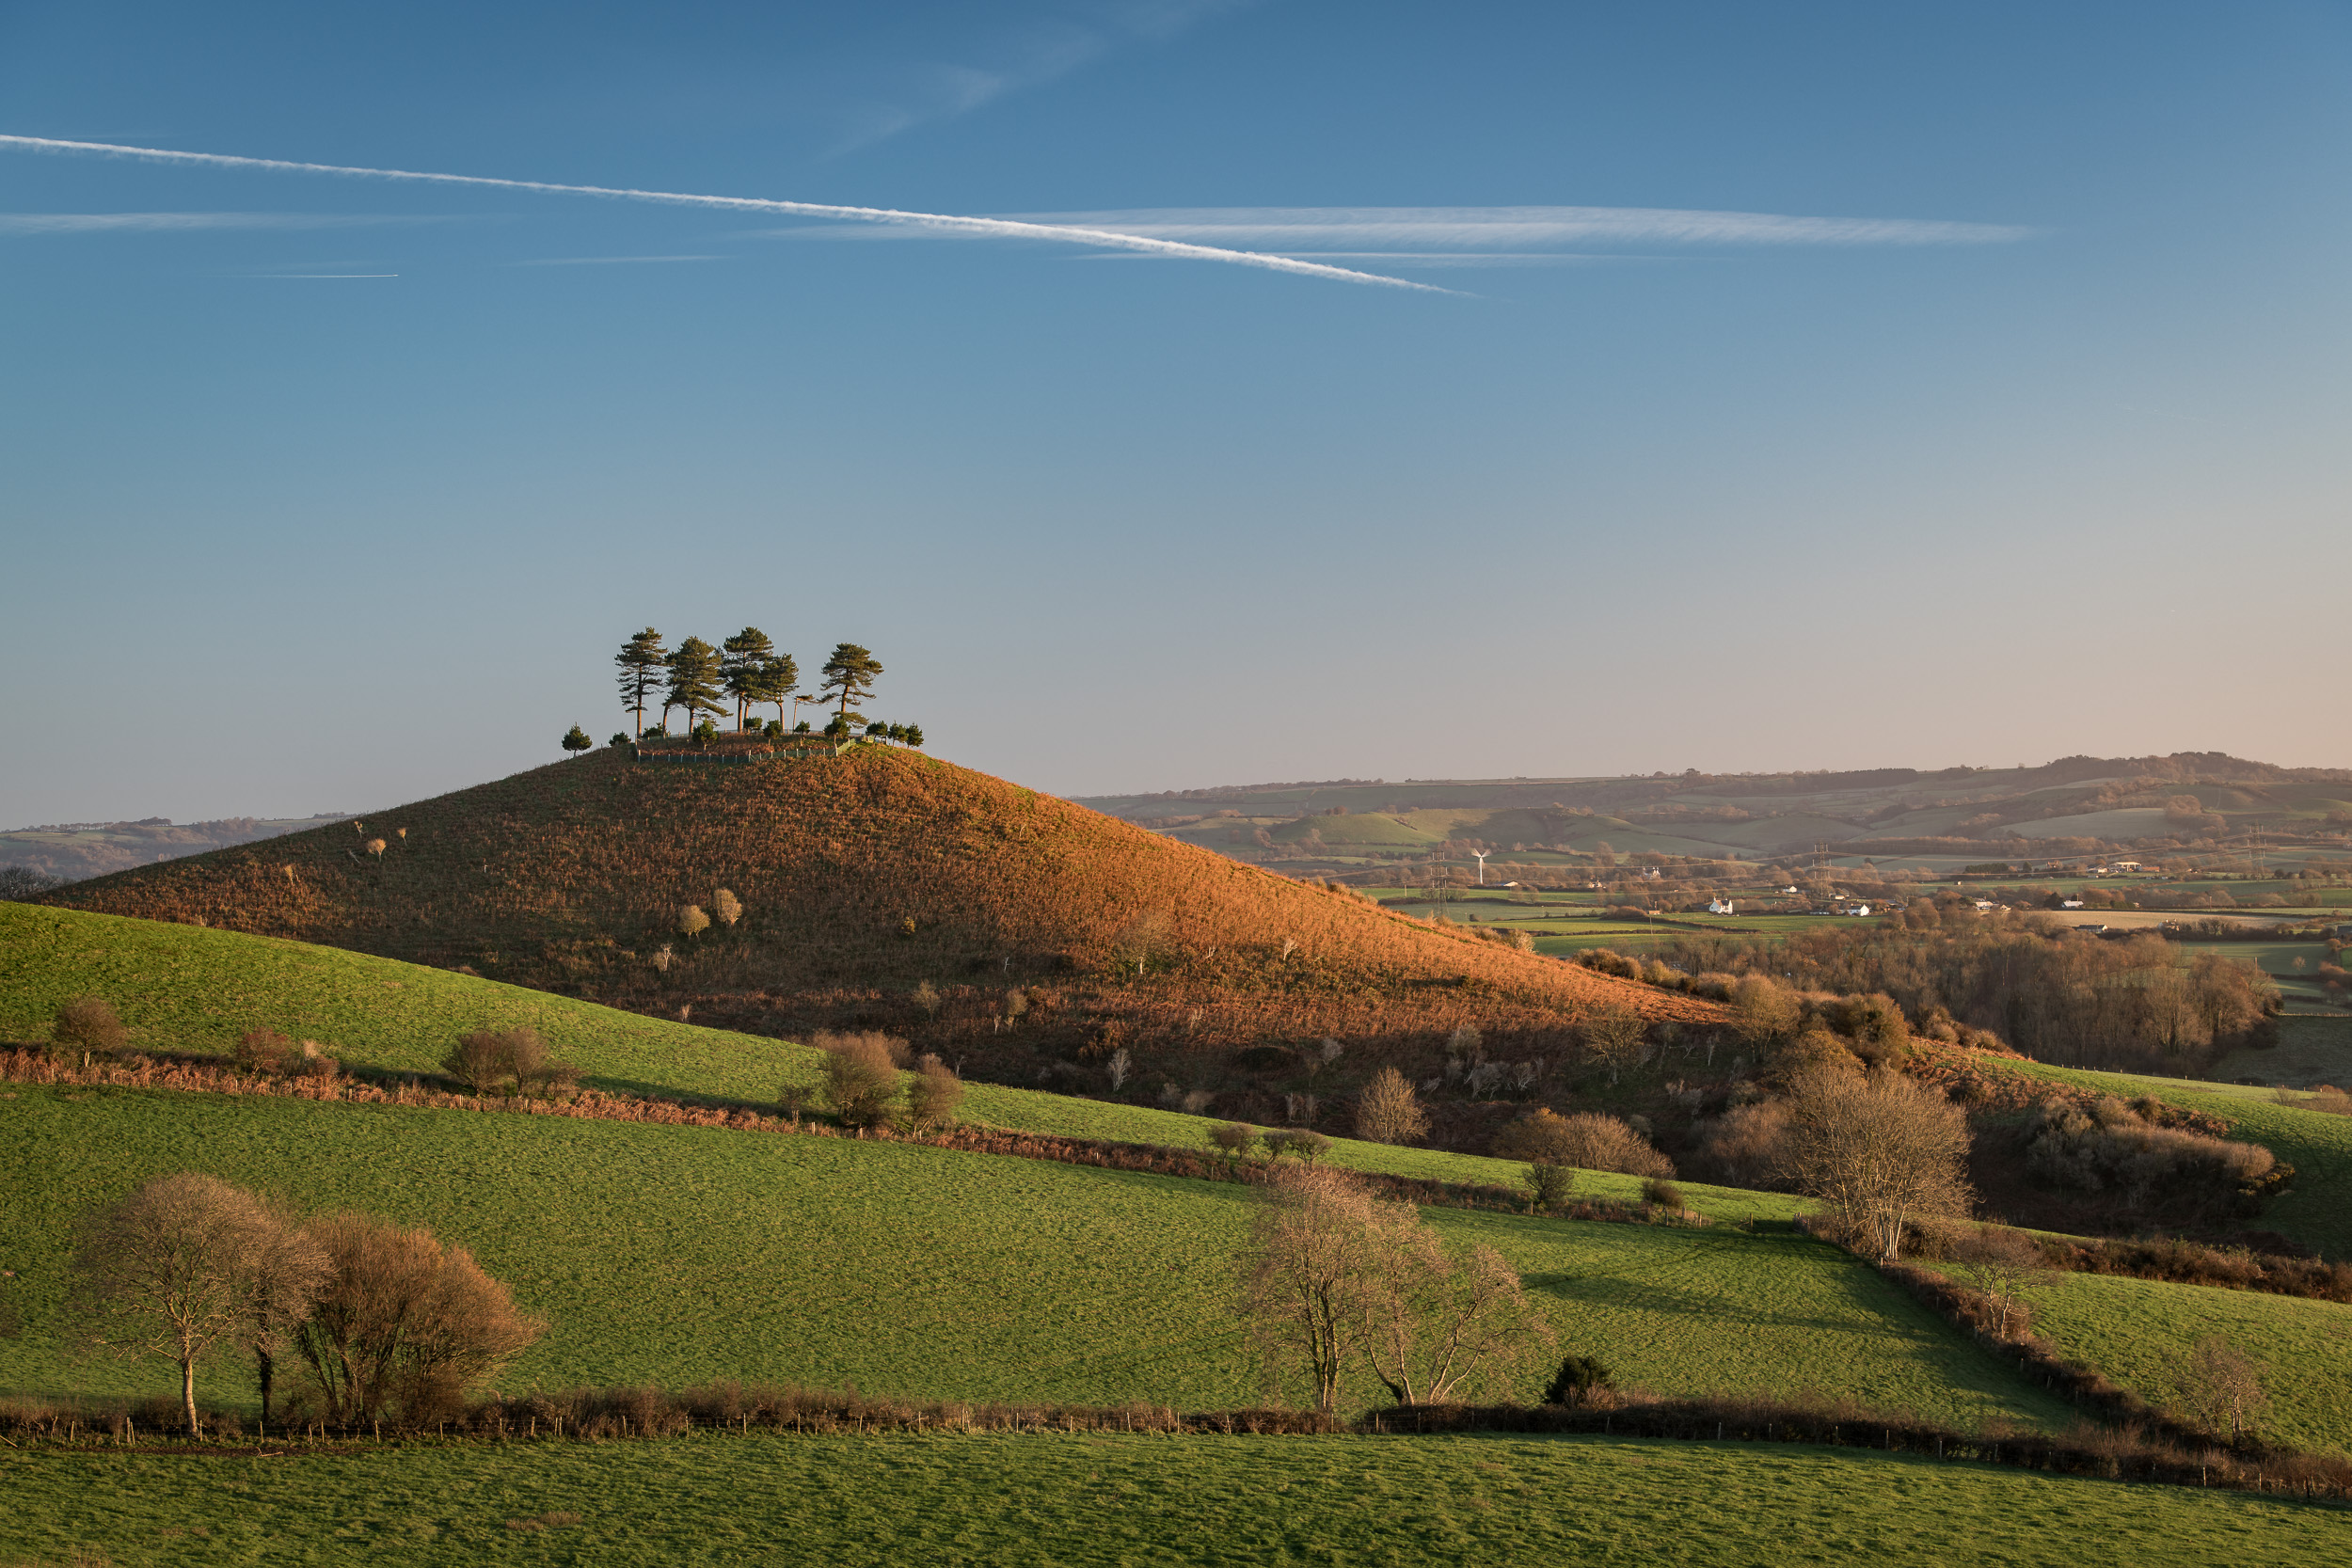
First Shoot of 2018: Colmer's Hill
In the blog this week I head out to Colmer's Hill in Dorset for my first shoot of 2018. With fog forecast, would I get the shot from that location that I'd always wanted?
Getting Back into Gear
Landscape photography in January can always be a bit of a hit or a miss but after a two-week break from photography, I was itching to get out again. I had been editing my Winter Solstice Adventure video over the festive period and despite the obvious ups and downs of that day, it had inspired me to get back out with the camera as soon as possible.
During winter my ability to get out with the camera is limited and for the first weekend of January, I only had the possibility of getting out on Saturday morning. Typically though, the weather across the south-west was dubious. To get any decent conditions I would have to travel further than I had time for, and depending on where you looked, the local forecast was everything from blue skies to fog on Dartmoor.
Though I couldn't get a concrete forecast for the Bridport area, there was a chance that fog would be there first thing in the morning so I decided to take a risk and head out to Colmer's Hill. I'd always wanted to capture the peak of Colmer's Hill poking out from mist covered landscape. Maybe this would be the morning!
At Colmer's Hill

An early morning shot from my normal dawn spot. The light wasn't great.
I've photographed Colmer's Hill a number of times now. You can read about some of my previous visits, here, here, and here. With a vision of photographing the hill in fog or mist, I headed straight for the viewpoint at the bottom of Quarry Hill. This lower elevation viewpoint places the top of the hill just above the horizon making it ideal for the type of shot I wanted.
Once there, there wasn't much in the way of low lying fog, but there was still enough interest in the sky to potentially make a good image. It soon became apparent though that light from the rising sun would be slightly later than the documented sunrise time due to a large bank of cloud. So as I was waiting, getting colder, I looked to my left and noticed the hill Eype Down.
Same Location, Different View

A slightly different viewpoint, but still terrible light!
I had originally become aware of this viewpoint when reading Mark Bauer's excellent book Photographing Dorset. So rather than stay where I was and get a shot similar to some of my previous efforts, I decided to grab my bag and tripod, and head to the viewpoint in Mark's book.
It was interesting to see Colmer's Hill from a slightly different angle. Unfortunately, the conditions hadn't improved much, and direct sunlight hadn't made an appearance, but at least I had checked out another viewpoint of one of my favourite locations in Dorset.
Practising Perfect Panoramas
If you watched my recent video, Developing a Passion for Printing, you'll have seen me print a panoramic image of Glencoe. In the video, I also promised myself that I would attempt to take more panoramic images. Though I had learned more about the technique while on a workshop in Glencoe, I was still a long way from being proficient at creating them. So as the conditions weren't ideal for the photograph I was hoping to make, I decided to practice my panoramic technique.
Nikon D850, Nikkor 70-200 mm f/2.8 at 110mm, ISO 64, 1/80th second at f/8. The light was better when I took this image, but my composition options were limited by a line of trees just below the edge of the frame.
Don't Leave Too Early!
After getting a couple of shots from my new viewpoint and practicing my panoramic technique I decided to give up and head home. It was nearly 9 am and I didn't think I was going to get any decent light at this stage. Just as I packed my tripod up and started to head down the hill, I started to see some nice light on the side of Colmer's Hill.
It was spectacular light, not by a long shot, but better than I had seen all morning. I quickly ran back up the hill and set my camera up again. Fortunately, I hadn't need to use filters all that morning so it didn't take too long to get back to a shooting configuration.

Nikon D850, Nikkor 70-200 mm f/2.8 at 1145mm, ISO 64, 1/50th second at f/8. Better light for this shot, but still nothing to get excited about.
While those images were only marginally better, it did remind not to leave a location until you are really, really sure you're not going to miss anything!
So how has your photography been in 2018 so far? Have you ever left a location a little to early and regretted it? Let me know in the comments below.

Developing a Passion for Printing
In the vlog this week I expand my printing skills by printing a panoramic image on panoramic paper and then mounting it into a custom-made panoramic frame. I also take a look at some different paper types to try and see what impact each one has on an image.
Discovering the Joy of Printing
Back in April of this year, I wrote about how I purchased a new Canon Pixma Pro-10S printer while I was at The Photography Show in Birmingham. You can read why bought a printer and watch the video I made on my first experiences of printing, in my blog article Discovery the Joy of Printing.
Ever since then I've been printing my images. A lot. And I have to say it's been a lot of fun. I've enjoyed the experience of going out to make an image, post-processing it, and then creating a print at the end.
Developing a Passion for Printing
I have however been keeping things relatively simple. I've been using standard paper sizes, using Canon's Platinum Pro glossy paper. The results have been great. Prints match what is on the screen and the whole workflow is straightforward.
However, there any many different paper types from many different paper manufacturers, so I thought it was about time to expand my printing horizons. In the video below I take one of my favourite panoramic images and print it on some panoramic paper from Fotospeed, and then mount it in a custom frame from Picture Frames Direct. I also take another one of my favourite images of the year and print it on some different paper types.
These are the images I printed in the video.
Nikon D750, Nikkor 24-70mm f/2.8 VR at 20mm, 1/3 sec at f/11, ISO 100, 7 image panorama.
Nikon D850, Nikkor 16-35mm f/4 @ 18mm, ISO 100, 5 sec @ f/13, Lee Filters circular polariser and ND grad.
Well, I hope you enjoyed my follow-up video on printing. As you can see I've still got a lot to learn, but I'm really enjoying the challenge. I get a great sense of satisfaction on owning the entire process from capture to print.
Have you recently taken up printing? Are you an experienced printer? Do you have any advice on printing? Let me know in the comments below.

Landscape Photography with the Mactrem AT64C Tripod
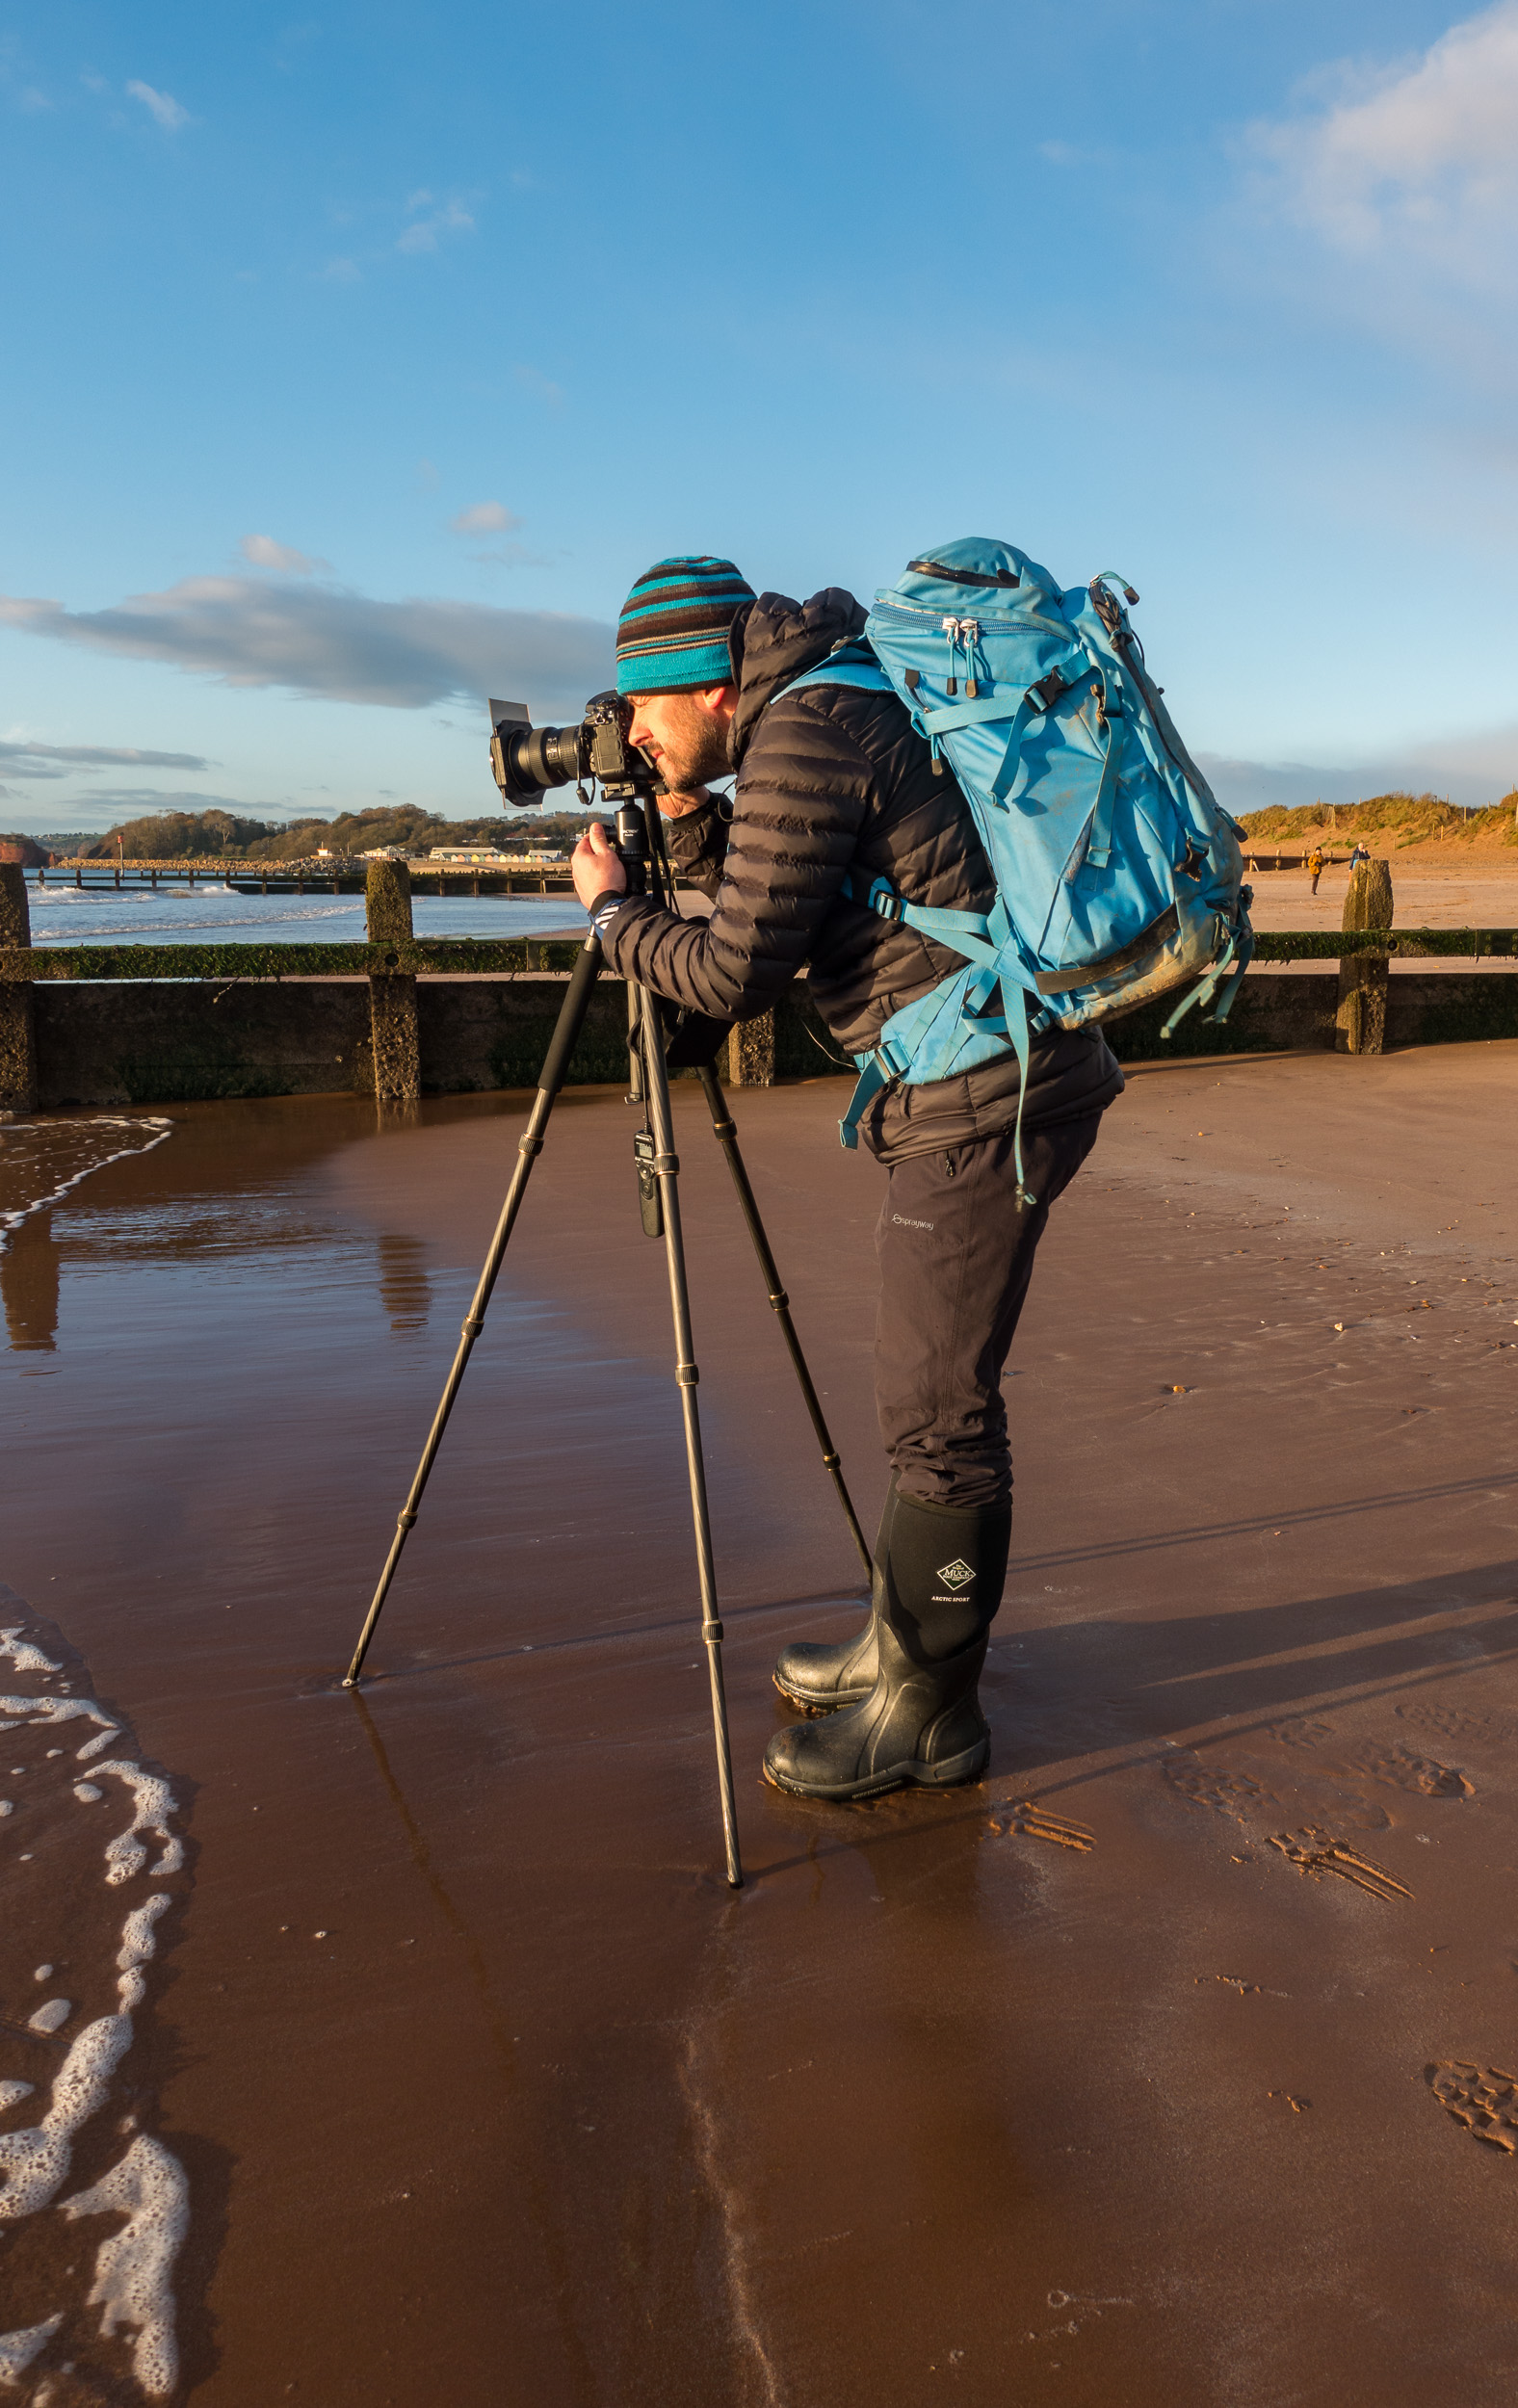
In the blog this week I take the Mactrem AT64C Carbon tripod on location to shoot some landscape images to see how it copes with real-world situations. Join me in my video review as I photograph long exposures at Dawlish Warren, use a long lens at Colmer's Hill, and take panoramic images from Pilsdon Pen. Finally, I give you my thoughts on this tripod. Is it worth buying?
Reviews On Location
When Mactrem reached out to me to review their AT64C carbon tripod I thought it would be a great excuse to go out and do some landscape photography. Not that I really need an excuse. I fairly well self-motivated when it comes to landscape photography!
For this review, I didn't want to just unbox the tripod and discuss the technical specs from the comfort of my home. That would be a bit boring wouldn't it? So I thought I would do my review a little differently. I would put the tripod to use in some real-world scenarios, capture some images and share my thoughts on both the photography and the tripod.
By doing this I would not only educate the viewer on the tripods performance on location but for anyone just interested in landscape photography there would be something there for them as well.
Reviewing to Mactrem AT64C Tripod
So regardless if you want to know more about this tripod or you just want to see me shoot some landscapes, I hope you enjoy this video:
I do hope you enjoyed this video and that you either found the review helpful or just liked the photography bit.
If you want to purchase one of these tripods then you can purchase one from Amazon.co.uk by clicking on this link here. Also, until 15th April 2018, if you enter the code UWSN5IQD at checkout, you will receive £15 off the price of the tripod.
So what tripod and head do you use? Would you like to see me do more product reviews on location like this one? Let me know in the comments below.
PS. Keep reading as below I'm going to share with you the images that I took at all the locations, along with some shots of me using the tripod.


Landscape Photography in the Lake District
In this blog post I write about my 2 day photographic adventure in the Lake District. Read about how despite the challenging weather I still came away with some great images and a sense of satisfaction.
Escape to the Lakes
When a photographer friend of mine invited me to spend a couple of days shooting the Lake District in the height of autumn I literally jumped at the chance. Over the last decade or so I had visited the Lake District a number of times with my family and enjoyed it immensely. After all if you like the outdoors there really isn't much not to like about the Lake District. This was going to be a different type of visit though. This visit was going to be all about photography and I couldn't wait!
The plan was to spend two full days shooting various locations around the Keswick area taking in tarns, lakes, hills and of course the odd jetty. Our only restriction was dates. Free time for photography has to fit in around family and work time, so when we picked our dates we were committed, no matter the weather.
November seemed to take an age to come round but when it did my levels of excitement had almost become palpable. I had packed my stuff two days prior to departure and when I did hit the road the 300+ mile journey flew by. I couldn't wait to get shooting but as I would soon find out, the Lake District weather was going to be typically British.
High Brandelhow Landing
It was a 5:30 am alarm call on the first day and despite the lack coffee I was in high spirits and ready to get shooting. Our first stop was High Brandlehow Landing, a pier on Derwentwater. It's a classic Lake District composition with a pier but it was an ideal location to get the photography brain into gear.
My first instinct was to shoot the pier vertically but I actually ended up preferring the horizontal version. Using the Little Stopper at ISO 100, f/11 gave a 2 minute exposure but I was loosing the detail in the sky. Setting the camera to ISO 200 gave me a one minute exposure maintaining some texture in the sky.
Stock Ghyll
Despite the sky being almost completely overcast it had been a reasonably successful start to the day. After breakfast though the weather turned rainy so we decided to head into the woodland at Ambleside and walk along Stock Ghyll.
Photographing Stock Ghyll was a real challenge as I spent most of the time clearing rain water from the camera. I found it difficult to concentrate on my composition. I later tried to shoot the waterfalls but couldn't really find a composition I liked.
Grasmere
After drying out over a pub lunch we took the short drive down to the southern end of the lake at Grasmere. Though it had stopped raining the weather remained resolutely overcast which was a shame as there was barely a breath of wind and the reflections were stunning.
Lovely reflections, just a shame about the light. This image is a 2:1 crop from the original frame.
Latrigg Fell
With a renewed sense of optimism on the morning of day 2 I headed down to the hotel lobby to meet my friend. Unfortunately he was taking shelter from the down pour of rain. Not to be put off we checked our respective weather forecast apps and agreed that an ascent of Latrigg Fell could be rewarded with some nice light come sunrise.
The weather at dawn was not great but we dug in and waited.
As time progressed some splashes of light started to appear on Cat Bells. This image is a 3:1 crop of a 9 vertical image panoramic stitch.
The dawn light struggled to get through the clouds but when it did it provided little moments of magic. This is 16:9 crop from the original frame.
Castlerigg Stone Circle
While ancient stone circles don't necessarily offer a lot of interest for me, the location of Castlerigg Stone Circle is still an interesting location to shoot. You don't necessarily need to include the stones in your compositions.
Bad weather can work in your favour as well. I just needed to wait for a break in the light which came and went in the space of seconds. You just have to stand there with the finger on the shutter....waiting....till you get that fleeting moment of light.
As I've written about before, its important to look around to see what else is happening. I was focused so much on getting the previous image that I almost missed this one.
Tarn Hows
After our trip to Castlerigg we headed up to Ashness Bridge. It was a short stop as no sooner had we got our cameras out it started to rain heavily. So as we approached the end of day 2 we decided that we might try and catch last light at Tarn Hows. The weather hadn't exactly been kind to us up to that point and unsurprisingly it didn't improve that much.
This scene just need a splash of light on the trees but it wasn't to be.
Cat Bells
I was due to make the long trip home the morning of the 3rd day, but I couldn't resist one more dawn shoot. My friend had hit the road at 4am to go home, so as I was on my own I decided I would make the 450m ascent of Cat Bells. Despite the the previous two days of poor weather, I remained optimistic as the weather forecast looked like it might produce some nice early morning light.
My vision for this image was to get some morning light break over the fell peaks (Robinson and Red Knot). I waited and waited but this was as good as it got.
As is often the case in the Lake District, the moments of good light are brief but wonderful. This image of Rigg Beck and Causey Pike is a 3:1 crop from a single frame.
I was on my way down from Cat Bells and looking forward to breakfast but sometimes you just have to stop and unpack all your gear again. The light on Lonscale Fell was too good to miss.
Fun but Challenging
There was no doubt that I was extremely excited about my trip to the Lake District. Having seen so many autumnal images of the area I was keen to produce my own spectacular images. However, as you can see from my images old mother nature had a different plan which mostly involved rain and overcast skies. Even when it was dry there was very little of that magical light that you want to really lift a scene. When it did rain I would just spend most of time trying to keep my gear and filters clear of water. This can be infuriating and doesn't leave much time for the creative side of photography.
So was the trip a failure? Of course not! Yes, it was challenging, difficult and sometimes frustrating but I was in the Lake District, in autumn, with my camera. Sure it would have been nice to have better weather but sometimes as a landscape photographer you have to work with what you get. As I write this blog and look back at the photographs there is a lot to be happy about. Those little breaks of light like I saw on Cat Bells, or the stormy sky over the trees at Castlerigg just goes to show that there is an image to capture in almost any weather condition.
For me landscape photography is also about the adventure, about being outdoors. This trip was an adventure and I managed to capture some dramatic images of the Lake District, so I'm calling my trip a success!
Do you have a bucket list of locations or areas you want to shoot? Have you turned up to a location and faced a few challenges? Is there any type of weather you wouldn't go out in? Let me know in the comments.
Remember to check out my Instagram and Flickr feeds so you can see even more of my images. See you next time!
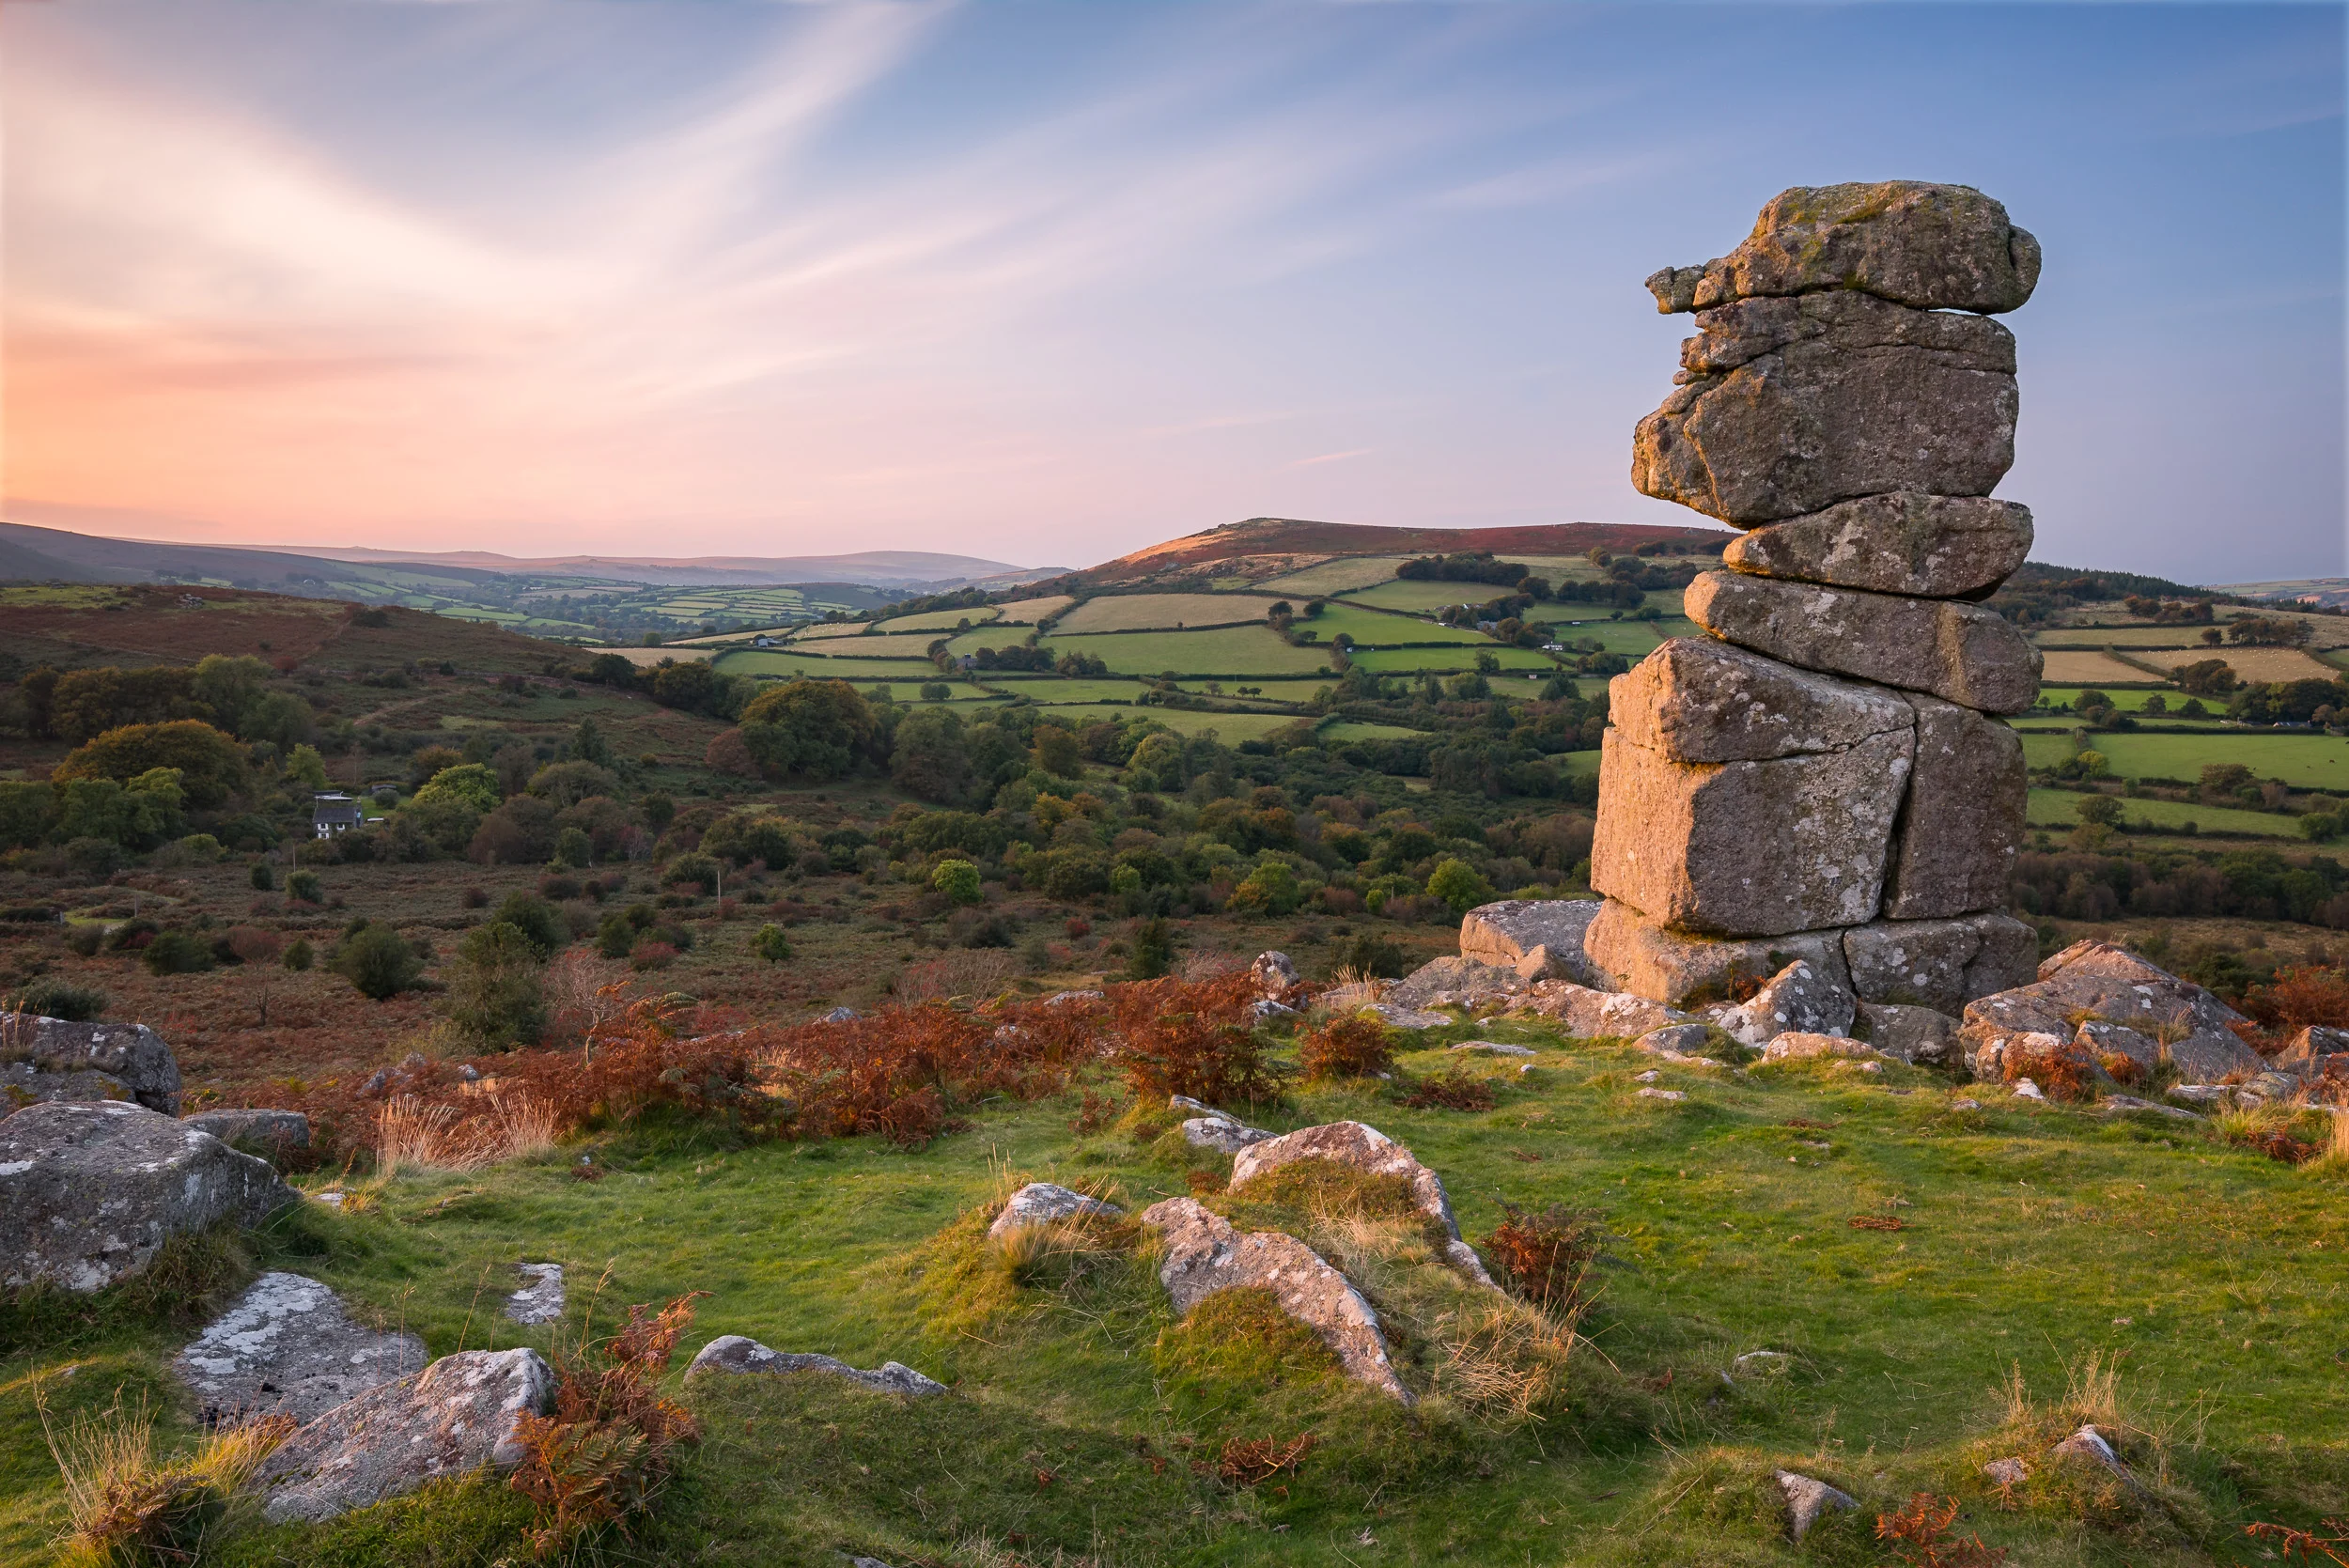
Perseverance - Photographing Bowerman's Nose
In this blog post I discuss the power of perseverance and why I keep going back to Bowerman's Nose on Dartmoor.
A Slight Obsession
I can't exactly remember how I found out about Bowerman's Nose. It might have been in a magazine, or a book, or even on Flickr. How I found out about this location is largely irrelevant though. My desire, or maybe obsession, in capturing an image of Bowerman's Nose that meets my artistic vision is more to the point though.
For those of you who haven't heard of Bowerman's Nose, it's a tall pillar of granite on Dartmoor. It's very distinctive and is surrounded by rolling hills. Given the right light and conditions it can make for a beautiful photograph. The problem for me is that I've never really managed to capture an image that does the location justice. Some of my early failings were due to poor technique, but latterly it's more to with poor conditions.
Part of the reason I'm probably so obsessed by this particular location is its close proximity to home. It's less than a 45 min drive and it's reasonably easy to get to (as long as you don't mind opening a gate and getting creative with your parking). This means that it is often my go to location on Dartmoor when the conditions are looking favourable.
Meeting Mr Bowerman
I probably made my first serious attempt at photographing Bowerman's Nose in early 2015. It was January so Dartmoor wasn't at its best, and it was a very grey and flat day. However, I do like to practice my photography so just been able to walk around and look at different compositions was valuable.


I returned in May of 2015 in the hope of better conditions. On this trip the ground was looking spring fresh, and I was getting some nice light reflecting of the edge of Bowerman's Nose from the setting sun. Unfortunately the sky was a bit bland and I wasn't getting the golden light I was looking for. Close, but not quite there. However, this trip did show me the real potential of the location.
A week later I was back again and trying a similar composition. Again, while the image was pleasing, I just felt it lacked something. While I was there I also tried my first panorama - I think Lightroom has just been given the native capability to stitch panorama's so I thought I'd give it a go.
Bowerman's Nose - May 2015
Perseverance
By the time 2016 had rolled around I had committed to myself that I was going to get an image worthy of the splendid Bowerman's Nose. I think it's part of my nature. Once I decide that I need to do something, I'll work at it until I get it done. I was determined that in 2016 all my perseverance would pay off. Obviously with some elements of of my control this would not be easy.


In May 2016 I captured this image of Bowerman's Nose. It had interesting sky (helped by the long exposure), but it lacked the light I was looking for.
Then in June 2016 I tried again, and I have to say I thought I was going get the image that night, but again, there was just something missing that evening. The image I was looking for escaped me again, but I would try, try, try again!
Gotcha!
Then, just the other evening, with only a little time between the end of work and sunset, I did a quick check of forecast and decided that I would attempt Bowerman's Nose again. When I got there the conditions looked good so I literally bounded up the hill and got my tripod setup. Would I finally be lucky?
Bowerman's Nose - October 2016
As you can see, yes I did. Well, it is at least my best image from that location. No it's not perfect and there is always room for improvement, but it is my best and favourite image from there. I finally feel that my perseverance had paid off.
Goodbye Mr Bowerman?
So am I done with Bowerman's Nose? Now that I have the image I wanted will I ever go back? Of course I will! There is always room for improvement. There are many different compositions to be had, different lighting conditions, even snow! It's an amazing location, and being so close to home it's always going to be on my radar to go back to.
So do you have a favourite location that you like going to? Is there a location you keep visiting in the hope that you'll get something special there one day? Do you preserve or just move on? Let me know in the comments.