

Long Lens Landscape Photography
In the blog this week I share with you my long lens landscape photography video. It was all inspired by my fellow landscape photographer Chris Sale who set me the challenge of capturing three long lens landscapes.
The Wide View
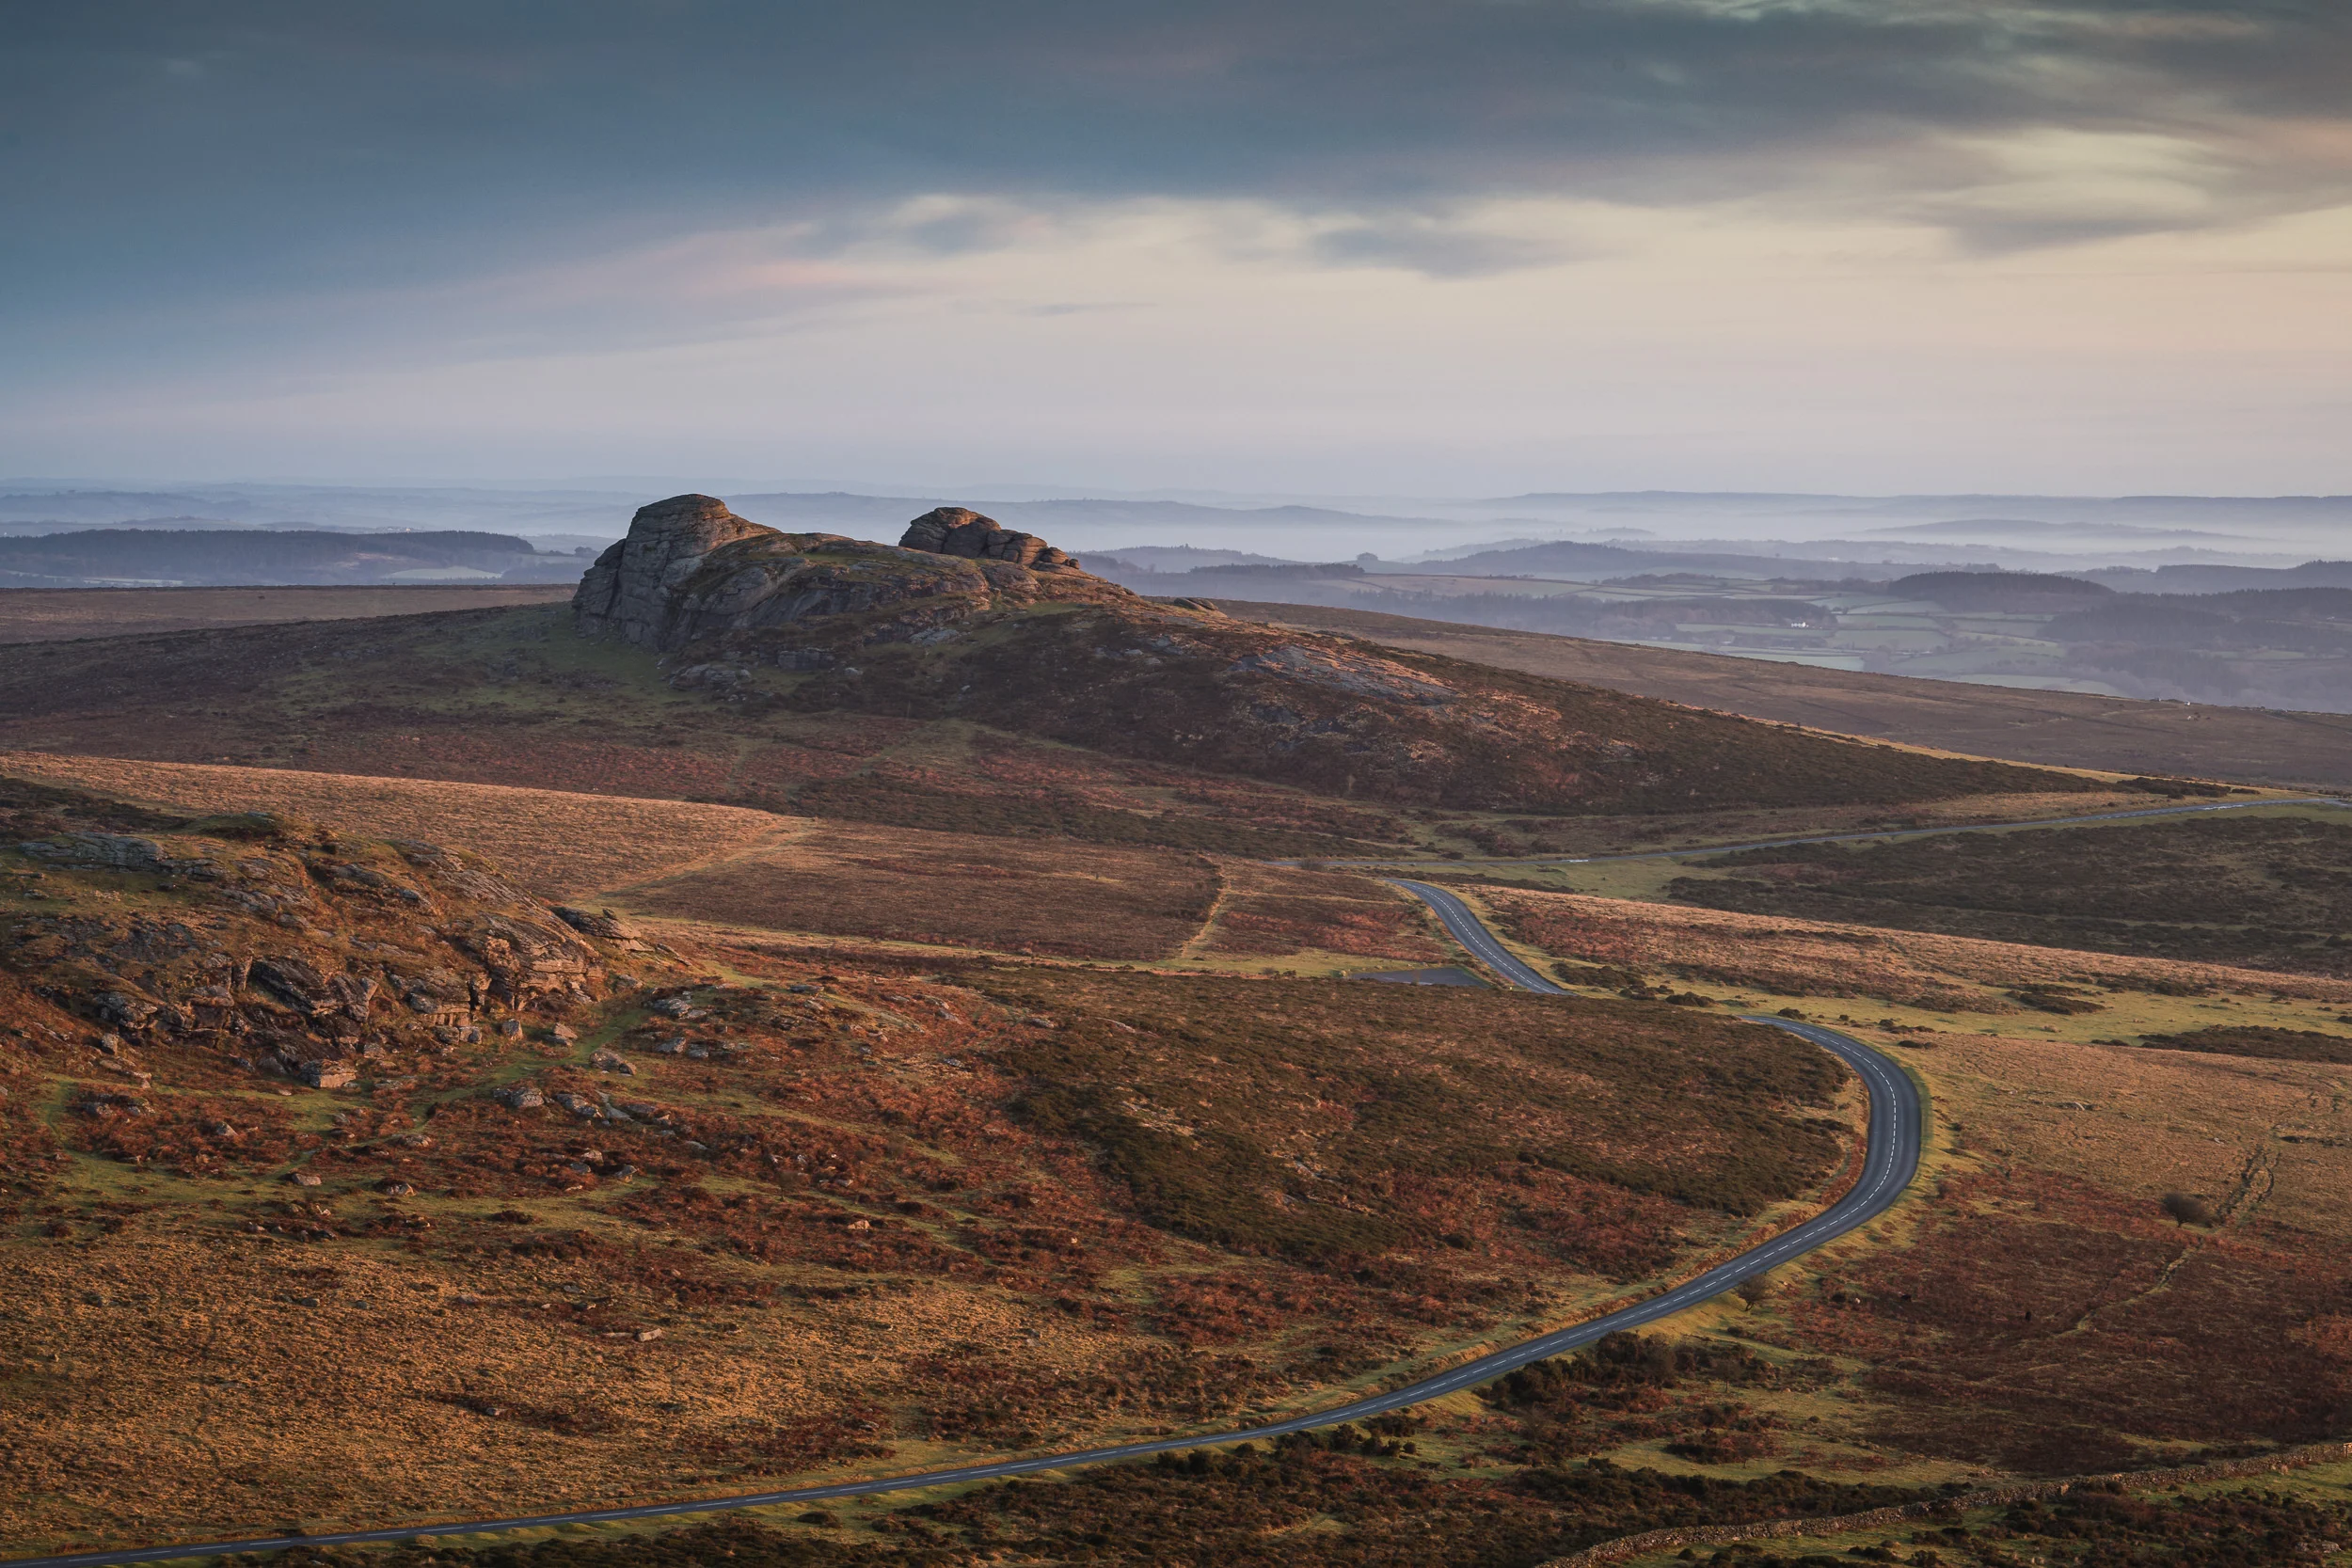
If I take a look at my Lightroom catalogue the most commonly used lens I have is without a doubt the Nikkor 16-35 mm f/4 VR. This is hardly surprising given that it was the first full frame lens I bought and that I love shooting my landscapes wide.
About 18 months ago I bought a used Nikkor 70-200 mm f/2.8 VR. I purchased it after renting one a few times to help with my live music photography when I was shooting at bigger events. I soon discovered though that I could use it for my landscape work as well.
Since then, I have shot landscape images with the 70-200 mm but I probably don't use it as much as I should have. So when fellow landscape photographer and YouTuber Chris Sale set me the challenge of shooting 3 images with my 70-200 mm I really had to get my creative brain into gear.
As we are both YouTubers I also set Chris the challenge of creating some wide angle landscape images. You can see how we both got on in the video below:
Well, I hoped you enjoyed watching that video. For me, it was a really good experience. It actually got me to think a little differently! It's opened my eyes a little more to creating landscape images with a longer lens, and I'm sure the 70-200 mm will be making a more regular appearance in my camera back.
Do you have a favourite lens? Do you prefer to shoot wide or tight? Or do you mix it up depending on the scene? Let me know in the comments below.
The Long Lens Images
In case you want to have a closer look at the images featured in the video here they are:
Nikon D850, Nikkor 70-200 mm f/2.8 at 112 mm, 0.6 seconds at ISO 64, f/11.

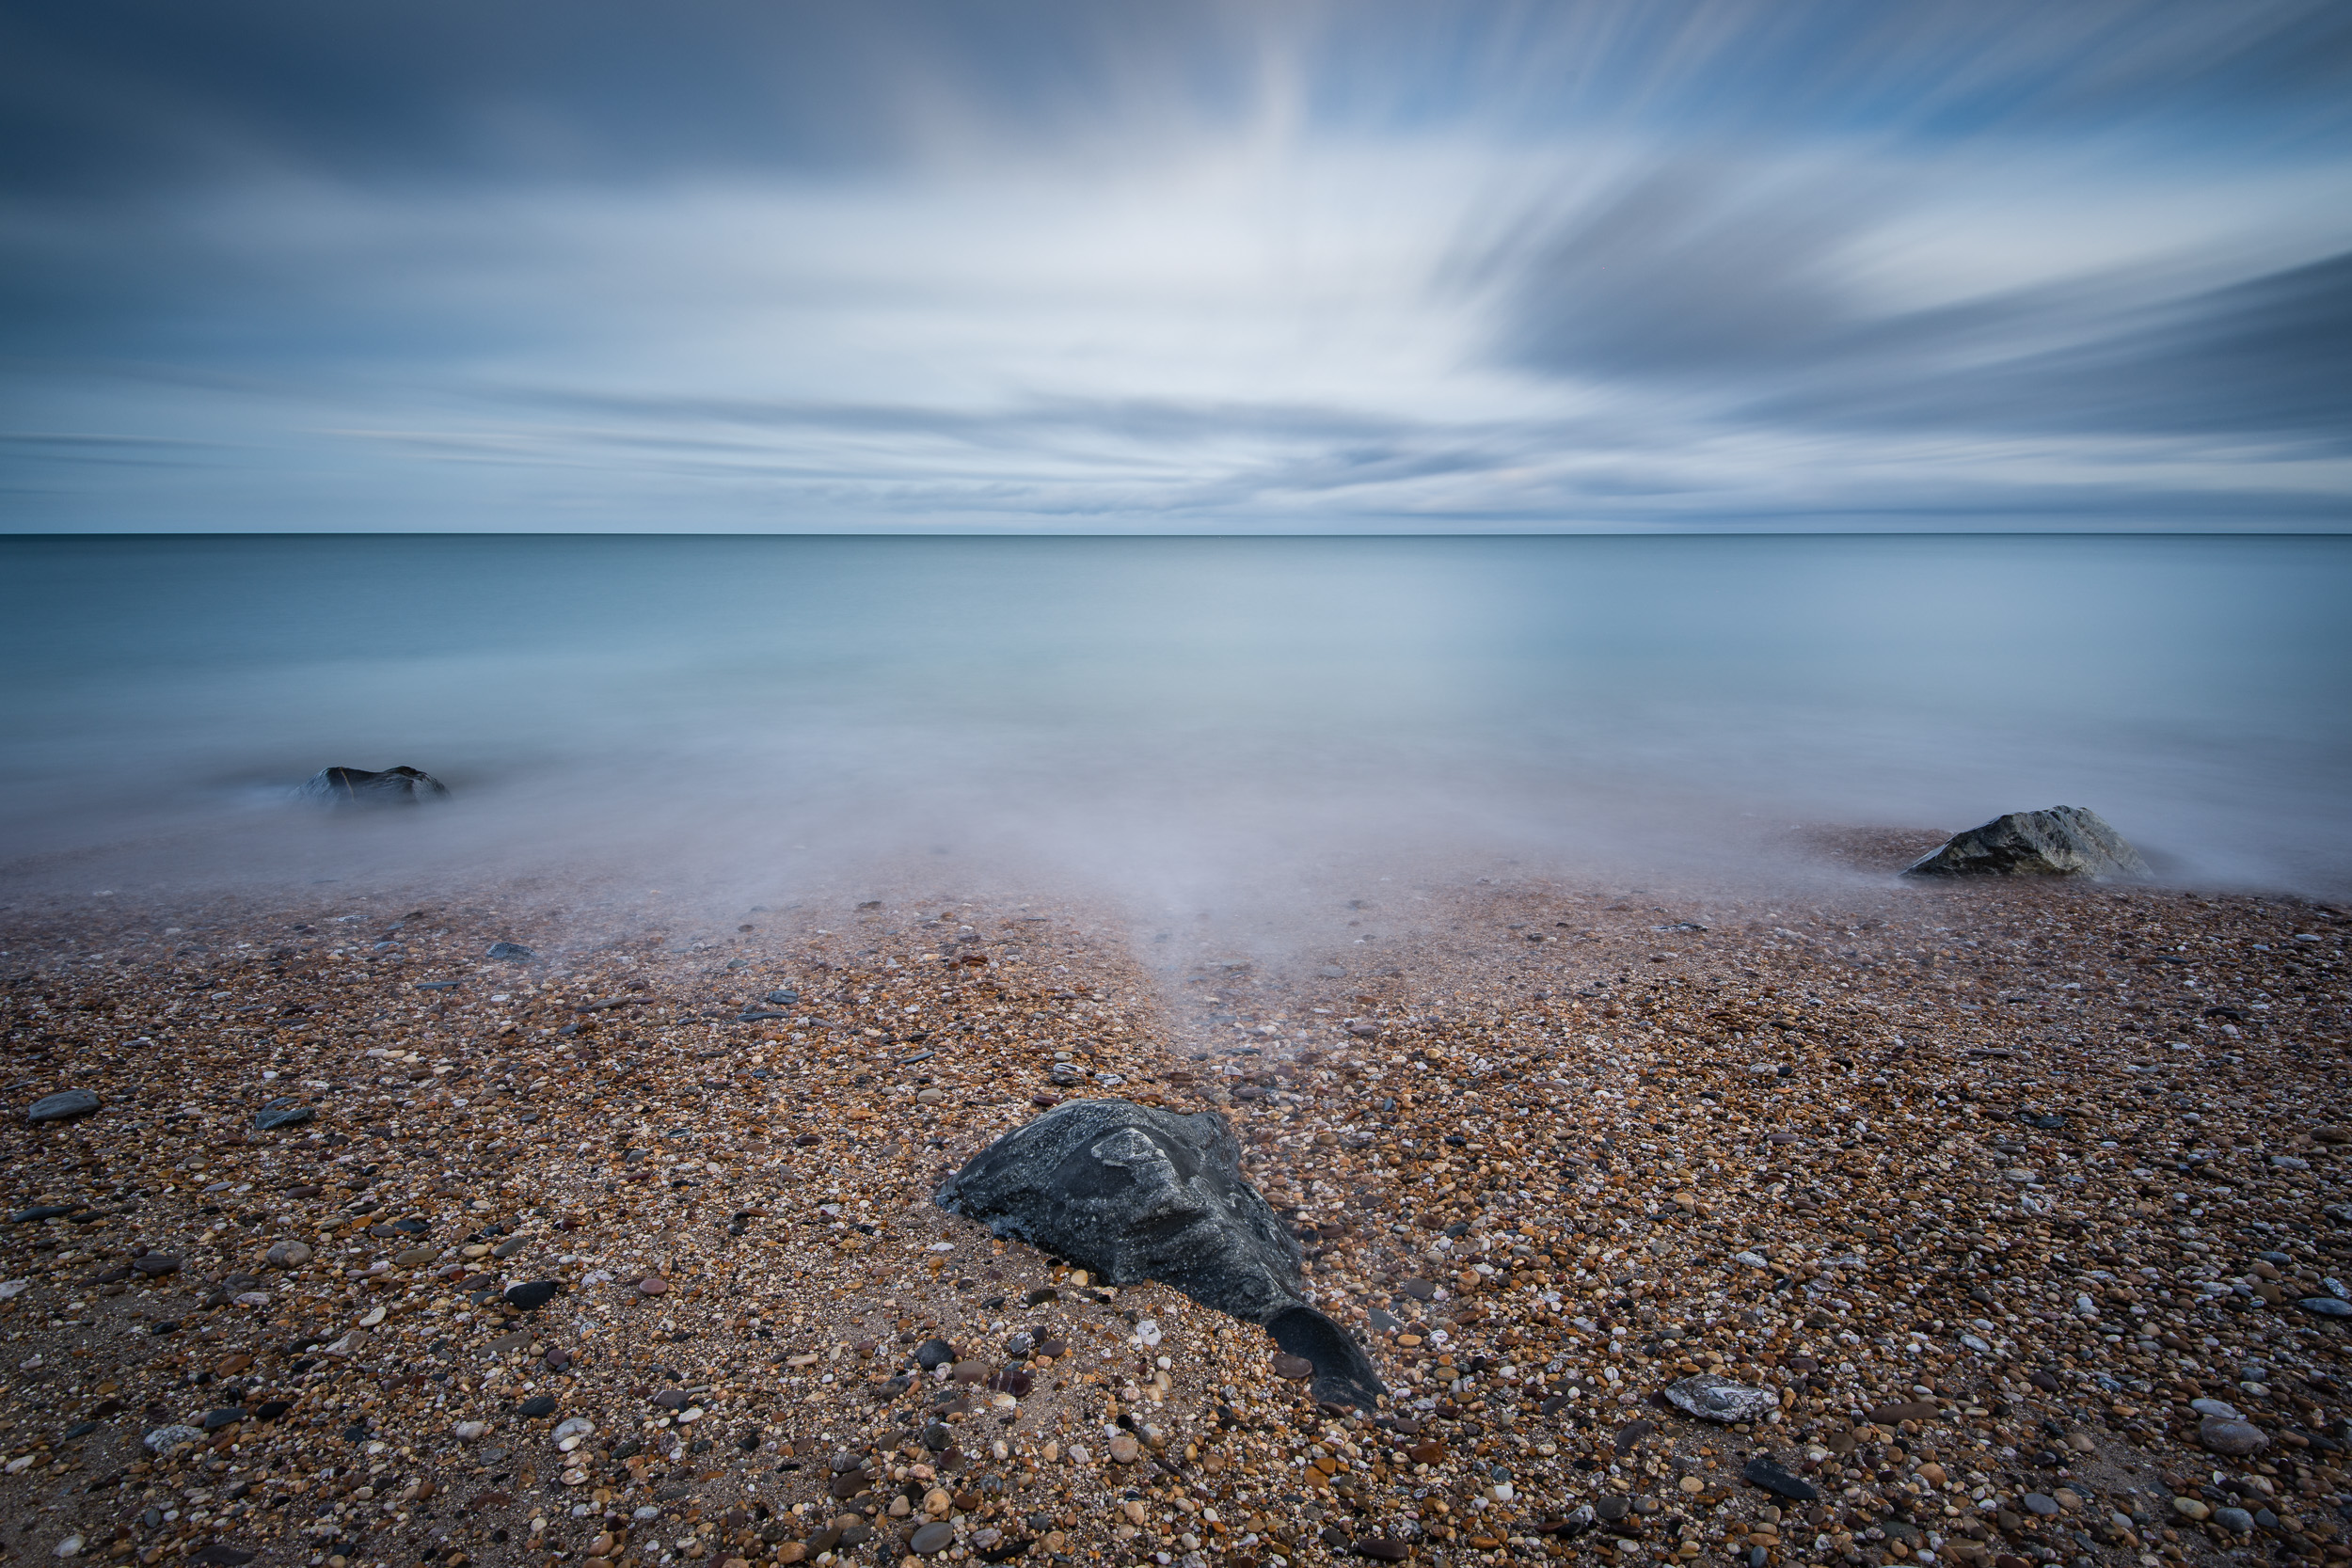
Nikon D850, Nikkor 70-200 mm f/2.8 at 100 mm, 0.6 seconds at ISO 64, f/11. This didn't actually make it to the video, but I do really like it!

Nikon D850, Nikkor 70-200 mm f/2.8 at 70 mm, 1/6th second at ISO 64, f/11.
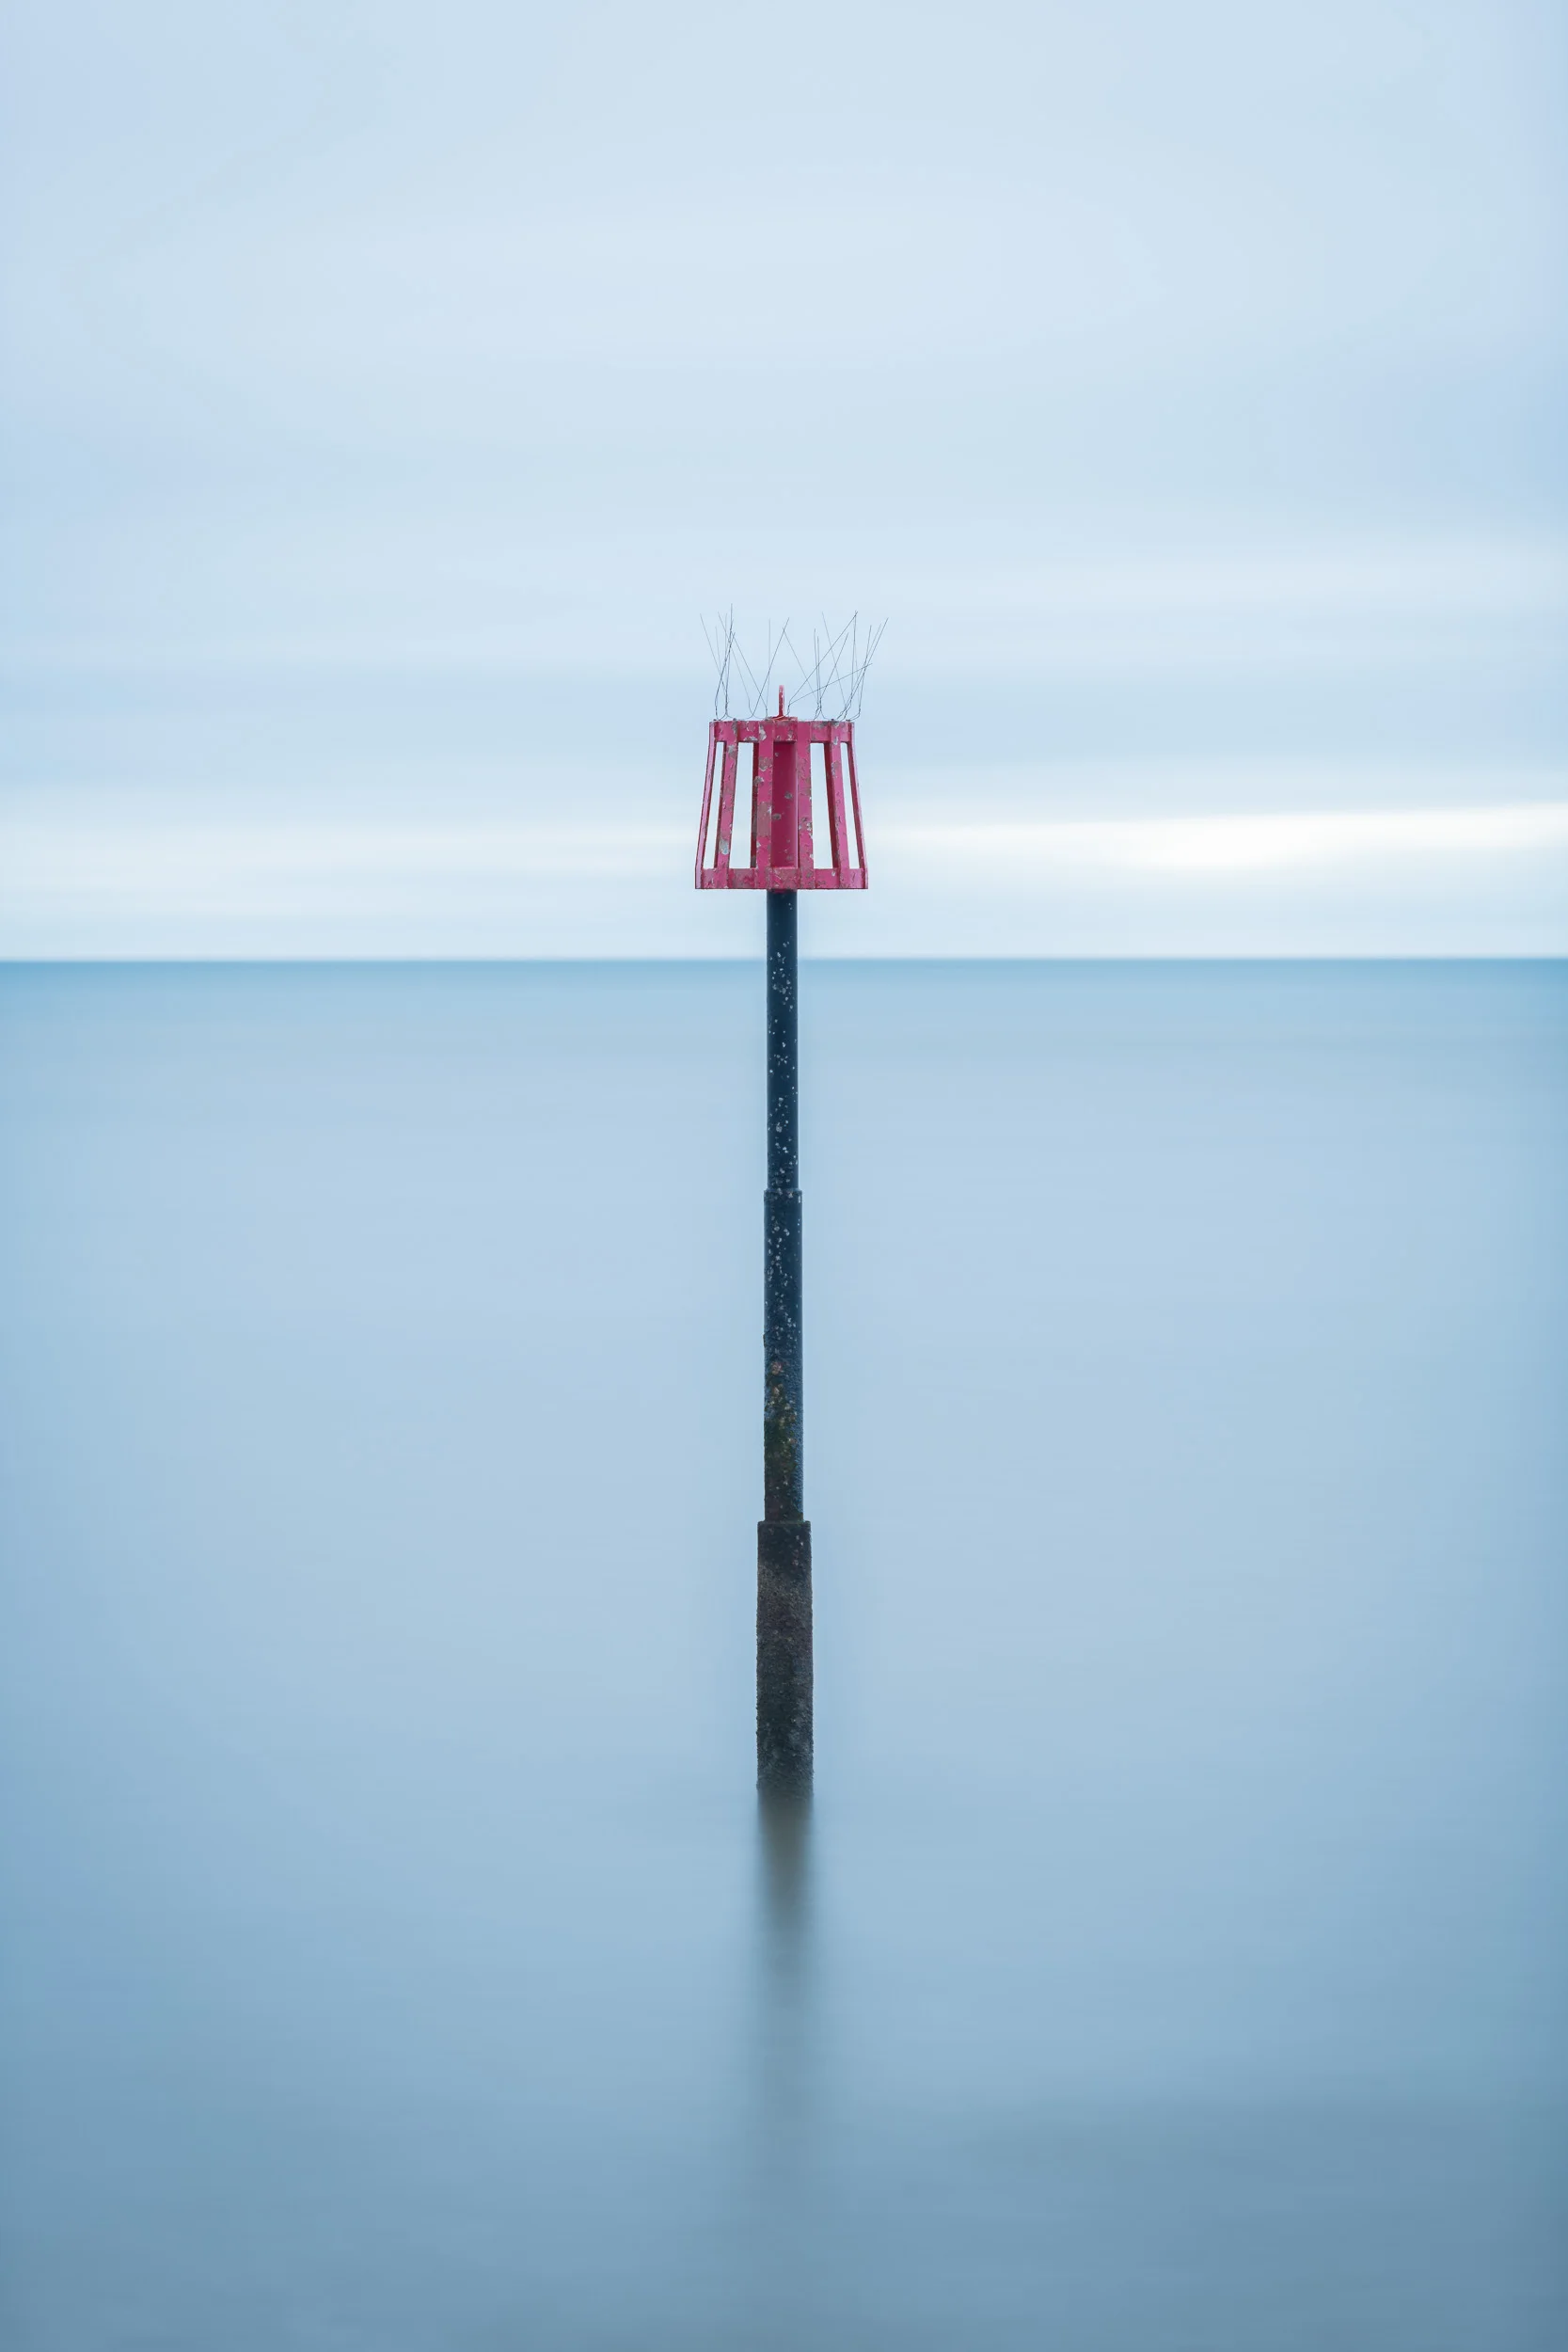
Nikon D850, Nikkor 70-200 mm f/2.8 at 135 mm, 75 seconds at ISO 64, f/2.8, Lee Filters Big Stopper and 3 stop ND.

Winter Solstice Adventure
In the blog this week I share with you the highs and lows of landscape photography as I head out on winter solstice to capture some images.
The Longest Shortest Day
Back in June of 2017, I headed out with the camera to create some landscape images on the summer solstice. You can see the images I created that day along with the video I made by clicking here.
I really enjoyed that day so I knew that when winter solstice came along in December I was going to spend the day out with the camera. Being the shortest day of the year it shouldn't have been nearly as tiring as the summer solstice.
Unfortunately when winter solstice did come around the weather was grey and overcast. I had checked the weather forecast the night before and had planned my locations to suit the weather. I'm all for "embracing the grey", but a full day might well be a challenge too far even for me!
As with summer solstice, I spent the day capturing images and filming my experiences. It was definitely a tough day. Maybe I was tired, maybe I was feeling challenged, but one thing is for sure, it sure did feel like a long day. However, saying all that I did have some great experiences, and if you watch all the video you'll see something special happen right at the end.
Enjoy!
A Winter Solstice Gallery
As always I do hope you enjoyed watching my adventures. I tried to make the most of the weather conditions and the images I took that day both reflect my varying moods and the conditions I had to work with.
You'll have seen these images in the video, but here they are again in case you want a closer look.

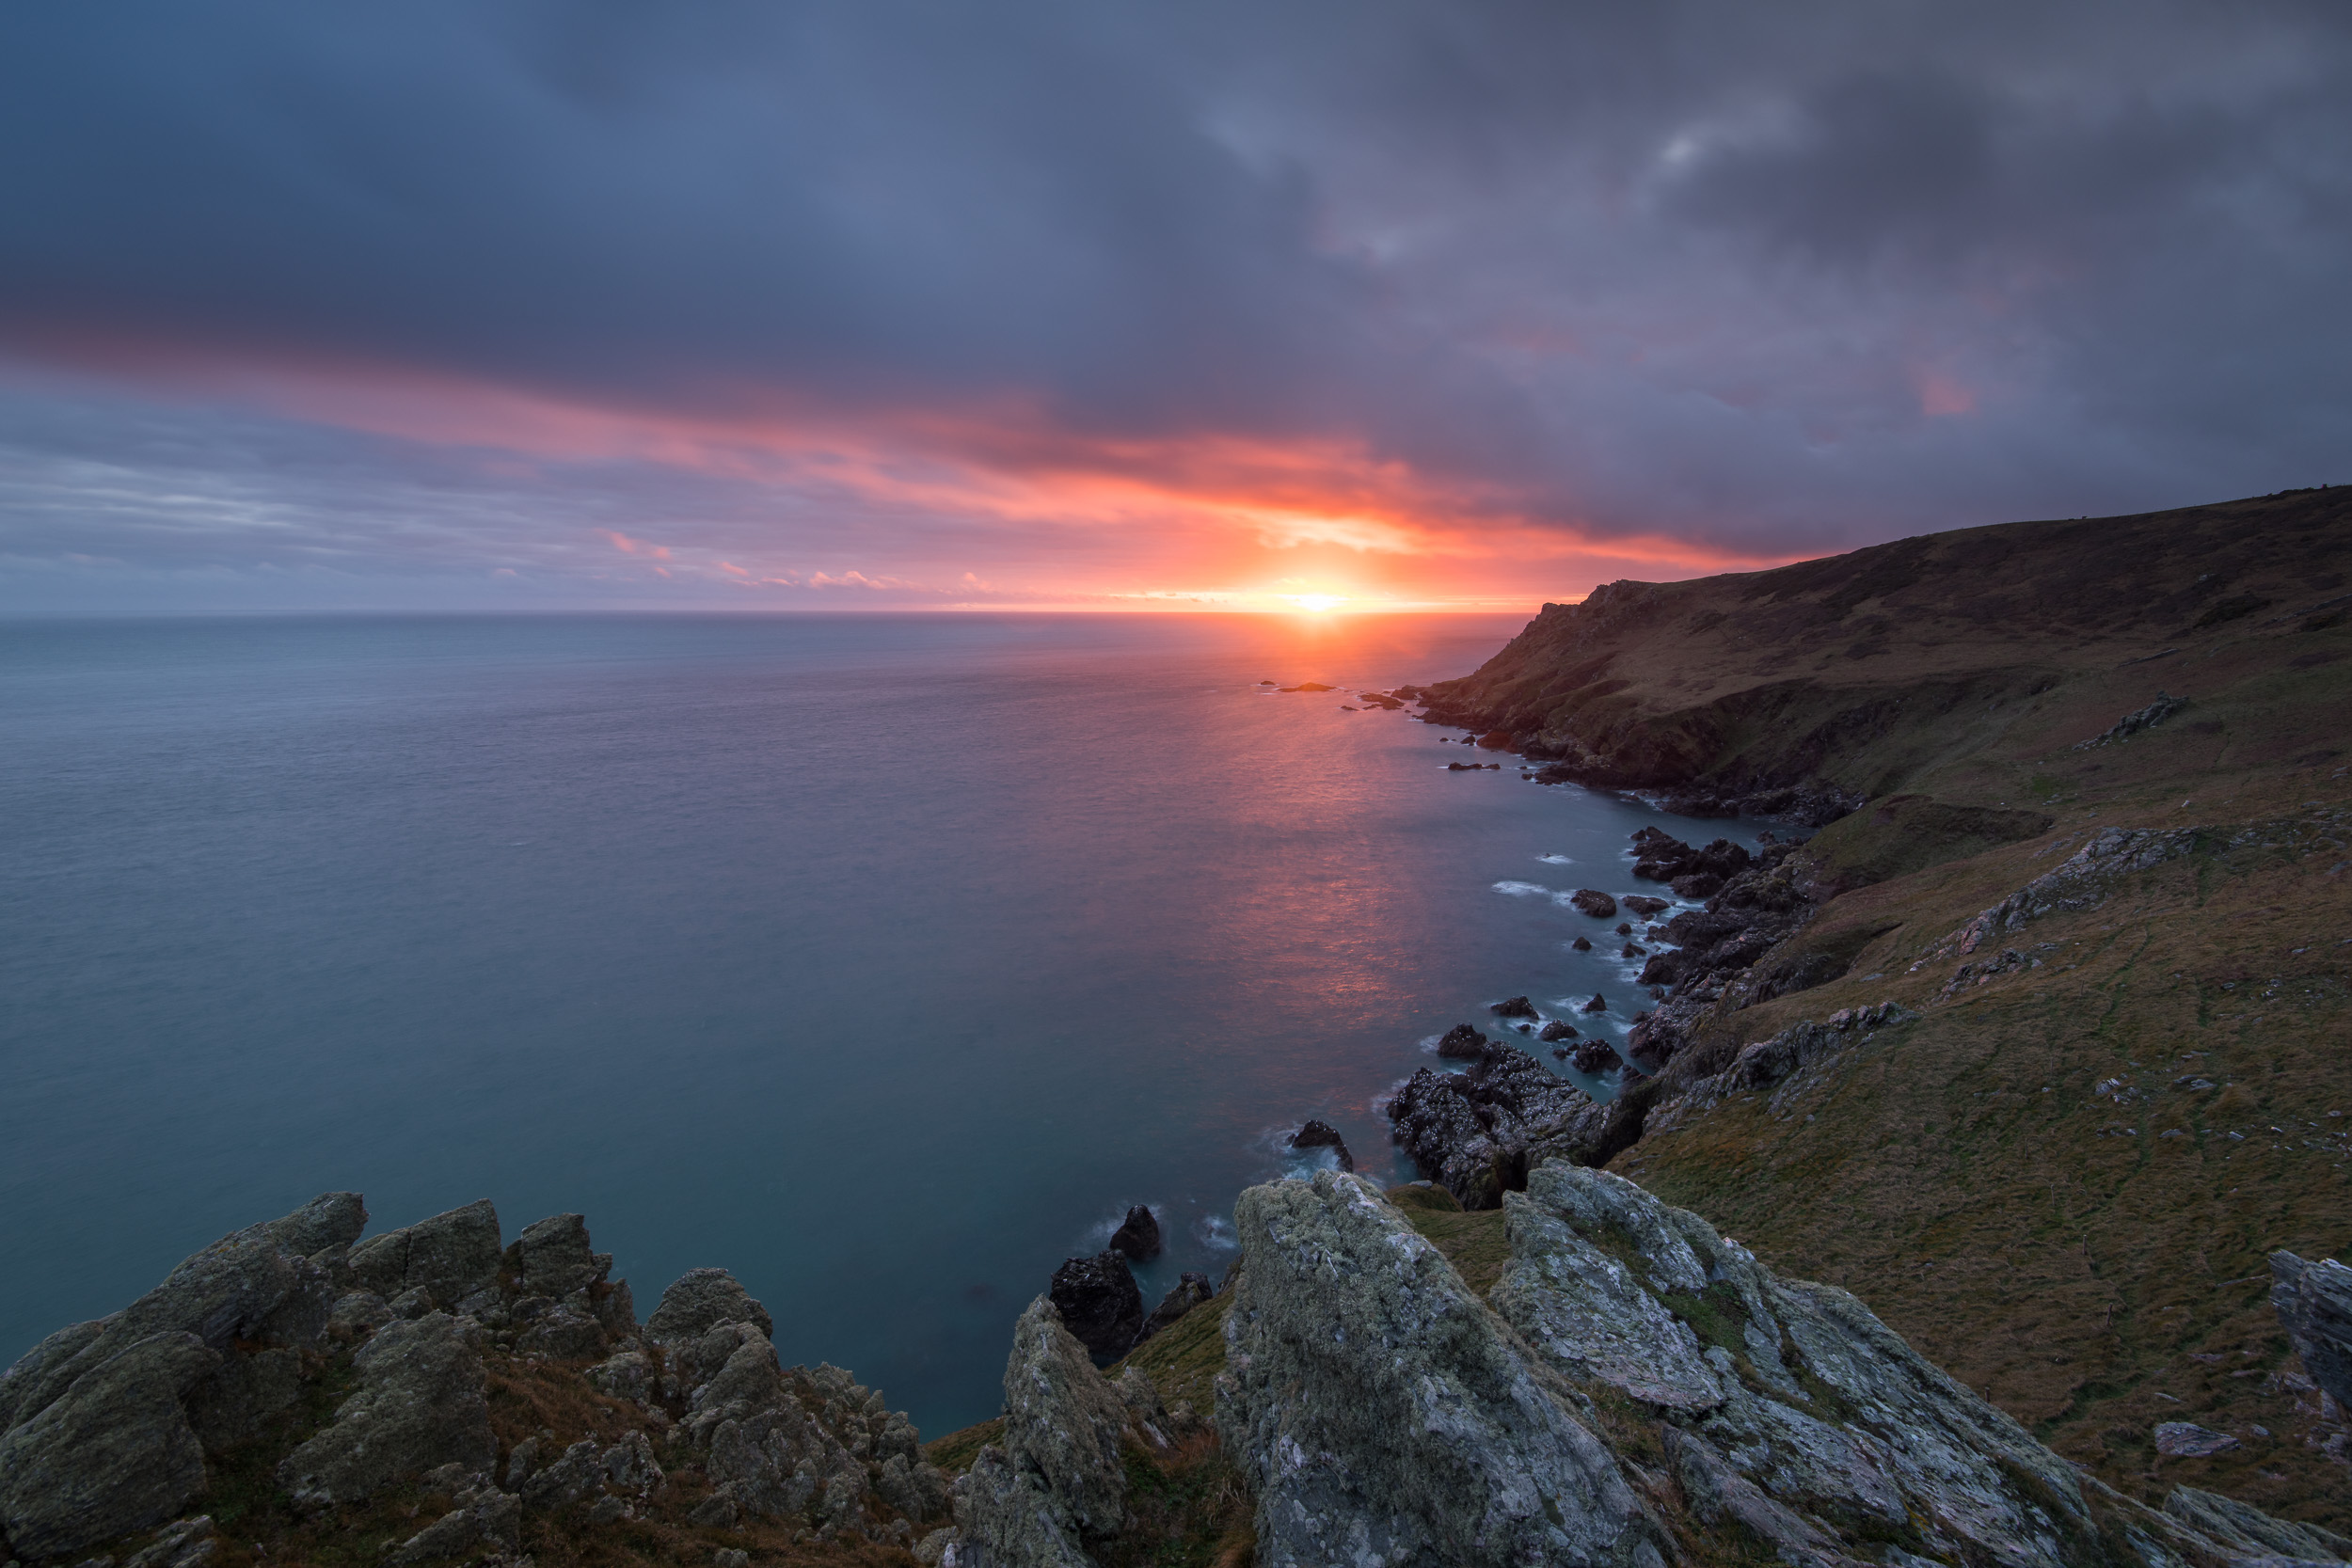
Nikon D850, Nikkor 16-35 mm f/4 VR at 19 mm, 180 seconds at ISO 64, f/11, Lee Filters circular polariser and Big Stopper.
Nikon D850, Nikkor 16-35 mm f/4 VR at 19 mm, 180 seconds at ISO 64, f/11, Lee Filters circular polariser, ND grad and Big Stopper.

Nikon D850, Nikkor 16-35 mm f/4 VR at 18 mm, 180 seconds at ISO 64, f/13, Lee Filters circular polariser, ND grad and Big Stopper.

Nikon D850, Nikkor 16-35 mm f/4 VR at 18 mm, 8 seconds at ISO 64, f/13, Lee Filters circular polariser, ND grad and Little Stopper.
Nikon D850, Nikkor 16-35 mm f/4 VR at 17 mm, 4.8 seconds at ISO 64, f/13, Lee Filters circular polariser, ND grad and Little Stopper.
Well, I do hope you enjoyed those images and my winter solstice video. Did you head out for winter solstice? Have you had days where landscape photography has been both a joy and a drag? Let me know in the comments below.

Using the Super Stopper in Sidmouth
The Lee Filters Super Stopper isn't exactly a filter you would use every day but it does have its uses. Read about how and why I used for a shoot in Sidmouth in my this blog post.
Free At Last
In my last couple of blog posts I may have mentioned that I'm finding it difficult to adjust to the short winter days. Opportunities to get out with the camera seem to be few and far between. Last weekend was different though. I didn't have too much on and the weather was looking favourable for some landscape photography.
Sidmouth Inspiration
My first challenge was to find a suitable location that I could shoot. In reality it didn't take too long. My decision to shoot the coast at Sidmouth in South Devon was driven by two things. Firstly I was inspired to shoot there. I've spoken about the importance of inspiration before on my blog before and how useful it can be.
My inspiration to shoot Sidmouth came from two photographers, atmoorehead and Neil Burnell.. Both of them had been shooting the curling stone groyne at the east end of the beach. I liked the images they had created so I wanted to go there and put my own spin on the location.
Super Stopper Time
The 2nd reason for choosing Sidmouth was that it was a coastal location that would be ideal for testing out my recently purchased Lee Filters Super Stopper. I'm a big fan of Lee Filters and use the Little Stopper and Big Stoppers in a lot of my images. When the Super Stopper was first announced I have to admit that I didn't really see the point but after seeing some of the images produced by Mark Bauer with the Super Stopper I pulled the trigger and picked one up.
My original plan was to shoot some midday long exposures during a recent Lake District trip but given the challenging weather it wasn't really the best time to try out this 15 stop monster. However, as I was planning my trip to Sidmouth it soon became apparent that this could be the perfect time to give the Super Stopper a go. I would be arriving around 2.30pm when there is still plenty of light, the tide would be coming in, and the light from the west would be illuminating the groyne. My only slight concern was the lack of cloud in the sky. It was apparently going to be very clear but I could live without the perfect conditions!
Setting Up For a Very Long Exposure
When I arrived at my location in Sidmouth things were looking favourable. The sun, which was already relatively low in the sky, was illuminating the inward curve of the groyne rather nicely and the tide, which was due be high at 16:08, was already a good way up the beach. I was glad I had got there early as the area was busy with people and where I was going to shoot from was a bit of a one tripod only location.

Base image with no filters. (Image unprocessed).
So with my tripod out I got to work on my composition. I had originally thought I would go for a vertical composition but it soon became apparent to me that a horizontal composition would work best as it provided more room for the groyne to curl out into the sea and into some empty space. With my composition locked in I took my base image. My base image is the image I take with no filters so I can easily check it for sharpness and exposure. Being a coastal location I reached for my Lee Filters Polariser as this would not only take off some reflections from the surface of the sea but it also removed all the reflections from the groyne where the water had been splashing.

The addition of the polariser reduces the reflections on the groyne and brings out a little more detail in the sky. (Image unprocessed).
However, the addition of the polariser always lengthens the exposure by a few stops so I had lengthen my shutter speed from around 1/80 sec (at f//11) to 1/25. Though I was happy with the effect the polariser was giving I was already concerned about how long the exposure was going to be when I added the Super Stopper. Using the Lee Filters app on my phone I worked out that a 1/25 second base exposure with a Super Stopper would require a 21 minute exposure. For my first use of the filter I felt this might be too long, but a Big Stopper would only give me 40 second exposure (which was not long enough for the image I wanted)
I had two options. I could either open up the aperture or increase my ISO. While opening up the aperture would have decreased my exposure time, I would have lost the depth of field I was looking for so I increased my ISO to 400. This effectively gave me a Super Stopper exposure time of around 8 mins. Much more manageable.
The Results
With everything set I got to taking some really long exposures. I modified my composition a couple of times which meant going through the whole setup process again but using the Super Stopper was never going to be a fast process. I also had to gradually increase my exposure length as the amount of light decreased. However there is a certain sense of excitement with really long exposures. I was investing 8 to 10 minutes for each exposure and the sense of not knowing exactly how the image would look was exciting.
Final image (processed in Lightroom). Nikon D750, Nikkor 16-35mm f/4 at 26mm. 641 seconds at f/11, ISO 400.
A Small Critique
I'm very happy with the end result and it's the image I had envisioned when I started planning this shoot. However, it's not perfect. Though I was shooting at a time very close to high tide, it wasn't quite high enough. I would have liked there to have been no beach visible in the lower right side of the image. There was a high tide of 4.06m so on my next visit I will try and plan it for when it's a little higher.
However, tide height aside, all the other elements came together nicely. The time of day and time of year were perfect to allow the golden light of the sun to reflect of the west side of the groyne. It's very rare that everything is perfect so for a Sunday afternoon shoot I'm still very happy.
Why Not Just Use a Big Stopper?
You might be asking yourself why I didn't just wait for sunset and then use a Big Stopper. Why purposely shoot earlier so you can use a Super Stopper? Well, it all had to do with the light. As the sun set the quality of the light reflecting off the groyne was nowhere near as nice as it was 45 minutes before. In order to realise my vision of a long exposure I need to have that 15 stop ND filter. So yes, while it was a specific set of conditions that required the use of the Super Stopper, it would have been an image that would have either not been possible to get or would have been more difficult. The Super Stopper is probably never going to be a filter that I use a lot, but now that I have it and have seen how I can put it to use, I'm glad I have it.
So are you a fan of long exposures? Do you own the Super Stopper? Are your creative ideas driven by the location you are visiting or by a vision of the image you want to create? Let me know in the comments below.