

Should YOU Photograph the Honeypot Locations?
Is there any point in capturing your own images from the landscape photography honeypot locations? With so many images captured from these popular locations you could be forgiven for giving them a miss. In this blog post I head to Glencoe in Scotland to photograph one of its most popular viewpoints and discuss why I think everyone should shoot a honeypot location.
They Are Honeypot Locations for a Reason
This is going to be a bit of a short blog post. There are a couple of reasons for this. Firstly, most of what I want to say is said in the video to go with this post, so there’s little point repeating it all here. I’m also a little short in time because I’ve got lots of exciting content to work on that I want to get ready before the festive period really starts.
All that aside, I’ve been wanting to make this video for a while. My original plan was to shoot it down at Durdle Door but I never quite made it there this year. When I started making plans for my trip to Skye I knew I was going to stop off in Glencoe so I decided that I would make the video there. Glencoe is not short of a few honeypot locations but I settled on the viewpoint with the small waterfall (on the river Coupall) and Stob Dearg in the background. There can’t be that many of you that haven’t seen that viewpoint before!
It’s a stunning viewpoint and one that I can’t resist photographing every time I’m in Glencoe. These viewpoints aren’t called honeypot locations for no reason! However, in some circles, photographing these locations and viewpoints can be frowned upon. While it is true that getting something new from these locations can be tricky, I don’t think this is a reason to not shoot them.
If you want to know why I think you should shoot them, check out my video below:
I’m sure most of you have already shot a few honeypot locations and have enjoyed the experience of capturing your own images. If you haven’t though, I hope this video has inspired you to visit places like the Glencoe viewpoint in the video, or even Durdle Door.
Do you have a favourite honeypot location? Are there any honeypot locations you’d like to shoot? Let me know in the comments below.
One Location, Many Viewpoints
If you want to see the images from the video in a bit more detail you’ll find them below.
The River Coupall and Buachaille Etive Mor, Glencoe, Scotland - Nikon Z7, Nikkor 14-30mm f/4 at 22mm, f/13, 1 second at ISO 200, CPL and 3 stop ND.
River Coupall Falls, Glencoe, Scotland - Nikon Z7, Nikkor 14-30mm f/4 at 15mm, f/13, 1/8th at ISO 160, CPL.
The River Coupall and Stob Dearg, Glencoe, Scotland - Nikon Z7, Nikkor 14-30mm f/4 at 22mm, f/13, 4 seconds at ISO 160, CPL and 3 stop ND.
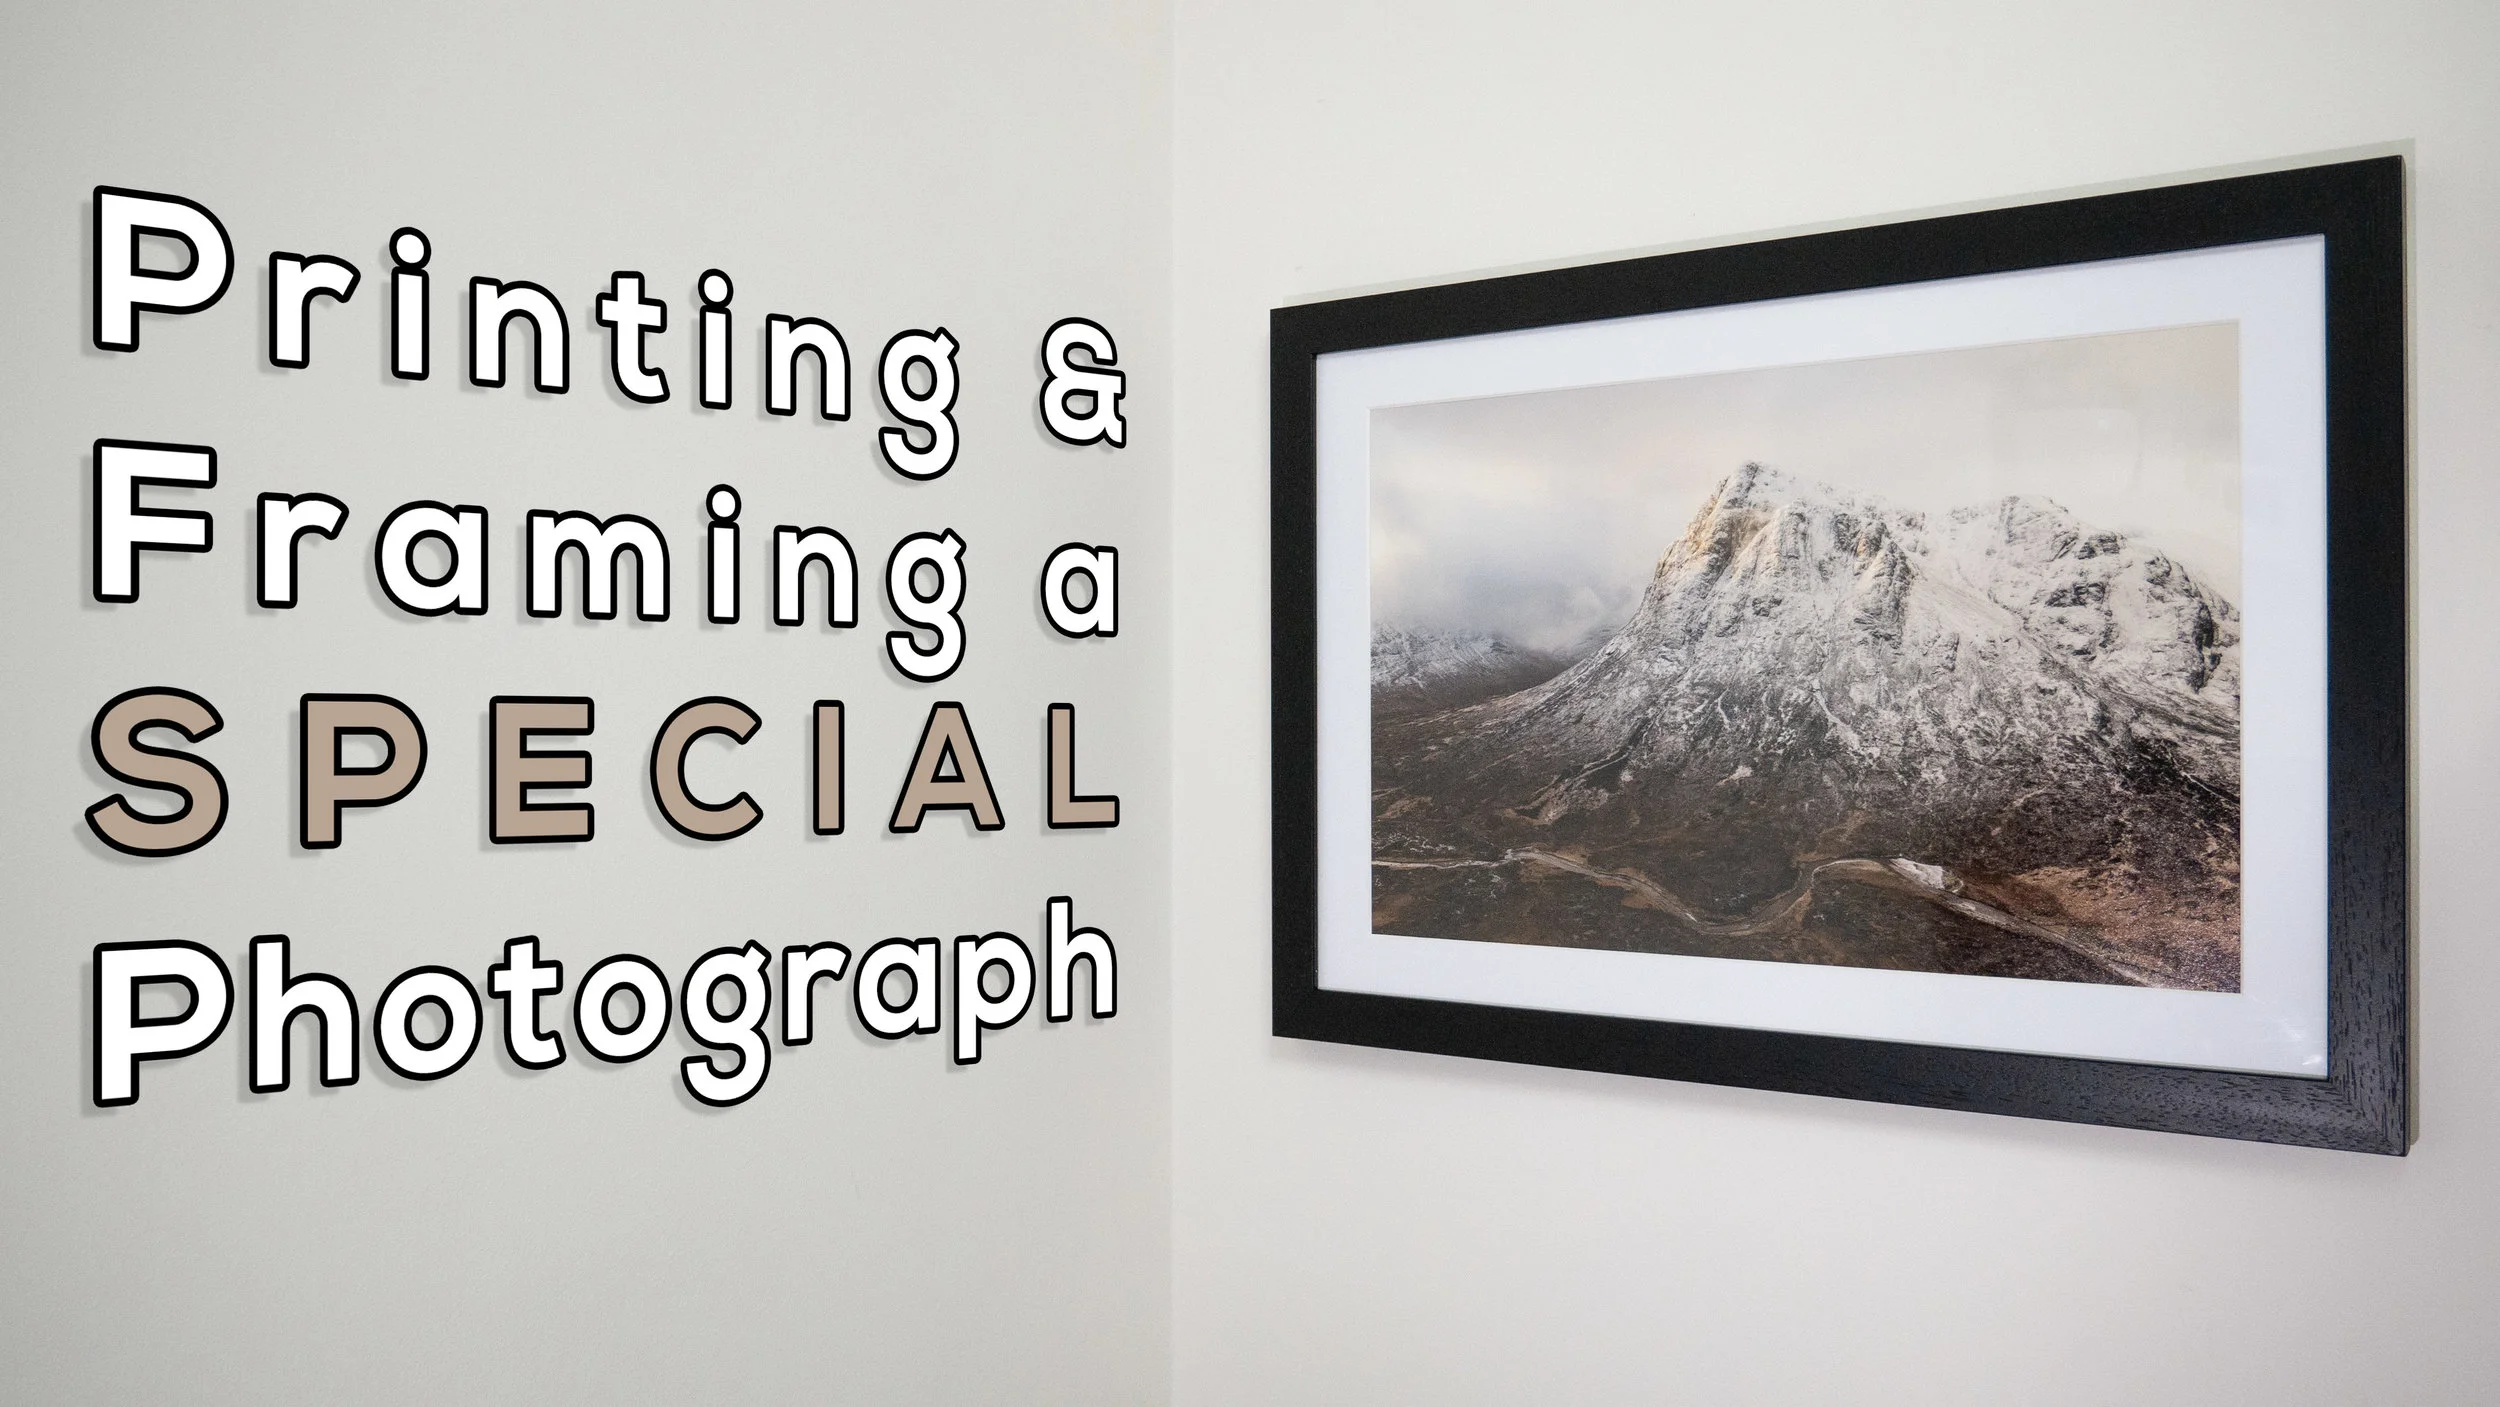
Printing and Framing a Special Landscape Photograph
Some landscape photographs just need to be printed and hung on the wall. In this blog post, I take a very special image, print it, frame it, and give it a permanent place on my wall.
Success in Scottish Landscape Photographer of the Year
Entering big photography competitions can seem like a waste of time. Some of these competitions can attract 1000's of entries, sometimes even 10,000’s of entries . Getting shortlisted can seem like an achievement sometimes. How do you create a winning image though? There's no easy answer to that question. Judging, even in the same competition, can vary from year to year. Just look at the winning images from Landscape Photographer of Year since it started. It's really hard to "know" what the judges are looking for.
However, there is one thing I do know. If I don't enter I certainly won't win anything! There is also one piece of advice I can share , and it's a piece of advice given to me by a photographer and photography competition judge. He told me that if you think you have a strong image then keep entering it into competitions year after year. Even if it doesn't get placed in one competition, it might in another. It's also worth entering the same image in the same competition a different year.
I've always remembered this bit of advice, so ever since I took the image of Stob Dearg (Buachaille Etive Mor) you see below, I've been entering it into competitions. This perseverance has finally paid off and the image has received a commended award in the Scottish Landscape Photographer of the Year competition. It's the 2nd time I've entered it into this competition, and 4th time in all competitions. So if you have a good image that you think could win an award, don't be put off by the first failure. Keep trying!!
First Light on Stob Dearg, Buachaille Etive Mor, Glencoe - Nikon D750, Nikkor 24-70 mm f/2.8 VR at 28 mm, f/11, 1/25th sec at ISO 100.
Printing and Framing
The image is one that I am immensely proud off and it brings back many happy memories of my adventure to Glencoe (which you can watch here). While it will be a real privilege to see it in the yearbook from the competition, I really wanted to make my own print of it, frame it, and give it a permanent place on my wall.
In the video below I show you how I went about printing the image, selecting a paper, framing it, and eventually hanging it on the wall.
If you are interested in doing something similar yourself, here are the products I used in the video:
Fotospeed Cotton 305 - https://www.fotospeed.com/Platinum-Cotton-305-Paper/groupproduct/2937/
Fotospeed Baryta 300 - https://www.fotospeed.com/Platinum-Baryta-300/groupproduct/1437/
Fotospeed Legacy Gloss 325 - https://www.fotospeed.com/NEW-Legacy-Gloss-325-Paper/groupproduct/3103/
Picture Frames Express - https://www.pictureframesexpress.co.uk/
Conservation Tape - https://www.pictureframesexpress.co.uk/picture-frame-supplies/tapes/74/
Picture Hanging Strips - https://amzn.to/2TWuE2l
I hope you enjoyed this video and blog post. Do you have any photography competition tips? How do you go about displaying your prints? Let me know in the comments below.

Developing a Passion for Printing
In the vlog this week I expand my printing skills by printing a panoramic image on panoramic paper and then mounting it into a custom-made panoramic frame. I also take a look at some different paper types to try and see what impact each one has on an image.
Discovering the Joy of Printing
Back in April of this year, I wrote about how I purchased a new Canon Pixma Pro-10S printer while I was at The Photography Show in Birmingham. You can read why bought a printer and watch the video I made on my first experiences of printing, in my blog article Discovery the Joy of Printing.
Ever since then I've been printing my images. A lot. And I have to say it's been a lot of fun. I've enjoyed the experience of going out to make an image, post-processing it, and then creating a print at the end.
Developing a Passion for Printing
I have however been keeping things relatively simple. I've been using standard paper sizes, using Canon's Platinum Pro glossy paper. The results have been great. Prints match what is on the screen and the whole workflow is straightforward.
However, there any many different paper types from many different paper manufacturers, so I thought it was about time to expand my printing horizons. In the video below I take one of my favourite panoramic images and print it on some panoramic paper from Fotospeed, and then mount it in a custom frame from Picture Frames Direct. I also take another one of my favourite images of the year and print it on some different paper types.
These are the images I printed in the video.
Nikon D750, Nikkor 24-70mm f/2.8 VR at 20mm, 1/3 sec at f/11, ISO 100, 7 image panorama.
Nikon D850, Nikkor 16-35mm f/4 @ 18mm, ISO 100, 5 sec @ f/13, Lee Filters circular polariser and ND grad.
Well, I hope you enjoyed my follow-up video on printing. As you can see I've still got a lot to learn, but I'm really enjoying the challenge. I get a great sense of satisfaction on owning the entire process from capture to print.
Have you recently taken up printing? Are you an experienced printer? Do you have any advice on printing? Let me know in the comments below.

Glencoe Adventure - Part 1, The Workshop
In this first of two special Glencoe blog posts I'll share with you my images and stories from the Dawn 2 Dusk Glencoe workshop that I attended recently. It was a fantastic few days of photography. Though the weather was typically Scottish at times, the variable conditions resulted in some awesome images.
The Importance of Adventure
I have talked about the importance of practising the art of photography on this blog a number of times. For me, and I expect this is the same for many photographers, most of this practice will take place in your own back yard. Not literally of course, but most of the time you are out with a camera it will be in your local area. For me, this is Devon with the occasional visit across the border to Cornwall or Dorset.
While there are many benefits to shooting locally, such as time and familiarity, there is nothing quite like the challenge of pushing the boundaries of your photography by going on an adventure! Adventure means different things to different people, but for me, it's the excitement of travel, of meeting new people and of course photographing something new. All these elements can really push your photography in a way that you sometimes just can't get locally.
Though I have visited Glencoe a number of times and even grew up not far away, this will be my first time in the area as a dedicated photographer. So while the area might be familiar, the prospect of photographing it was exciting, to say the least. Well worth the 3 days off work (plus the weekend) and the 10 hours drive each way!
This week, in the first of two Glencoe blog posts, I will be sharing my memories, thoughts and photographs of the Dawn 2 Dusk Photography Glencoe photography workshop that I attended. Next week, in part 2, I will be sharing the images and video that I took with some of the extra time I had in Glencoe.
Why Workshops are Important
So why didn't I just spend all the time I had in Glencoe doing my own thing? Well, for me at least, workshops provide a number of unique benefits that I can't get by shooting on my own:
Practical and Artistic Development - Tuition is still a big part of my development as a landscape photographer and for the Glencoe workshop, I had access to two of the UK's leading landscape photographers, Ross Hoddinott and Adam Burton. Having access to this level of photographer not only helps with the artistic side of my photography but also with some of the more practical aspects of photography (read how later in the blog post).
Being Social - The life of a landscape photographer can be a solitary existence, especially if you favour early mornings like me. However, every now and again it's just good to be around like-minded individuals. Just by chatting during the day you can not only learn about how your photography looks to others, but also learn from their photography. At night, normally around the bar, it is a great chance to share those funny, odd, or disastrous trips out with the camera.
Local Knowledge - There is only so much planning and preparation you can do on the computer. In order to maximise time with the camera when you arrive at a new location, it's sometimes useful to have access to some local knowledge. For me, workshops provide me with an introduction to the photographic possibilities of an area and while I could do this myself I don't always have the extra time.
So now that we've talked about the importance of adventure and the value in workshops, let's get into the most important aspects of this adventure, the photographs!
Day 1: Castle Stalker
The 2.5-day workshop started with a briefing at our base of the Clachaig Inn just outside Glencoe village. Adam and Ross managed to suitably embarrass me by remembering my birthday with a chocolate cake and singing happy birthday! After the very sociable start of coffee and cake, we all headed down for a sunset shoot at Castle Stalker on Loch Linnhe.
Nikon D750, Nikkor 70-200mm f/2.8, @ 200mm, f/8, 1/60th second, ISO 100, Lee Filters ND Grad, 16:9 crop.
As you can see from the shot above, the descending sun illuminates the side of the castle rather nicely. I was hoping to get a similar shot to this with water surrounding the island, but as the tide came in the light became flat thanks to some heavy cloud where the sun was setting.
It was still a good start to the workshop and we all headed back to the hotel for some well-earned food and drinks.
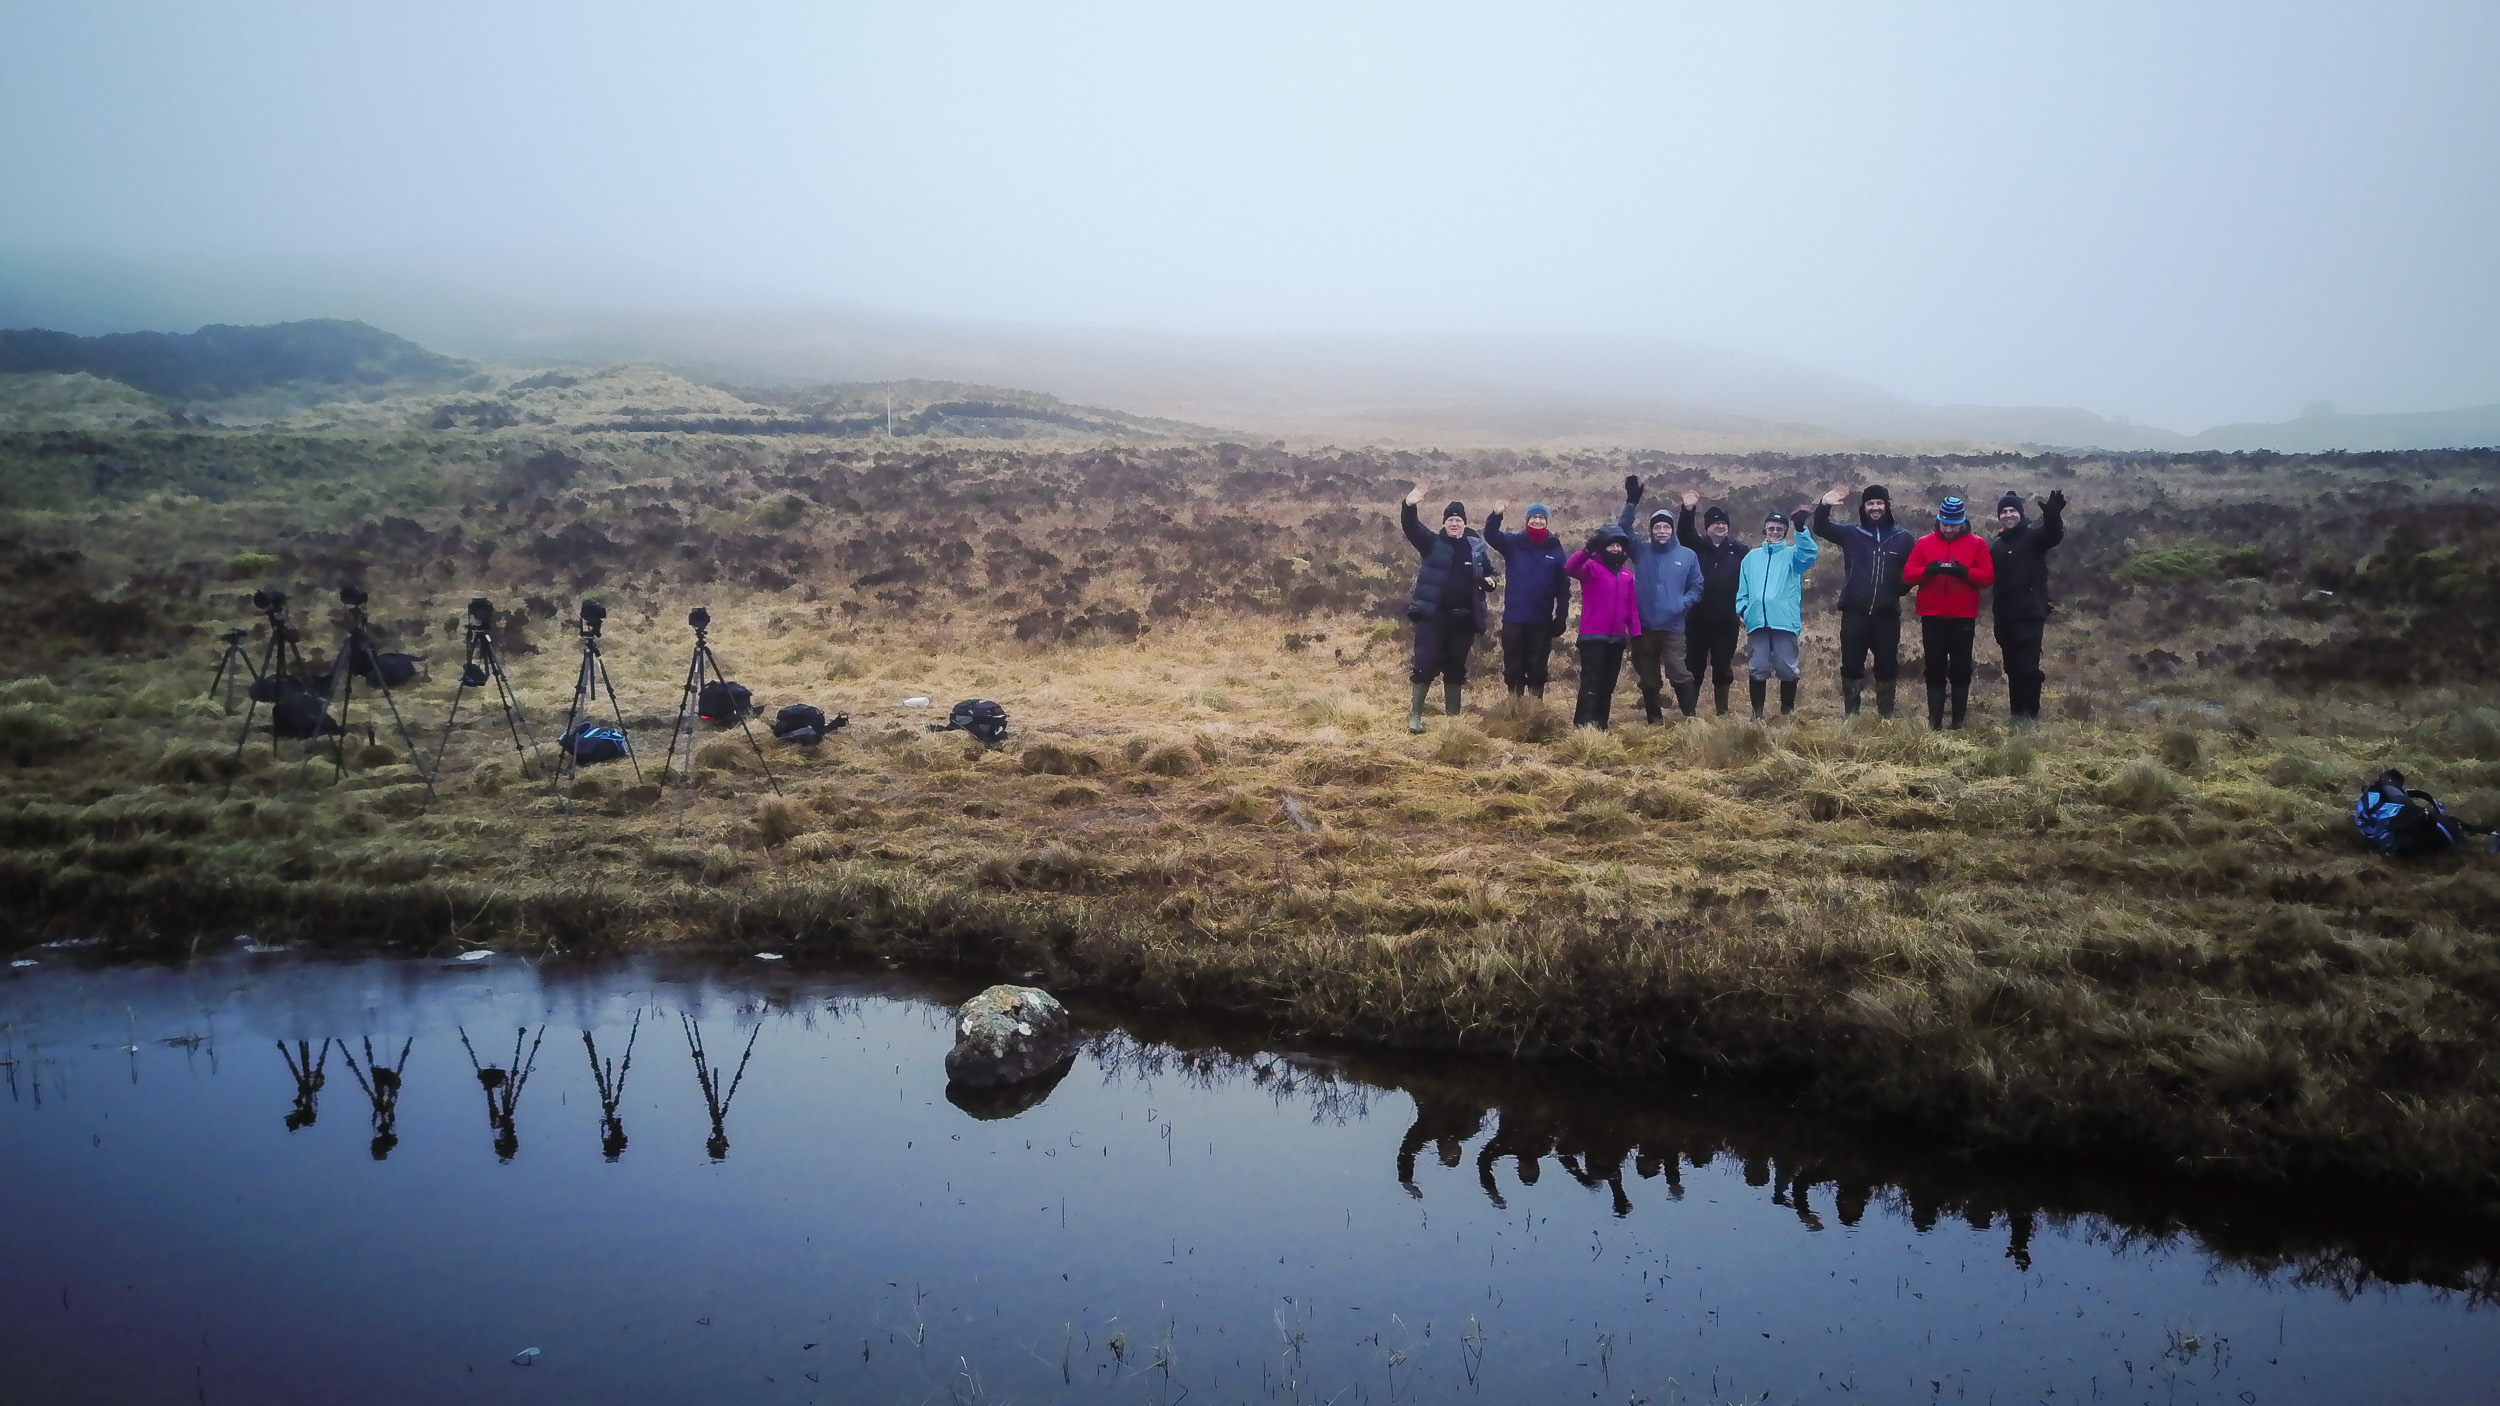
Day 2: Lochan na Fola and Stob nan Cabar
As you might expect with a landscape photography workshop it was an early start to the 2nd day. Fortunately, the drive to our next location of Lochan na Fola wasn't far from our hotel so the alarm call wasn't too early.
When we arrived at Lochan na Fola the water was beautifully still giving us some wonderful reflections of Stob nan Cabar. Just as we setup though some cloud rolled in blocking the view of the mountain. As we waited I decided to try out my new drone the DJI Mavic Pro. The arrival of the drone caused a bit of excitement amongst the group as I demonstrated some of its capabilities. While I couldn't get find a gap in the cloud to fly a little higher, I did get the chance to grab a quick group shot.
We didn't have to wait to long for the cloud to clear though and all of sudden it was battle stations as we were presented with some truly epic scenes!
Nikon D750, Nikkor 16-35mm f/4 @ 18mm, f/11, 1/20th second, ISO 100, Lee Filters Circular Polariser.
Nikon D750, Nikkor 16-35mm f/4 @ 26mm, f/11, 1/20th second, ISO 100, Lee Filters Circular Polariser.
I can't decide which of the two images above I like the most. Both of them greatly appeal to me with their near perfect reflections and frosty reeds in the chilly lochan. It would have been so easy just to go back to the hotel and have an early breakfast when the cloud came in, but everyone was glad they stuck it out.
Day 2: Lochan na h-Achlaise and Loch Ba
After a very successful morning and a big Scottish breakfast, we headed up to Lochan na h-Achlaise. Shooting around midday is always challenging though and coupled with the bright blue sky I did struggle a little bit to get some images.
However, by exploring along the shore line of Lochan na h-Achlaise I did find this interesting composition.
Nikon D750, Nikkor 24-70 f/2.8 @ 34mm, f/13, 30 seconds, ISO 100, Lee Filters Circular Polariser and Big Stopper.
Exploring just a little further I found this scene just off the road at Loch Ba. This is a more pleasing image thanks to the horseshoe arrangement of the foreground rocks and the reflection of the mountain in the water.
Nikon D750, Nikkor 24-70 f/2.8 @ 40mm, f/13, 2.5 seconds, ISO 100, Lee Filters Circular Polariser and Little Stopper.
I also had just enough time to try and capture a panorama of the area using my DJI Mavic Pro.
DJI Mavic Pro - 7 images stitched and processed in Lightroom.
Day 2: Blackrock Cottage
Blackrock Cottage is probably one of the most photographed locations on Glencoe, but it would have somehow seemed rude not to photograph it. After all, we were passing it on our way to get coffee from the cafe at the ski centre.
I rarely convert to black and white but in this case, the image seemed to work better without colour. The texture on the mountain (Buachaille Etive Mor) really stands out.
Nikon D750, Nikkor 24-70mm f/2.8 @ 62mm, f/11, 1/25th second, ISO 100.
Day 2: Glen Etive
Towards the end of day 2, we headed down the long and windy road of Glen Etive towards the head of Loch Etive. Here the stunning mountains reach right down into the sea loch and it's an ideal location for capturing the last light as it touches the tops of the mountains.
As I waited for the light I was still able to capture some striking images of the north east shore of Loch Etive.
Nikon D750, Nikkor 24-70mm f/2.8 @ 26mm, f/11, 198 seconds, ISO 100, Lee Filters Big Stopper, ND Grad and Circular Polariser.
As I've written on this blog before it's always important to see what is going on behind you. It appeared that the sun was shining on the mountains diretly behind me!
Nikon D750, Nikkor 70-200mm f/2.8 @ 150mm, f/8, 1/5th second, ISO 100, Lee Filters Big ND Grad.
In my hurry to get to the head of the loch to capture last night on the mountains I completely missed another great composition. It wasn't until I was heading back to the car that I found a few of my fellow photographers shooting this interesting scene.
Nikon D750, Nikkor 16-35mm f/4 @ 19mm, f/11, 20 seconds, ISO 100, Lee Filters Circular Polariser and ND Grad.
I had actually walked by this location in my hurry to get to the head of the loch. Perhaps I should have taken just a little more time to explore this area before settling into my chosen location.
Day 2 was certainly a busy one. Would day 3 be just as good?
Day 3: The Study
After the successes of day 2, the weather had a change of heart and went typically Scottish. Lots of low clouds, and lots of rain. Our initial plan was to do a pre-breakfast shoot of Buachaille Etive Mor. We would go down to the river Coupall to shoot the waterfalls with the mountain in the background. Only trouble was you couldn't see the mountain or anything really. Reluctantly we headed back for an early breakfast and discuss our next move.
With the weather forecast predicting a stop to the rain, our tutors suggested we shoot from The Study, a slightly elevated viewpoint with excellent views of the mountains (The Three Sisters). Sure enough, the rain stopped and we were back in business.
I don't often shoot panoramas but this viewpoint seemed like the ideal location to do so. Fortunately, Adam Burton was on hand to give me some excellent tuition on how to setup the tripod correctly and the best way to rotate the camera. Taking my new found knowledge I managed to capture this image of The Three Sisters.
Nikon D750, Nikkor 24-70mm f/2.8 @ 24mm, f/11, 1/100th second, 10 vertical images stiched and processed in Lightroom CC.
I then decided to opt for a much tighter composition giving me one of my favourite images from the workshop.
Nikon D750, Nikkor 70-200mm f/2.8 @ 90mm, f/11, 1/40th second, ISO 100, Lee Filters ND Grad.
Day 3: Stob Dearg and the River Coupall
There is no doubt that this location has been photographed a lot. However, that doesn't make it any less worth shooting. There are always new compositions to be had, different weather conditions to manage and personal style to put into an image.
The key element for this location is a visible Stob Dearg (Buachaille Etive Mor), something that was missing that afternoon. This made my decision a couple of days earlier not to photograph this very scene because "I'll be back in a couple of days", even more heartbreaking.
However, with probably an unjustified amount of optimism, I put on my wellington boots, got into the river and set up my shot. All I needed was for the cloud to clear from the mountain. So I waited, and waited, and waited. It came so very close to being completely clear, but as the sky darkened I knew it wasn't going to happen.
Though you can't see the whole of the mountain in this image, I still like the end result.
Nikon D750, Nikkor 16-35mm f/4 @ 19mm, f/13, 0.8 seconds, ISO 100, Lee Filters Circular Polariser and 0.3 ND Grad.
Though it had been a challenging day with the weather, it was still a successful day out with the camera.
Workshop Summary
At the start of this blog post, I mentioned the three things that I look for on a workshop; personal development as a photographer, social interaction, and local knowledge.
There is no doubt that my artistic eye has developed a little bit more and that I'm now better prepared to shoot panoramas. I also got to spend a couple of days with a great group of people who shared my passion for landscape photography. We all shared some great stories in the bar! And finally, thanks to some excellent planning and local knowledge, the weather and conditions rarely caused a problem with the flexible itinerary.
I've come away with some great images and some even better memories, so it was definitely worth a few days off work and a very long drive!
In Part 2...
In part 2 of my Glencoe Adventure blog post, I will tell you about the images I took during the spare 24 hrs I had before the workshop started, including a video of my very early and snowy ascent of Beinn a'Chrulaiste!