
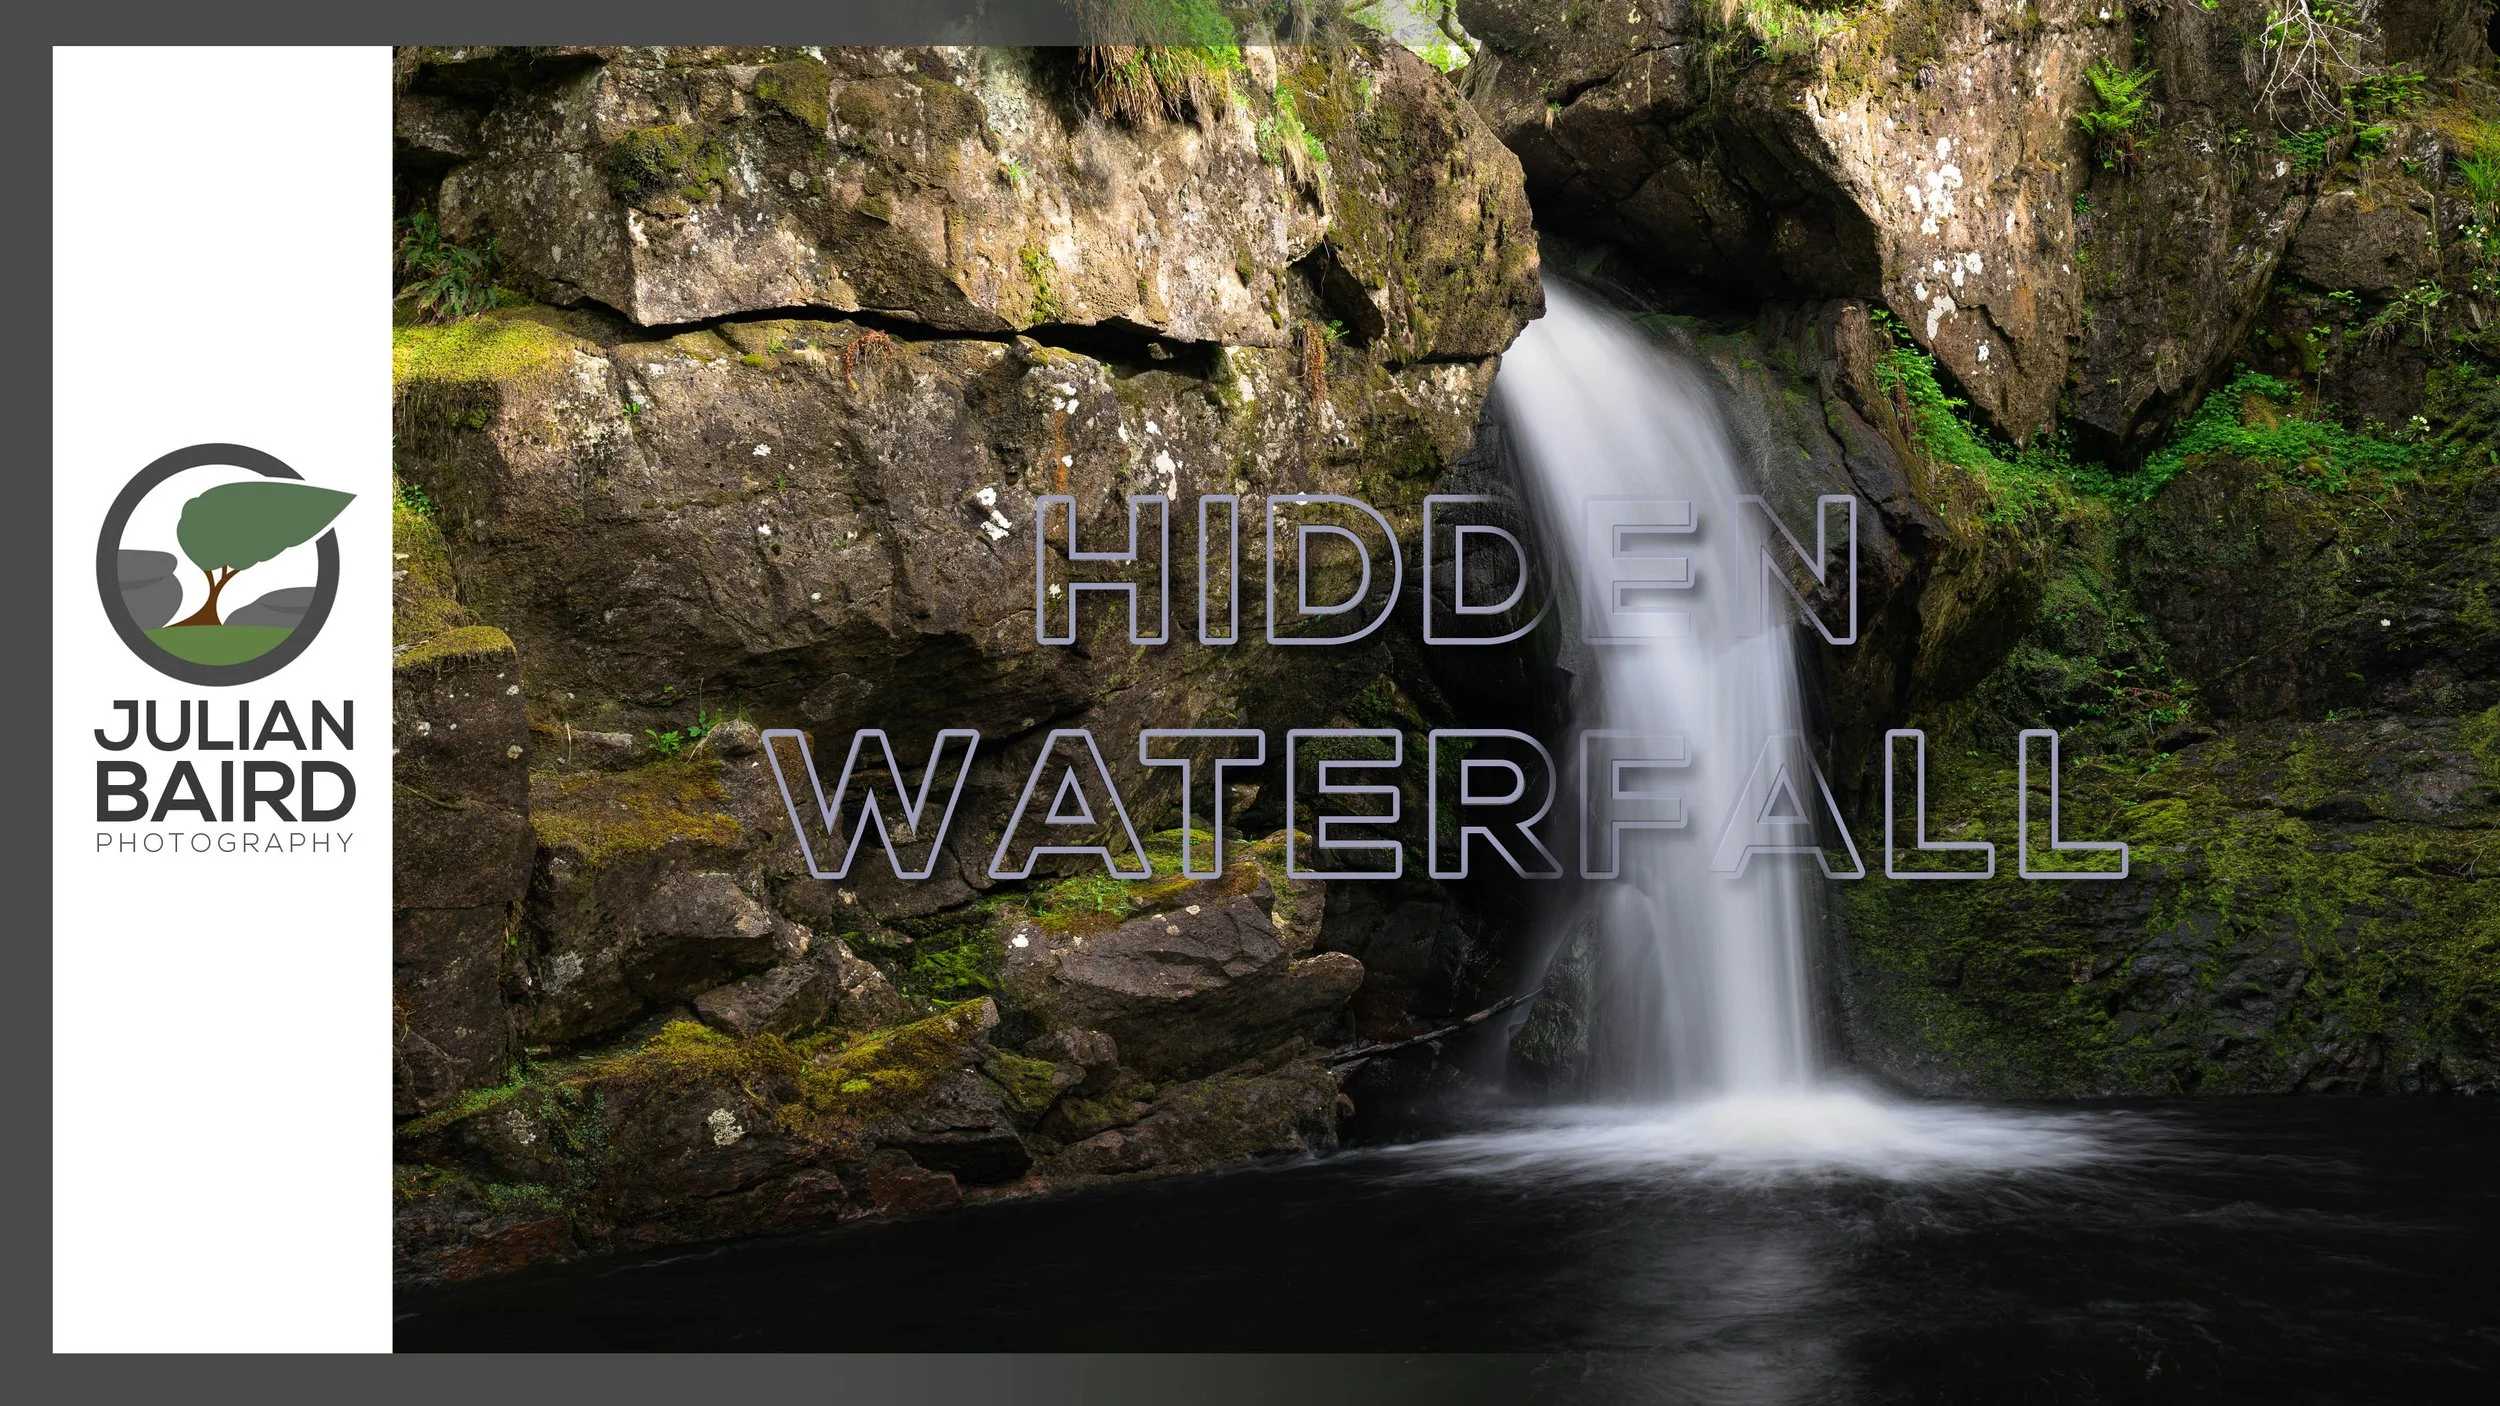
Photographing a Hidden Waterfall in the Scottish Highlands
Returning to the Scottish Highlands always feels like coming home and on this visit I finally made the long walk to a hidden waterfall I had been wanting to photograph for years.
A Glen of Secrets and Surprises
A few times each year I return to my homeland of the Scottish Highlands. These visits are always precious to me, giving me the chance to reconnect with my family, my roots, and the landscapes that I love. They also give me the opportunity to stretch my photography and photograph something other than Dartmoor for a change! If you are a regular reader of the blog, you will know there are two Highland locations I return to again and again: Kilchurn Castle and Glencoe. Both are beautiful, iconic places, and understandably very well photographed.
Photography is not the only thing I love doing when I am in Scotland. I also have a love of walking, running, and cycling. Sometimes I follow routes I know well, but I also enjoy exploring and seeing what I can discover. It was during one of those walks a few years ago that I stumbled across a waterfall that immediately caught my attention. Not only did it look like a wonderful place for a wild swim, but it also sparked my imagination photographically.
Now, I am certainly not claiming to be the first person to discover this hidden gem, but given its remote location it is not a place that sees a huge number of photographers. Walkers, runners, and perhaps even a few cyclists may recognise it immediately when they see the photographs. One thing is certain though, it receives nowhere near the footfall of some of Glencoe’s more famous waterfalls.
Ever since first seeing it, I had wanted to return with my camera, but it has taken until now for me to finally make the long walk back. What a journey it turned out to be. The walk into the glen was beautiful, with constantly changing Highland weather bringing rain, rainbows, and moments of glorious sunshine. The old saying about experiencing four seasons in one day could not have been more accurate.
As I entered the glen, the light was simply stunning. Clouds drifted across the mountains, creating moving patches of light that danced across the landscape. I stopped several times just to breathe it all in. Even if I had come home without a single photograph, I was already in a place that made my heart sing.
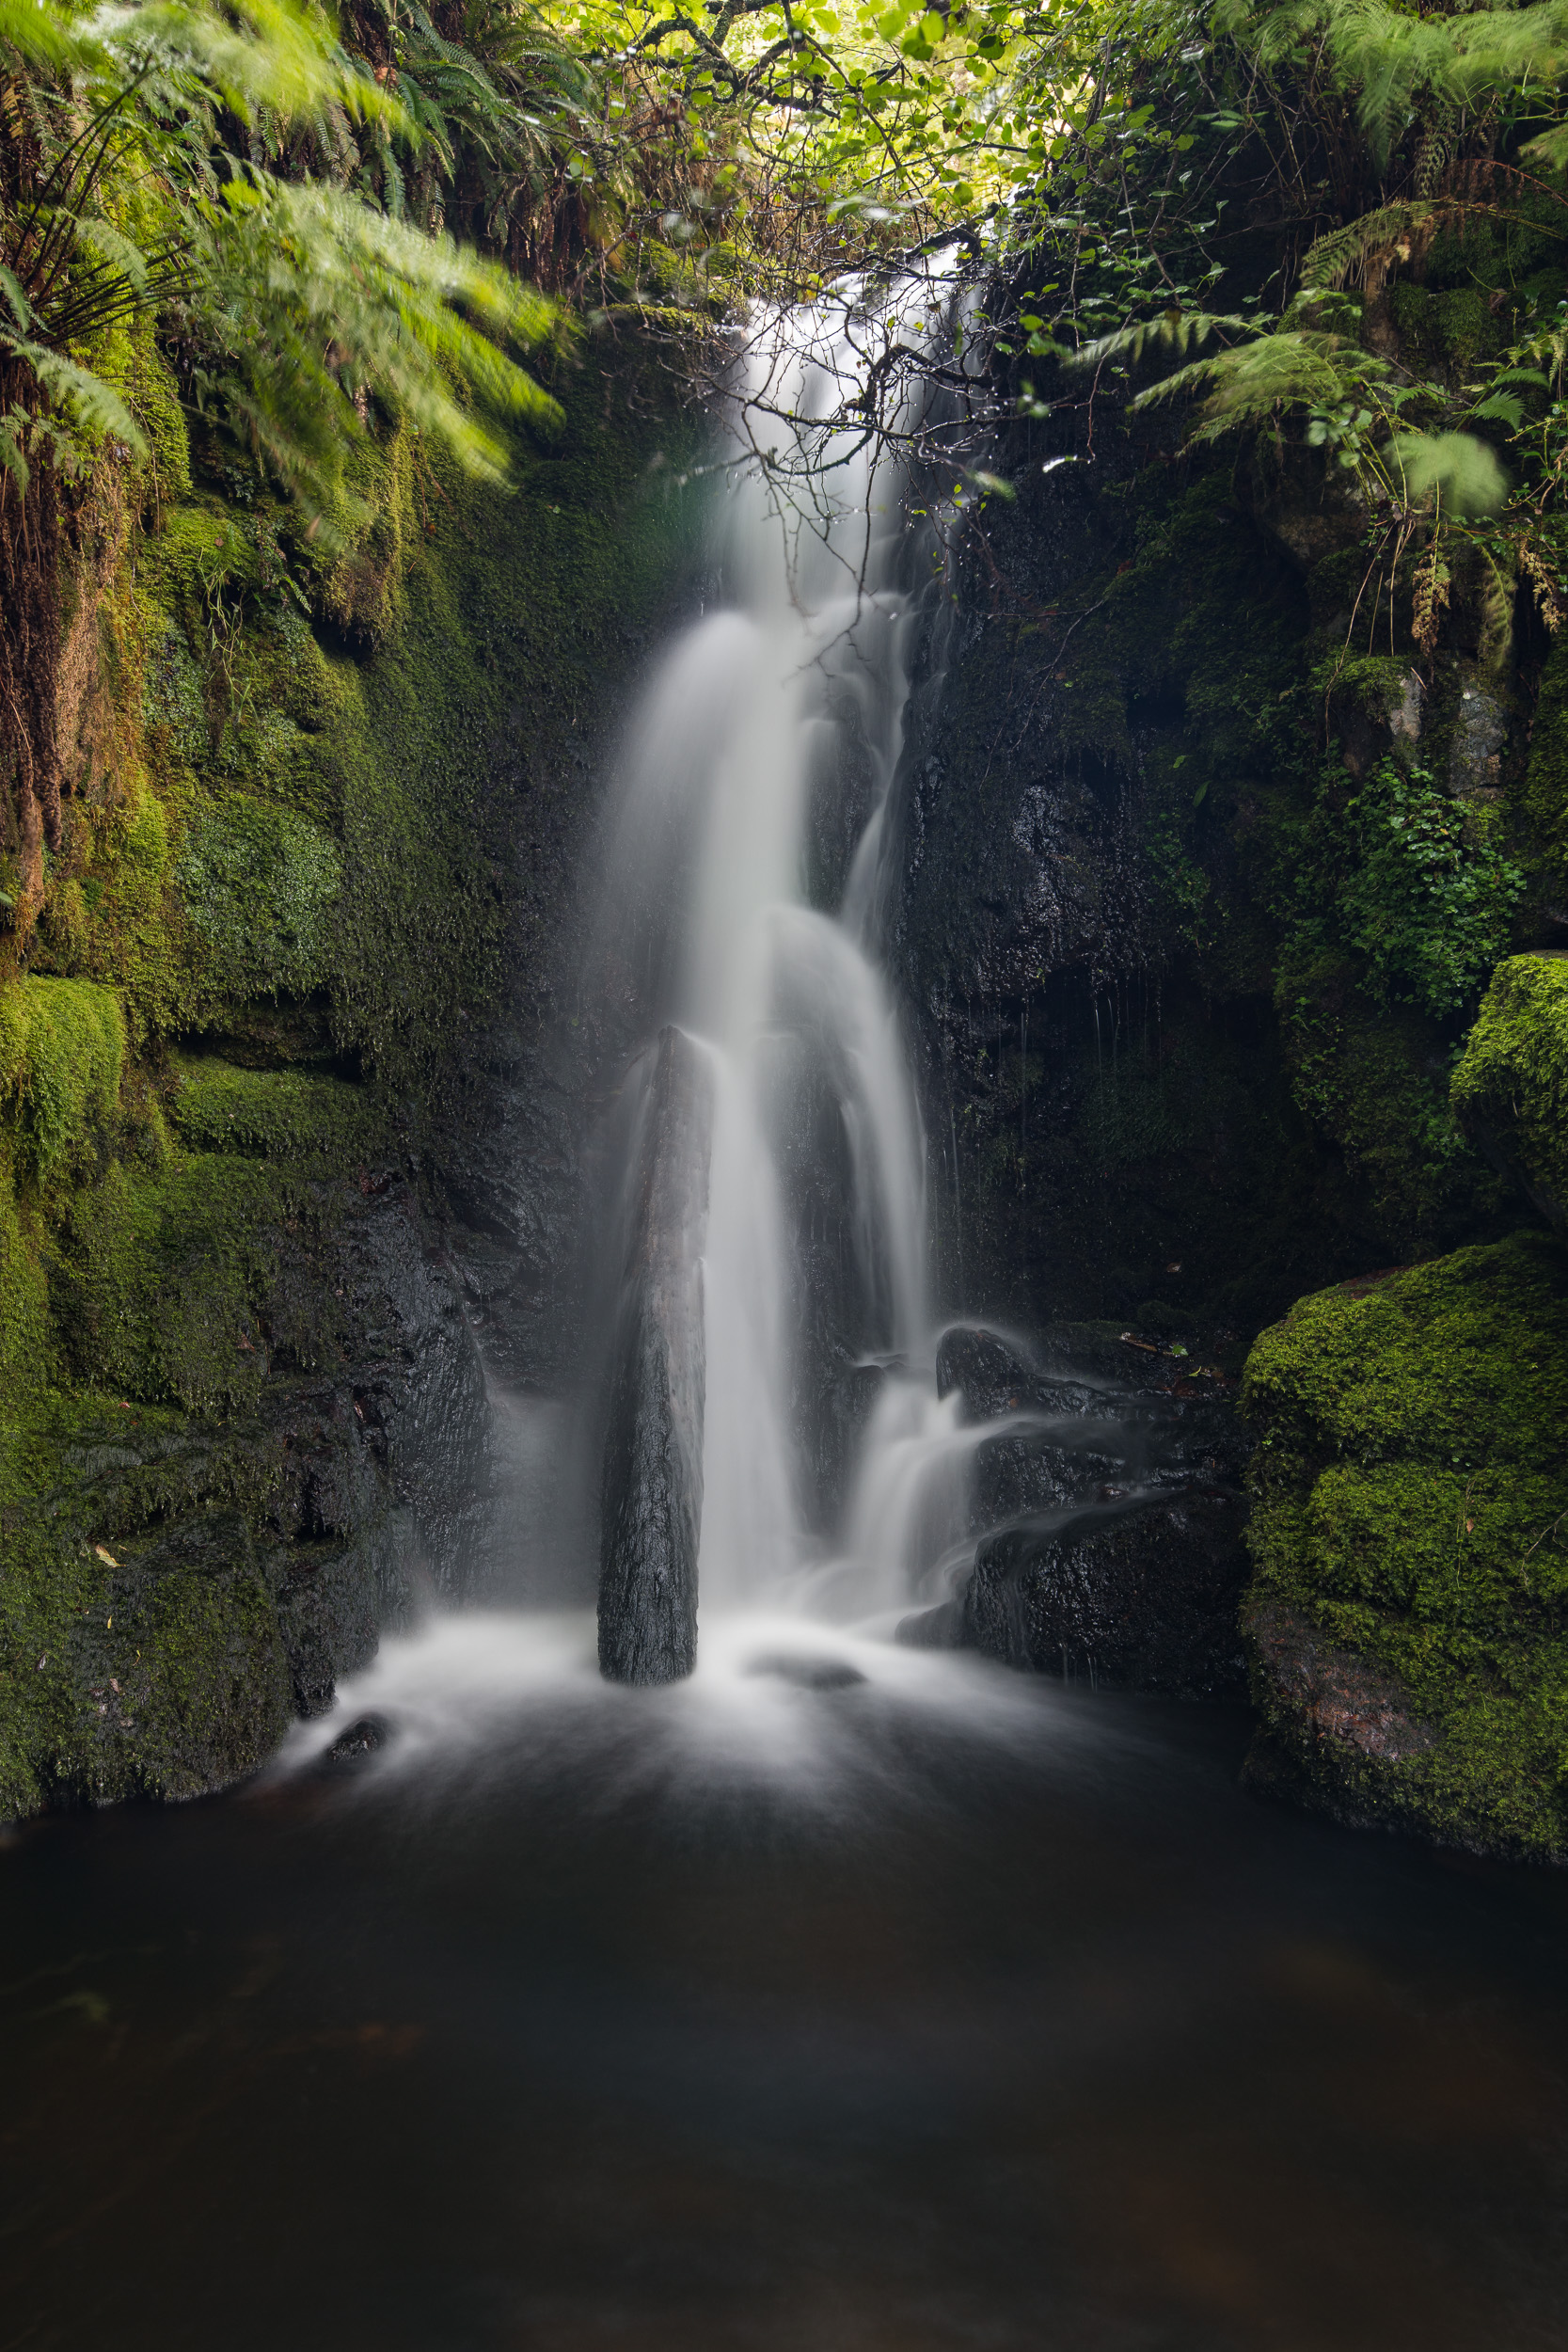
The Fall, Scottish Highlands - Nikon Z8 with Nikkor Z 24-120mm f/4 S at 37mm, f/8, 1.6 secs at ISO 80 with Kase Revolution CPL and 3 Stop ND.
Arriving at the waterfall with my camera felt genuinely special. There was no one else around for miles and I had the place entirely to myself. I could slow down, take my time, and really enjoy the process of photography. So much of landscape photography can feel slightly frantic, especially during those fleeting moments of soft light at sunrise or sunset. Here though, tucked away deep in the glen with only the sound of the water for company, time seemed to slow down. Whether I stayed for thirty minutes or three hours, very little would change. It was bliss.
While I am not publicly sharing the exact location, I am very happy to share the experience of photographing it in this video. I hope it gives you a small taste of what it felt like to be there.
I already know there is more work to be done at this waterfall. I would love to refine some of the compositions and experience the place in different seasons, water levels, and conditions. And perhaps next time I will finally bring some shorts and take that swim I keep promising myself.
I cannot wait to return.
The White Fall, Scottish Highlands - Nikon Z8 with Nikkor Z 24-120mm f/4 S at 55mm, f/8, 30 secs at ISO 80 with Kase Revolution CPL and 6 Stop ND.
Purchase Kase Revolution Filters
If you’d like to purchase some filters from Kase you can do so directly using the links below. You can also use the discount code Julian for a 5% discount.
🛒 Kase Revolution Plus Entry Kit - https://kasefilters.com/product/kase-revolution-plus-entry-kit/ref/JulianB/
🛒 Kase Revolution Plus Pro Kit - https://kasefilters.com/product/kase-revolution-plus-pro-kit/ref/JulianB/
Bite-Size Blog Post #64 - River Coe Waterfall
Just because a location is well photographed doesn’t mean it’s not worth returning to, especially when you have something specific in mind.
Yes, It’s That Waterfall
Over the last few weeks in Scotland I’ve been focusing, amongst other things, on capturing high contrast black and white photographs of waterfalls. The last two I’ve shared here are not widely photographed, which gives some scope to create something a little different.
This waterfall is the opposite. It’s one that a lot of people have photographed, myself included. Does that mean it’s not worth revisiting? Of course not. As I mentioned in my recent post about Kilchurn Castle, a honeypot location is popular for a reason. The challenge is not whether to photograph it, but how to create something that feels personal.
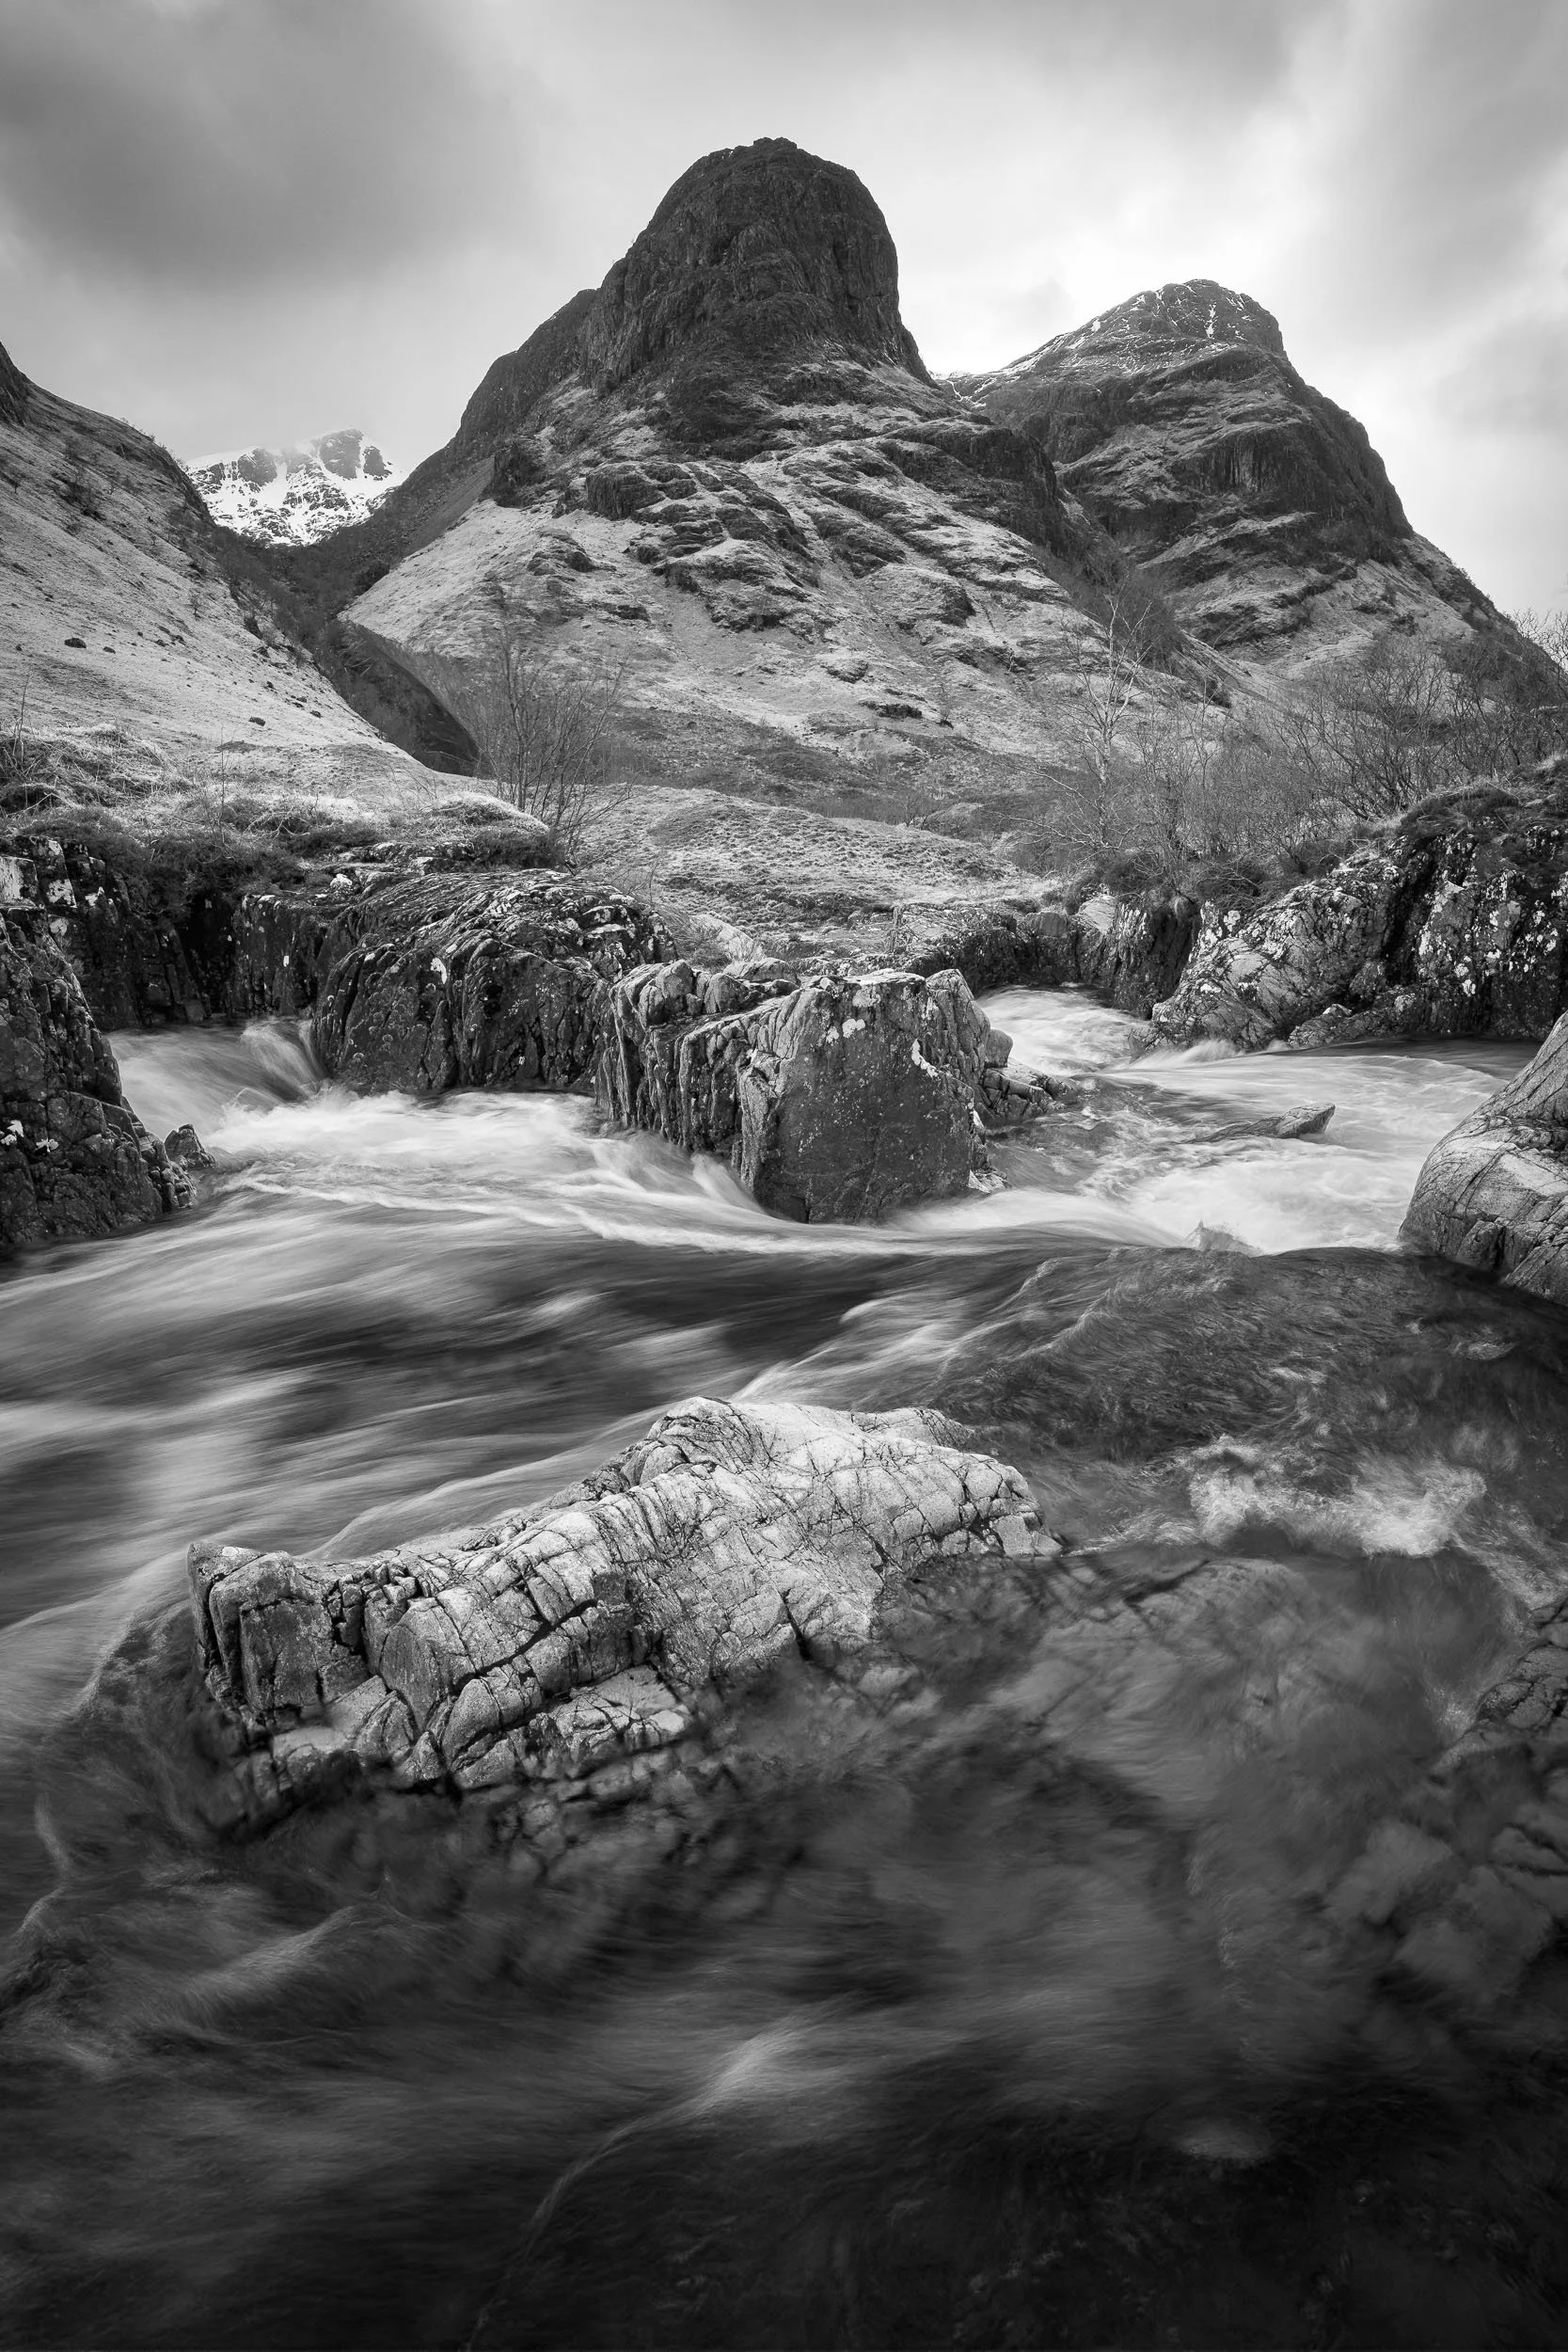
Standing beside the River Coe, looking at a scene that has been photographed countless times, I wasn’t searching for something completely new. I was looking to create an image that fits within my collection of high contrast black and white waterfalls from the Highlands. Not every photograph needs to stand alone as a masterpiece. Some simply need to play their part in a wider body of work.
Like many places in Glen Coe, this is somewhere I will return to. Conditions change and each visit brings a different opportunity. You never quite know when everything will come together.
Glen Coe Waterfall, Scotland - Nikon Z8 with Nikkor Z 14-30mm f/4 S at 21mm, f/13, 1/5 sec at ISO 64, Kase Filters CPL
Bite-Size Blog Post #63 - Glen Orchy Waterfall
A dramatic stretch of the River Orchy delivers both striking compositions and a bit of danger!!!
Danger! Danger!
In my previous blog post, I wrote about the difficulty I had photographing a waterfall close to where I was staying in Scotland, and how that experience inspired me to start a mini project capturing high-contrast images of other waterfalls in the area. With a few locations already in mind, I wasted no time getting back out there.
The Glen Orchy road, which runs from Dalmally to Bridge of Orchy, is a lovely drive. If you’re heading for Glen Coe, it’s quicker to take the route via Tyndrum, but if you’ve got time on your hands, this quieter road is well worth it. It’s scenic, peaceful and, importantly for this story, home to a number of waterfalls.
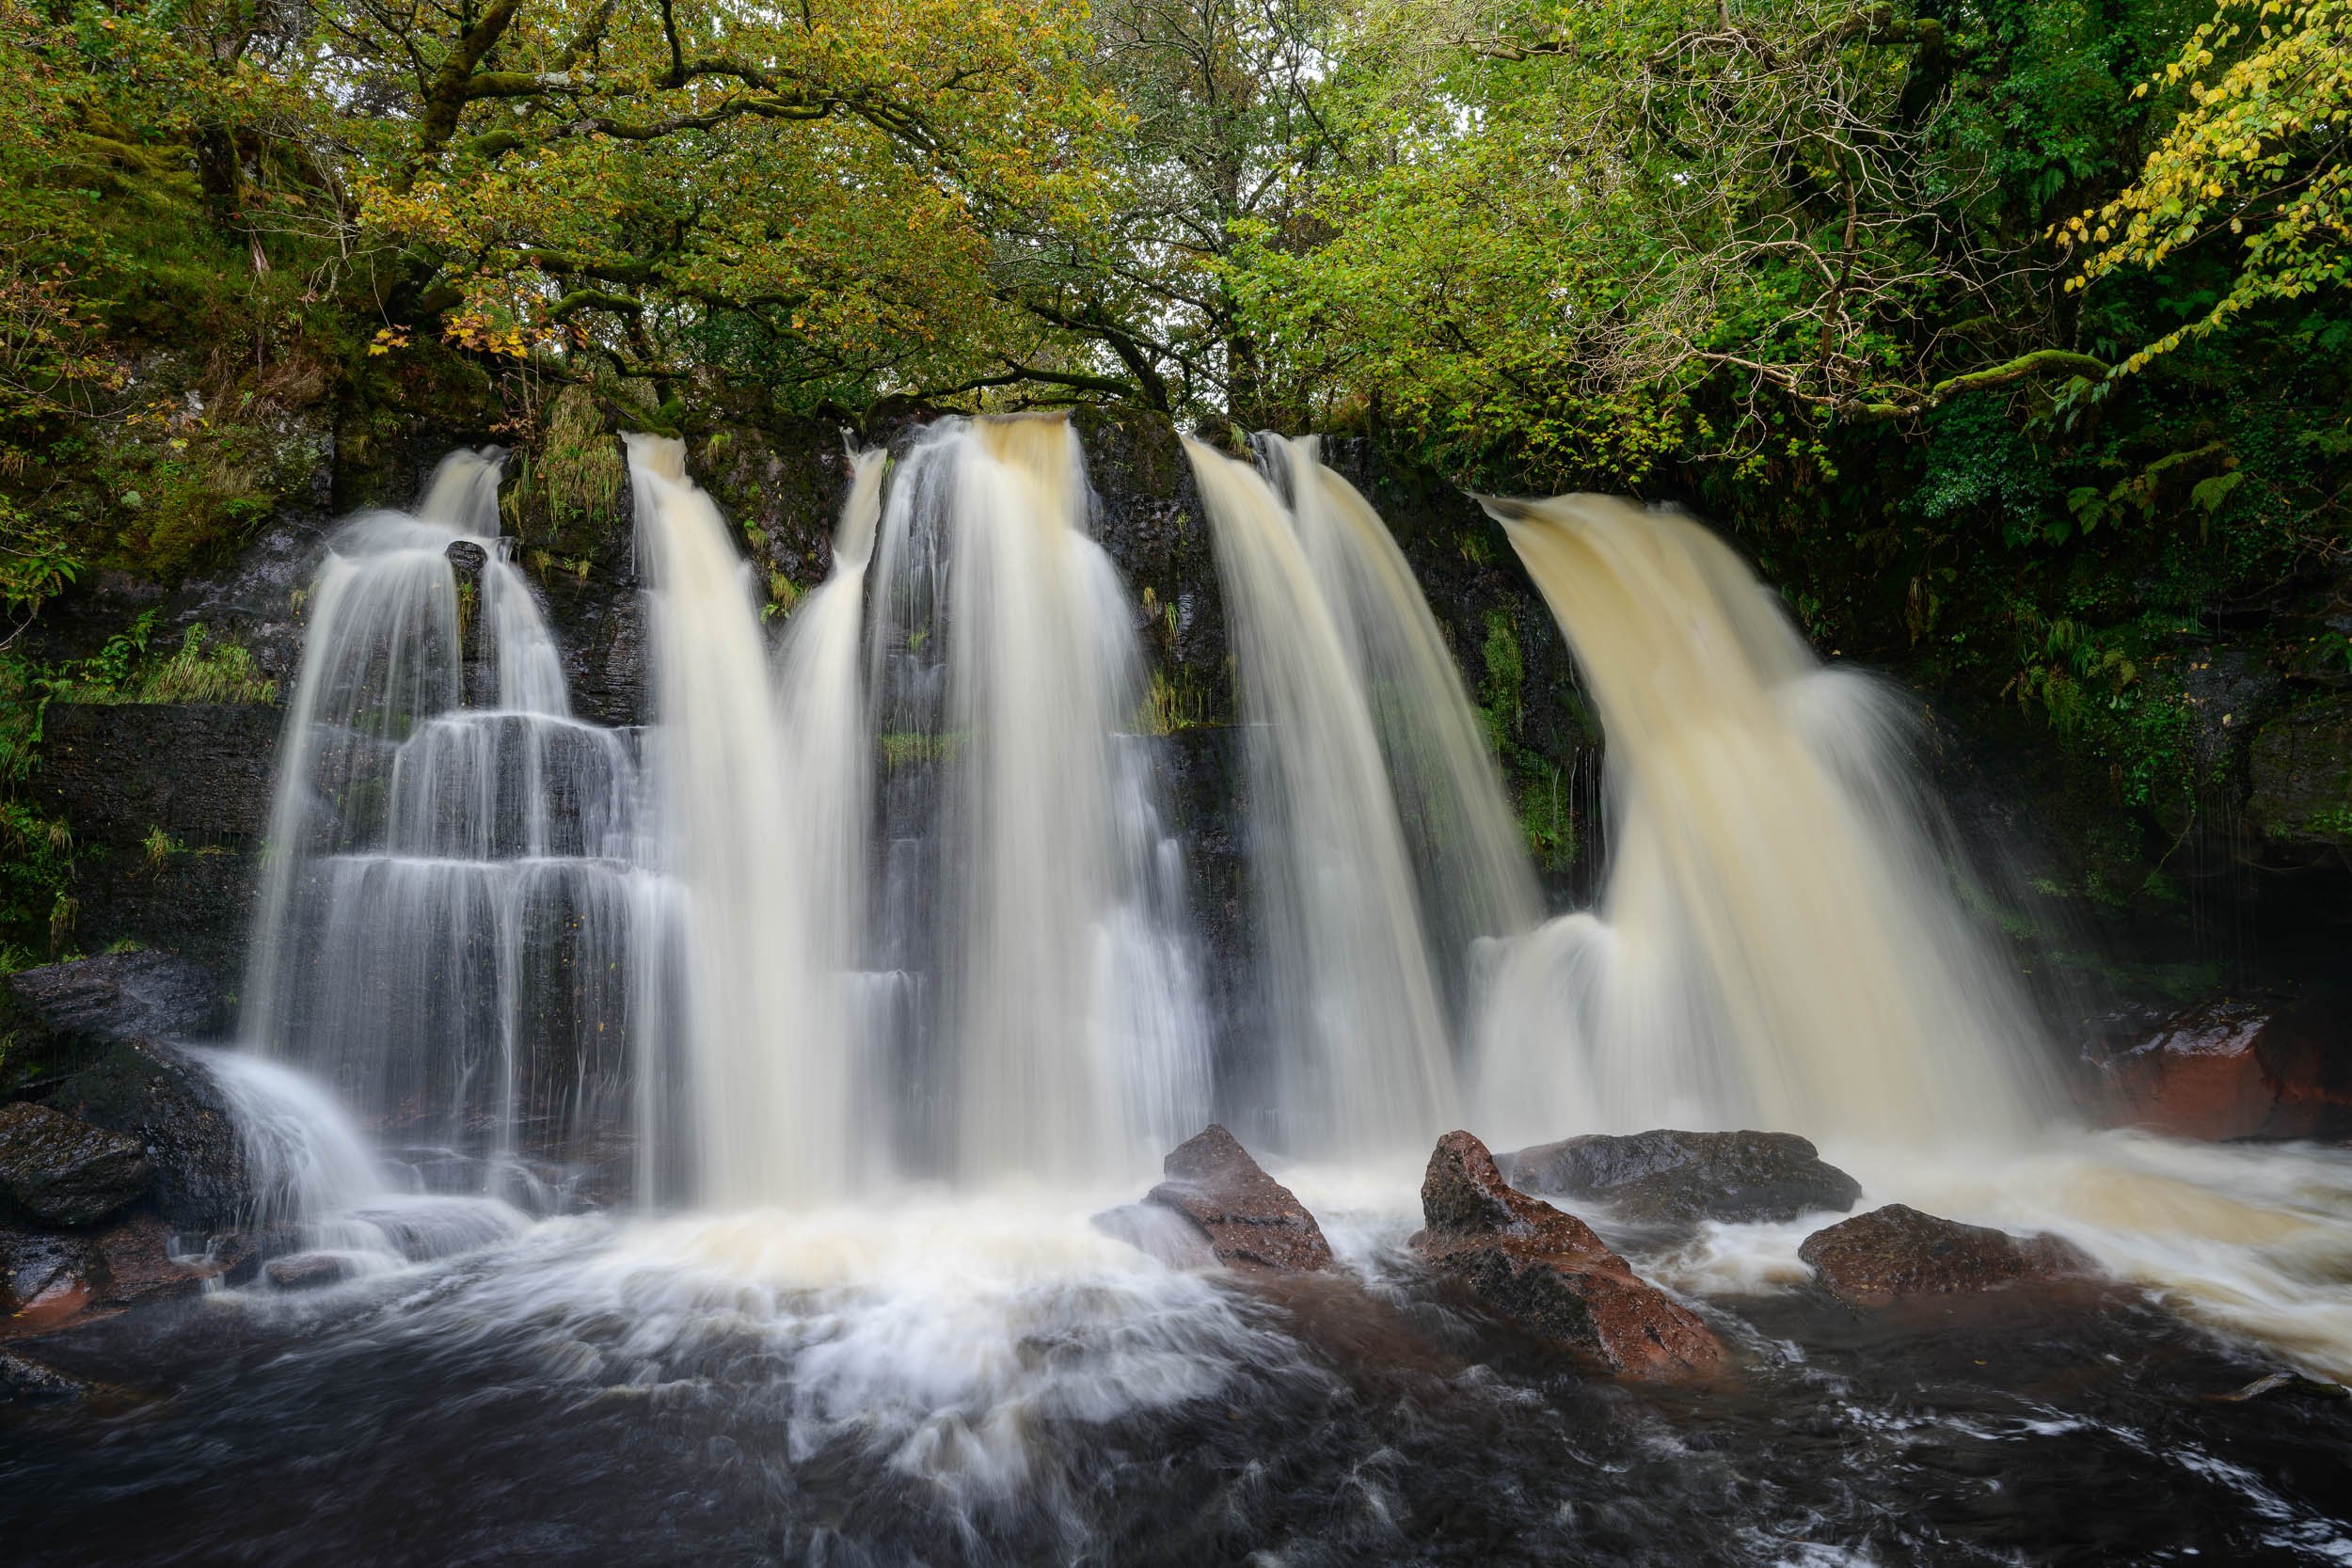
Glen Orchy is home to the stretch of the River Orchy that flows from Bridge of Orchy down to Loch Awe, famous for Kilchurn Castle. In winter, and especially after heavy rainfall, the river transforms into a powerful torrent, and the waterfalls truly come alive. The most striking of these is also, perhaps unsurprisingly, one of the most dangerous.
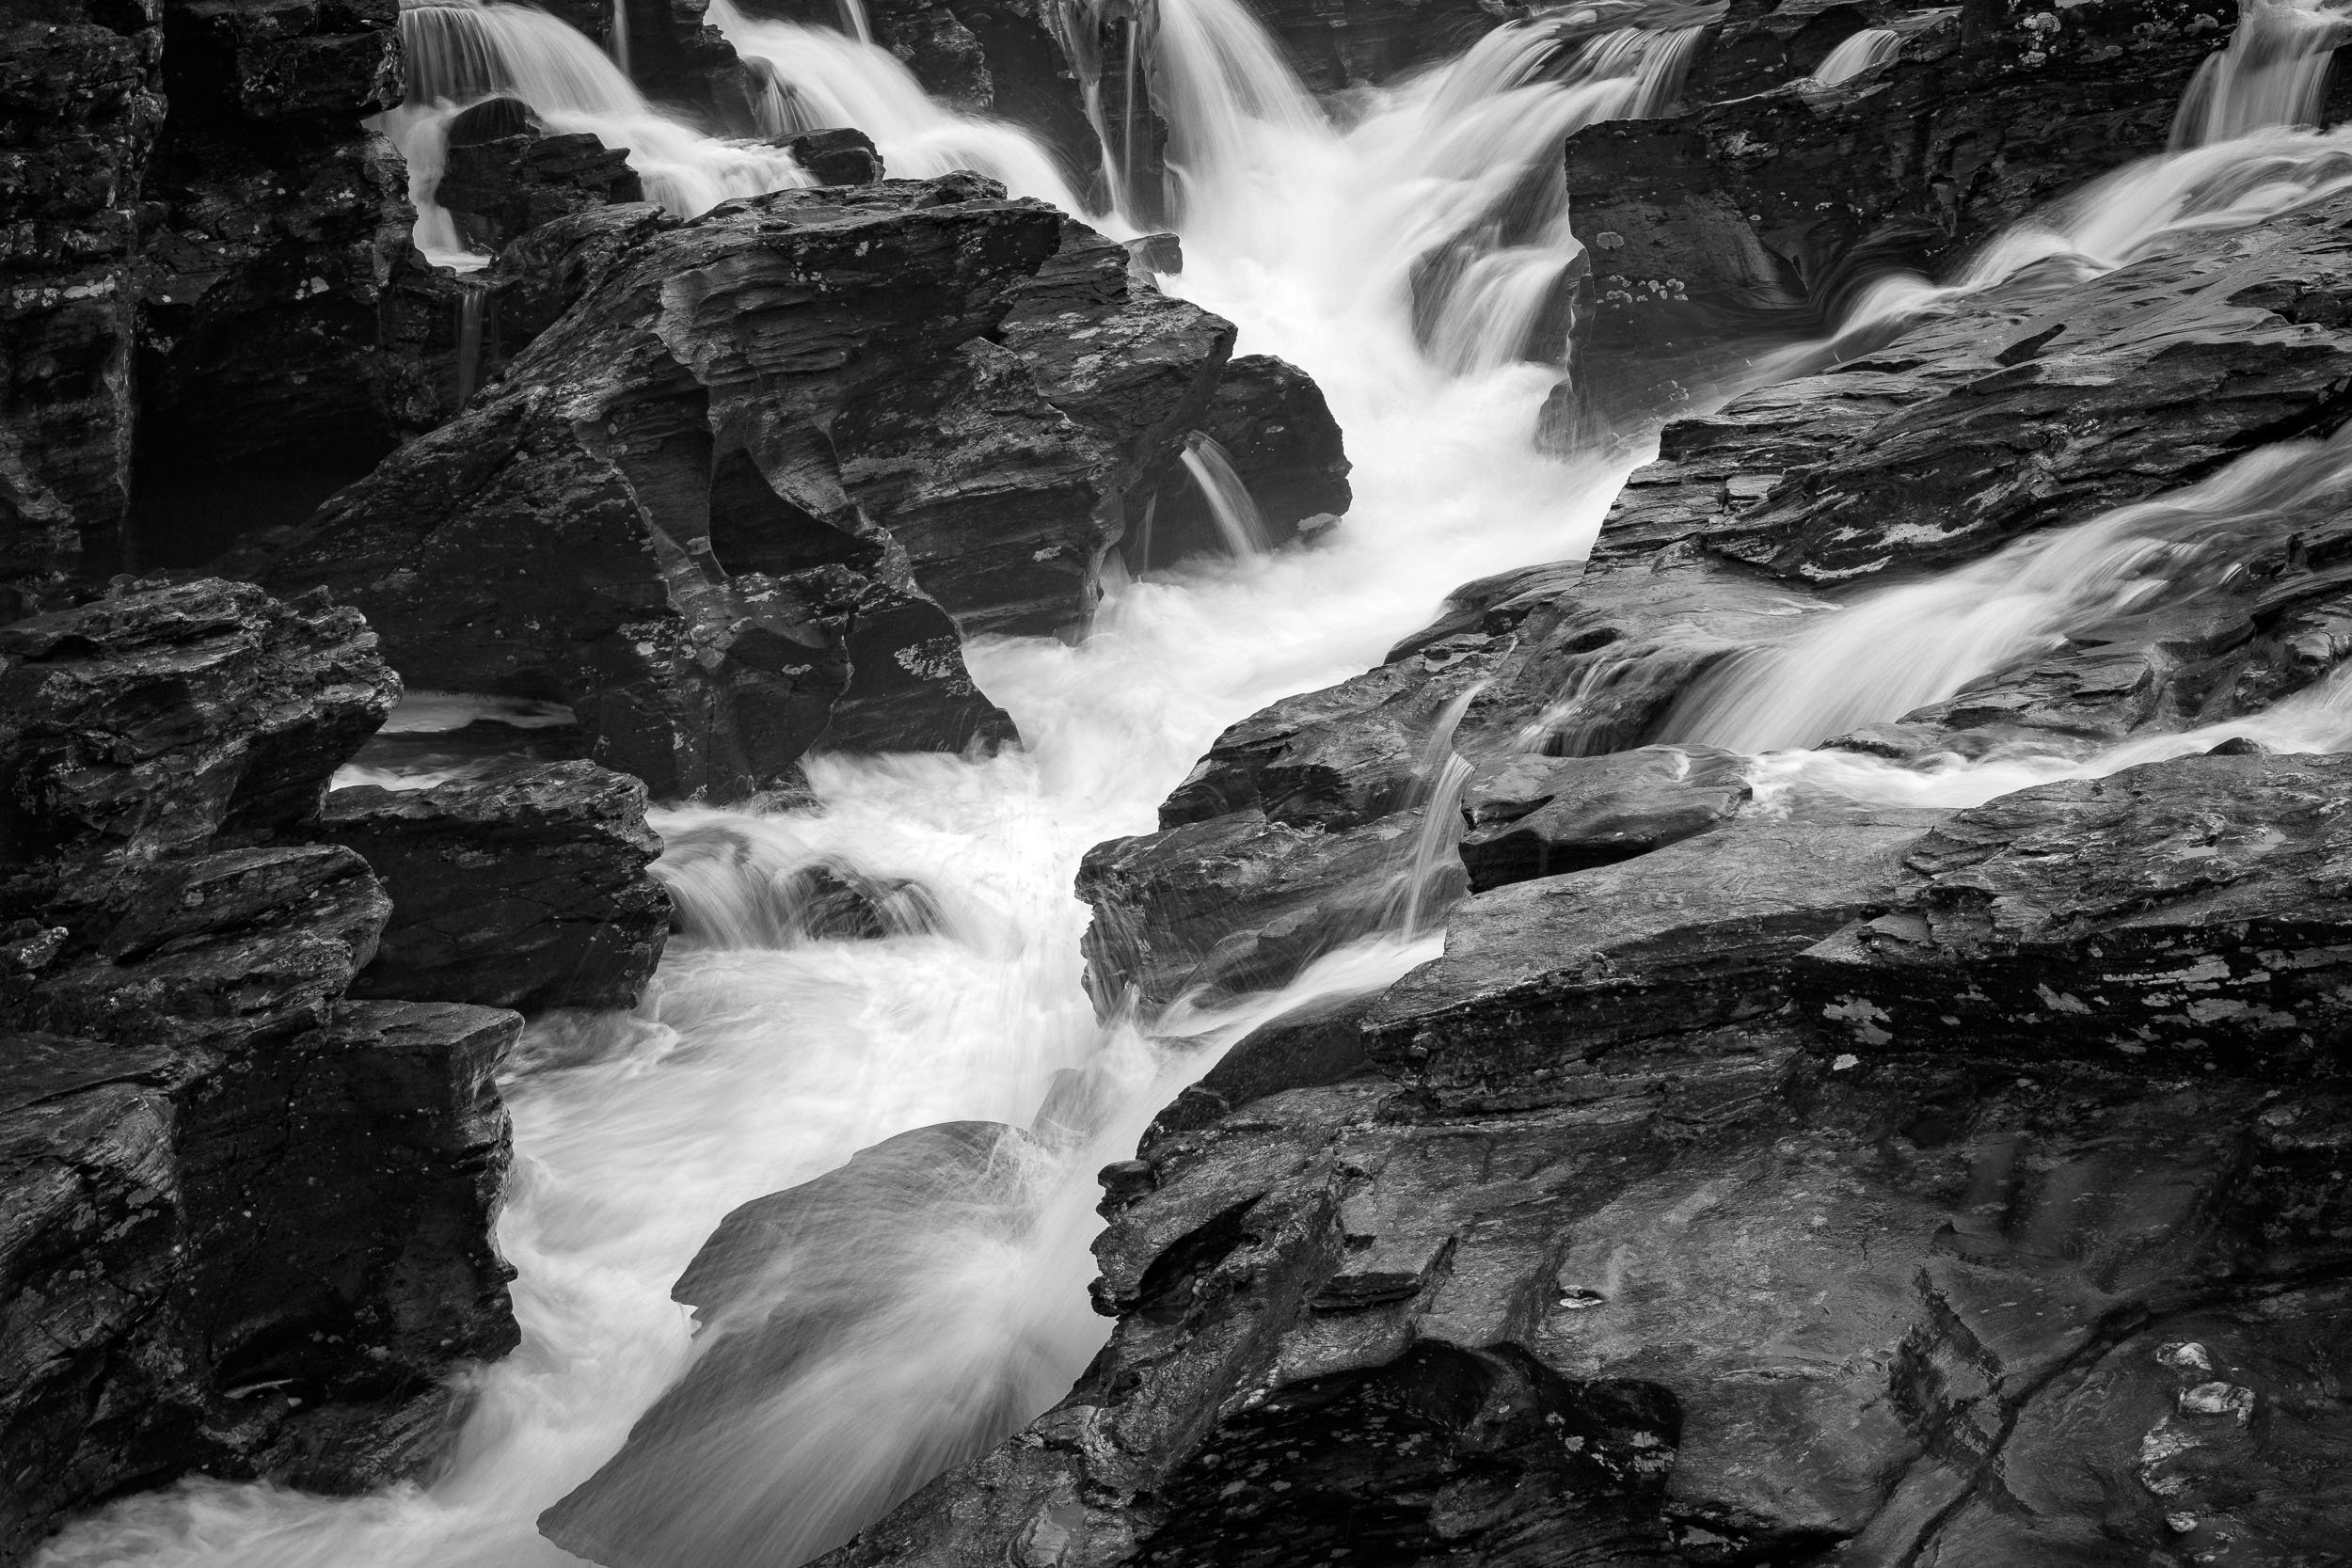
As you can see in the image below, this particular waterfall is made up of multiple streams and smaller cascades, offering a wealth of compositional options. The challenge, however, lies in getting into position. The rocks you need to traverse are treacherous when wet. It’s not just a case of slipping and landing on your backside, the real danger is being swept into the fast-flowing river below. It’s certainly not for the faint-hearted, and for me, pushing into a slightly better position simply wasn’t worth the risk.
That said, it was a rewarding location to photograph, and one I’ll definitely return to. Perhaps in spring or summer a wider composition might work better, but on this occasion, I found the tighter scenes far more compelling. Ideally, I’ll catch it again when there’s still plenty of water flowing, but the rocks are a little less unforgiving underfoot.
As for the next waterfall on the list? I’ve got a few in mind, so stay tuned.
Glen Orchy, Argyll, Scotland - Nikon Z8 with Nikkor Z 24-120mm f/4 S at 57mm, f/13, 1/5 sec at ISO 100.
Photographing One of Scotland's Hidden Waterfalls
Scotland has many famous and majestic waterfalls, but for the landscape photographer willing to do a bit of exploring, there are also a few hidden gems. Join me in this 5 Minute Photo Adventure where I photograph one of those hidden gems near the coastal town of Oban in West Scotland.
A Very Wet and Challenging Photography Adventure
There’s not much Scotland doesn’t offer the adventurous landscape photographer. It has mountains, lochs, coastline, woodlands, and waterfalls. Some of those waterfalls have a lot of grandeur and are well known. There are also a few hidden gems. Not that hard to get to, but you need to know where they are.
There is one such waterfall near the town of Oban in West Scotland where I grew up. It’s been on my list of places to photograph for many years but it’s only on my most recent visit to Scotland that I’ve finally taken the chance to photograph it.
When I arrived at the waterfall though, it was in full flow, and it was raining. I shouldn’t have been surprised though. It is Scotland! With so much water in the air, it turned out to be one of the most challenging photographs I’ve ever captured. But I must admit, it was still a lot of fun!
Watch me get wet and take some photographs of this hidden gem of a waterfall in my latest 5 Minute Photo Adventure.
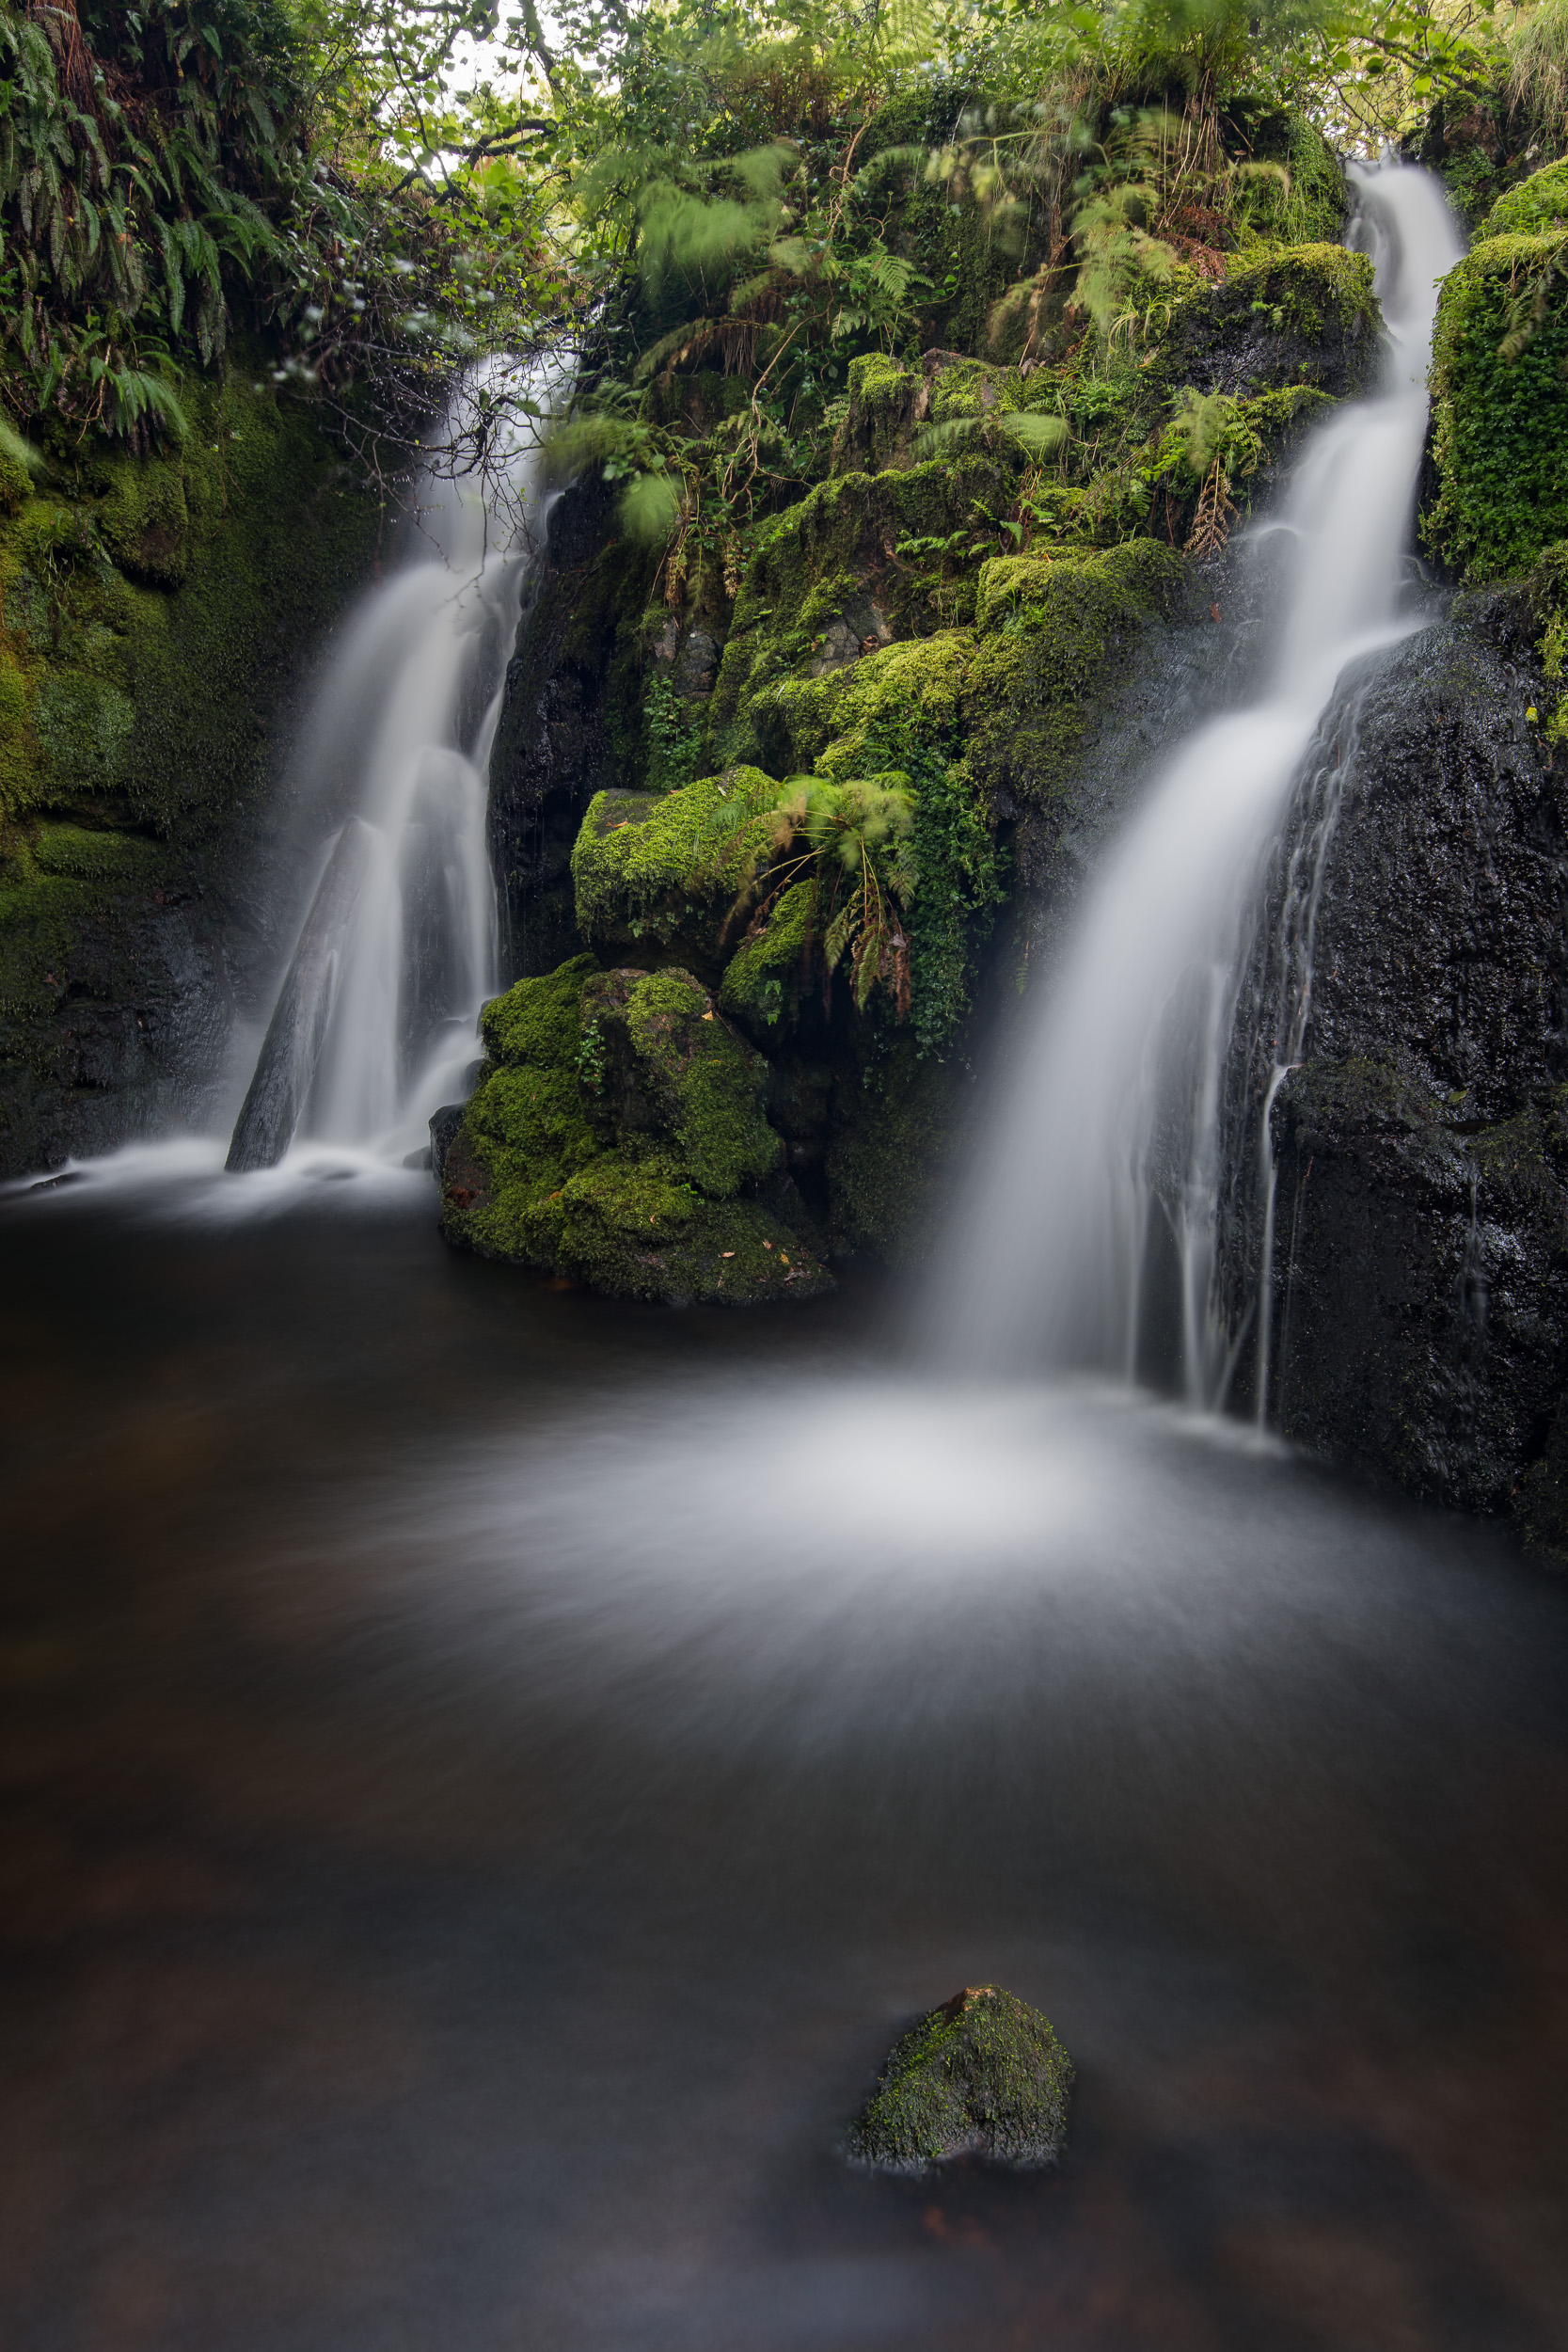
Landscape Photographs of Oban’s Hidden Waterfall
Waterfalls #1, Oban, Scotland - Nikon Z7, Nikkor 14-30mm f/4 S at 21mm, f/13, 0.4 sec at ISO 50, Kase Filters CPL.

Waterfalls #2, Oban, Scotland - Nikon Z7, Nikkor 14-30mm f/4 S at 16mm, f/13, 0.4 sec at ISO 50, Kase Filters CPL.

Should YOU Photograph the Honeypot Locations?
Is there any point in capturing your own images from the landscape photography honeypot locations? With so many images captured from these popular locations you could be forgiven for giving them a miss. In this blog post I head to Glencoe in Scotland to photograph one of its most popular viewpoints and discuss why I think everyone should shoot a honeypot location.
They Are Honeypot Locations for a Reason
This is going to be a bit of a short blog post. There are a couple of reasons for this. Firstly, most of what I want to say is said in the video to go with this post, so there’s little point repeating it all here. I’m also a little short in time because I’ve got lots of exciting content to work on that I want to get ready before the festive period really starts.
All that aside, I’ve been wanting to make this video for a while. My original plan was to shoot it down at Durdle Door but I never quite made it there this year. When I started making plans for my trip to Skye I knew I was going to stop off in Glencoe so I decided that I would make the video there. Glencoe is not short of a few honeypot locations but I settled on the viewpoint with the small waterfall (on the river Coupall) and Stob Dearg in the background. There can’t be that many of you that haven’t seen that viewpoint before!
It’s a stunning viewpoint and one that I can’t resist photographing every time I’m in Glencoe. These viewpoints aren’t called honeypot locations for no reason! However, in some circles, photographing these locations and viewpoints can be frowned upon. While it is true that getting something new from these locations can be tricky, I don’t think this is a reason to not shoot them.
If you want to know why I think you should shoot them, check out my video below:
I’m sure most of you have already shot a few honeypot locations and have enjoyed the experience of capturing your own images. If you haven’t though, I hope this video has inspired you to visit places like the Glencoe viewpoint in the video, or even Durdle Door.
Do you have a favourite honeypot location? Are there any honeypot locations you’d like to shoot? Let me know in the comments below.
One Location, Many Viewpoints
If you want to see the images from the video in a bit more detail you’ll find them below.
The River Coupall and Buachaille Etive Mor, Glencoe, Scotland - Nikon Z7, Nikkor 14-30mm f/4 at 22mm, f/13, 1 second at ISO 200, CPL and 3 stop ND.
River Coupall Falls, Glencoe, Scotland - Nikon Z7, Nikkor 14-30mm f/4 at 15mm, f/13, 1/8th at ISO 160, CPL.
The River Coupall and Stob Dearg, Glencoe, Scotland - Nikon Z7, Nikkor 14-30mm f/4 at 22mm, f/13, 4 seconds at ISO 160, CPL and 3 stop ND.

Focus Shift / Stacking with the Nikon D850: Capture and Processing
In the blog this week, I finally put the Nikon D850 Focus Shift feature to work by heading out to Dartmoor National park to capture a focus stacked landscape photograph of the waterfalls at Venford.
Using a New Feature of the D850
I love using my Nikon D850. It is without a doubt the best camera I've ever used. I even made a video on the 8 Things I Love About the D850. However, there was one feature that until recently I had never used. That feature was Focus Shift Shooting.
Focus Shift Shooting was a feature introduced with the D850 that allowed the camera to automatically take a series of photographs at different focus points throughout the scene. The idea is that you take those images, each with a different point of focus, and then "stacked" them in Photoshop, to create one super sharp image.
While the idea of focus stacking is hardly a new one, having a camera do the hard work for you is relatively new. Even the amount of work in post processing is much reduced now with Photoshop generally doing an excellent job of merging the photographs automatically.
Using Focus Shift in the Field
With the process of creating a focus stacked photograph becoming easier and easier I thought it was about time, I gave it a look. After all, even if I don't use focus stacking all the time, having another skill in your photographic toolbox can never be a bad thing.
So if you want to learn how I focus stack my images (and you don't necessarily need to own a D850 to do it), then check out my video below:
I hope you enjoyed that brief tutorial. Like I said, you don't have to own a D850 to create a focus stacked image. The D850 just automates the process of capturing the images. I was also a bit hesitant at first on trying out focus stacking. It all seemed a bit like hard work, but as it turns out it's not that difficult and the results are great. It's not needed for every photo, but you'll be glad you learnt the skill should you need it.
So, do you focus stack your images? Do you have a slightly different technique? Let me know in the comments below.
Those Focus Stacked Photographs
Venford Falls - Dartmoor, Devon: Nikon D850, Nikkor 16-35 mm f/4 at 24 mm, 2.5 secs at f/8, ISO 64, Lee Filters Circular Polariser.
Life on the Edge - Bedruthan Steps, Cornwall: Nikon D850, Nikkor 16-35 mm f/4 at 26 mm, 1/15th sec at f/5.6, ISO 64, Lee Filters Circular Polariser.

Grey Mare's Tail and Loch Skene: A 5 Minute Photo Adventure
In this blog post, I share with you the story, photographs and video of my time photographing Loch Skeen and Grey Mare's Tail. This is another location I discovered just off the M74.
If you've been reading my blog over the last few weeks you'll have seen that despite being on a family holiday I still managed to capture images from Dalveen Pass, Kilchurn Castle, and Glen Etive. I even managed to make the experiences into some 5 Minute Photo Adventure videos. This was far more photography that I could have hoped for or even planned for.
So when I finally finished my holiday in Scotland and started the journey back I expected that was the end of my photography activities for this holiday. However, as with the idea behind shooting Dalveen Pass, I thought I might be able to do something similar for the journey back.
Amazing scenery but…
So yet again I picked up my copy of Photographing Scotland and looked for a suitable location. Almost on the opposite side of the M74 from Dalveen Pass, I found the location called Grey Mare's Tail. It looked perfect. Only a few miles off my route it had a big waterfall and a beautiful loch. I had a plan. I would drop my family off at Glasgow Airport, drive down the M74 and then stop and grab some images.
I departed for Glasgow Airport early in the morning and I soon started driving along the banks of Loch Awe. To my surprise there the water was calm and there was a lot of low lying mist hanging over the water. I already knew before I got to Kilchurn Castle that the conditions for taking photographs there would almost be perfect. Glassy water, low lying mist and a ruined castle…what more could you want?
It broke my heart to drive past Kilchurn Castle that morning. I could have taken some amazing photographs but I had to get to the airport. There simply wasn't time to stop. The amazing conditions didn't stop there though. All along the route to Glasgow, there was mist and the low-level cloud hanging about over water. As I approached Loch Lomond I was sure there was a cloud inversion and if I'd had time to ascend Ben Lomond I would have been treated to an epic show!
Grey Mare's Tail
It was tough having to drive past all those amazing locations in those weather conditions but that's just the way it is sometimes. However, I dropped off the family at the airport and started my journey to Grey Mare's Tail. When I arrived and saw the waterfall and the surrounding hills I was not disappointed. It looked amazing. Here's what I got up to:
The conditions weren't ideal, and I was really short of time, but this is definitely a location I need to revisit. There is a lot of different spots along the path past the waterfalls and up along the loch side. I wish I could have spent all day there. However, now I know where it is and what to expect, it's definitely getting added to my custom Google locations map.
Have you visited Grey Mare's Tail before? Did you make the ascent all the way up to Loch Skene? Let me know in the comments below.
The Photographs
Here are some of the images I captured during my brief time at Grey Mare's Tail and Loch Skeen (Skene).
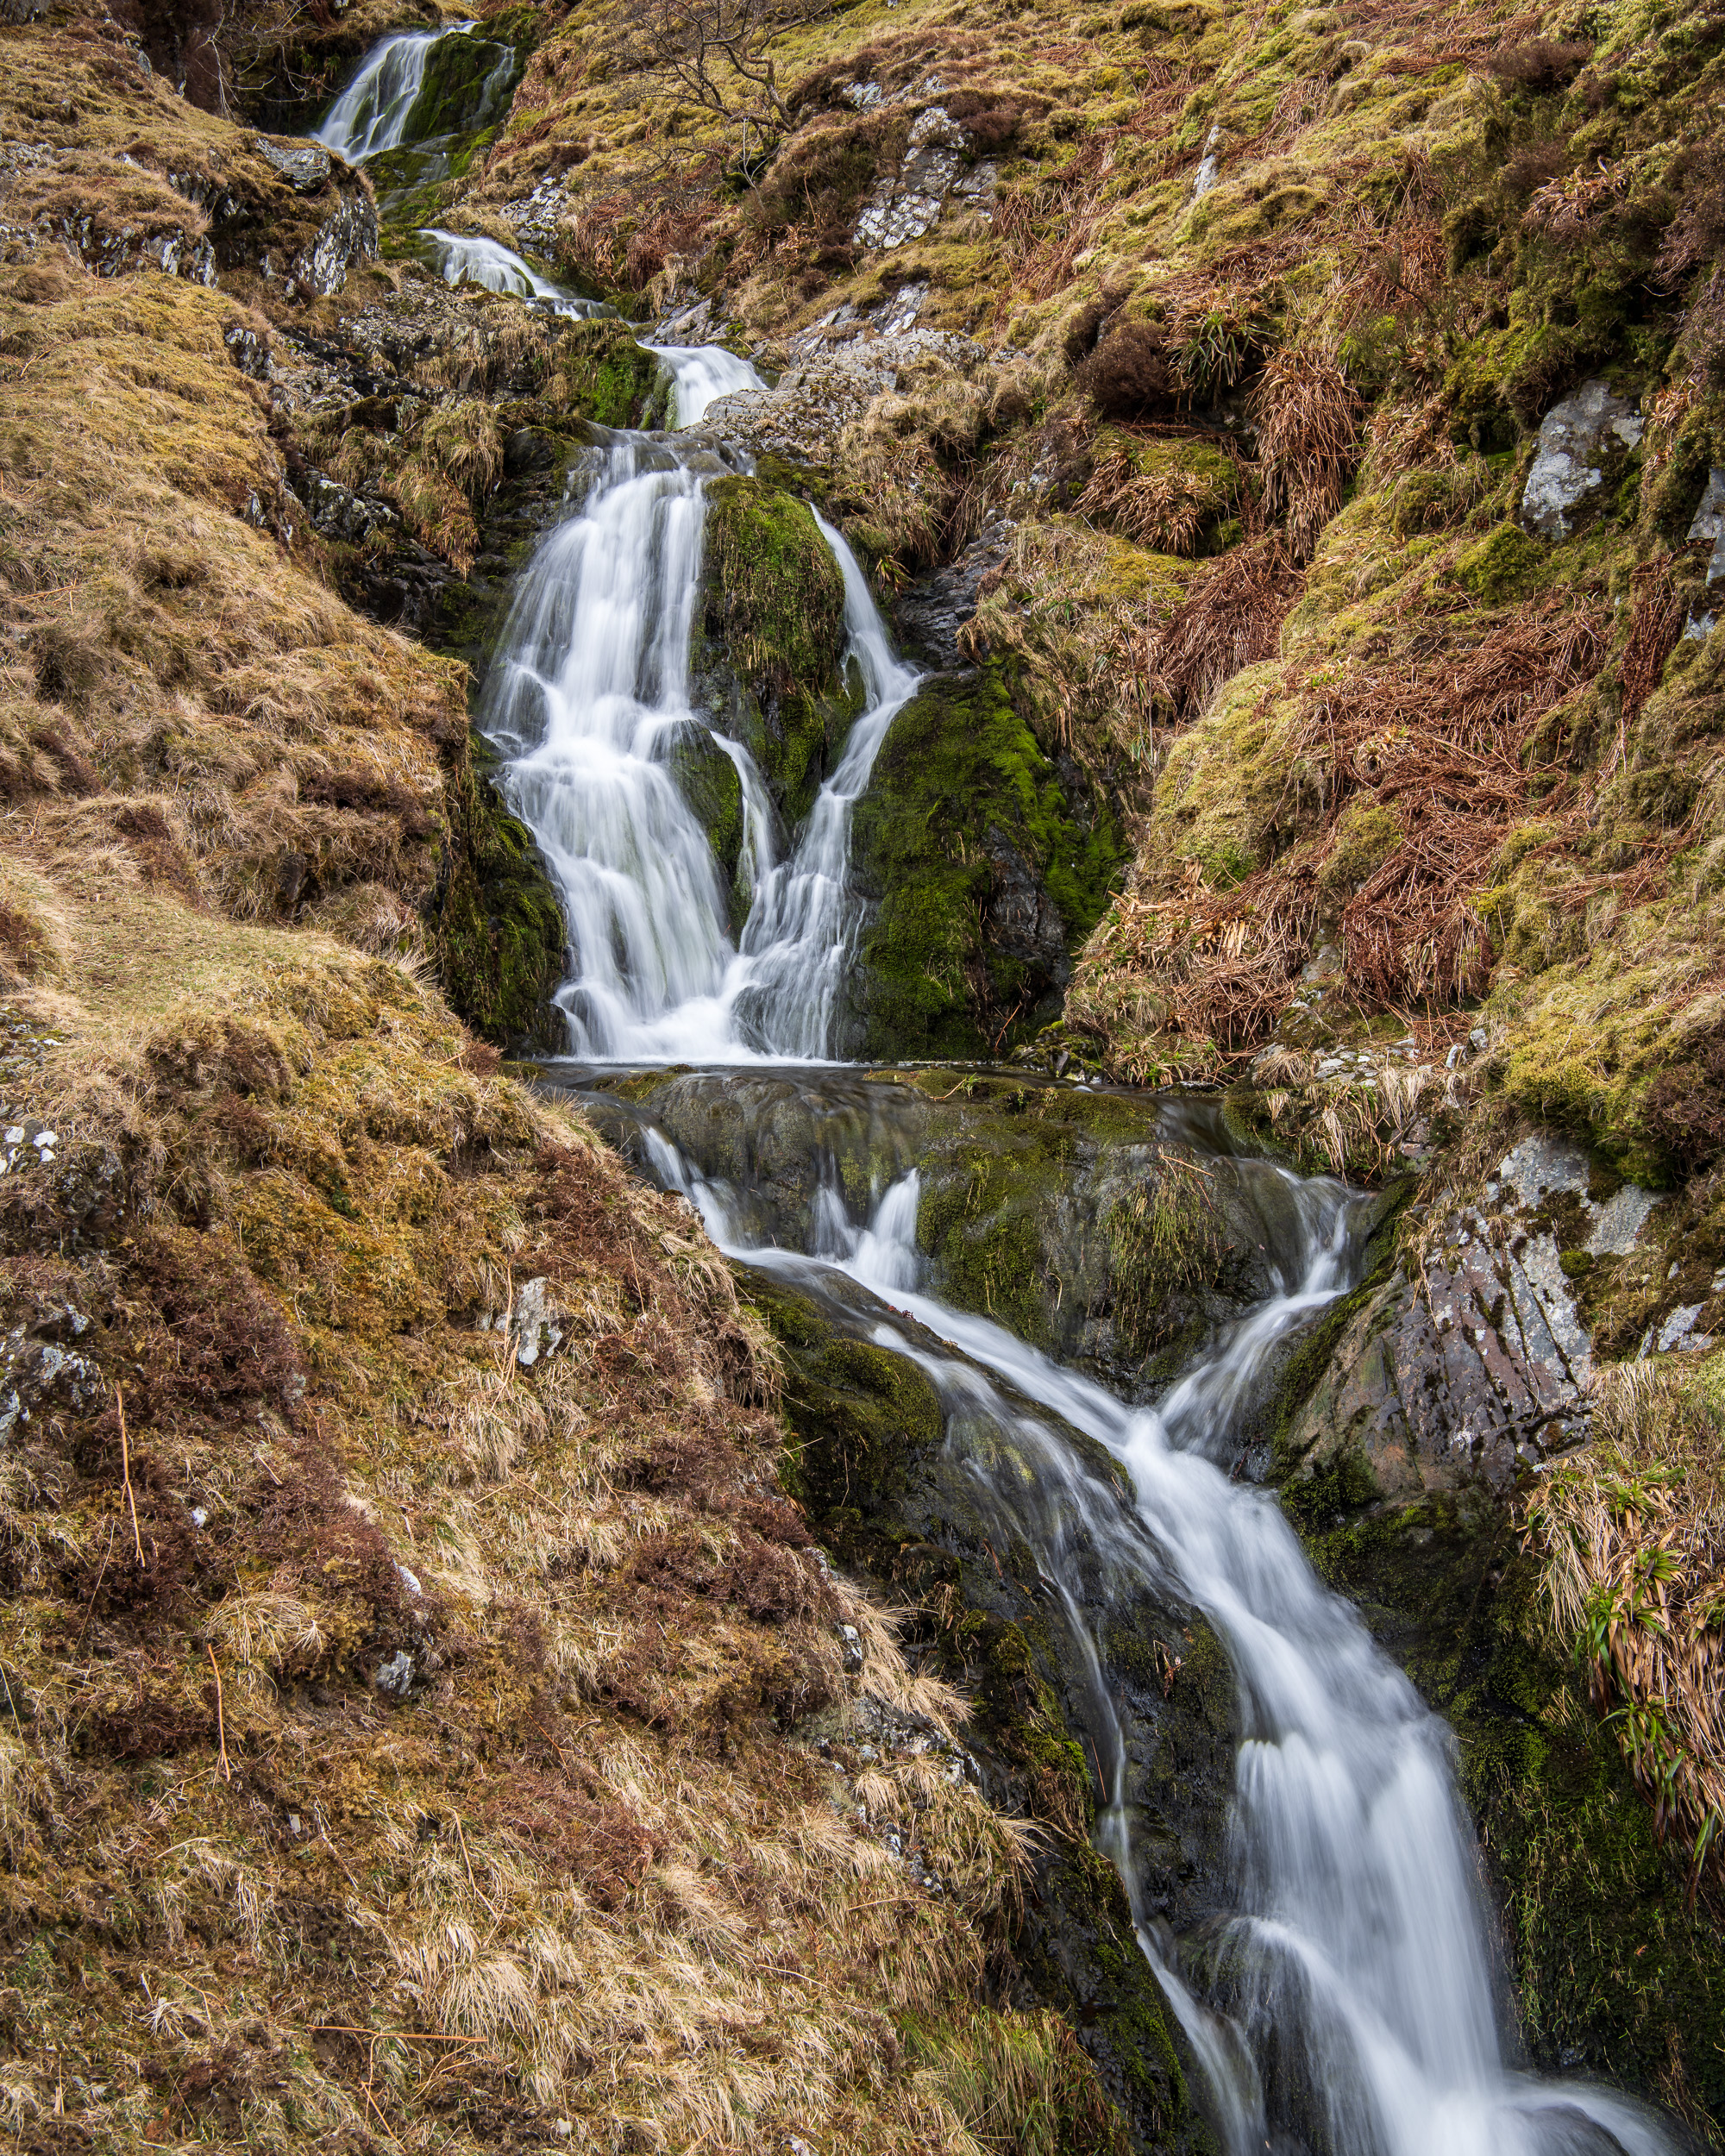
Nikon D850, Nikkor 24-70mm f/2.8 @ 52mm, f/11, 25 seconds at ISO 64, Lee Filters Circular Polariser and 10 stop ProGlass IRND.
Nikon D850, Nikkor 24-70mm f/2.8 @ 32mm, f/11, 13 seconds at ISO 64, Lee Filters Circular Polariser and 10 stop ProGlass IRND.
Nikon D850, Nikkor 24-70mm f/2.8 @ 34mm, f/13, 1/8th seconds at ISO 64, Lee Filters Circular Polariser.
PS - The product links used in this article are Amazon affiliate links. By buying through the links I may receive a commission for the sale. This has no effect on the price for you.

Dalveen Pass: A 5 Minute Photo Adventure
In this blog post, I share with you the story, photographs and video of my discovery of a great roadside location just off the M74 called Dalveen Pass.
Landscape Photography on Holiday
Family holidays are typically not a great time for landscape photography. After all, the point of being on holiday is that one should take a break and spend time with loved ones. However, it can be difficult for me to switch off my passion for landscape photography so I'm always thinking of new ideas and how to make opportunities to get out with the camera.
So when I arranged a holiday to the highlands of Scotland my mind was full of grand ideas for photography and creating content for my YouTube channel. Most of my grand ideas though would involve being away for hours and getting out the house at unsociable hours. All these photography based plans would essentially defeat the purpose of going on a family holiday, and to be honest, I actually needed a break so I decided to reign in my ideas.
M74
There was one idea that I came up with though that wouldn't impact my holiday. Though we would all be going to the same holiday destination, my wife and kids would be flying up, and I would be driving up to Scotland with all the bags, bikes, and most importantly the camera gear. With such a long drive I would need to stop a few times for a break so surely there would be some close by locations worthy of a bit photography.
I would be passing near the Peak District and the Lake District, but I wanted to visit somewhere a bit different, and closer to my final destination. So I picked up my copy of Photographing Scotland and spotted the location Dalveen Pass in Dumfries & Galloway. It looked ideal as it was just off the M74 and a couple of recommended viewpoints were on the roadside. It looked perfect. I could stop and have some lunch, and grab a few photos.
Photographing Davleen Pass
The morning of the drive I set my alarm nice and early so I would have plenty of time for the drive, make my planned stop, and still reach my destination in time to meet my family off the plane. Despite it being Easter weekend the traffic was light and I made it to Dalveen Pass in plenty of time. When I got there I decided that I would also make video of my experience so I'm very happy to share with you my latest 5 Minute Photo Adventure from Dalveen Pass.
As you can see I didn't exactly have the best conditions for photography. The grey overcast skies don't matter so much for the waterfall shots, but those beautiful hills would have been lovely with a bit of light and drama in the sky. However, I very much enjoyed my time on Dalveen Pass. This location has a lot of potential and with it being just of the M74 I'm sure to stop off again on my way up or down from Scotland.
Have you photographed Dalveen Pass before? Do you have any recommendations for great locations near motorways? Let me know in the comments below.
PS. There will be more landscape photography videos from my holiday in Scotland so stay tuned to my blog or even better make sure you subscribe to my YouTube channel and remember to click on the bell icon so you receive a notification as soon as I post up a new video.
The Photographs
As promised in the video here are the photographs that I captured from Dalveen Pass.
Nikon D850, Nikkor 24-70mm f/2.8 VR at 62mm, f/11, 1/4 sec at ISO 64, Lee Filters Circular Polariser.

Nikon D850, Nikkor 70-200mm f/2.8 VR at 70mm, f/11, 1/30th sec at ISO 64

Nikon D850 Exposed - Unboxing, Capture, Process and Print
In this special blog post and video, I take a look at the new Nikon D850. I unbox it and take it out to Dartmoor to capture some images. Back home I process and print the images and give you my first impressions of the camera.
A Little Camera History
My first full frame camera was the Nikon D600 which was released in September 2012. As many people know this camera had a few problems with oil leaking onto the sensor. Despite a number of product recalls the product was eventually replaced by the D610 in October 2013. I was lucky though as Nikon replaced my D600 with a new D610 under warranty.
In July 2014 Nikon announced the Nikon D810 and this was followed up by the release of the D750 in September of the same year. After only a short time with the D610 I decided that I was going to upgrade again. I looked at both cameras but at the time I felt I couldn't justify the cost of the D810, nor would I probably benefit from what it offered.
The D750, on the other hand, had a few of killer features. It had the flippy out LCD screen, high ISO capabilities, and WiFi built in. While the latter two would only really benefit my music photography, the flippy out LCD would be great for my landscape work. So I sold my (almost new) Nikon D610 and purchased the D750.
It's Finally Here
The D750 continued to be my main camera for the next three years until the D850 appeared on my doorstep the other day. I had been considering an upgrade for around a year but there was nothing really to upgrade to. The Nikon D810 was still a great camera, but I would miss some of those great D750 features.
I wasn't going to change camera systems either. Sure the Sony mirrorless technology is very attractive, and the new Fuji mirrorless medium format camera is a landscape photographers dream, However, the transition to either system would be costly and neither was that well suited to my music photography.
So when I saw the D850 announcement and looked at the specification list it ticked all my boxes. When pre-orders became available I was ordering within minutes! This was going to be a significant investment for me but I feel I'm at a point in my photography journey that I can justify the upgrade. Thanks to part-ex with WEX I can offset some of the cost by trading in my D750.
Using the D850
So now that I have the D850, what is it like? To document my experience from unboxing to capturing my first landscape image, processing it and finally printing it I have created this video.
I would have like to have used the camera for the first time in better circumstances but the weather was just proving too problematic. Venford Falls was a good option but looking at the images a lot of foliage is being blown about by the wind. The falls really look their best in spring time when everything is green, fresh and lush.
However, even with the challenging conditions, the camera was able to produce images with great tones, colour, and contrast.
A metered exposure of 30 seconds gives great results.
This image is the same as the previous image but at 8 seconds this image was deliberately underexposed. However, there was no apparent loss in quality when the darker areas of the image were recovered.
I really liked the handling of the camera it made the capturing of images just a little easier than it is in the D750.
More to Learn, More to Shoot
I've only had the D850 for a few days so there is so much more to learn about this camera. There will be the enhanced features over the D750 as well as some new capabilities that I can learn about. I guess it will take a while before I really start leveraging what the D850 has to offer, but it's going to be fun learning.
So will the D850 make me a better photographer? Of course not! Only by practising the craft of photography will I become a better photographer. The D850 is a tool and it will help me capture my images, but it can't improve my creative eye. As David duChemin says, "Gear is good, but vision is better".
So have you bought or considered the new Nikon D850? Have you recently replaced your camera? Have you changed camera systems before? Let me know in the comments below.

Venford Brook
After a heavy rainfall, I decided to head off to Venford Falls again to see if I can't improve on the images from my last visit. I also discover that there is plenty more to photograph around Venford Falls as I go exploring downstream and take some intimate landscapes.
It was only a few weeks ago that I wrote about a visit to Venford Falls. In the blog post I told you how I attempted to improve on an image of the falls that was in my portfolio. Though the area around the falls was lush and green, the lack of rain had made it look a bit dry. So while the image was good, and a little different from the image of last year, I wasn't sure it was any better.
Back to the Falls...Again
If you read that blog post and saw the images you may have thought there would be little point in returning so soon and at the same time of year. However, not only did I want to take an image of the falls after a rainfall, but I also wanted to explore the area around the falls a bit more.
Fortunately, as is the way in the UK, I didn't really have to wait to long for the next downpour of rain and soon I was heading back to Venford Falls. With the ground being a bit wetter the walk down the steep hillside tot the falls was a little treacherous, but I was happy to see the green on the rocks was looking, well, rather moist!


So looking at the 3 images it's still hard to say which is better. My most recent image improves the image from the 9th of May thanks to the rainfall, but I'm not sure it's better than the image from 2016. I prefer the size and placement of the foreground rock in the most recent image, but I still prefer the look and clarity of the pool from the 2016 image. Honestly, I still think there is room for improvement so I may just have to go back and try again!
Just before I move on to Venford Brook, there was another shot that I wanted to take on this visit.
Nikon D750, Nikon 16-35mm f/4 @ 20mm, ISO 100, 2 seconds, f/16, Lee Filters Circular Polariser.
As you can see this is a much wider angle of the falls adding some trees and sky to the top of the composition. I'm not sure these elements add too much to the image, but they do provide a better sense of scale and place. What do you think?
Venford Brook
With my waterfall shots in the bag, I decided that I was going to follow the brook downstream to see if there was more to shoot than just the falls. I was happy to find that I didn't have to wonder to far to find something interesting.
Nikon D750, Nikon 16-35mm f/4 @ 30mm, ISO 400, 0.6 seconds, f/16, Lee Filters Circular Polariser.
The brook had carved an interesting flow down the moss covered rocks and I thought it might make for an interesting intimate landscape image. This kind of landscape photography isn't normally something I go for. I'm normally a big vista type of photographer, but sometimes you see something and you know you need to make an image from it.
Nikon D750, Nikon 16-35mm f/4 @ 31mm, ISO 400, 0.5 seconds, f/16, Lee Filters Circular Polariser.
If you've read the shooting details of those images you will have noticed that I shot the images of the brook using ISO 400. With this type of shot it's easy just to extend the exposure as long as you can but with water in rivers and streams, 0.5 seconds is just about right. So raising my ISO shortened my exposure time without any noticeable loss of image quality.
I was glad that I'd spent the time doing a bit of exploring around Venford. While the falls are very attractive and make for great photographs, it's important not to get too attached to a specific location, particularly if there are good images to be had just downstream!
So what did you think of the images of the waterfalls? Do you have a favourite? Do you take intimate landscapes? Let me know in the comments.

Venford Falls
In my blog this week I tell about a recent trip to Venford Falls where I hoped to create an even better version of the image that's in my portfolio. Would an additional 12 months of Photography experience help me achieve this goal?
A Favourite Location
There's no doubt in my mind that Venford Falls is one of my favourite locations. Ever since I saw an image of it over on Flickr, I knew I had to shoot it. Well, as soon as I managed to find it that was! I liked it so much I featured it my video My 5 Favourite Landscape Photography Locations in Devon.
History has taught me that Venford Falls is best shot around May time when the foliage is green and lush. So when I started planning my shoots for May, Venford Falls was on my list of must do locations for the month.
Not Enough Water
The great thing about Venford Falls is that it is feed by a stream that is fed by Venford Reservoir. This means that it almost always has a constant flow of water and together with its sheltered location it makes it an ideal location to shoot anytime of the day. However, upon my arrival at Venford Falls one sunny May evening, one thing became immediately apparent. There was a lack of water!
It wasn't a lack in water in the falls themselves but a lack in moisture on the face of the falls. Between to the waterfall flows themselves there is a rock wall which is typically covered in moss and other green plants. Due to the recent dry spell all that green was dry as a bone. If you hadn't visited Venford Falls before you might not have noticed, but it stood out for me. So while everything was green, it didn't have that lush look I was after.
Making a Better Shot
Aside from being one of favourite locations, I've also produced one of my favourite images there (which you can see on my portfolio page). One of my goals with this trip though was to try and make an even better image. This looked unlikely given the lack of moisture in the surrounding ground, but maybe I could work the composition to see I could minimise that area in the frame.
So did I make a better image? If I'm honest, no. It's a very similar image in terms of composition but when I compare the detail that dry area in the image still stands out. The image that is currently in my portfolio is better. It's not perfect though, so I will be heading back to Venford Falls as soon as it has rained!
I also took some test shots of some wider compositions. I didn't connect with them when looking at them on the back of the camera, but now that I've seen them on the computer I'm changing my mind. I've always like the tight shots of the waterfalls as the sky rarely adds anything to the image, but I think they are worth revisiting if I'm honest. I can't wait to get back to Venford Falls!
So have you been to Venford Falls? Did you shoot wide or get in closer? Have you ever improved on one of your favourite shots? Let me know in the comments below.