
Friends, Failures and Being Frozen
In the blog this week I tell you about a trip to Brentor church with friends where the freezing weather resulted in a failed attempt at shooting a video on the D850!
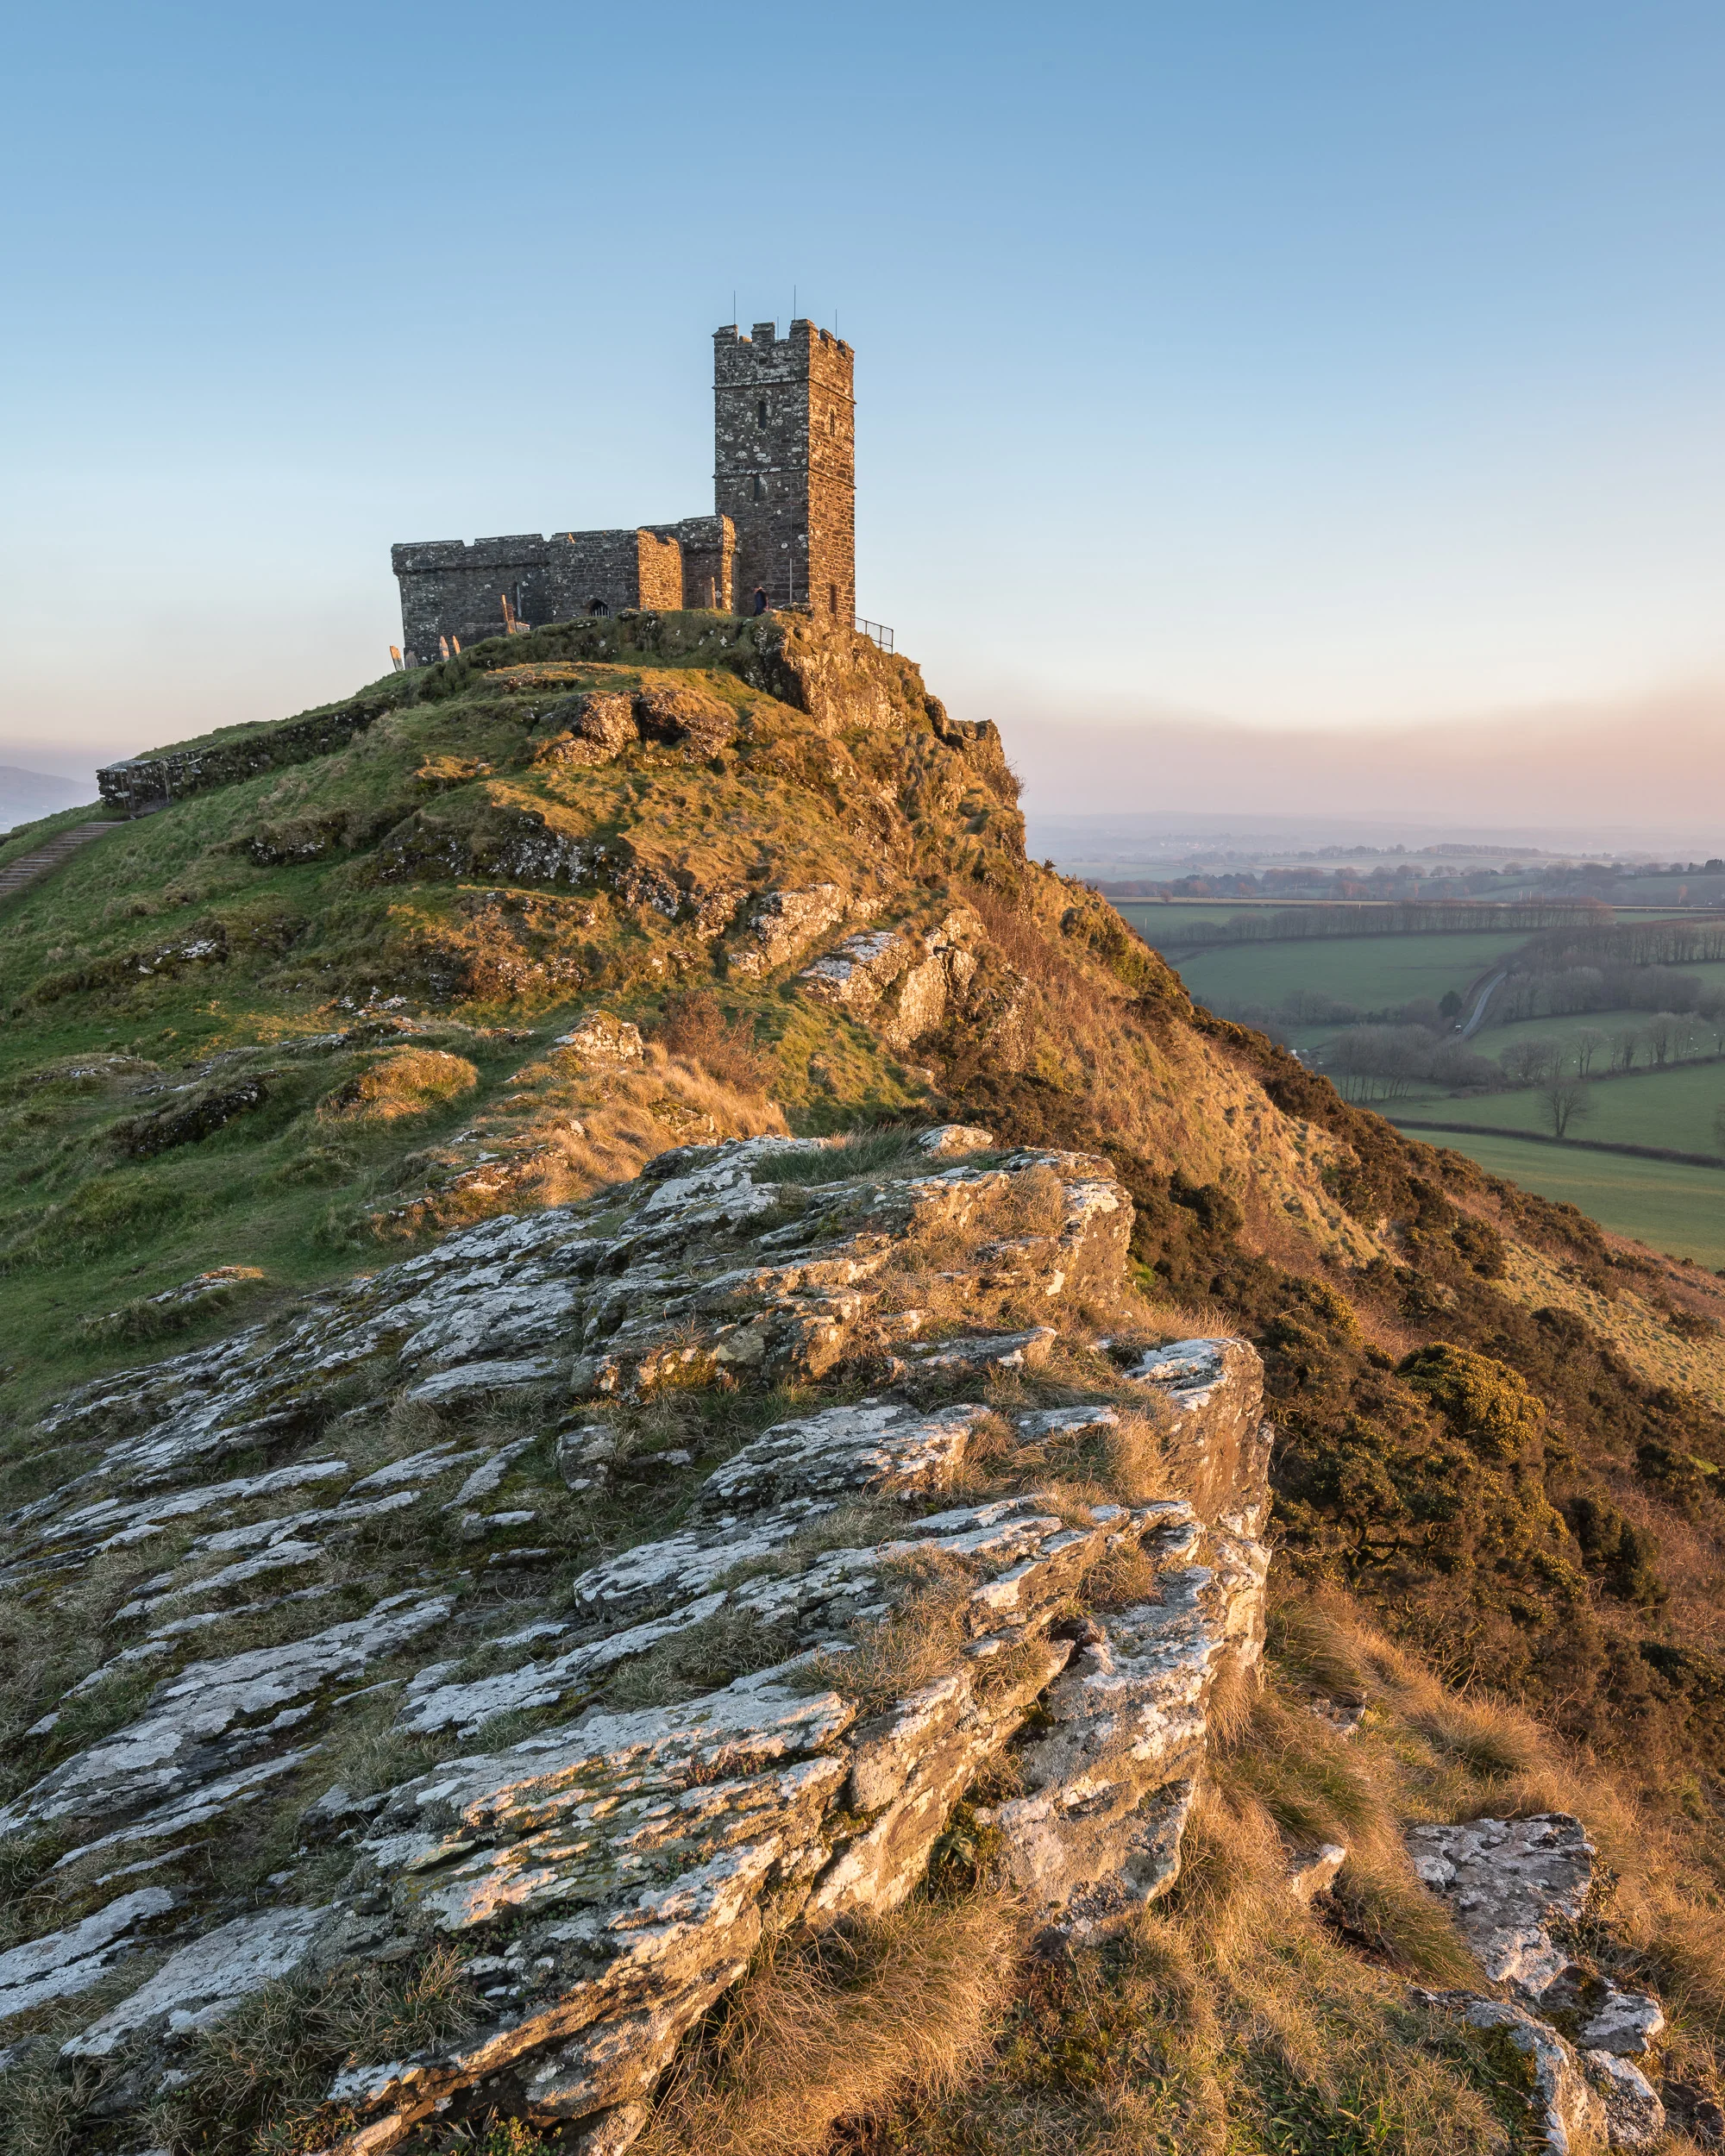
Let's Go Back To Brentor
It's rare that I have a Saturday afternoon available for photography so when one did present itself a few weeks ago, I wasn't going to let it slip by. Even if the weather conditions weren't necessarily going to be great. Though the setting sun was in a direction that would give me good light on the church, the skies were going to be very clear. However, one of the things I've learnt over the years is to take some weather forecasts with a pinch of salt. But would I get an epic sunrise like I did on my last visit to Brentor?
Most of my trips out with the camera are a bit last minute. This makes it difficult to make arrangements to meet up with fellow photographers. So when friend and fellow photographer Andy Hobbs said he could join me on my trip to Dartmoor I was delighted to have the company.
Things I love About the D850

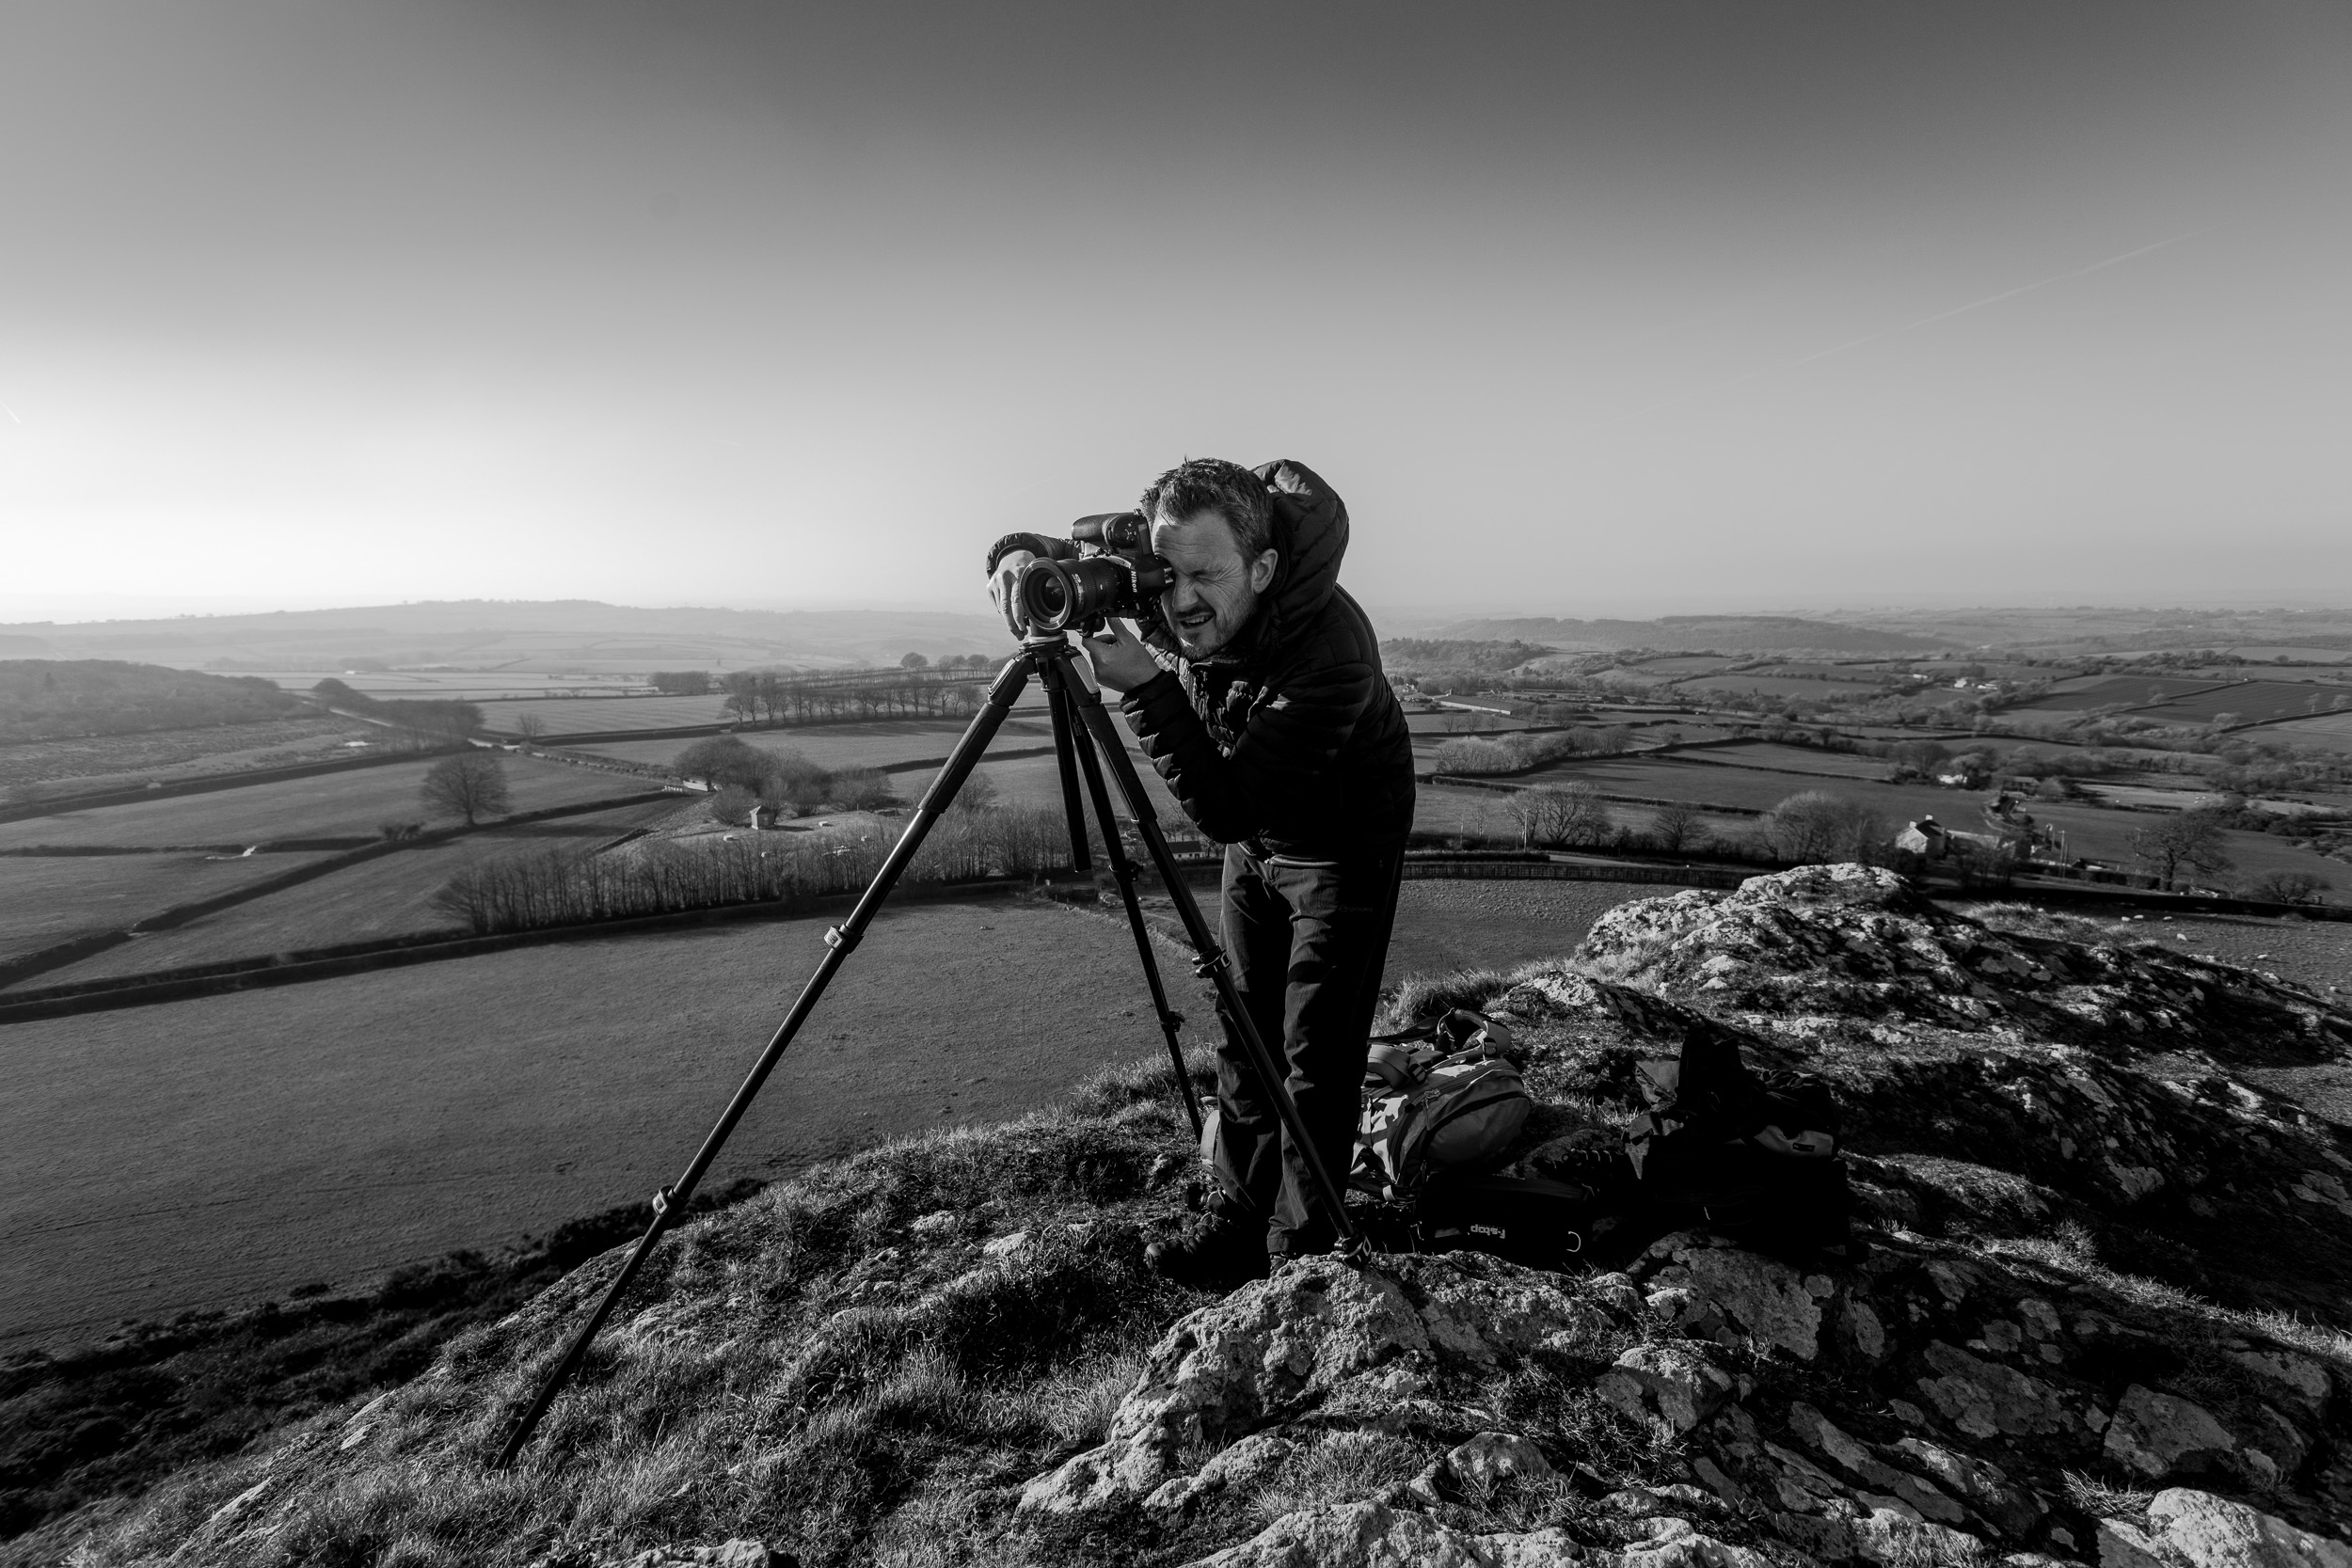
It's me doing some filming. A rare behind the scenes shot taken by Andy.
One of my goals of going to Brentor Chruch was to shot my video called 8 Things I Love About the Nikon D850. If you click on that link you'll see I have indeed published that video but you'll also see it certainly isn't filmed at Brentor.
My plan for Brentor was fairly straightforward. I would arrive a couple of hours before sunset, do some filming, and then capture a great sunset. What could go wrong?
When we arrived we found we had the best spot to shoot Brentor to ourselves. This is rare, especially for a Saturday. However, the skies were very clear and while this makes it all look very lovely, it is a bit of a nightmare for photography and for video because of the high contrast of bright and shadow areas. Then there was the cold. Brentor is notorious for being windy and cold.

When my hands were warm I was happy to double check the audio. Thanks again to Andy for the BTS shot.
The filming started off OK, and it was really great having Andy there to help out, but sometimes you just can't find your mojo. Maybe it was the strong light from the sun or just the cold wind, but it just seemed to take me an age to get into my stride.
While I managed to get all the scenes shot for the video, I, unfortunately, skipped a few steps that I would normally take to ensure certain things have worked correctly. When I later got home and went to edit the video I noticed that some of the clips shot towards the end had no audio. What probably had happened is that as I got colder I probably didn't rigorously check things after and it appeared that I had disconnected the mic from the audio recorder.
This failure to check my recordings, something I normally always do, resulted in the entire video shoot being scrubbed. To be honest, I also don't think it was my best time behind the camera so in some respects I was happy to shoot it again in a few days time at a different location.
The Photographs
Shooting that video was only half the purpose of the trip. Of course, I wanted to get some good landscape photographs as well. Unfortunately, the sunset wasn't the best I'd seen at Brentor, but we still got some nice light.
Filming was done, it was time to move onto capturing some still images. Thanks again to Andy for the BTS shot.
I took a couple of frames and I even tried out the focus shift feature of the D850 for the first time. I did a very rough focus stack in Photoshop, and while the image could do with a bit more finesse, it is clear the image has better sharpness from back to front than from the single frame.
Nikon D850, Nikkor 16-35mm f/4 at 23mm, ISO 64, 1/13th sec at f/13 - single image
Nikon D850, Nikkor 16-35mm f/4 at 21mm, ISO 64, 1/6th sec at f/4.6 - focus stacked
Despite the failed video and the lack of interest in the sky for the pictures, it was still time well spent out with the camera. It was great chatting with Andy and we had a great laugh. There might even be some funny video outtakes that I might publish one day!
So have you ever had things go wrong on a shoot? What's your worst disaster? Let me know in the comments below.
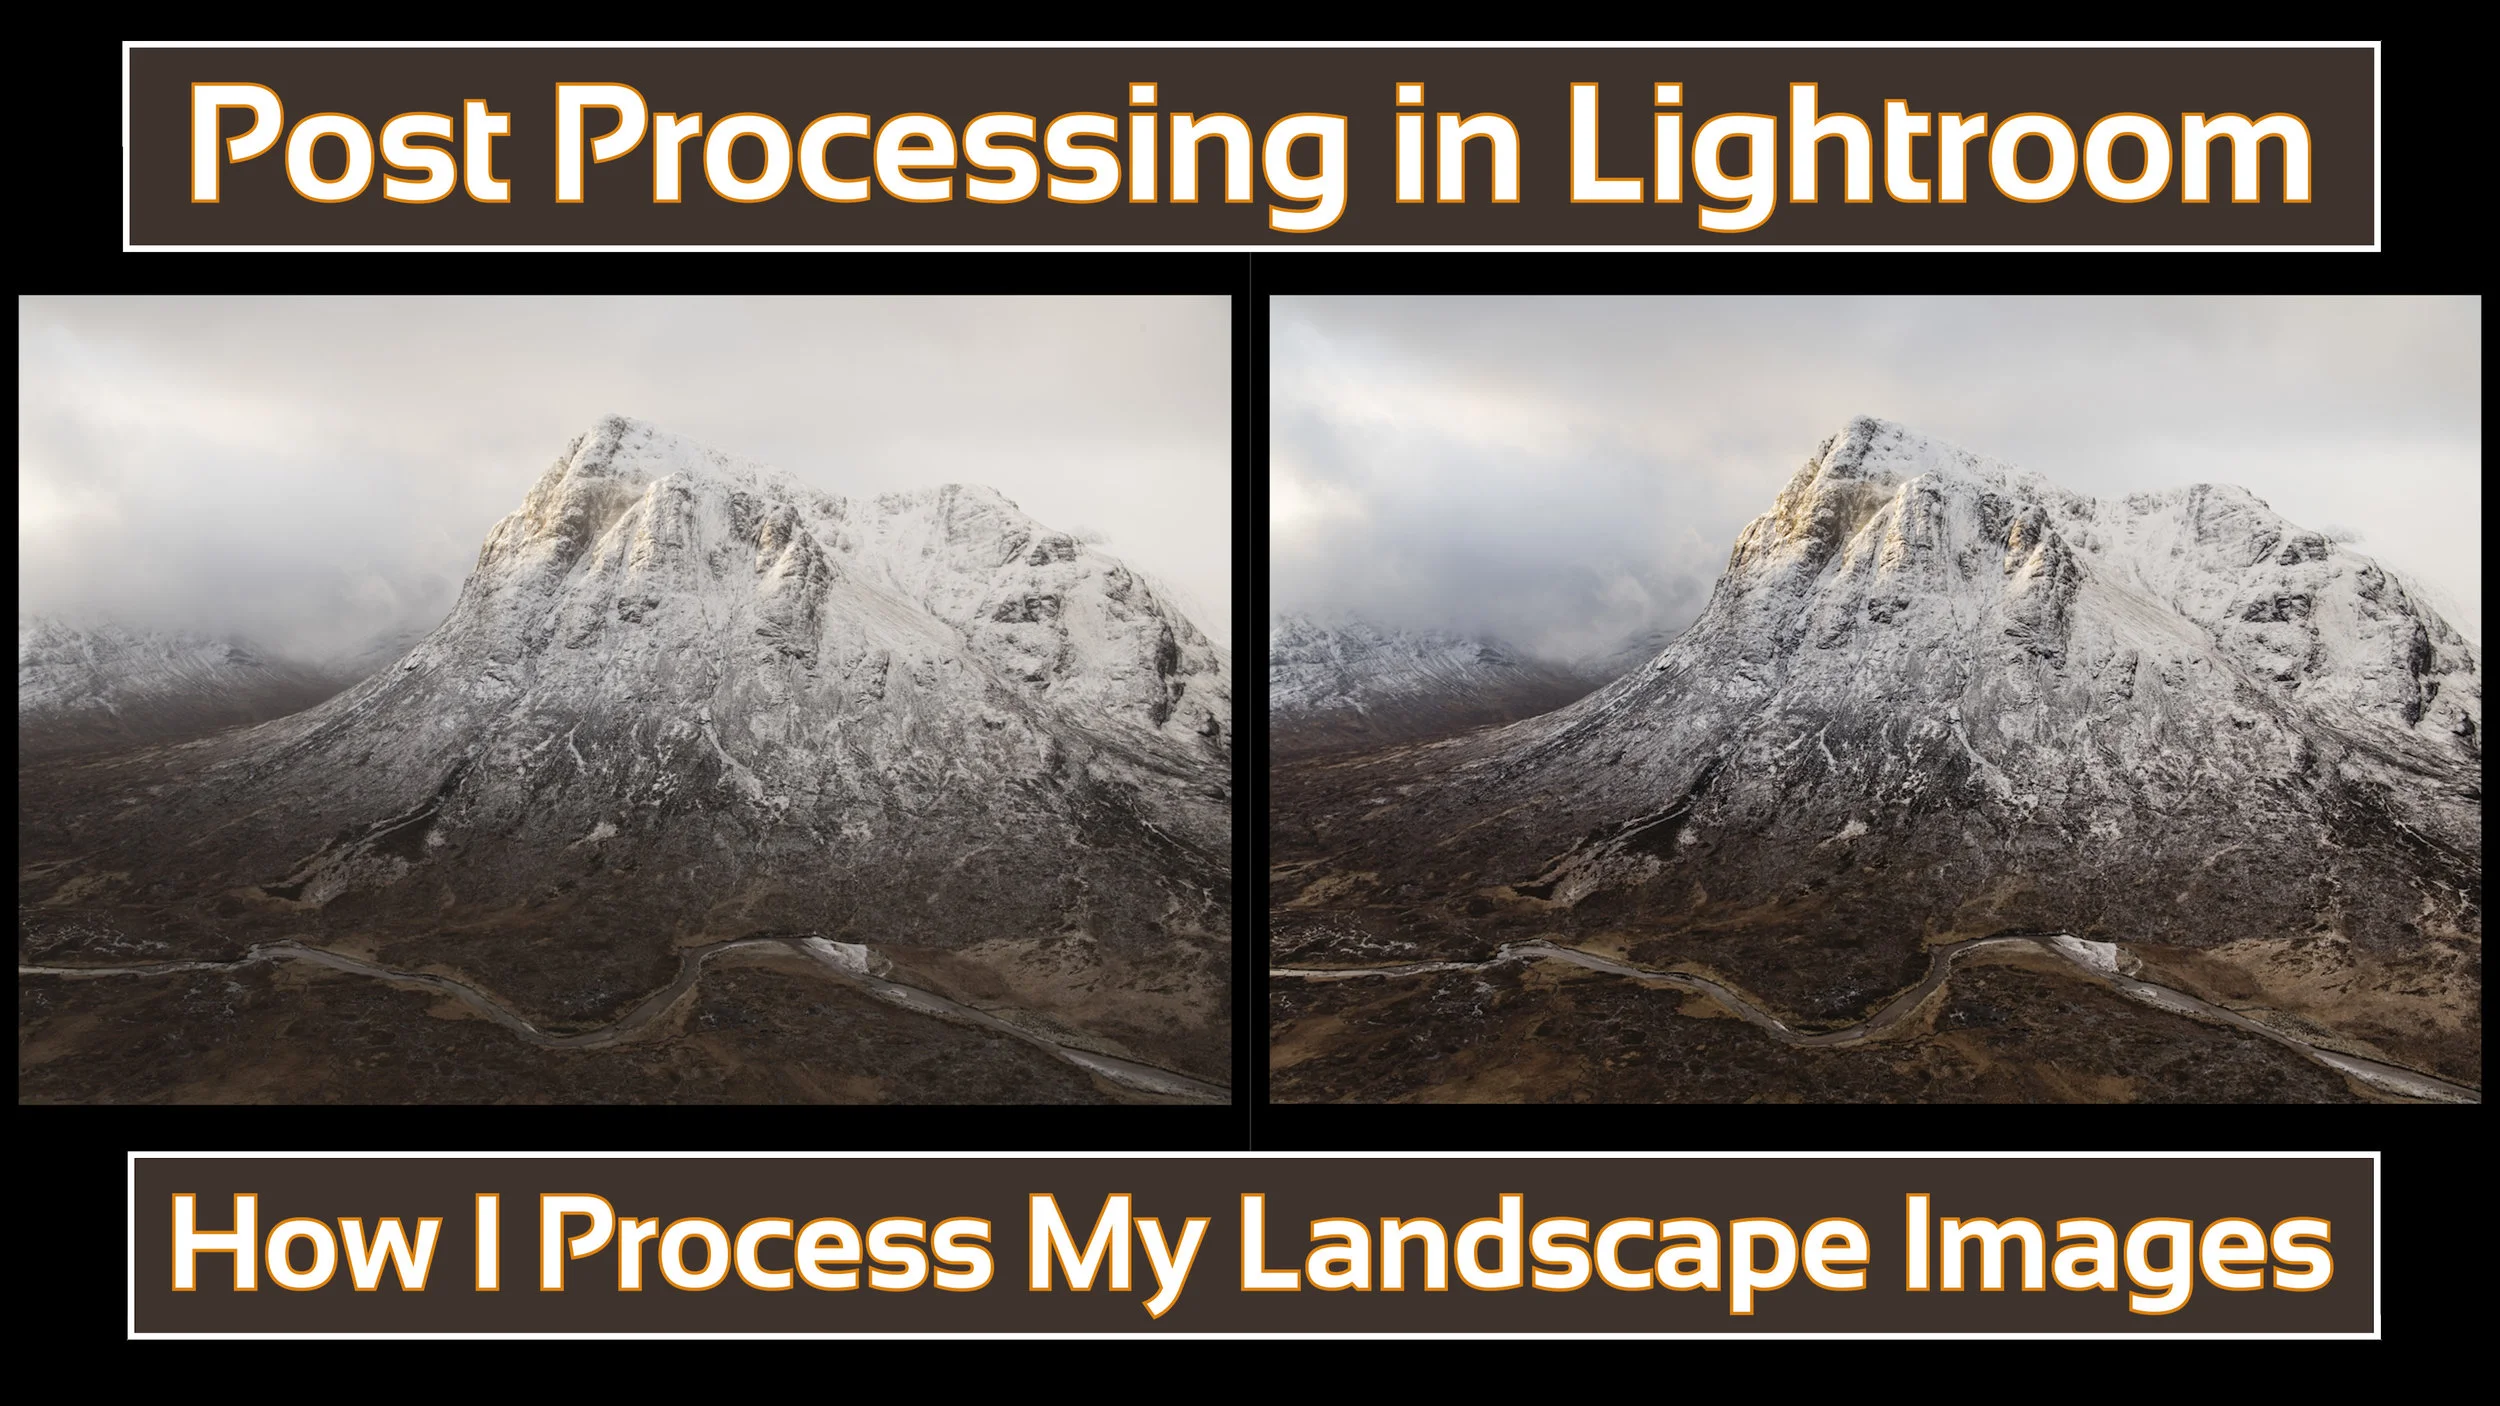
How I Post Process My Landscape Images in Lightroom
In the blog this week I share a video on how I post process my landscape images using Adobe Lightroom.
As Requested!
Over the last few months, an increasing number of my YouTube followers have asked about my post-processing technique and would I do a video on the subject. Well, I finally found a suitable gap in my schedule to create a post-processing video and you can watch it right here:
As I said in the video, what I do is not necessarily the right way or the only way to do post-processing, it's just the way I do. Hopefully, even if you already know Lightroom you might have picked up on something new that you didn't know about.
Anyway, just a really short blog post from this week. I just wanted to share that video.
Are you interested in how I backup my data? Would you like to know how I manage my Lightroom catalogue? Let me know in the comments below.

My 5 Favourite Images of 2017 and How to Find Yours
In the blog this week I take a look at my 5 favourite images from 2017. I also tell you why you should find your 5 favourites and show you how.
The How and Why
At the end of each year, I like to look back at the photographs I have taken. This reminds me not only that I had some challenges with my photography, but also that I had some successes. By putting these successful photographs into an annual collection it helps focus my mind for the following year and gives me plenty of inspiration and encouragement.
In the video below I share with you the process of how I select my 5 favourite images so that you can do the same.
My 5 Favourite Images of 2017

As with my image review from last year, this review has given me a lot of inspiration to take through into 2018. I went out over 50 times with the camera in 2017 and drove over 6000 miles, and it was great to see all that effort wasn't wasted!
So which one of my 5 images was your favourite? Have you gone through a similar process as well? Let me know in the comments below.

Bad Weather Photography
In the blog this week I remember to "embrace the grey" and head out to Dawlish to get some photos in less than optimal conditions.
Time to Embrace the Grey
I once went on a Nikon School one day workshop with Jeremy Walker. I remember the weather not exactly being great but one thing stuck in my mind from that day. As Jeremy was laying out the plans for the day he already knew it was going to be an overcast day. His advice was to "embrace the grey".
I did just that with this photograph:
Banjo Pier, Swanage. Nikon D750, Nikkor 16-35mm f/4 at 28mm, f/11, 30 secs, ISO 100, Lee Filters Big Stopper.
Now I may have mentioned once or twice on the blog recently that the recent weather has been playing havoc with creativity. So when the weather forecast for the week was looking grim I decided enough was enough and I was going yet again embrace the grey!
I needed to find an appropriate location to make an image but when I remembered about the stone groynes at Dawlish my mind was set. So off I headed with a clear vision of what I wanted to capture.
Despite the weather. No hang on, because of the weather, I really enjoyed myself at Dawlish. It made me look at the location with different eyes.
Here's what I photographed:
Nikon D850, Nikkor 24-70mm f/2.8 VR at 31mm, ISO 64, 5 minutes at f/11, Lee Filters Circular Polariser and Big Stopper.
If you want to see how I went about capturing the image, here's a short video I shot while I was there...
So do you have a favourite bad weather location to take photographs? Is there really such thing as bad weather for photography? Let me know in the comments below.
PS.
On a little side note, I'm very happy to say that Adobe has now updated Lightroom to support the Nikon D850. This means I no longer have to convert the files to DNG format first. I can now import the NEF (raw) files straight from my memory card. I was so happy about this I posted a video on my YouTube channel.

Same Spot, Different Photo
In this blog post I discuss why I was back photographing Trevose Head again and how despite putting my tripod legs in almost exactly the same spot as before I ended up with a unique image.
The Perfect Location?
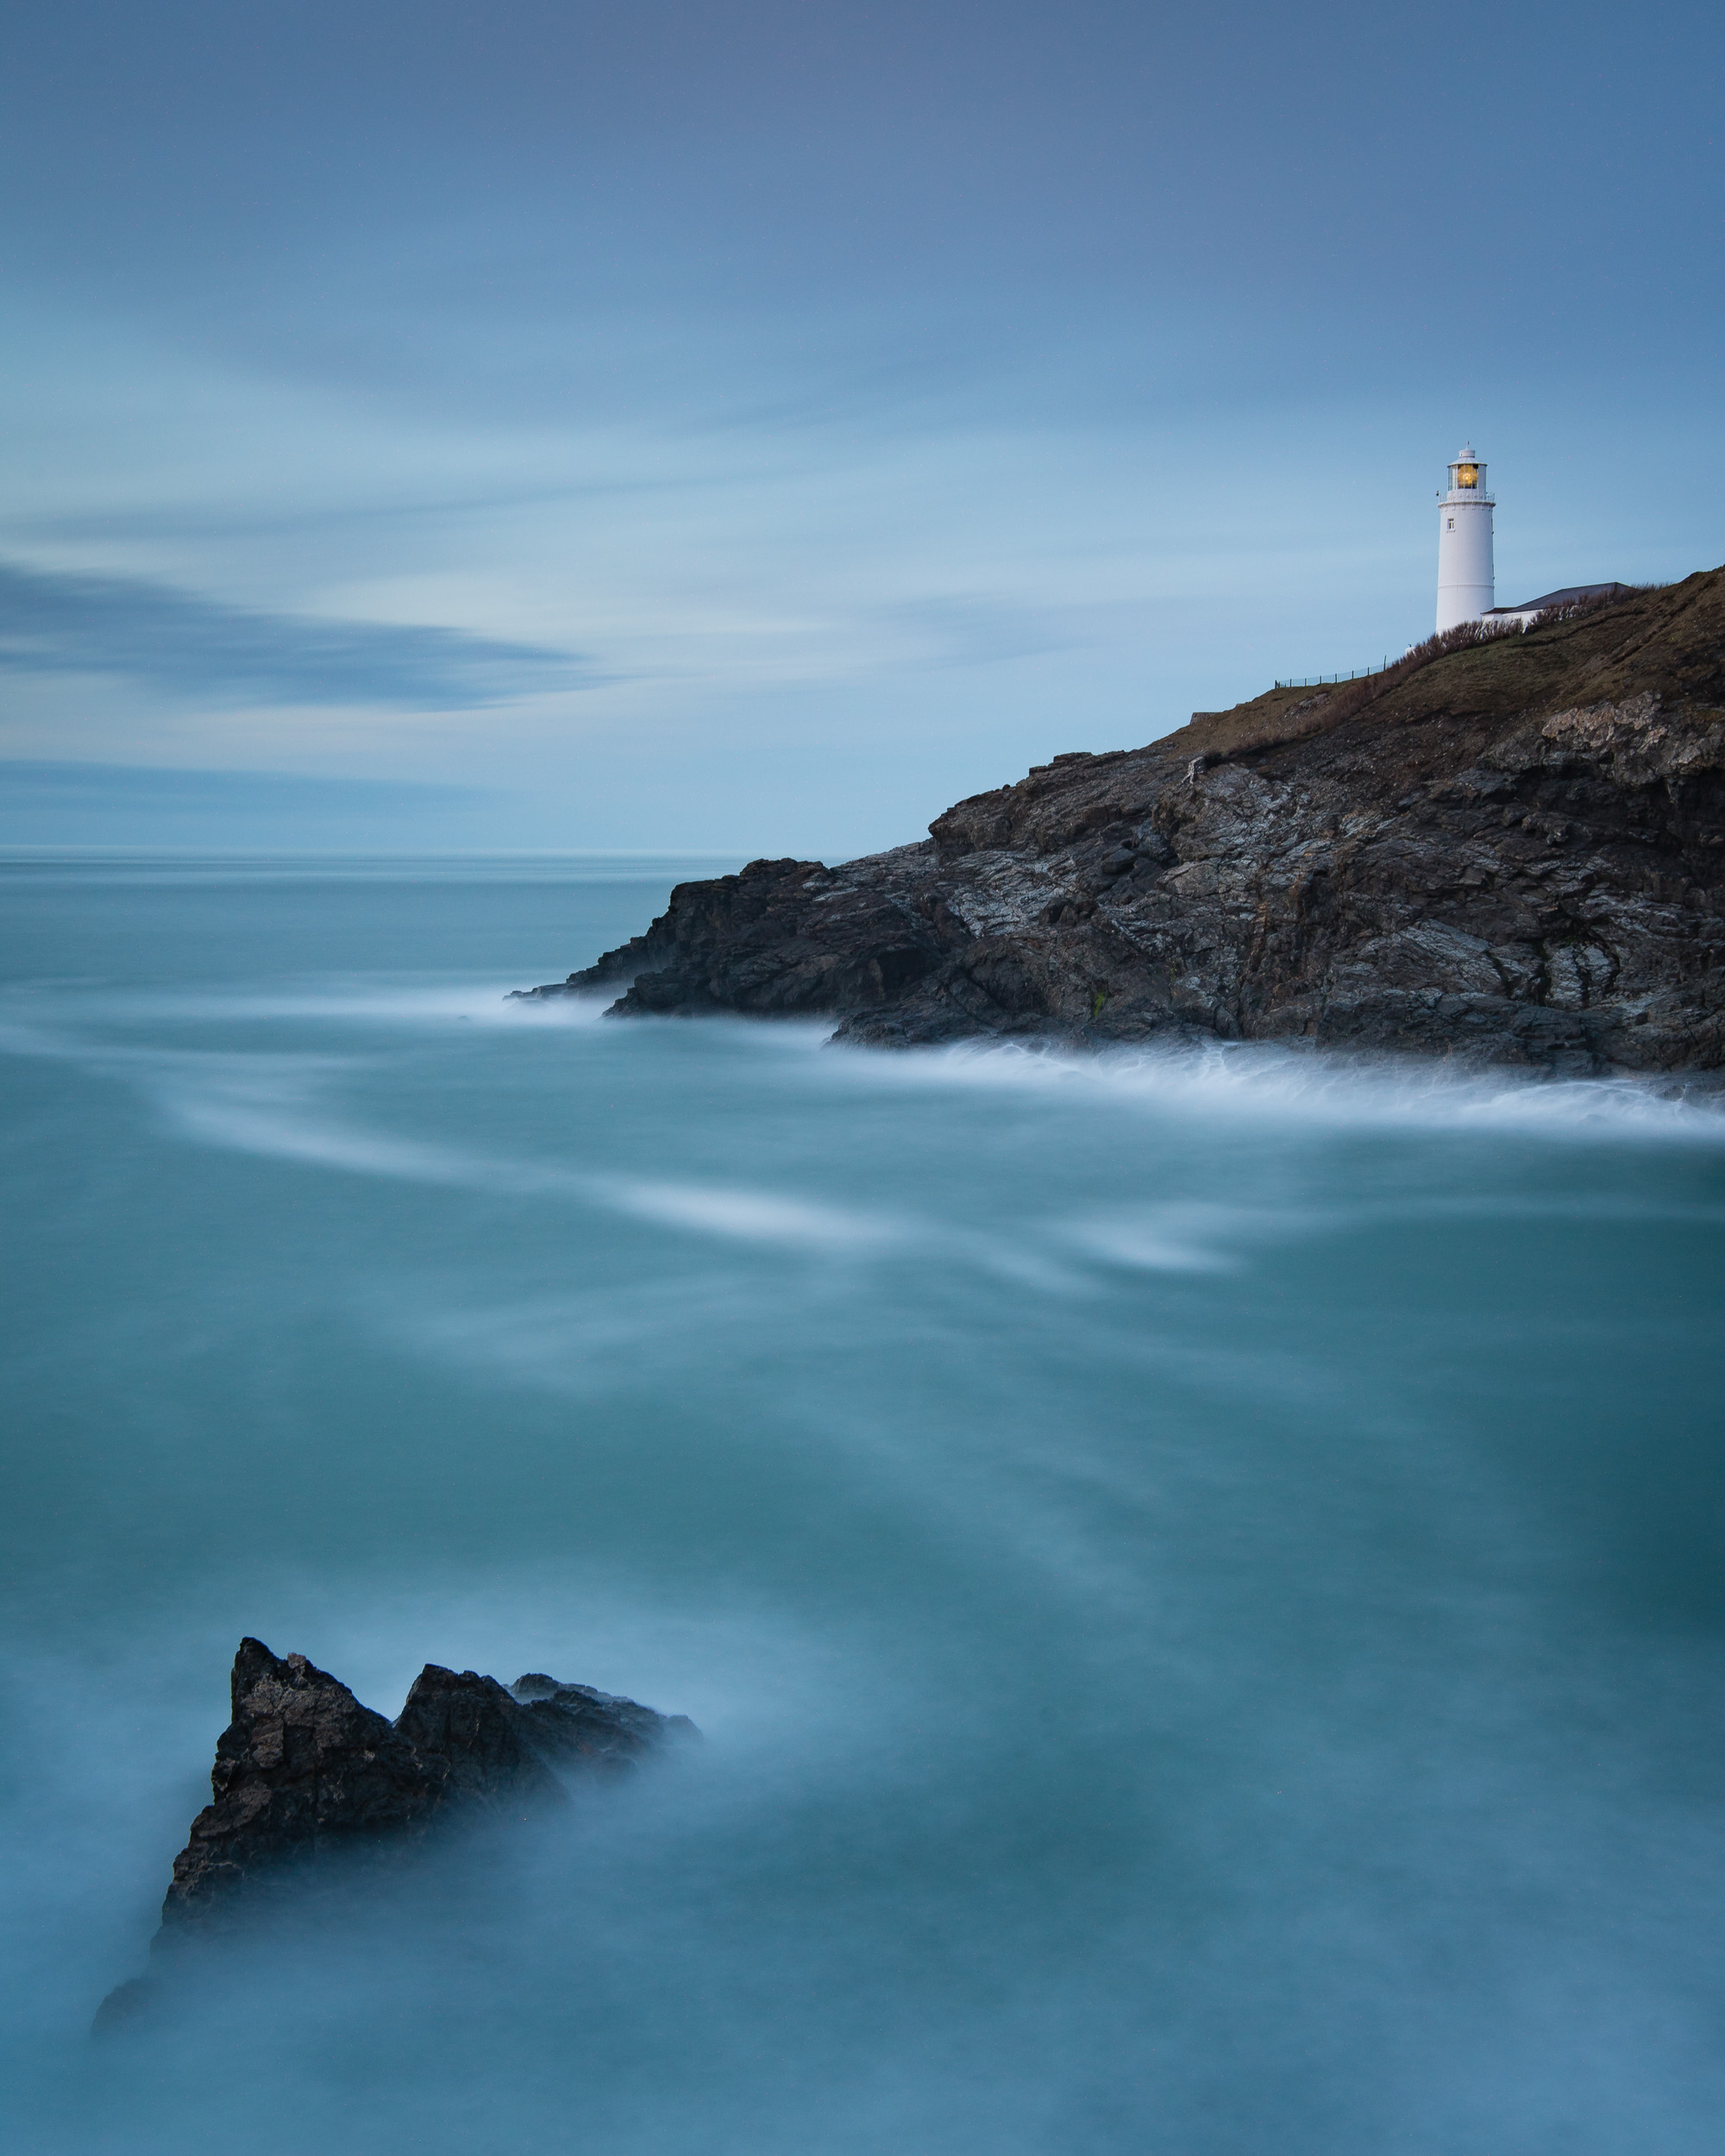
I like shooting at Trevose Head on the north Cornish coast. I never seem to leave that location without having taken a decent photograph. Sometimes I even leave there with a great photograph. I also just enjoy being there. It's an amazing bit of coastline with its lighthouse, rocky cliffs and crashing waves. It can get very windy, and salt spray on your equipment can be a challenge, but just being there and watching the sunset over the coast is a pleasure.
If you want to see what I'm talking about then you should check out my 5 Minute Photo Adventure video from Trevose Head.
But what makes Trevose Head so special? Why do I keep putting my tripod legs in the same spot? I think one of the great appeals with Trevose Head is that it works in a variety of weather conditions. It doesn't seem to matter if the weather is good or bad, overcast, windy, or even what season it is. Don't get me wrong. It's not the perfect location. No location is. However, if you can vary your technique and adjust your style to the conditions then it's one of those locations where you stand a good chance of making a decent image.
Here are some of my previous images from Trevose Head.
Whose Tripod Holes Are They?
I've just returned from another visit to Trevose Head and the image I captured there inspired me to write this blog post. Though I've previously captured some images that I'm really happy with from Trevose Head, I still thought I could capture something new. So when my friend asked me if I wanted to join him for an evening's shoot at Trevose Head there was only one answer.
It was going to be tough to get there before sunset though. The earliest I could leave home was 7 pm, and given that it is around a 90-minute drive that would only leave me about 40 minutes to jump out the car, make the short walk, setup, and capture something. But the weather forecast looked good and based on my previous experience from that location, I knew the journey would probably be worth it.
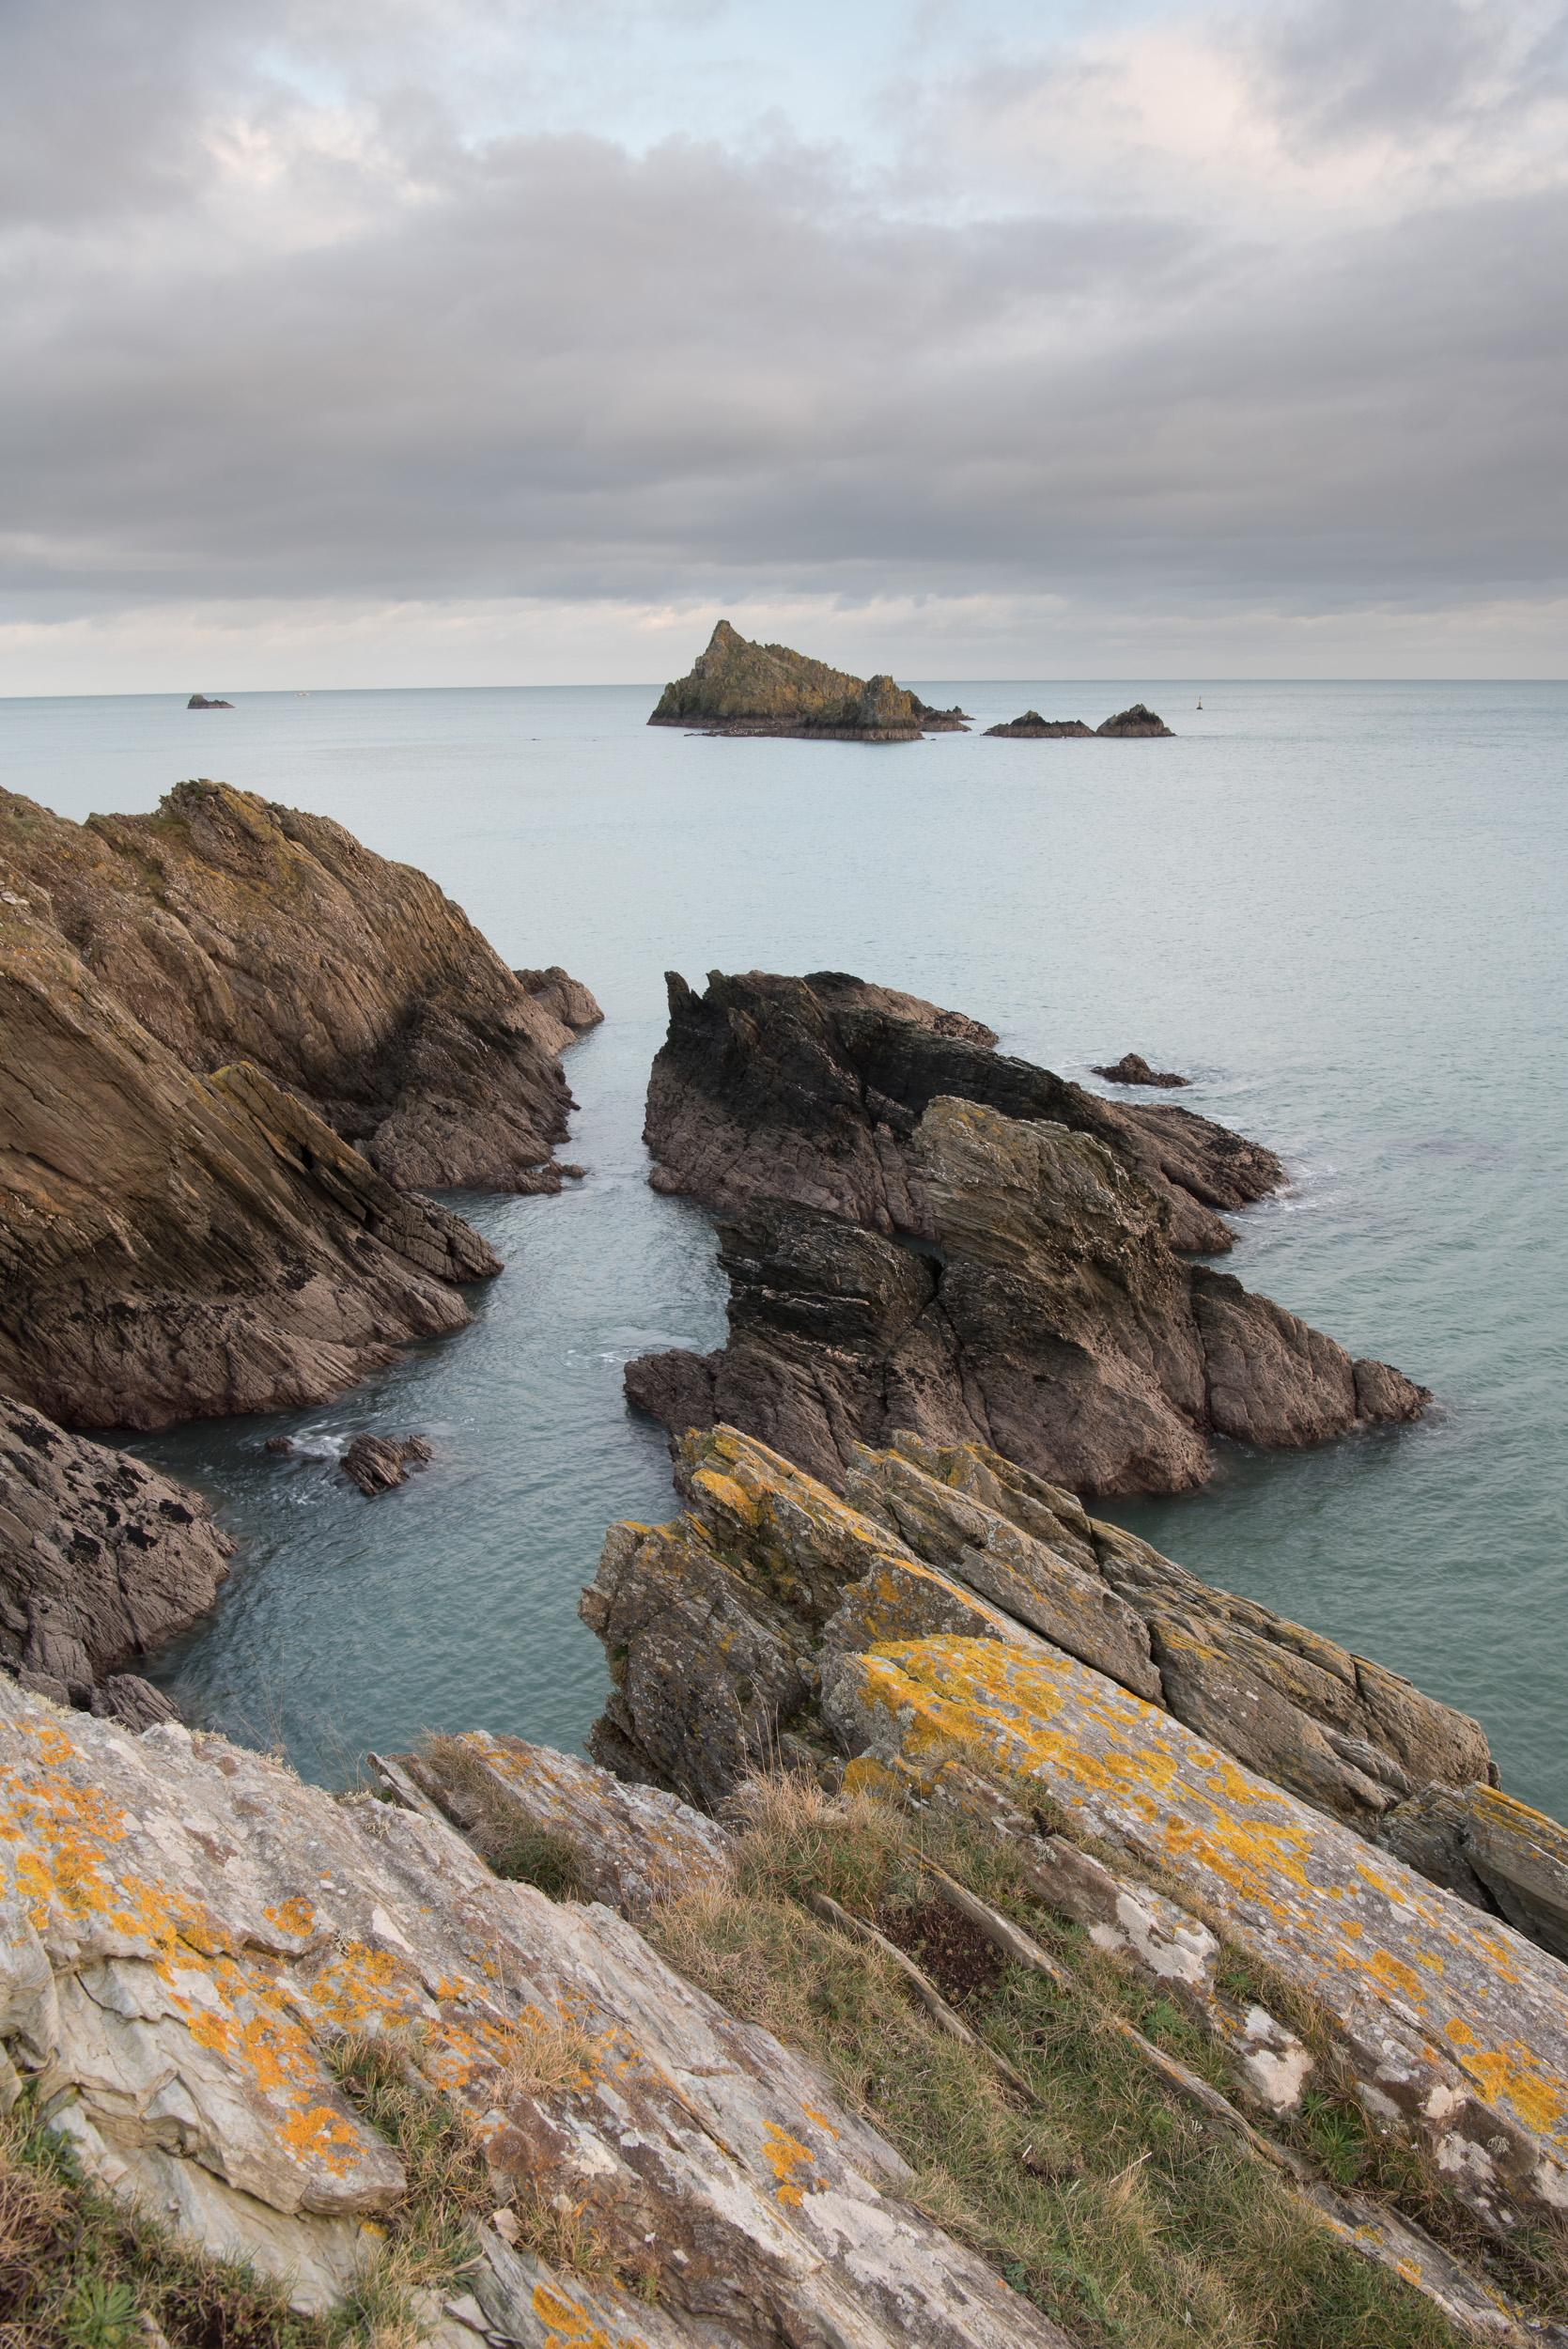
When I got there my friend had been shooting for a while and after a quick catch up, I got to work. For me, the best location to shoot Trevose Head is from Stincking Cove looking north east towards the lighthouse. Being a cliff top location there isn't a huge amount of room to move about, so my tripod legs were probably placed in the same spot as they usually are. However, even with my inability to move around a lot there is still plenty of variation to be had by shooting different focal lengths and exposure times.
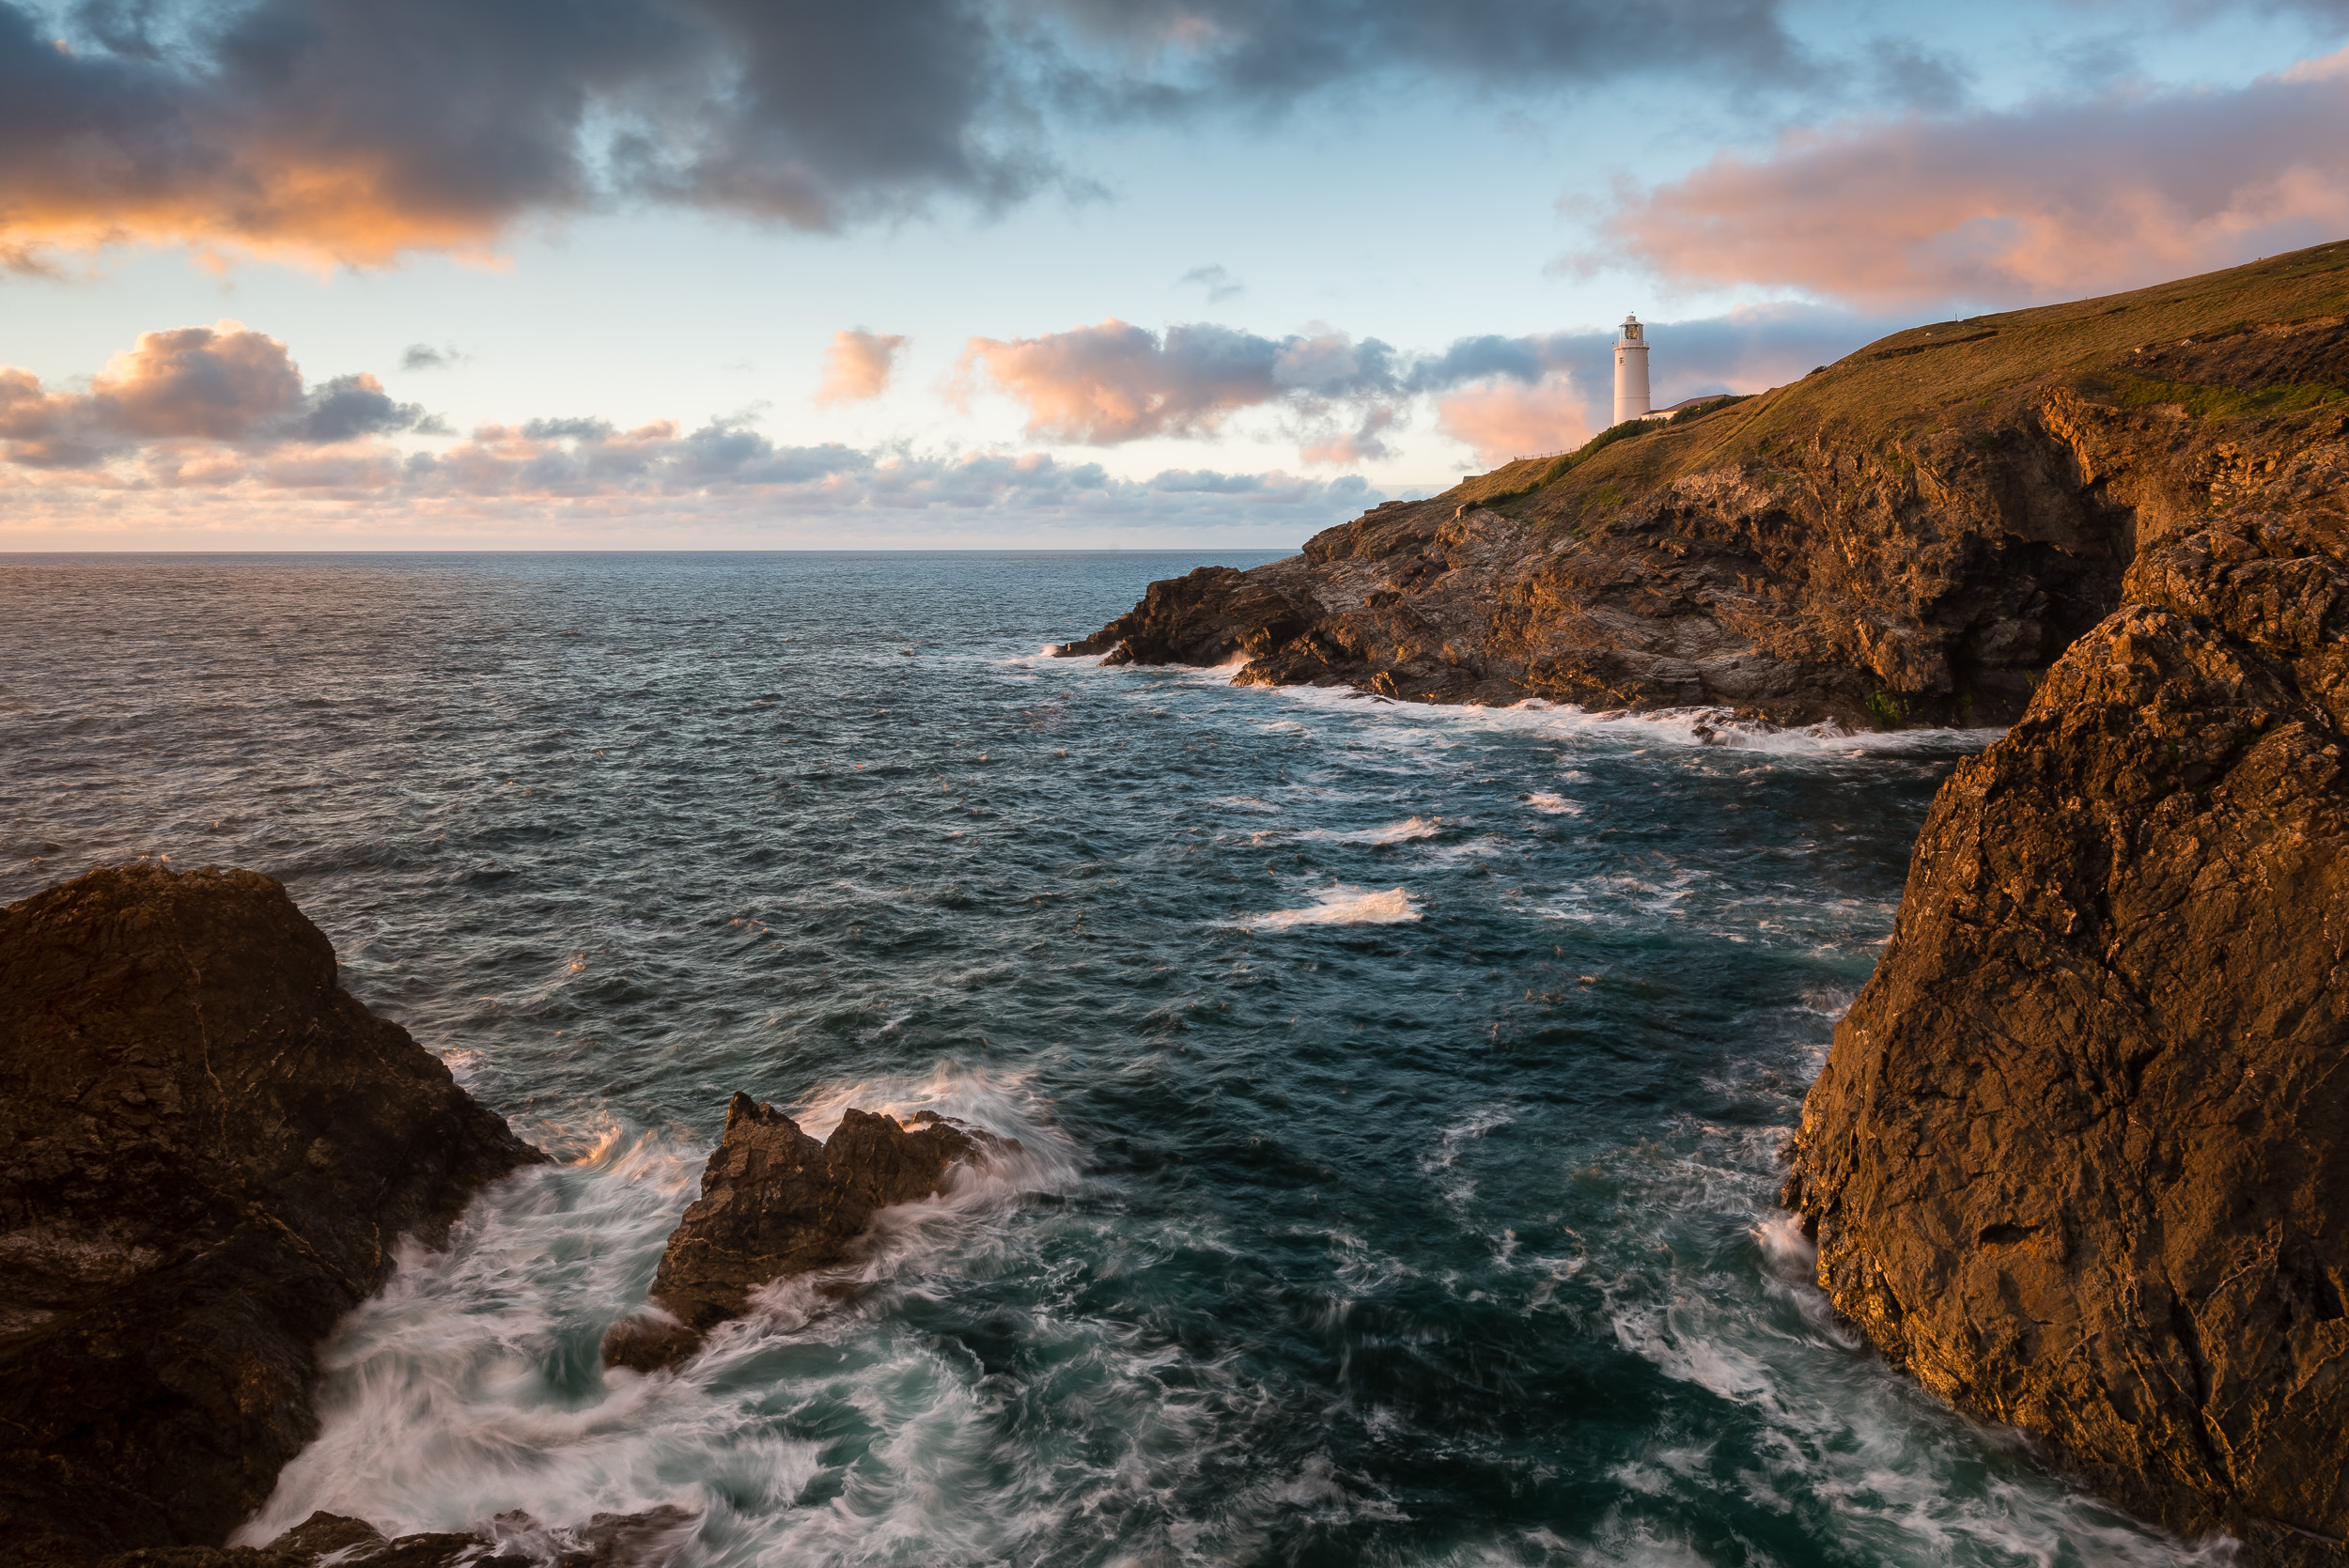
What made my image different this night was the light. Photographers, including myself, do talk about the "light" an awful lot, but hopefully in this image you can see what a difference the light can make:
Nikon D750, Nikkor 16-35mm f/4 @ 22mm, 0.5 sec, ISO 100, f/16, Lee Filters circular polariser, ND grad.
I'm not saying this image is necessarily any better than some of my other images taken from the same spot, but it is a very different image from my darker, moodier images that I've taken there previously. The light was only there for a few minutes but I love the way it reflects off the sea, the cliffs and the lighthouse. It just shows you that every visit to a location can be unique and therefore produce a unique image.
To ND or Not To ND
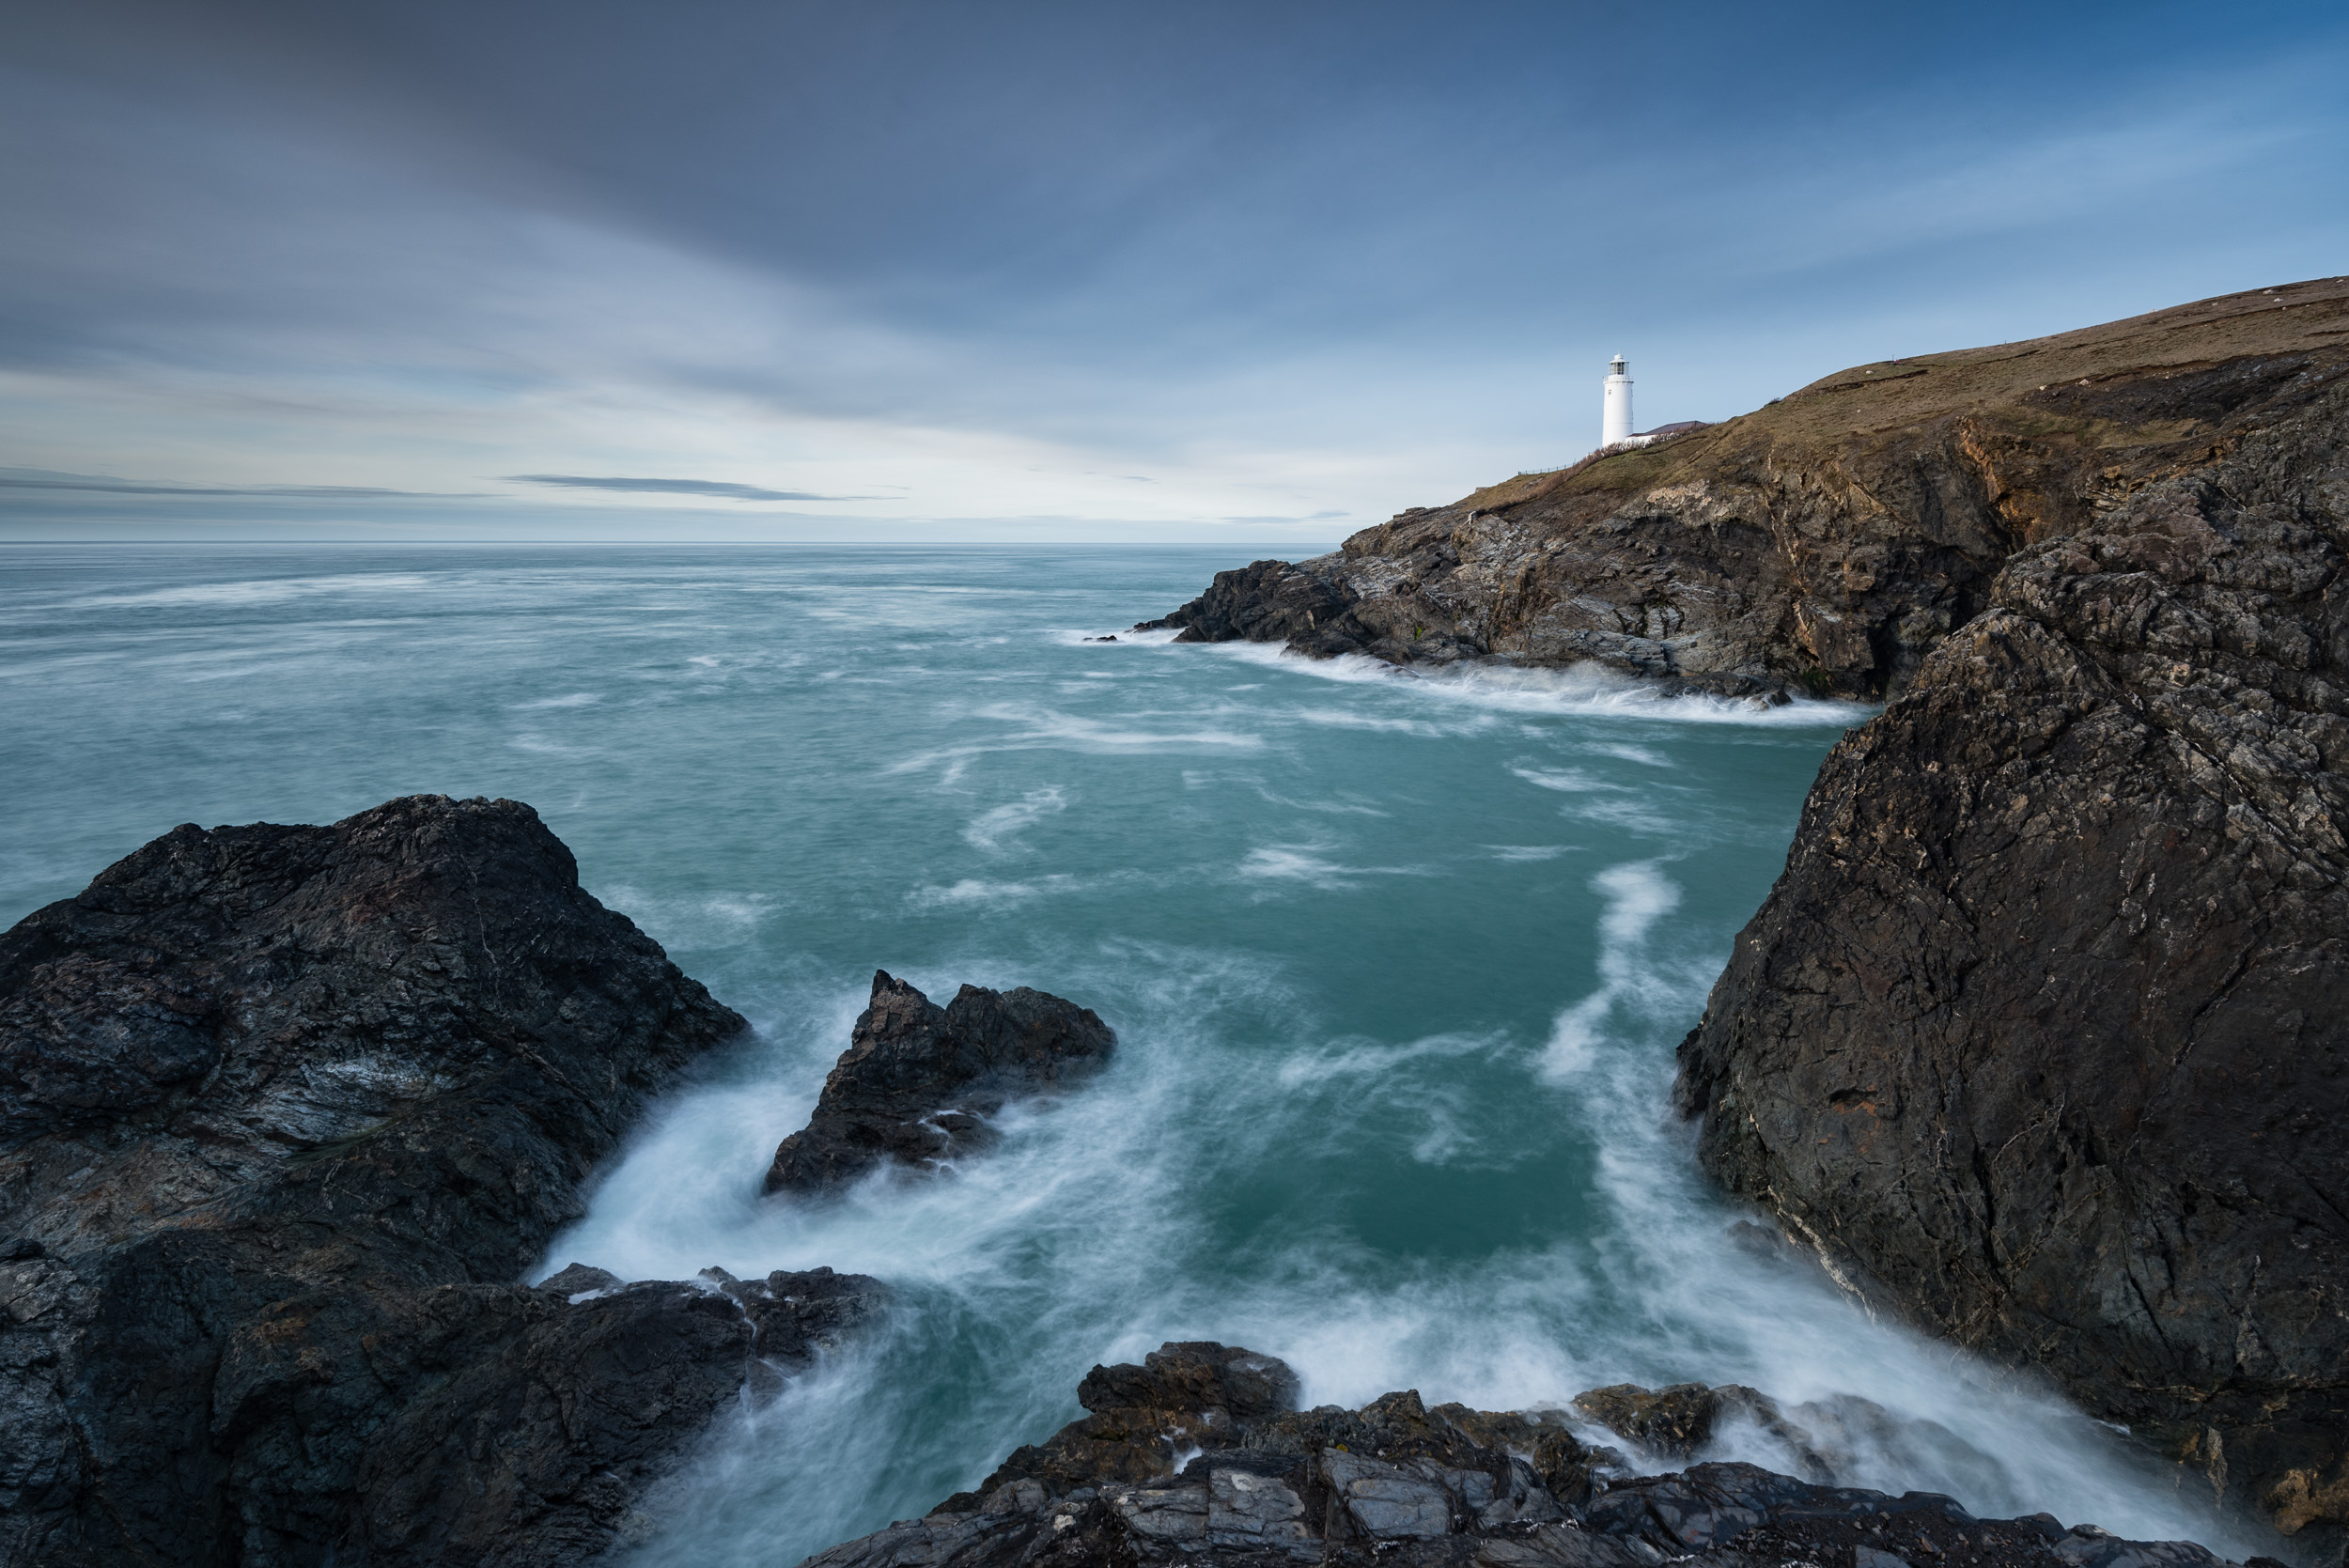
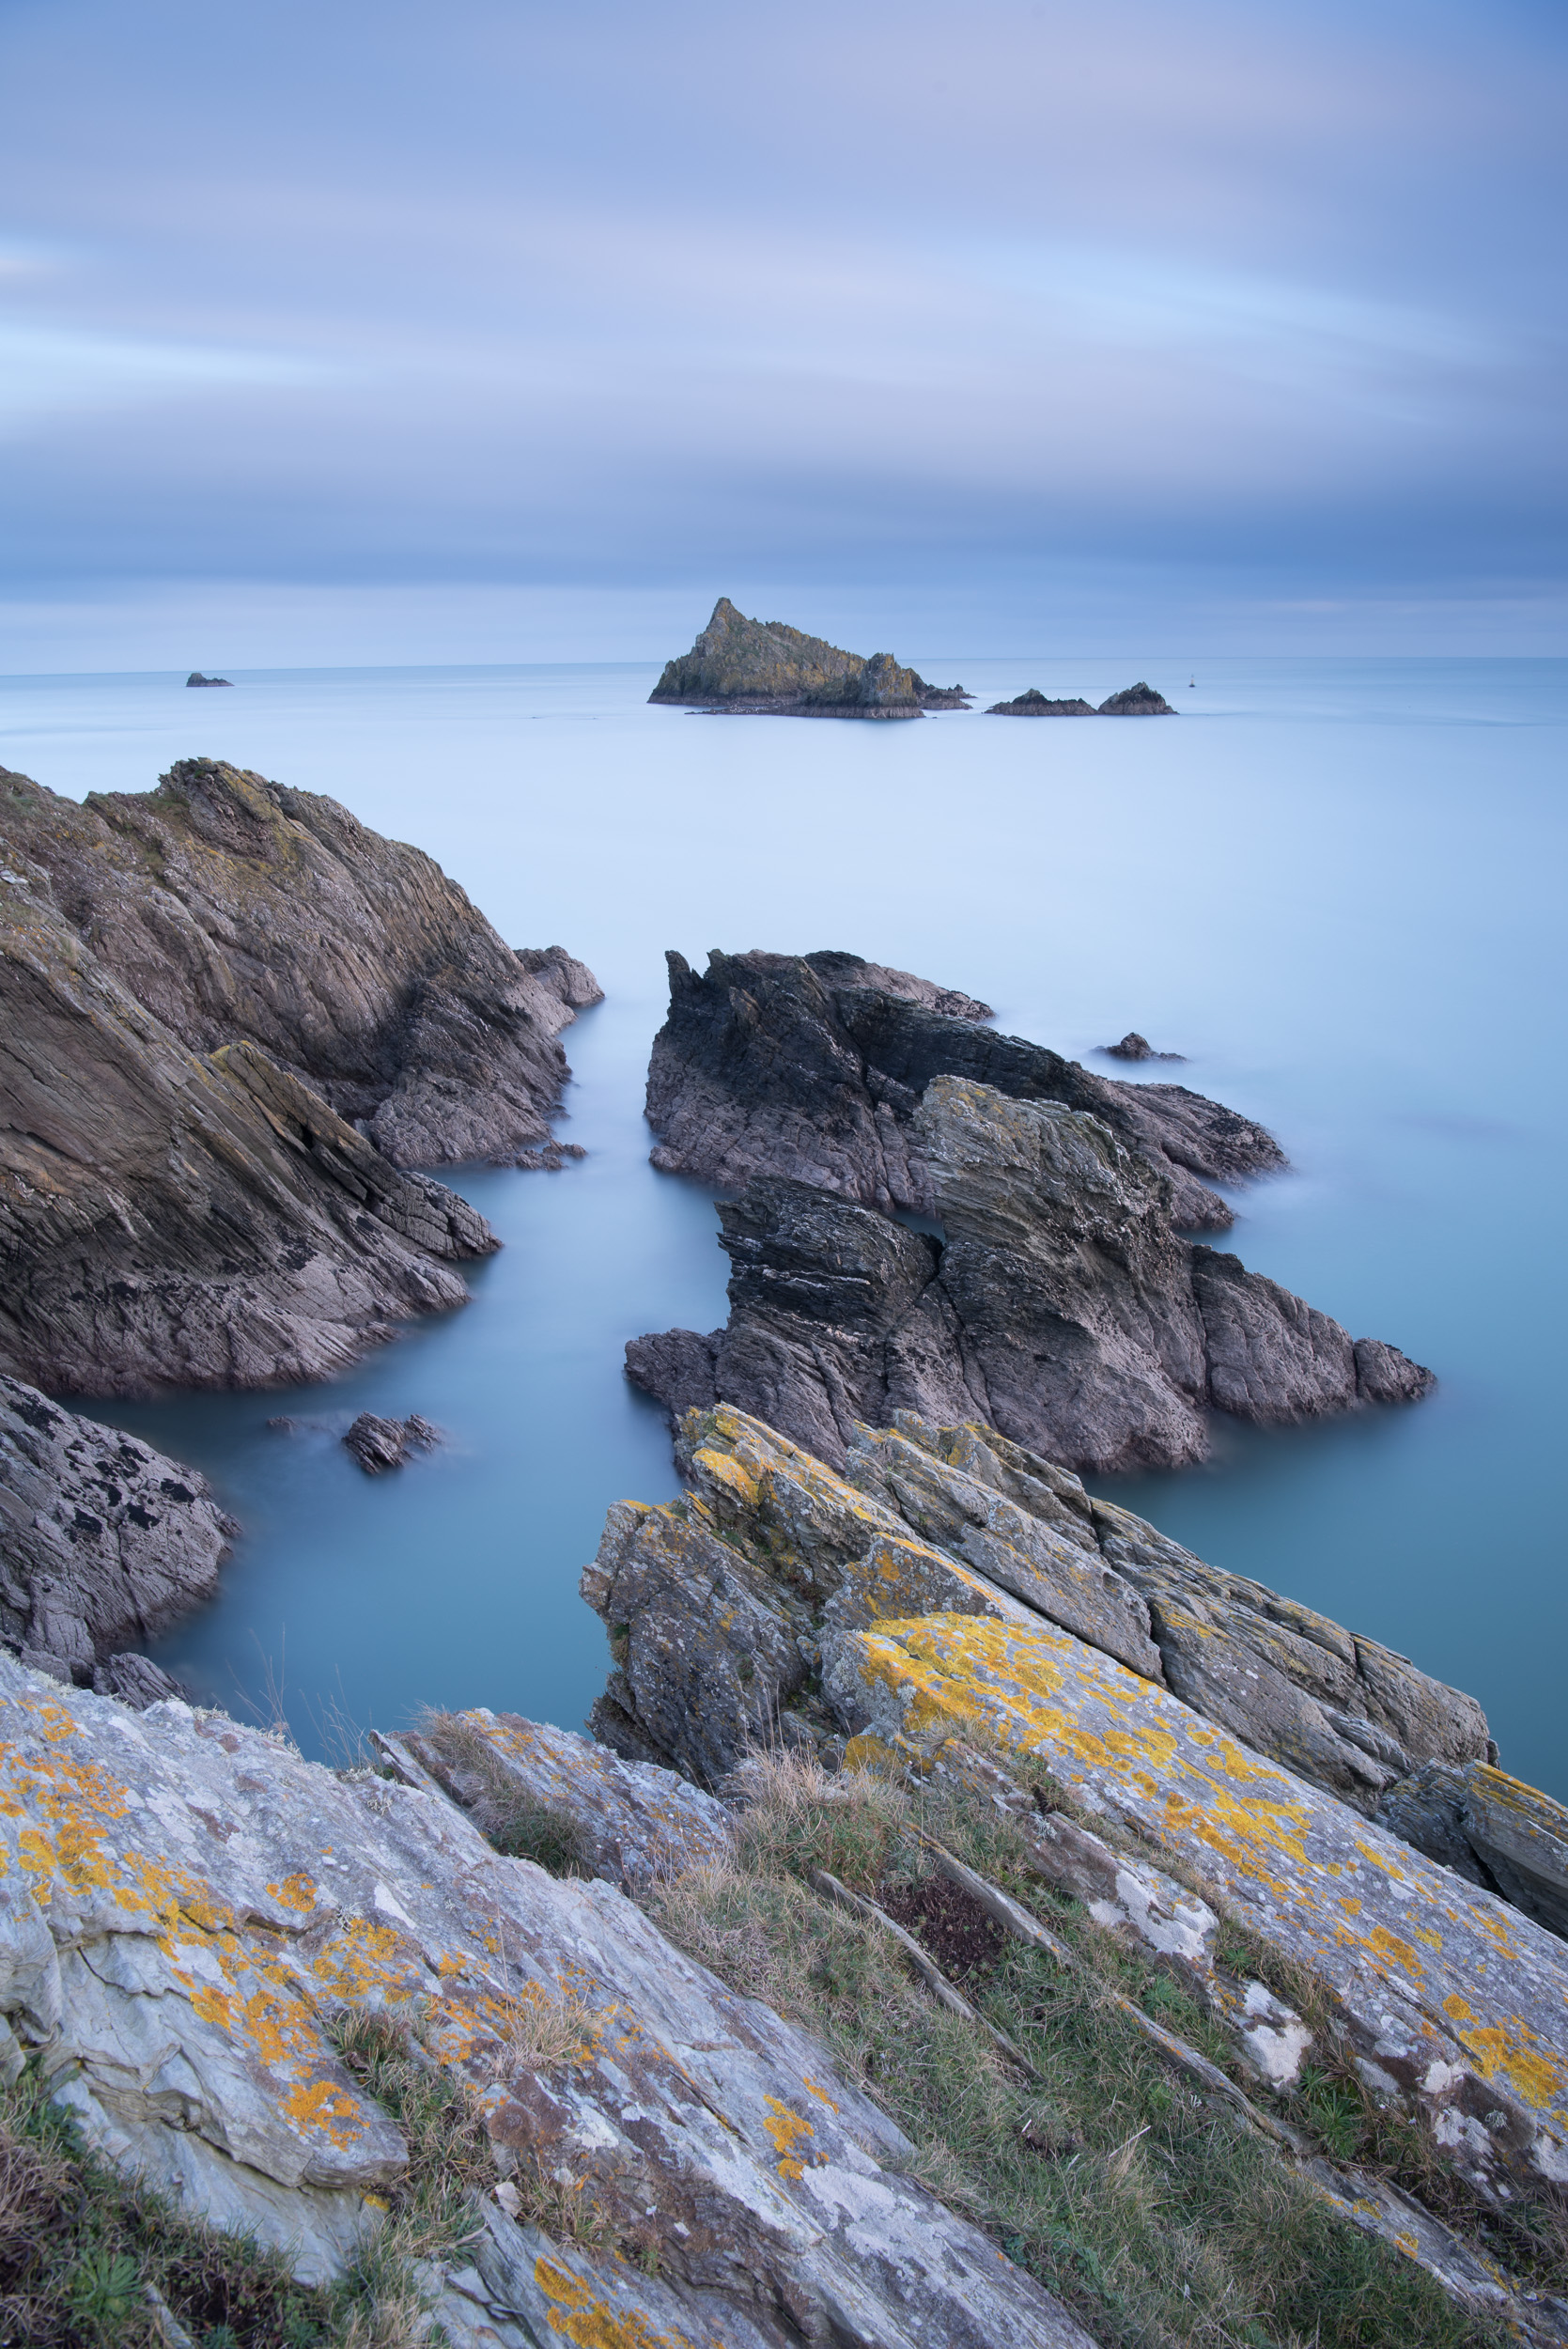
I'm a big fan of the ND filter. I use them a lot and you can see how I use them in this video. That doesn't mean I will use them in all my images though. I try to use them creatively if I think the image will benefit from a slightly longer exposure. I do tend to go for longer exposures for my seascapes as I like the resulting smooth water or the patterns that are painted by the moving water. You'll maybe have noticed though that the image I've just shared above isn't a long exposure. At the time I felt that smoothing out the water wouldn't be the right thing to do for the image I wanted to create. I liked the choppy water and the way the light reflected off the tops of the waves.
I did take a long exposure and while I am of course very happy with it, I still very much prefer the shorter exposure.
Nikon D750, Nikkor 16-35mm f/4 @ 22mm, 30 secs, ISO 100, f/16, Lee Filters circular polariser, ND grad.
Ignore Those Who Say...
All this talk of returning to a location to take the "same" picture reminds me of a Twitter post that I saw recently. I can't remember what it said exactly but it seemed to involve a number of photographers talking about a photograph of a few sets of tripod legs all crammed into the same spot. The general gist of the conversation was that these photographers lacked any original thought and were just copying each other or those that were there before them.
Though I didn't reply to the Twitter post, I couldn't have disagreed more for two reasons. Firstly, who's to say that just because a photograph has been taken from a spot before that another photographer can't take a similar image. If you are just starting out in photography I would actively encourage you to visit locations that you've seen in other peoples images. I even don't see any problem with trying to replicate the composition. It's often a good way of learning. If you have been inspired by an image you have seen then why not try your hand at that location.
I bring this topic up now because even though I have visited Trevose Head a few times and taken photos from the same spot, I get different results each time. So I would encourage you to put your tripod legs where my legs were and take the same photo. Your image will be unique and hopefully special to you.
The other reason I disagree with that Twitter post is that if you put two photographers in the same location at the same time you'll likely end up with two different images. An example of this was when I met a very nice photographer called Johnny Baird during a trip up to Scotland to photograph Glencoe. We both stood in the middle of the River Coupall, photographing Buachaille Etive Mor at sunset and despite the close proximity of our tripod legs, we shot very different images. Just because we were in the same location at the same time, how we choose to interpret the scene, choice of equipment and setup all meant we ended up with different images.
Don't let anyone tell you that a location has been overshot or that you must find a unique location for your photograph to be worth anything. So next time you're in Dorset, go to some of its most iconic locations such a Durdle Door and join the dozen other photographers that will be there and get your very own image.
Do you have a location that always delivers results for you? Did you prefer the long or short exposure that I took? What are your thoughts on visiting well shot or iconic locations? Let me know in the comments below.

Trying Something New at Daymark Tower
It's always good to expand your photographic horizons and so on a recent visit to Daymark Tower in Devon I decided to try some new techniques and styles. Read on to see how I got on!
Every Visit is Unique
Over the last few weeks I have been finding myself to a number of locations where I have previously taken some of my favourite images. There is of course nothing wrong with this as I'm a firm believer that even if a 1000 people have already placed their tripod legs on a particular spot, there are still new and exciting images to be had on every visit.
Most recently I wrote about my visit to Venford Falls in an effort to improve on a photograph I took there last year. Shortly after that I returned to the same location and was pleasantly surprised to discover a little more about that location by photographing Venford Brook.
The point I'm trying to make is that even if a location has been well photographed either by yourself or any other photographer, each visit to a location is unique and therefore you can get a unique image.
Returning to Daymark
I recently visited Daymark Tower to shoot on of my 5 Minute Photo Adventure videos. Though I didn't manage to get any portfolio class images from that particular shoot I knew that if I returned a few weeks later when the crops had grown a little more I could try again.
I had a number of goals for a return visit. Firstly I wanted to see if I could improve on one of my portfollio images from last year.
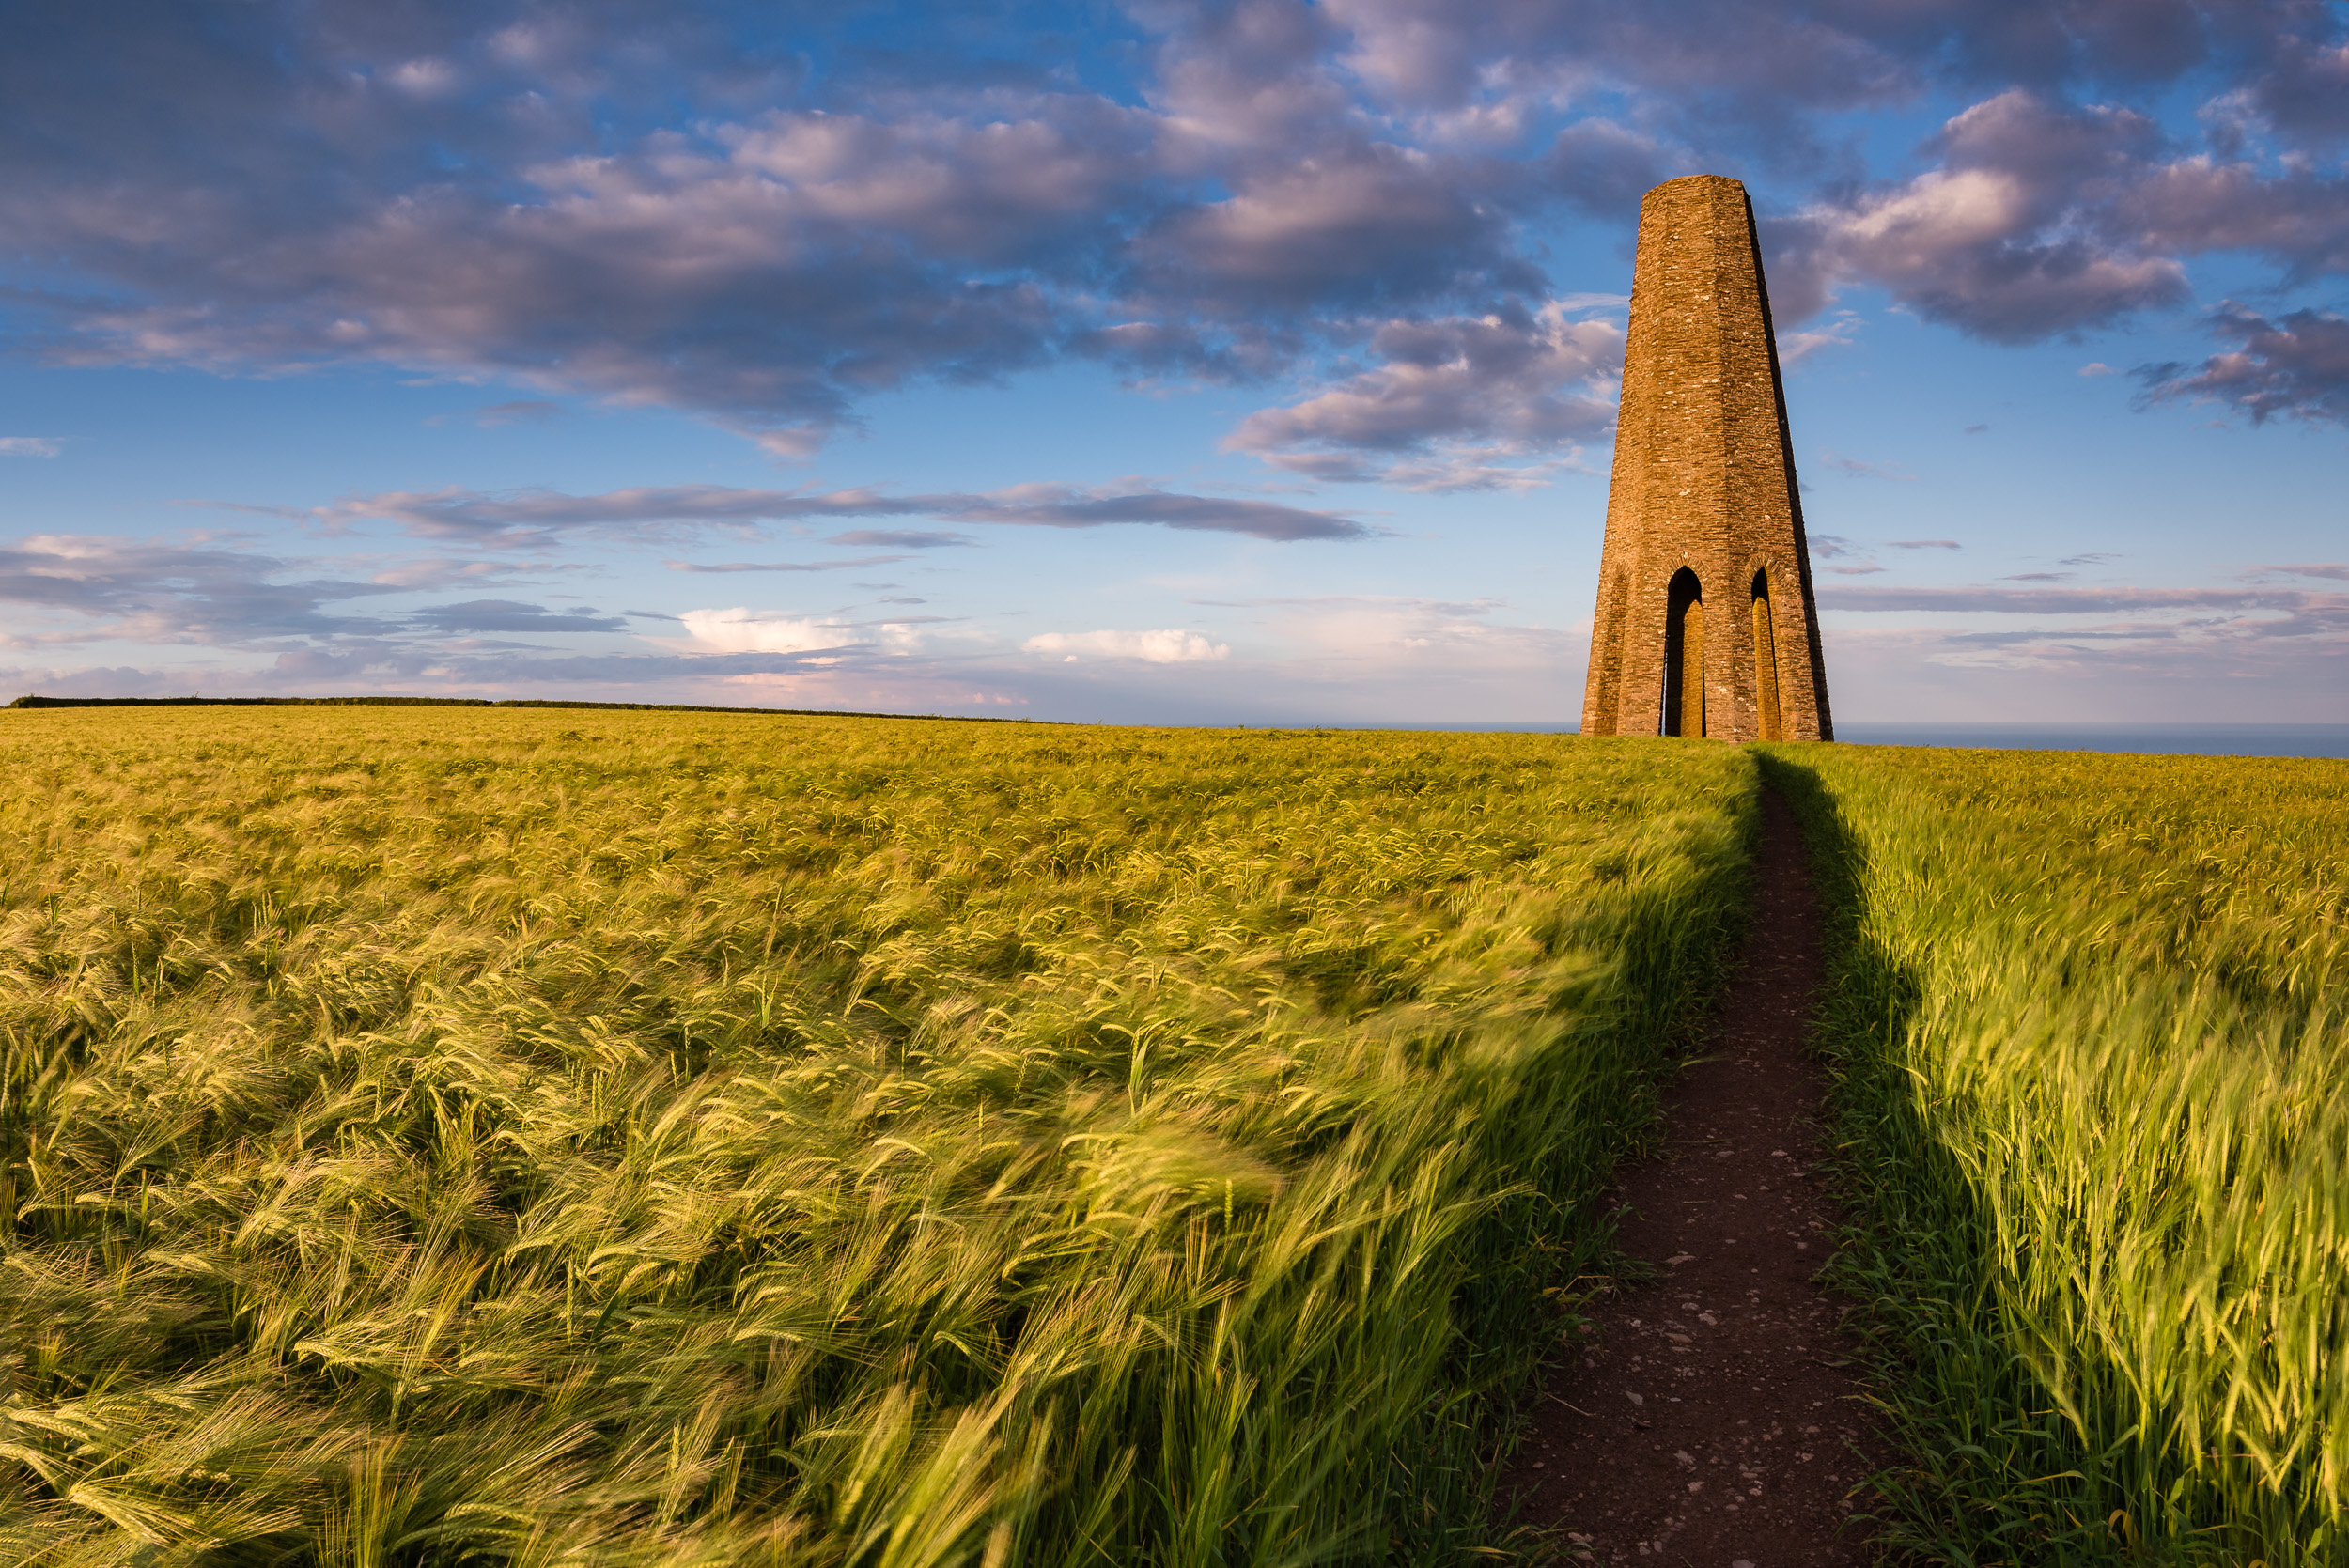
Could I improve on this image from last year?
The image above that I took last year benefited greatly from good light. The setting sun illuminated the tower nicely and added a warm glow to the crops swaying gently the breeze. It's rare that the image you have in your head before you go to a location is actually the image you get.
So what was I hoping to improve on? Well, to be honest, I'm not exactly sure. I think the main element I would like to have seen improvement in is the sky. A beautiful Devon sunset sky with pink or red clouds would have been lovely.
Unfortunately for this particular visit though, the sun disappeared early behind a bank of distant cloud so I never really got a chance to make the most of the golden hour.
Nikon D750, Nikkor 24-70mm f/2.8 @ 44mm, ISO 100, 1/60 second, f/13
Fly Away Drone
I mentioned earlier that I had a number of goals I wanted to achieve on this visit. Another goal was to take some aerial photographs of the tower and crops using my DJ Mavic Pro. This didn't go as planned! Being a coastal location there is always a little wind and though it was breezy on this particular evening, I thought it was within the limits of the drone.
Shortly after take off I soon realised that the wind was a bit stronger than I had thought. Despite turning around my drone and applying full power it was slowly drifting away from me. I had a fly away drone on my hands! As a private pilot I've learned not panic in these situations, so knowing that the wind would probably be weaker lower down I reduced to height of my drone to just above the crops.
The wind was indeed weaker lower down and I was able to return the drone back to its starting point. The aerial photos would have to wait for another day!
Something New
My final goal was to try and take some intimate landscape images. The crops in the field around Daymark Tower look beautiful as they gently move in the breeze. However, could I translate what I saw into a good image?


So while I'm reasonably happy with the result, I still have a lot of work to do to create compelling images in this style. This isn't a style of landscape photography I'm used to and I need to train my photographic eye a little more for this type of photography. However, it's always good to try something new and with a little more practice who knows what I can produce in the future.
Have you been to Daymark Tower? Do you photograph intimate landscapes? Have you had your drone fly away from you? Let me know in the comments below.

Plan B Photography
In my blog this week I talk about the importance of having a plan B. On recent visits to Hartland Quay and Trevose Head I ended up shooting something different from what I had originally planned. I might have come away with nothing if I hadn't had a plan B!
Always Have a Plan B
My recent trip to Porth Nanven in Corwnall was a very successful one and I managed to capture a new image for my portfolio. The weather gods had been kind to me that evening and the conditions were ideal for that location. With the weather looking reasonably settled for the next couple of weeks I hoped I could build on that success and get a few more portfolio shots at some locations I had been itching to get back to.
As is always the way with landscape photography though, things didn't go exactly to plan.
Trevose Head
My first and until recently, my only visit to Trevose Head, was a very successful one. On my previous visit had managed to get a number of great images of the the lighthouse in a variety of different lighting conditions using varying exposure lengths. It was one of those trips out with the camera where things just seem to go right for you.
However, even though I had some quality images from that trip, I still wanted to go back and try and get an even better image of the lighthouse and cliffs in even better, more dramatic light.
When I arrive at Trevose Head on my most recent visit things were looking good except that the wind was howling! This is hardly a surprise as Stincking Cove (where I was going to shoot from) isn't exactly sheltered so a bit of wind is to be expected. Not to be deterred though I got setup and got shooting.
It soon became obvious though that the wind was much stronger than my last visit. Even with my heavy duty tripod, and a relatively short exposure time, the camera was getting a battering from the wind. It was looking unlikely that I would get a stable image. There was no chance that I would be getting the Little Stopper out! This was a shame as the light was looking good. Time for plan B!
On my walk over to Stincking Cove I had noticed there was some thrift flowering on the cliff edge. It was a lot more sheltered over there so I decided to head back and shoot something different. I hadn't planned to go to Trevose Head and shoot the thrift but persevering with wind wasn't going to get me anywhere.
While the shot below might not be one for the portfolio, it's a pleasing image and I'm glad that I took it rather than I just went home feeling glum that I hadn't taken any decent photographs.
Nikon D750, Nikkor 16-35mm f/4 @ 19mm, f/16, 1/13 sec., ISO 100, Lee Filters Circular Polariser and ND Grad.
Hartland Quay
A very similar thing happened to me when I went to Hartland Quay about a week later. This time it was almost the reverse though. I had gone to Hartland Quay to photograph the thrift only to change my mind and shoot Screda Point. Unlike my trip to Trevose Head though, I was at least able to capture an image of the scene that I had originally thought about.
The image below of thrift and the bay at Screda Point is pleasing enough but forecasted cloud coverage wasn't there and so I feel the sky lacks interest. The colour and light are there, but it's just missing that something extra in the sky. Realising that things weren't going to improve, I decided to go for plan B!
Nikon D750, Nikkor 16-35 f/4 @ 18mm, f/14, 0.5 sec, ISO 100, Lee Filters Circular Polariser and ND Grad.
For my plan B image, I decided to put on my 24-70mm f/2.8 lens and go in tighter to focus more on the dramatic rocks of Screda Point. Though the sky still lacks the cloud coverage I would have ideally liked, I do prefer this image over my image of the thrift. I like shooting long exposures on the coast so maybe I'm slightly biased towards this image, but I like the lines of the rocks on the beach, the pastel colours of the sky and the simplicity of the image.
Unlike my trip to Trevose Head though, I probably would have left Hartland Quay happy with the photo of the thrift. However, I'm still glad I had a plan B!
So do you always have a plan B? Do you decide before you go somehwere or wing when you get there? Let me know in the comments below.

Mentoring and Porth Nanven
I'm constantly striving to improve my skills as a landscape photographer and in this blog post I tell you about my latest meet up with my mentor and share with you the photographs I took while we were at Porth Nanven in Cornwall.
Long Overdue
I have previously written about how important it is to continue developing my skills as a photographer. Sometimes I do this by attending a workshop or by getting some 1-2-1 training. Though I had been on a workshop recently it had been nearly a year since I had a 1-2-1 session with my photography mentor. I had been very busy with my landscape photography over the last year so I had a lot to discuss and a good number images to review.
So we got a date booked in the diary and as the day got closer the weather forecast was scrutinised carefully. After all, we couldn't possibly meet just to discuss photography, we would definitely have create some images as well.
Image Review
For the first part of the day we went through the best of my images I had taken since our last session. This is a really important part of the session for me as it's probably the only time I can really get some honest and open feedback about my images. But it's not just about the feedback around the composition but I also get useful feedback on the processing. "Have you tried a square crop", or "try cooling this image down". Critique is often just one person's opinion but getting other people's opinion or view of your images allows you to see them in a different way which should mean you grow as a photographer.
All this reviewing of images is hard work so we did it over lunch at Strong Adolfos, a fantastic cafe on the A39. So if you are ever in the area it's highly recommended!
Life as a Photographer
On our way to Porth Nanven, our chosen location for photography that evening, we discussed all things photography. We chatted about everything from other photographers work, to the state of the photography market, and to our gear. One thing we were both keen on seeing was some new FX (full frame) Nikon bodies. Our camera bodies (D810 and D750) are 3 years old now and we're ready for some new tech!
Aside from just chewing the fat over the world of photography it was really good to talk about my continuing journey as a landscape photographer. Since our last session I had started this blog and created my YouTube channel so there was a lot to talk about. Both these forms of self publishing are hard work but I enjoy producing content for them.
However I have recently been concerned that they might be impacting my development as a photographer. Was I focusing more on delivering content rather than creating images? Was I going to locations that suited my content plan rather than where I would get the best images? It was good to talk about these concerns and how it might impact my goals as a landscape photographer.
After much discussion on photography we headed to Porth Nanven so we could create some fresh new images.
Porth Nanven
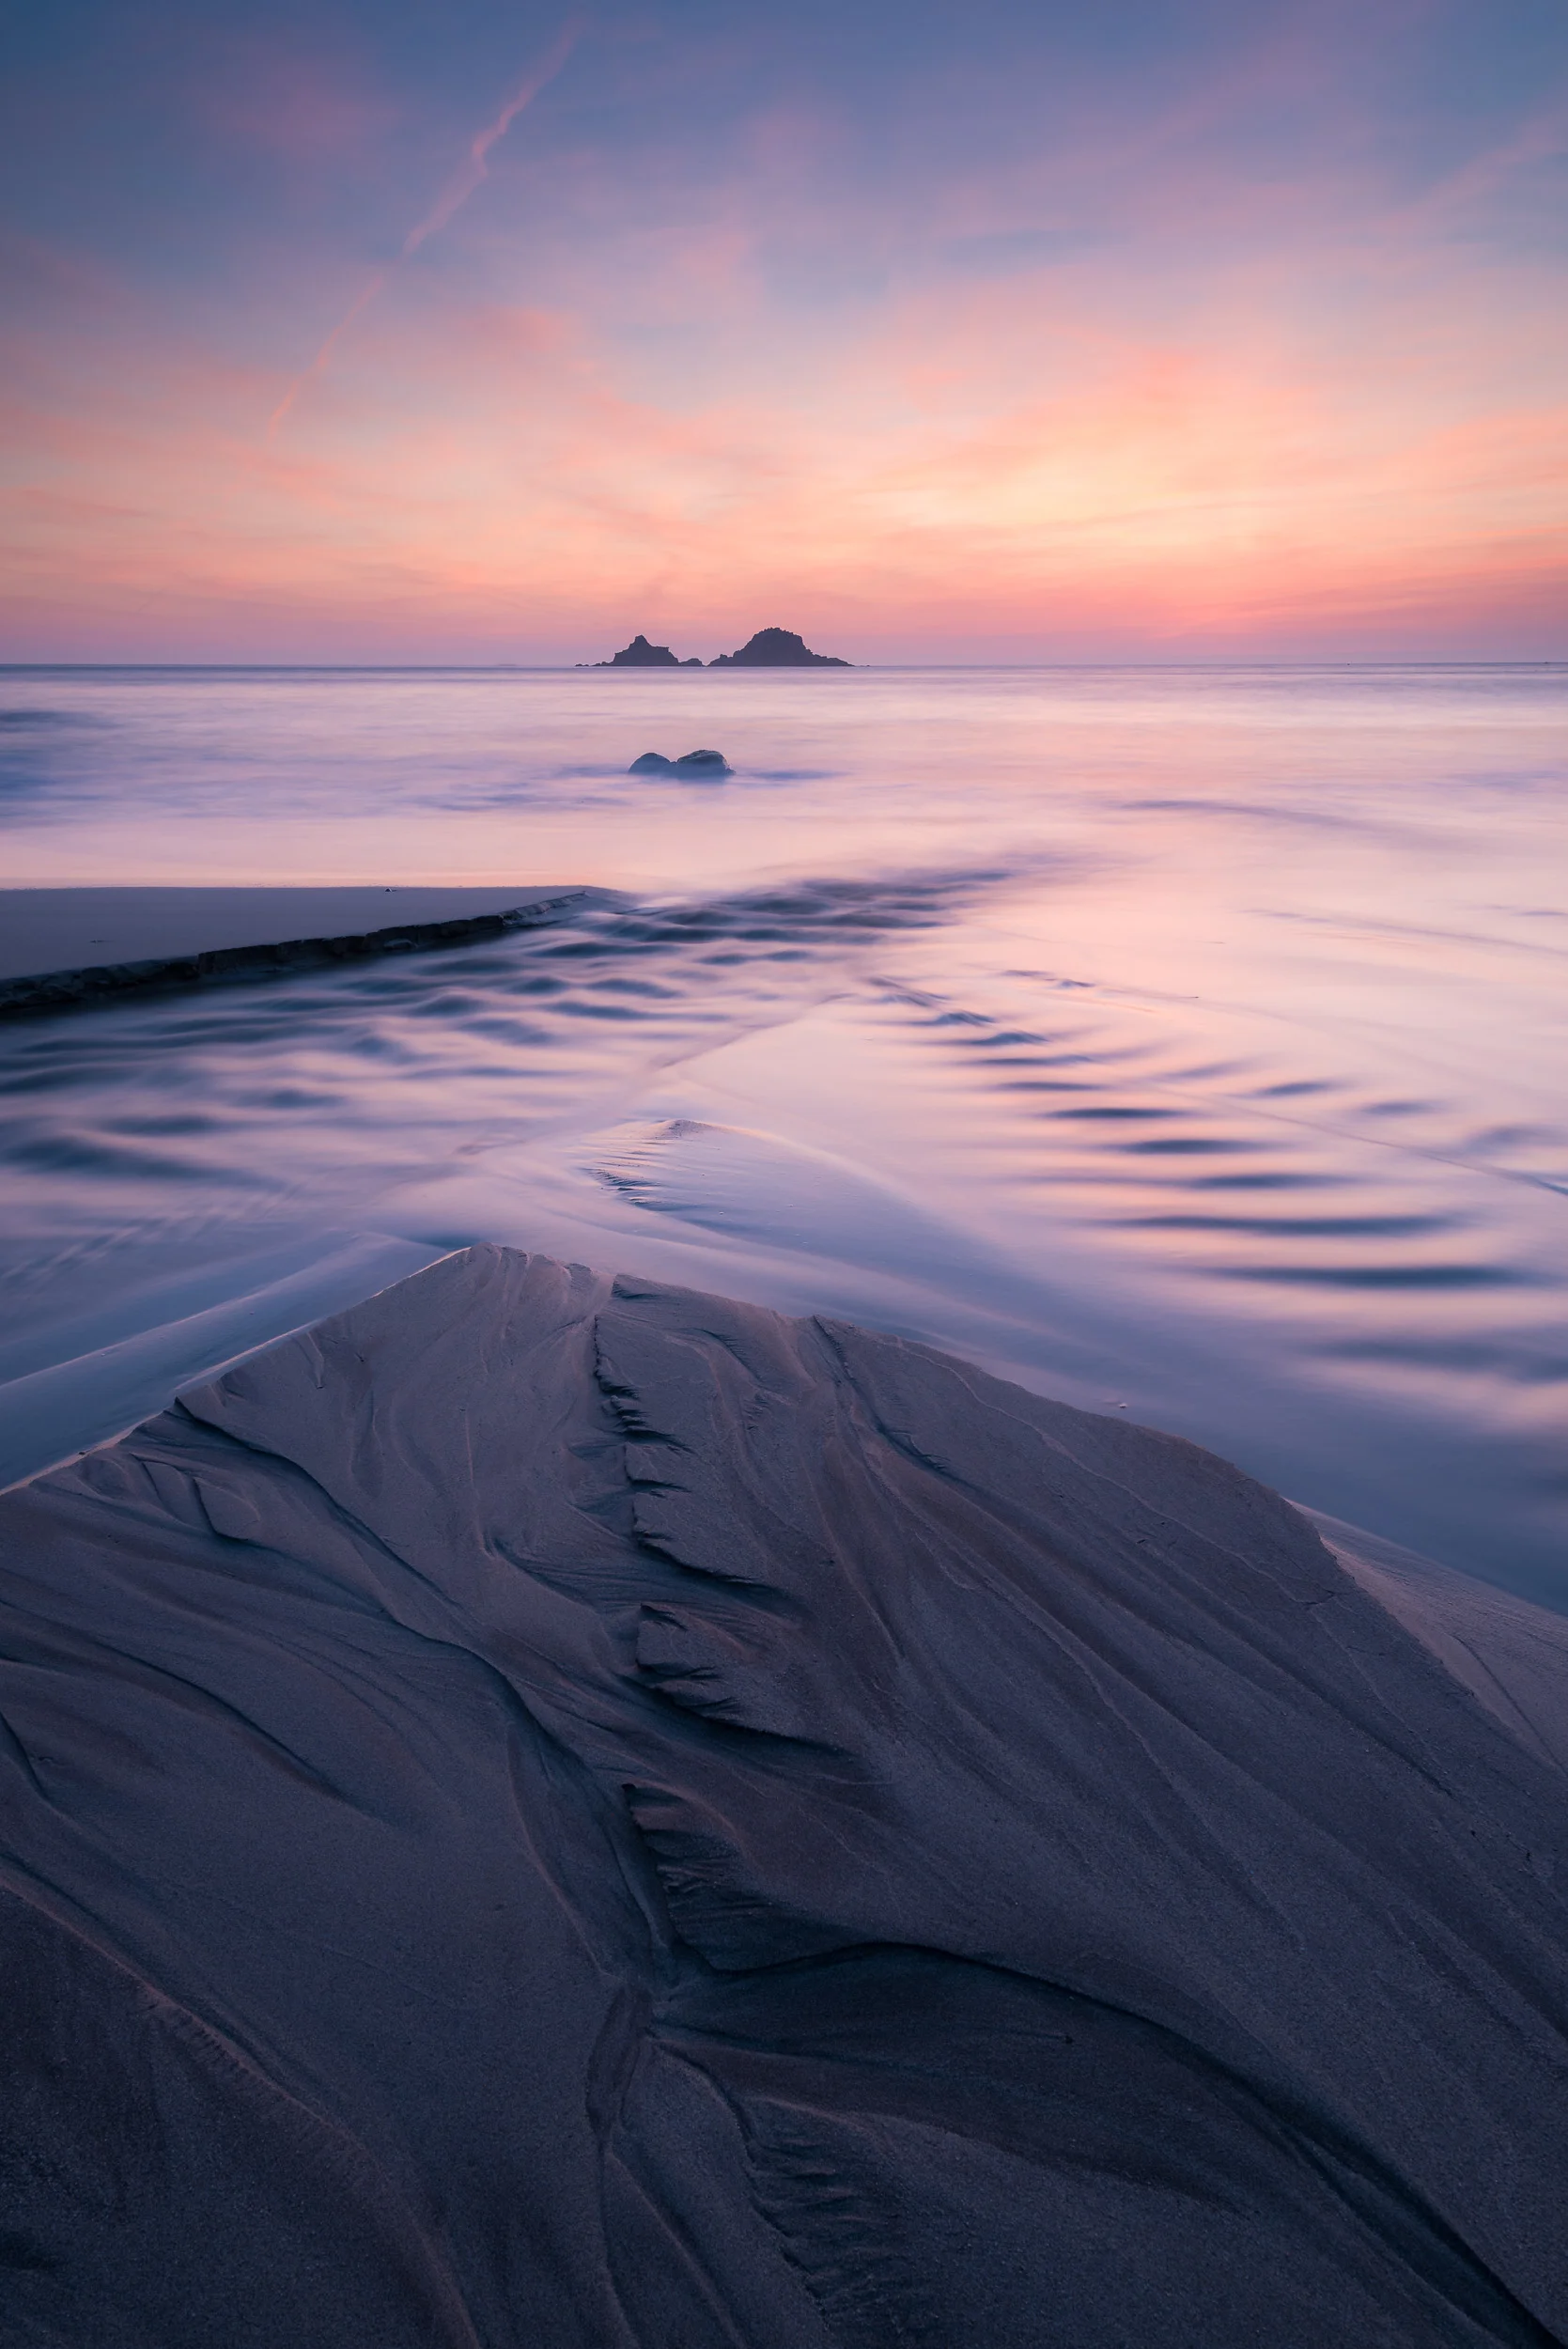
I first photographed Porth Nanven in March of 2015 and since then I've been back once. So when the conditions looked good for a sunset shoot at this popular location I was keen to go back. Porth Nanven is near to Lands End so it's a bit of drive, but sometimes you need to go that extra mile if you want to get some extra special. Due to the limited number of spots to shoot the beach of Porth Nanven we decided we would get there early as being a Friday evening it was sure to be a popular location for photographers.
Arriving some 2.5 hrs before sunset we found what we thought the ideal spots would be and started to eat our doughnuts and pasties as we chatted about Star Wars and Game of Thrones. After all, sometimes there is only so much photography you can talk about!
As the sun began to set more photographers arrived so we were glad that we had made the decision to get there early. We started getting our gear setup and discussed compositions. Anyone who has been to Porth Nanven will tell you about the wonderfully large, smooth boulders that cover the back of the beach. Using these boulders and the water from the stream flowing out to sea seemed to be a great first composition of the night.
Nikon D750, Nikkor 16-35mm f/4 @ 16mm, 4 sec, f/16, ISO 100, Lee Filters 0.6 medium grad.
As the tide continued to go out some beatufiful patterns started to appear in the sand so we moved from shooting the more traditional boulder shot to a more minimalist composition.
Nikon D750, Nikkor 16-35mm f/4 @ 24mm, 10 sec, f/16, ISO 100, Lee Filters 0.6 medium grad, 3 stop ND.
I was really happy with these last two compositions. Porth Nanven is known for its big boulders so if you look up the location on Flickr for example you will see most of the shots will include boulders. So I found it really satisfying and interesting to make images that are a little different. As I mentioned in my recent post about Colmer's Hill, it can take many visits to really get to know a location. Next time I visit Porth Nanven I will now have a number of different compositions that I could shoot allowing me to vary my plan on the fly.
Satisfied with our shots we started the long drive home.
A Good Day
Overall it was a fulfilling day. As always it was really useful to have a portfolio review and to review my progress and goals as a landscape photographer. My personal development as a landscape photographer is more than just about creating beautiful images. Having a mentor allows me to develop not only my creative skills but my skills in the business of photography. It was almost a bonus to capture some lovely images from Porth Nanven!
Have you photographer Porth Nanven before? Have you ever had a 1-2-1 session with a photographer? How do you develop your skills as a photographer? Let me know in the comments below.

The Power of Failure
In this blog post, I tell you why I had to ditch a mornings work because I failed to check the setup of one of my cameras. It was a tough lesson but one I will learn from.
Not What I Had Planned
In this blog post, I was originally going to tell you about a new video I was making for my YouTube channel and how I got on when I visited my first location for the video. However, not only did the photography not go exactly how I hoped, but I also made some mistakes with shooting the video.
With my planned blog post not looking worthwhile, I was going to bring forward next week's planned blog post to this week. Then this morning I accidentally deleted a folder full of video and it got me thinking about mistakes and failures. We all make them but what is important is that we learn from them. So in this blog post, I'm going to tell you about my mistakes and what I've learnt this week.
Check Your Camera Settings
So this week I was going to tell you about a new exciting video project I was working on. It involved visiting a number of great locations where I would shoot some video, take some photographs and hopefully inspire you to visit these locations. As you'll read though, the shoot at my first location, The Cobb in Lyme Regis didn't exactly go to plan.
Let's start with the photography. The forecast and tide had looked promising, but as most landscape photographers will tell you, that doesn't necessarily mean that's what you'll get or that you'll get a good image.
At The Cobb I generally prefer the morning sun to come from the side, but on this morning it was rising directly in front of me. However, the forecast said there would be a bit of cloud about and I hoped the rising sun and clouds would mix to give me a beautiful sky.
Unfortunately, it didn't quite happen that way as you can see from the image below, which was probably the best of the morning.
So while the image itself isn't one for the portfolio, together with the video I was shooting it still would have told the story that I needed it to.
As I started to edit the video from The Cobb, something quickly became apparent. It's wasn't the shots from the DSLR, or the video from the Sony RX100M4, or even the audio from Zoom H1. What I had failed to do was to check the settings on my DJI Mavic Pro. All the video I had shot with the drone was low resolution and at the wrong frame rate. The drone footage was very important in showing the viewer more about the location. Unfortunately, the drone footage would not work well with the other video I had captured.
I'm not entirely sure why the drone camera was configured incorrectly, but that isn't really the point. I should have checked the settings before I started shooting. I always check the camera settings on my DSLR and Sony RX100M4 so why on earth wouldn't I do the same for my other cameras!
I like to put out quality work, and while the still image I captured was suitable, when I had realised I had made a mistake with the video I decided I would rather go back and shoot the whole thing again. I've been working hard to increase the overall production quality of my videos so I wasn't willing to let this pass quality control.
So what have I learnt? I need to check each and every camera I use, each and every time I use it! I put a lot effort in my content, and the time I have to do it is very limited, so I need to make sure I don't waste time by not checking all my cameras on each shoot.
I will of course not let this little setback deter me from making the planned video!
I Just Deleted All My Video Content
This morning, while cotemplating this particular blog post, I decided I would "tidy up" some of my unused, but still potentially useful, video clips I have. Trouble was that I deleted all my current video content, including some highly valued footage!
Here I have some good news though. I run a rigorous and regular backup process so while the deletion of the data was a drag I knew I could restore it quickly enough. Sure enough, I just inserted the hard disk with my last backup and restored the data with one click. My backup routine is far more extensive than a single hard disk so if you are interested in hearing more about it let me know in the comments below.
So do you check your settings before each shot? Have you taken a bunch of photos with camera incorrectly setup? Let me know in the comments.

My Top 5 Tips to Improving Your Landscape Photography
In this blog post I share with you my latest video in which I tell you what my top 5 tips are to improving your landscape photography.
Tips for Landscape Photographers
I've been shooting landscapes since I got my first DSLR back in 2006. However, it's probably only in the last few years that I've started to really progress as a landscape photographer.
In this vlog, I share with you the 5 things I think will help you improve your landscape photography. This is a personal list, and not even necessarily the only 5 things you should do. It's just 5 things that I did that had a direct impact on my landscape photography. Hopefully, some of them will work for you also!

In Summary
I explain the tips in the video, but for those of you who are currently unable to watch the video, the tips are:
Practice - Make sure you practice your photography. Practice lots!
Be Inspired - Have plenty of sources of inspiration!
Get Involved - Go on a workshop or enter for a magazine feature!
Get Sharing - Share your work or enter a competition!
Adventure - Get out there and go on a photography adventure!
And there is a bonus tip, but you'll just have to watch the video for that one!
So do you have any tips you want to share? What things did you do to improve your skills as a photographer? Which of my tips are you going to follow? Let me know in the comments below.

My Field Guide to Using ND Filters
In this blog post and video I take you out on a shoot to Froward Point in South Devon to take you through my workflow when using Neutral Density (ND Filters). It doesn't matter what strength of ND filter or even who makes it, my process is the same. Read the blog post and watch the video to find out more!
Control
Modern cameras are wonderful and amazing bits of technology. They allow us to turn our creative visions into beautiful images that we can connect with. We have a lot of control. We can change shutter speed, aperture, focus, ISO, and position, all with the aim of capturing that moment. One thing we can't control is mother nature and so sometimes we need a little extra help "control the light".
This image required an exposure time of 72 seconds. Generally speaking it would not have been possible to get an exposure of this length without an ND filter.
This is where filters come in. Now, there are such a dizzying array of filters available it would be slightly foolish of me to try and cover them all here, so I'm going to concentrate on the use of ND (Neutral Density) filters or to be more specific how I use ND filters.
Though I use ND filters in my landscape work, it is probably in my seascape work that I will use them the most. They allow me to creatively control how the water looks in the image. It could be that I want to lengthen the exposure to 1 or 2 seconds to show the path of a wave, or even 3 or 4 minutes to smooth out the texture of a choppy sea. Sometimes you just can't get exposures times like that just with the camera alone.
The Process
I have a range of ND filters in my bag, all made my Lee Filters (my filter manufacturer of choice). I have a 3 stop, 6 stop (Little Stopper), 10 stop (Big Stopper), and 15 stop (Super Stopper). The Super Stopper is a recent addition to my kit bag and you can read how I got on with it on my first trip out with it here.
No matter which ND filter I use, the setup and execution process I go through is the same. To show you what my process is I've created in this field guide video which takes you through my process while out on a shoot.
To recap from my video the process I follow is:
Composition - first things first, I need to have a composition. Get this right first!
Base image - take a shot with no filters. Check composition again, image sharpness and exposure. If needed adjust, shoot and check again.
Add other filters - if needed, add ND graduated filters or a polariser. Shoot the image again and do all the same checks.
Add ND filter - finally, add ND filter of choice and take the image. Do all the same checks again.

Once processed the final image looks like this:
Final image. Nikon D750, Nikkor 24-70mm f/2.8 VR @ 28mm, f/13, 202 seconds, ISO 100, Lee Filters ND 0.6 (2 stop) graduated filter, Lee Filters Big Stopper (10 stop ND), cable release.
I hope the reading about my process for using ND filters has been useful. Do you follow the follow the same process? Do you do things a little differently? Are ND filters part of your creative workflow? Are you considering getting some ND filters? Please let me know in the comments below.

Snow, Glorious Snow!
In this blog post, I tell you about a recent visit to photograph Dartmoor in the snow, how I learnt a little more about a favourite location, and how I can plan my shoots more effectively.
Weather Forecast Addict
Though I do whinge about winter with its short days and fewer opportunities for landscape photography, it is also the season for snow. Snow down here in the south-west of England is rare, especially at lower elevations, but every now and again some of the higher ground will get a coating of the white stuff.
All it took was the rumour of a possible snowfall to get me excited and straight onto regularly checking the snow forecast for Dartmoor. As the weekend approached the number of times I was hitting refresh on my browser steadily increased. The "snow risk" percentage went up, then down, then up again. Towards the end of the week I was also checking the Dartmoor Webcam desperately hoping to see a dusting of snow on the ground.
Do You Wanna Build a Snowman?
When I finally saw a little snow on the Dartmoor Webcam I decided that I was going to get up early the next morning and head to Dartmoor. Even without snow, the conditions up on Dartmoor can be arctic so the first step in getting organised was to get out all my winter layers. I know from bitter experience that if I found myself freezing cold that my enthusiasm for photography would be short lived and I would be home with a cup of coffee and bacon roll before sunrise.
When I left in the morning there was no sign of snow but I already knew that I would have to go to higher ground. My planned location of Emsworthy (one of My 5 Favourite Locations for Landscape Photography in Devon) would probably be high enough so I wasn't overly worried. Sure enough just as I passed Haytor everything started to turn white. There wasn't a huge amount of snow, but I was sure there was enough to work with (or at least build a snowman).
Waiting for the Light

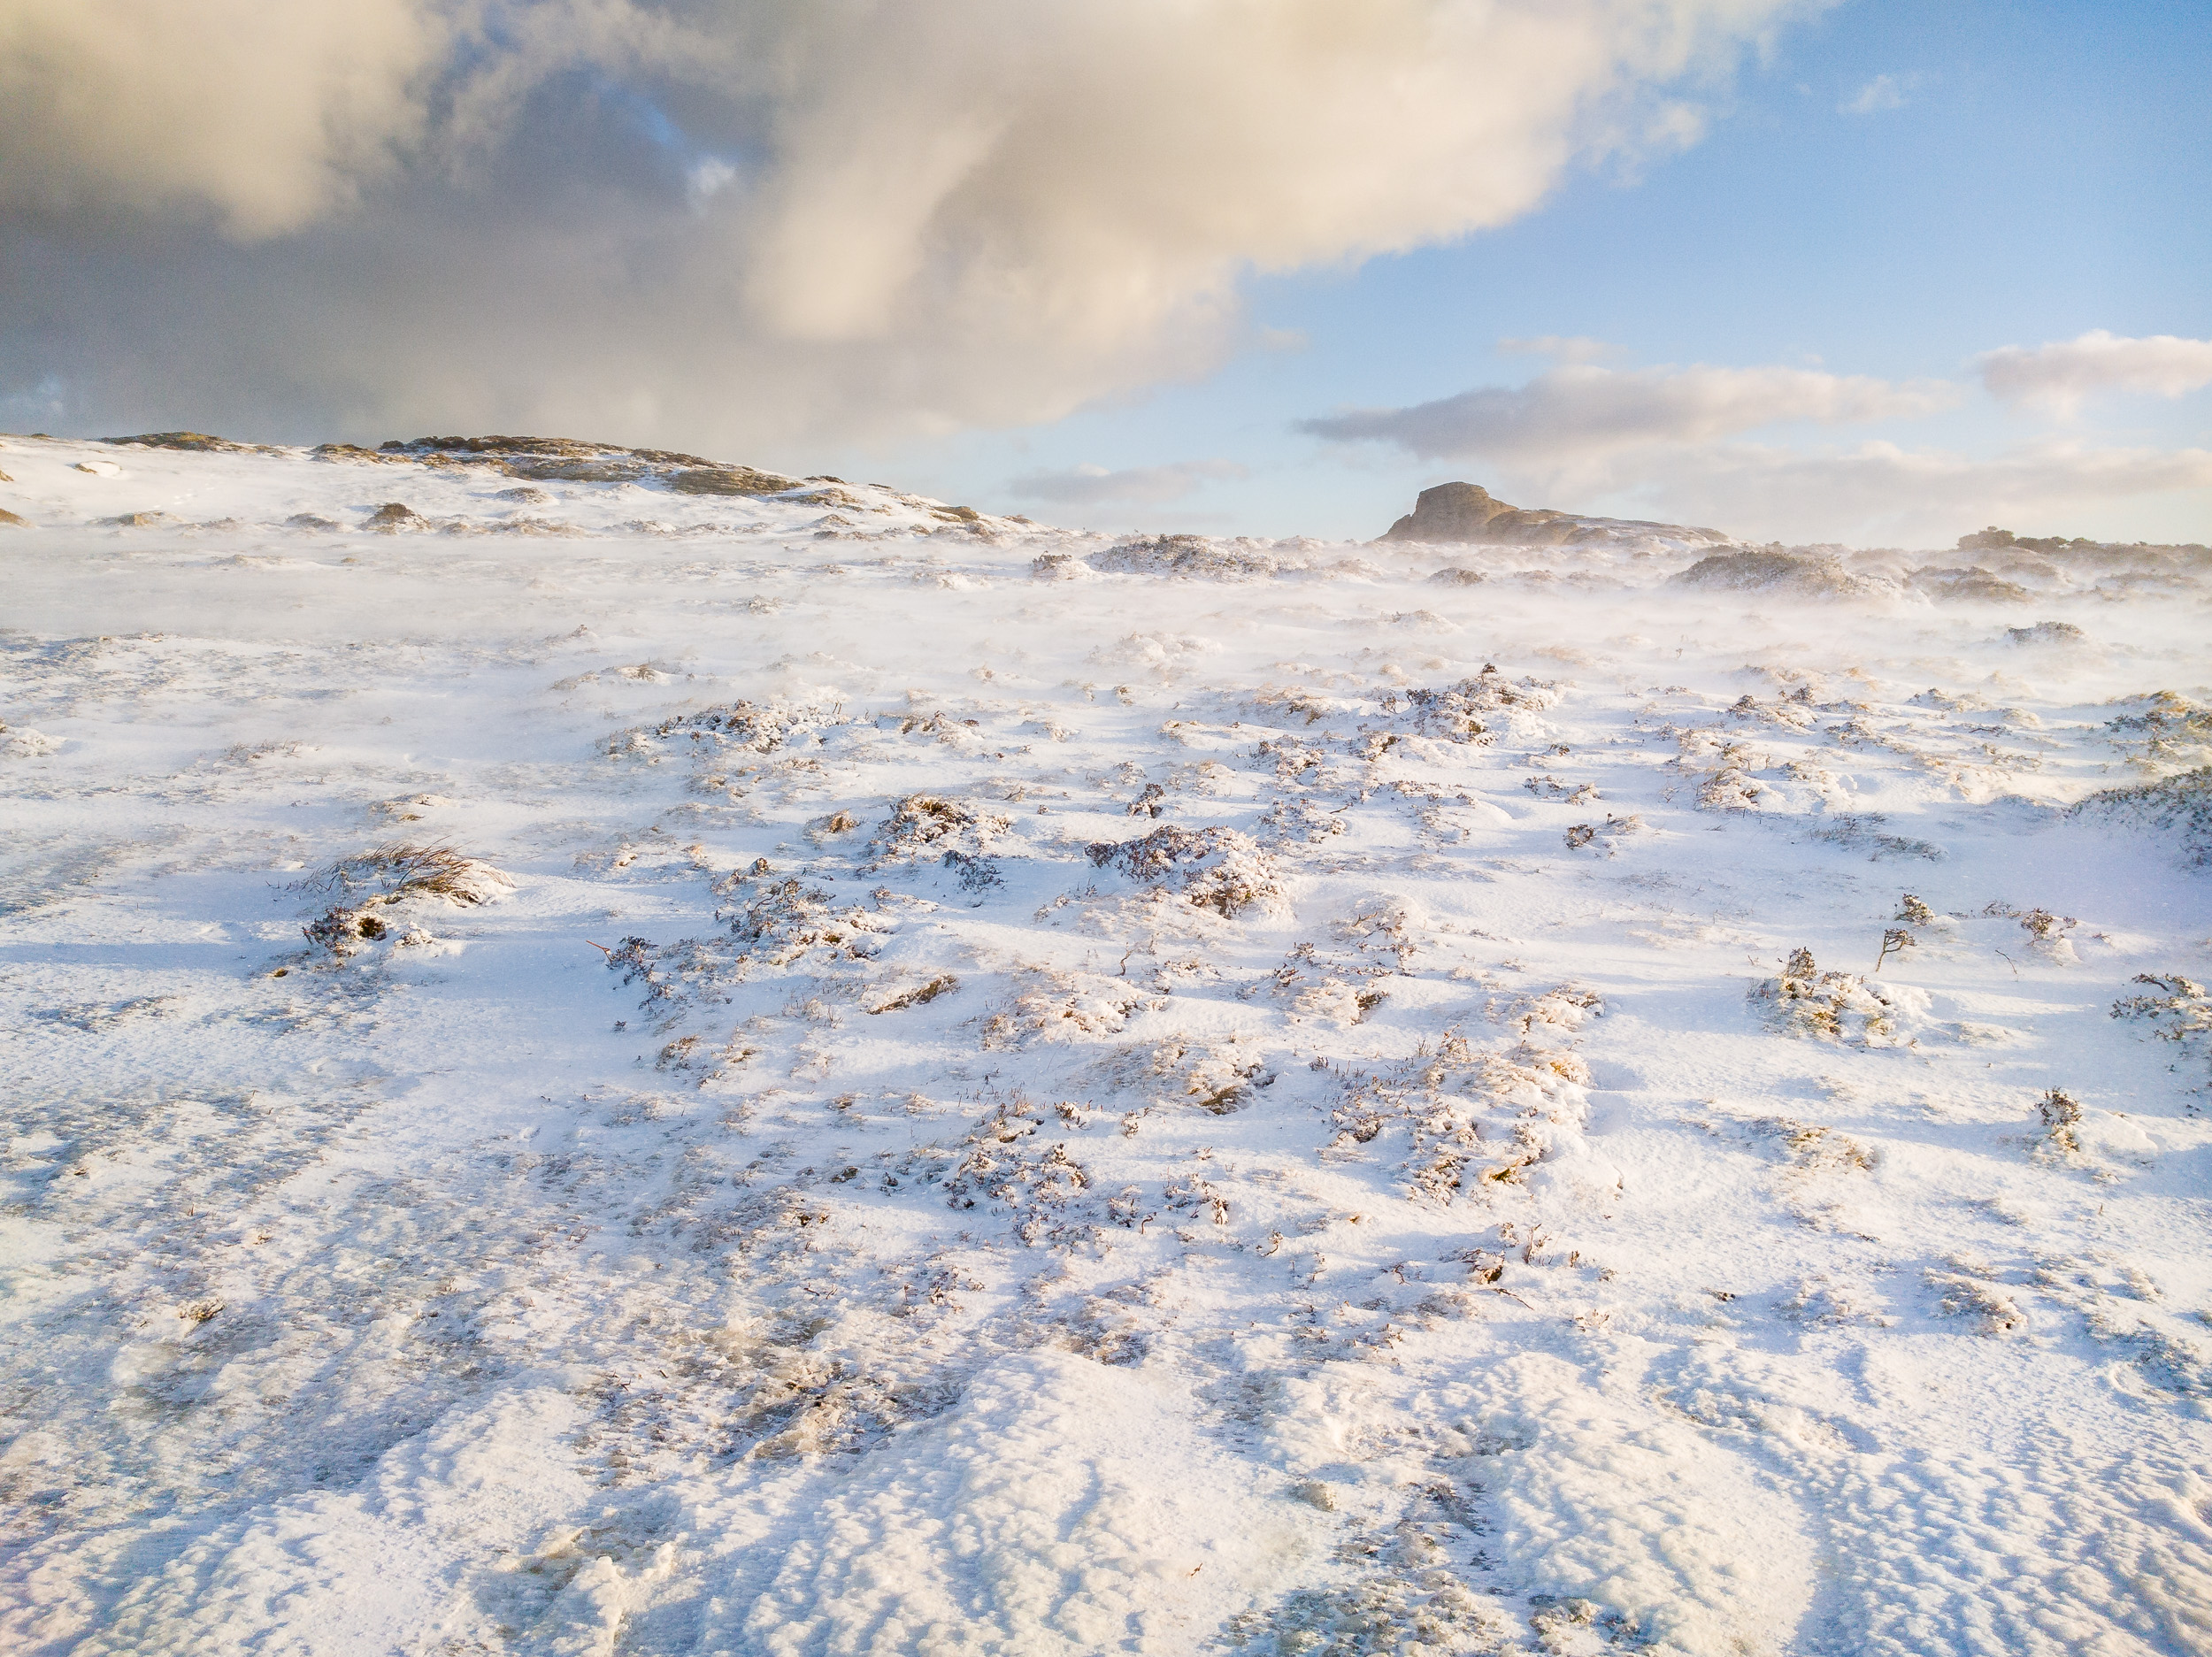
The signs looked good early on.
Naturally, snow on Dartmoor attracted a fair few photographers to come out so I wasn't overly surprised to be sharing my Emsworthy location with a couple of other local photographers. There's plenty of room at Emsworthy for three photographers so there were no issues over who was where and it was nice as always to have a chat and a coffee while waiting for the sun to come up.
My vision for the image I was hoping to get was relatively straight forward. In the foreground are small clumps of ground, which when illuminated by the rising sun would hopefully turn the snow a nice golden colour. This coupled with the tree and the tor in the foreground, and some dramatic clouds would make a good image. All I had to do was wait for the sun to rise and bathe the ground, tree and tor in golden light.
Always Learning
Landscape photography is rarely easy and conditions can change rapidly, for the better or for the worse. As I patiently waited for the sun to rise the cloud started to clear. Those nice big pink clouds that I thought would be a key feature of the image cleared from the sky leaving it almost clear. Not to be put off though I continued to wait.
Another problem was that when the sun had risen over the horizon, it wasn't high enough to shine over the hill behind me. What I hadn't taken into account was that during the winter months the direction of the sunrise meant it would be around 30 minutes before the sunlight would hit the foreground at my location. The problem with the sunlight 30 minutes later is it can be a bit harsh and will have lost some of its morning warmth as you can see with the image that I took below.
Nikon D750, Nikkor 24-70 f/2.8 VR at 38mm, F/11, 1/40 sec, Lee Filters ND Grad, post processed in Lightroom CC.
So while my first image lacks the punch I was hoping for I did learn something from the experience. I've shot Emsworthy a few times in the morning, but that doesn't necessarily mean that it's a good sunrise location all year round. Though I use The Photographer's Ephemeris to plan my shoots I've learnt that not only do I need to pay attention to the direction of sunrise, but the height of the surrounding ground.
Alyn Wallace has actually produced an excellent video on how he uses The Photographer's Ephemeris to plan around changes in ground elevation. I shall be watching his video a few more times! Also, be sure to check out Alyn's work, it's inspiring stuff.
Goodbye Snow
Unfortunately the arctic conditions didn't last the weekend.
The snow on Dartmoor didn't really last past that weekend so I was unable to go back out and try again. So while I was unable to get the image I was hoping for it was great, as always, to get out with the camera and practice the craft of photography. I also learnt something new about one of my favourite locations and how to plan a little bit better. So overall I call that shoot a success!
So have you been out with your camera in the snow recently? Do you use The Photographer's Ephemeris to plan your shoots? Let me know in the comments below.

Creating a Locations Map with Google Maps
In this video I take you through process of creating your own custom Google map so you can record, track and visualise your landscape photography locations
Location Planning
Back in September I posted a blog article on planning for a landscape shoot. In the blog post and associated YouTube video I talked about a number of planning tools that I use for weather, tides, sunset / sunset timings etc. However, it was my use of a custom Google Map to record locations that I have either visited or plan to visit that seems to have generated the most interest from my readers / viewers.
Using Google Maps
Given the level interest I thought I'd produce a brief tutorial to tell you how to create your own map. So in this video I take you through the steps of:
Creating a map
Adding locations
Using colours, icons, and layers
Modifying locations with comments
Accessing your maps on a mobile device
I find it a really useful tool and I'm sure you will to. Check out the video below:
Hopefully you found this video useful. If so, please do subscribe to my YouTube channel! Don't worry if you don't, I always post a blog article here with the video embedded so you won't miss out.
Do you use Google Maps for any of your location planning? Do you have any tools that you recommend? If so, please let me know in the comments.

Using the Super Stopper in Sidmouth
The Lee Filters Super Stopper isn't exactly a filter you would use every day but it does have its uses. Read about how and why I used for a shoot in Sidmouth in my this blog post.
Free At Last
In my last couple of blog posts I may have mentioned that I'm finding it difficult to adjust to the short winter days. Opportunities to get out with the camera seem to be few and far between. Last weekend was different though. I didn't have too much on and the weather was looking favourable for some landscape photography.
Sidmouth Inspiration
My first challenge was to find a suitable location that I could shoot. In reality it didn't take too long. My decision to shoot the coast at Sidmouth in South Devon was driven by two things. Firstly I was inspired to shoot there. I've spoken about the importance of inspiration before on my blog before and how useful it can be.
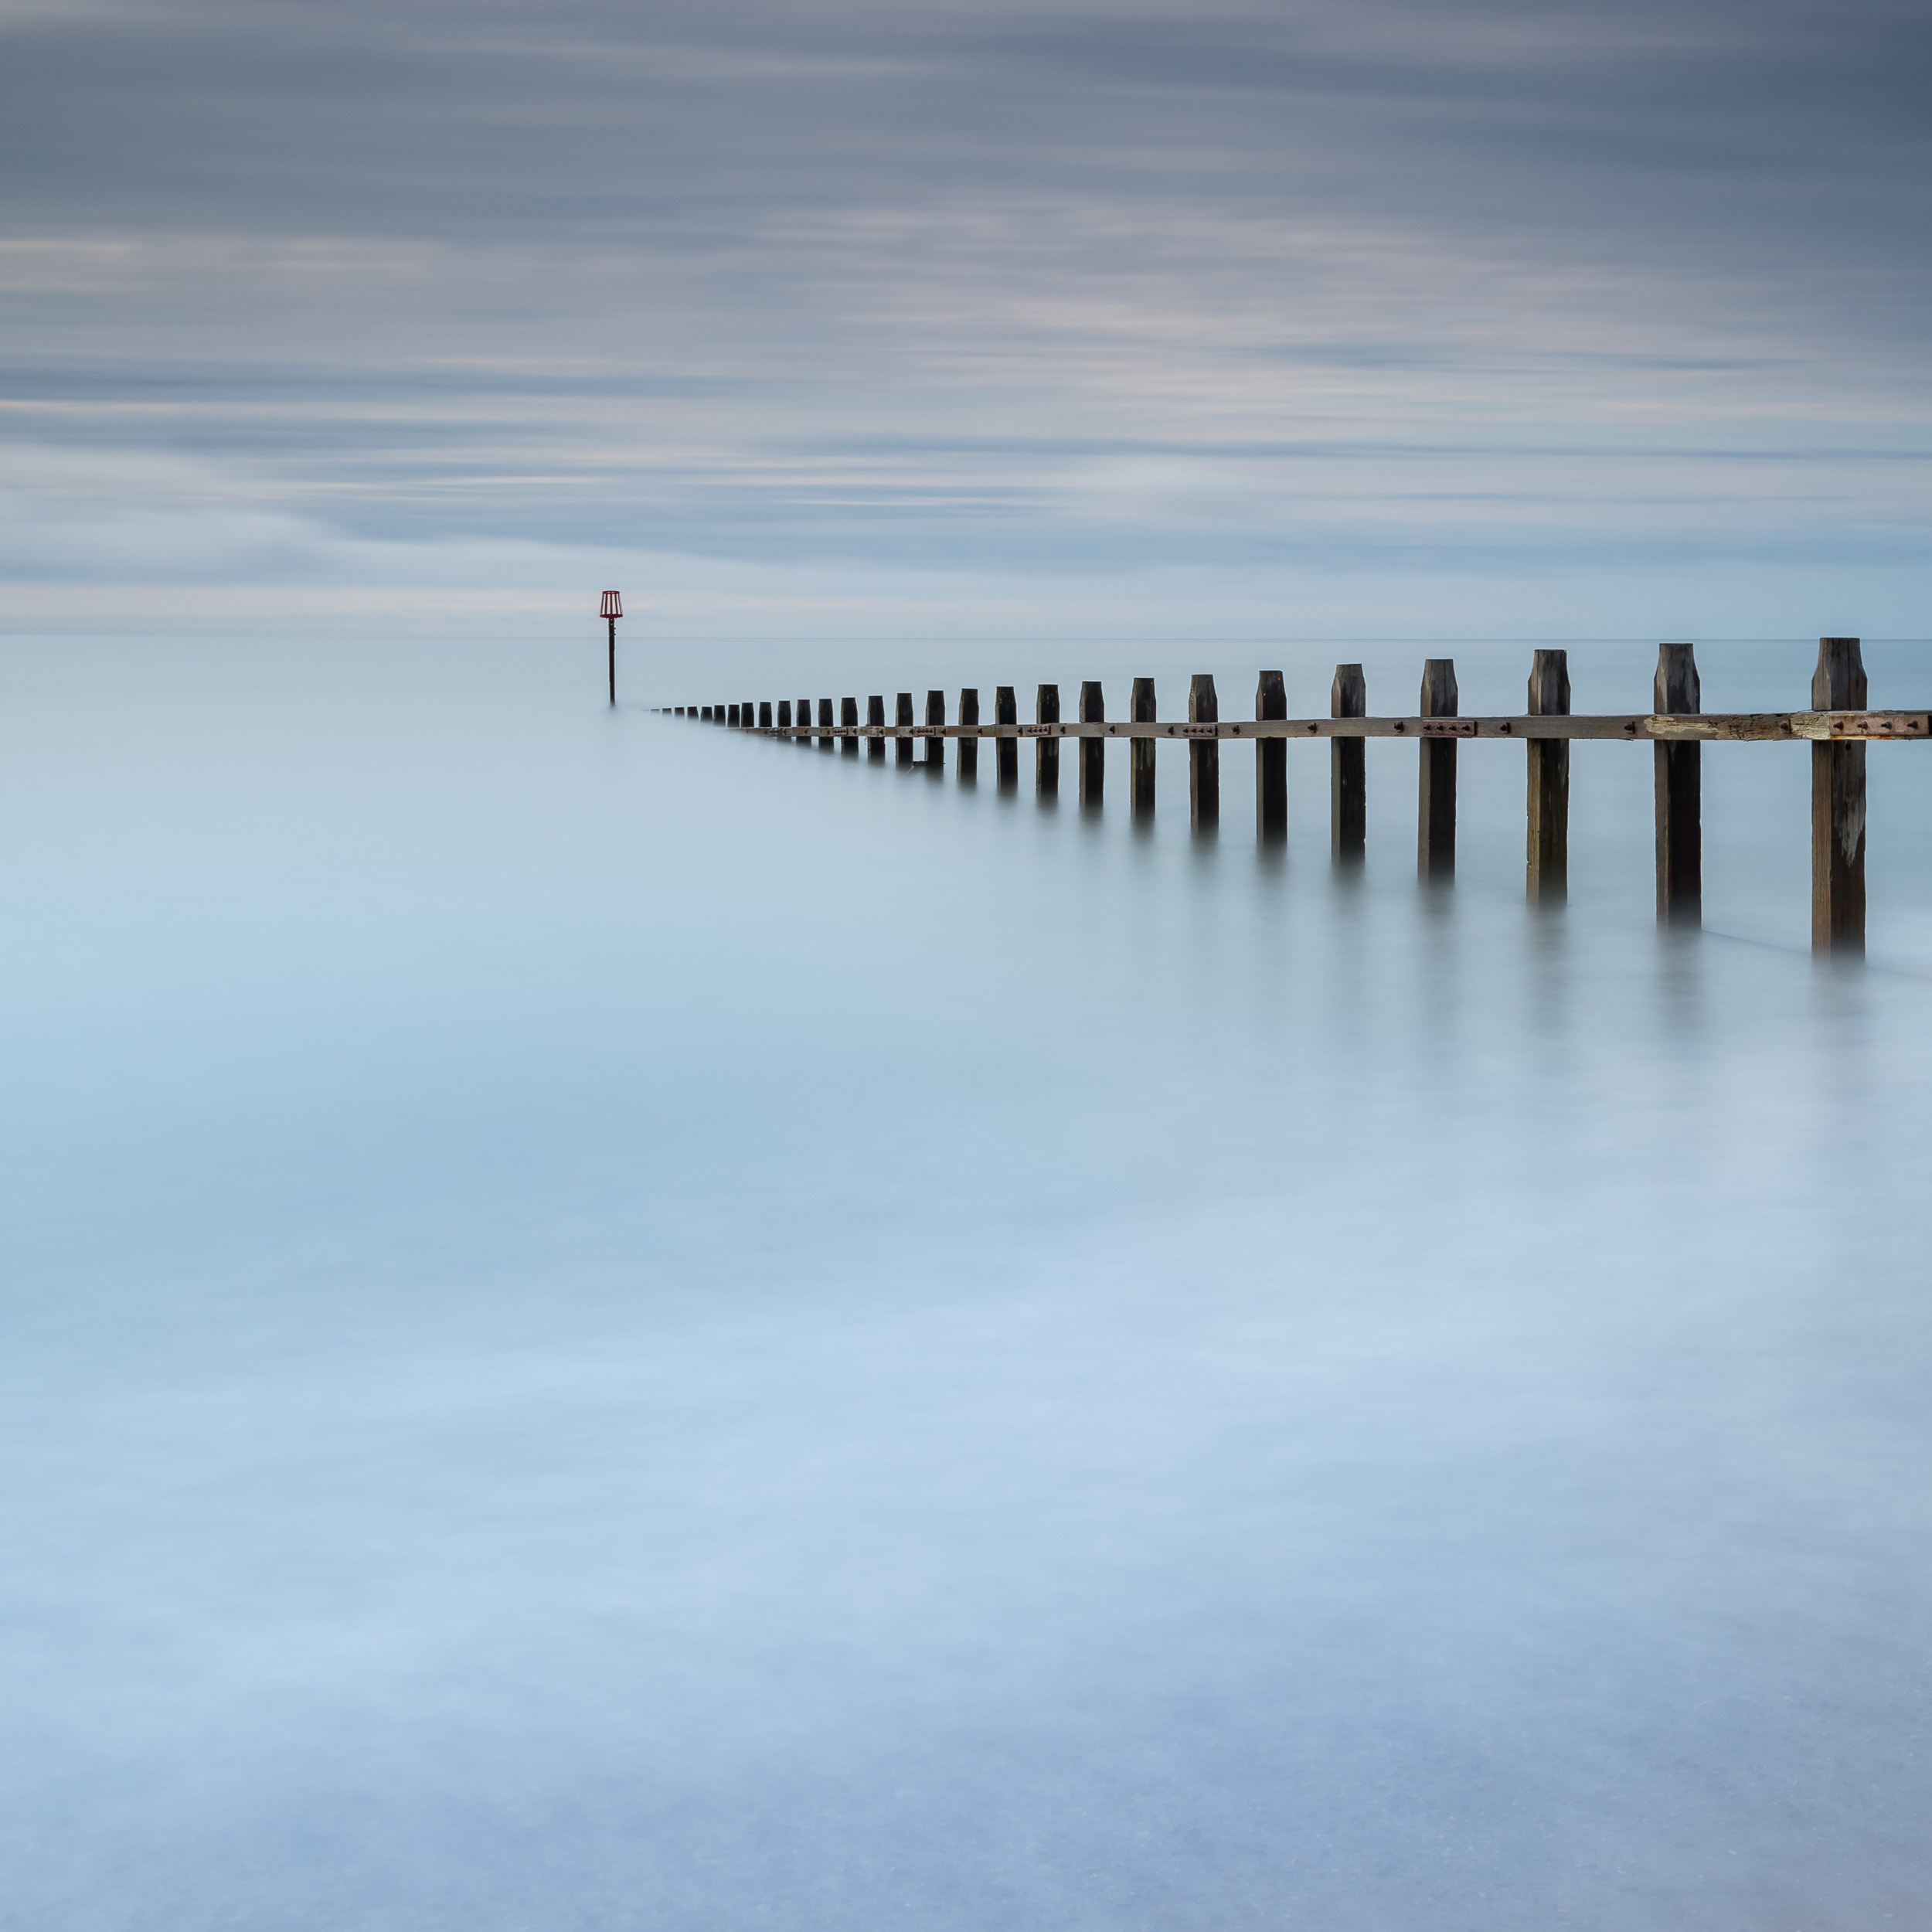
My inspiration to shoot Sidmouth came from two photographers, atmoorehead and Neil Burnell.. Both of them had been shooting the curling stone groyne at the east end of the beach. I liked the images they had created so I wanted to go there and put my own spin on the location.
Super Stopper Time
The 2nd reason for choosing Sidmouth was that it was a coastal location that would be ideal for testing out my recently purchased Lee Filters Super Stopper. I'm a big fan of Lee Filters and use the Little Stopper and Big Stoppers in a lot of my images. When the Super Stopper was first announced I have to admit that I didn't really see the point but after seeing some of the images produced by Mark Bauer with the Super Stopper I pulled the trigger and picked one up.
My original plan was to shoot some midday long exposures during a recent Lake District trip but given the challenging weather it wasn't really the best time to try out this 15 stop monster. However, as I was planning my trip to Sidmouth it soon became apparent that this could be the perfect time to give the Super Stopper a go. I would be arriving around 2.30pm when there is still plenty of light, the tide would be coming in, and the light from the west would be illuminating the groyne. My only slight concern was the lack of cloud in the sky. It was apparently going to be very clear but I could live without the perfect conditions!
Setting Up For a Very Long Exposure
When I arrived at my location in Sidmouth things were looking favourable. The sun, which was already relatively low in the sky, was illuminating the inward curve of the groyne rather nicely and the tide, which was due be high at 16:08, was already a good way up the beach. I was glad I had got there early as the area was busy with people and where I was going to shoot from was a bit of a one tripod only location.

Base image with no filters. (Image unprocessed).
So with my tripod out I got to work on my composition. I had originally thought I would go for a vertical composition but it soon became apparent to me that a horizontal composition would work best as it provided more room for the groyne to curl out into the sea and into some empty space. With my composition locked in I took my base image. My base image is the image I take with no filters so I can easily check it for sharpness and exposure. Being a coastal location I reached for my Lee Filters Polariser as this would not only take off some reflections from the surface of the sea but it also removed all the reflections from the groyne where the water had been splashing.

The addition of the polariser reduces the reflections on the groyne and brings out a little more detail in the sky. (Image unprocessed).
However, the addition of the polariser always lengthens the exposure by a few stops so I had lengthen my shutter speed from around 1/80 sec (at f//11) to 1/25. Though I was happy with the effect the polariser was giving I was already concerned about how long the exposure was going to be when I added the Super Stopper. Using the Lee Filters app on my phone I worked out that a 1/25 second base exposure with a Super Stopper would require a 21 minute exposure. For my first use of the filter I felt this might be too long, but a Big Stopper would only give me 40 second exposure (which was not long enough for the image I wanted)
I had two options. I could either open up the aperture or increase my ISO. While opening up the aperture would have decreased my exposure time, I would have lost the depth of field I was looking for so I increased my ISO to 400. This effectively gave me a Super Stopper exposure time of around 8 mins. Much more manageable.
The Results
With everything set I got to taking some really long exposures. I modified my composition a couple of times which meant going through the whole setup process again but using the Super Stopper was never going to be a fast process. I also had to gradually increase my exposure length as the amount of light decreased. However there is a certain sense of excitement with really long exposures. I was investing 8 to 10 minutes for each exposure and the sense of not knowing exactly how the image would look was exciting.
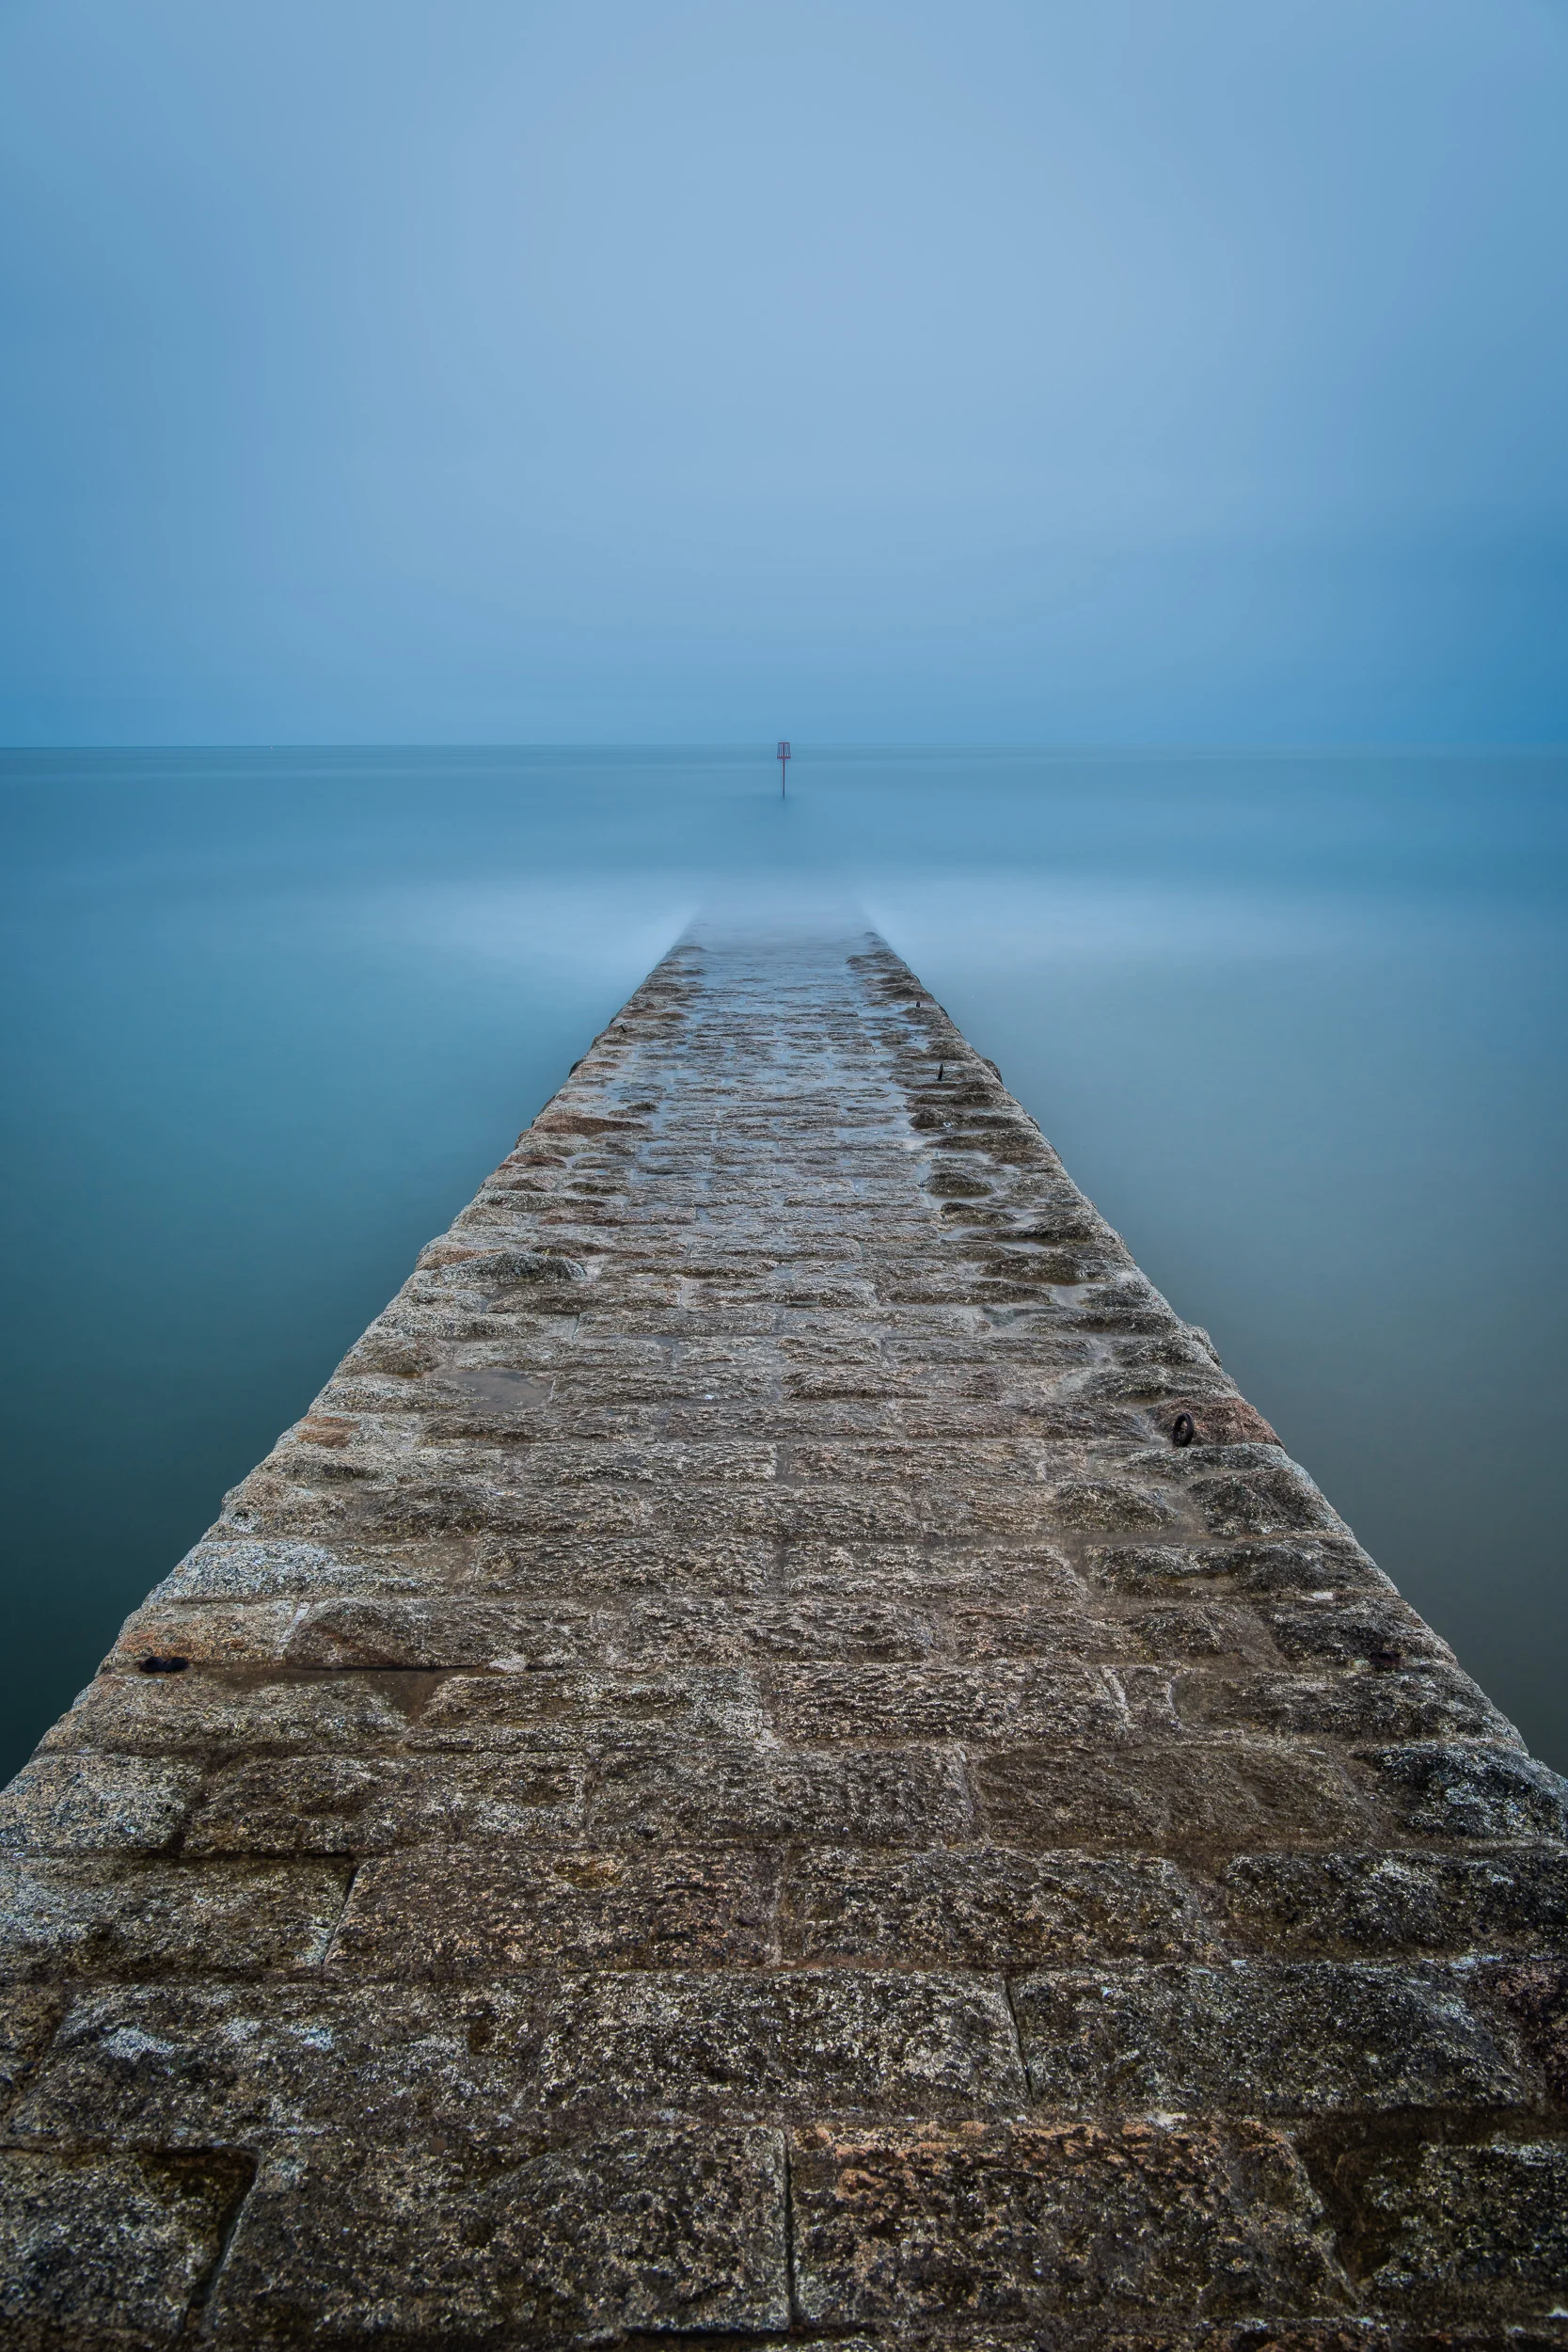
Final image (processed in Lightroom). Nikon D750, Nikkor 16-35mm f/4 at 26mm. 641 seconds at f/11, ISO 400.
A Small Critique
I'm very happy with the end result and it's the image I had envisioned when I started planning this shoot. However, it's not perfect. Though I was shooting at a time very close to high tide, it wasn't quite high enough. I would have liked there to have been no beach visible in the lower right side of the image. There was a high tide of 4.06m so on my next visit I will try and plan it for when it's a little higher.
However, tide height aside, all the other elements came together nicely. The time of day and time of year were perfect to allow the golden light of the sun to reflect of the west side of the groyne. It's very rare that everything is perfect so for a Sunday afternoon shoot I'm still very happy.
Why Not Just Use a Big Stopper?
You might be asking yourself why I didn't just wait for sunset and then use a Big Stopper. Why purposely shoot earlier so you can use a Super Stopper? Well, it all had to do with the light. As the sun set the quality of the light reflecting off the groyne was nowhere near as nice as it was 45 minutes before. In order to realise my vision of a long exposure I need to have that 15 stop ND filter. So yes, while it was a specific set of conditions that required the use of the Super Stopper, it would have been an image that would have either not been possible to get or would have been more difficult. The Super Stopper is probably never going to be a filter that I use a lot, but now that I have it and have seen how I can put it to use, I'm glad I have it.
So are you a fan of long exposures? Do you own the Super Stopper? Are your creative ideas driven by the location you are visiting or by a vision of the image you want to create? Let me know in the comments below.

Finding a Gem in My Back Catalogue
In this blog post I talk about the value of looking back at your catalogue of images and how you might just find a little gem in there.
Super Dad 1, Photography 0
As I mentioned in last weeks blog post the winter months are playing havoc with my ability to get out and take pictures. However, last weekend it wasn't the weather or the short days that stopped me getting out with the camera. My wife was away for a well deserved break so I was left holding the fort with the kids. So unless you count some family snapshots as photography it was a shutter free weekend.
Competition Time
Not one to let the lack of camera action stop me from scratching my photography itch I decided I would get together my entries for this year's South West Coast Path photography competition. This is my first year entering this competition and it looks like a good place to hopefully show case one of my images. It's also good to see that they have respected landscape photographer Adam Burton on the judging panel.
The Power of the Catalogue
Fortunately a lot of my photography takes place along the South West Coast Path so I had a good range of images to work from. It was also really easy to find them. I'm a Lightroom user and I like to keyword my images. I don't keyword all my images on import, but any image that I complete editing on gets a full set of keywords. So when it came to finding all my 4 and 5 star images taken on the South West Coast Path it was a matter of just creating a dynamic collection and there they all were.

Creating a dynamic collection allowed me to find all my images from the South West Coast Path.
Finding A Gem
Winning images from the competition will be published in the South West Coast Path 2018 calendar and while the rules didn't preclude the inclusion of vertical orientation images I thought I'd stick with horizontal orientation. The slight problem was that I had a series of images from Trevose Head that I had taken earlier in the year and while I was very happy with them, they were all of vertical orientation.

I had a couple of options. I could either submit a vertical orientation image or bypass my Trevose Head images all together. I knew I would have taken images in both orientations so I right clicked the one the Trevose Head images and selected the collection it was in. (I add each photo shoot to it's own collection so it was easy to find).
Almost immediately I found what I was looking for. Best of all though the image had been mostly processed to completion. It only needed a bit of dodging and burning in the sky and it was ready to go. At the time I must have done a basic edit on it and then ditched it in favour of the vertical version. With a few clicks I had a new image and the competition entry I was looking for.
This is the image I found in my catalogue and have now entered into the competition.
Check Your Catalogue
Finding this image has made me think about what other images I might have lurking in the depths of my Lightroom catalogue. How many other images were culled during the editing phase in favour of a different composition?
What about you? Do you have a back catalogue of images with some hidden gems? Do you process your images straight away or leave them for a bit and come back to them at a later date? If you cull an image is it culled forever? Let me know in the comments.

Inspiration and Influence
In this blog post I discuss my personal photographic influences. These are the photographers that have not only inspired my creative style but also given me encouragement to publish my work, write this blog and even create videos.
A Source of Inspiration
Inspiration is a powerful thing and for landscape photographers it can come from many sources. It could be from seeing in image in a magazine you were reading over a coffee one morning, or from a visit to an art gallery to see the work of some of the greats. Either way, I'm not sure many of us would have become photographers if we hadn't been inspired by someone or something.
As a landscape photographer (who is still learning his craft), I gain a lot of inspiration from the work of other landscape photographers. In particular I have been heavily motivated by the inspiring photographs in competitions such as Landscape Photographer of the Year. (Read my thoughts on photography competitions here). Images like those found in Landscape Photographer of the Year have driven me to shoot more and improve the quality of my work. Without the influential and inspiring works of others I probably would have chosen to ignore some of those 4am alarm calls or have chosen to open a bottle of wine in the evening.
In this blog post I discuss my personal photographic influences. These are the photographers that have not only inspired my creative style but also given me encouragement to publish my work, write this blog and even create videos.
Thomas Heaton
I first discovered the work of Thomas Heaton on the Improve Photography podcast where I pleased to hear a British photographer being interviewed. Not only does Thomas Heaton produce stunning landscape images but he produces fantastic YouTube videos on how he goes about his photography. It was content that I could connect to and relate to.
His stories are wonderfully told and though I'd been thinking about blogging and vlogging for a while it was definitely the viewing of Thomas Heaton's videos that gave me that final inspiration to just get on and do it. His images also are a great source of inspiration. So much so that I've purchased his 2017 calendar which you can see here and purchase here. That calendar should encourage me to see a few more 4am alarm calls.
And if you ever need some motivation or inspiration for you landscape photography check out this wonderful video by Thomas Heaton called Wake Up.
Not only is this video by Thomas Heaton inspiring, but it is a great example of how to produce engageing content.
Jared Polin - Aka FroKnowsPhoto
As with Thomas Heaton I discovered the work of Jared Polin on a photography podcast, but this time it was TWiP. It's hard to describe Jared in words but larger than life seems apt. His work has influenced and inspired me in two ways. Firstly his photography has greatly influenced my music work (see my blog post on My Other Photography Life). Through his YouTube channel I have learnt not only how to go about shooting live music but how to work my way up from shooting local venues to music festivals run by national broadcasters.
He has also been very influential in how I style the content that I'm writing now and will be in the future. If there was ever a great example of how to produce compelling and entertain content it is him. His free video guide to branding is well worth a download and I recommend you subscribe to his YouTube channel.
My first landscape photography video. I'm trying to make engaging content, something that Jared is a master at. I have a long way to go, but we've all got to start somewhere.
David duChemin
David's work and videos have been inspirational in developing the artistic style of my images. His YouTube channel has a wonderful series of videos in which he delves into the art of photography. Topics such as intent, composition, processing and printing have all influenced my approach to photography and how I output my images. It inspires me to improve my process and approach to taking images in the field.
Though I will probably never visit some of the locations David has photographed, images like the those found in his Portraits of Earth collection inspire me to improve my artistic skills and develop my own personal style.
When I shot this image I had a vision in mind. It also didn't need much post-processing. This kind of approach to my photography has been influenced by the approach taken by David in his videos.
Ross Hoddinott
Ross has probably has probably inspired me the most in my journey as a landscape photography. This will be largely due to the regular contact I have with him (see my post on Tuition and Mentoring). Through the many 1-2-1 tuition sessions I've had with Ross I have learnt a great deal about photography and how to approach and shoot the landscape. With each new photography skill learnt from Ross my confidence grows and it is with that growing confidence that I find myself being even more inspired to not only shoot more but to drive up the quality of my images.
Furthermore I find his images inspiring as not only is a lot of his work local to me but I find he produces images of a style and quality that I wish to aspire to. Just check out his wonderful image of Dawlish Warren in this link.
I created this image of a groyne on Dawlish Warren after being inspired by the work of my photography mentor Ross Hoddinott.
Always Look for Inspiration
While all these photographers have inspired and influenced my artistic style, each one has also influenced my photographic journey in other ways. Photography is so much more than just taking images and through following the work of others I have been inspired to extend my skills as a photographer by taking on challenges such as writing this blog.
I continue to find new sources of inspiration and influence, and hopefully one day the pictures I take or the content I create will inspire a photographer to produce something special.
Which photographers inspire you to get out of bed in the morning? Do we even need inspiration or should we try to find our own direction from the start? Let me know in the comments.

Magazine Submissions - Seeing Your Images in Print
Is this blog post I chat about seeing one of my images printed in Outdoor Photography magazine and how this inspires and motivates me to work harder at my photography.
Outdoor Photography Magazine
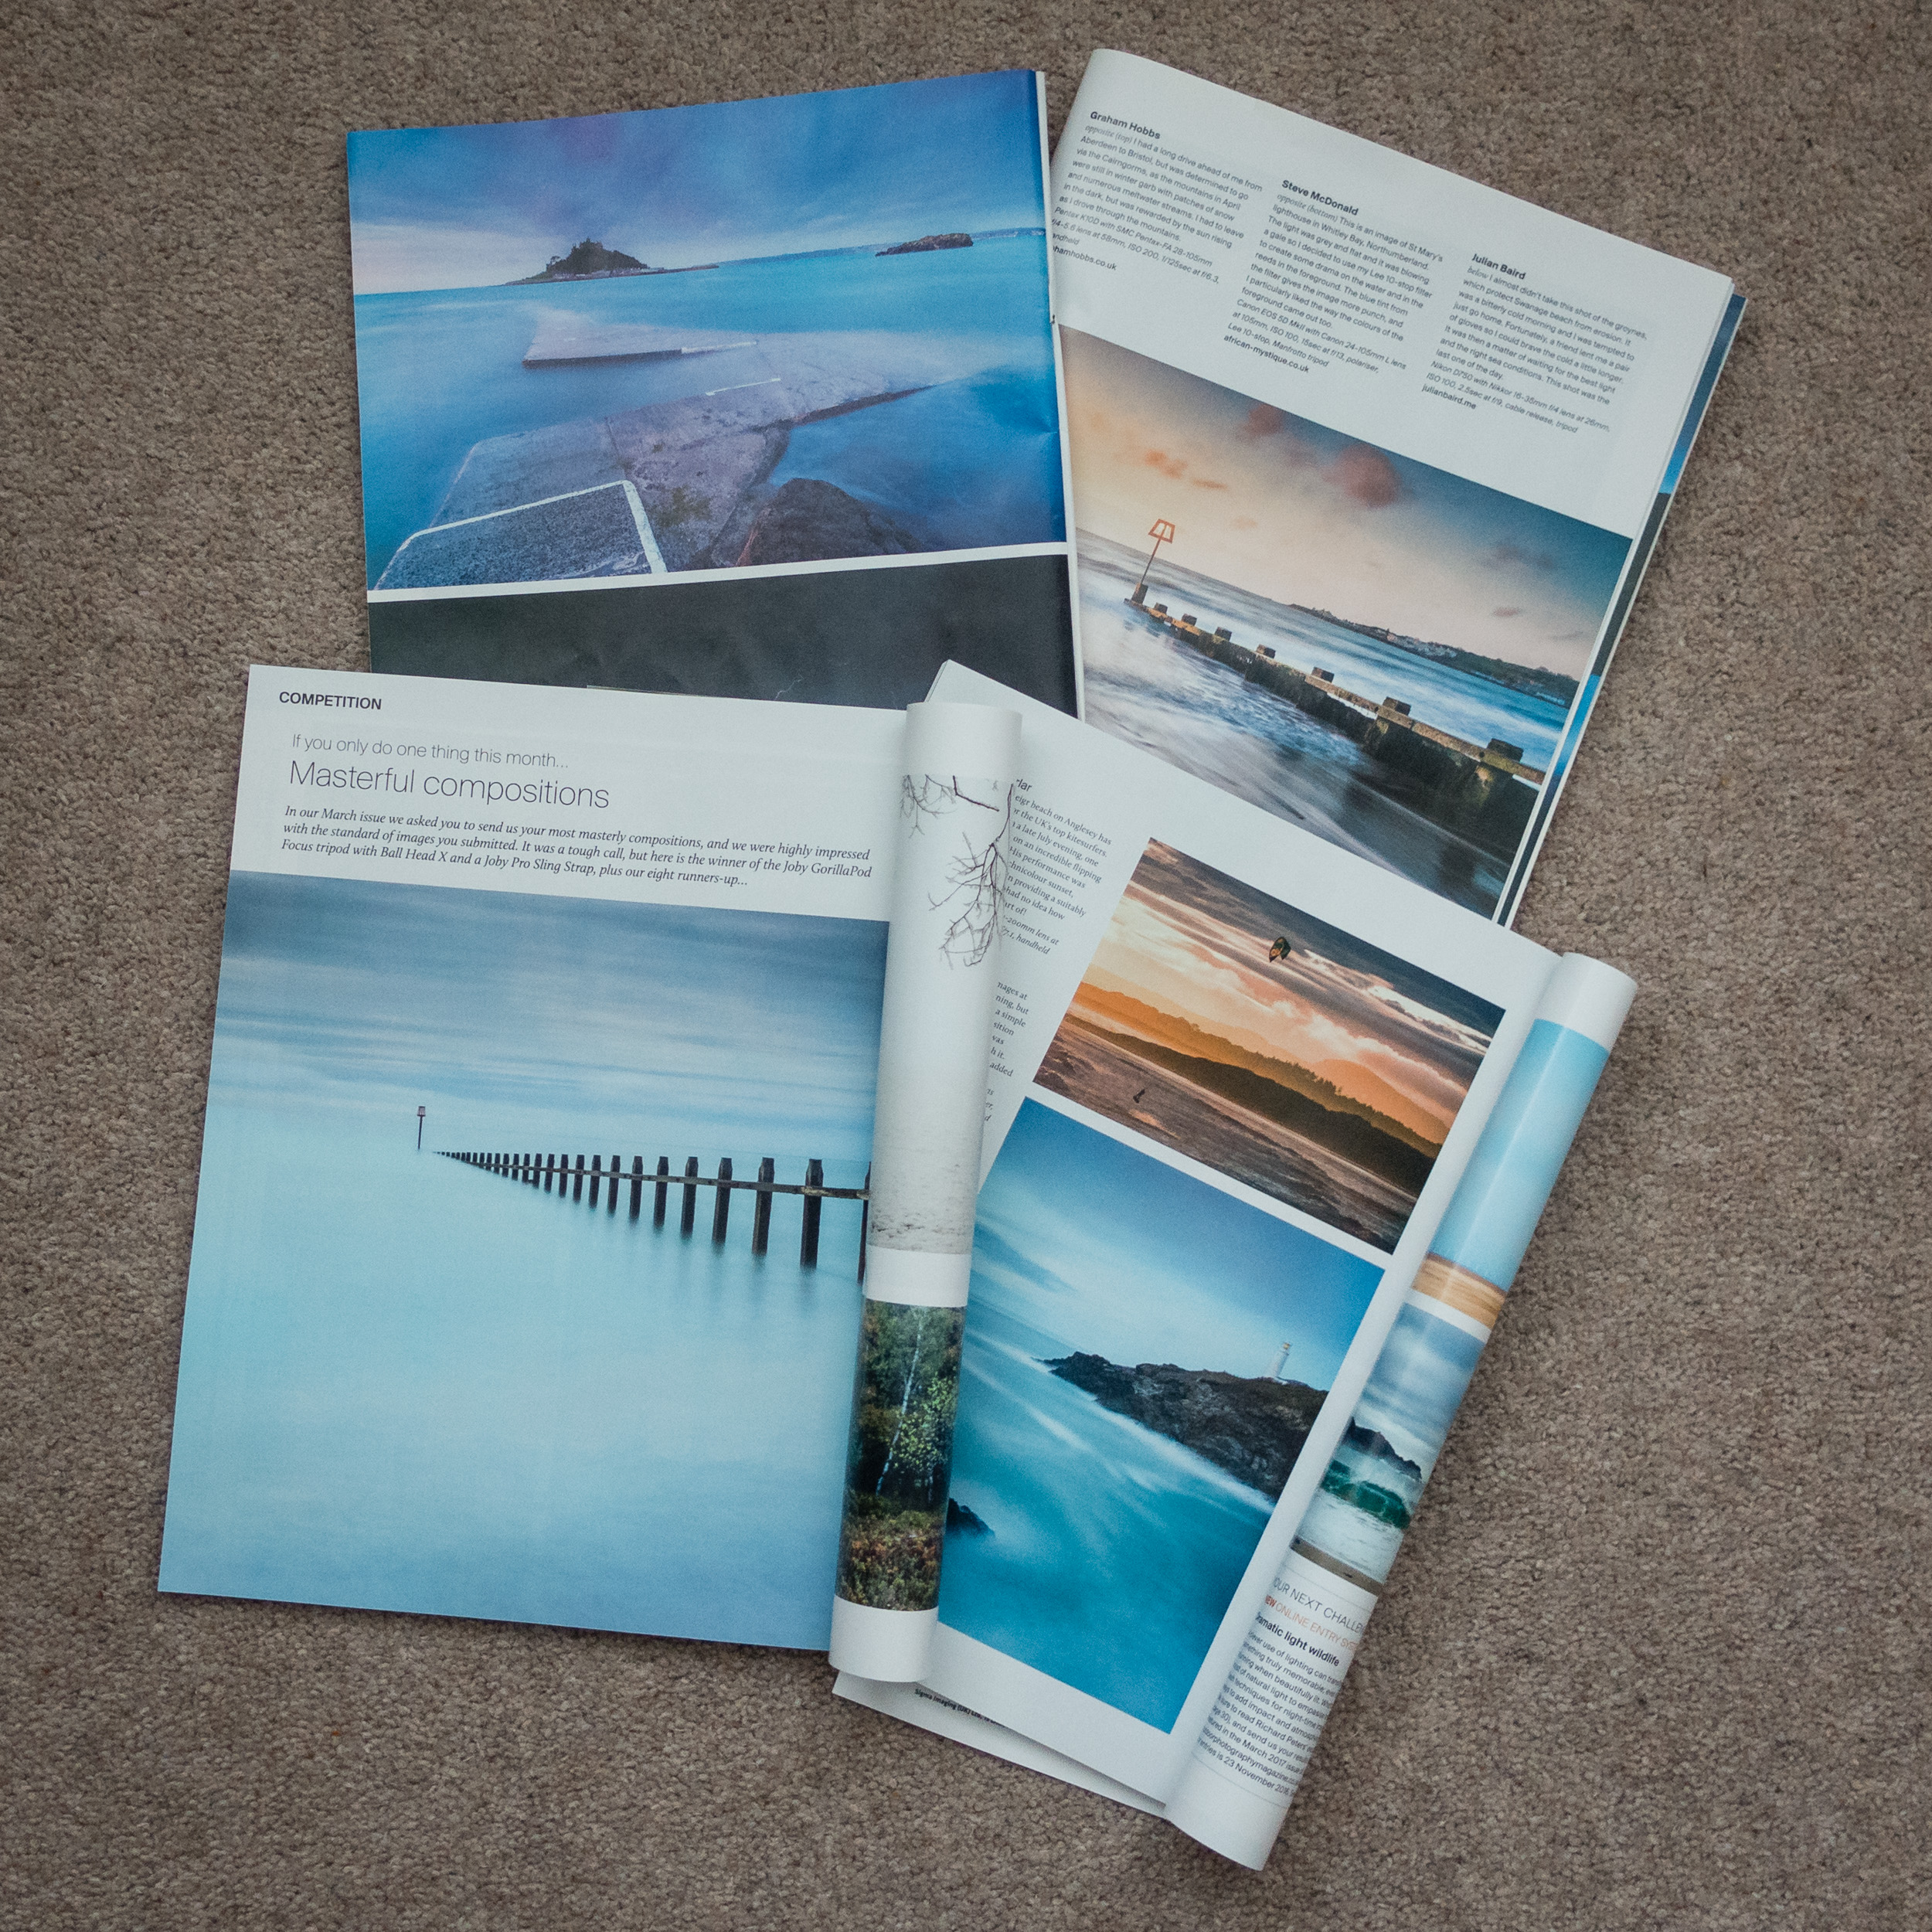
In Outdoor Photography magazine this month (Issue 211, November 2016), on page 110, you will find one of my images :
Without any shame or modesty, this makes me very happy. I'm happy for two reasons. Firstly, Outdoor Photography magazine is my favourite photography magazine. I've been a reader for many years and the quality of the content and the magazine itself is brilliant. Every month I look forward to my issue arriving so I can sit down with a nicecup of coffee and get inspired!
The other reason for my happiness is that it's one of my favourite images of 2016 and it is wonderful to see it in print. I'm ashamed to say that I don't print my work. For some the photographic process isn't complete until you have printed your work. The more I think about it, and the more times I actually see my work in print, the more I'm convinced that this is the truth. I'm going to start printing at home soon, but that story is a tale for another blog post.
Back to magazine though. Seeing one of your favourite images in a well printed magazine like Outdoor Photography is very satisfying. For those that already print their work it's a very tactile experience holding your image in your hand rather than pixel peeping on your monitor.
Inspiration and Motivation
The image above is in the magazines "If you only do one thing this month…" feature. Each month the magazine sets a new challenge and readers submit their best images that meet that brief. I find these monthly themes a great source of motivation and inspiration. So much so that I do try and regularly submit images. Though there is a prize for the monthly winner, I don't enter to win a prize, I enter for the satisfaction of being featured in print. It's much the same motivation that drives me to enter other photographic competitions.
Though I didn't win the competition this month, I did win "Masterful Compositions" in issue 206 (July 2016, page 106) with this image:
I was also featured in issue 194 (August 2015, page 109) with this "Natural Light" image from Swanage:
In issue 192 (June 2015, Page 110) I also had my first image printed in the magazine with this "Low Light Landscapes" image of St Michaels Mount:
St Michael's Mount - Nikon D750, Nikon 16-35mm f/4, 19mm, 30 seconds at f/13, ISO 100
Why Submit?
Now, for some of you this post might all seem very self-congratulatory. And to a certain extent it is. I'm very proud to have a 4th image in Outdoor Photography magazine. What is more to the point though is how seeing that very first image in the magazine has driven me even more to improve my photography. Submitting your images to a competition, even a monthly magazine competition, sets you up with the risk of failure. But I need to take that risk, and no matter the outcome I will use my success and failure to continually drive my desire to improve.
So should you submit your images to magazines? Well that would be up to you. What works or drives me will likely be different for you. All I can say is that seeing my first image in a magazine gave me confidence that I was going in the right direction and made me want to work even harder at the art of photography.
Have you ever had an image published in a magazine or a book? Did it bring you any further success? Do you print your own work? Let me know in the comments.
Perseverance - Photographing Bowerman's Nose
In this blog post I discuss the power of perseverance and why I keep going back to Bowerman's Nose on Dartmoor.
A Slight Obsession
I can't exactly remember how I found out about Bowerman's Nose. It might have been in a magazine, or a book, or even on Flickr. How I found out about this location is largely irrelevant though. My desire, or maybe obsession, in capturing an image of Bowerman's Nose that meets my artistic vision is more to the point though.
For those of you who haven't heard of Bowerman's Nose, it's a tall pillar of granite on Dartmoor. It's very distinctive and is surrounded by rolling hills. Given the right light and conditions it can make for a beautiful photograph. The problem for me is that I've never really managed to capture an image that does the location justice. Some of my early failings were due to poor technique, but latterly it's more to with poor conditions.
Part of the reason I'm probably so obsessed by this particular location is its close proximity to home. It's less than a 45 min drive and it's reasonably easy to get to (as long as you don't mind opening a gate and getting creative with your parking). This means that it is often my go to location on Dartmoor when the conditions are looking favourable.
Meeting Mr Bowerman
I probably made my first serious attempt at photographing Bowerman's Nose in early 2015. It was January so Dartmoor wasn't at its best, and it was a very grey and flat day. However, I do like to practice my photography so just been able to walk around and look at different compositions was valuable.


I returned in May of 2015 in the hope of better conditions. On this trip the ground was looking spring fresh, and I was getting some nice light reflecting of the edge of Bowerman's Nose from the setting sun. Unfortunately the sky was a bit bland and I wasn't getting the golden light I was looking for. Close, but not quite there. However, this trip did show me the real potential of the location.
A week later I was back again and trying a similar composition. Again, while the image was pleasing, I just felt it lacked something. While I was there I also tried my first panorama - I think Lightroom has just been given the native capability to stitch panorama's so I thought I'd give it a go.
Bowerman's Nose - May 2015
Perseverance
By the time 2016 had rolled around I had committed to myself that I was going to get an image worthy of the splendid Bowerman's Nose. I think it's part of my nature. Once I decide that I need to do something, I'll work at it until I get it done. I was determined that in 2016 all my perseverance would pay off. Obviously with some elements of of my control this would not be easy.


In May 2016 I captured this image of Bowerman's Nose. It had interesting sky (helped by the long exposure), but it lacked the light I was looking for.
Then in June 2016 I tried again, and I have to say I thought I was going get the image that night, but again, there was just something missing that evening. The image I was looking for escaped me again, but I would try, try, try again!
Gotcha!
Then, just the other evening, with only a little time between the end of work and sunset, I did a quick check of forecast and decided that I would attempt Bowerman's Nose again. When I got there the conditions looked good so I literally bounded up the hill and got my tripod setup. Would I finally be lucky?
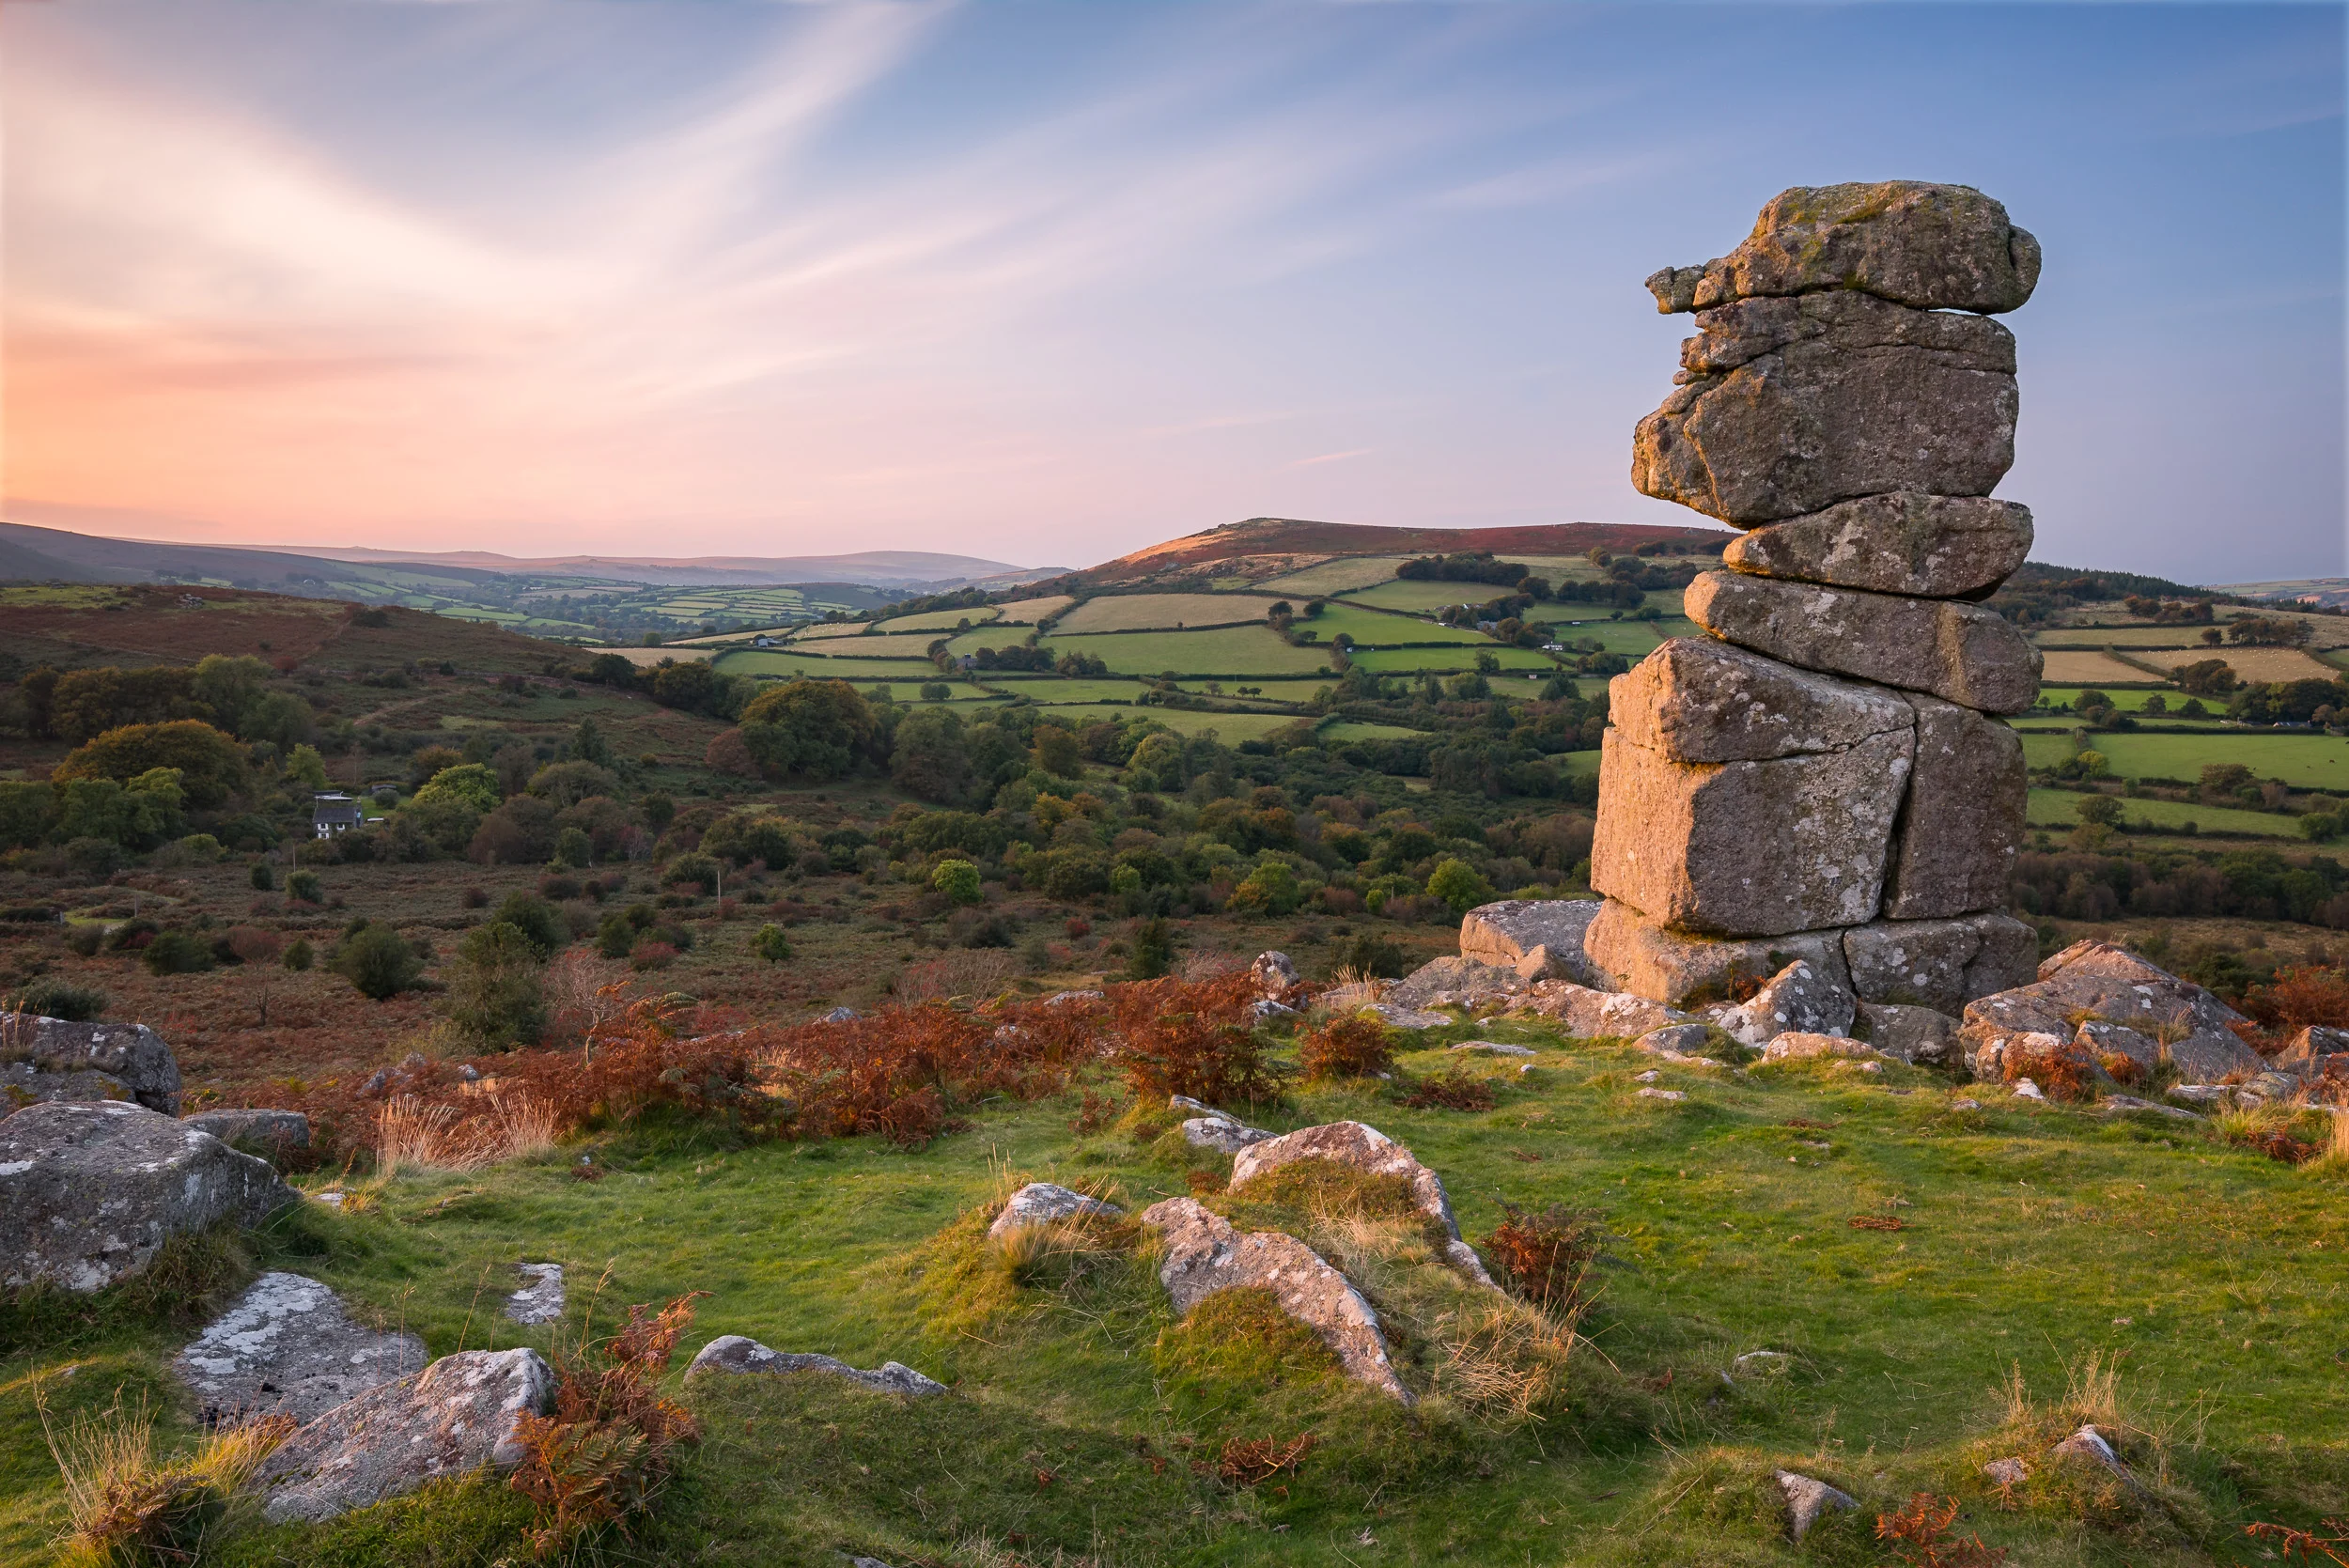
Bowerman's Nose - October 2016
As you can see, yes I did. Well, it is at least my best image from that location. No it's not perfect and there is always room for improvement, but it is my best and favourite image from there. I finally feel that my perseverance had paid off.
Goodbye Mr Bowerman?
So am I done with Bowerman's Nose? Now that I have the image I wanted will I ever go back? Of course I will! There is always room for improvement. There are many different compositions to be had, different lighting conditions, even snow! It's an amazing location, and being so close to home it's always going to be on my radar to go back to.
So do you have a favourite location that you like going to? Is there a location you keep visiting in the hope that you'll get something special there one day? Do you preserve or just move on? Let me know in the comments.

Not All Shoots Are Successful Shoots
In this blog I discuss the challenges of shooting on a beach and I give my own image a critique.
The Best Laid Plans
As a photographer you always want to put your best images out there. If you practice enough your technique will improve and your style develop, hopefully resulting in a gradual but noticeable improvement to your images. While this is generally true, it doesn't necessarily mean that every trip out with the camera will result in an image that was better than the last one. When I started this blog one of my key goals was to discuss my success and my failures. As I said in my first blog post, landscape photography isn't all about 5 star images captured on epic international trips.
In this blog post I'm going to take you through one of my less successful trips out with the camera. I had it all planned out. I would finish work bang on time, drive to West Bay in Dorset, and photograph the sea and evening light as it gloriously reflected off sea and cliffs. Well, that was my vision anyway. I went through all my normal planning steps, weather, cloud, tide, bearing of sunset and it all looked good.
Challenging Conditions
I've visited West Bay a couple of times, but never to photograph it. The east beach there, recently made more famous by the TV series Broadchurch, is long and sandy with dramatic cliffs running as far as the eye can see. However, when I arrived the reality of actually shooting there became apparent.
Firstly was the tide. After checking the tide tables I knew it was coming in, but what you can't tell from the tables is how long of a reach those waves have. The waves weren't tall, but their reach up the beach was long. Now I don't mind getting my feet wet, but it becomes really difficult to frame your shot if your camera sinks a little with each wave. If I moved further away from the waves I lost a lot of the sea in the frame. Normally this would be less of an issue if the beach has a natural curve.
The other challenge was the weather. While it wasn't raining nor the wind as strong as I expected it to be, the light was very flat. The forecast had indicated lots of high cloud and no low cloud. This I hoped would give me a spectacular evening sky to add to my composition. However, there was a lot of low cloud and the chances of there being any evening light bouncing off the cliff seemed very unlikely.
Change of Plan
Spare time to do photography is at a premium for me. While I like to do some location scouting when I can, it's not always possible, and so sometimes I just have to wing it. So with the very real sense that I might have just wasted a 2 hour round trip in the car, I put my thinking hat on and tried to think of a different composition. This approach of looking around and not getting focused on one thing had worked well on a recent trip to Dartmoor, so I picked up my tripod and got walking.
It wasn't long before I had the idea of doing a long exposure of the beach, looking straight out to see, and including a few well-placed rocks or stones in the foreground. This composition would probably deliver better results. I would have better visibility of the waves and the quality of the light was less of a dependency.
An Ever Changing Beach
Though I had a new vision on what my photograph would be my challenges weren't over. I would find an interesting composition, setup, grab a frame, maybe two at the most, and then a wave would come in wash my composition away! Even some of the larger stones in my composition weren't big enough to resist the pull of the waves. So this left me with very little time to grab a frame for each composition I found along the beach. I had to make sure the camera was level, focused, and correctly exposed in very short time or I might not get another go at it.
After only a few compositions the light had faded and I decided to take my very sandy tripod and wet feet back home for a nice meal and glass of wine.
Critiquing My Own Image
I only took a handful of frames that evening but here is the image that I think turned out the best.
Nikon D750 with Nikon 16-35mm f/4, 1.3 secs, f11 at 20mm, Lee Filters Polariser and 3 Stop ND
Now I'll be the first to admit this isn't an image for my portfolio. Though I like the mood and style of the image it does have a number of issues. If I'd had more time at the location I might have worked out these issues but as I said at the start of the blog, not all shoots are successful shoots.
The main issues I have with the image are around the rocks I have used in the foreground. The rock in the lower right of the frame for me is just a little too close to the edge of frame. I would like to have had just a little bit more space as there is with the rock on the left.. Given a bit more time between waves, I might have setup my tripod in a slightly different location to give me that space.
While the image roughly follows the rule of thirds, it doesn't follow the rule of odds. Now, I know that these rules are more like guidelines, but quite often they do make sense and I do think following the rule of odds in this scene would have helped with the overall composition.
Rocks at Porth Nanven - Nikon D750, Nikon 16-34 f/4 at f/16, 1.6 secs at 20mm.
I learnt about the rule of odds in the book, The Art of Landscape Photography by Mark Bauer and Ross Hoddinott (it's a fantastic book and well worth picking up). In the book Ross and Mark discuss how having an odd number of objects helps create visual stability or symmetry.
In this image I took of Porth Naven a couple of years ago you can see how I've composed with three rocks in the foreground. The balance and implied triangle in this image is something I would have liked to have seen in my West Bay image.
Always Good to Be Out With The Camera
Despite the fact that my shoes are still drying off and I had to strip down my tripod to get rid of the sand, I still felt it was time well spent with the camera. I'm also not going to win any awards for the image, but that really isn't the point. I was outdoors with my camera on a beautiful beach taking images and for a person that spends most his time sitting at a desk it's just nice be outside. Yes, conditions were challenging but it's through these challenges that you learn to progress as a photographer.
Actually I'm going to change my mind, it was a successful shoot. Just successful in a different way.
So what do you think of the image? How would you have shot the scene? Have you got any tips for photographing beach scenes? Please let me know in the comments.
Planning a Landscape Shoot at Dawlish Warren
In this video blog post I show you some of the planning tools I use to help increase the chances of a succesfull trip out with the camera. After that I take you on a trip to shoot seascapes at Dawlish Warren to see if all the planning was worth it!
Plan, Plan, Plan
I like a plan. Plans are good. Plans don't always go to plan, but I like having one none the less. As a private pilot I definitely like to have a plan when I head out to the skies. And though photography is arguably less risky than flying I still want my trips out with the camera to be worthwhile and successful. After all, there is no point in heading out for sunrise only to arrive at your location as the sun comes up. This has happened to me before and trust me, after the hour and half it took me to get there it was a painful lesson.
So to prevent missed sunrises, badly timed tides, and gale force winds, I like to plan my shoots so I can maximise my chances of success. In this video I will use:
These are the tools I use the most and I've found them to be very effective and accurate in the past. So let's see them in action along with my shoot down at Dawlish Warren beach:
Success
As you can see from the video, I had a successful trip and I've come away with an image I was very happy with. By checking out what the conditions were going to be like before I headed out I could be reasonably confident that my image would meet my vision for that location.
Not as calm as it looks. Nikon D750, Nikon 24-70 f/2.8 VR, 195 secs at f/11, Lee Filters ND Grad, Polariser, and Big Stopper. Processed in Lightroom CC.
Audio Quality
As I mentioned in the video, though the photography went well I had a few problems with the video. When I had the camera facing into the wind I lost all the audio of my voice over the wind noise so I had to ditch a lot of the clips. Being a landscape photographer this won't be the last time I will have to deal with this issue so I have purchased a Rode smartLav+ external mic (and some added furs for extra noise reduction). Though I will have to sync up the audio in post using Premiere Pro CC (my Sony RX100 M4 doesn't have a mic input), the improvement in audio quality will be worth it. So expect to hear my dulcet tones much improved in the next video!
Do you plan?
So do you plan your trips out with the camera? Or do you chuck the camera in the car and go for it? Let me know in the comments. And if you have a couple of minutes please like and share this blog post. Till next time....