
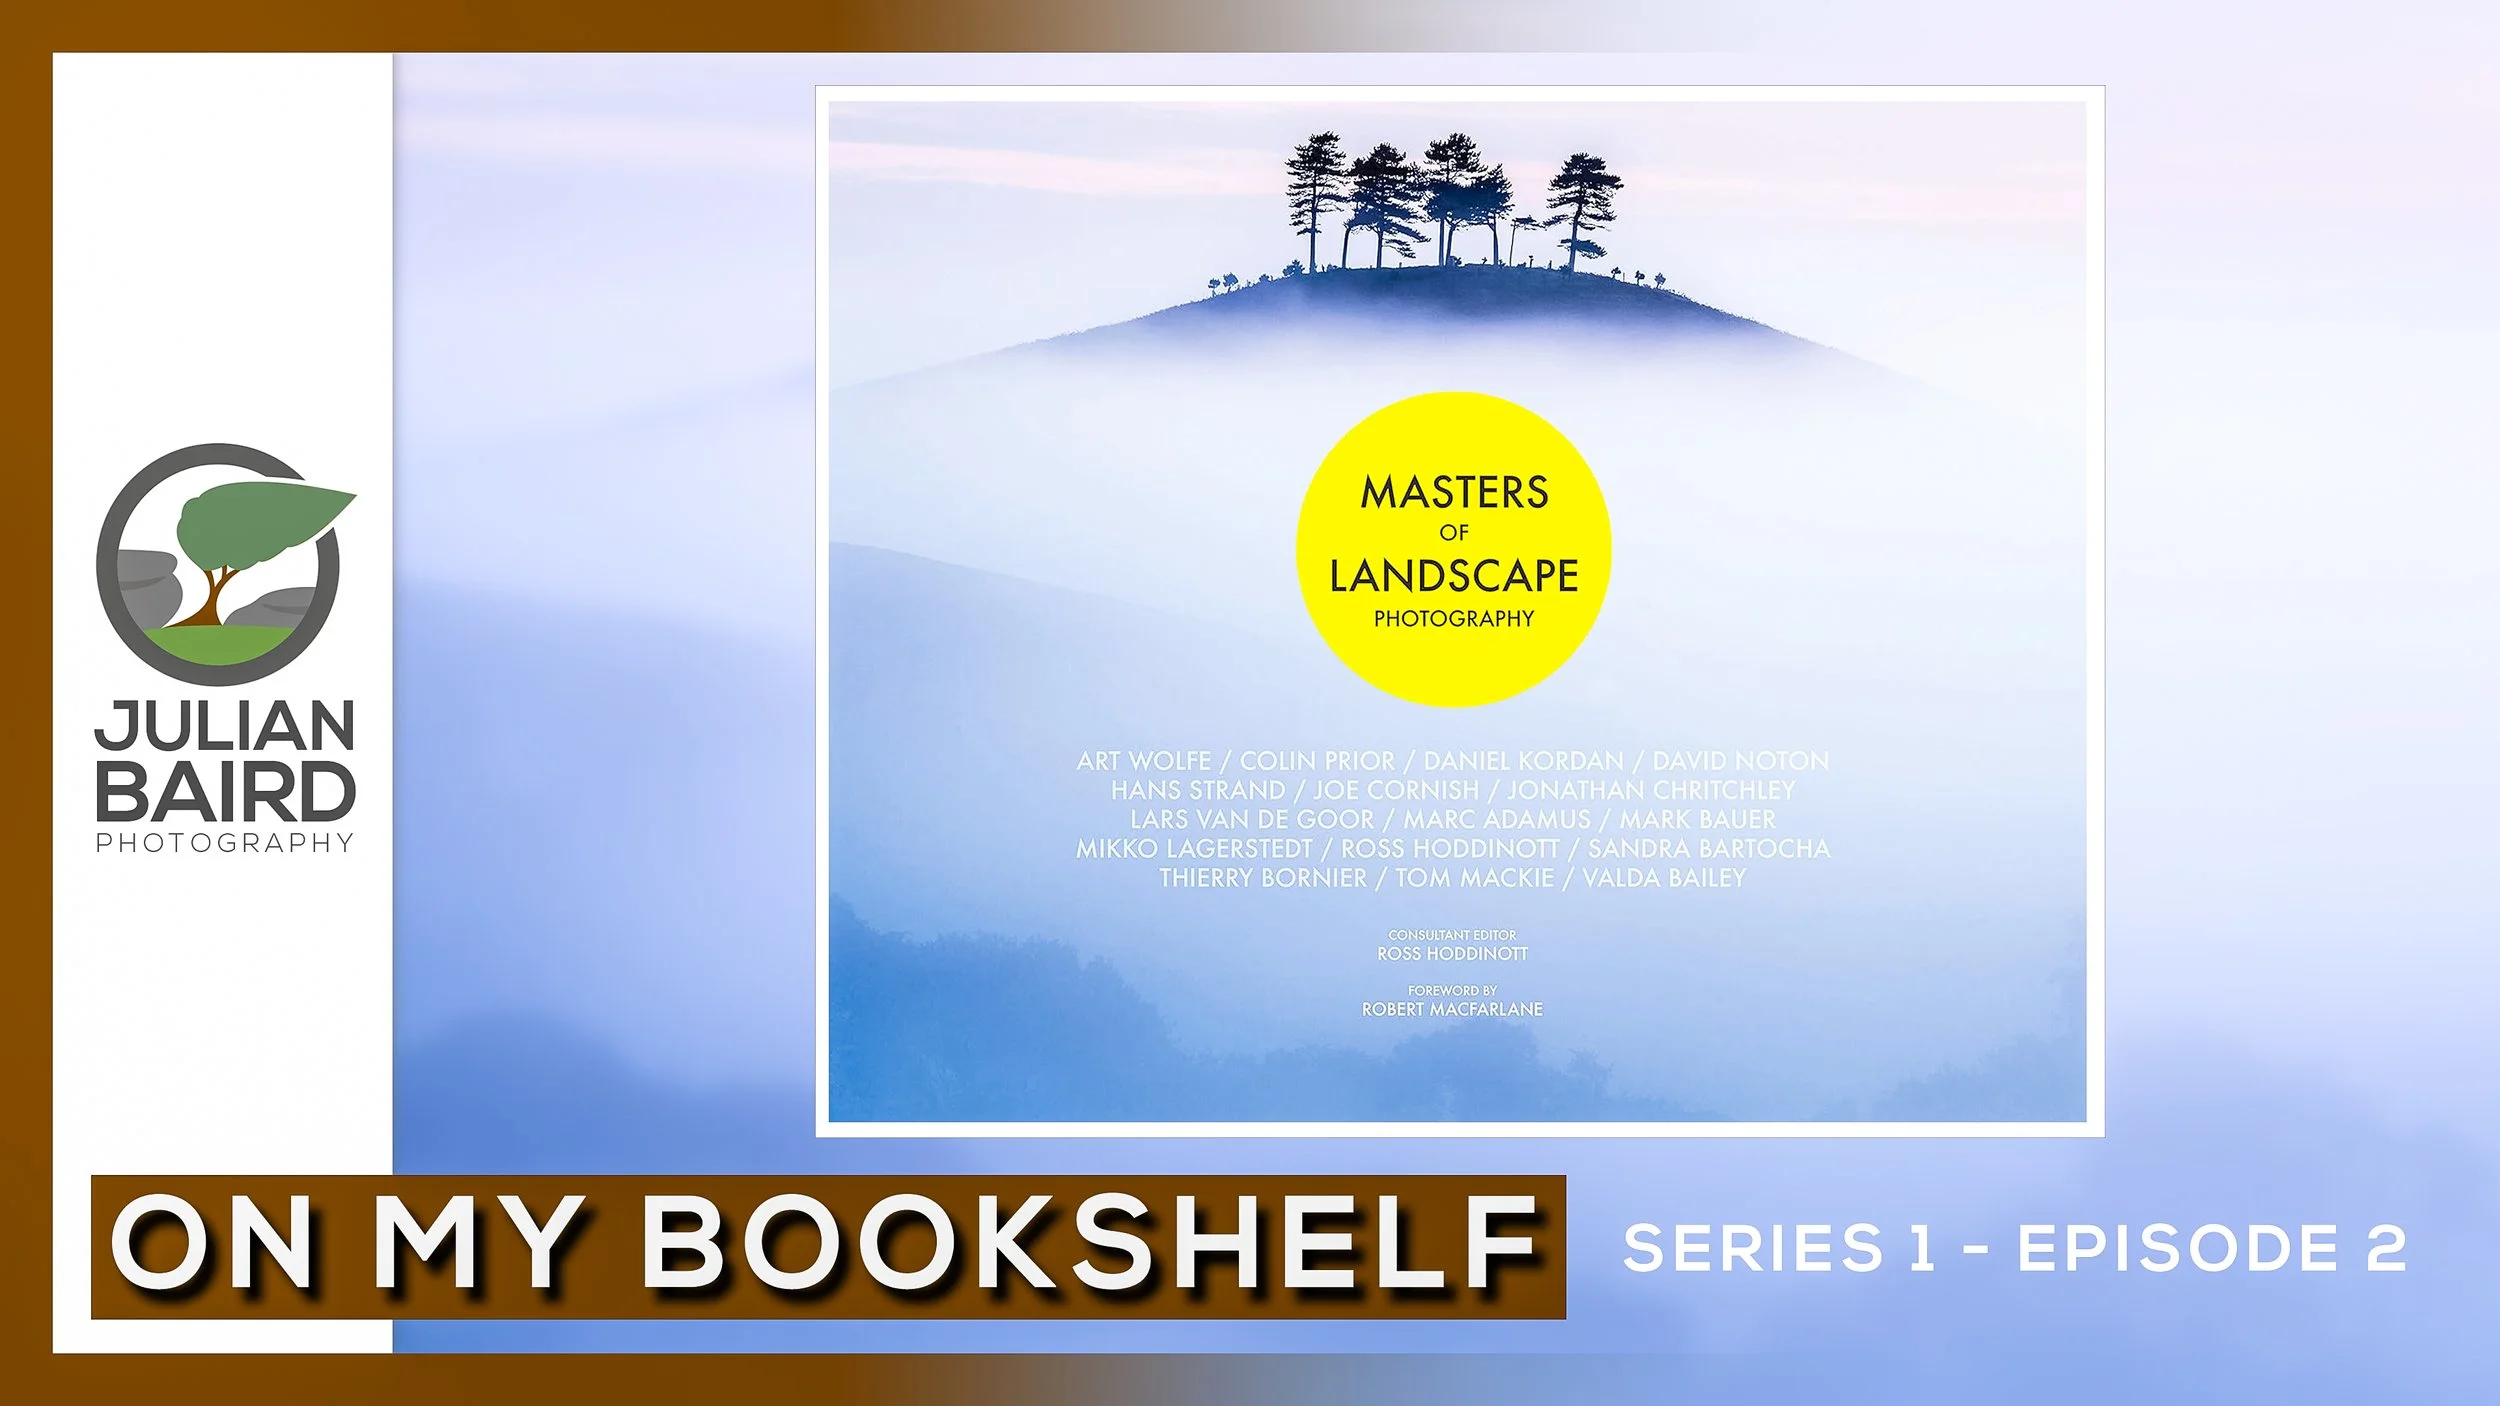
Masters of Landscape Photography - On My Bookshelf S01E02
In this blog post, I take a look at the book Masters of Photography.
Masters of Landscape Photography
Back in October, I introduced you to a new series of videos that I was going to create called On My Bookshelf. The first video was called 5 Great Landscape Photography Books and it feature 5 of my favourite landscape photography books.
Well, I'm very pleased to share with you the latest episode of On My Bookshelf which looks at the book, Masters of Landscape Photography.
You can see my thoughts on this book in the video below:
I do hope you enjoyed that episode of On My Bookshelf. If you'd like to pick up a copy of this book then you click here and it will take you straight to Amazon.
I'm also very interested to hear your feedback. Is this type of content of interest to you? Was this episode too long or too short? Let me know your thoughts in the comments below.

Snow on Belstone Common
In this blog post and video, I head up to Belstone Common on Dartmoor to catch the first snow of the winter.
Snow!
I think most landscape photographers like a bit of snow. It's rare to see here in the south west of England, so when it does come it can transform the winter landscape from dull and boring, to crisp and white. It can really change the look of a location and provide opportunities to shoot something a little different.
When my wife casually mentioned that snow was forecast my first reaction was for disbelief. It was November and probably a little early for snow. However, I'm not one to miss an opportunity so I checked the Will It Snow forecast and was happy to see that there was a 57% chance of snow on Dartmoor.
I got my thinking hat on and thought the higher up I went on Dartmoor, the greater the chance of snow there would be. I then remember Belstone Common, a location that I've photographed before. It's close to home, easy to access and importantly over 400m above sea level.
Despite the 50/50 odds on it snowing, I couldn't miss this potential opportunity, so I got my gear ready and made plans for an early start the next day.
You can see how I got on in my latest 5 Minute Photo Adventure video below:
The Images
Here are the images that I captured that you will have seen in the video.

Nikon D850, Nikkor 16-35mm f/4 at 18mm, ISO 64, 3 seconds at f/13, Lee Filters 0.6 ND graduated filter.
Nikon D850, Nikkor 16-35mm f/4 at 18mm, ISO 64, 1/5th second at f/13.
Nikon D850, Nikkor 16-35mm f/4 at 18mm, ISO 64, 1/5th second at f/13, Lee Filters 0.6 ND graduated filter.
Nikon D850, Nikkor 16-35mm f/4 at 19mm, ISO 64, 1/8th second at f/13, Lee Filters 0..6 ND graduated filter.
I hope you enjoyed the video and the images I captured. I certainly had fun up on Dartmoor that morning, despite the freezing temperatures. It really is mornings like that I look forward to. A lot of action, changing conditions, and plenty of opportunities to capture images.
So have you photographed any snowy scenes this winter? What is your favourite season to photograph? Let me know in the comments below.

Landscape Photography with the Mactrem AT64C Tripod
In the blog this week I take the Mactrem AT64C Carbon tripod on location to shoot some landscape images to see how it copes with real-world situations. Join me in my video review as I photograph long exposures at Dawlish Warren, use a long lens at Colmer's Hill, and take panoramic images from Pilsdon Pen. Finally, I give you my thoughts on this tripod. Is it worth buying?
Reviews On Location
When Mactrem reached out to me to review their AT64C carbon tripod I thought it would be a great excuse to go out and do some landscape photography. Not that I really need an excuse. I fairly well self-motivated when it comes to landscape photography!
For this review, I didn't want to just unbox the tripod and discuss the technical specs from the comfort of my home. That would be a bit boring wouldn't it? So I thought I would do my review a little differently. I would put the tripod to use in some real-world scenarios, capture some images and share my thoughts on both the photography and the tripod.
By doing this I would not only educate the viewer on the tripods performance on location but for anyone just interested in landscape photography there would be something there for them as well.
Reviewing to Mactrem AT64C Tripod
So regardless if you want to know more about this tripod or you just want to see me shoot some landscapes, I hope you enjoy this video:
I do hope you enjoyed this video and that you either found the review helpful or just liked the photography bit.
If you want to purchase one of these tripods then you can purchase one from Amazon.co.uk by clicking on this link here. Also, until 15th April 2018, if you enter the code UWSN5IQD at checkout, you will receive £15 off the price of the tripod.
So what tripod and head do you use? Would you like to see me do more product reviews on location like this one? Let me know in the comments below.
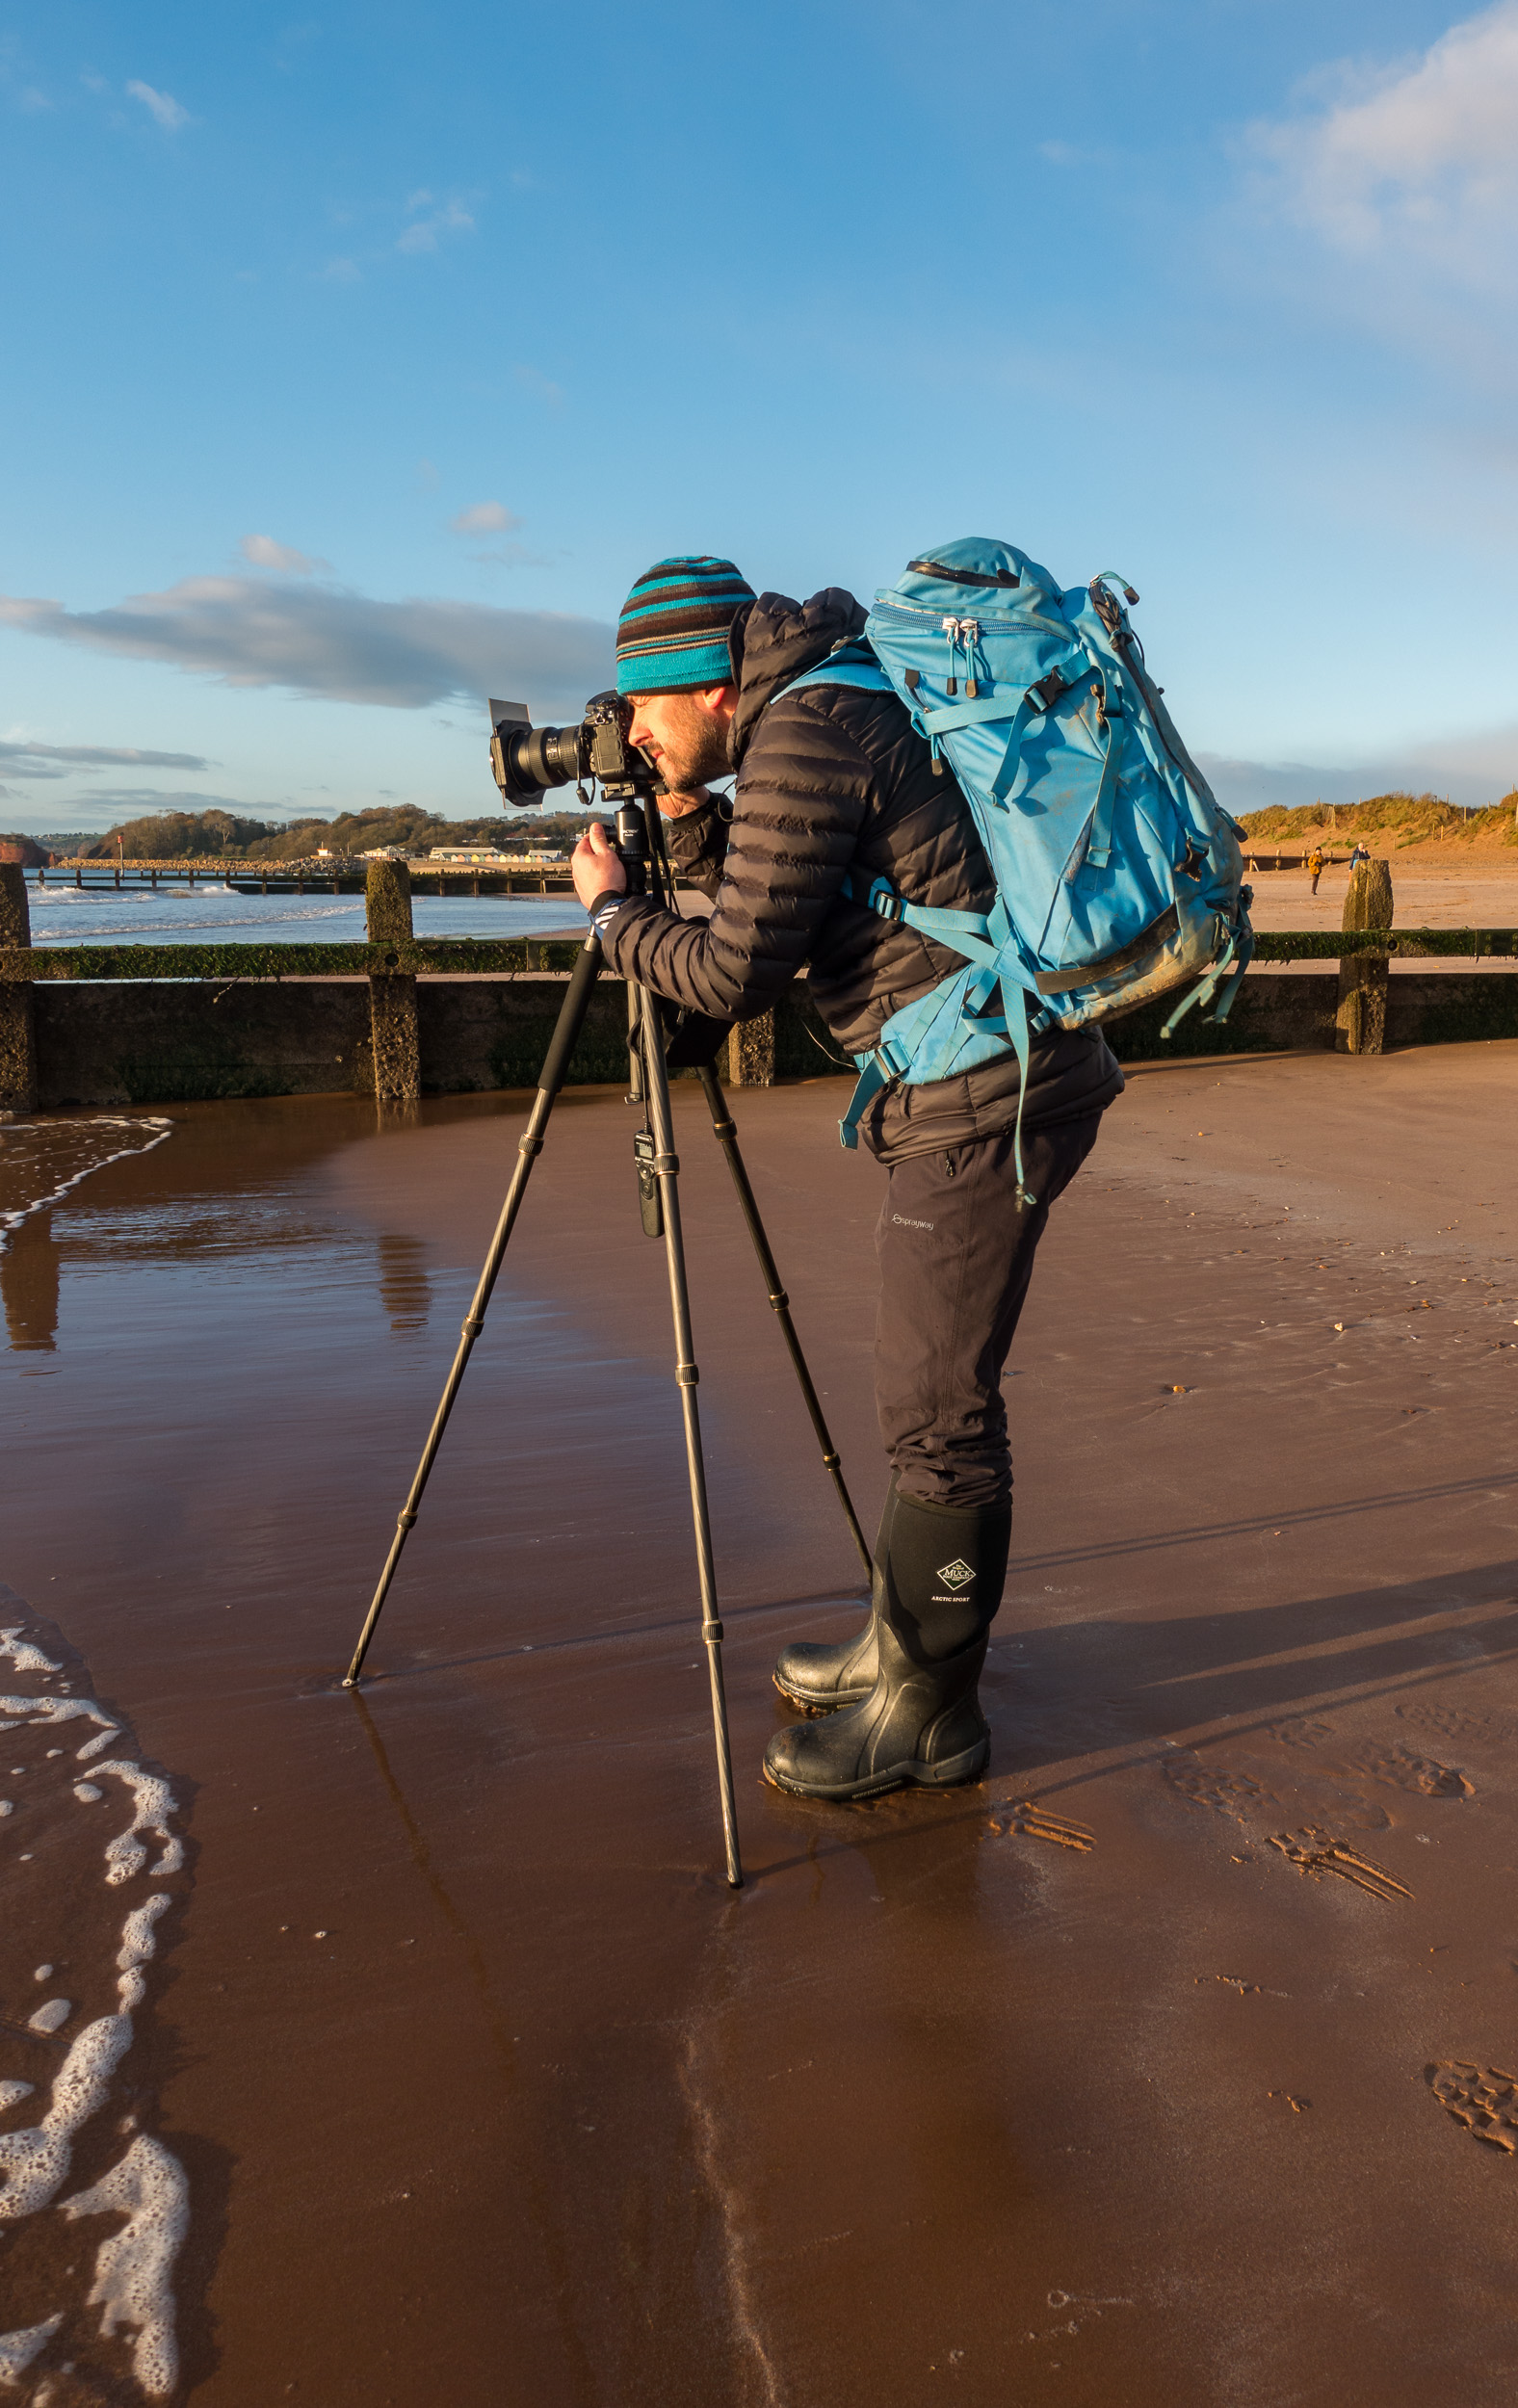
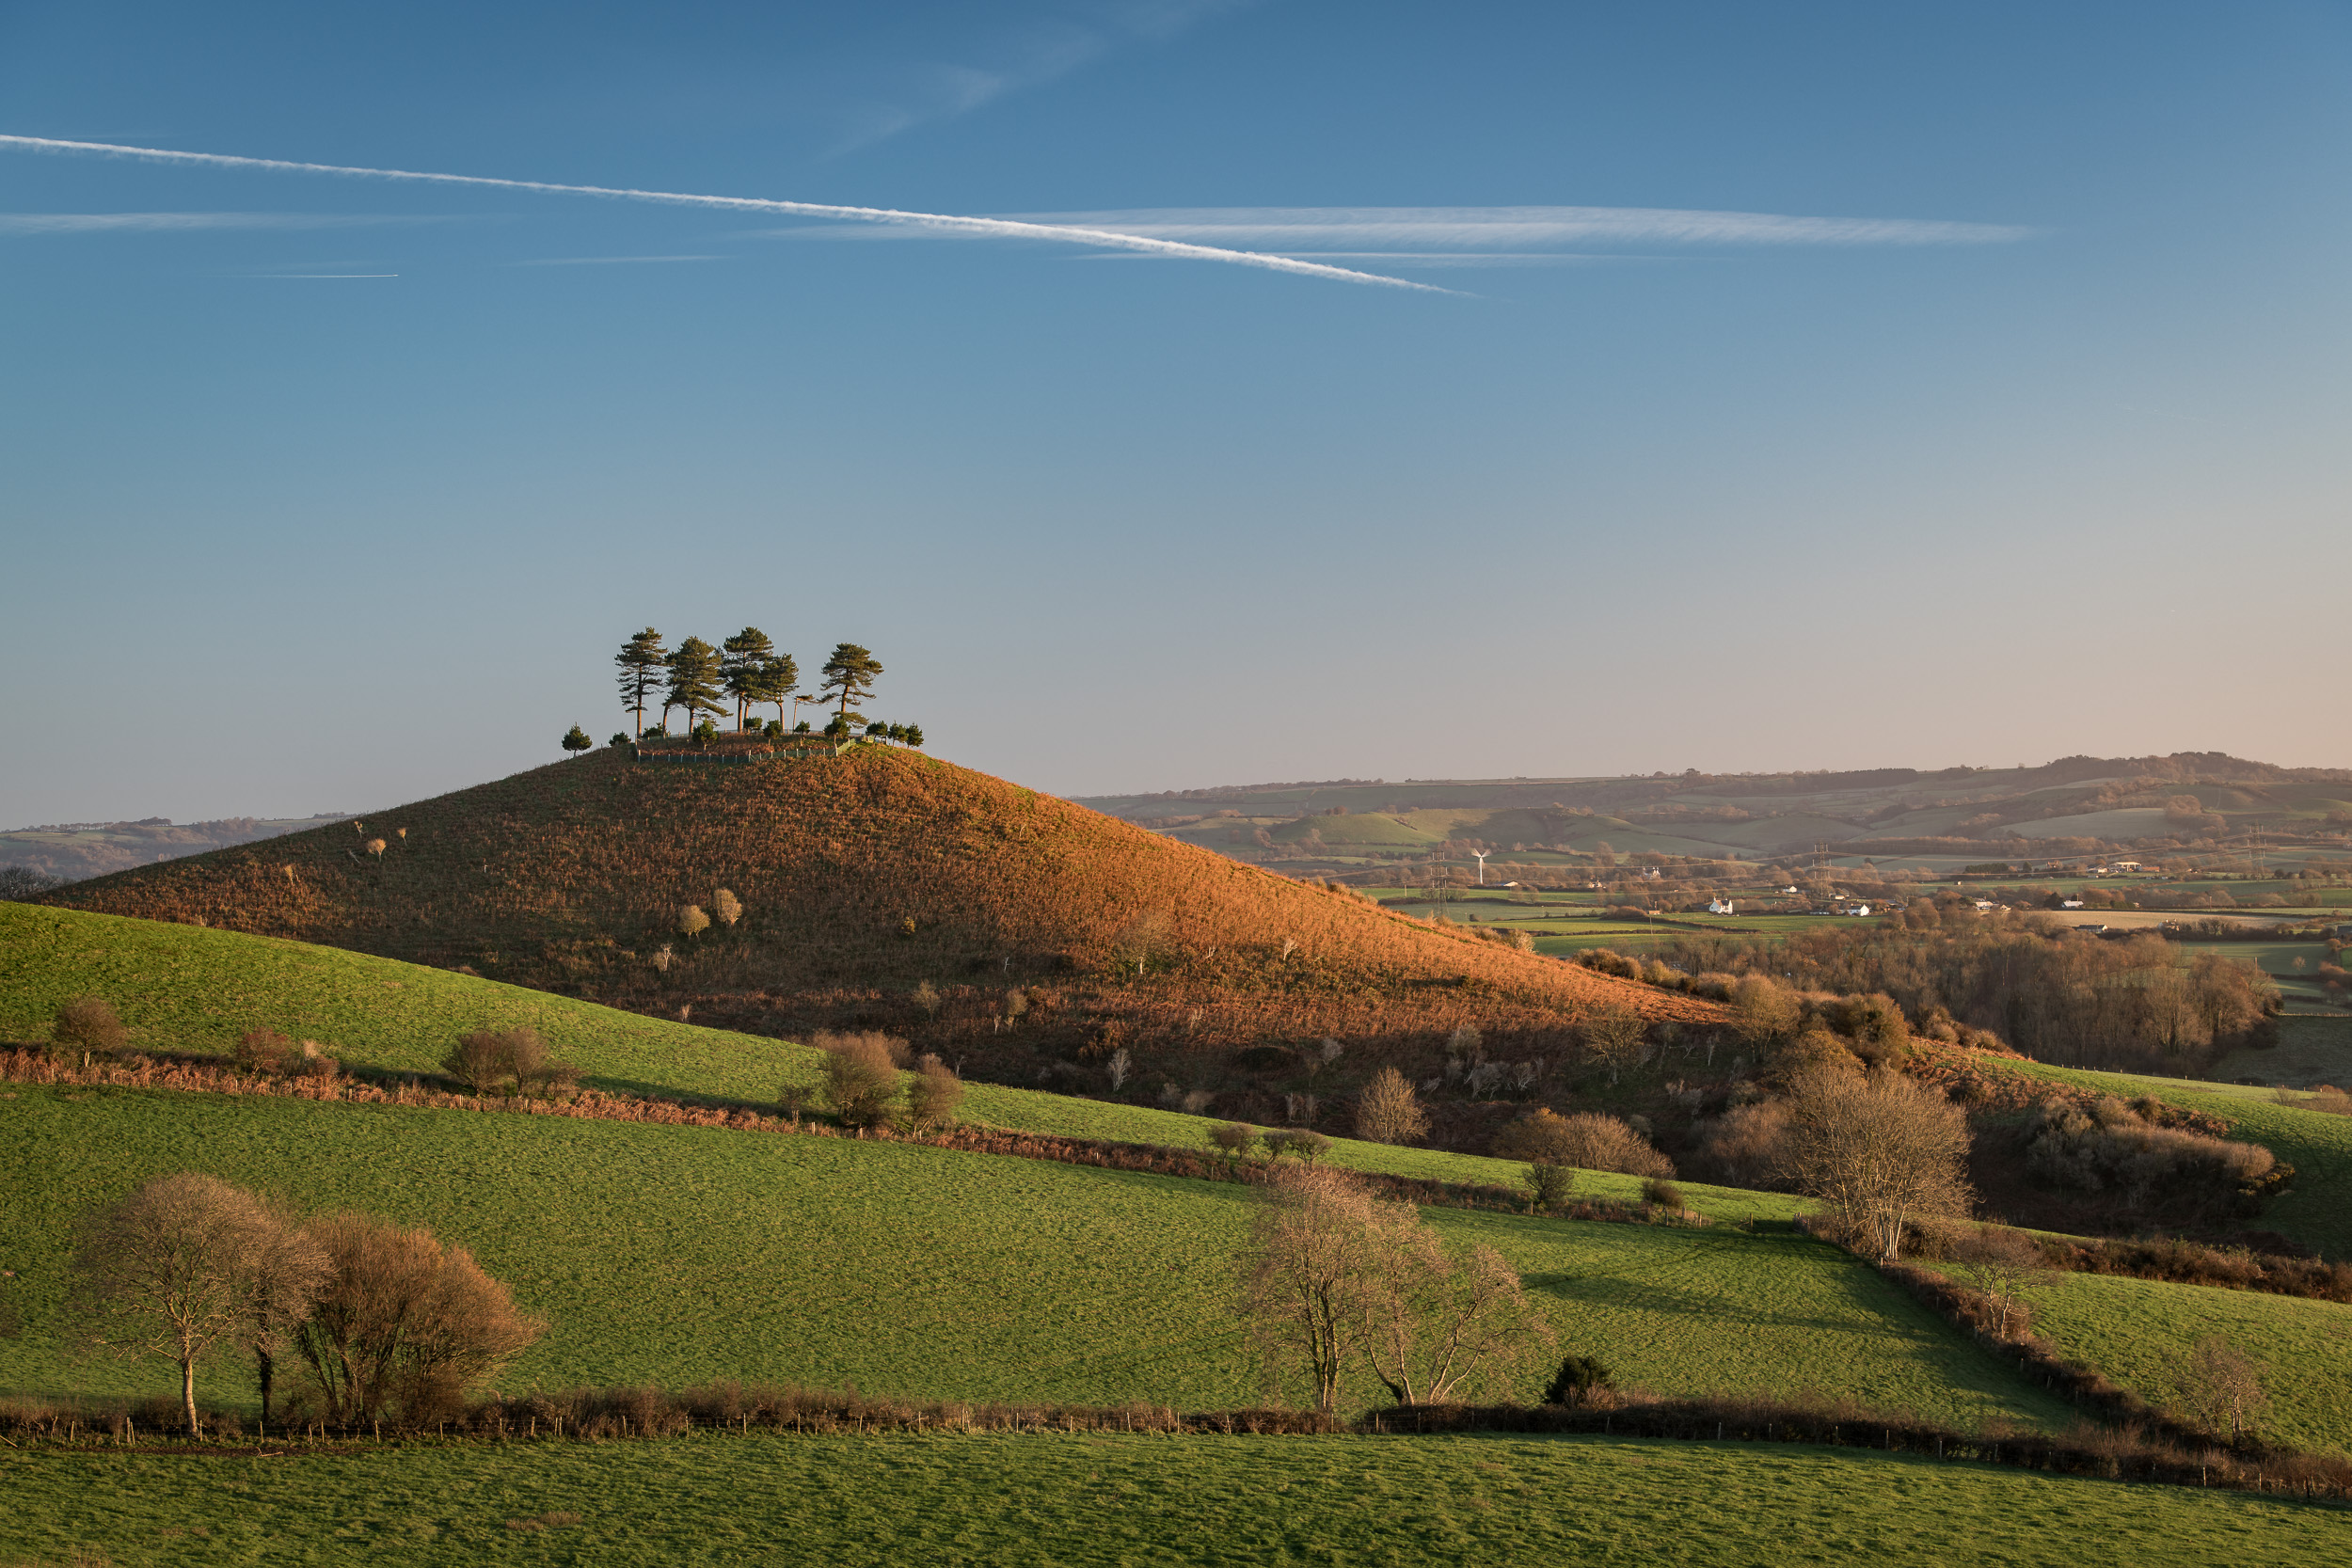
PS. Keep reading as below I'm going to share with you the images that I took at all the locations, along with some shots of me using the tripod.





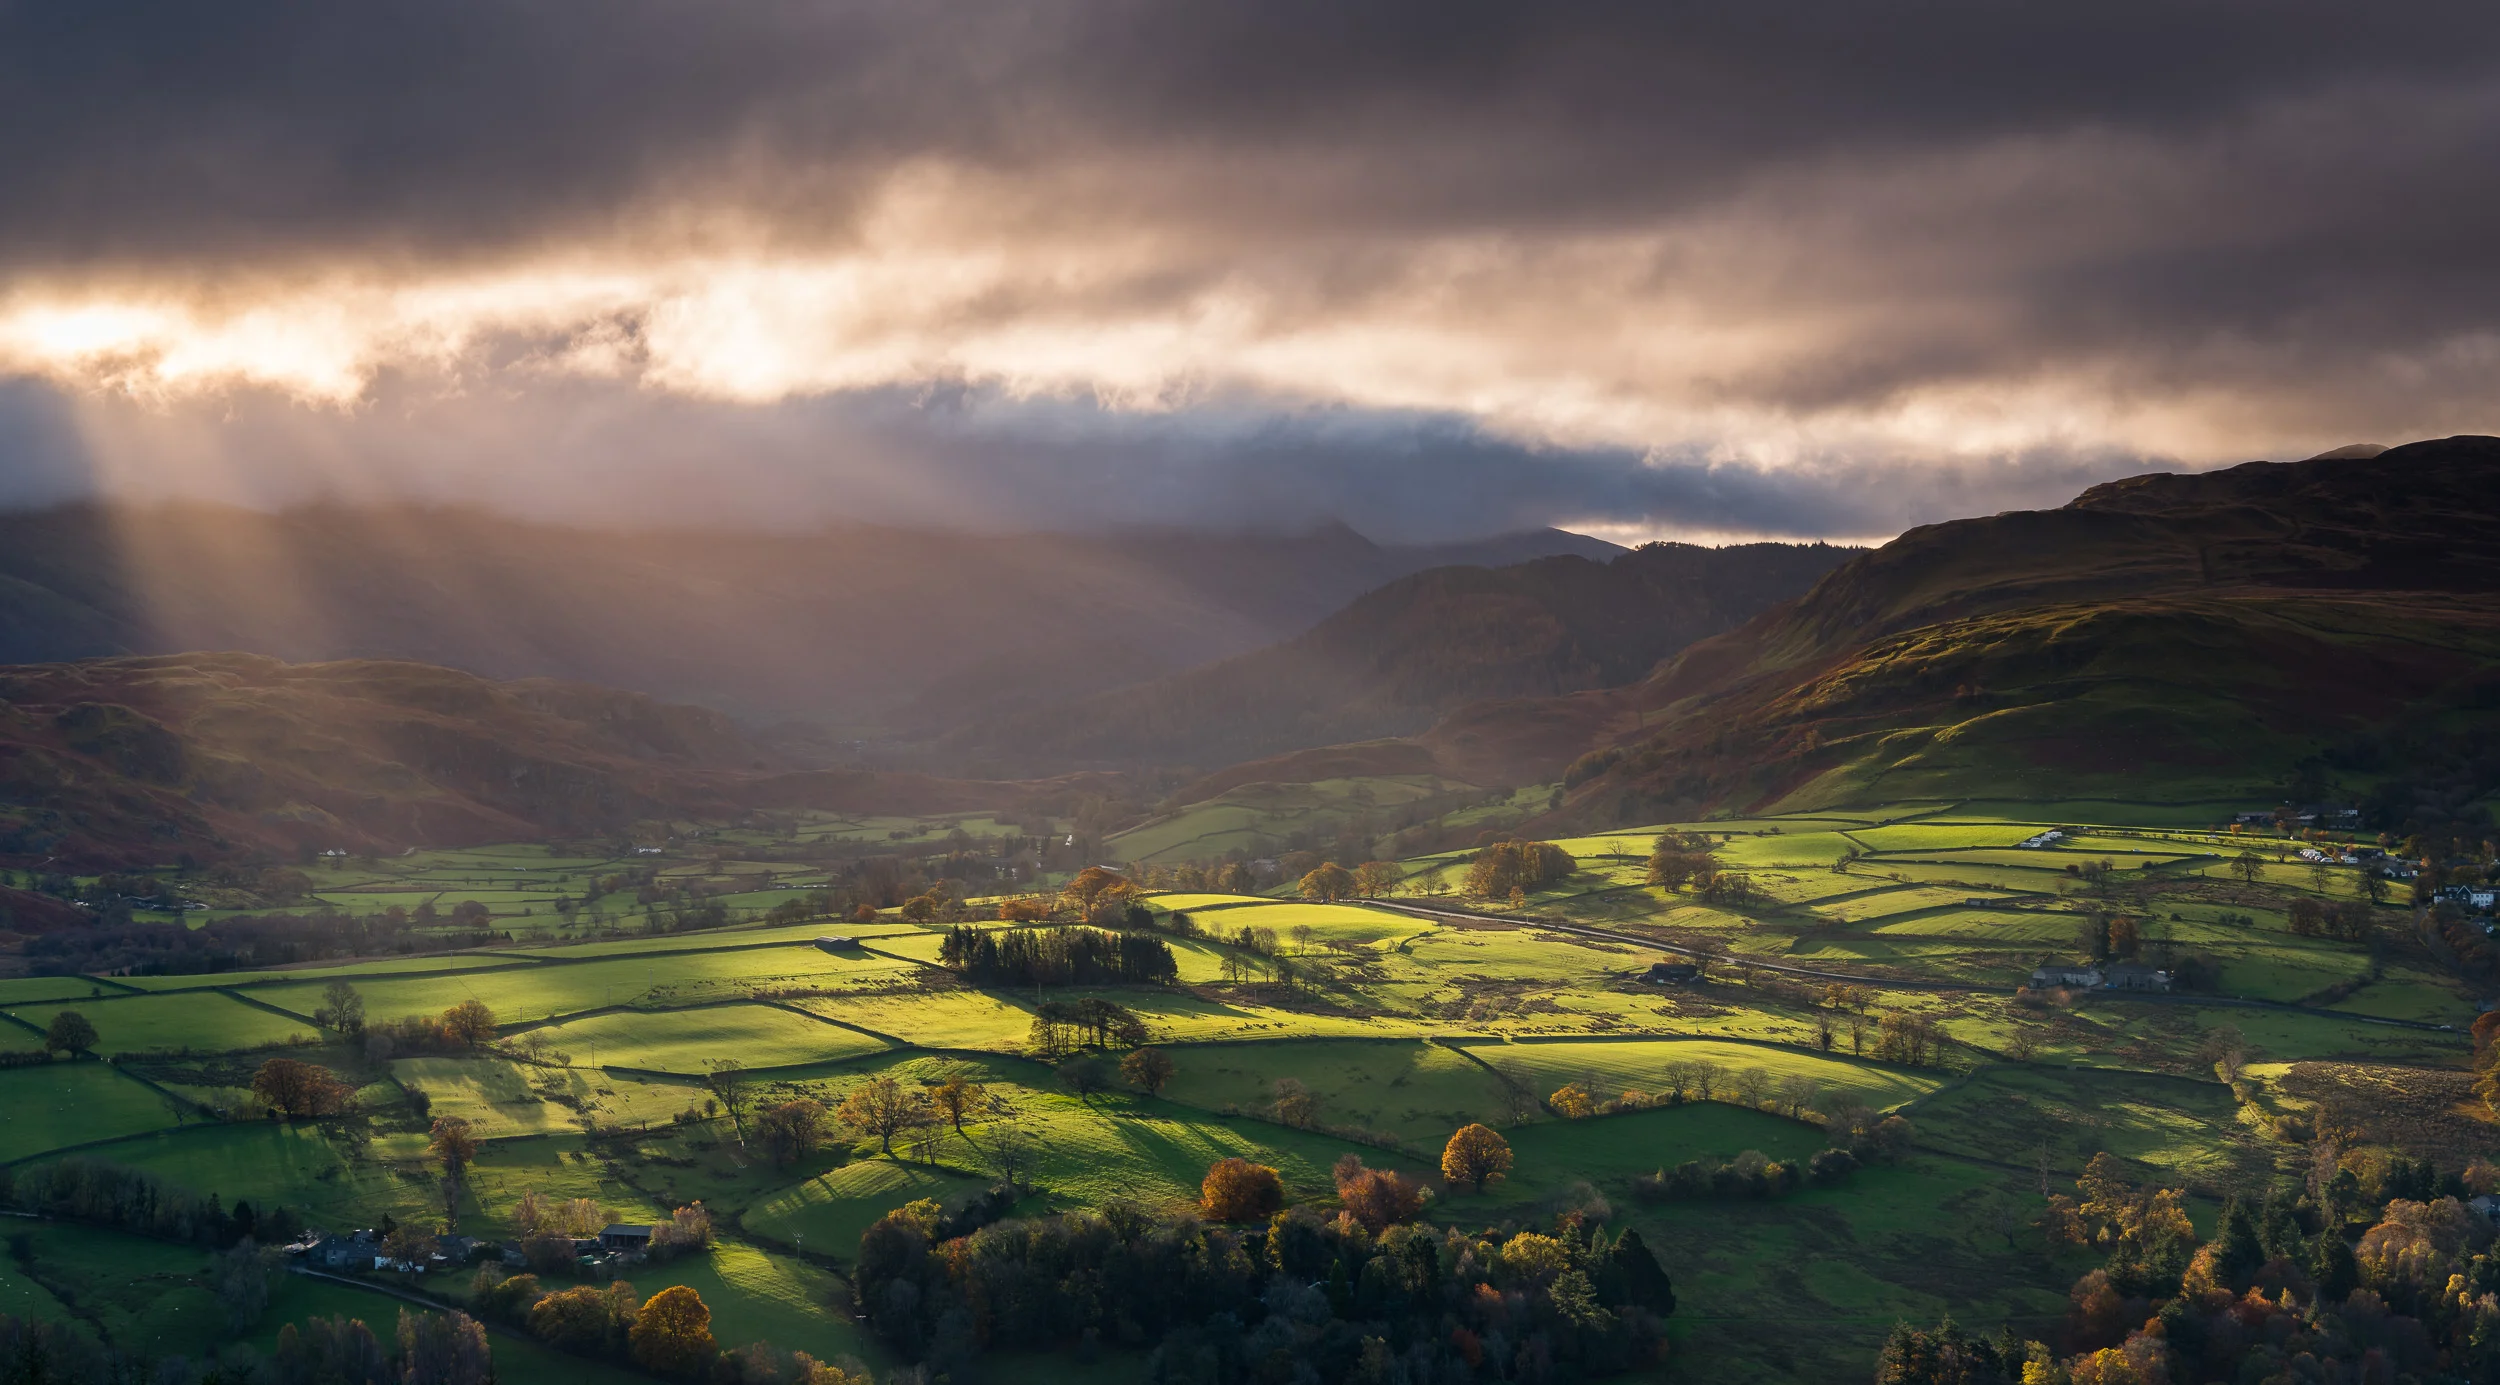
Landscape Photography Adventure in the Lake District - Part 3
In this special blog post, I share with you the final part of my landscape photography adventure video from the Lake District.


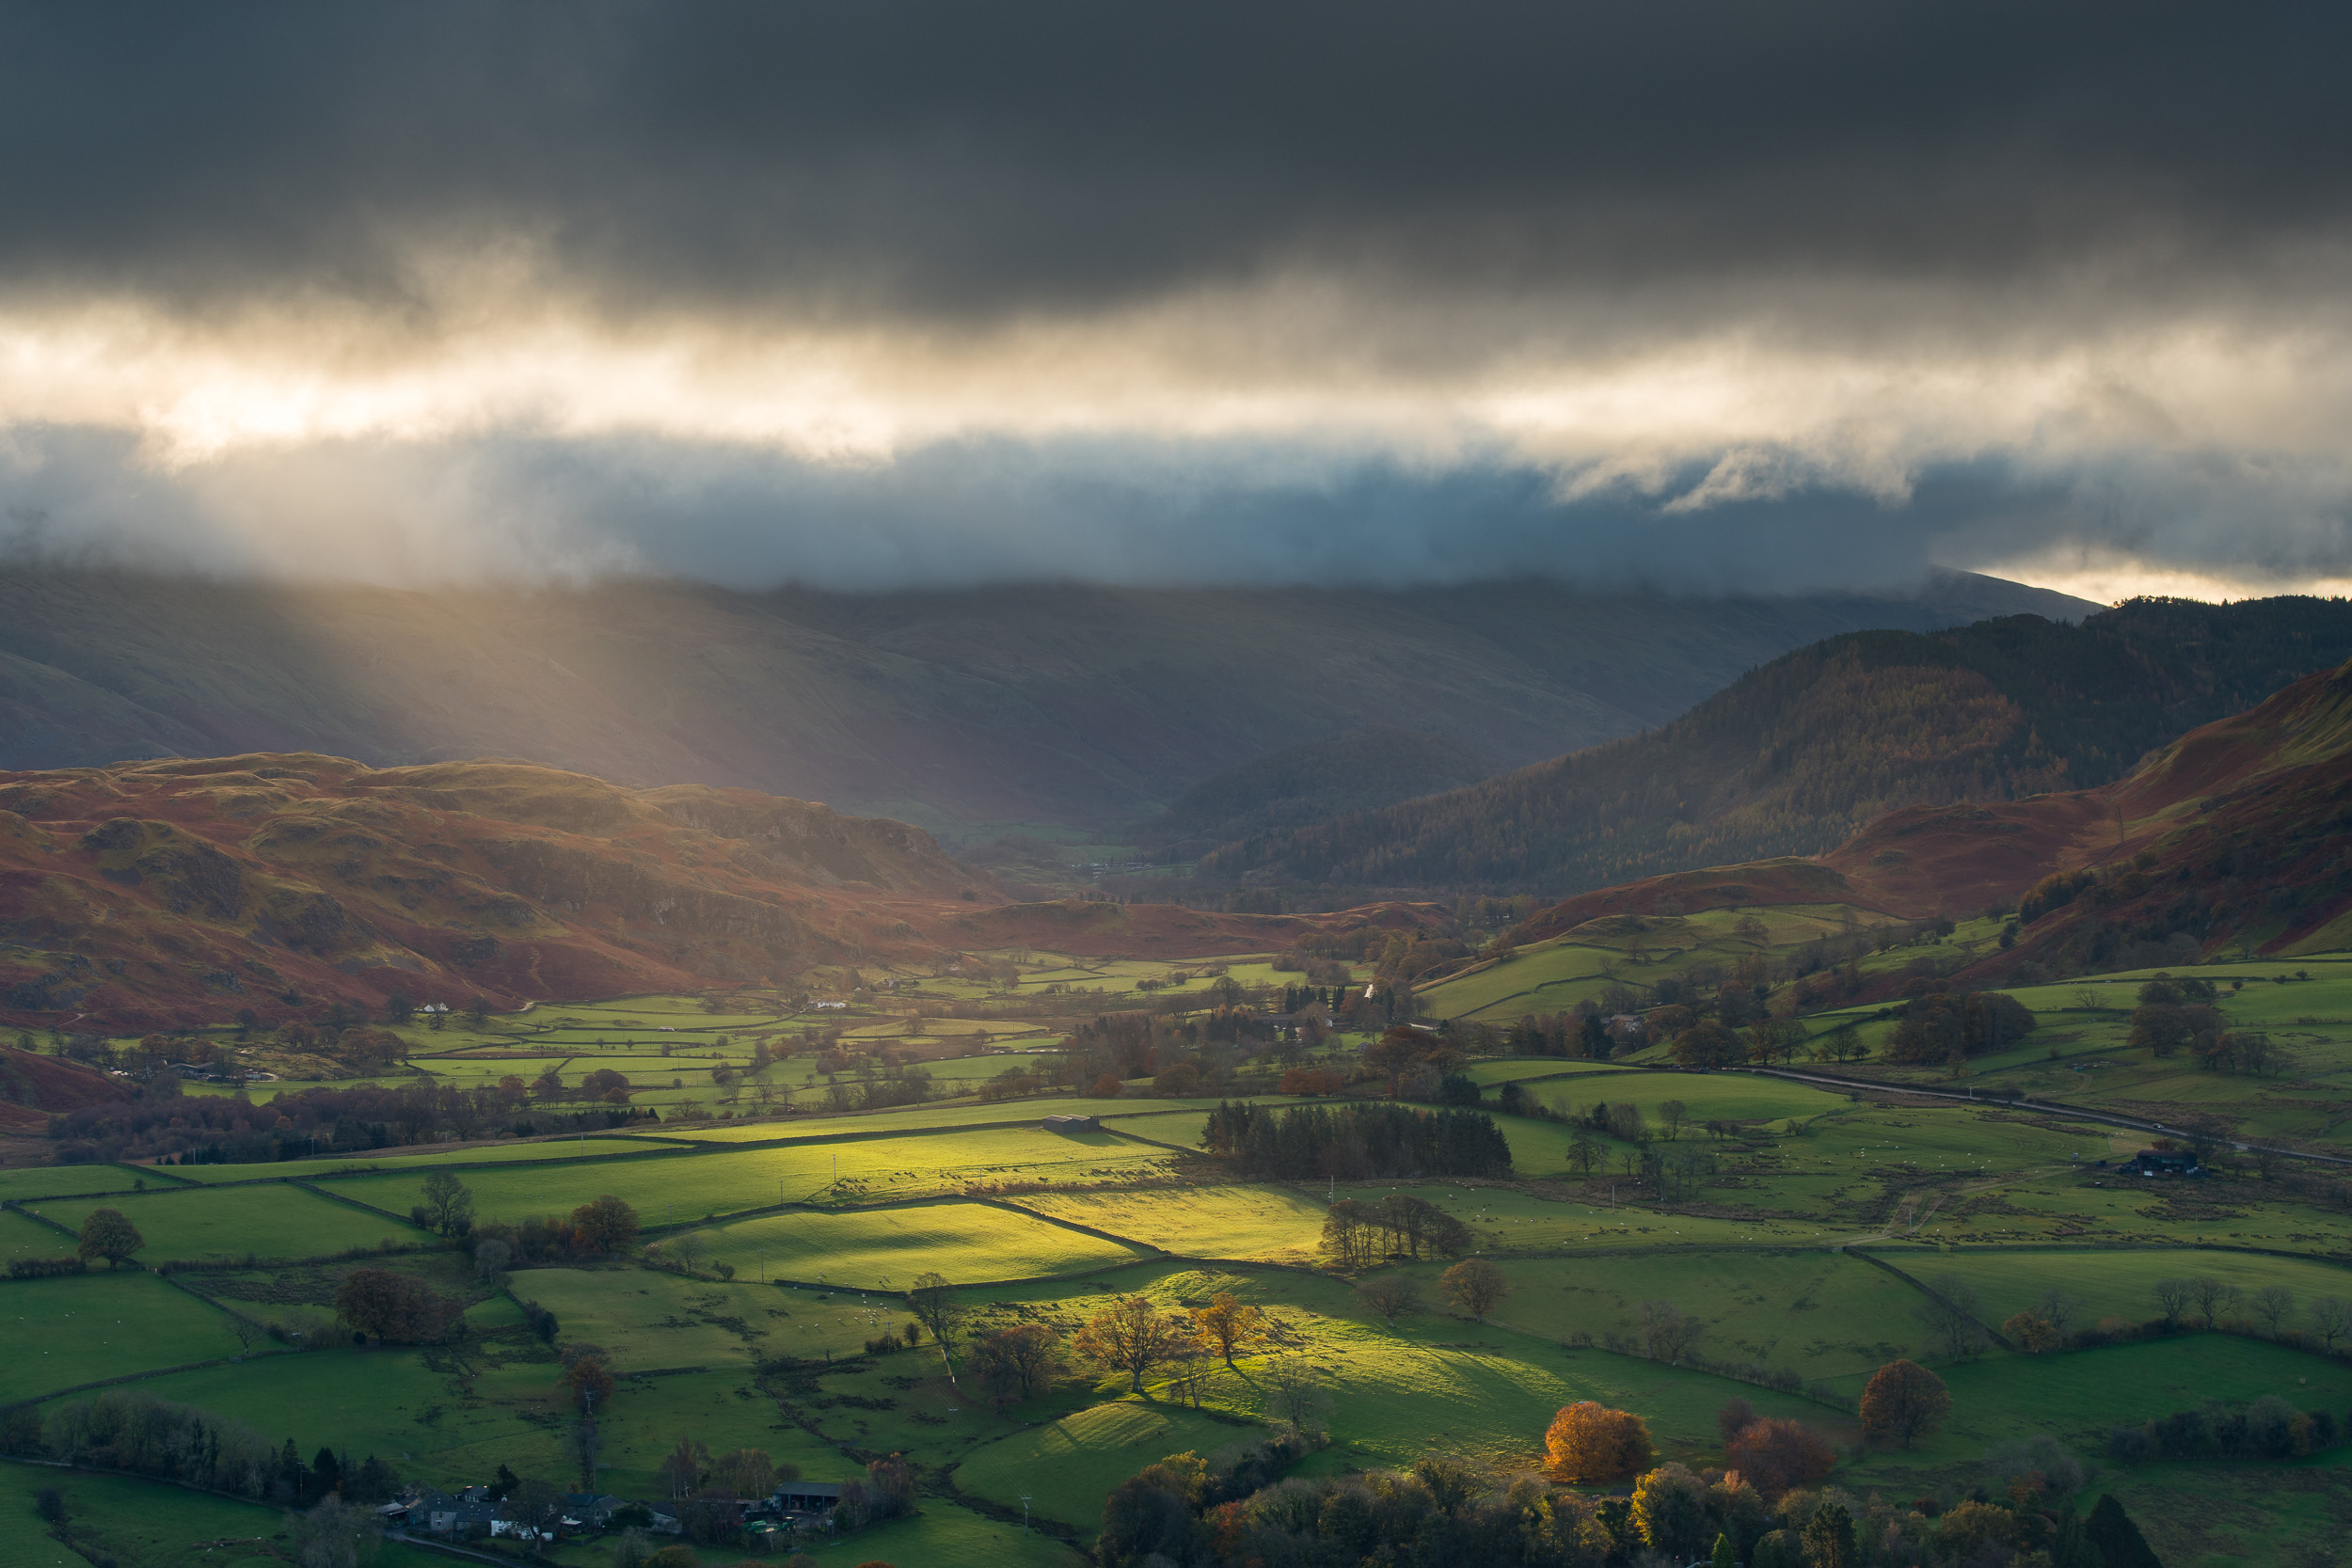
If you watched part 1 and part 2 you'll know that I didn't have the best of luck with the weather. For two days I had grey, flat light, and while I was capturing nice images, they just lacked the dramatic light that I know the Lake District can produce. Then, and I'm not joking here, the light broke through the clouds in the last 15 minutes of my adventure. I was just about to pack up and leave as I need to get back to my hotel to check out when all the action happened.
As long as I could go away with one great image I would have been happy. It just happened that on this trip I needed to wait until the very end of my trip!
Overall I had a really good time in the Lake District. While the photography was challenging at times, it was also a lot of fun. As is often the case with these trips the enjoyment comes from more than just photography. I'm a big fan of the outdoors, so just being outside and wandering about some of these great spots and locations is a wonderful experience. I also met some great people on my adventure. From fellow photographers, hill walkers, and even a fell runner. I guess I like to talk as much as I like to take photographs!
I hope you enjoyed this three-part blog and vlog on my recent Lake District adventure. I'm already making plans for more adventures next year, so remember to stay tuned.
So have you ever photographed the Lake District? What has been your favourite 15 minutes of photography? Let me know in the comments below.

Landscape Photography Adventure in the Lake District - Part 2
In this special blog post, I share with you the 2nd part of my landscape photography adventure video from the Lake District.
In the blog last week I shared with you part 1 of my Lake District photography adventure. This week I'm very happy to share with you part 2 of that adventure. I'm not going to write much else this week as let the video and the images below tell the story.
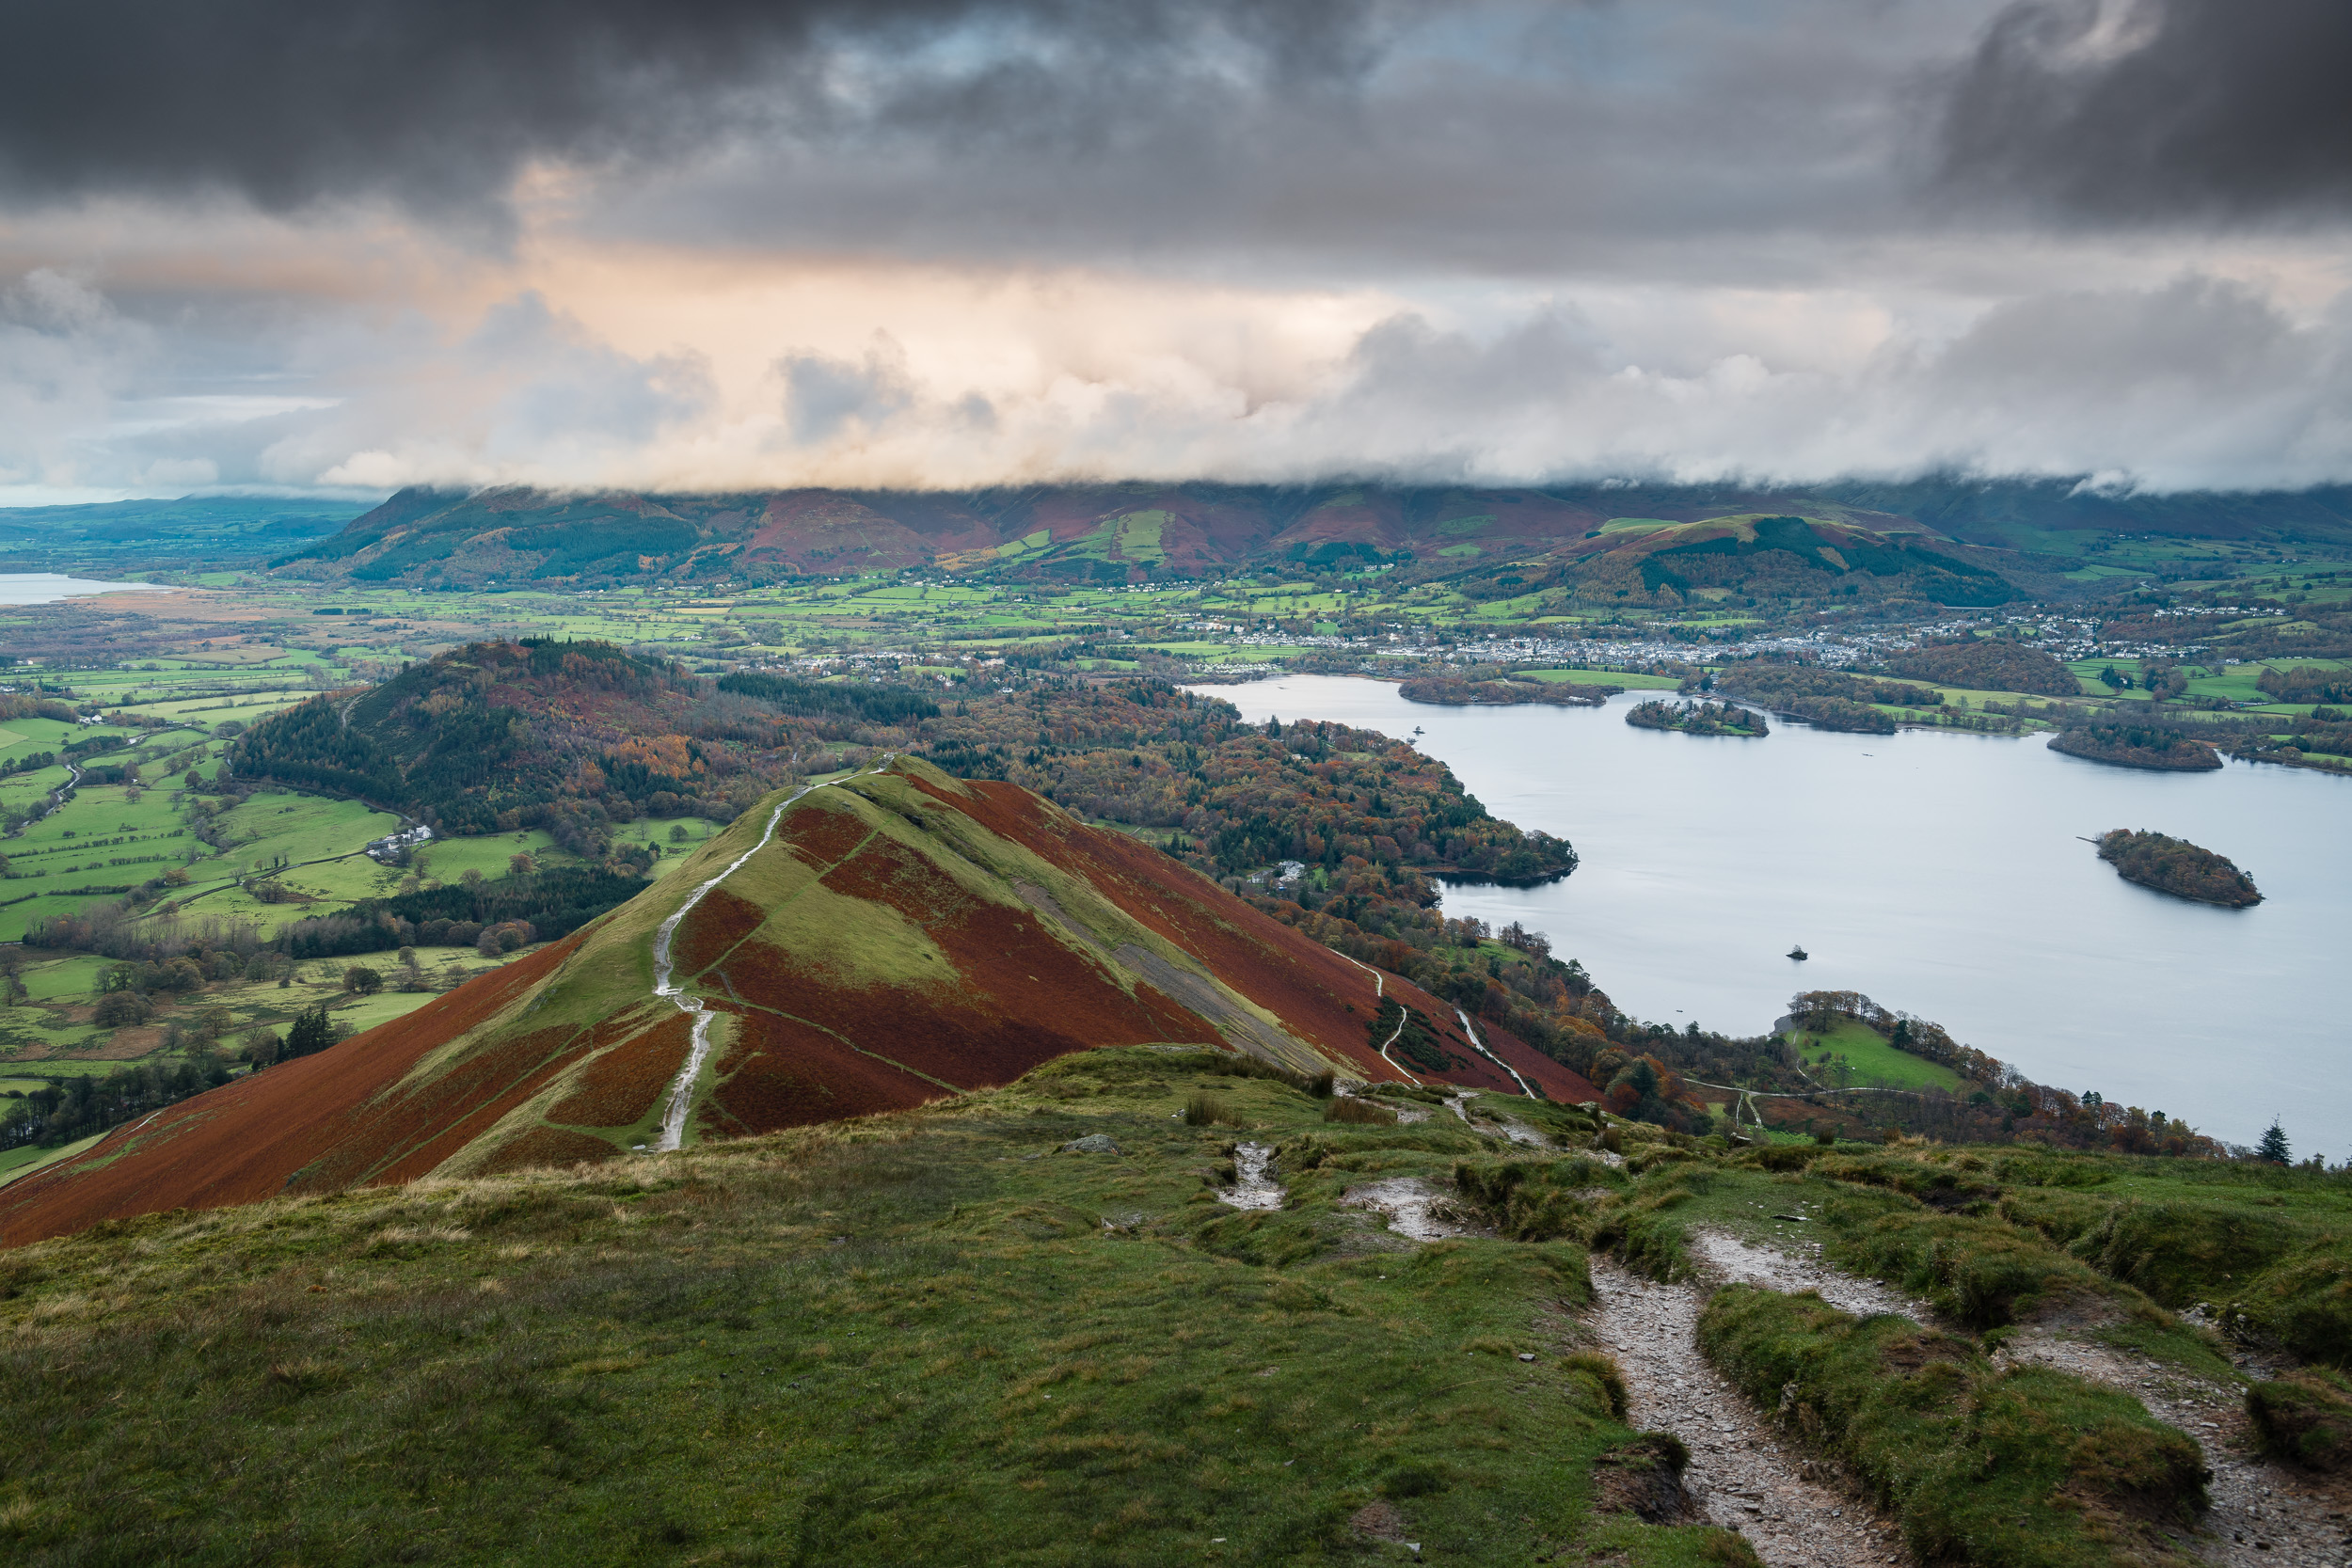


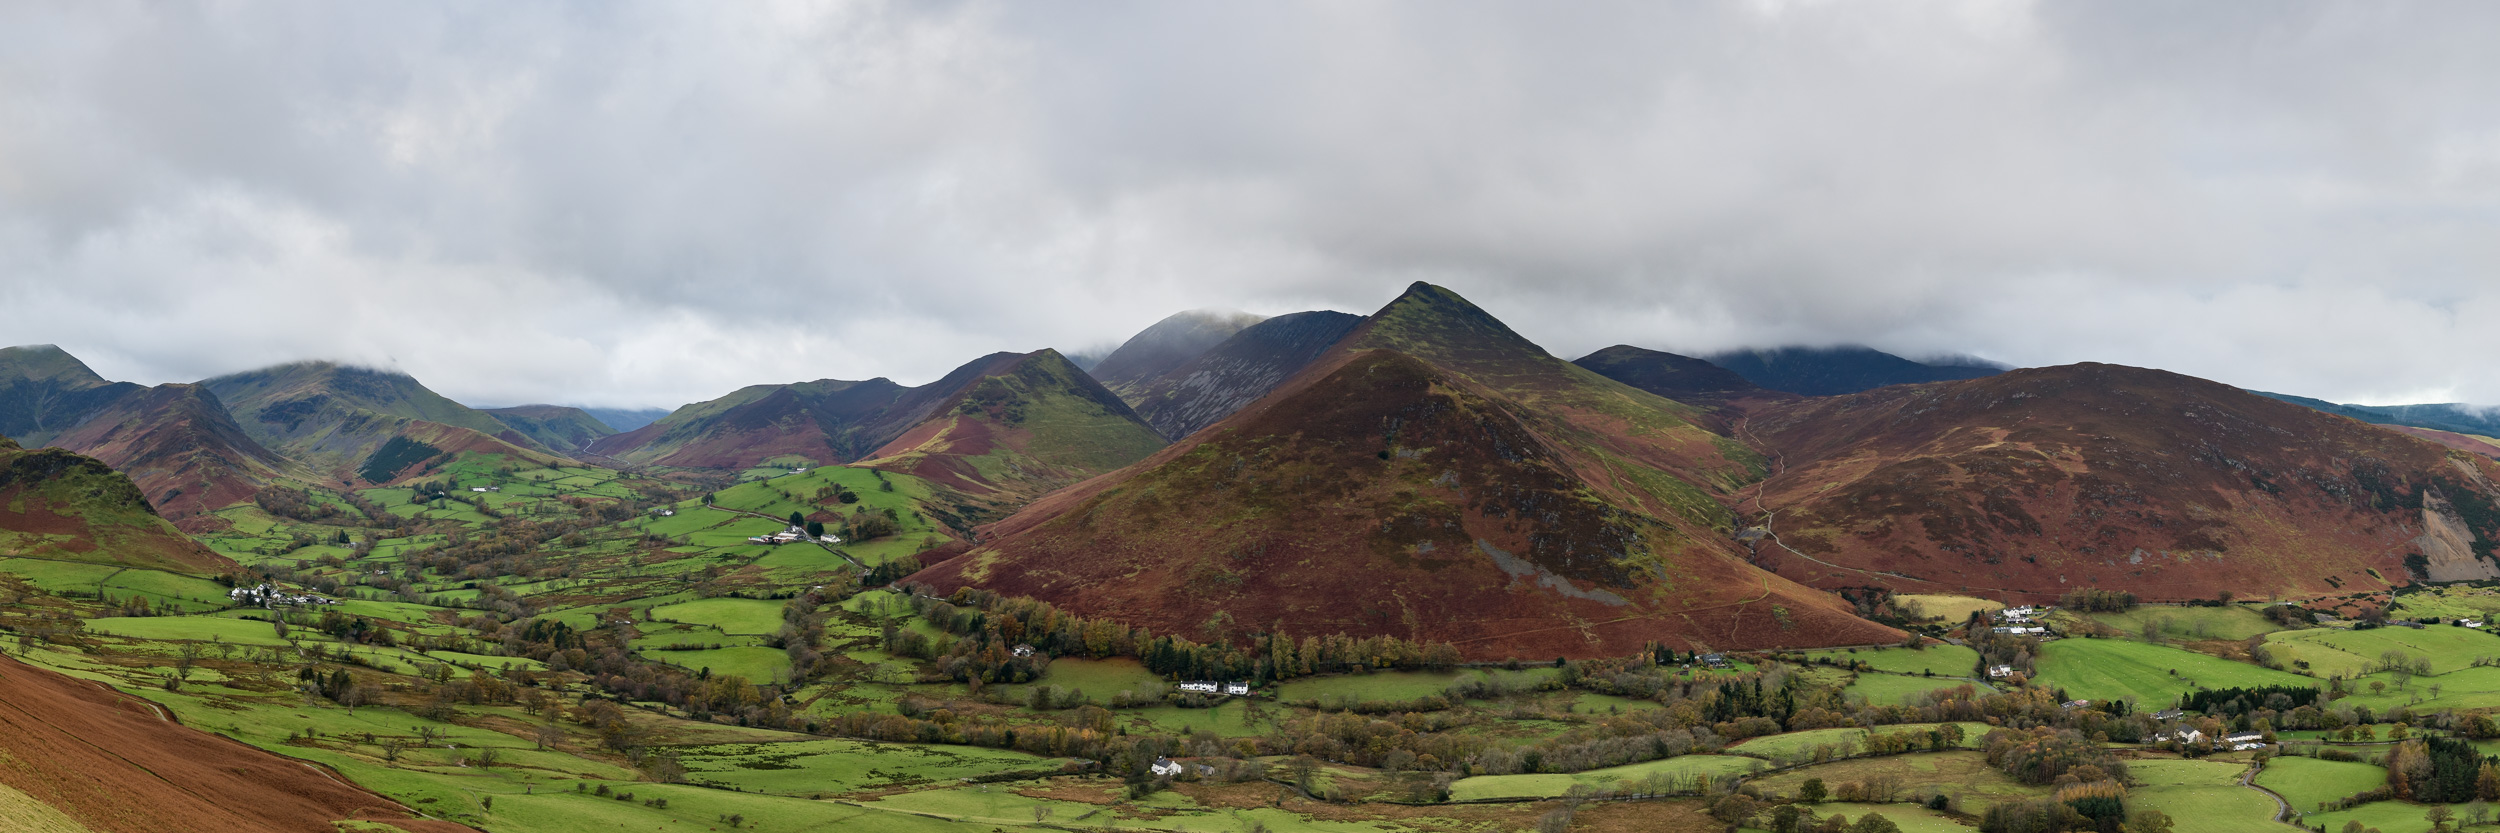
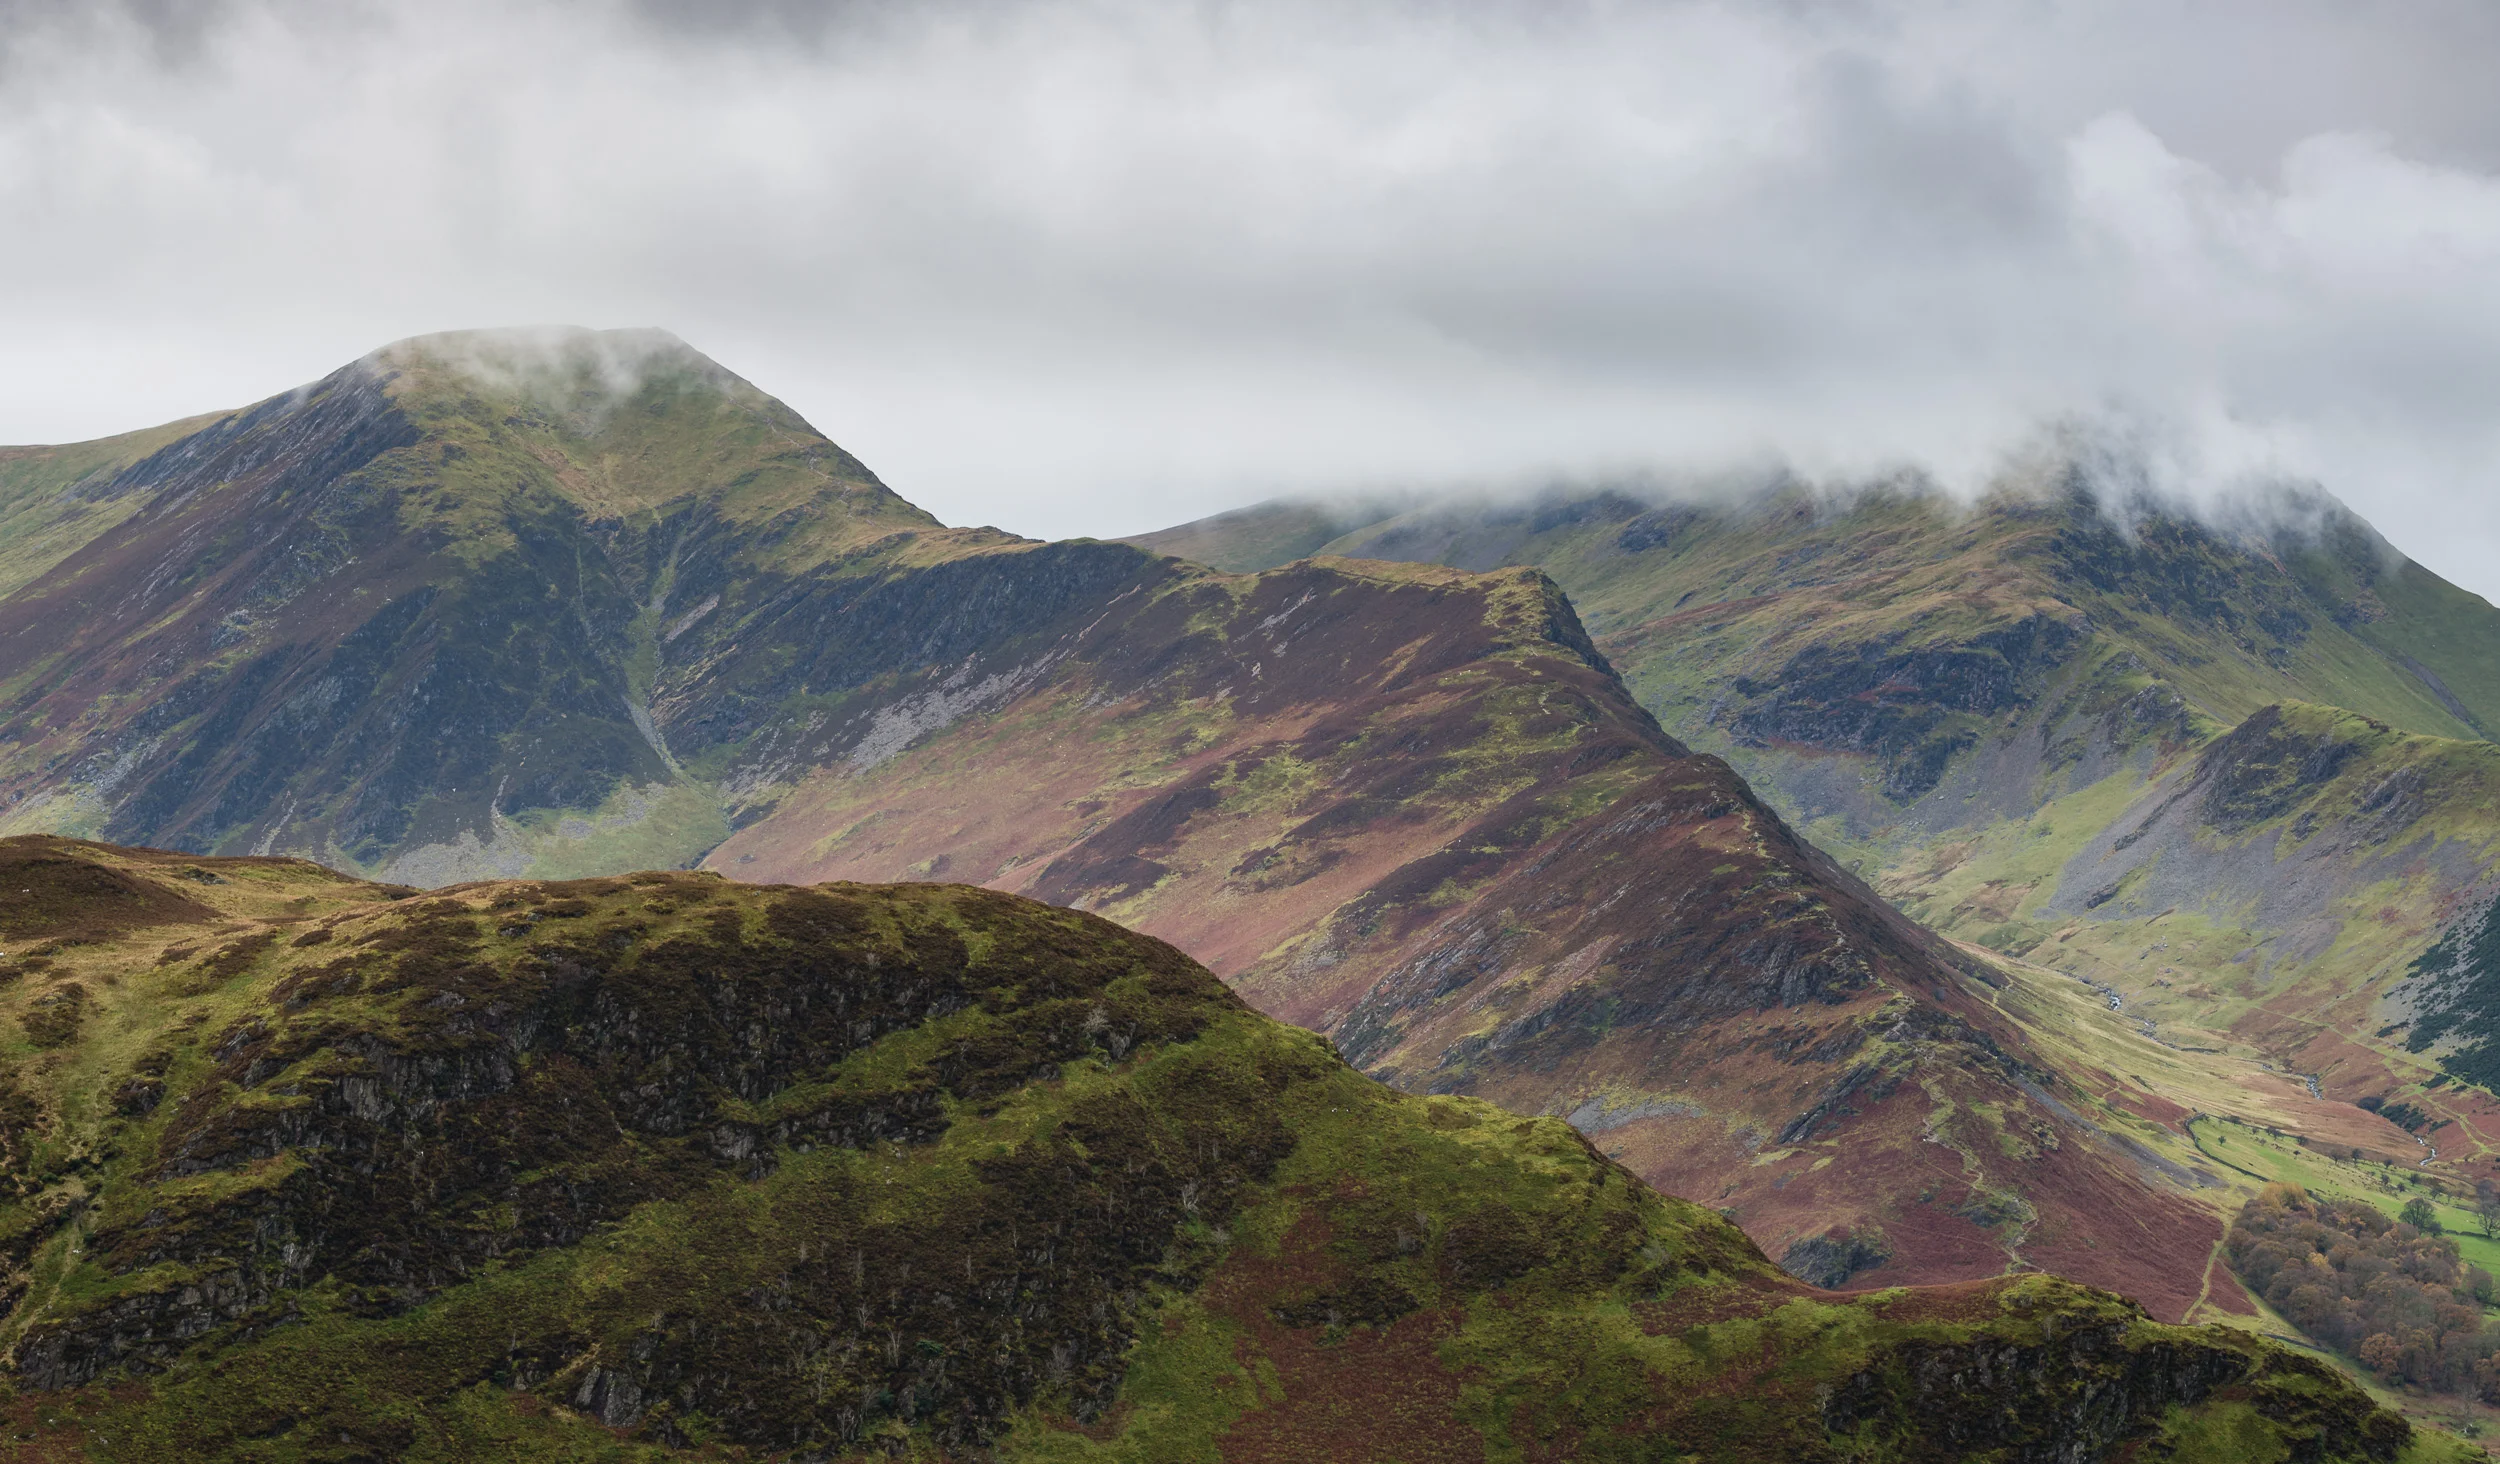


I hope you enjoyed part 2 of my Lake District adventure. Remember you can see part 1 here, and the 3rd and final part will be published next week right here on the blog.

Landscape Photography Adventure in the Lake District - Part 1
In this special blog post, I share with you the 1st part of my landscape photography adventure video from the Lake District.
Adventure
I love a going on a landscape photography adventure! Don't get me wrong, I'm very lucky to live in the south west of England. I've got easy access to two national parks and more coastline than I could ever photograph. Every now and again though you need to spread your wings, push your photography and get out there and visit somewhere different.
Earlier this year I had a fantastic adventure in Glencoe so I was keen to go on an adventure for autumn. But where would I go? Well, there aren't many better places to go in the UK for autumn than the Lake District.
I had given myself two and half days of photography in the Lake District. In that relatively short time, I had a list of locations that I wanted to shoot. These were a combination of locations that I had marked on my custom Google map over the years, some from my previous visit last year, and some from the excellent book Photography the Lake District.
As with my Glencoe adventure I knew I wanted to record my time at the Lake District using both photographs and videos. So in the next few blog posts not only will I be sharing with you the images that I captured but I've also created a 3 part video series so I can share the story behind the images.
Part 1 - Buttermere, Ashness, and Ullswater
Here is part 1 of the video in which you will see me photograph the lone tree on Lake Buttermere, Ashness Bridge, Ashness Jetty and Ullswater.
I hope you enjoyed the video and the images I captured. Here are the images again if you want to see them in a little more detail.


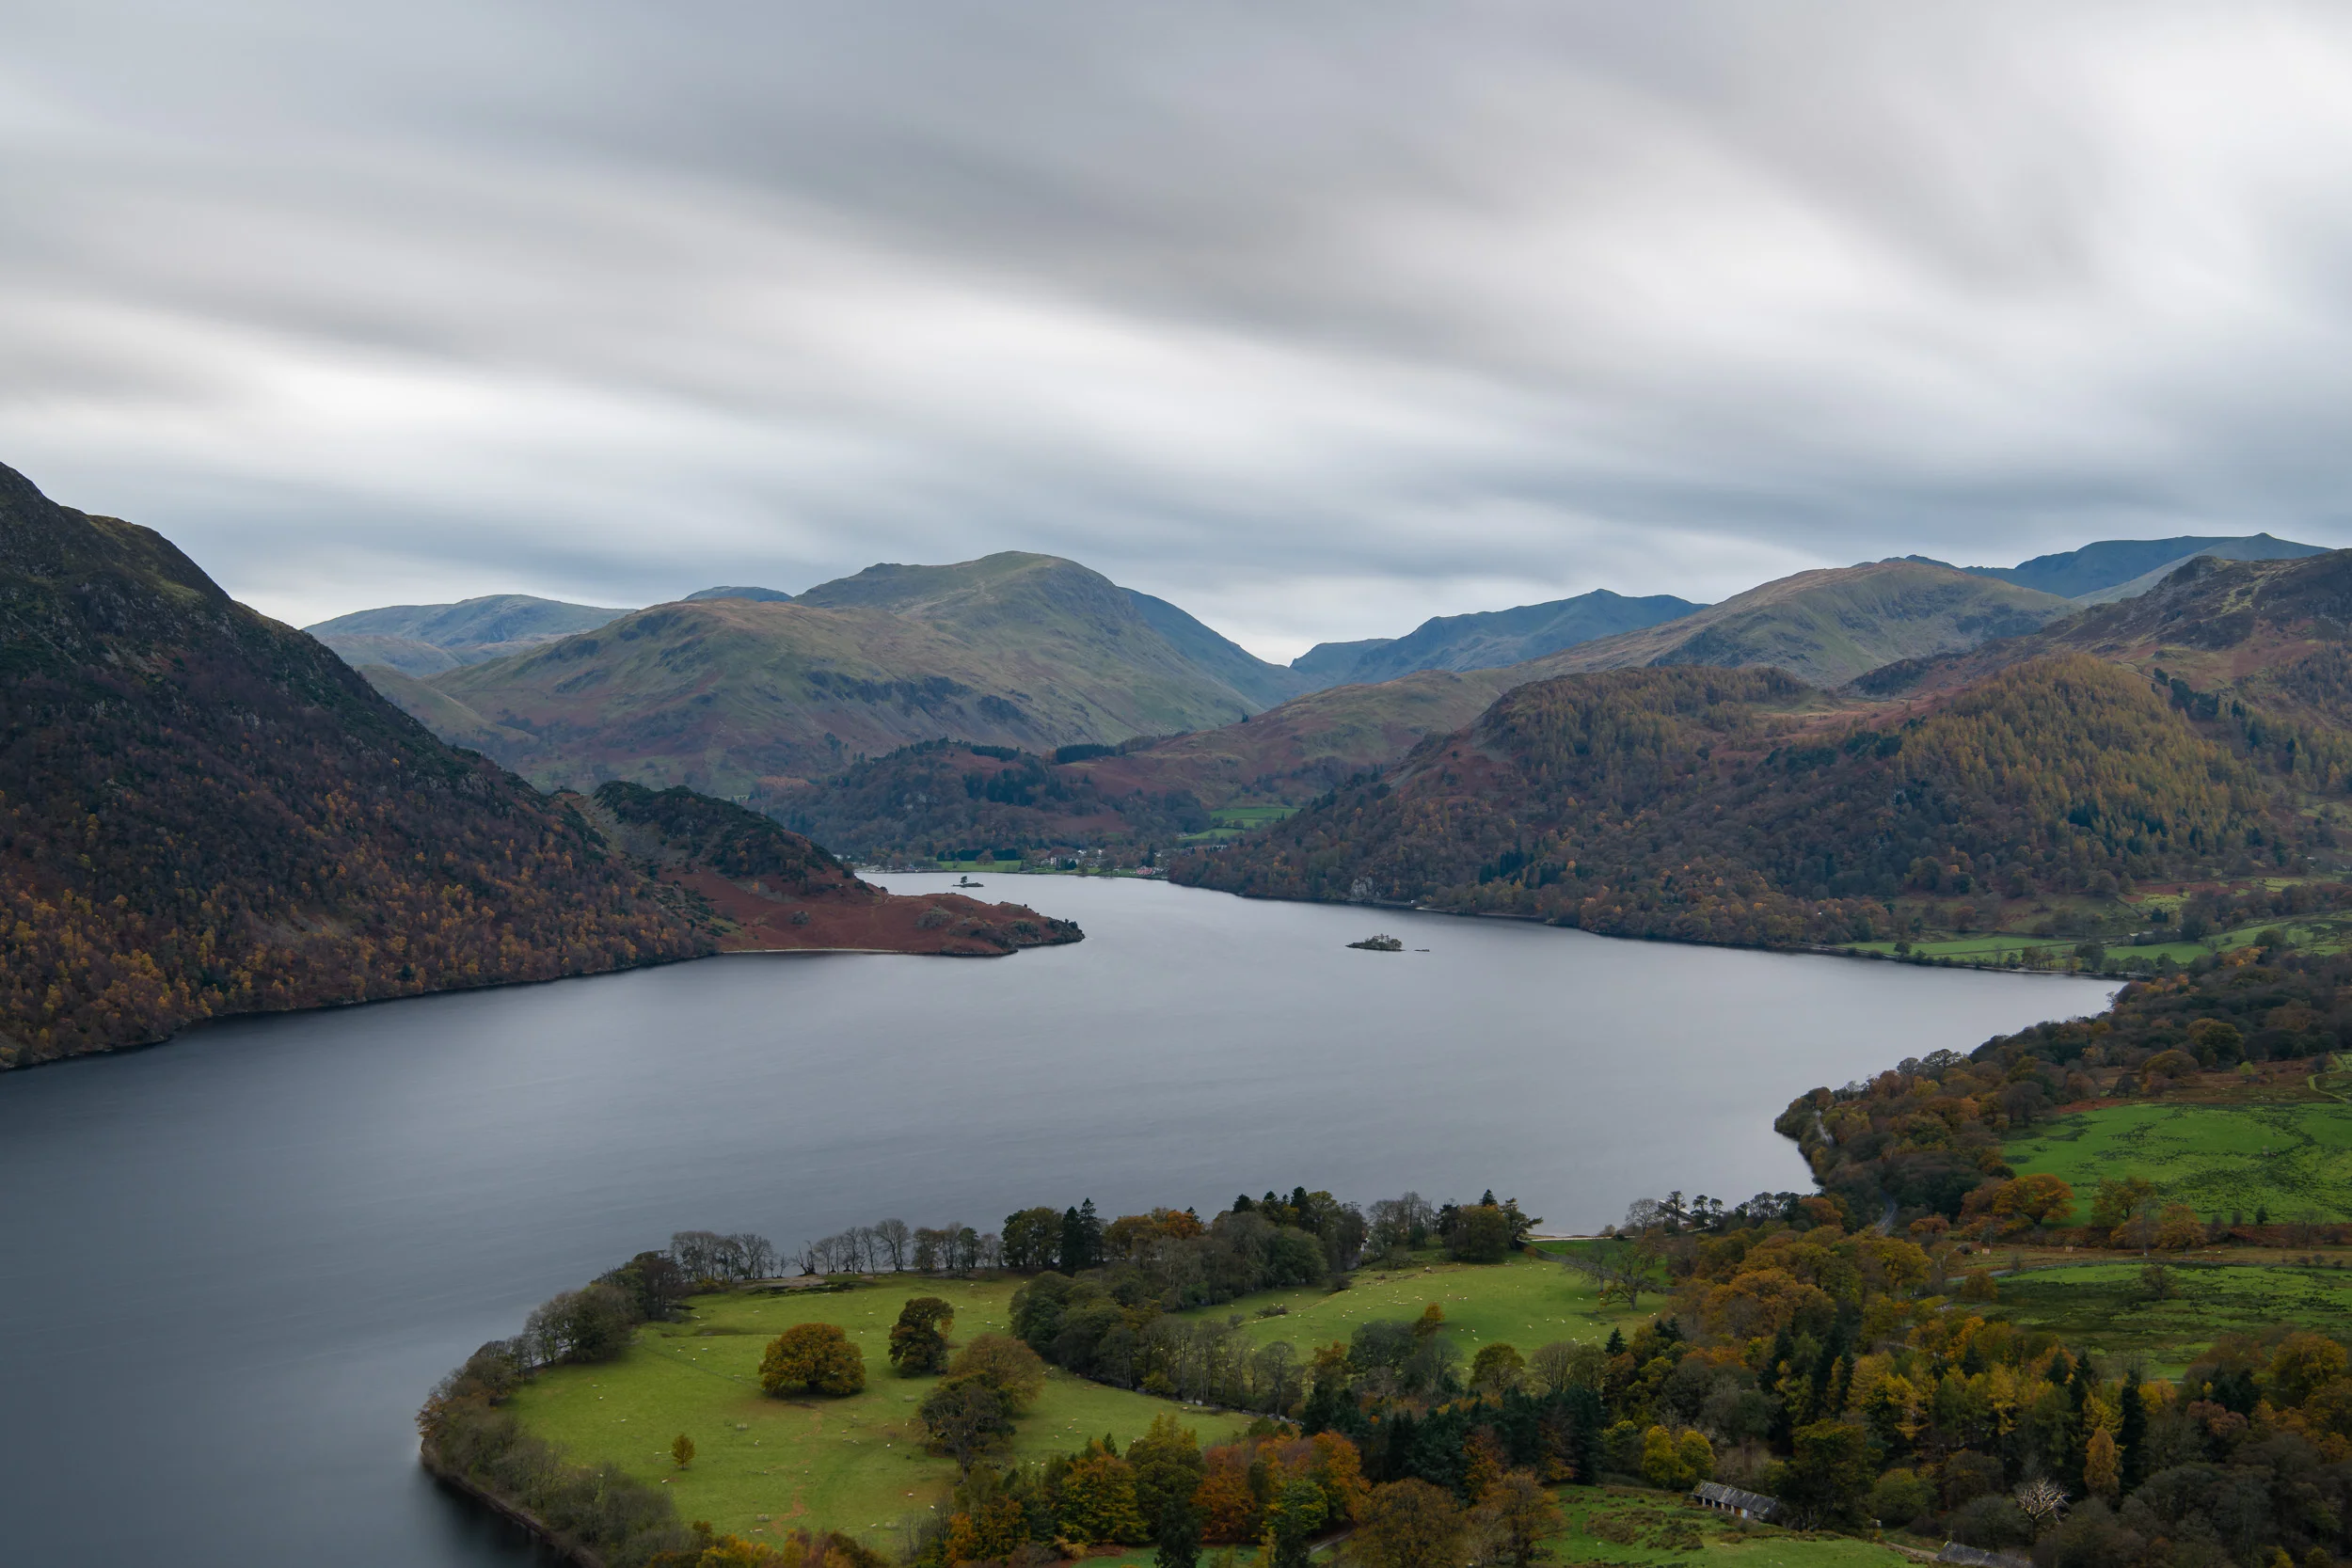
I hope you enjoyed part 1 of my Lake District adventure. I will be publishing part 2 next week so you won't have long to wait!
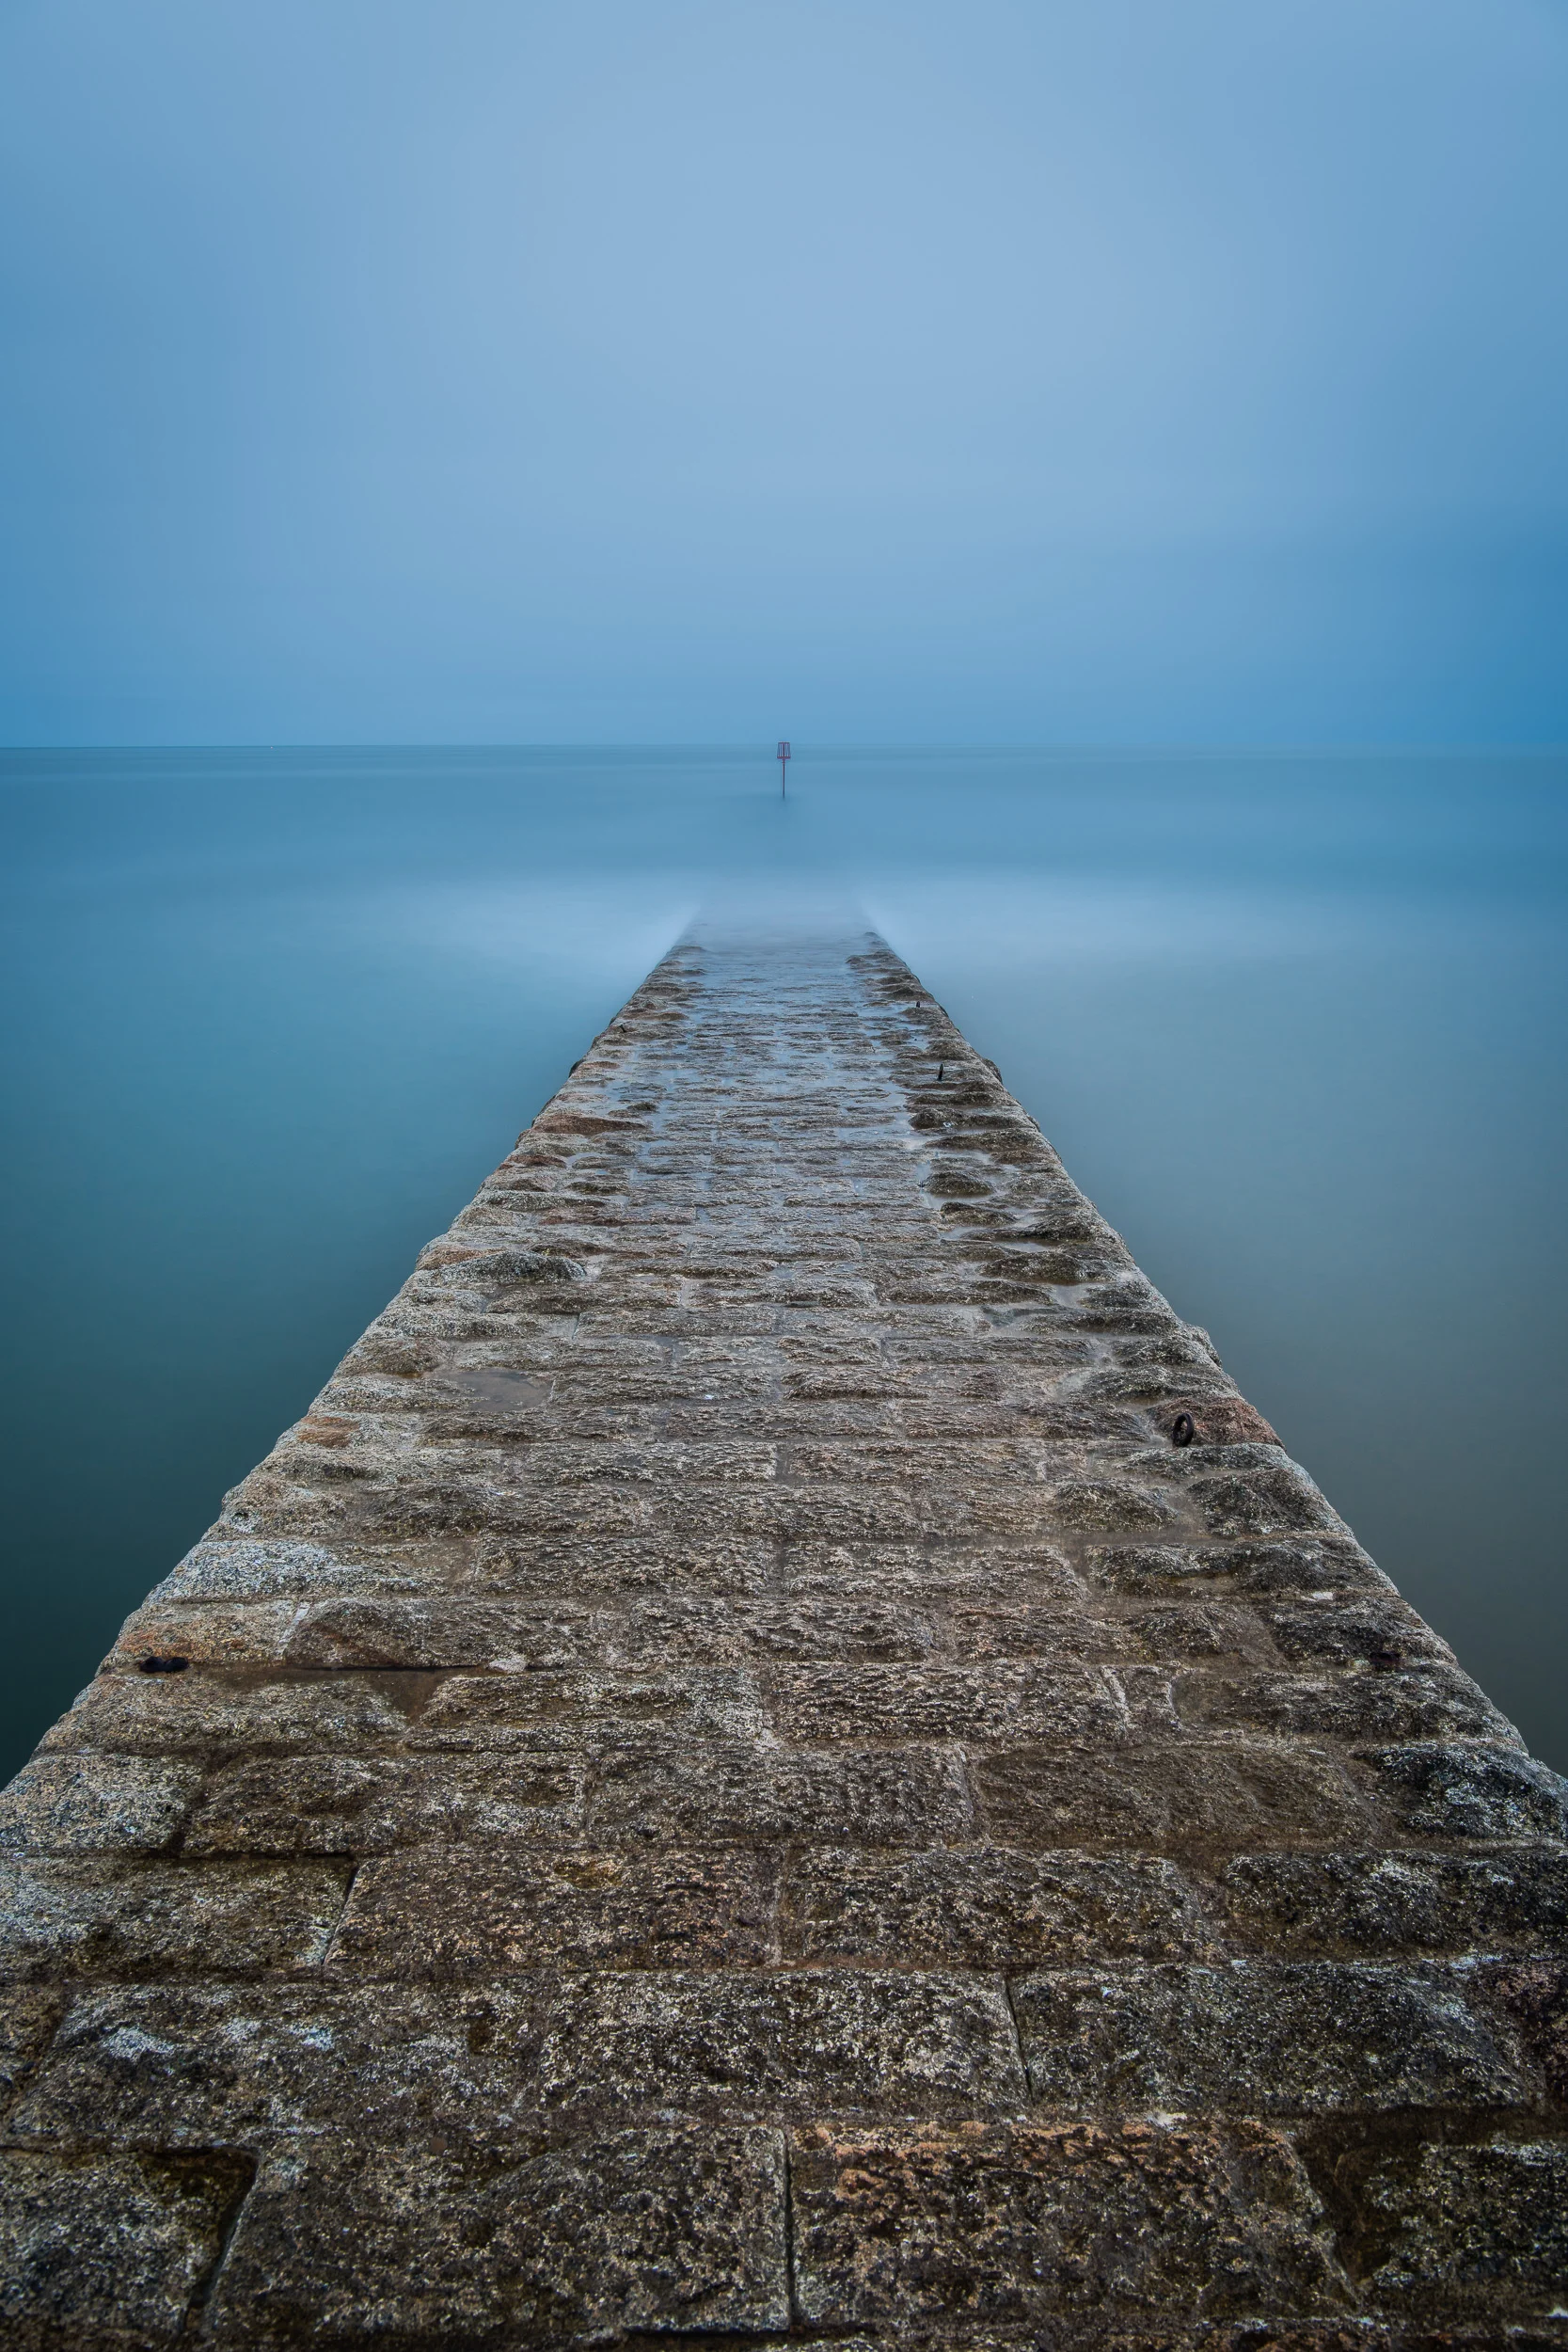
Bad Weather Photography
In the blog this week I remember to "embrace the grey" and head out to Dawlish to get some photos in less than optimal conditions.
Time to Embrace the Grey
I once went on a Nikon School one day workshop with Jeremy Walker. I remember the weather not exactly being great but one thing stuck in my mind from that day. As Jeremy was laying out the plans for the day he already knew it was going to be an overcast day. His advice was to "embrace the grey".
I did just that with this photograph:
Banjo Pier, Swanage. Nikon D750, Nikkor 16-35mm f/4 at 28mm, f/11, 30 secs, ISO 100, Lee Filters Big Stopper.
Now I may have mentioned once or twice on the blog recently that the recent weather has been playing havoc with creativity. So when the weather forecast for the week was looking grim I decided enough was enough and I was going yet again embrace the grey!
I needed to find an appropriate location to make an image but when I remembered about the stone groynes at Dawlish my mind was set. So off I headed with a clear vision of what I wanted to capture.
Despite the weather. No hang on, because of the weather, I really enjoyed myself at Dawlish. It made me look at the location with different eyes.
Here's what I photographed:
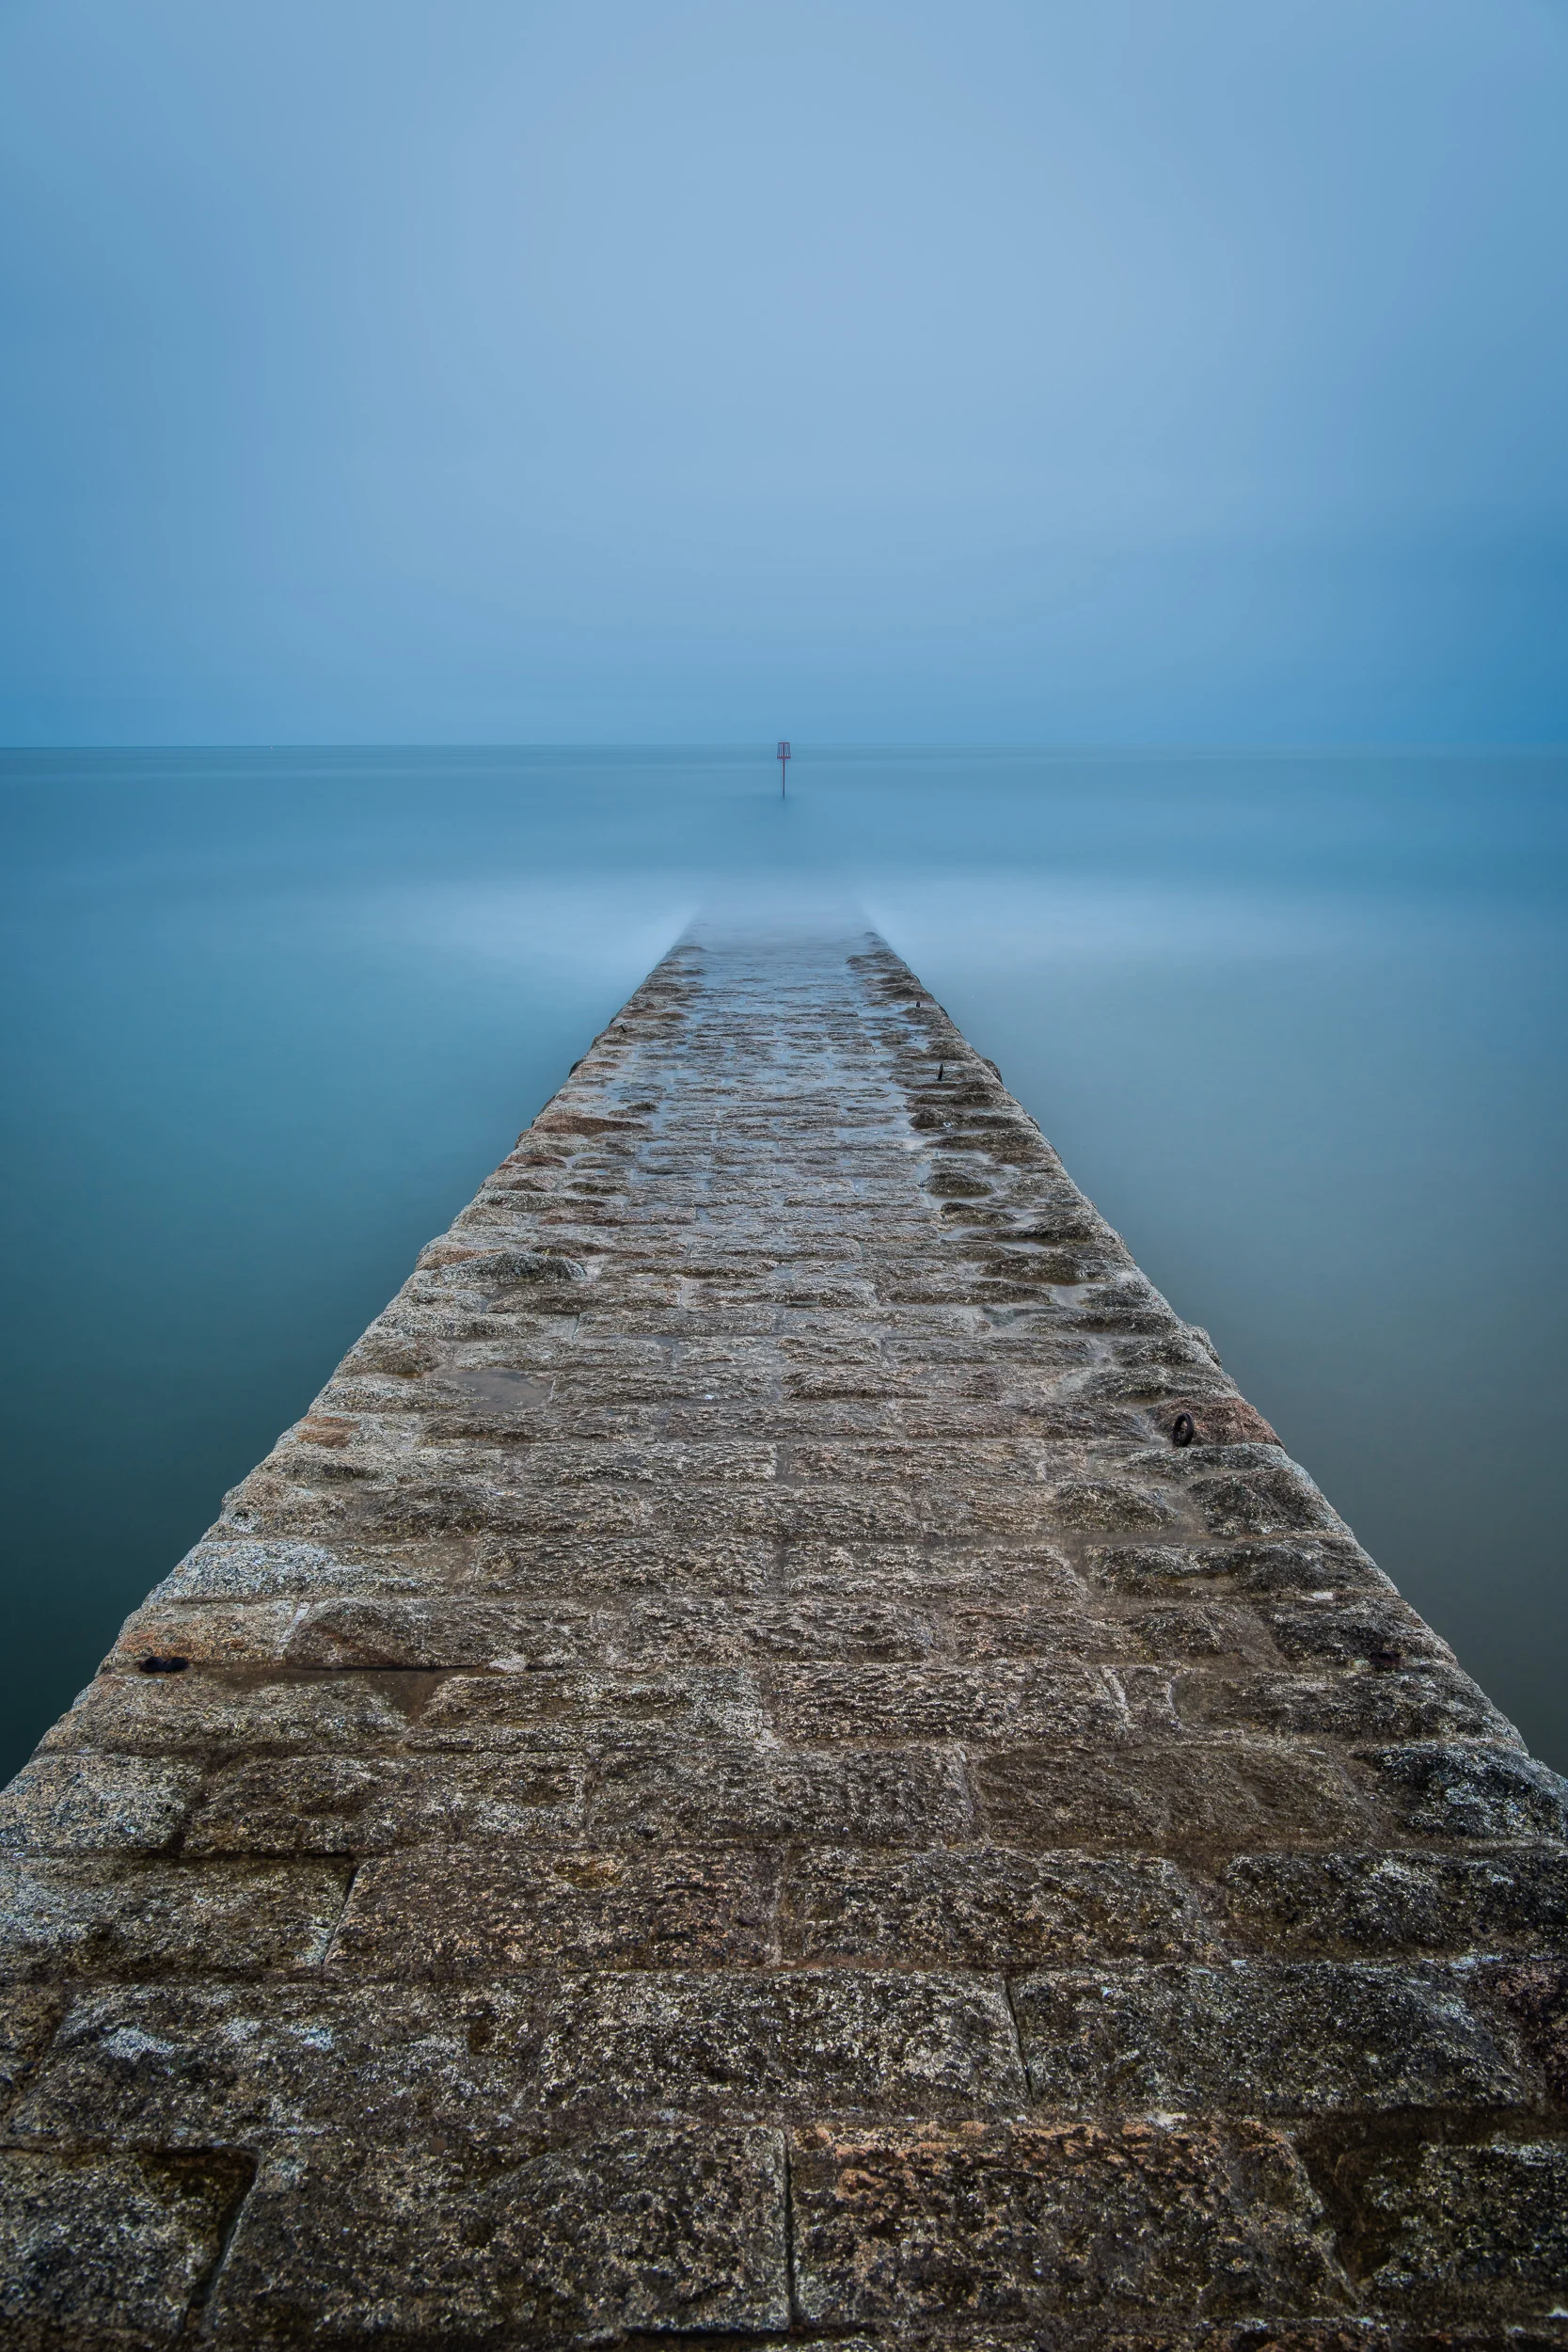
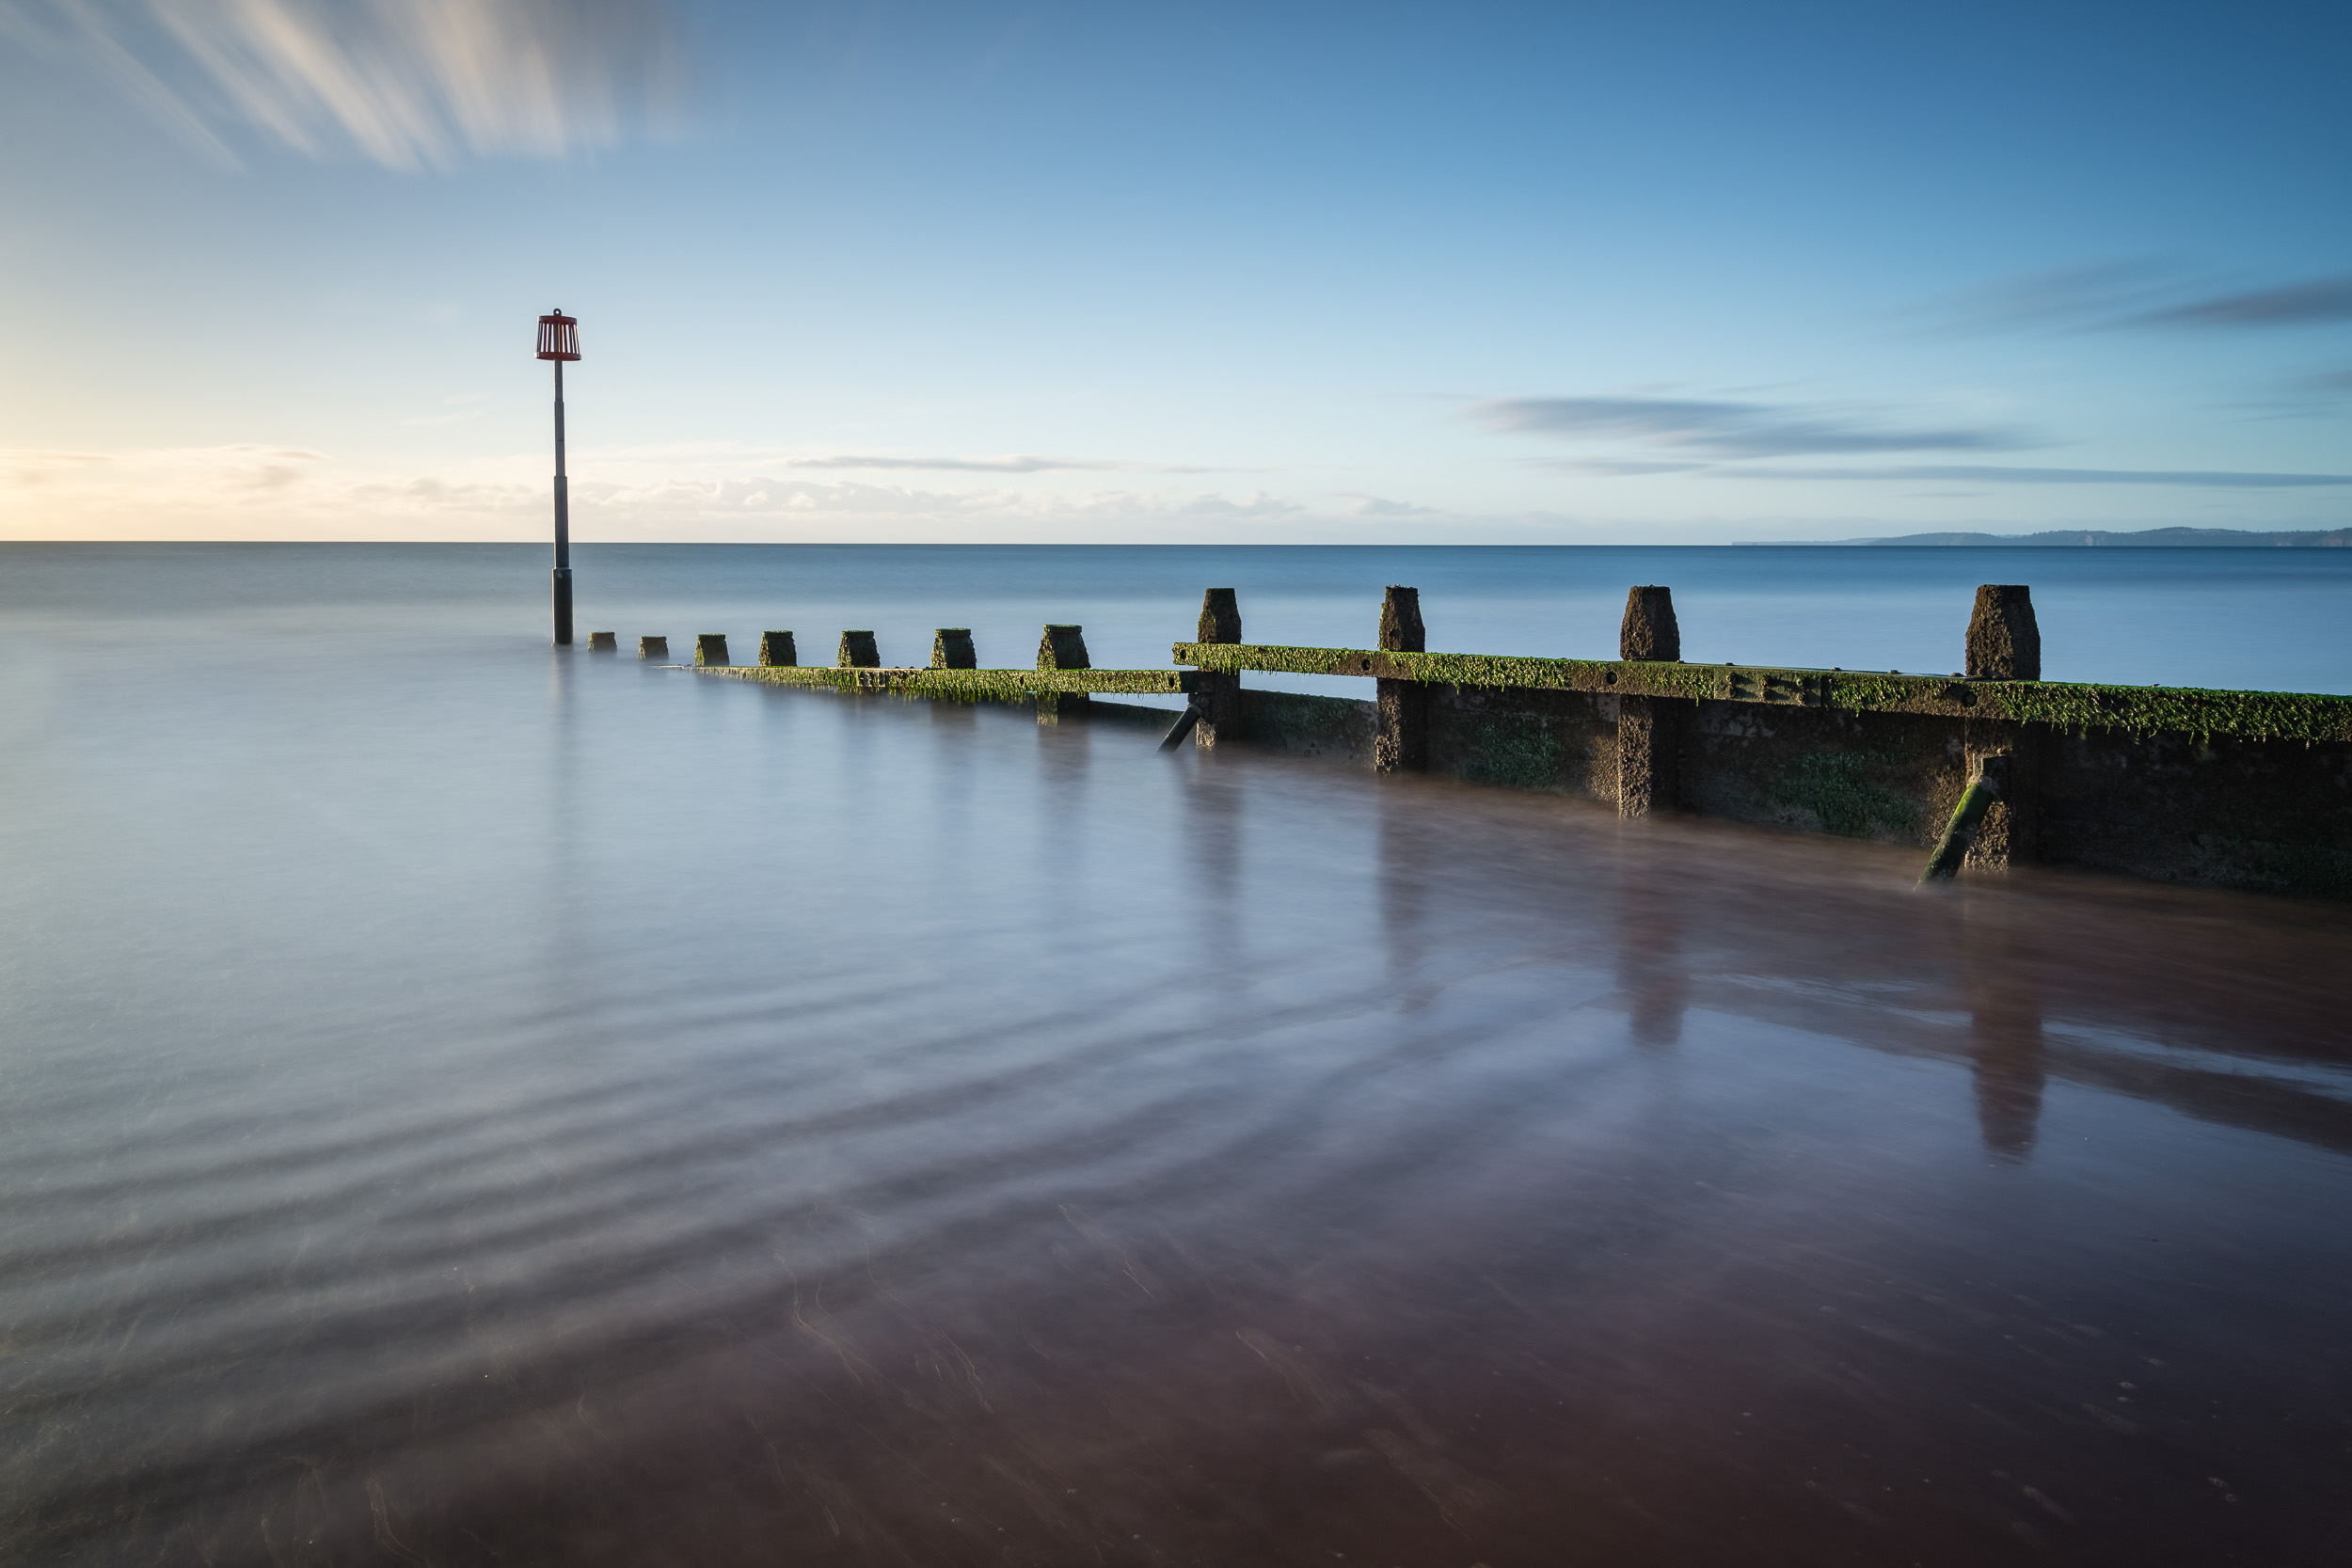
Nikon D850, Nikkor 24-70mm f/2.8 VR at 31mm, ISO 64, 5 minutes at f/11, Lee Filters Circular Polariser and Big Stopper.
If you want to see how I went about capturing the image, here's a short video I shot while I was there...
So do you have a favourite bad weather location to take photographs? Is there really such thing as bad weather for photography? Let me know in the comments below.
PS.
On a little side note, I'm very happy to say that Adobe has now updated Lightroom to support the Nikon D850. This means I no longer have to convert the files to DNG format first. I can now import the NEF (raw) files straight from my memory card. I was so happy about this I posted a video on my YouTube channel.

5 Great Landscape Photography Books - On My Bookshelf S01E01
In the blog this week I tell you about a new video series I'm creating and what my 5 favourite landscape photography books are.
A New Video Series
For me, photography books are still very important in my development as a landscape photographer. I value the experience that a book gives me. Rather than simply just scrolling through an image feed on one of the popular photo sharing sites, reading a book gives me the time to really look at a photograph. It's a more involved experience and I like the way it forces me to take time away from the computer to look at an image in detail. Besides, looking at photographs in print is always a great experience.
So I've decided to create a new series of videos for my YouTube channel called On My Bookshelf. In each video will talk about a book (or even a few books) that are important to me and tell you why. I think we all should spend more time reading photography books, and hopefully, these videos will give you some ideas on what to read next.
5 Great Landscape Photography Books
For my first video in this series, I tell you about my 5 favourite landscape photography books.
I hope you enjoyed the video and that it has inspired you to grab your favourite photography book. If you are interested in picking up any of the books I mentioned in the video, you can use the following links:
The Causeway Coast by Steven Hanna (ISBN 978-0857043047) - Amazon or direct from Steven for signed copy
The Art of Landscape Photography by Ross Hoddinott and Mark Bauer (ISBN 978-1781450529) - Amazon
Wildlife Photographer of the Year: Portfolio 26 (ISBN 978-0565093952) - Amazon
Photographing Cornwall and Devon by Adam Burton (ISBN 978-0992905132) - Amazon
Landscape Photographer of the Year: Collection 1 (ISBN 978-0749552244) - Amazon
The links used above are Amazon affiliate links. By buying through the links I may receive a commission for the sale. This has no effect on the price for you.
There are a number of exciting landscape photography books coming out over the next few months so be sure to subscribe to my YouTube channel so you get notified when I publish a new episode of On My Bookshelf!
So do you have a favourite photography book? Which photography book are looking forward to seeing next? Let me know in the comments below.

On Location with the Nikon D850: Froward Point
In the blog this week I share with you my latest video on the Nikon D850. Watch I as I go on location to shoot some seascape images at Froward Point in Devon. I take you through my workflow on how I setup the camera and how I'm using some of the features of the D850. I then head home where I process, print and review the image.
Getting to Know the Nikon D850
Since getting my Nikon D850 I haven't been out to take photographs with it as much as I hoped I would. The bad weather at the moment always seems to know when I have time to go out with the camera. However, I was treated to an epic sunset up on Dartmoor the other day. I got some wonderful images and I'll be sharing them on my blog in the near future.
The Nikon D850 is performing very well and is delivering me some wonderful raw files full of dynamic range. I just wish I didn't have to convert them to DNG first....c'mon Adobe, update Lightroom, please! LR issues aside this is a great camera and so I wanted to do a follow up to my Nikon D850 Initial Impressions video. This video is my most popular video on YouTube to date and there seemed to be a real desire from people to know more about some of the capabilities of this camera.
So in this video, I take the Nikon D850 out to photograph seascape images at Froward Point in Devon. This time I take a closer look at my workflow and how I put some of the features of the Nikon D850 to work.
Froward Point
I've talked about Froward Point a couple of times on the blog and in my videos, but in case you don't know where it is, here it is on the map:
So onto the image itself. Unfortunately, I didn't get the light I was after but I'm still reasonably happy with the image I took.
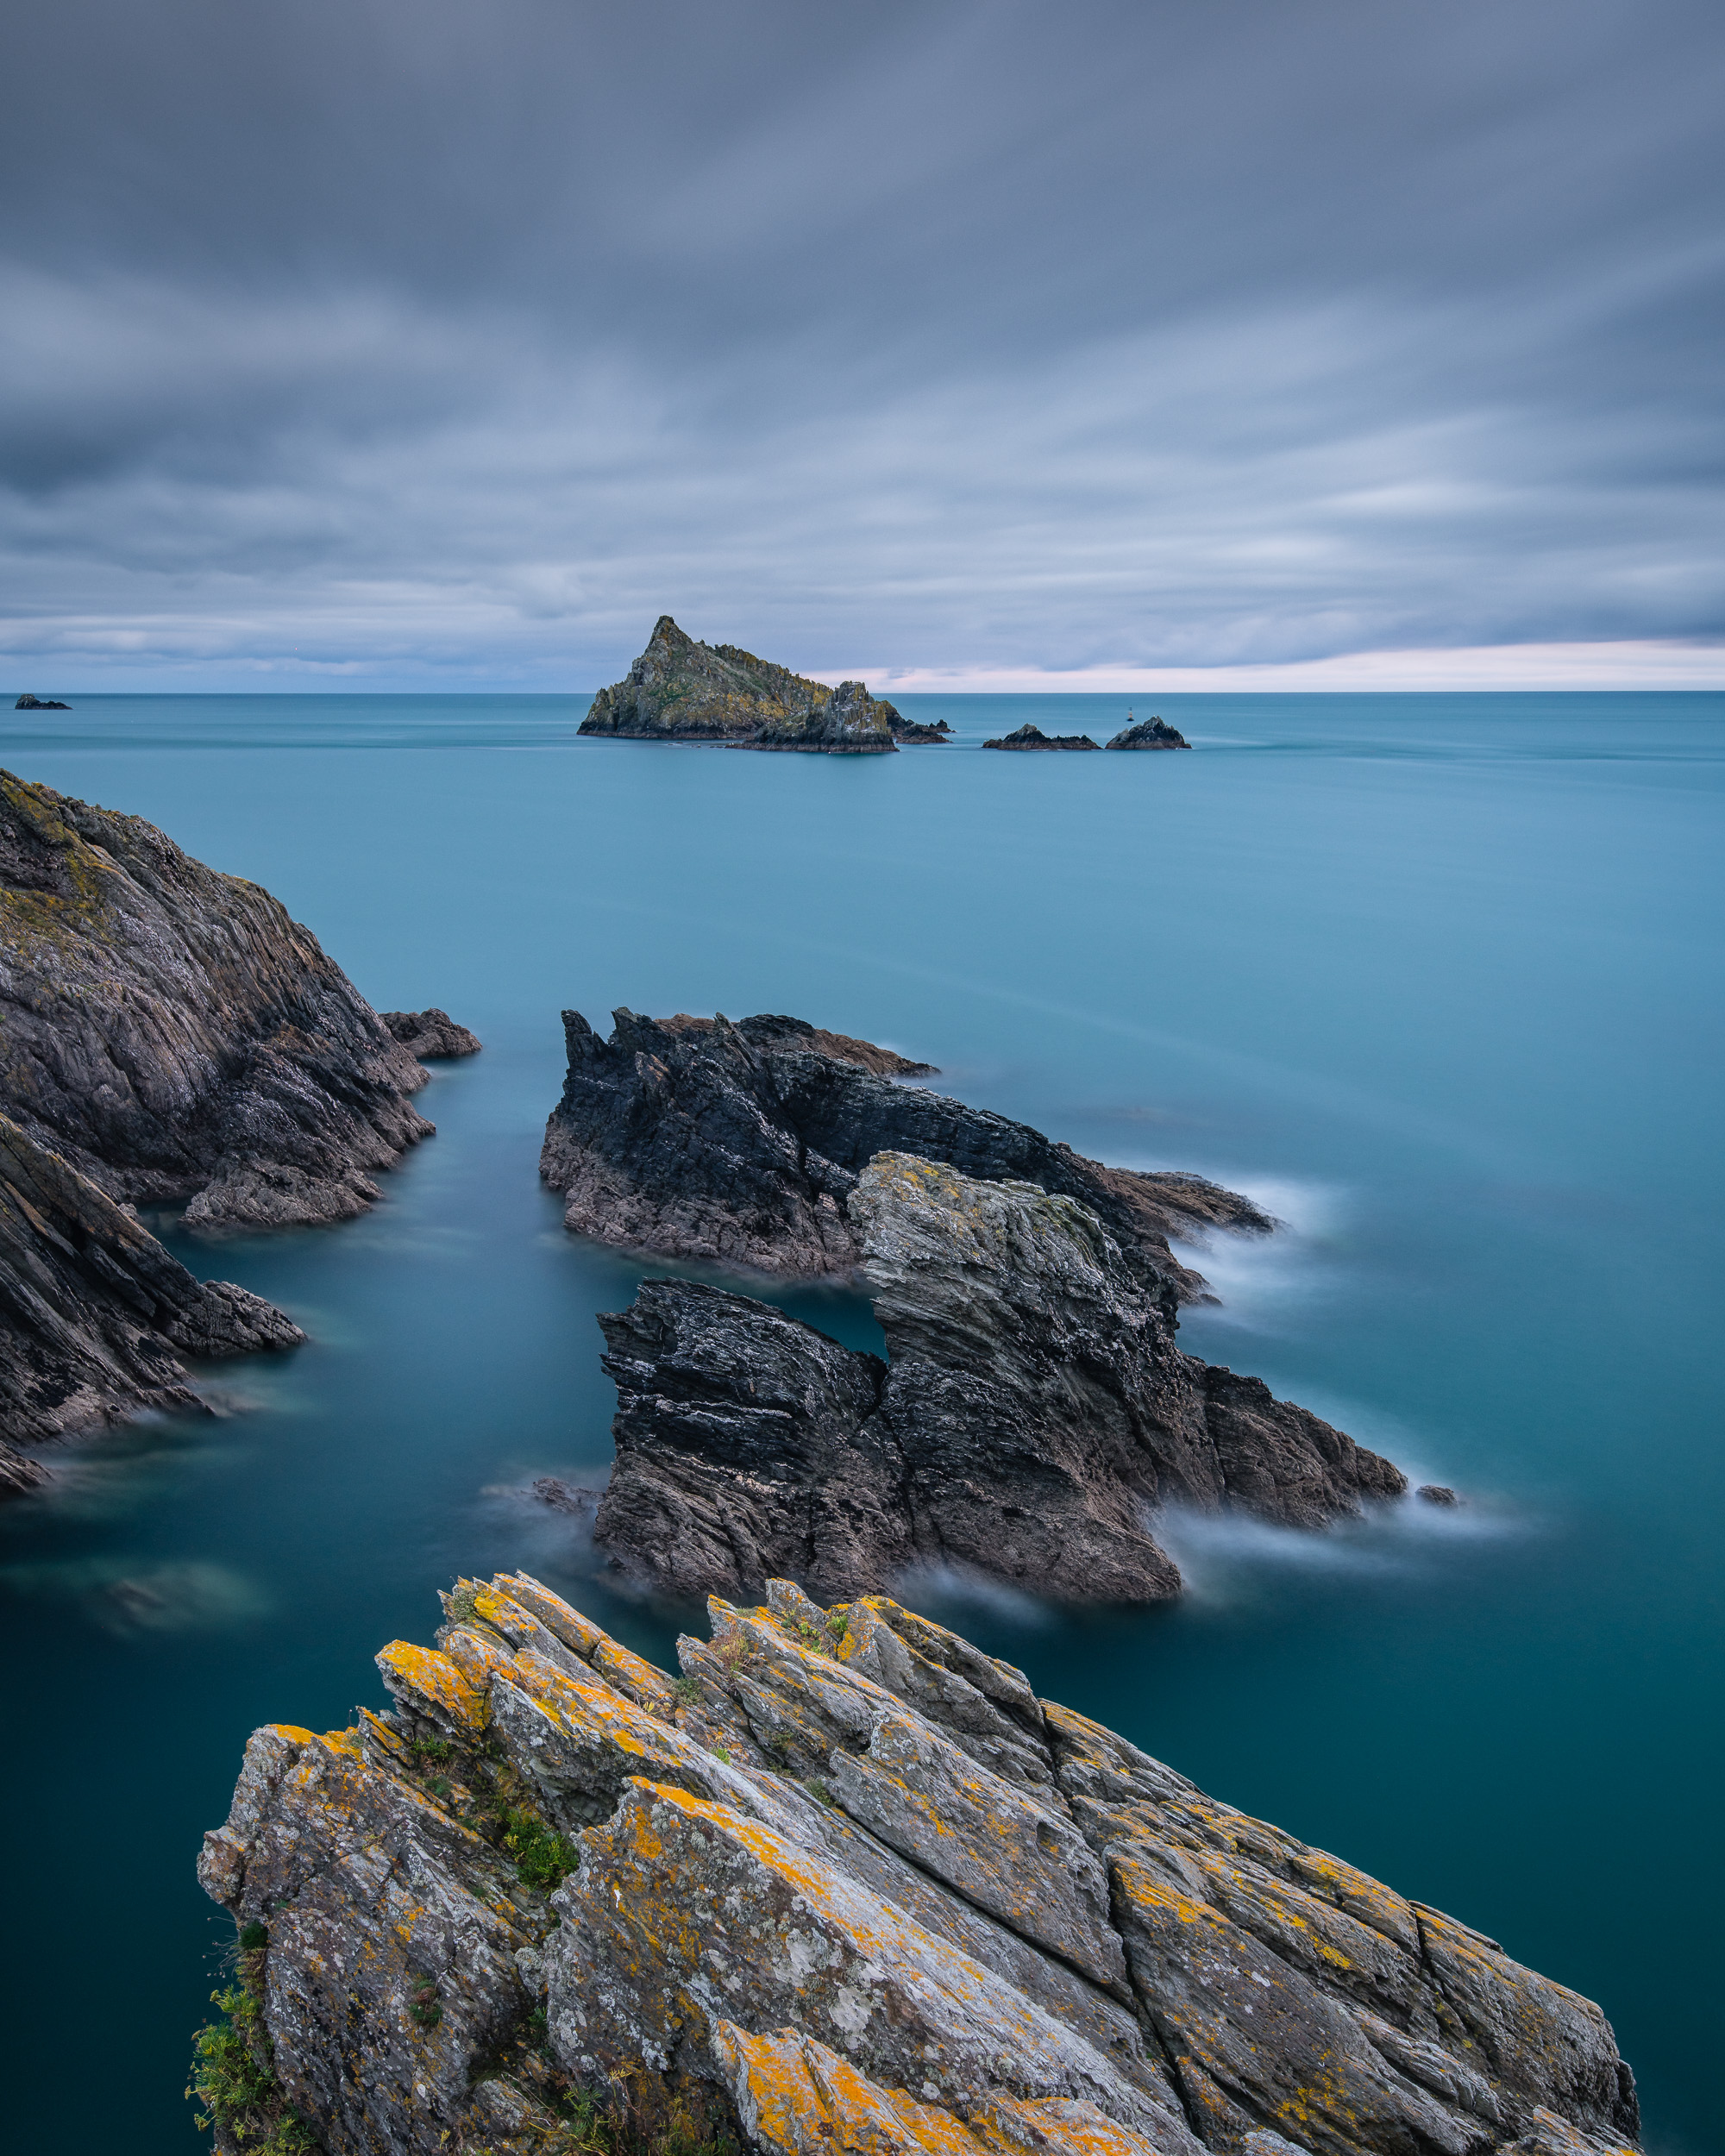
Nikon D850, Nikkor 16-35mm f/4 @ 29mm, ISO 64, 180 secs at f/10. Lee Filters circular polariser and 3 stop medium edge ND grad.
While the image might not be one that goes in the portfolio it was, as always, good to get out with the camera. I'm still familiarising myself with the D850 so time with the camera at the moment is even more important. Overall though I only have positive things to say about the D850 and I'm looking forward to shooting even more with it.
So have you been to Froward Point? What new feature in the D850 interests you? Let me know in the comments below.

My YouTube Channel is 1 Year Old
In this blog post, I celebrate my YouTube channel's first birthday. I talk about why I started the channel and show you some of my most important videos.
Another Birthday!
I recently celebrated the first birthday of my blog and now I'm pleased to say that my YouTube channel is doing the same!
My blog was an easy way for me to journal and share my photography stories, but it soon became apparent to me that creating videos would be a natural extension of this. As with most things though it wasn't as straightforward as I thought it might be, but once I had started I was determined to keep going with it and improve.
My First YouTube Video
My first video, which you can see below, was on drone photography. The story was that I would leave my big Nikon camera behind and see what landscape images I could capture using my DJI Phantom 3. Looking back it's a bit rough around the edges, but as a first VLOG, it was to bad!
My first video on my YouTube channel.
After that video, I created a few others with varying degrees of success. I covered topics such as My Top 5 Landscape Photography Locations in Devon, Creating a Custom Google Map, and How to Use ND Filters. I found the filming hard work. There was a lot to deal with on top of just taking pictures. I had to worry about audio, repeat takes, camera position etc. Then back in post-production, I had to learn how to edit, merge audio to video, export and publish. However, once a video was published there was a great sense of satisfaction.
The Big Adventure
What really keeps me creating new content is the fact that people actually watched my videos. Not in huge numbers, not like a Thomas Heaton, but enough people left positive comments to make me want to carry on. Much in the same way people did with my blog.
So when I decided to spend a few days in Glencoe in March I thought it would be an adventure worth documenting.
My Glencoe adventure video really seemed to hit a mark with people and it gave my subscriber count a significant boost. It was another turning point for my channel and rather than doing videos when I could I started adding video to my regular publishing schedule.
The 5 Minute Adventures
While the longer and more adventurous videos are great to make, they are a significant investment in time and can sometimes take weeks to get done. I wanted to create more videos but with a day job and a family, having the time to create long videos was difficult to find.
After a few people commented on how the liked some of my shorter videos and that enabled them to watch them more readily, I decided to start the 5 Minute Photo Adventure Series. The idea was simple really. I would go to a single location, talk about what I had planned, what I was doing and shoot an image. With just a single location and shot to plan for the production time was much reduced and so I could create more videos.
Here is one of my favourite 5 Minute Photo Adventure videos, but you can watch the entire series by clicking here.
The Nikon D850 Video
I was very excited about the purchase of my Nikon D850 and I was fortunate enough to get one of the day of release. In all the excitement I decided to make a video on my initial experiences. I posted up the video and within 24 hrs it was approaching 10,000 views! This was twice as many views as my Glencoe video ever had. There was an obvious demand for D850 on YouTube and thanks to some good timing I think I had managed to capitalize on that.
The D850 video is by far my most popular video and has given me the biggest subscriber boost.
The Future
I've got a number of videos planned in for the remainder of the year. I'll keep doing my 5 Minute Photo Adventure videos and I have a few bigger adventure videos planned as well. I'm also aiming to do a follow-up drone video and a follow-up video on printing. So there should be something there for all my 1900+ subscribers (never thought I'd get that many!).
So have you checked out my YouTube channel? Do you have a favourite video? Is there a video you'd like to see my make or a location you want me to visit? Let me know in the comments below.

Nikon D850 Exposed - Unboxing, Capture, Process and Print
In this special blog post and video, I take a look at the new Nikon D850. I unbox it and take it out to Dartmoor to capture some images. Back home I process and print the images and give you my first impressions of the camera.
A Little Camera History
My first full frame camera was the Nikon D600 which was released in September 2012. As many people know this camera had a few problems with oil leaking onto the sensor. Despite a number of product recalls the product was eventually replaced by the D610 in October 2013. I was lucky though as Nikon replaced my D600 with a new D610 under warranty.
In July 2014 Nikon announced the Nikon D810 and this was followed up by the release of the D750 in September of the same year. After only a short time with the D610 I decided that I was going to upgrade again. I looked at both cameras but at the time I felt I couldn't justify the cost of the D810, nor would I probably benefit from what it offered.
The D750, on the other hand, had a few of killer features. It had the flippy out LCD screen, high ISO capabilities, and WiFi built in. While the latter two would only really benefit my music photography, the flippy out LCD would be great for my landscape work. So I sold my (almost new) Nikon D610 and purchased the D750.
It's Finally Here
The D750 continued to be my main camera for the next three years until the D850 appeared on my doorstep the other day. I had been considering an upgrade for around a year but there was nothing really to upgrade to. The Nikon D810 was still a great camera, but I would miss some of those great D750 features.
I wasn't going to change camera systems either. Sure the Sony mirrorless technology is very attractive, and the new Fuji mirrorless medium format camera is a landscape photographers dream, However, the transition to either system would be costly and neither was that well suited to my music photography.
So when I saw the D850 announcement and looked at the specification list it ticked all my boxes. When pre-orders became available I was ordering within minutes! This was going to be a significant investment for me but I feel I'm at a point in my photography journey that I can justify the upgrade. Thanks to part-ex with WEX I can offset some of the cost by trading in my D750.
Using the D850
So now that I have the D850, what is it like? To document my experience from unboxing to capturing my first landscape image, processing it and finally printing it I have created this video.
I would have like to have used the camera for the first time in better circumstances but the weather was just proving too problematic. Venford Falls was a good option but looking at the images a lot of foliage is being blown about by the wind. The falls really look their best in spring time when everything is green, fresh and lush.
However, even with the challenging conditions, the camera was able to produce images with great tones, colour, and contrast.
A metered exposure of 30 seconds gives great results.
This image is the same as the previous image but at 8 seconds this image was deliberately underexposed. However, there was no apparent loss in quality when the darker areas of the image were recovered.
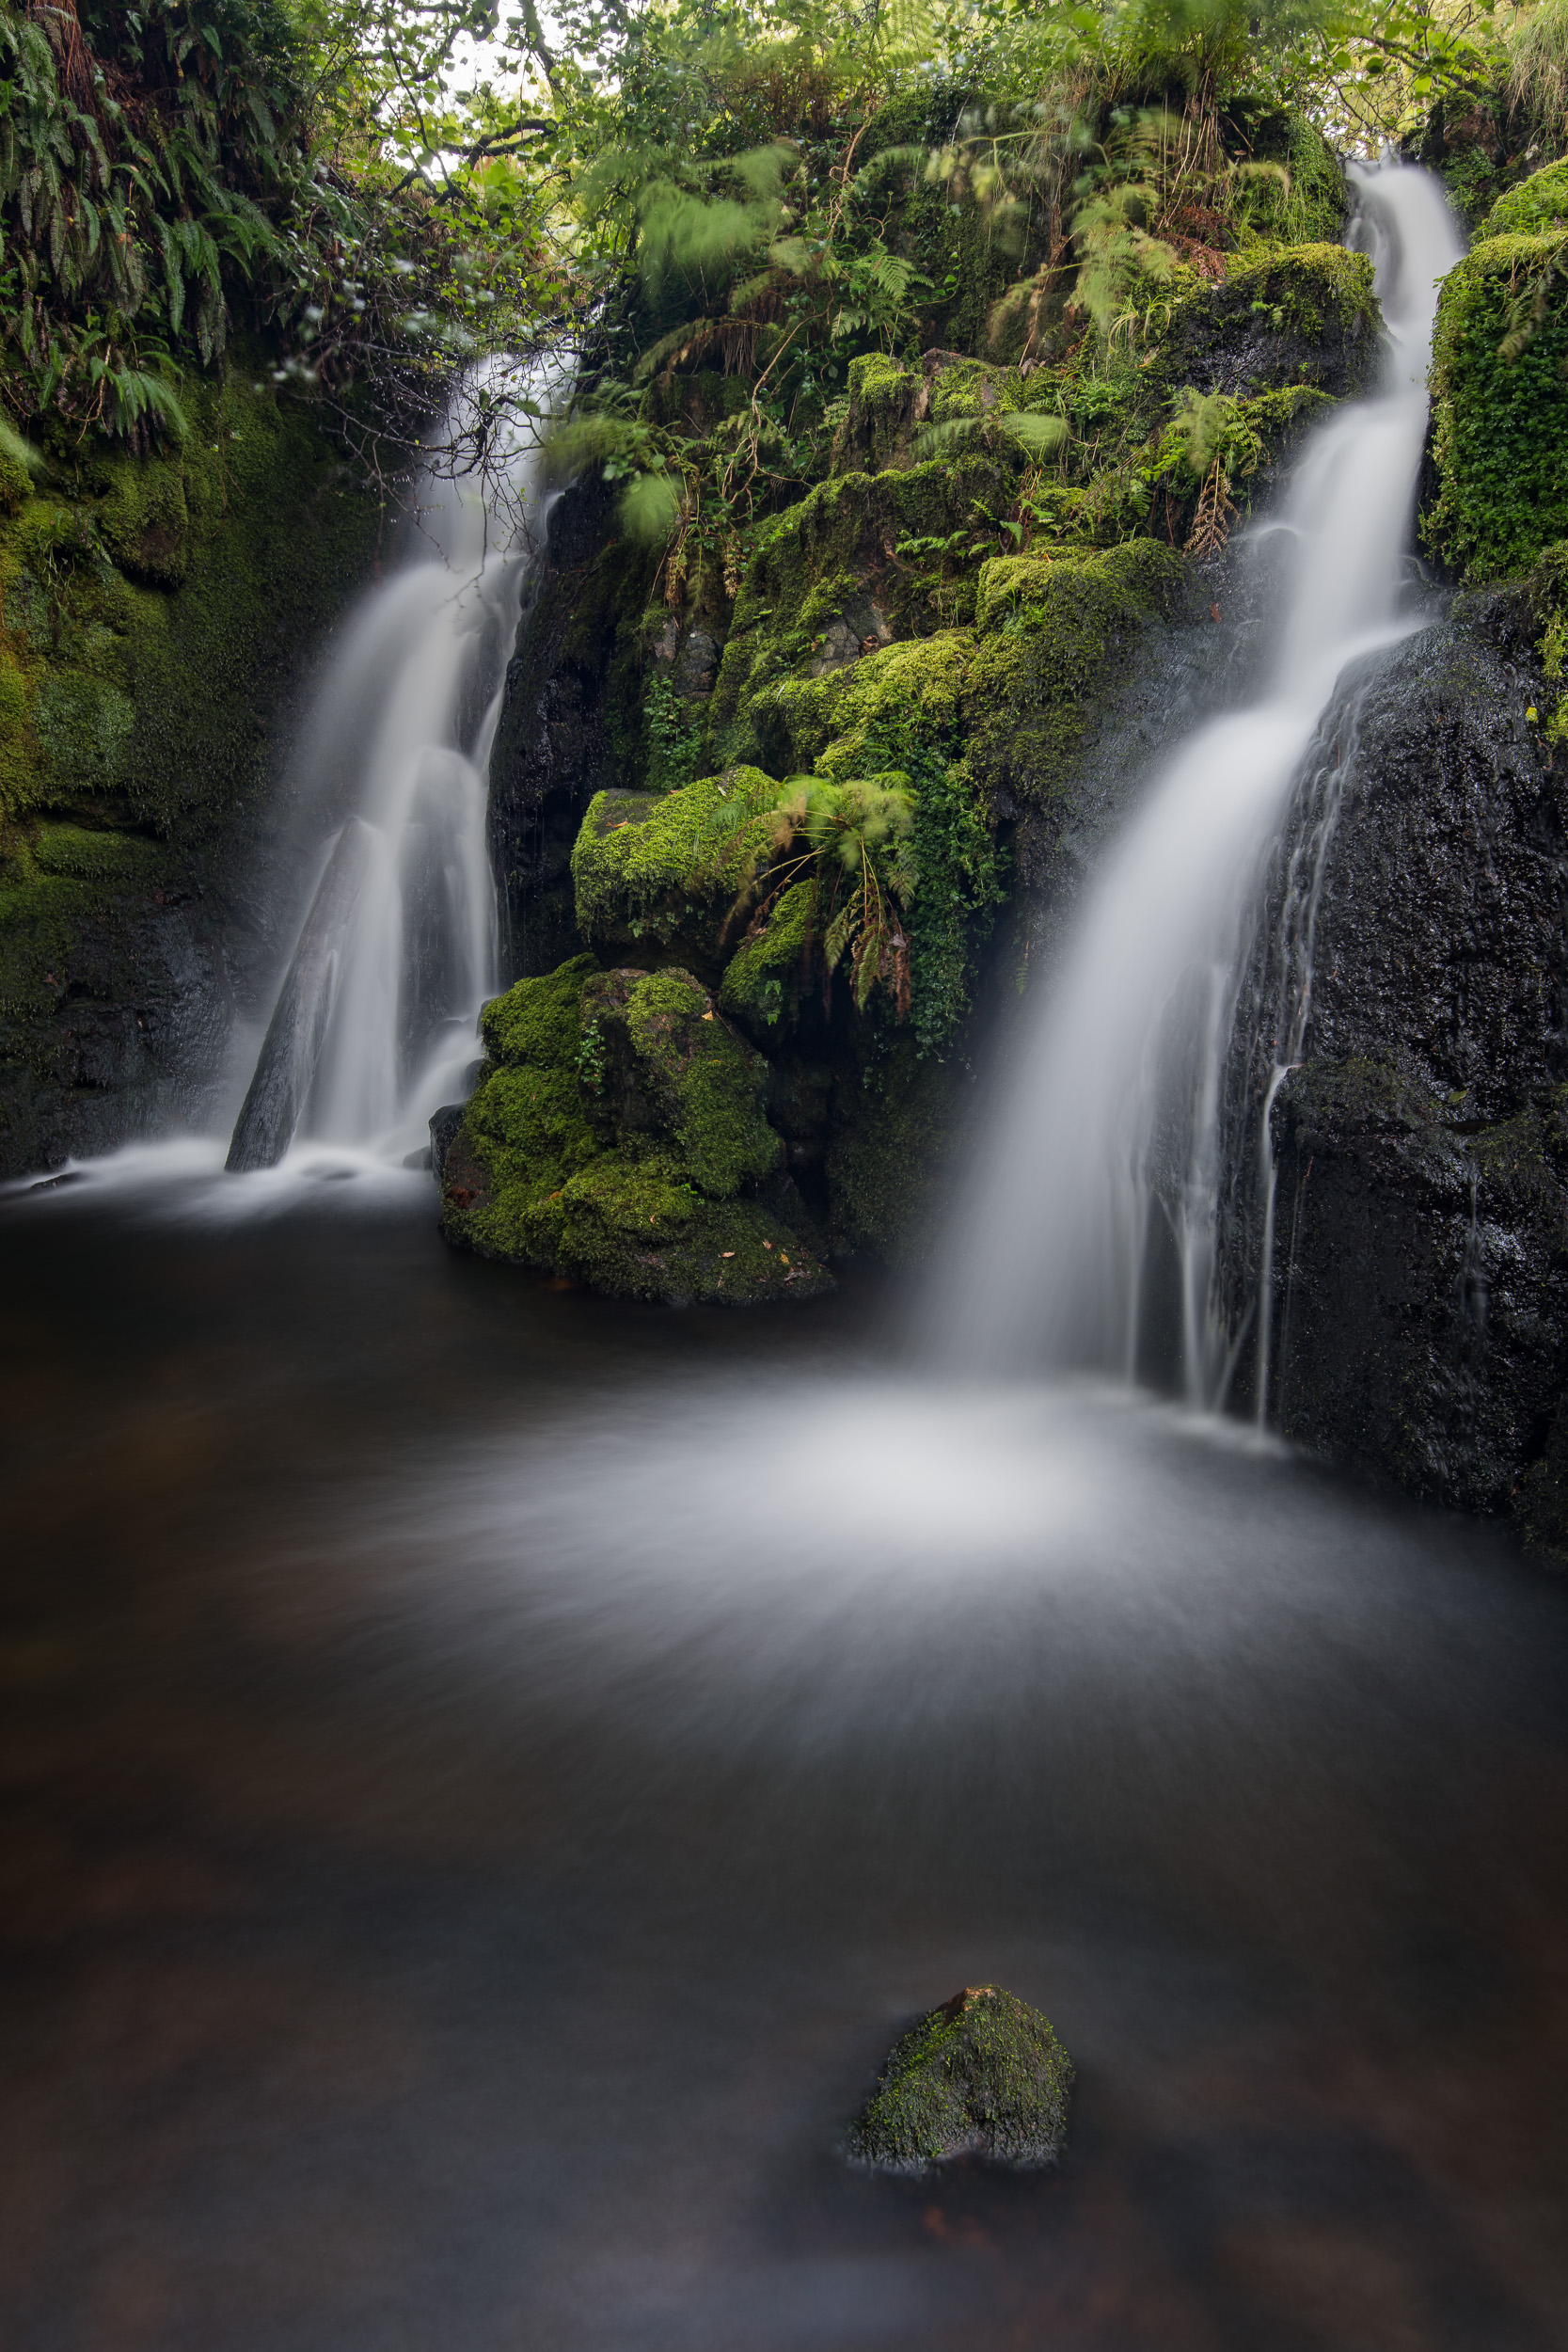
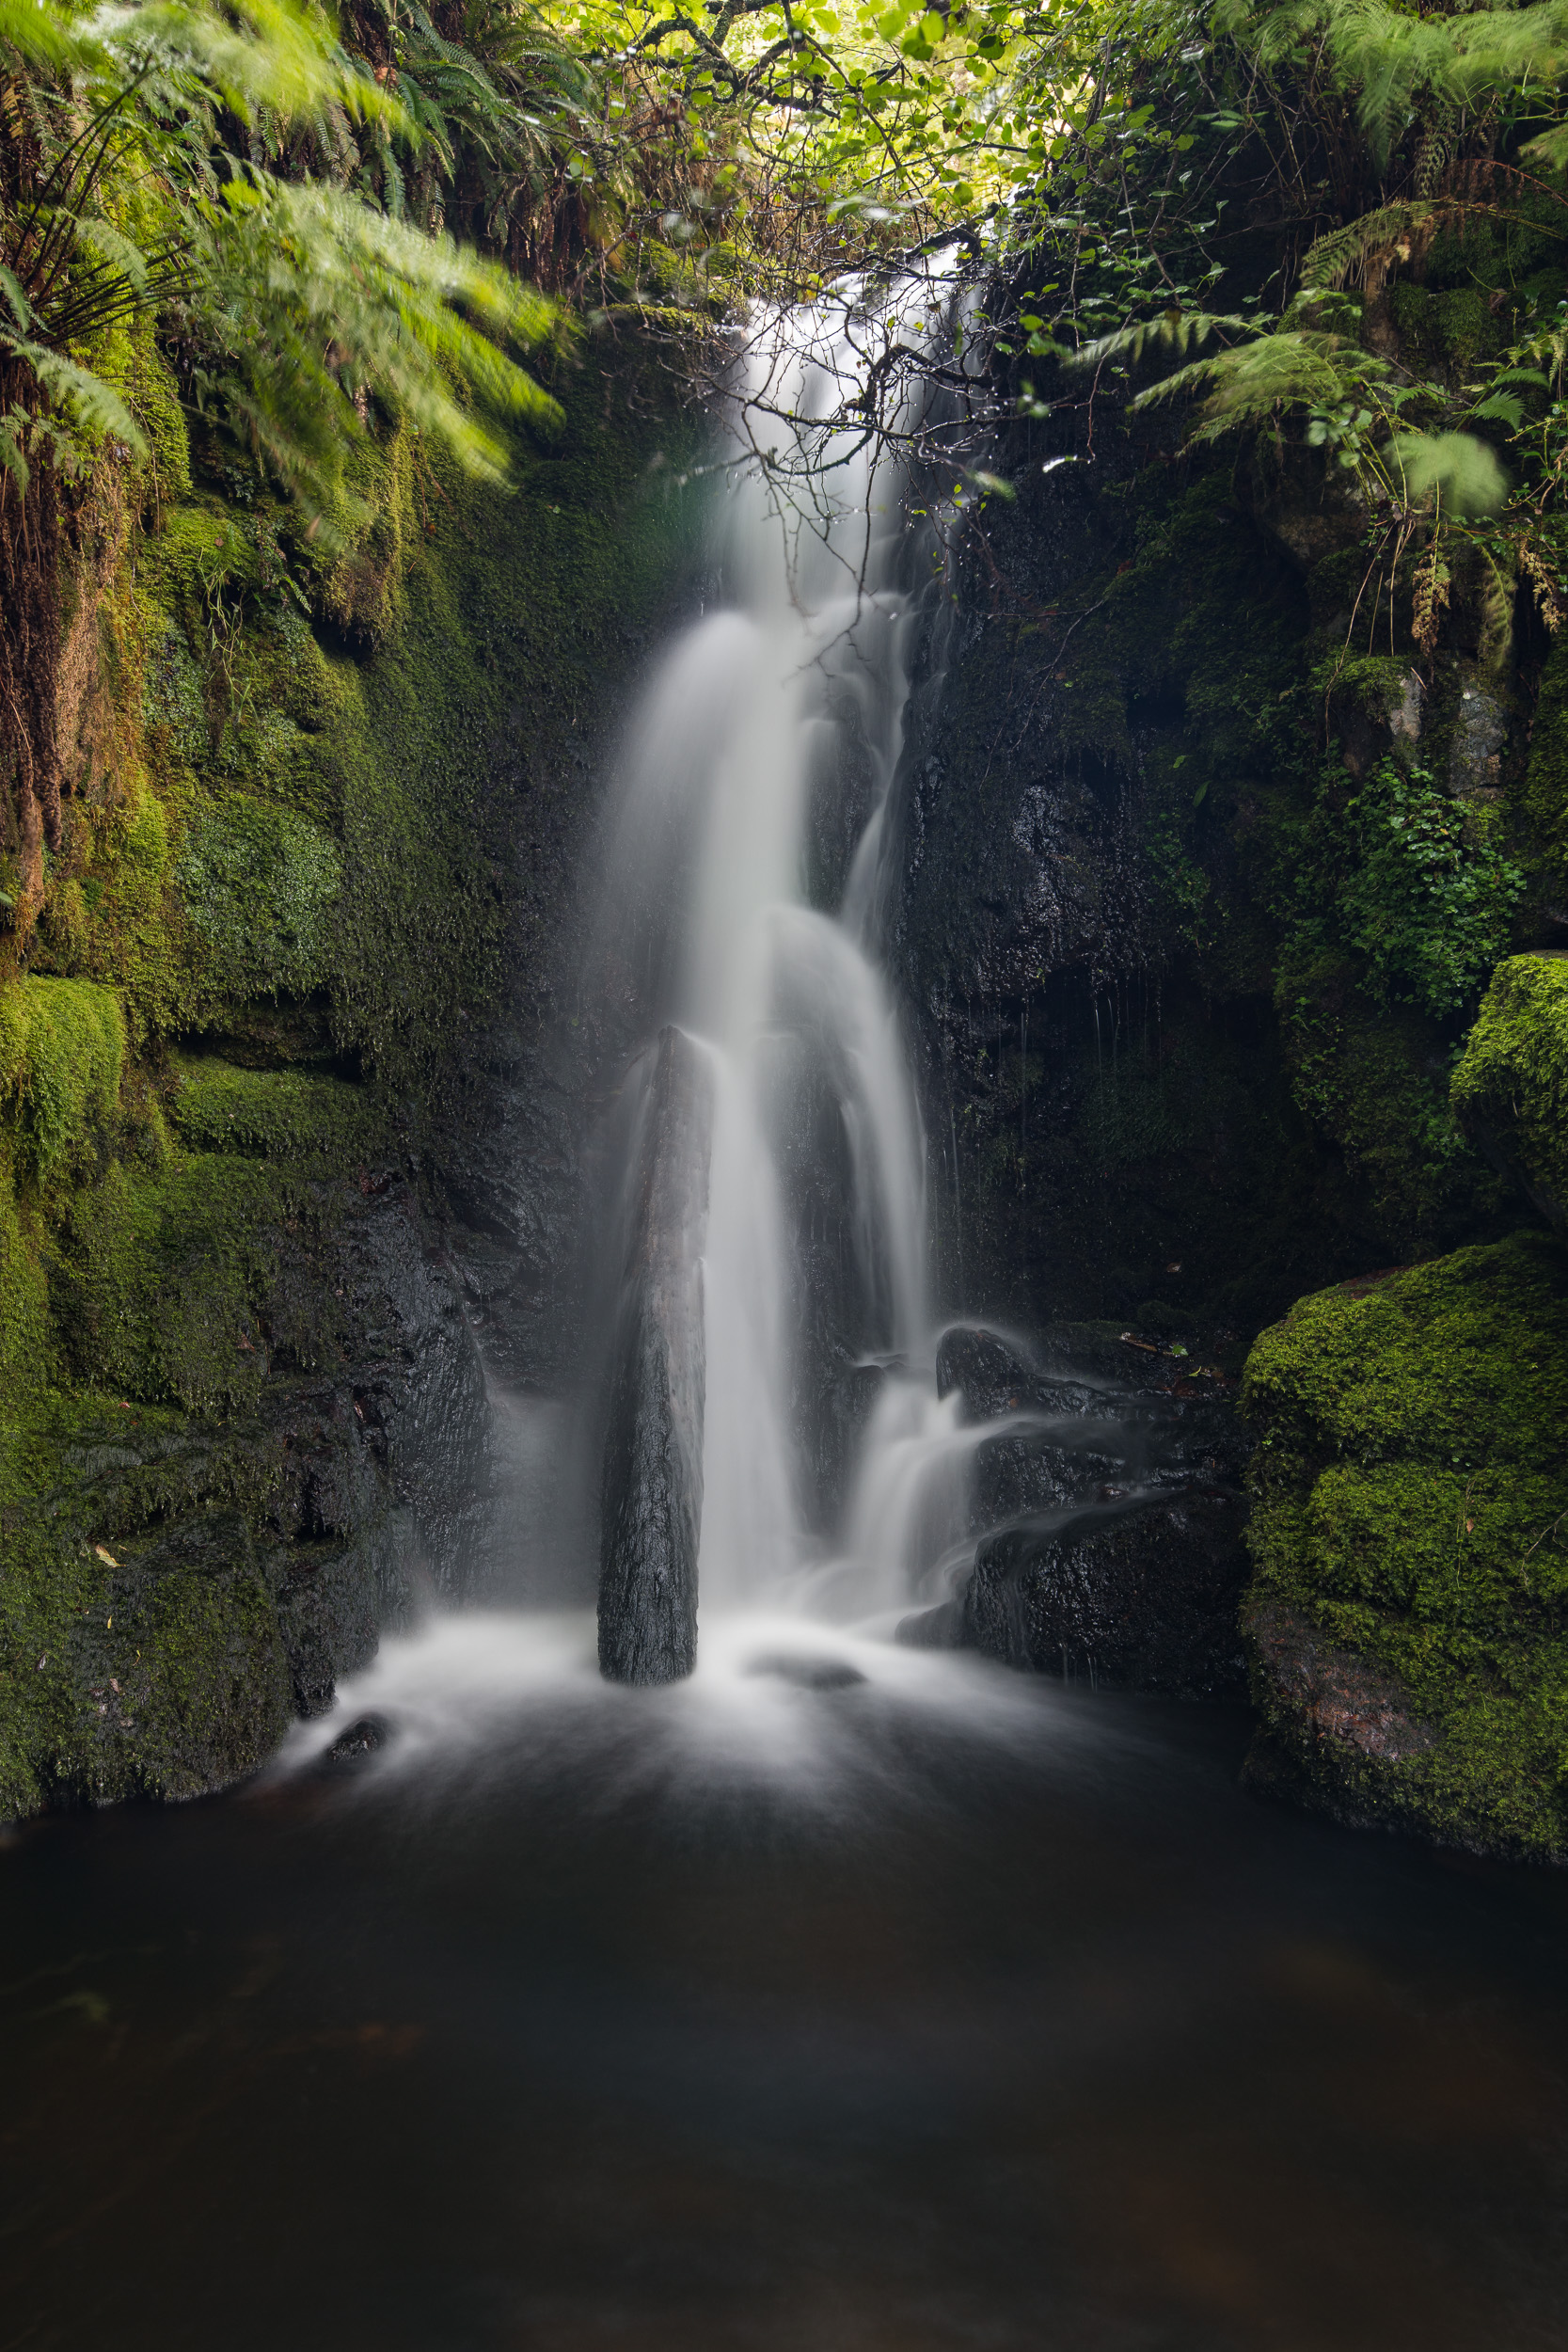
I really liked the handling of the camera it made the capturing of images just a little easier than it is in the D750.
More to Learn, More to Shoot
I've only had the D850 for a few days so there is so much more to learn about this camera. There will be the enhanced features over the D750 as well as some new capabilities that I can learn about. I guess it will take a while before I really start leveraging what the D850 has to offer, but it's going to be fun learning.
So will the D850 make me a better photographer? Of course not! Only by practising the craft of photography will I become a better photographer. The D850 is a tool and it will help me capture my images, but it can't improve my creative eye. As David duChemin says, "Gear is good, but vision is better".
So have you bought or considered the new Nikon D850? Have you recently replaced your camera? Have you changed camera systems before? Let me know in the comments below.

Landscape Photography with a Lensbaby Velvet 56
In this special blog post and video, I go on a creative journey with my landscape photography as I try out the Lensbaby Velvet 56.
A Creative Journey
The gear that I use to take landscape photographs hasn't changed too much over the years. I've upgraded my Nikon bodies and expanded my lens collection to encompass a wider range of focal lengths. Aside from that though, things have remained largely the same. After all, the gear I use suits the type and style of photographs I take.
So when Lensbaby asked me to try their Velvet 56 lens I wondered how it might fit into my style of photography. The Velvet 56 is the type of lens that you would use for portraits or close up photography, or if you wanted to add a glow or vintage look to your photographs. All the kind of things that I typically don't do with my photography.
So why did I decide to give the Velvet 56 a try then? Simple really. I wanted to expand my photographic horizons. You should never be scared to try new things. I felt that even if I decided that this wouldn't be a lens that I buy I was sure trying something new would be fun, challenging, and most of all teach me something new.
Rather than write a very lengthy blog post on my experiences with the Velvet 56, I've documented the entire experience and my conclusions in this video:
So that was my adventure with the Velvet 56. As I said in the video it was a great experience and I very much enjoyed doing something different with my photography and pushing the boundaries of what I'm used to. Sure it's not a lens I would use a lot, but in the right situation, it's a lens that can be used to great creative effect.
So how do you like to push your creative boundaries? Have you ever considered using a Lensbaby lens? Let me know in the comment below.
The Images
You will have seen all the images in the video but if you want to see what they look like in more detail so you can really see the effects produced by the Velvet 56, they are here in this handy little gallery.


The Rumps - 5 Minute Photo Adventure
In this blog post I take you on another 5 Minute Photo Adventure. This time I'm back in Cornwall to photography the twin headland known as the Rumps. This is a great coastal sunset location and offers fantastic views of the surrounding coast. Read the blog and watch the video to see why.
Seeing More
The more 5 Minute Photo Adventure videos that I make the more I realise how amazing the coastline around the south west of England is. Over the last few years of photographing my local coastline, I've discovered many wonderful and dramatic locations. I am indeed very lucky to live in a place where I can access a wide range of beautiful photographic locations.
By shooting these videos I have started to discover more about the locations I photograph. For each video, I try to shoot lots of B-Roll so that I have additional footage to help tell the story of the location. This could be me walking around the location or using the drone to capture some aerial footage. It's from this aerial footage that I have seen some amazing coastal sights and views. It could be the elevated view or the view that would otherwise be inaccessible that provides me with a new way of looking at a location. A great example of this would be my previous 5 Minute Photography Adventure video from the Valley of the Rocks (insert link).
When I get home from shooting a video and I look at the B-Roll I often see how much more that location has to offer. Sometimes I get very focused on making an image that I forget to look around me and see what else there is. The B-Roll not only adds the video itself but also reminds me to keep my eyes open when I'm on location and not to just look through the viewfinder.
The Rumps
With so many great locations to pick from in the South West, it was hard to decide where to shoot my next video from. So, as I often do I checked out my custom Google Map and spotted the location known as The Rumps. The weather forecast was looking OK, but I thought it would be worth the risk so I packed my gear and headed out in the car. Here is what happened:
The Images
In the video, I showed you just one of the three images that I took that evening. Here are all three for you to look at:


While these images are pleasing enough, I don't feel any of them stand out. When shooting one of my 5 Minute Photo Adventure videos it's always nice to get a standout image to finish the video with, but the video is more about my desire to share the location with the viewer, tell them about my process of shooting the image, and hopefully inspire them to visit the location. So I don't necessarily consider it too much of an issue not to have a portfolio class image at the end of each video. It would be nice if every trip out with the camera did produce a portfolio class image but this simply isn't the case. For me, any time out with the camera is time well spent. Getting an awesome image is a bit of a bonus.
Looking at the images now I don't think the compositions work particularly well. Sure, not having great light didn't help, but I'm not entirely sure nice side lighting or a pink sky would have helped. The images lack balance and in some cases, they need more negative space in the lower part of the foreground.
So while these images might not necessarily be my best work, they are still important. Every image I take, good or bad, I will personally critique to see how I might improve next time. Photography is a journey of constant learning and improvement, but one that I still very much enjoy.
Looking back at my previous visits though, I think I prefer this viewpoint. This image was taken south of the viewpoint in the video and shows a bit more of landscape around The Rumps.
Have you been to The Rumps before? How much do you critique your own images? Are there any locations you like to me make a 5 Minute Photo Adventure video on? Let me know in the comments below.

Trevose Head - 5 Minute Photo Adventure
In this blog post I take you on another 5 Minute Photo Adventure. This time I'm off to Trevose Head on the north Cornish coast. This amazing location has a lot to offer the landscape photographer. Read the blog and watch the video to see why.
As a landscape photographer I'm extremely lucky to live in the south west of the UK. Even if I didn't have Exmoor and Dartmoor, I would still have over 630 miles of the South West Coast Path to photograph. With so much to choose from I couldn't possibly pick a favourite location, but when it comes to Trevose Head, I'd have to say it's up there in my top 10 Cornish coastal locations to photograph.
So what makes Trevose Head so special? Well, for me it's the drama of the location. It's got the lighthouse perched on a cliff edge, the rocky inlet where the waves come crashing in and it makes for a great sunset location just about all year round. And did I mention you can drive within 200m of the best spot to shoot from?
On the downside it is very exposed and getting blasted by rain, wind and sea spray isn't to be unexpected, so sometimes it's nice to have the car nearby after you've been battered by the elements!
If this sounds like the kind of location you might want to photograph, why not check out my 5 Minute Photo Adventure video below:
Padstow Lifeboat Station
As I showed in the video, the lighthouse isn't the only spot to photograph at Trevose Head. Located not farm from the lighthouse is Padstow Lifeboat station. As you can see on the map below both locations are close together and so if you have time it's worth visiting.
This was my first time visiting the lifeboat station. I remembered it after looking at the area on my custom Google Map while I was wondering about. It's not that easy to photograph if you want to include the surrounding elements such as the stairs down to the entrance, but with the right lens and a bit of moving about, a good image can be made.
Nikon D750, Nikkor 16-35mm f/4 at 22mm, ISO 100, 30 seconds, f/13, Lee Filters circular polariser, Little Stopper and ND grad.
Trevose Head Lighthouse
Though the forecast for Trevose Head was to be for relatively clear skies, as you can see from my first image this wasn't exactly the case.
Nikon D750, Nikkor 16-35 f/4 at 19mm, ISO 100, 2 seconds, f/11, Lee Filters circular polariser, 3 stop ND and ND grad.
While I do like this image what I was really hoping for was for some golden light from the setting sun (off to the left) to illuminate the rock faces. This would have really lifted the tone of the image. However, sometimes you just have to work with the light you have so I decided to adopt a slightly different style.
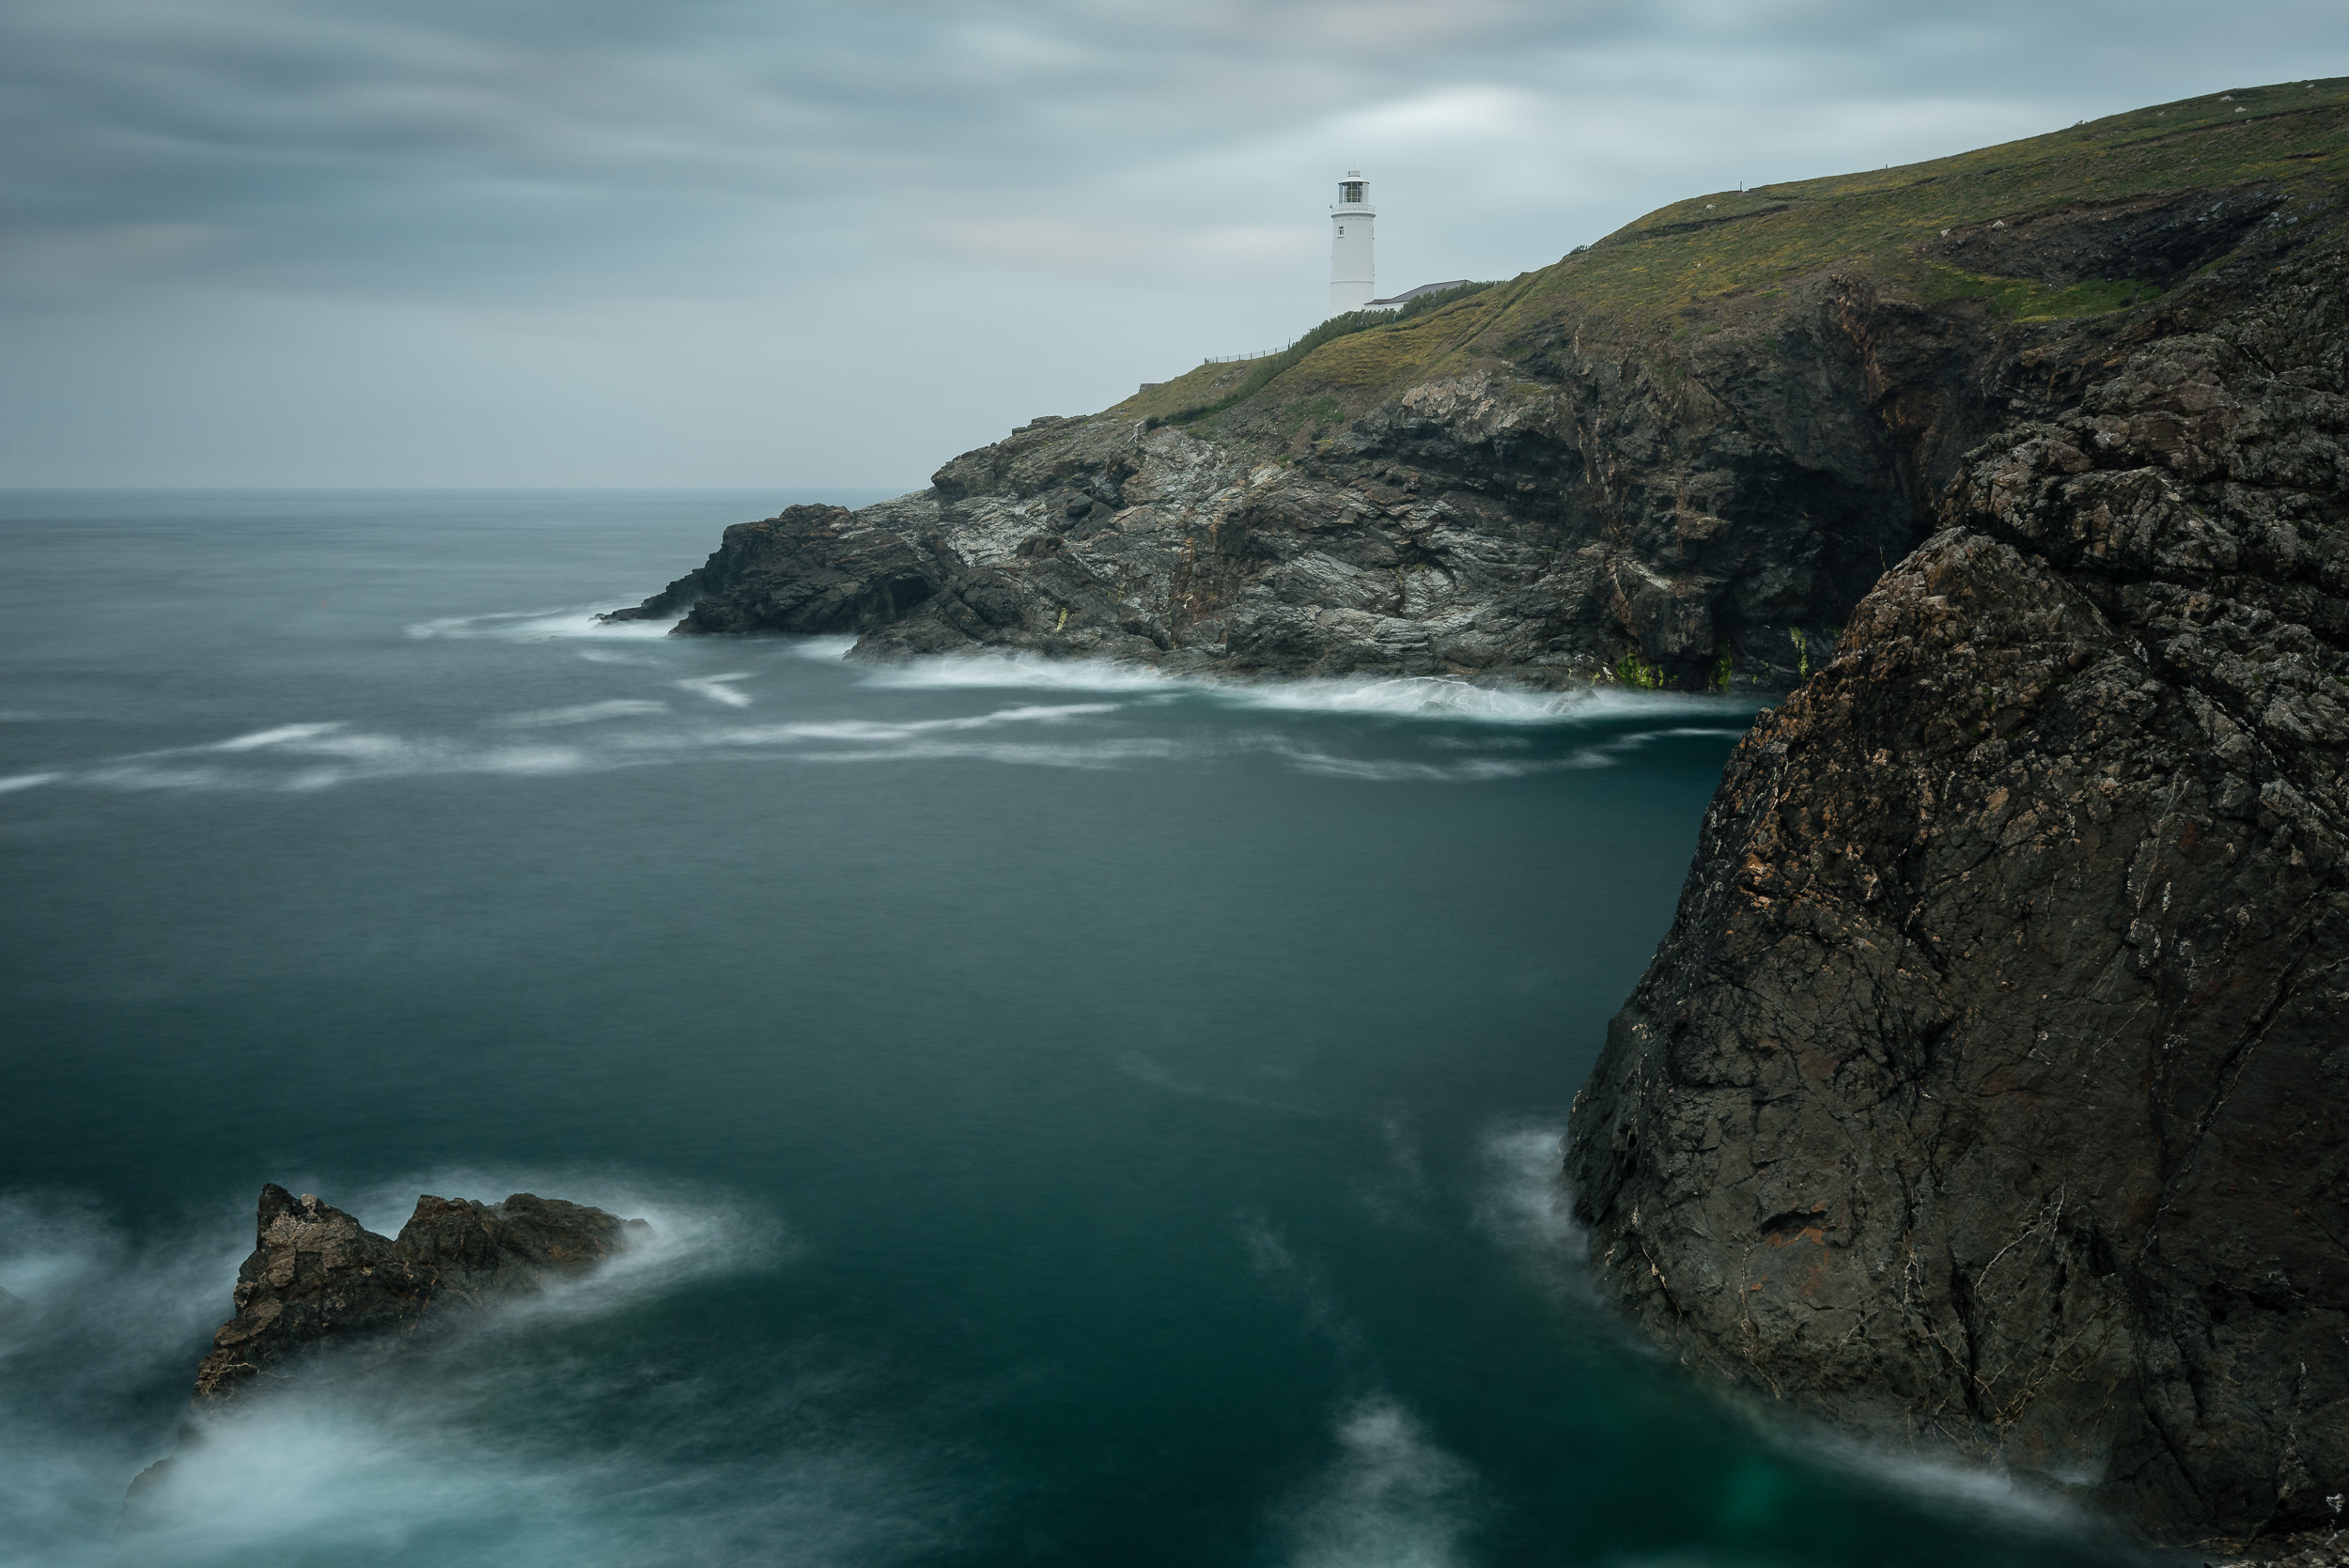
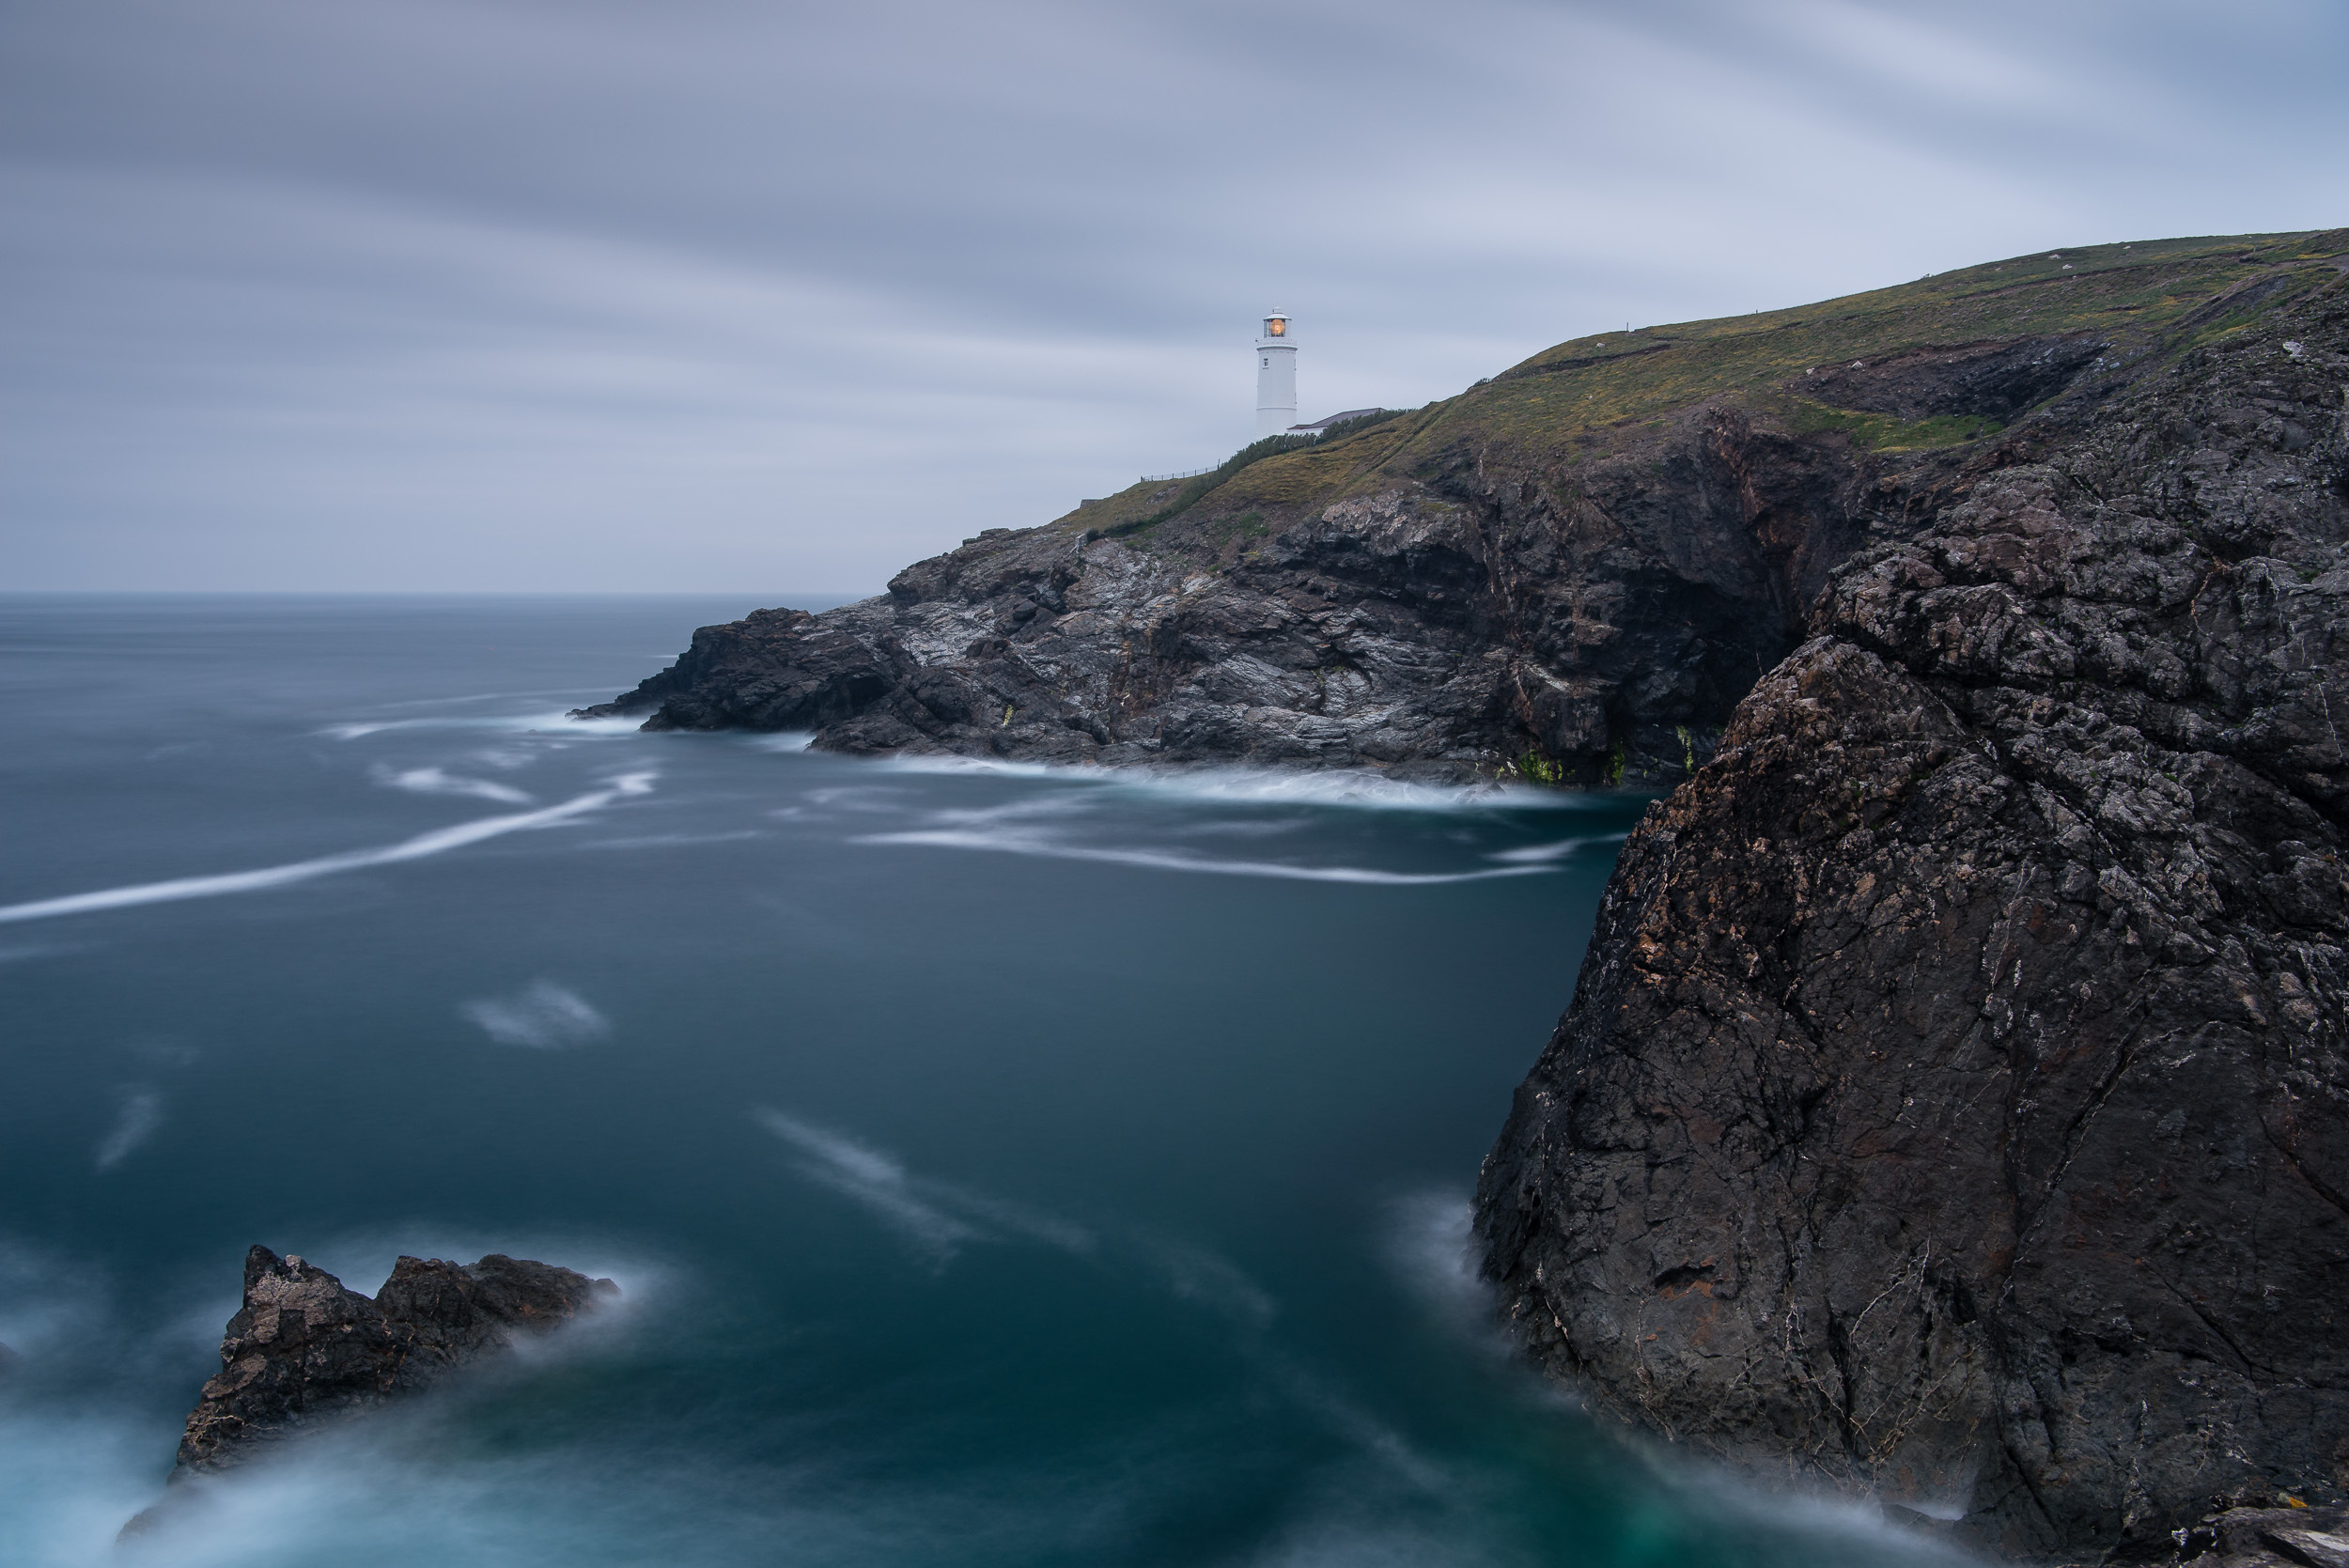
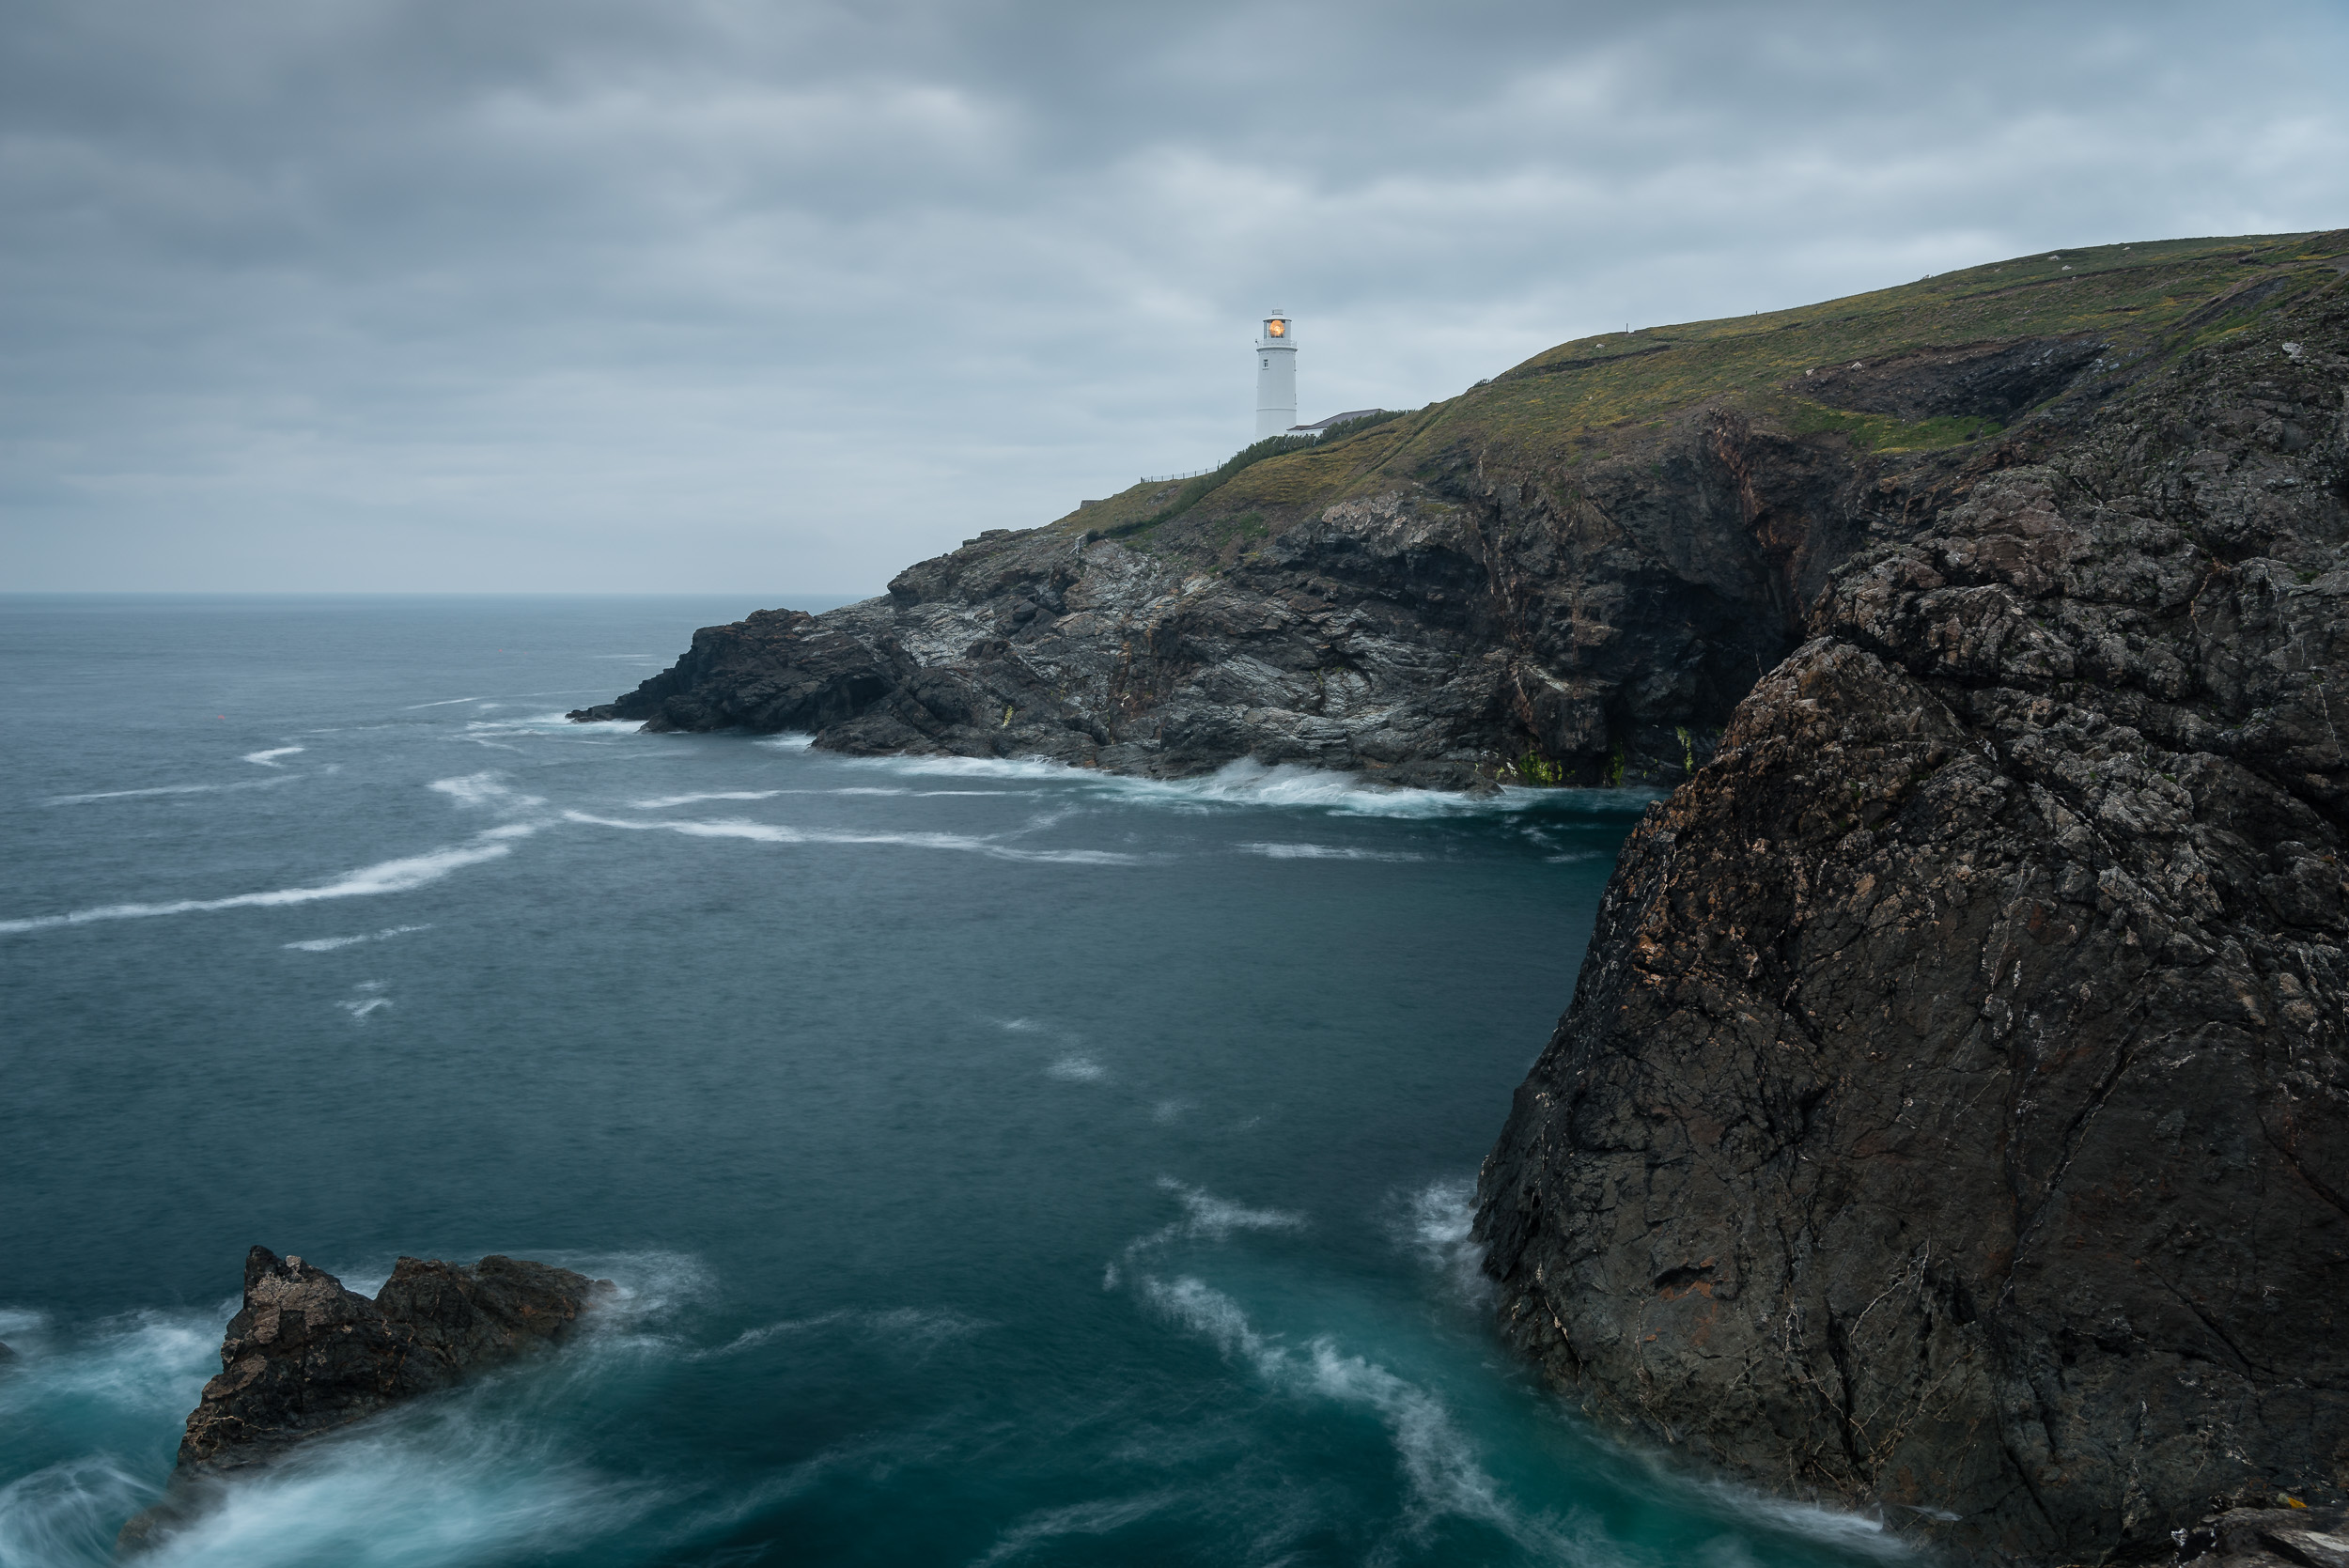
By embracing the grey and opting for longer exposures I was able to create a set of darker and moodier images. I also varied the exposure times by choosing different ND filters. The longer exposures allowed the crashing waves to paint white lines and create shapes on the image.
I'll be back...
Though I didn't manage to create the image I had planned for I still came away with some images that I'm very happy with. I also got a chance to to photograph Padstow Lifeboat station, so it was good to get two locations for the price of one! One thing is for sure, I'll be heading back to Trevose Head again in the near future.
So have you been inspired to visit Trevose Head? Have you photographed this location before? Let me know in the comments below.

Summer Solstice in Devon
In this blog post, I share my Summer Solstice Landscape Photography in Devon video. Join me as I head to two classic Devon locations, Dawlish Warren beach and Dartmoor, and take images either end of the longest day.
Summer Solstice Plan
I'm always thinking about what my next YouTube video will be about. I keep all these ideas in a notebook so that when I'm looking for a fresh idea I have some inspiration. I was looking through the list the other day and I spotted something that I had added some time ago. The idea was relatively straightforward. On the day of the summer solstice, I would shoot one dawn photo and one sunset photo.
With sunrise on the day being around 5 am I needed to go somewhere local. I like to get to a location 1 hour before actual sunrise so wherever I was going to be I would need to be there for 4 am. Now, I like getting up in the morning as much as the next landscape photographer, but even I was going to struggle to get up that early in the morning!
So I looked at my custom Google locations map and spotted a favourite local location, Dawlish Warren beach. Sure I would still need to get up at 3:15 am, but the weather forecast was good and the sun would rise from a direction that would give me some good light (hopefully).
For the sunset location, I would also need to go somewhere local. I knew that when I returned from Dawlish Warren beach that I would still have the school run to do, then a full day of work, and then I had some family commitments. In all likelihood, it would be nearly 8 pm before I headed out. Even with sunset being around 9:30 pm, that didn't leave me a lot of time to get somewhere. To be honest, even if I was able to get out earlier I didn't want to have a big drive to do when I'd already been up since 3:15 am!
I'm really fortunate that I live near Dartmoor so this seemed like a great place to go. I was thinking about going to Bowerman's Nose, but as I had just recently shot a video there, I decided that a good option would be Emsworthy Tor. Though Dartmoor would be busy in the evening with people watching the summer solstice sunset, Emsworthy Tor is a little bit further off the beaten track so should be a little quieter. It's a classic Dartmoor location and if I were to get some good evening light I could be onto a winner.
So how did I get on? Let's take a look at the video:
As I said in the video you can take a look at the images (plus a couple of bonus ones) in a bit more detail below.
Dawlish Warren
5:12 am, Nikon D750, Nikkor 16-35 f/4 @ 30mm, ISO 100, 4 seconds, f/13, Lee Filters Circular Polariser.
5:41 am, Nikon D750, Nikkor 16-35 f/4 @ 19mm, ISO 100, 30 seconds, f/13, Lee Filters Circular Polariser and Little Stopper.
Emsworth Tor
9:14 pm, Nikon D750, Nikkor 16-35 f/4 @ 24mm, ISO 100, 0.8 seconds, f/13, Lee Filters Circular Polariser.
9:22 pm, Nikon D750, Nikkor 16-35 f/4 @ 18mm, ISO 100, 1 second, f/13, Lee Filters Circular Polariser.
I hope you enjoyed watching the video and looking at the images. Did you go out for Summer Solstice to do some photography? What's the earliest you've ever got up in the morning to take a photo? What's the latest time you've seen the sunset? Let me know in the comments below.

Bowerman's Nose - 5 Minute Photo Adventure
In this blog post, I show you my 5 Minute Photo Adventure video of Bowerman's Nose on Dartmoor. I also discuss the image I took there and how it compares to the previous images I took of this unique location.
I have a bit of a long history with Bowerman's Nose on Dartmoor. I last wrote about this location back in October 2016 in a post entitled Perseverance - Photographing Bowerman's Nose. In that post, I talked about my desire to capture an image that I felt did this unique location justice. On paper, it shouldn't be too difficult to shoot but it's a location that needs good light. I've come close a couple of times and last time I got pretty close to what I was looking for.
Probably my best image of Bowerman's Nose.
But there's more to this location than just my desire to create an image that meets my vision. Simply put I like shooting there and I think you would to. To help inspire you I thought I would create one of my 5 Minute Photo Adventure videos.
You can see the Bowerman's Nose video right here:
Near Epic Conditions
As you'll have seen in the video, I had near epic conditions. It was looking like I wasn't going to get any good light when all of a sudden the sun dropped below a cloud and bathed the moor in a bright orange light. It was spectacular.
If only the light had reached Bowerman's Nose... Nikon D750, Nikon 24-70mm f/2.8 @ 35mm, ISO 800, 1/50 second, f/16, Lee Filters ND 0.9 soft edge grad.
What that image is really missing is light on the side of Bowerman's Nose. The light being scattered on the trees in the background is lovely and if it had just reached where I was it could have lifted the image from OK to spectacular. Just take a look at the image at the top of this blog post to see what a difference good light can make to Bowerman's Nose.
I've seen Bowerman's Nose in all sorts of light, and this last visit to shoot my video has actually inspired me even more to visit it again. I know this location has all sorts of potential and I hope you have seen that to. As I said in the video, Dartmoor is one of the best places to come as a landscape photographer and if haven't already been hopefully this video will give you that extra nudge.
Have you photographed Bowerman's Nose? Have you experience near epic conditions? Let me know in the comments below.

Bedruthan Steps Photo Adventure
In the blog this week I share with you the story of my latest trip to Bedruthan Steps to photograph the coastal thrift. Not only will you see the images from that trip, but I also share with you my top tips for photographing Bedruthan Steps. And if that wasn't enough for you, I also share with you my latest 5 minute photo adventure video!
Why Shoot Bedruthan Steps
I have a great many locations on my custom Google map, many of which can be shot at any time of year. There are a few however that are best shot at particular times of the year. Bedruthan Steps on the north Cornish coast is one such location. It has plenty to offer the photographer with golden sand beaches (at low tide) and miles of dramatic Cornish coastline.
It's spring time though when Bedruthan Steps comes to life. Like many areas along the coast, springtime brings on the flowering of the thrift, a beautiful pink flower that likes to cling to the side of the coastal cliffs. If you can find a nice clump of thrift and you are lucky enough to get some great morning or evening light, you'll have everything you need to produce an amazing image.
While there a number of locations to shoot the thrift in Cornwall, my favourite place to shoot them is at Bedruthan Steps. There is nothing quite like seeing the thrift flowering all along those stunning coastal cliffs.
The Clock is Ticking
The thrift flowers in spring but it may only be in its prime for a couple of weeks. This unfortunately isn't exactly the same time every year so knowing when to go isn't easy. Bedruthan Steps is a 1 hr 40 minute drive so I want to be reasonably assured of good conditions if I go. I would also need to the good conditions to match up with a free evening for photography!
However, time was ticking for me. I had started to see some spectacular shots of the thrift at Bedruthan Steps on Instagram so I was starting to panic that I was going to miss the best of the thrift this year. Luck had not been with me. When I had a free evening the weather was rubbish, and when the weather was forecast was good I didn't have free time. I was getting frustrated!
As mid May rolled round I came to the conclusion that I would have to go now or forget about for this year. So with a dubious Sunday evening forecast I decided to put caution to the wind and go for it regardless of the conditions.
A 5 Minute Photo Adventure
As I announced in my recent blog post for Daymark Tower, I've started a new series of videos that aim to give the viewer an introduction to a location and inspire them to photograph it. So for the 2nd of my 5 Minute Photo Adventure videos I've created this video of Bedruthan Steps which I filmed on my recent trip there:
I hope you enjoyed that video and that it has indeed inspired you to visit Bedruthan Steps. If you want to see the images from the video in a bit more detail you'll find them below.
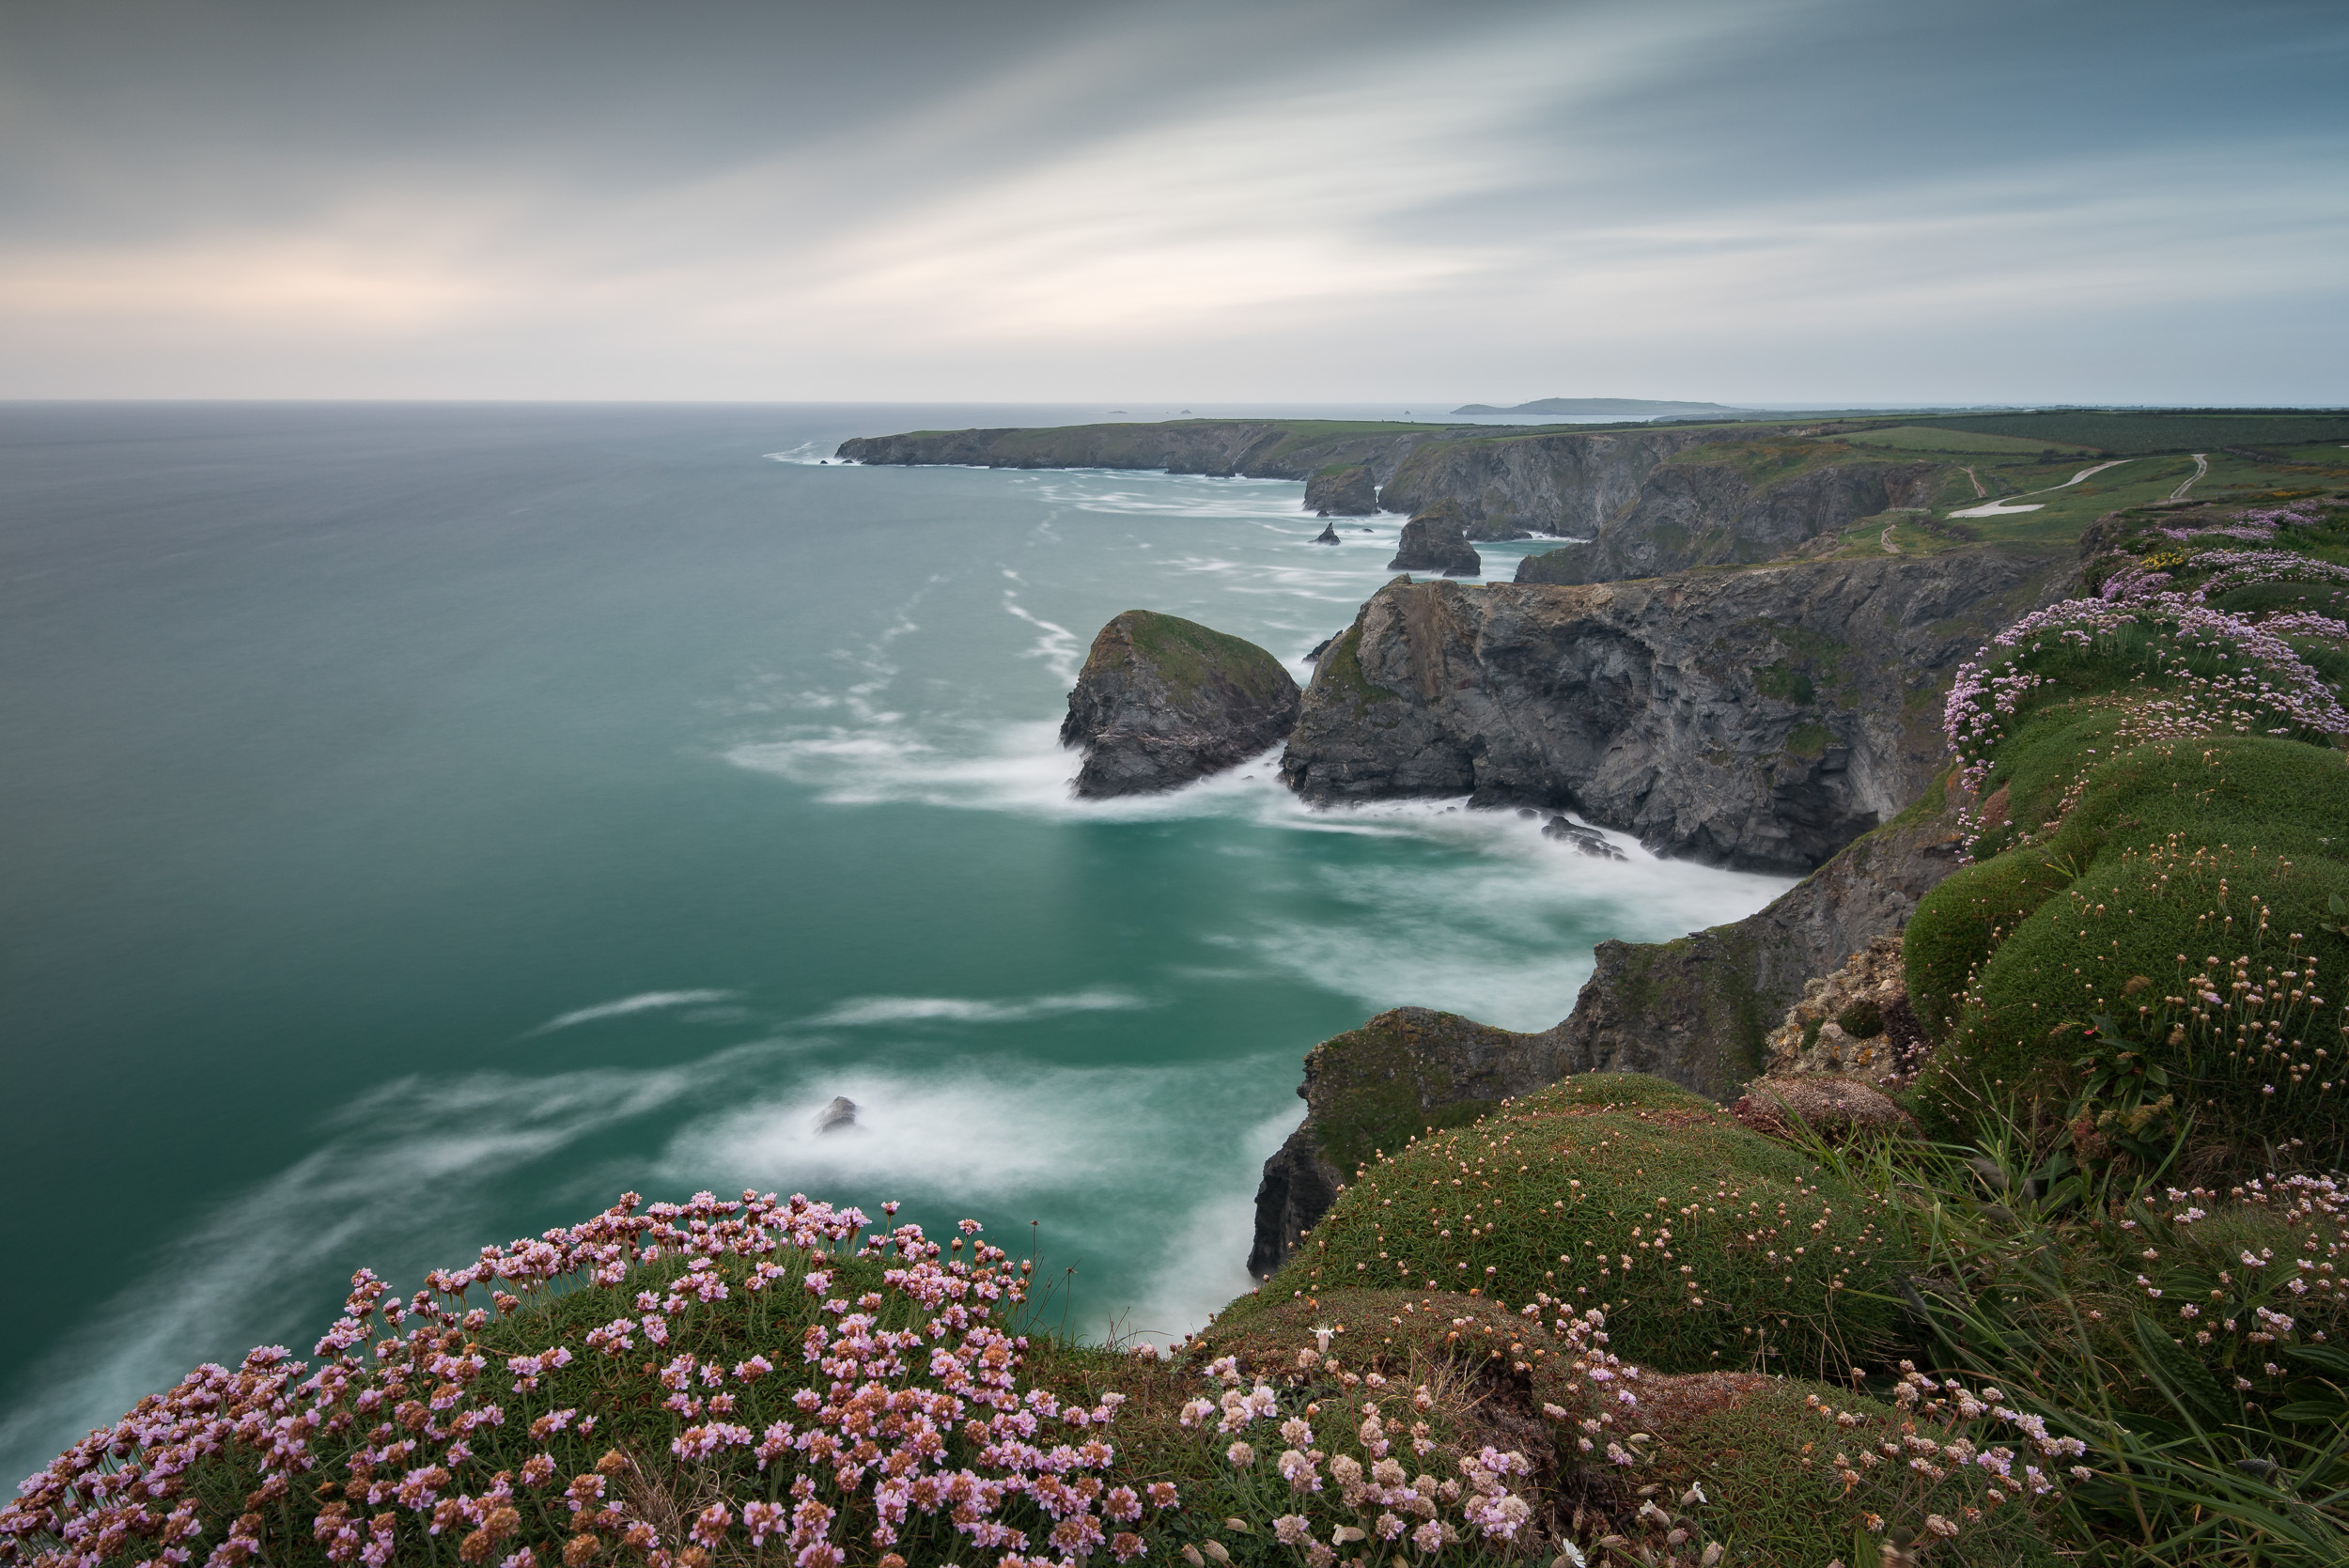
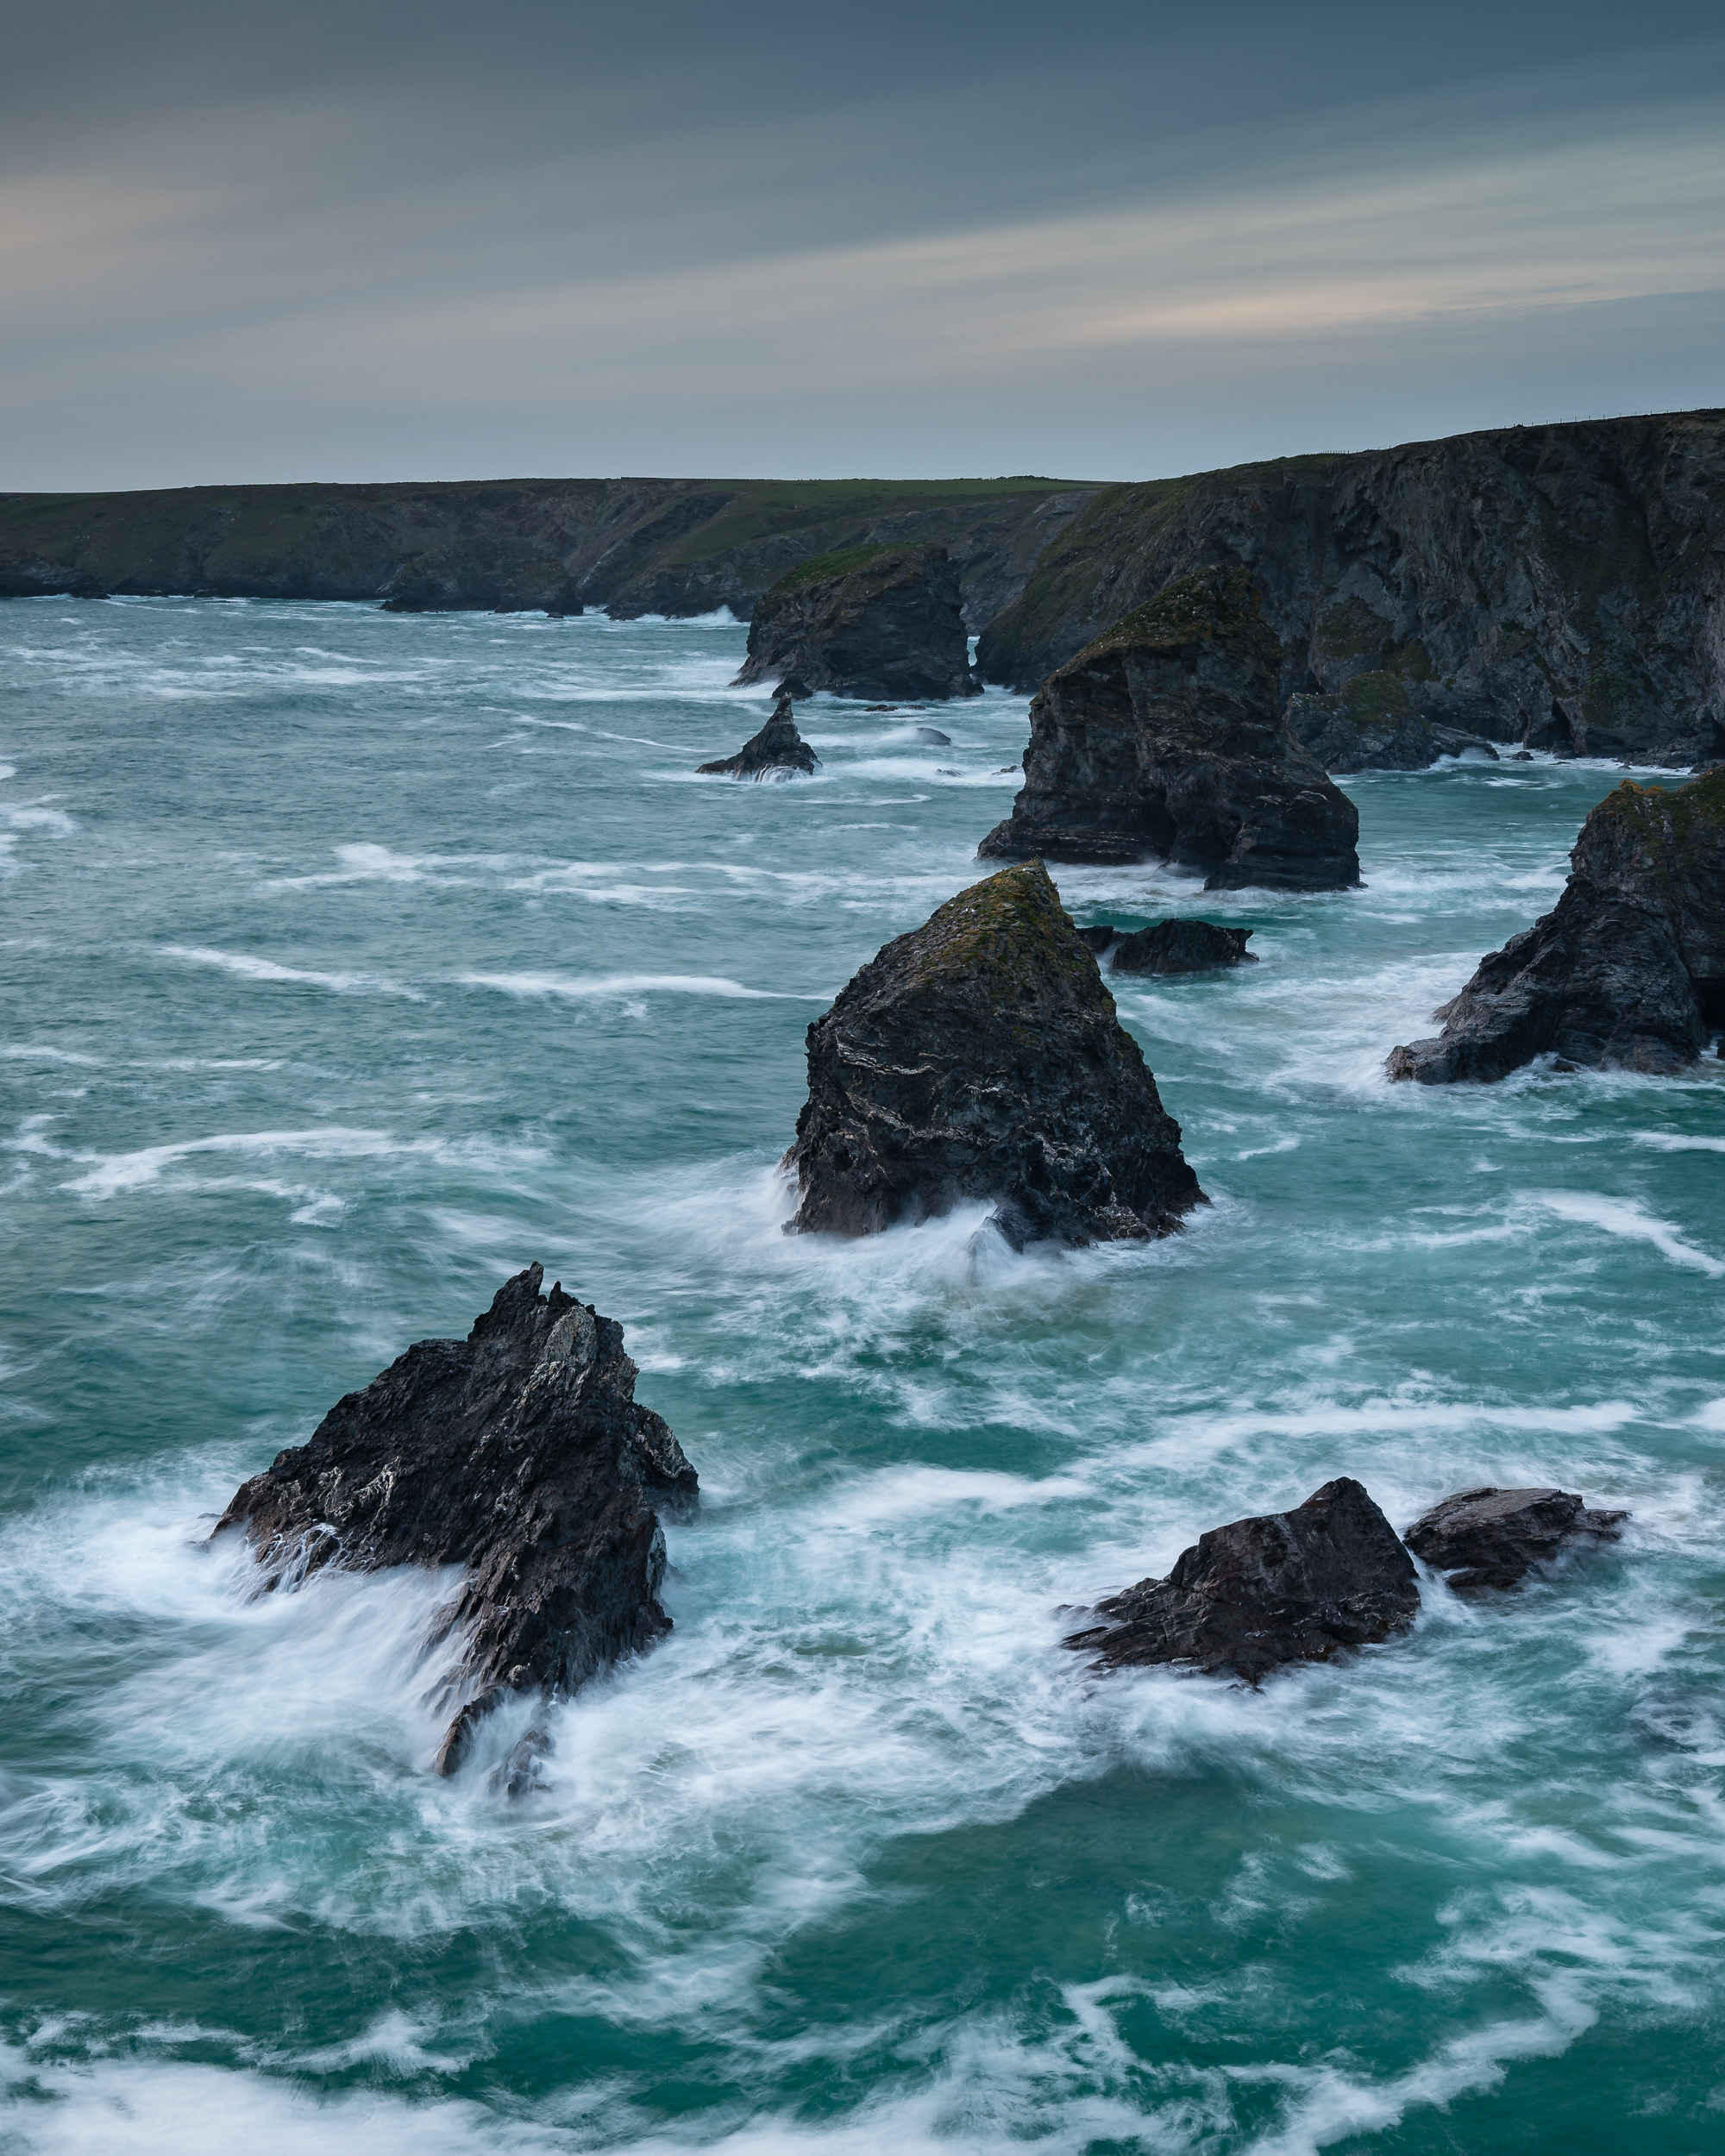
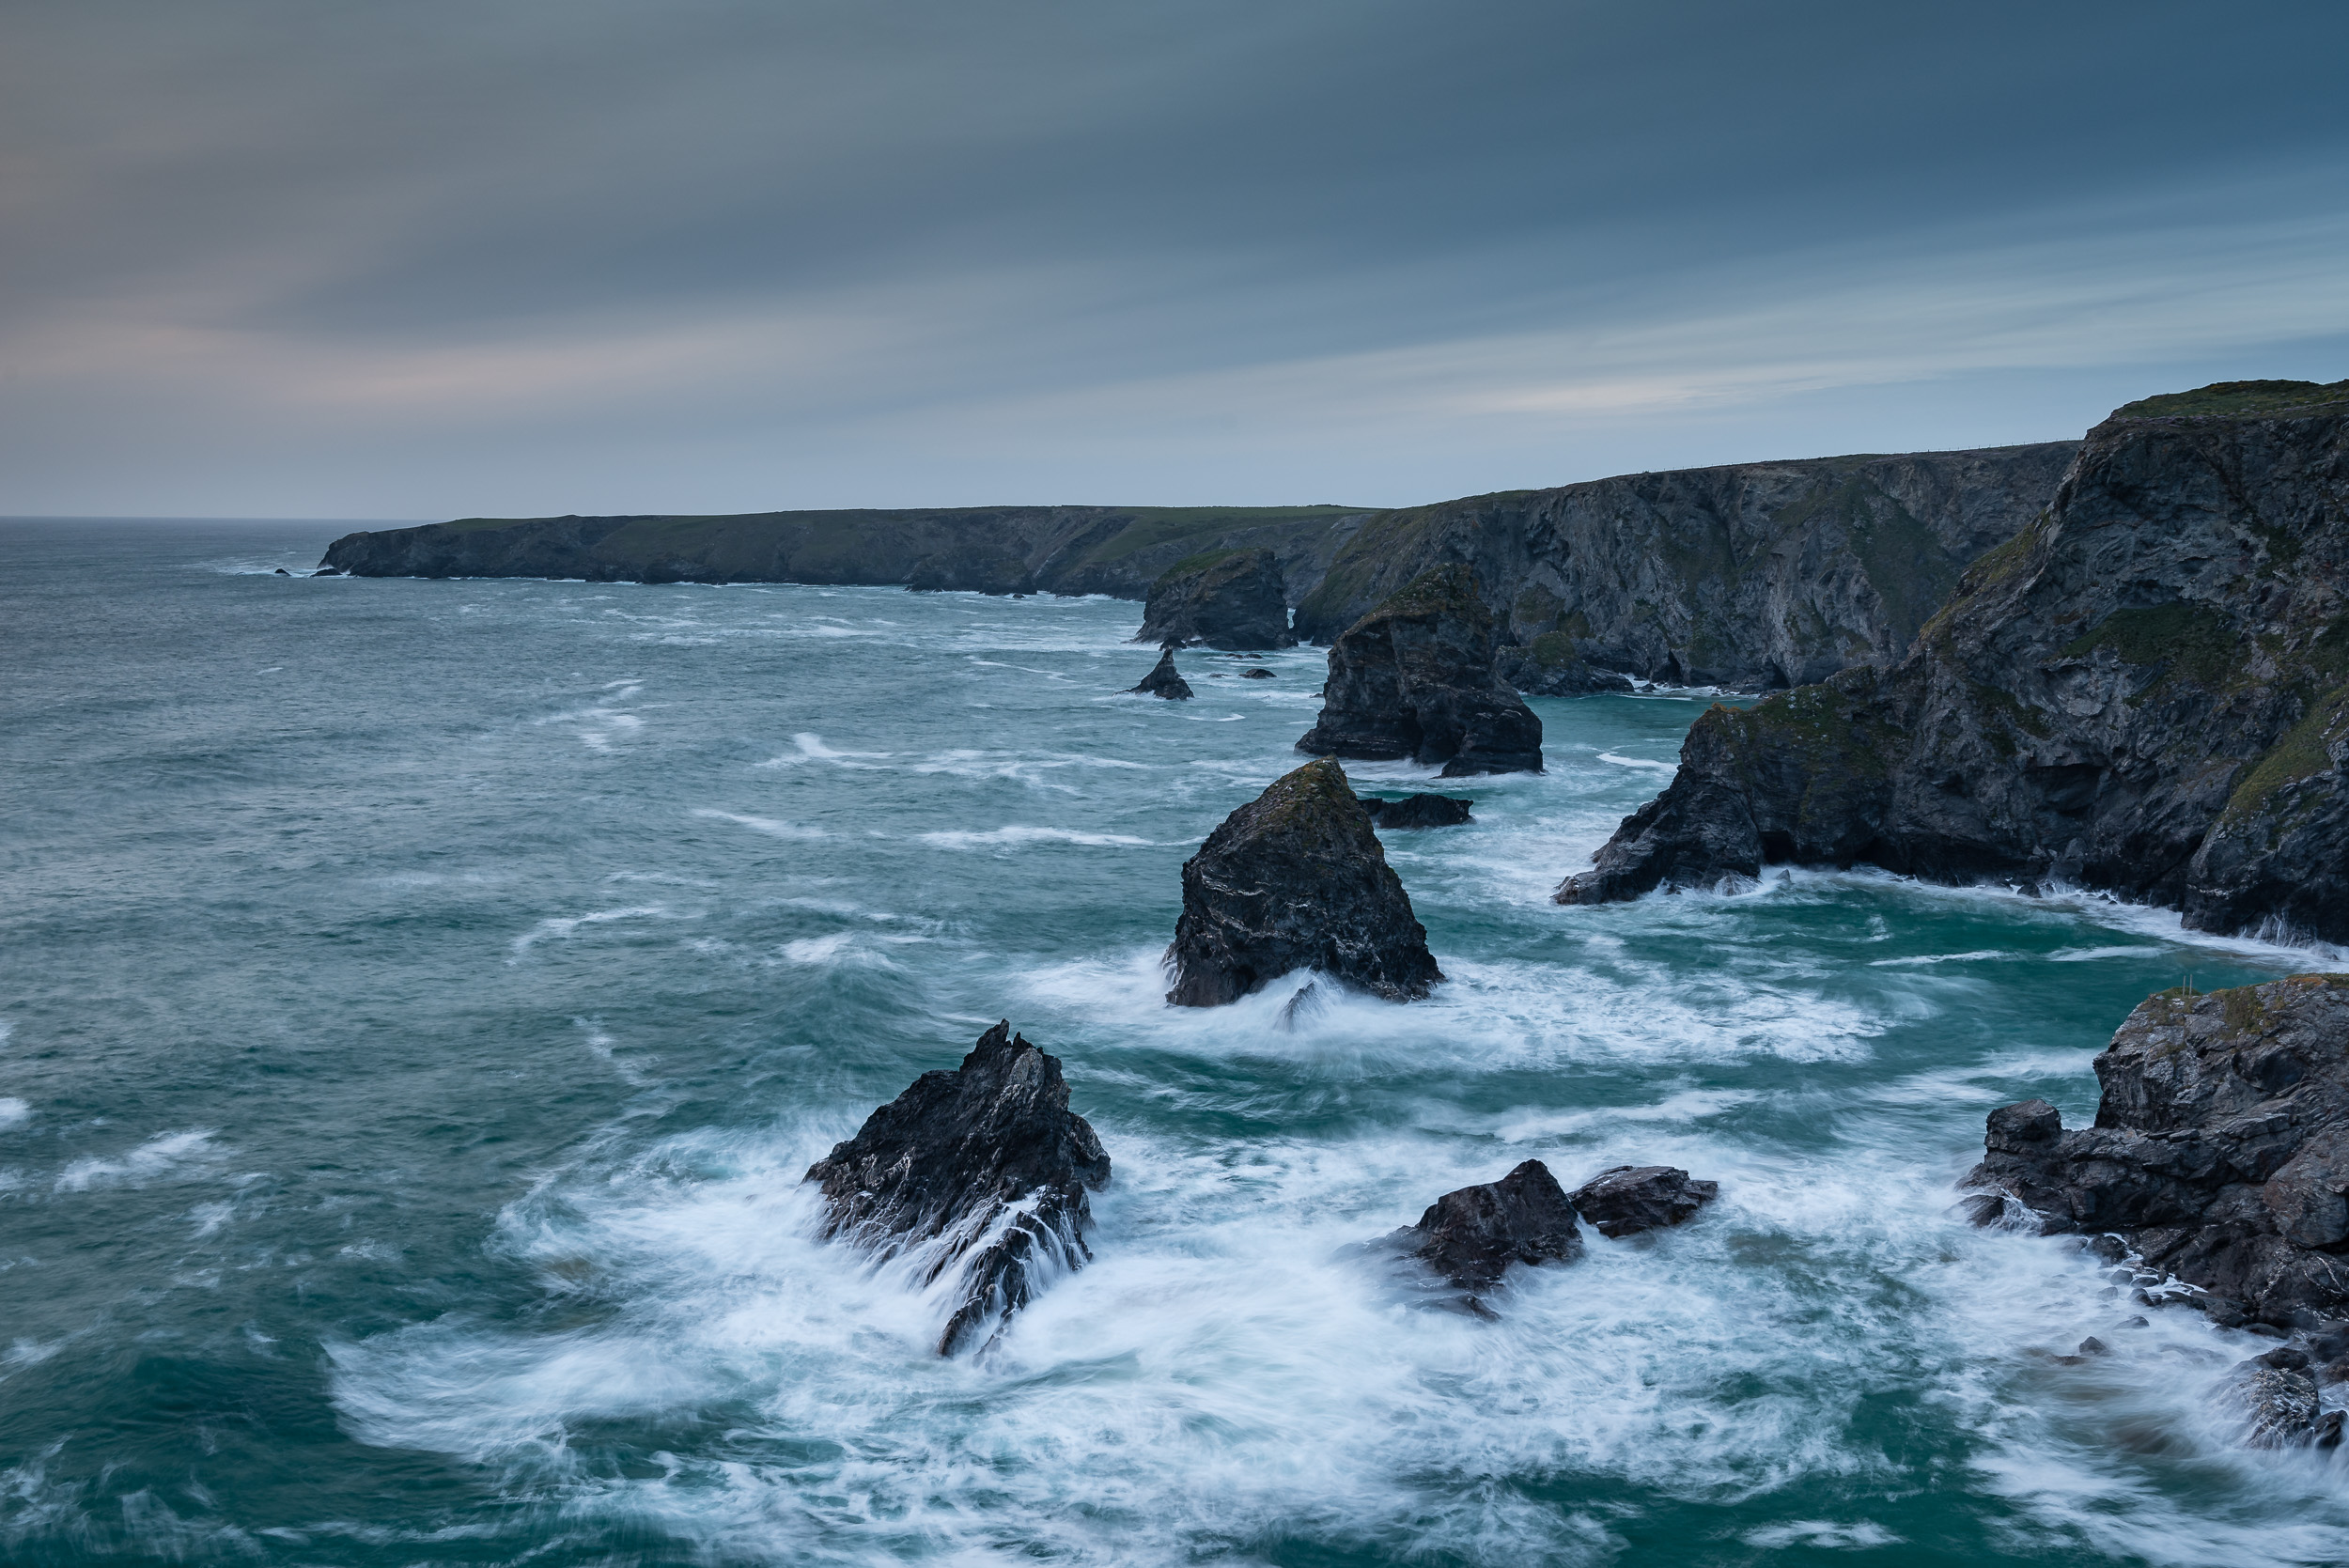
So if that has inspired you to visit Bedruthan Steps, here are my 3 top tips to help you make the most of your visit:
Lenses - Take a wide angle lens for shooting the thrift, but also take a medium telephoto (like a 24-70mm) and shoot and isolate some of those rocky sea stacks.
Walk the Walk - Though there are a couple of great viewpoints just a short walk from the National Trust car park, you'll find so much more by walking along the coast path. So give yourself sometime to explore the area. The beach at Bedruthan Steps is also worth checking out, but only at low tide and you don't mind the steep descent.
Be Careful - It should go without saying, but do be careful on the cliffs, especially when photographing the thrift. It's all too easy to get very close to the edge in search of some nice thrift, and if it's windy up there you don't want to loose your balance.
Though I was keen to get to Bedruthan Steps to photograph the thrift, it is a location I will visit at anytime of year. The coast line is beautiful and spectacular there and given the right like it can make for some epic photographs.
So have you visit Bedruthan Steps? Have you photographed thrift before? Let me know in the comments below.

Beautiful Boscastle
In the blog this week I tell you about my most recent trip to Boscastle, show you the images I took, and share a few tips should you decide to visit this picturesque Cornish coastal village.In the blog this week I tell you about my most recent trip to Boscastle, show you the images I took, and share a few tips should you decide to visit this picturesque Cornish coastal village.
Classic Cornwall
Even if you aren't a photographer there is a lot to love about Boscastle. This picturesque little village in Cornwall is always busy with tourists enjoying the village, wondering along the harbour and ascending the surrounding hills for some fantastic views of the coastline. It has everything you would typically look for in a Cornish fishing village.
The things that make this village a popular tourist spot also make it popular for photographers. From happy mobile phone shooters to those who take their photography a little more seriously there is something for everyone to shoot.
The Photographers View
For me though, I go to shoot the harbour. The entrance of the harbour has dramatic cliffs on either side and the beautiful turquoise water snakes its way into the village to meet the River Valency. There are paths on both sides allowing you to walk the length of the harbour, but for those who have a little more puff in their lungs, there are paths leading up the hills. This is where I like to shoot from.
On this visit to Boscastle, I decided to take the path on the north side of the harbour. The view up there really allows the photographer to make the most of the S-shaped harbour entrance. With the sun setting in a westerly direction I was hoping that the last of the light would illuminate the hillside on the opposite bank with nice evening light. The weather forecast was looking good and with an incoming tide, I was optimistic.
Subtle Changes
After a short ascent to the top of Penally Hill, I just had to stop for a little while and admire the view. It's all too easy to get to your location, unpack your gear, and get shooting, but sometimes you need to pause and take in the scene. Though I have photographed this scene a couple of times now, each visit has been unique and I wanted to walk about a little to see how I might shoot it differently this time. I was hoping to see some Thrift flowering but unfortunately, there wasn't any. Well, you can have everything, can you?
After taking in the view I decided on two compositions, one vertical, one landscape. Both would include the S-shaped harbour entrance and the foreground rocky ledges, but I would shoot the landscape picture closer to sunset and include Meachard island in the composition.
Nikon D750, Nikkor 16-35mm f/4 @ 20mm, f/13, 30 secs, ISO 100, Lee Filters Circular Polariser, Lee Filters 0.6 ND Grad, 4:5 crop.
Though the light isn't fantastic in the above image I do like the composition. To get it right I had to make a number of minor adjustments. If I was too low down, the flow of the harbour water is cut off at the bottom of the frame and if I went too far to the left the curvy pier gets lost behind the foreground rocks. Too far to the right and the headland (Penally Point) on the north side is cut out of the frame and you lose the S shape of the harbour.
I also had a to take into account the foreground rocks which play an important part of leading the viewer out into the rest of the image. Overall, I had to make a lot of small tripod changes to get things just right.
Nikon D750, Nikkor 16-35mm f/4 @ 19mm, f/13, 56 secs, ISO 100, Lee Filters Circular Polariser, Lee Filters 0.0 ND Grad, 4:5 crop.
It was a similar story for the landscape orientation image above but as you can see I then had to take into account the placement of Meachard island. These aren't necessarily difficult compositions to get but you do need to pay attention to where everything is in the frame in order to get the most out this view.
Unfortunately, as you can see by the images, I didn't get the light I was looking for but I never come away from Boscastle feeling like it was a wasted trip. It's a lovely location and even in less than optimal weather conditions you can still get good images. It also makes you work at your composition skills as you try to get all the most interesting elements into your frame.
So if this blog has inspired you to visit Boscastle, here are my three top tips for shooting the view from Penally Hill.
Take a Polariser - The waters of the harbour are a beautiful turquoise colour and using a polariser will help you take the glare of the water and emphasise those colours.
Explore the Hill - There are a number of compositions to be had up on Penally Hill. Try shooting up into the harbour and village as well.
Thrift - If you can time your visit, try and go there when the Thrift is flowering. There isn't a lot of it up there, but adding it when it is can really add something to a composition.
If you want to see how I went about shooting these images, check out my latest 5 Minute Photo Adventure video on Boscastle.
I'm going to try and get back to Boscastle again soon. I've been a few times but never managed to truly capture in the way that I would like. I have a number of compositions I like from Penally Hill but so far I have always missed out on some great light. As with Colmer's Hill and Bowerman's Nose, I will just have to persevere until I get an image that meets my vision!
So have you photographed Boscastle before? What viewpoints do you shoot there? Let me know in the comments below.

Daymark Tower
In the blog this week I share with you my video on shooting Daymark Tower on the South Devon coast. You can also read my top 3 tips on shooting at this fantastic location.
A Brief History
I started this blog back August 2016 and shortly after that, I posted my first video over on my YouTube channel. When I made that first video it was just something I wanted to do and I didn't really have a plan for growing and developing a YouTube channel.
However, after posting a few more videos I realised that I enjoyed the process of creating video content so I decided to keep it going. I then started getting some positive feedback and my subscriber count grew. I've always been committed to my website and blog, but I now also wanted to develop and grow my YouTube channel. Soon I had a long list of video content that I wanted to shoot.
I remain committed to my blog which is my primary output channel for my landscape photography stories and as long as I'm out taking pictures I normally have something to write about. Creating video is a different ball game though and while I have some grand ideas and themes for my videos, producing them takes time, so the rate of delivery is going be slower than the blog.
A New Video Series
So this brings us nicely onto this video I've just made on shooting Daymark Tower. I decided to shoot it as I've just had the following image used in Outdoor Photography this month (issue 208, June 2017, page 55).
I thought it would be useful if I shot a brief video on the location so other photographers could get a better idea of what the location is like before they visited it. It's only a short video and unlike most of my other forthcoming videos it will be about one location only so it will be quicker to produce. So this video marks the start of what I will hope will be a series of short videos that introduce photographers to locations they may not have visited before. A little dose of inspiration!
My website and my blog will always be my home and I will continue to produce regular content there as I have done before, but by producing more frequent video content I hope to share my landscape photography journey with an even wider audience.
The Daymark Tower
So onto my first location in this new series, The Daymark Tower.
I hope you enjoyed that video and that it's given you a better idea of what it is like to shoot there. Here is the final image I captured there in a bit more detail:
Nikon D750, Nikkor 24-70 mm VR f/2.8 @ 45 mm, f/13, ISO 100, 1/15 sec, 4:5 crop.
Unfortunately I didn't get the light I was after to produce a really stunning shot but hopefully, you've seen enough from my images and the video that you too will be inspired to visit this great location. If you do decide to go, here are my top 3 tips for shooting the Daymark Tower:
Shadows - While shooting at sunset will work at most times of the year you will be casting a long shadow if it is behind you. So if you want to include the path in your composition, check which direction the sun is setting so your shadow isn't cast along the path. Something which I failed to check in my planning for this video!
Wide Angle Correction - If you are shooting with a wide angle lens be aware that the tower may be distorted in the frame. This is generally easy to correct in post production, but it normally involves the image being cropped. So be sure to include some extra room around your composition so you don't lose anything critical when the image is corrected and cropped. Though I spend 99% of post processing life in Lightroom, I found the wide angle correction feature in Photoshop to be much better at correcting the distortions in the tower.
Timing - My preferred time of year to shoot Daymark Tower is when the crops are approaching harvest. I shot the video a little early which still works very well, but by around, mid-May the crops swaying in a gentle breeze looks very nice indeed.
I hope you enjoyed reading about and looking at the Daymark Tower. Hopefully by the time you read this I will have already shot the video for the 2nd location. I should also be well on my way to shooting some of those bigger videos that I have planned. If you want to know when those videos are published you can of course subscribe to my YouTube channel or you can follow me on the Instagram, Twitter, Facebook, Flickr and Google Plus where I will also post notifications when new video content is posted up. The video and additional content will always be available here on the blog as well.
Do you include man-made elements in your landscape photography? Are there are any locations in the South West that you would like me to make a short video on? Let me know in the comments below.

Getting to Know Colmer's Hill
In this blog post I tell about my 3rd visit to Colmer's Hill and how despite the experience of the previous 2 visits I still have a lot to learn about this fantastic Dorset location.
Third Time Lucky?
On paper Colmer's Hill is a relatively straightforward location to shoot. Its conical shape makes it stand out from the rest of the landscape luring the photographer into some obvious but pleasing compositions. However, as I've just learnt the most obvious composition isn't always the best.
My most recent visit to Colmer's Hill is my third this year. The previous two visits had largely been unsuccessful but I was putting both those visits down as exploratory shoots while I looked for the optimal position. On my third visit, I decided that I would opt to shoot the hill from a less elevated viewpoint so that the top of the hill would be above the horizon. On my previous visits, I had adopted a position on top of the hill opposite Colmer's Hill. This drops the top of the hill below the horizon which, based on the images I've seen, work best when mist surrounds the hill leaving just the peak visible, similar to this image I took on my first visit in January of 2017.
The weather forecast for my most recent visit wasn't for any mist but it did show signs that the high-level cloud could be well illuminated by the rising sun. These predicted conditions together with the plan but of shooting from a lower elevation I thought would provide me with the best chance of getting a good photo. With my plan decided I set the alarm for 04:30!
On my arrival at Quarr Lane at 05:45 the conditions were already looking promising so I quickly headed to my chosen spot. Sure enough, the top of Colmer's Hill was placed nicely above the horizon and I was sure I know had the best spot. So I started to set up my camera and waited for the cloud and light show to start. And start it did. Just not where I wanted it to be. Sure there was sufficient cloud above the top of the hill but the real action was happening just 45 degrees to my right.
Not Quite the Right Spot
The most glorious show of pink clouds was happening just above the spot where the rising sun was. As a personal preference, I don't shoot straight into the sun so I had positioned myself so that it would be excluded from the frame. It seemed like a good plan at the time, after all, the good colour in the sky is not often limited to a single spot. However if I had selected a more northerly position, so the sun was rising directly behind the hill, I would have been able to include the dramatic clouds in my composition.
However, landscape photography is a combination of luck, planning and experience. I had done my planning and luck I can't really control but having little more experience at the location may have allowed me to assess the conditions more effectively and possibly change the spot I was shooting from. It would have been a bit of a walk and might have needed a brisk run but it probably would have been worth it.
However the morning wasn't wasted as I still got out with the camera, enjoyed a lovely sunrise and managed to get this pleasing image.
Nikon D750, Nikkor 70-200mm f/2.8 @ 70mm, f/11, 1/13 sec, ISO 100, Lee Filters ND 0.9 soft grad.
Understanding Your Location
So what did I learn from this trip out with the camera? Well, despite the experience of my previous two visits, and planning for the third, I found that I still had plenty to learn about shooting Colmer's Hill. As I described in my previous blog article, Perseverance - Photographing Bowerman's Nose, it can take many, many trips to a location before you really get to know it and get an image that is worthy of the location. In some cases, you might never really know a location and it will continue to throw you a surprise or two. To be honest, that's probably a good thing though.
Even though I've been there three times I will certainly be going back again. Each time I go though I will understand the location a bit better and I will be able to make the necessary adjustments to increase the likely hood of success.
My Top 3 Tips for Colmer's Hill
So if you fancy a trip to Colmer's Hill, and why wouldn't you, here are my three top tips:
Take a long lens. You'll want something in the range of 24-70mm, but if you have it take a 70-200mm (or something can reach past 100mm).
Explore. You can shoot Colmer's Hill from a number of spots, covering a range of elevations and distance. You might need to go a few times to understand which spots work best and when.
Check Weather and Direction of Light. Colmer's Hill is both a sunrise and sunset location, and it works in a variety of weathers. Choose your spot(s) based on the conditions, but be prepared to change them.
If you'd like to see more of Colmer's Hill why not check out my 5 Minute Photo Adventure video that I shot while I was there. You can see how I created the images above and give you an idea of what it's like to shoot there.
So have you shot Colmer's Hill before? Do you have a favourite spot to shoot it from? Do you have a favourite location that you've visited many times but you still feel you are getting to know it? Let me know in the comments below.