

Why PureRAW 6 Is the First Step in My Landscape Workflow
In this video I share how I use DxO PureRAW 6 as the first step in my landscape photography workflow. This is not a traditional feature review. Instead, I want to show you how PureRAW fits into the way I actually work. I have been using PureRAW since version 2, and over time it has become a consistent part of how I prepare my RAW files before I begin editing.
Getting More From My RAW Files with PureRAW 6
Over the past few years I have refined my landscape photography workflow in many small ways. But one of the most important things I have done is what I do with my raw files before I start editing.
I have been using PureRAW since version 2. What began as an experiment gradually became part of my normal process. These days most of my landscape images pass through PureRAW before I open them in Lightroom.
A raw file is not yet an image. It is sensor data that still needs to be interpreted. The way that data is processed has a direct impact on fine detail, shadow recovery, noise, and overall flexibility in the edit. For landscape photography, where textures, distant detail, and subtle tonal transitions matter, that starting point is important.
In this video I walk through exactly where PureRAW 6 fits into my workflow and why I continue to use it. This is not a feature by feature breakdown. It is a practical look at how I prepare my raw files and why that first step matters in landscape photography.
If you are interested in getting more from your raw files I hope the video gives you something useful to consider.
🛒 You can download a free trial or purchase a full/upgrade license directly from DXO - https://www.dxo.com/dxo-pureraw/
And use the discount code JulianBaird15 (new licenses only, sorry!)

The Dance of Light and Shadow - How Black and White is Changing My Landscape Photography - Part 1
What’s the point in creating black and white landscape photographs? Is it just a last-ditch attempt to rescue a poor photograph? In this video I tell you why I’m now using black and white and with intent. Join me on #Dartmoor to find out more.
Dartmoor - A Land of Light and Shadow
It's funny, but probably not wholly unexpected, that the more experience you gain with landscape photography the more likely it is that your photography tastes will change over time. And this is what has happened to me. Kind of.
I say kind of because the style of landscape photographs that I like to capture hasn't changed. I still take natural looking photographs with minimal editing, using a wide-angle lens, and with lots of contrast and colour. It's just that now I'm happy to occasionally drop the colour element and work in black and white.
Capturing black and white landscape photographs is nothing new, and there are plenty of great photographers capturing black and white images of Dartmoor, but for me it's a style of landscape photography I'm getting increasingly comfortable with.
In the video below I talk more about my adoption of black and white landscape photography, how the Nikon Z8 is helping me, and I do it all from the land of light and shadow, Dartmoor.
Enjoy and let me know in the comments below your experience of black and white landscape photography.
Yes Tor Photography Gallery
Here are the photographs you saw me capture in the video.
Yes Tor #1, Dartmoor National Park - Nikon Z8 with Nikkor Z 14-30mm f/4 S at 17mm, f/13, 1/13 sec at ISO 64.
Yes Tor #2, Dartmoor National Park - Nikon Z8 with Nikkor Z 14-30mm f/4 S at 14mm, f/13, 1/13 sec at ISO 64.
Yes Tor #3, Dartmoor National Park - Nikon Z8 with Nikkor Z 14-30mm f/4 S at 18mm, f/13, 1/13 sec at ISO 64.
Yes Tor #4, Dartmoor National Park - Nikon Z8 with Nikkor Z 14-30mm f/4 S at 23mm, f/13, 1/13 sec at ISO 64.
Yes Tor #5, Dartmoor National Park - Nikon Z8 with Nikkor Z 14-30mm f/4 S at 30mm, f/13, 1/6 sec at ISO 64.
Nikon Z8 Pixel Shift Shooting for Landscape Photography
180 Megapixel raw files and reduced noise are all claims of Nikon’s Pixel Shift Shooting feature, but is it useful to the landscape photographer? In this video I show you how to shoot with Pixel Shift (on location) and how to merge the files in post-processing. I'll also look at the results to see if this is a feature that is useful to landscape photographers.
Learn How and When to Use Pixel Shift Shooting
Pixel Shift Shooting is a feature of the Nikon Z8 that was introduced in Firmware 2.0 (and it shipped with the Nikon Zf). Depending on how you configure it, Pixel Shift Shooting can generate 180-megapixel raw files with better colour reproduction and reduced noise. Sounds like a no-brainer for every shot, doesn’t it?
Well, things are rarely that easy in the world of landscape photography. With Pixel Shift Shooting there’s the risk of too much subject movement during capture (yes, the landscape does move!), there’s the additional storage space required for all the individual raw files, and there’s the additional post-processing required to create a single merged file. Even after all that, does it really make deliver you a better file to process for your landscape photograph?
I was curious to find out if this was just a headline grabbing feature or something of genuine use to the landscape photographer. So, in this rather long video I head out on location to show you how to capture a Pixel Shift sequence, then how to merge the sequence in post-processing to create a .NEFX file, and then I’ll look at the results to see if I can really notice any difference.
I hope you enjoyed this video, and you found the information useful. As I said in the video, I wouldn’t use Pixel Shift Shooting for all my landscape photographs (it has limitations), but the important thing is to know how it works and more importantly when to use it. It’s another tool at my disposal and one that I’m sure to use again in the future.

Why Your Image Editing Workflow Needs DxO PureRAW 4
In this video, I take a quick look at the newly released PureRAW 4 from DxO. If you've not used PureRAW 4 before this video will give you an overview of the product and if you are an existing PureRAW user, I'll highlight some of PR4's new features.
Making the Most of Your Raw Files in Post Processing
I admit that back in 2022 when I first tried DxO PureRAW 2, I was sceptical of the claims it was making in its advertising. However, I downloaded the free trial so I could evaluate it for myself. Needless to say, I was really impressed, and I bought the software.
The following year I paid for the upgrade to PureRAW 3, and now in 2024, PureRAW 4 is with us and I’m excited to see some genuinely useful new features. Who’d have thought it would be possible to get excited about a raw processing engine!
I’ve only just got my hands on PureRAW 4 and as I’m about to leave for a photography trip to Scotland I’ve only had time to create a short video on PR4. But hopefully it will provide new users with an overview of PR4 and for existing users an idea of some of the new features. Enjoy!
You can get a FREE trial or buy DxO PureRAW 4 here - https://tidd.ly/3F2y73y
If you want to know more about the reasons I use PureRAW then check out my original PureRAW 2 video - https://youtu.be/h39PVABNFYI
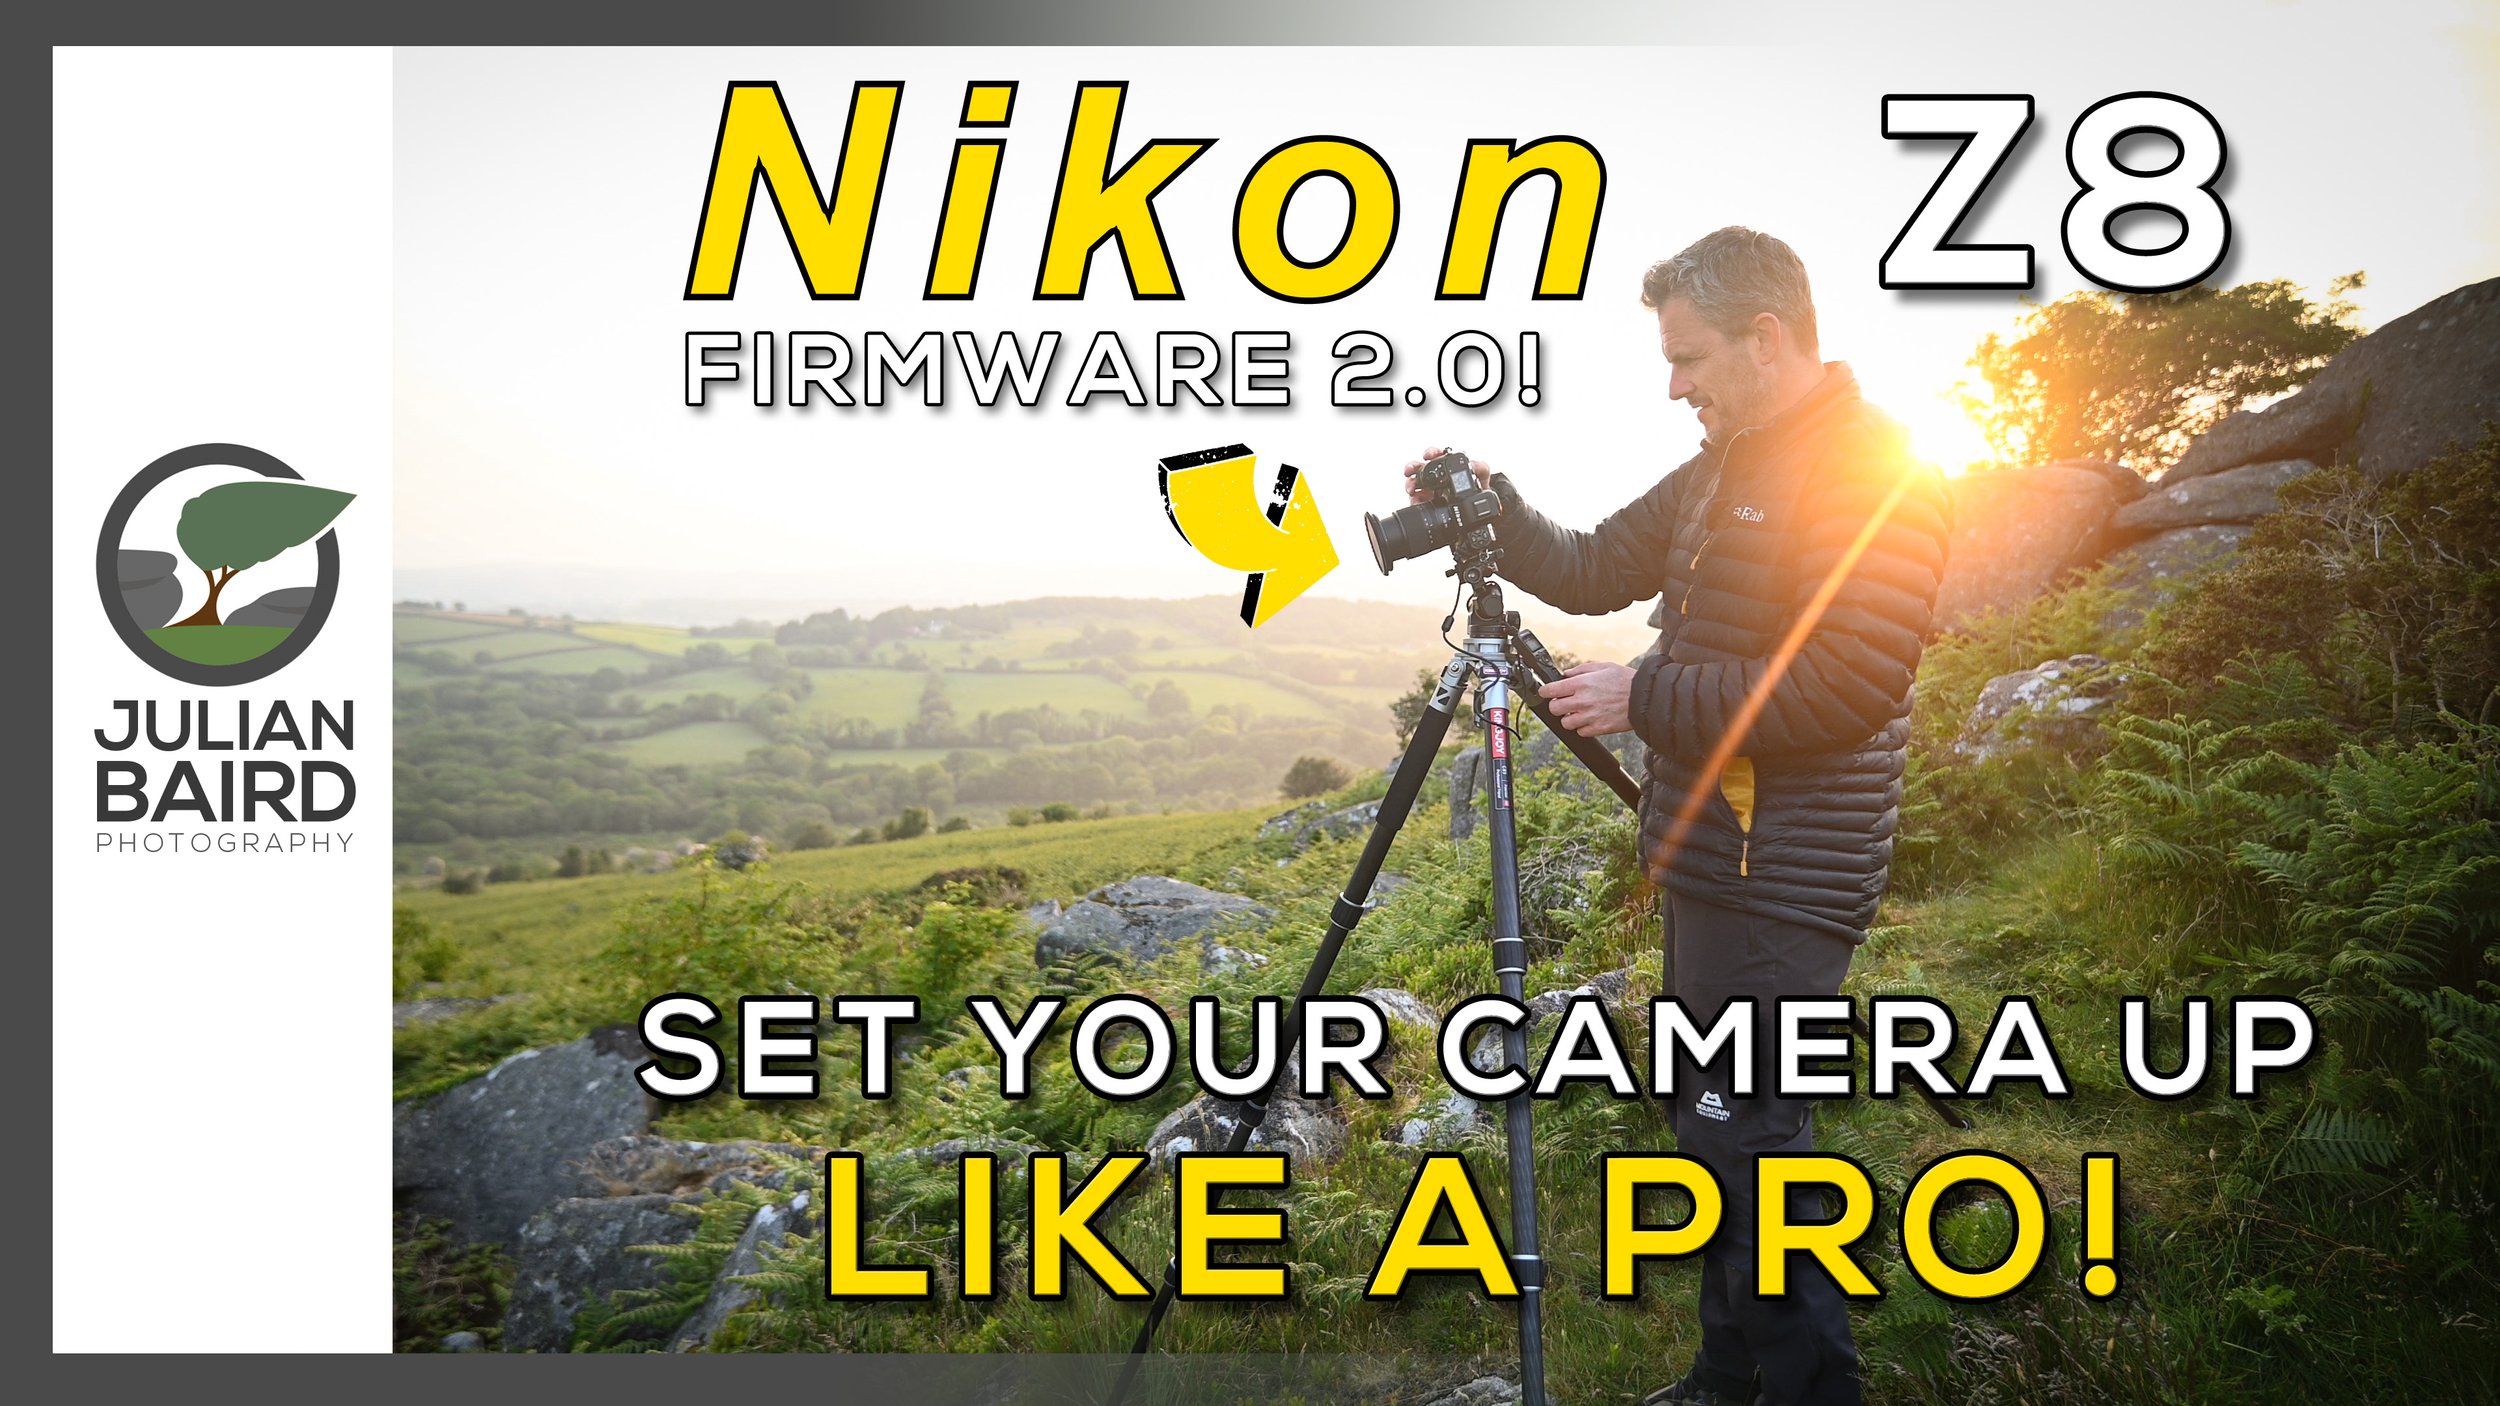
Nikon Z8 (Firmware 2.0) - PRO Settings for Landscape Photography - FREE Download
What are the best settings on a Nikon Z8 for landscape photography? In this video take you through the settings that I would immediately apply to any Nikon Z8 that I was going to capture landscape photographs with. I've also included some new settings that are available with Firmware 2.0.
What Are the Best Settings for Landscape Photography?
I’ve been using Nikon cameras since 2006 and over the years I’ve learnt the language behind the Nikon menu options and which settings I always apply to a new camera. So, when I received my Nikon Z8 I already knew most of the settings I would apply straight away. There were of course some new settings with the Z8 that my previous cameras didn’t have, but I quickly learnt which settings applied to me and my workflow.
As I went through the menu system of the Nikon Z8 configuring the settings for how I take landscape photographs I thought it would be useful if I shared them with you.
Like many things in photography, everyone works slightly differently, and there is often more than one way to achieve the same thing, so the settings I describe in this video are the BEST settings for ME, and the way I work. So, I’m not saying these are the settings you have to apply to get the results you want, but hopefully they’ll give you some ideas and tips on how to configure your Nikon camera. Even if you don’t have a Nikon Z8, many of these settings will apply to other Nikon Z cameras and some Nikon DSLR cameras.
In this video I will take you through the best settings I use for landscape photography to help me get the most out of my Nikon Z8. I’ve also created a reference PDF file with my settings in it so you can look at them in a more leisurely way. Details on how to access that are further down this blog post.
More Nikon Z8 Related Videos
Since receiving my Nikon Z8 I’ve produced several Z8 related videos. Why not check out my Nikon Z8 playlist or my Nikon Z8 review video below.
Subscribe and Get Access to a FREE Download
As I said in the video it’s easy to get access to a PDF with all the settings that I talked about in the video. All I ask that you do is subscribe to my newsletter. As soon as you confirm your subscription you will receive a link to where you can download the file in your email.
Please note - If you are already a newsletter subscriber, and you try to subscribe again you won’t receive the subscription confirmation email with the link in it. However, don’t panic! Links to all the free stuff I give away, including this PDF and my landscape photography locations map are included in every newsletter.

A Landscape Photography Project to Capture the Changing Seasons
Each season offers the landscape photographer something unique and wonderful. One of the best ways to discover those changes is to photograph the same location every season. Sounds like a great idea for a photography project, doesn't it? I thought it was, so I decided to photograph Holne Bridge on Dartmoor during summer, autumn, winter and spring. However, things didn't turn out how I expected them to.
The Value of Photography Projects
Undertaking a photography project can be a big commitment. In 2019 I began a yearlong photography project to capture a photograph every month from the same location and despite the tight brief, I still found it challenging. But a photography project should be challenging, shouldn’t it? I am also in the middle of my biggest ever photography project and despite 12 months passing by, I don’t feel like I’m making any significant progress.
Despite what I’ve said, a photography project is a wonderful thing, and every photographer should undertake one. They can be incredibly rewarding and stretch your skills as a photographer. The important thing is to make sure the project is achievable. There is no point in undertaking a 365 project when you know from the outset you won’t be able to capture an image every day.
A Failed Photography Project?
On the topic of completing photography projects, I have just completed a project that I’ve been working on for the last year. Well, I say completed, but that’s that not strictly true. Yes, it’s finished, but is it complete? I’ll explain everything in the video below.
What do you think? Is that a photography project failure? Let me know in the comments below.
Lastly, if you’re interested here is a list of gear and services, I used to create the print.
Photograph printed with the Canon imagePROGRAF Pro-300 - my video review
Paper from Fotospeed
Picture frames from Picture Frames Express
Project Photographs - Holne Bridge on Dartmoor
Here are the final 4 photographs.
Holne Bridge, Dartmoor - Summer - Nikon Z7, Nikkor 14-30mm f/4 at 20mm, f/11, 0.6 sec at ISO 200, Kase CPL.
Holne Bridge, Dartmoor - Autumn - Nikon Z7, Nikkor 14-30mm f/4 at 19mm, f/11, 1 sec at ISO 800, Kase CPL.
Holne Bridge, Dartmoor - Winter - Nikon Z7, Nikkor 14-30mm f/4 at 22mm, f/11, 0.5 sec at ISO 200, Kase CPL.
Holne Bridge, Dartmoor - Spring - Nikon Z7, Nikkor 14-30mm f/4 at 18mm, f/16, 1/5 sec at ISO 64, Kase CPL.
Why I PRINT My Landscape Photographs - From Capture to Print
When does a photograph become a photograph? Can a photograph be more than just a collection of ones and zeros? For me, the photographic process isn't complete until I have made a print. In this video, I share with you my passion for printing by capturing a landscape photograph on Dartmoor and then making a print of it to display on my wall.
The Print is the Photographs Rightful Inheritance
I don’t often quote people, but Charlie Waite got it right when he said, “The print is the photographs rightful inheritance”. Ever since I Discovered the Joy of Printing 5 years ago, nothing has given me more pleasure than making a big print of one of my photographs. There is something hugely satisfying about watching one of your photographs gradually feed out the printer. It’s that final stage that is the most rewarding. Holding your photograph in your hands. Seeing it on a computer monitor just isn’t the same.
Over the years I have printed hundreds of my photographs, but very few of them end up in frames and on my wall. Most are printed and displayed on my picture ledges where I not only study and learn from them, but I also enjoy them. They might stay there for a few days, even a few weeks, but at some point, they are replaced with new prints.
I have two framed photographs on my wall, both commended images from the Scottish Landscape Photographer of the Year competition. While I am immensely proud of those photographs, I’ve always been aware that I don’t have a framed photograph of Dartmoor.
A Dartmoor Connection
Dartmoor is my local area. An area that I derive an immense amount of pleasure in photographing. So, I set myself the task of not only capturing a photograph of Dartmoor, but one that I would be pleased to print, frame, and hang on my wall. I wanted to capture a photograph that would inspire me to discover and photograph Dartmoor. I wanted a photograph that captured the things that I love about photography on Dartmoor. I wanted a photograph that would allow me to reconnect to a moment experienced on Dartmoor.
Sounds easy, eh? Not exactly. If you’ve been reading this blog for any length of time you know how hard photographing Dartmoor can be. Frustrating is a better word. It’s just as well I love being outdoors as the photography isn’t always satisfying.
Patience is the key with Dartmoor and with some planning and a little luck, I was finally able to capture a photograph that I could hang on the wall. In the video below you can watch me capture the photograph, print it, frame it, and hang it on my wall. My photographs rightful inheritance. Well said Charlie, well said.
East Mill Tor, Dartmoor
A Perfect Morning at East Mill Tor, Dartmoor, Devon - Nikon Z7, Nikkor 14-30mm f/4 at 23mm, f/13, 0.6 sec at ISO 64, pre-processed in DxO PureRAW 2.
Editing and Printing
If you’d like to see how I post processed this photograph, I’ve done a whole video on that which you can view below.
Lastly, if you’re interested here is a list of gear and services, I used to create the print.
How I manage and edit my photographs - video playlist.
Photograph printed with the Canon imagePROGRAF Pro-300 - my video review
Paper from Fotospeed
Picture frames from Picture Frames Express - see how I design my frames in this video.
Will DxO PureRAW 2 IMPROVE My Images?
Over the years I've barely changed my landscape photography post processing workflow, but DxO PureRAW promises to change all that! It claims that its demosaicing, denoising, lens correction and deep learning technologies will improve sharpness, and reduce distortion, chromatic aberrations, and vignetting. Those are some bold claims, so I decided to try it out for myself. The results surprised me!
My Post Processing Workflow
I haven’t felt the need to change my post processing workflow for a long time. I’ve adapted it and leveraged new tools and capabilities from Lightroom as they’ve been released, but at a fundamental level, it hasn’t changed in at least 4 years. It can be summarised as a “light touch” approach using a combination of global and local adjustments in Lightroom. I very rarely use Photoshop for image editing, and I’ve never felt the need to add additional products to my workflow.
I’ve always been happy with my digital output but when I saw an advert or YouTube mention for a product called DxO PureRAW 2 something clicked, and I decided now was the time to try something different. I was also editing an image that I was going to print and hang on my wall, so it seemed the ideal time to try something new to see if I could squeeze even more out of my raw files.
I decided not to look at any video tutorials or marketing blurbs before trying this software for the first time. I wanted my first impressions to not only be free of bias but also genuine.
In the video below you will see me use DxO PureRAW 2 for the first time and hear my first impressions, both in terms of how the output looks digitally and in printed form. I’ll also tell you if I decided to use my own money to buy this product. (If you want to buy or try DxO PureRAW 2 then click here).
If you enjoyed this video, you might also enjoy the video I made where you can see me capture, print and frame the image I used in the video above.
I hope you enjoy both of these videos. Let me know in the comments below if you print your photographs and how you process your raw files.

Add Precision to Your Landscape Photography Compositions
In this blog post and video, I tell you the reasons why I love using a geared head when composing my landscape photographs. I also share my thoughts on my latest tripod head, the SunwayFoto GH-PRO II geared head. Is this the best geared head available?
My Preference for Geared Heads
My first “proper” tripod was a Manfrotto and it came with a ball head. This was back in 2008 so I can’t exactly remember what I thought about it, but I do know that I had soon replaced it with a Manfrotto “joystick” grip ball head.
When I started taking my landscape photography more seriously, I also decided to have 1-2-1 sessions with a professional. He was using a geared head and I soon became convinced that I needed one as well. So, in 2014 I purchased my first geared head and I’ve never looked back.
Here we are in 2021, and I’m now on my third geared head, the SunwayFoto GH-PRO II. It’s not that my previous 2 geared heads have failed in any way, but each successive geared head has been smaller, lighter and had better features.
I’d heard good things about the SunwayFoto geared head, so I was eager to get one and put it to good use. The question is, how good is it? Let’s find out in my video review below. Oh, and don’t worry, I’ll be capturing some landscape photographs as well (which you can see below).
Dartmoor Landscape Photographs
Belstone Tor at Sunset #1, Dartmoor National Park, Devon - Nikon Z7, Nikkor 14-30mm f/4 at
Belstone Tor at Sunset #2, Dartmoor National Park, Devon - Nikon Z7, Nikkor 14-30mm f/4 at
Belstone Tor at Sunset #3, Dartmoor National Park, Devon - Nikon Z7, Nikkor 14-30mm f/4 at
Belstone Tor at Sunset #4, Dartmoor National Park, Devon - Nikon Z7, Nikkor 14-30mm f/4 at

Essential Outdoor Photography Gear - Muck Boots Apex Zip Short Boots
There's more to landscape photography gear than just cameras and lenses. The clothing I wear can make the difference between being comfortable and creative, and being cold, wet and miserable. In my latest video, I head to Dartmoor to capture landscape photographs and tell you about an essential item of gear, my Apex boots from Muck Boots.
The Importance of Good Outdoor Clothing
As a landscape photographer, it’s all too easy to focus on making sure you have the best camera gear you can afford. While good camera gear is obviously important, the need for good outdoor clothing should not be ignored. I’ve learnt this the hard way. I’ve been cold, wet, and miserable when out with my camera. For the last few years though, I’ve always budgeted for good outdoor clothing as part of the photography kit bag.
Back in January, I talked about the winter photography gloves I use, but good outdoor clothing isn’t just for winter conditions. The latest addition to my kit bag is a pair of Apex Boots from Muck Boots. These boots are shorter and lighter weight than my Arctic Sport Boots, and for me, are better suited for the warmer months.
Thanks to some very wet weather over the last few weeks, my new Apex Boots were given a good workout. I put them to further use when I went out recently to capture some photographs of Holne Bridge and Venford Falls. As I was making a video as well, I also I thought this was the perfect time to talk about my thoughts on the boots. In the video below you can join me on my photograph trip to Dartmoor and see the boots in action.
I’m always happy to talk about the gear I use, whether it’s cameras or clothing, but I will always try and include some landscape photography as well. I hope you enjoyed watching my adventure to some of Dartmoor’s damper spots and learning about my new boots. Let me know in the comments below if there are any other items of outdoor clothing you might want to see a video about or let me know what your best item of outdoor clothing for photography is.
Holne Bridge Photographs
Here are the photographs you saw in the video in a bit more detail.
Holne Bridge at Spring #1, Dartmoor, Devon - Nikon Z7, Nikkor 14-30mm f/4 at 14mm, f/13, 1/5th sec at ISO 64, Kase Filters K9 CPL.
Holne Bridge at Spring #1, Dartmoor, Devon - Nikon Z7, Nikkor 14-30mm f/4 at 18mm, f/16, 1/5th sec at ISO 64, Kase Filters K9 CPL.
Venford Falls Photographs
Venford Falls at Spring #1, Dartmoor, Devon - Nikon Z7, Nikkor 14-30mm f/4 at 15mm, f/9, 0.4 sec at ISO 64, Kase Filters K9 CPL.
Venford Falls at Spring #3, Dartmoor, Devon - Nikon Z7, Nikkor 14-30mm f/4 at 30mm, f/8, 1/8th sec at ISO 64, Kase Filters K9 CPL.
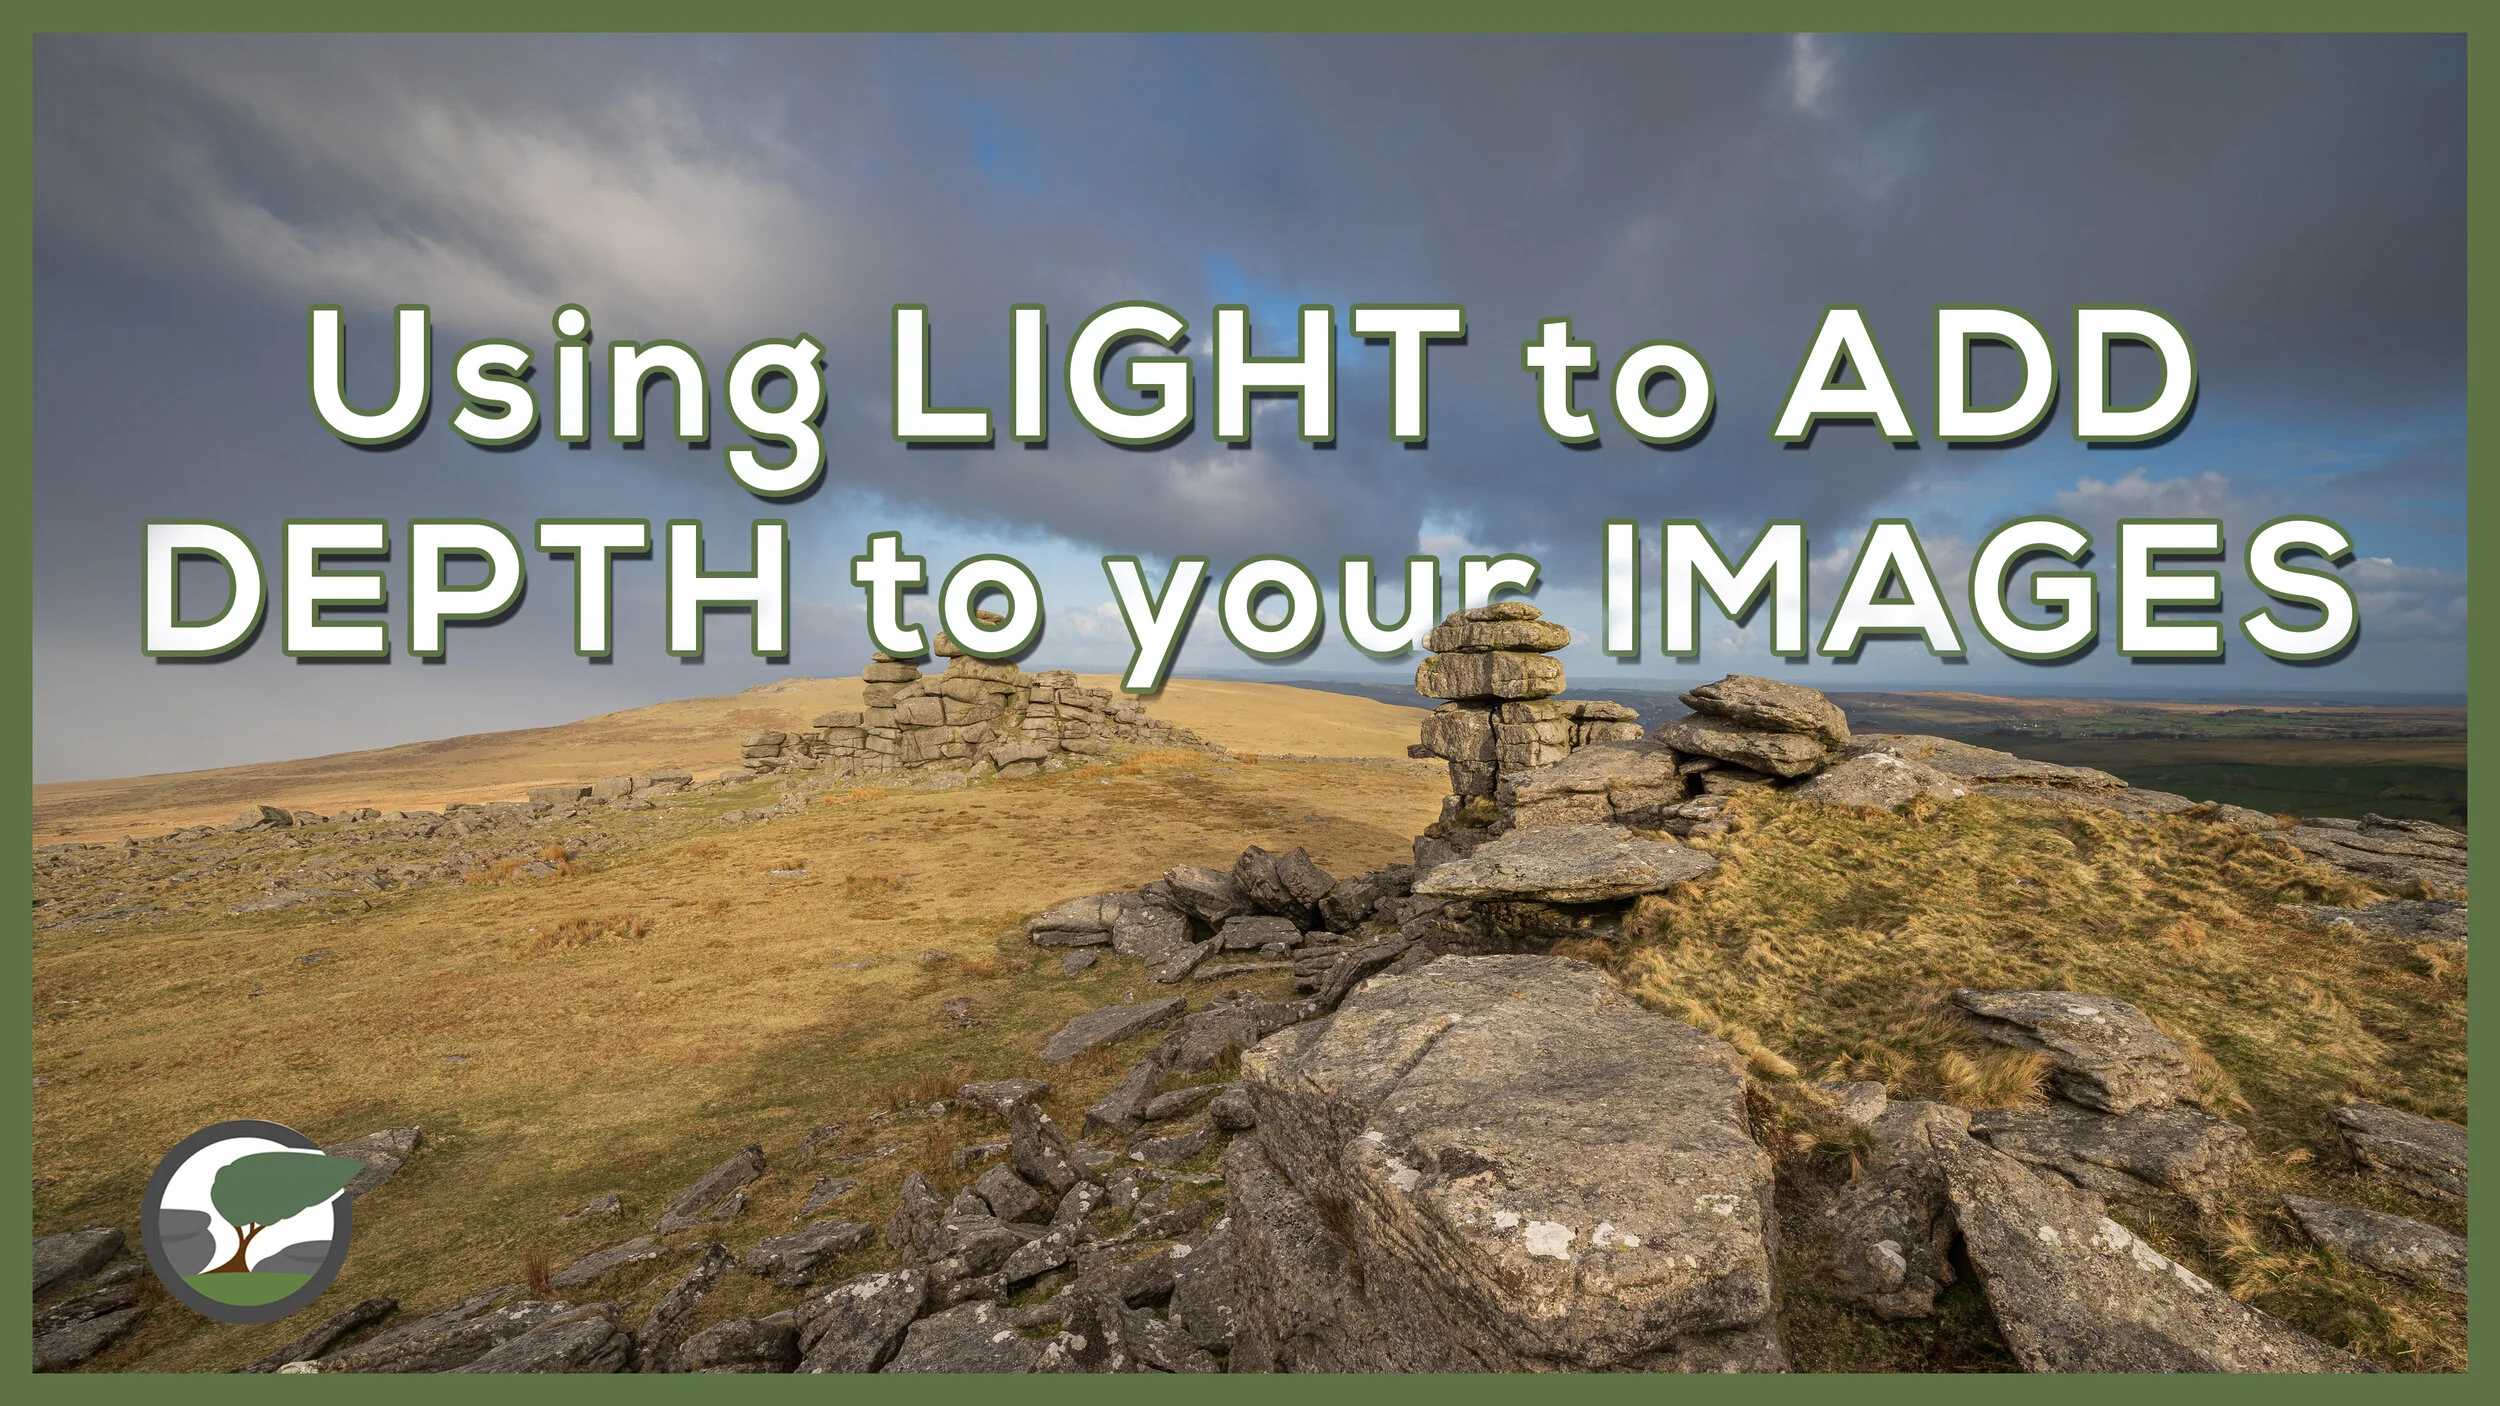
Using Light to Add Depth to Your Landscape Photographs
How does light transform the landscape and add depth to your photographs? In this video, I head up to Great Staple Tor on Dartmoor where the changing light provides me with the chance to show you how to use light to add depth and contrast to your landscape photographs.
Chasing the Light
Photographers often use the phrase “chasing the light” and for good reason. Light is possibly one of the most important elements in a landscape photograph. Light can change the look, feel and mood of an image. Light can add depth and contrast to a photograph. Nowhere is this more evident to me than it is up on Dartmoor. I’ve lost count of the number of times that I’ve been stood in front of a spectacular tor only for my photograph to look dull and two-dimensional thanks to flat light.
Dartmoor is also a great place to see how light can add depth and contrast to your landscape photographs! I recently visited Great Staple Tor where the constantly changing cloud cover reminded me how quickly the light can change on Dartmoor and how that changing light can be used to good effect.
Not one to pass up the opportunity to create a video on the subject I created this video. Enjoy!
Landscape Photographs from Great Staple Tor
Below you’ll find the photographs you saw in the video plus a bonus photo that I took early on that didn’t make the video.
Dawn over Great Staple Tor, Dartmoor, Devon - Nikon Z7, Nikkor 14-30mm f/4 at 14mm, f/18, 1/4 sec at ISO 64.
Dawn over Great Staple Tor #2, Dartmoor, Devon - Nikon Z7, Nikkor 14-30mm f/4 at 20mm, f/11, 0.4 sec at ISO 64.
Dawn over Great Staple Tor, Dartmoor, Devon #3 - Nikon Z7, Nikkor 14-30mm f/4 at 14mm, f/11, 0.4 sec at ISO 64.
Dawn over Great Staple Tor, Dartmoor, Devon #4 - Nikon Z7, Nikkor 14-30mm f/4 at 16mm, f/11, 1/15th sec at ISO 64.
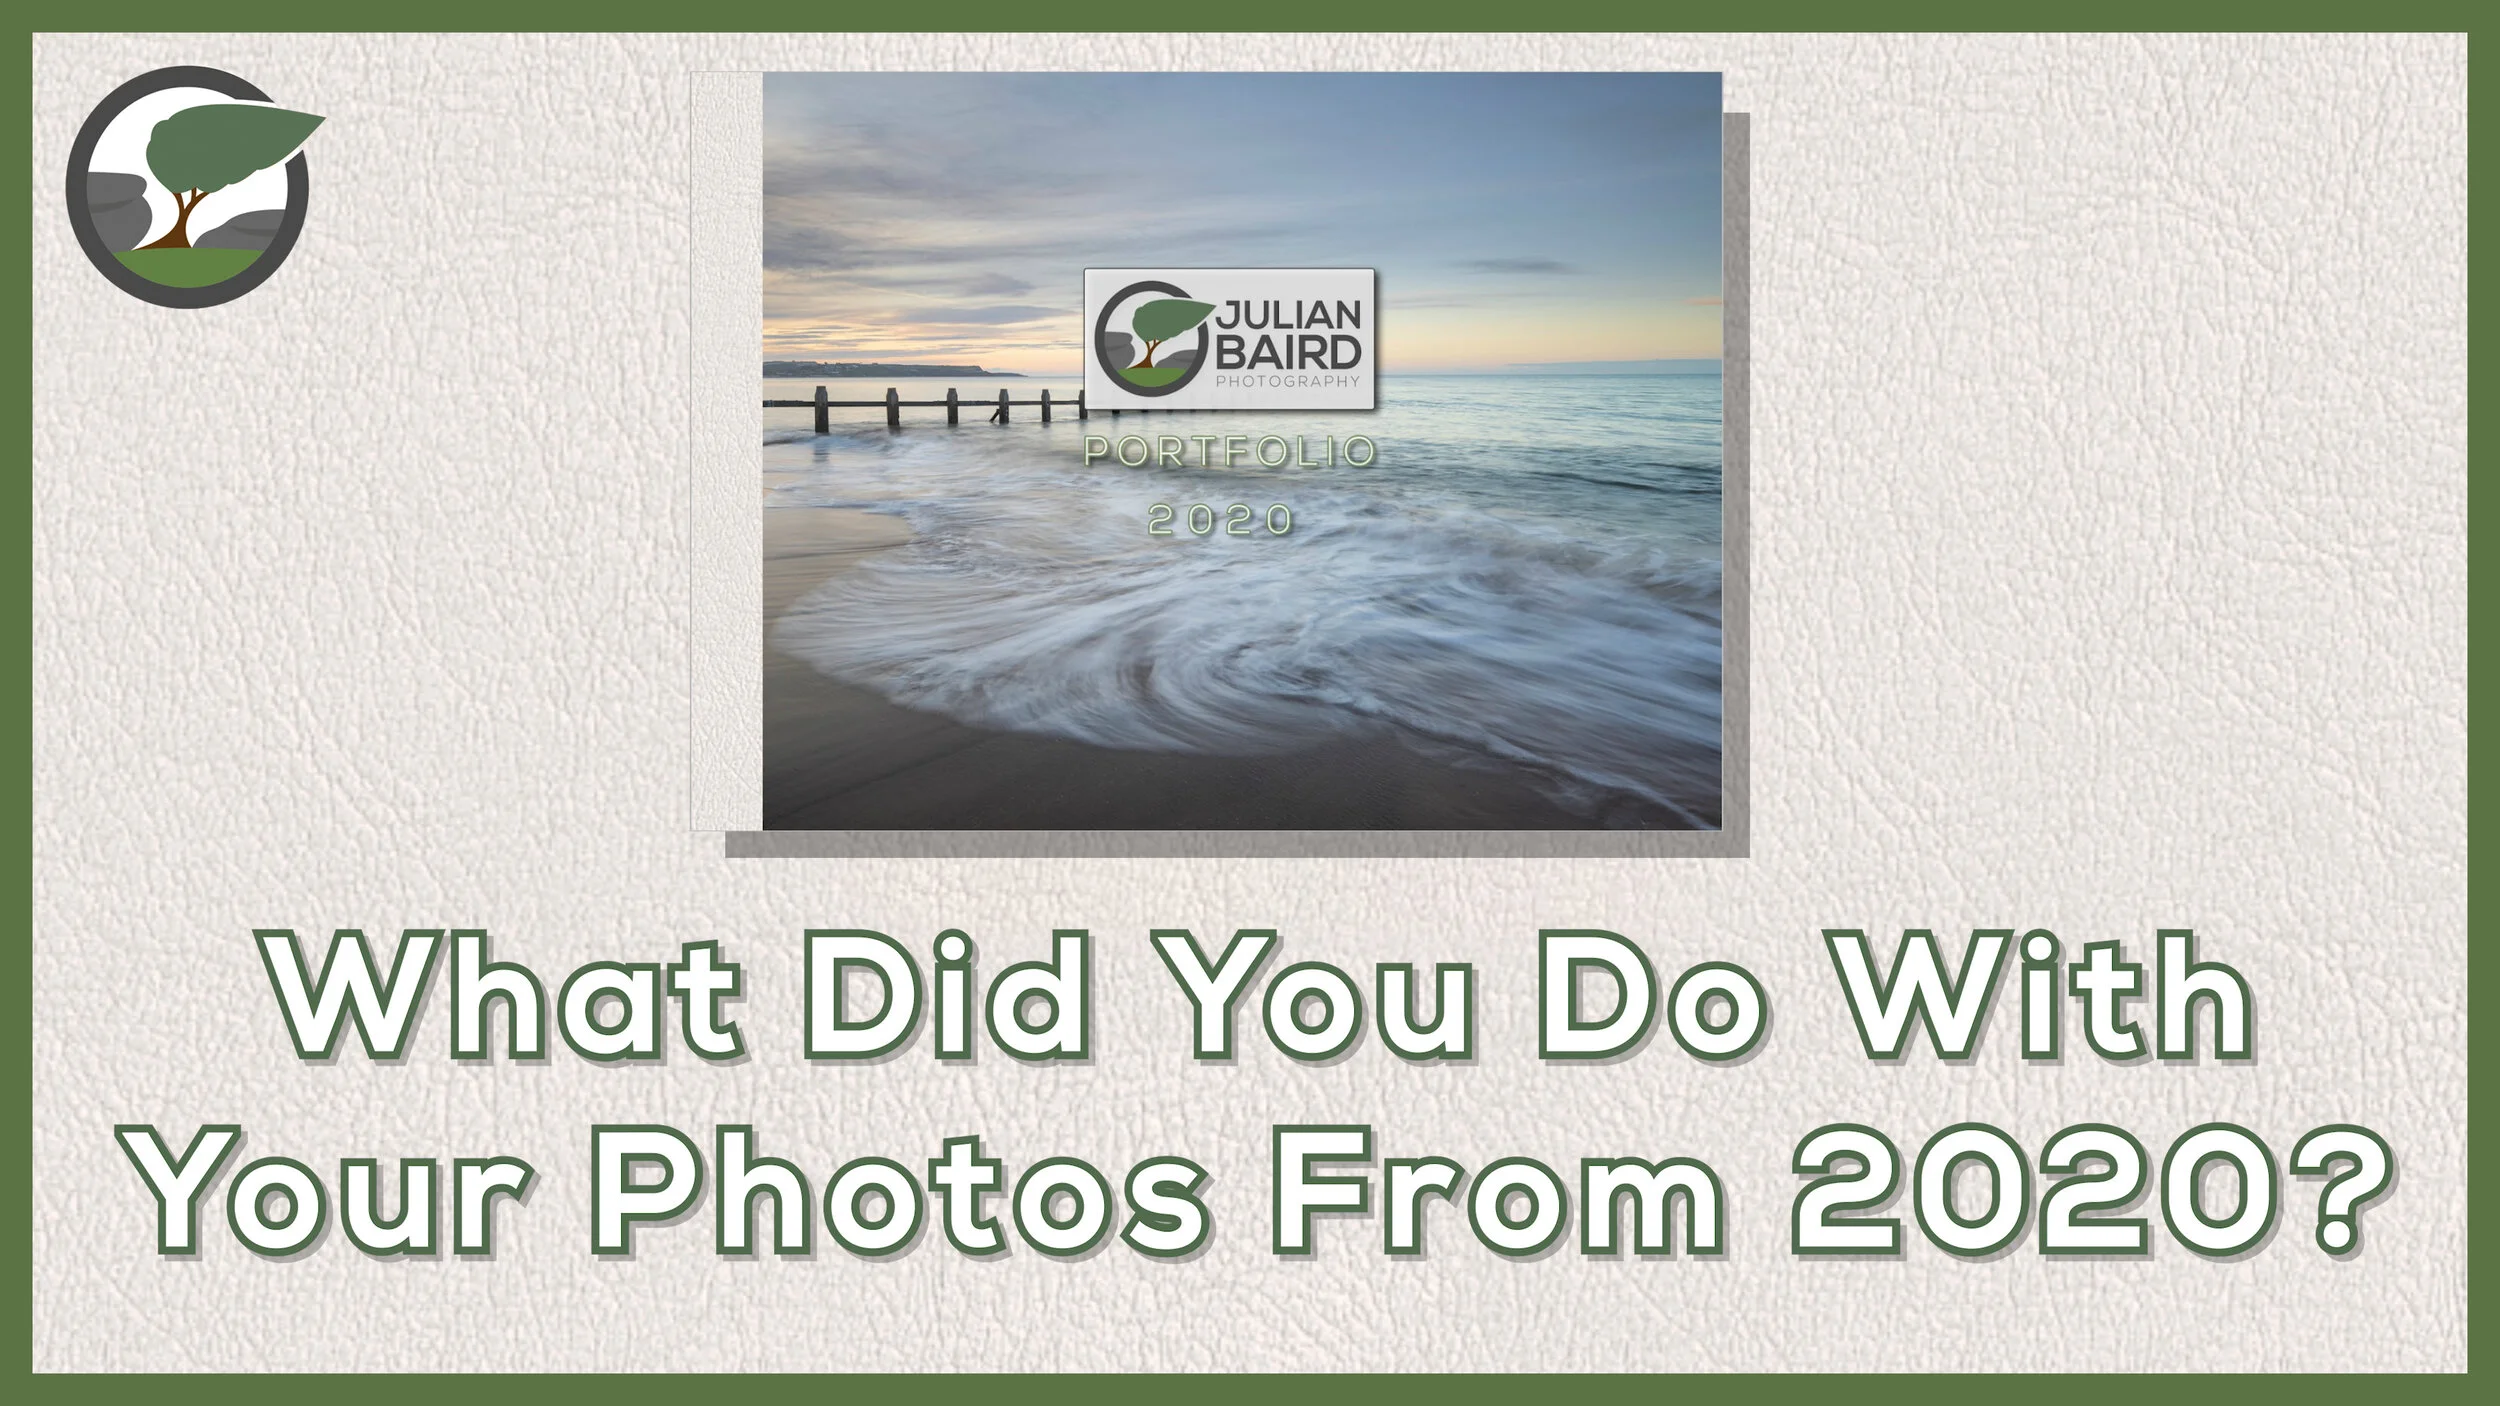
Crafting a Luxury Photo Book With My 2020 Landscape Photographs
Sometimes you just need to produce something special with your photographs. In this video, I select my best landscape photographs from 2020 and design a rather luxurious photo book.
Taking the Positives from 2020
Let’s face it, 2020 wasn’t exactly a stellar year. Everyone’s photography suffered in some way but that pales in comparison to the wider problems the pandemic brought. However, I’m a half glass full kind of person so I will always try and look for the positives. Despite missing some important photographic events through the year, I was still surprised by the number of good images that I had captured during 2020.
At the start of 2020 I made the commitment to myself that I would create a photo book of my images at the end of each year. I was inspired to do this after I created my first Saal Digital photo book which was a retrospective look at the previous 10 years of my landscape photography. You can see how I went about that in this blog post.
Looking at the book was such a wonderful experience, much in the same way that viewing an individual print is such a positive thing to do. That experience stuck with me for 2020, so when 2021 rolled around I got to work on creating my Portfolio 2020 book. As before I decided to have it printed by Saal Digital but this time I went the extra mile and added something a bit special.
You can find out all about my Portfolio 2020 book, and the extra item I ordered in the video below.
Do you create your own photo books? Has this video inspired you to do something similar? Let me know in the comments below.
Capture or Editing - Which Has the Biggest Influence on Landscape Photography?
How much of a photographer’s vision is realised in post processing? Is the look of a landscape photograph fixed at the point of capture? Can one raw file produce two different photographs? In this post, I aim to answer this question by editing another photographer’s raw file in Lightroom.
Virtual Collaborations
Collaborations can be a great way to discover more about your photography. They can also be a lot of fun. That being said I don’t do them that often. I tend to only do them with photographers I know and trust, and when the idea is unique or interesting. They require a fair bit of planning and coordination, but they can be rewarding if they benefit everyone involved in the collaboration.
Time is perhaps the biggest enemy of collaborations, but in recent months it’s been a very different issue. I don’t need to go into too much detail here. I’ll just mention the word “lockdown” and you’ll know exactly what I mean.
With travel not possible I found myself a bit stuck for collaboration ideas when I was chatting to my mate and fellow photographer Chris Sale the other day. We were both looking for something we could do together that didn’t involve travel. I’ve worked with Chris a few times on various projects, such as the documentary I made about him recently, but whatever we’ve done, we’ve normally done it in person.
How Important is Post-Processing?
As I chatted with Chris, I came up with the idea of editing each other’s raw files. This would be something we could do without meeting up, but it would still hopefully prove to be interesting. Neither of us would normally let someone else edit one of our raw files, but we’ve been friends for a while now so we both felt we could trust each other with our precious digital negatives.
The question we were aiming to answer in our collaboration was how much influence does post-processing have on the final image? If you give one raw file to two different photographers, how different will the results be? Is the output of the image fixed at the time of capture, or does the photographer's post-processing style have a significant impact on the output? You get the idea!
In the videos below you’ll find Chris editing one of my raw files, and me editing one of Chris’ raw files. At the end of each video, we’ll present our results back to each other, and compare them to the photographer's original edit. How different will the photographs look? Find out below.
Did the results surprise you? Would you ever let someone edit one of our raw files? Let me know in the comments below
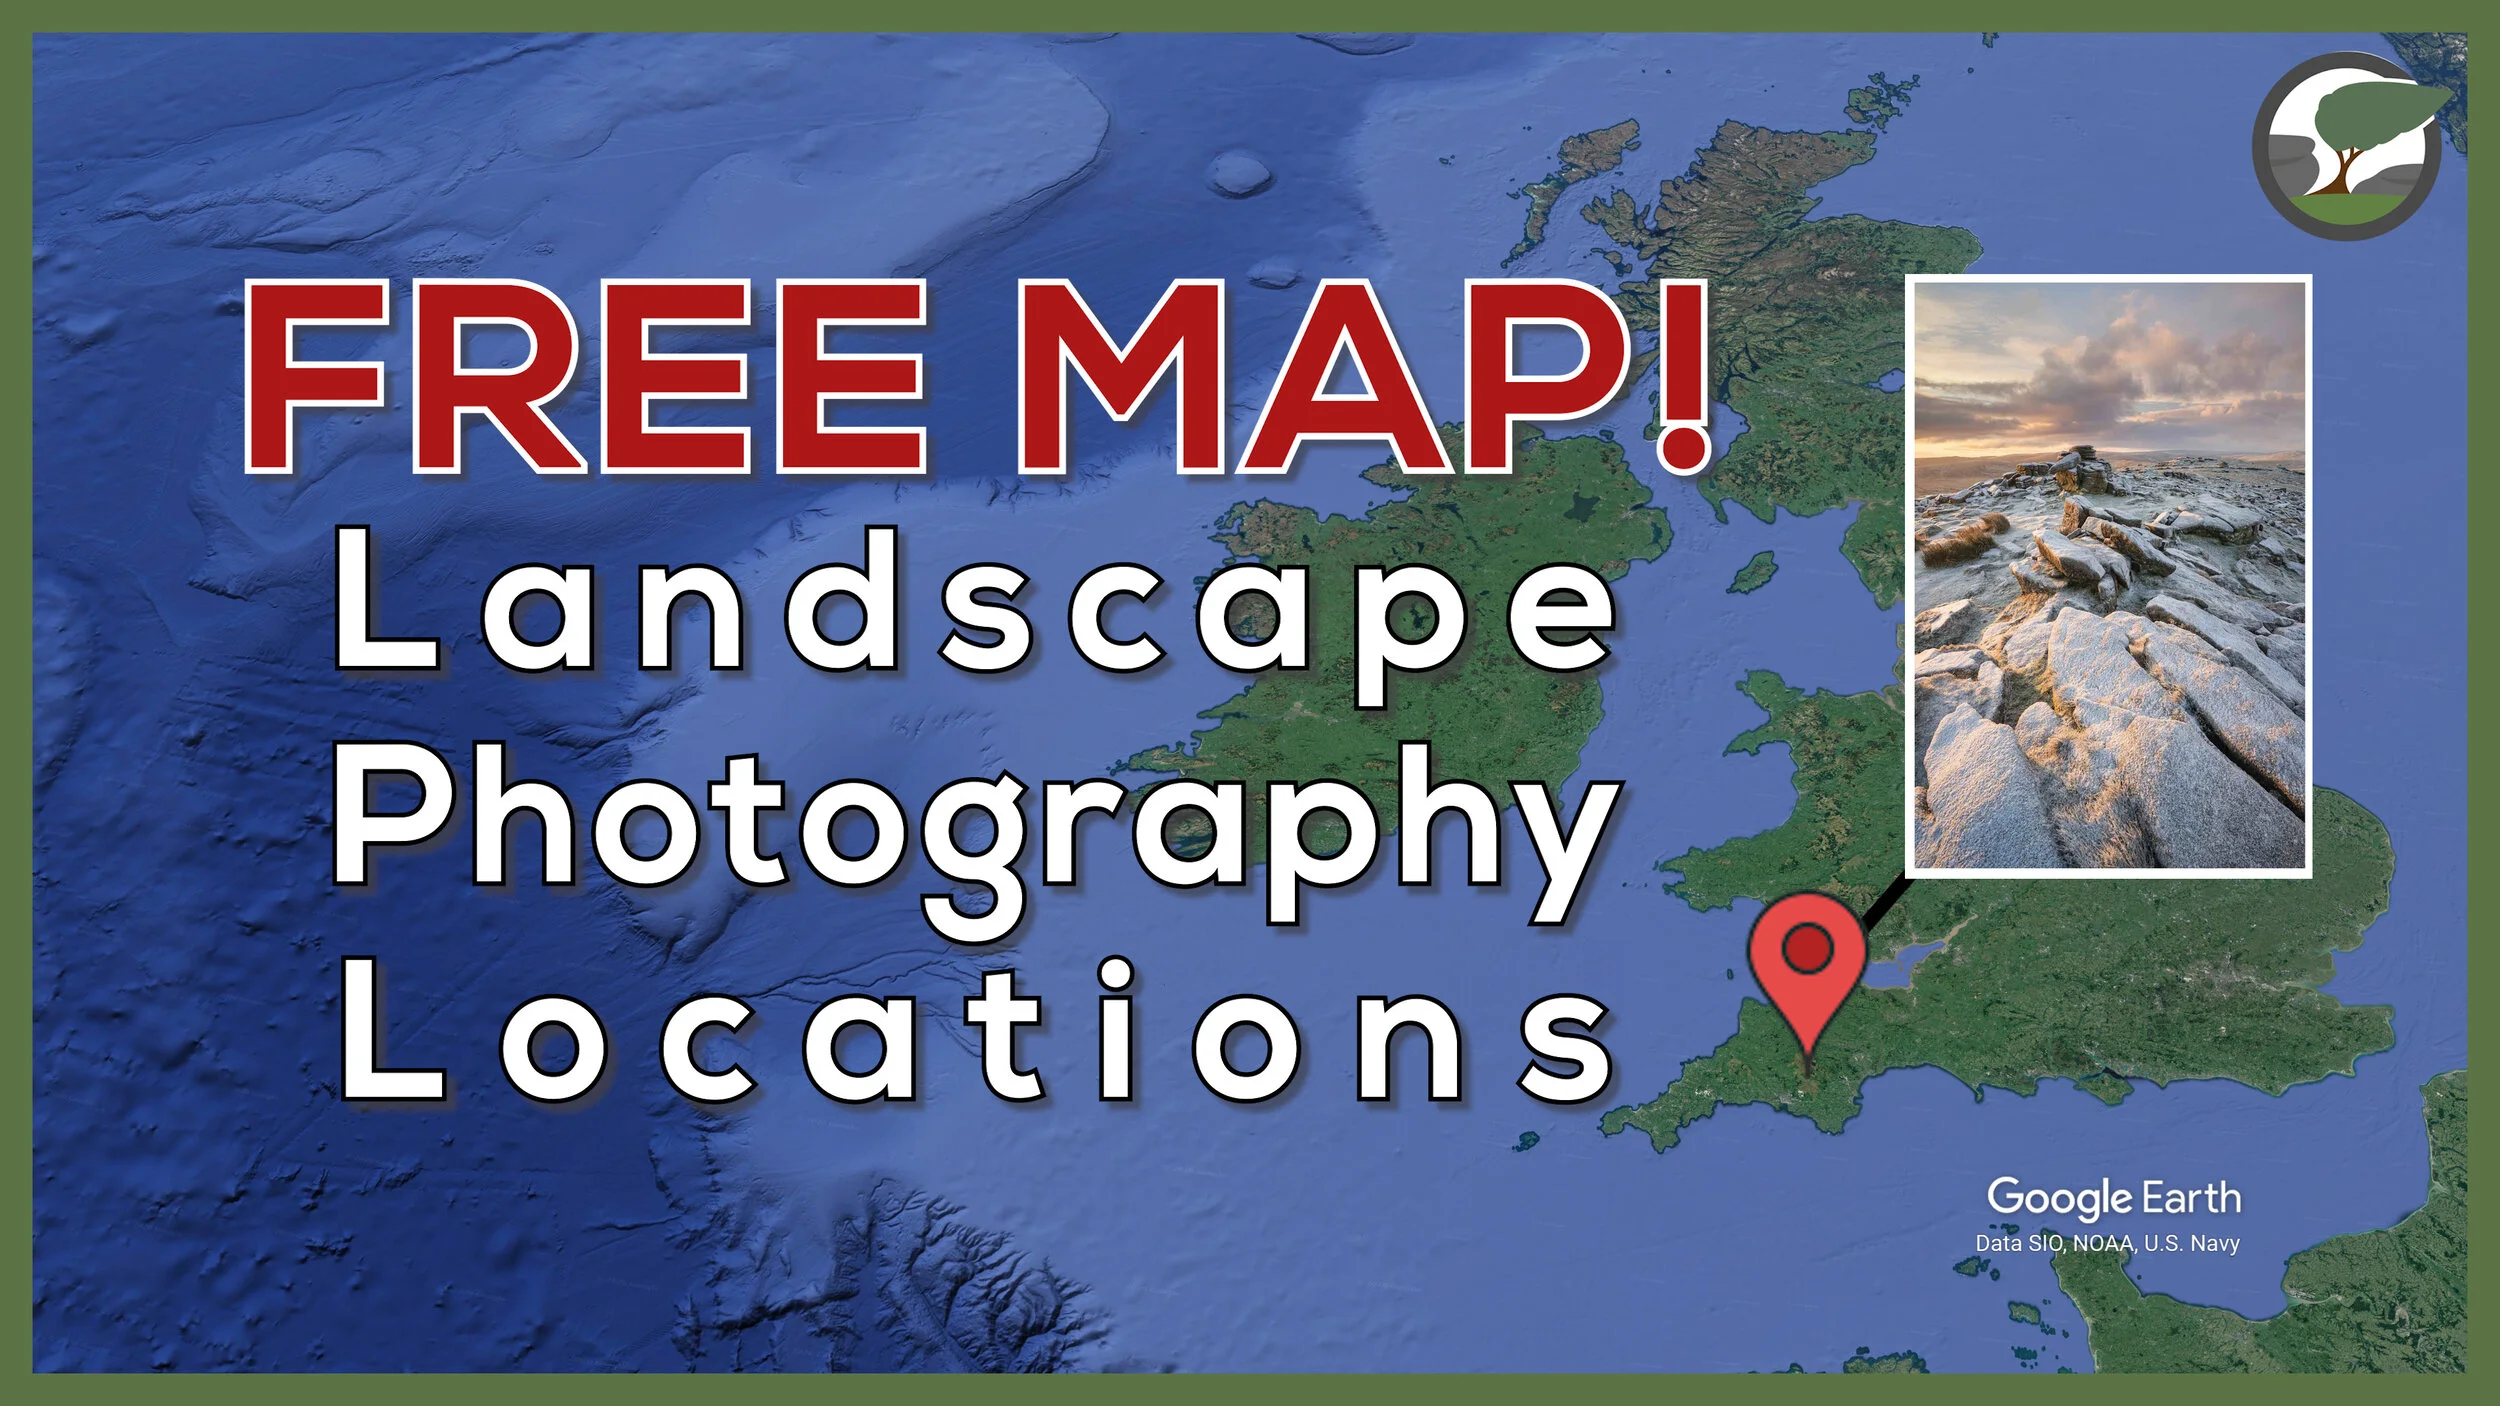
My FREE Landscape Photography Locations Map
What will your next landscape photography location be? Are you looking for a little bit of inspiration for your next adventure? In this video, I share with you my FREE landscape photography locations map.
A Map of My Blog
When I started this blog back in 2016, I committed myself to publishing regular posts of my photography adventures. I’m proud to say that I have kept that commitment and now my blog is packed full of stories, adventures, photographs, and videos.
With so much content for even me to navigate I decided to create a custom Google Map with pins in all the locations I have photographed and written about. Once it was complete it occurred to me that it would a wonderful thing to share with the people that regularly visit my website!
In the video below I talk more about my map of landscape photography locations and how to use it. So, if you’ve ever wanted to know where to shoot on Dartmoor, or you are just looking for some photography inspiration I hope you will find the map useful.
Subscribe and Get Access
As I said in the video it’s really easy to get access to my locations map. All I ask that you do is subscribe to my newsletter. As soon as you confirm your subscription you will receive a link to the map in your email.
Thanks for your support, it is very much appreciated.
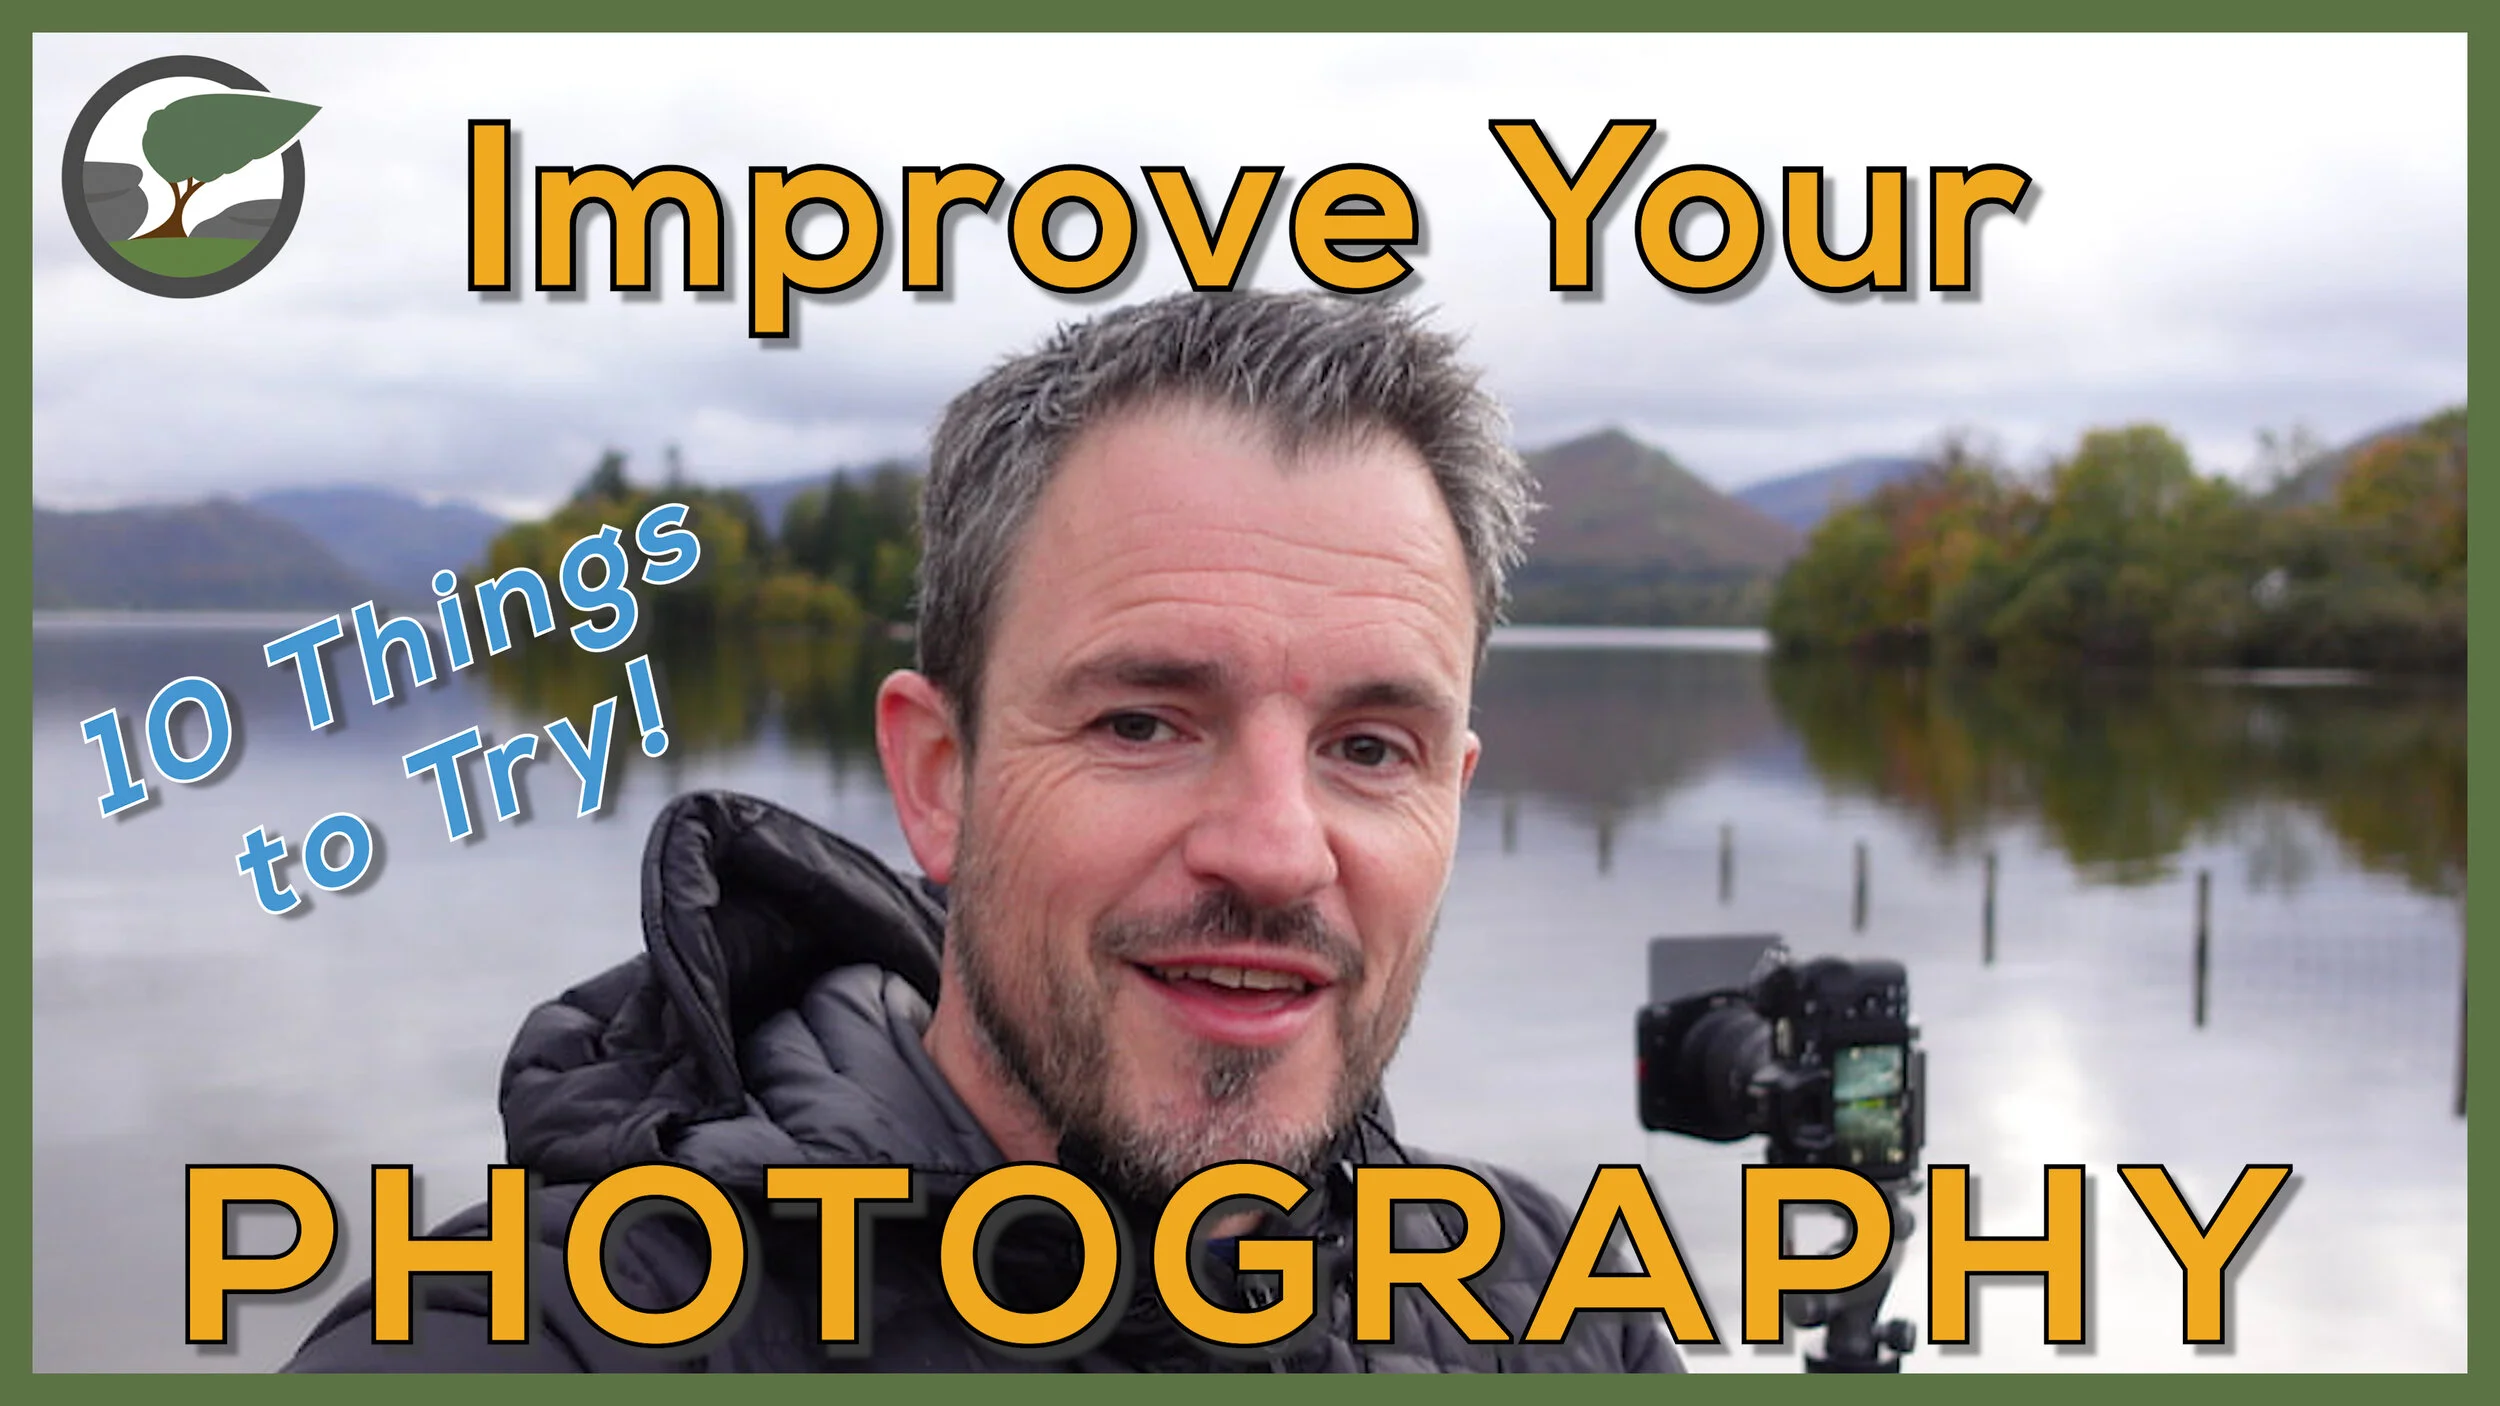
Improve Your Landscape Photography Skills
Over the years I’ve done several things that have helped improve my landscape photography. In this blog post, I share with you what some of those things are.
Things I’ve Learnt on My Way to Becoming a Better Photographer
How do you become a better photographer? It’s not an easy question to answer, and to make things more complicated there certainly isn’t just one answer. Everyone follows a different path and importantly that journey never ends. No matter what level of experience you are at with your photography there will always be ways to improve.
In the video below I share with you some of the things that worked for me. This isn’t a prescriptive video in which I’m saying you must follow every idea. It is more about providing you with some suggestions. People learn and improve in different ways so not all these tips will be suitable for your photography journey. Hopefully though one or two of my suggestions will be useful and you might put them to the test to see if they can help you.
Useful Links I Mentioned in the Video
For 1-2-1 tuition and workshops take a look at:
Try these YouTube channels and podcasts:
The Art of Photography - YouTube channel by Ted Forbes
Sean Tucker - YouTube channel
A Beautiful Anarchy Podcast - David Duchemin
Check out all my printing videos in this playlist.
Snowdonia Landscape Photographs
Aberglaslyn Pass, Snowdonia National Park, Wales - Nikon Z7, Nikkor Z 14-30mm f/4 at 14mm, f/13, 1/8th sec at ISO 64, Kase Filters K9 CPL.
Afon Glaslyn from Pont Aberglaslyn, Snowdonia National Park, Wales - Nikon Z7, Nikkor Z 24-200mm f/4-6.3 VR at 51mm, f/13, 1/4th sec at ISO 64, Kase Filters K9 CPL.
Waterfall near Cwm Bychan, Snowdonia National Park, Wales - Nikon Z7, Nikkor Z 14-30mm f/4 at 18mm, f/11, 1/8, 0.4 sec at ISO 64, Kase Filters K9 CPL.
Lake District Landscape Photographs
Derwent Isle, Lake District National Park - Nikon Z7, Nikkor Z 24-70mm f/4 at 37mm, f/11, 1/8, 30 sec at ISO 64, Kase Filters K9 CPL and 6 stop ND.
Derwent Water from Crow Park, Lake District National Park - Nikon Z7, Nikkor Z 24-70mm f/4 at 29mm, f/8, 0.5 sec at ISO 64, Kase Filters K9 CPL, 9 image panoramic cropped at 6:17.
Strandshag Bay, Lake District National Park - Nikon Z7, Nikkor Z 24-200mm f/4-6.3 VR at 200mm, f/8, 0.8 sec at ISO 64, Kase Filters K9 CPL, 9 image panoramic cropped at 6:17.

Celebrate YOUR Photography by Creating a Landscape Photography Calendar
I want to inspire you to celebrate YOUR photography in 2021 creating your very own landscape photography calendar. I'll take you through the process of how I created my calendar, share my thoughts on the final product and tell you why you should also make one.
A New Photography Project
Not all photography projects need to be about going out and capturing new images. Some projects can be about celebrating the images that you already have in your library. There are many ways to do this, but I think one of the most rewarding things to do is to make prints of your photographs. Why spend all that time (and probably money) capturing wonderful photographs for them to end up sitting on a hard drive somewhere.
I’ve printed my photographs in a variety of different ways from single prints, home galleries and by creating a book. It was while creating the book that I had the idea of making a calendar. I was using the services of Saal Digital to create my book when I noticed that they also printed calendars and so I made a note to make one towards the end of the year.
Celebrate YOUR Photography
As the end of 2020 approach, I decided it was time to start that project to create a calendar. The idea of creating a calendar was exciting and I thought that if I were excited then I was sure other people would feel the same. Not excited about my calendar that is, but excited about the idea of creating YOUR own calendar! What better way to celebrate your photography than by creating a calendar?
So, in the video below I share with you the process of how I created my calendar with Saal Digital. The purpose of the video isn’t to sell you my calendar but to inspire you to create one yourself! Aside from selecting which 12 images to include in the calendar, the process of putting it together is relatively straight forward. What better way to travel through each month of 2021 by marveling at one of your own images!
A Very Limited Edition
While I have mentioned that I used Saal Digital to create my calendar, I did pay for my own calendars. It’s also not my goal to sell my calendars. This is very much a personal project for me. While I didn’t order hundreds of calendars, I did order two. One is for me to hang on my wall and the other is to giveaway to someone like you. Someone in my community. Details of how you can win this very limited edition calendar are all in the video.
I’ll be doing another photography publishing project early next year so stay tuned to the blog!

Not Every Photograph Needs to be a Masterpiece
As a landscape photographer I'd like every shoot to result in a portfolio class image, but this is an unrealistic expectation. Sometimes you just need to take joy in the experience of capturing an image and learning from it.
Embrace the Grey Once Again!
I’ve made several videos on the theme on embracing the grey and because I live in an area where overcast days aren’t exactly unheard of it might not surprise you that I’ve decided to do another one. For me, the key to a successful shoot in grey and overcast conditions is to find the right subject (as I discussed in this video).
There’s been a location near to home that I’ve been wanting to photograph for a while and that’s the Philip Lucette Light near Teignmouth. I found out about this interesting location from an image I saw from Neil Burnell and a video from Lynne Luxon-Jones. It looked like an interesting subject to photograph and I thought it would make for a great #EmbracetheGrey subject.
In the video below you can follow me along as I photograph this location for the very first time. I also show you how I edit the image to give me a specific look and feel, and I of course make a print of the image. I also discuss in the video the importance of just going out to take pictures, and not to worry about every shot being a masterpiece. After all, we should love the art of taking a picture first and foremost.
Enjoy!
Philip Lucette Light #2, Shaldon, Devon - Nikon Z7, Nikkor 24-200mm f/4-6.3 at 48mm, f/8, 214 seconds at ISO 64, Kase Filters CPL and 10 Stop ND
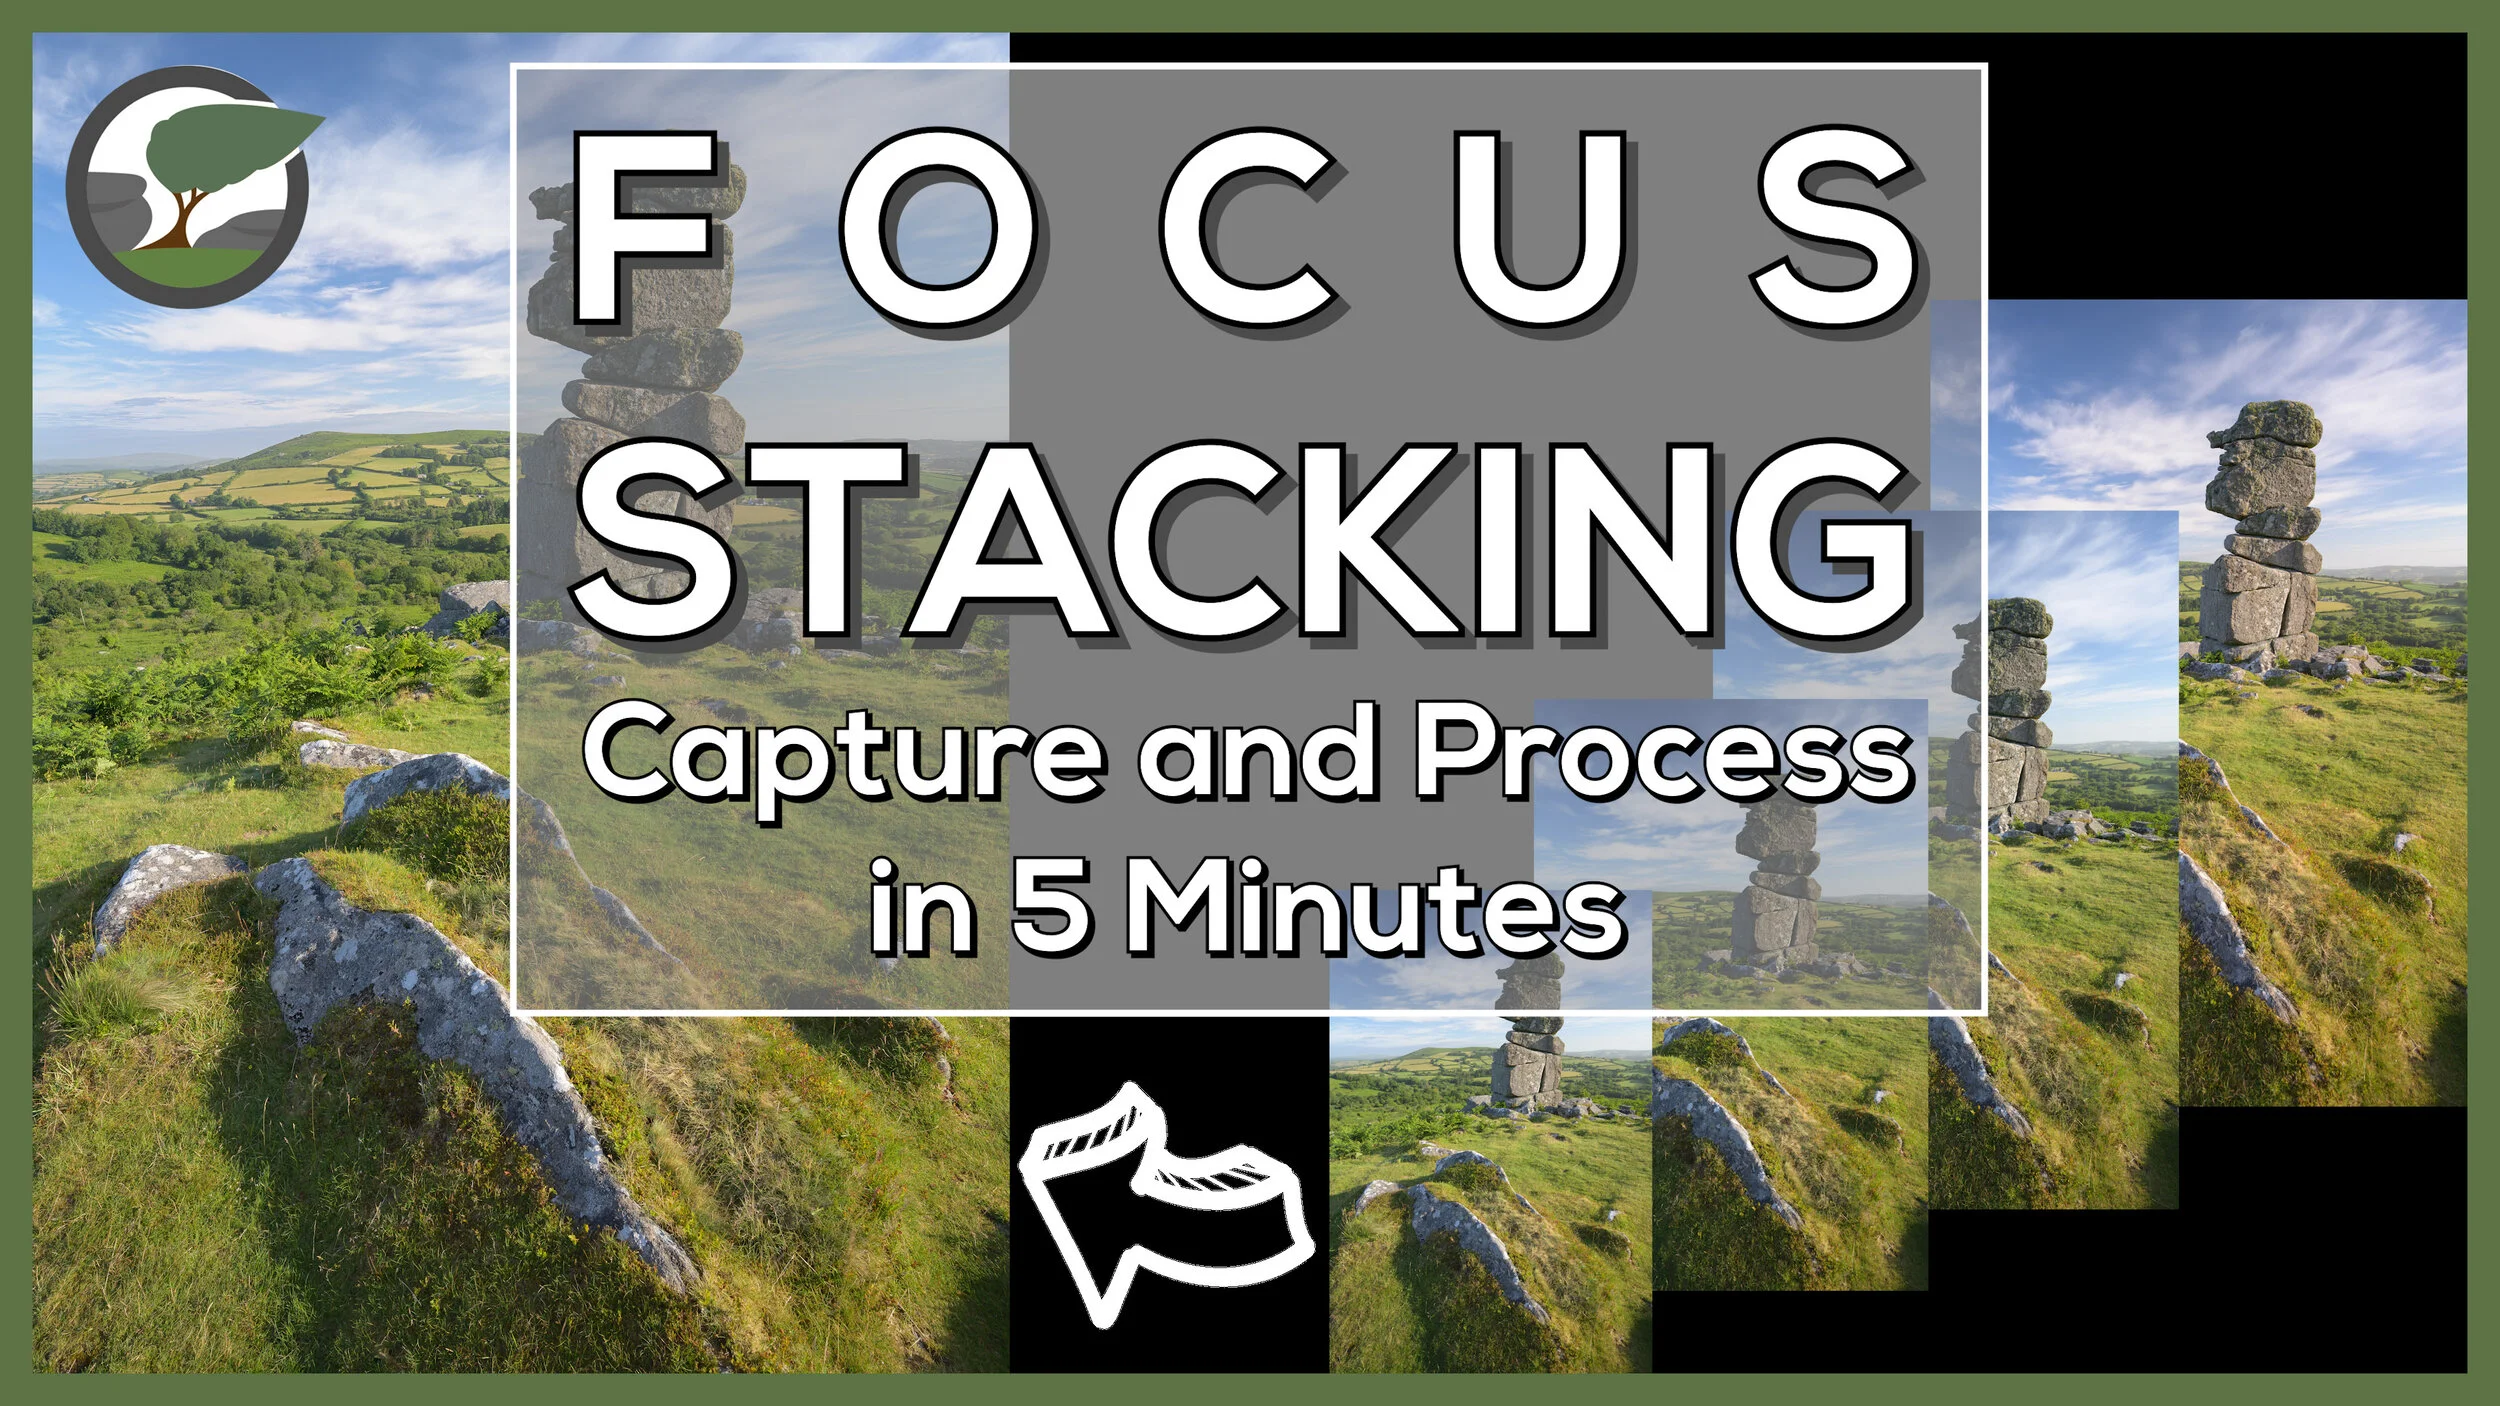
Focus Stack a Landscape Photograph in 5 Minutes
Focus stacking a landscape photograph needn’t take a long time. In this video, I’ll show you how to capture and process a focus stacked landscape photography in 5 minutes.
Focus Stacking - Capture and Process
When you first start to learn how to focus stack it can seem a bit overwhelming. It seems to be a bit complicated and not worth the effort. However, the complexity of the focus stack is very much dependent on the subject being photographed. Macro subjects are trickier to focus stack correctly.
What if you want to focus stack a landscape photograph though? I’m pleased to say the process is much easier and quicker. Despite the relative simplicity of the focus stacking process for landscape photographs, it’s not something I do that often. Sometimes it’s just not needed, and a single shot will yield sufficient sharpness, but when you do need it, you'll be glad you have the skills in your toolbox.
In the video below I aim to show you how straightforward to process can be to capture and process a focus stacked landscape photograph. You will rarely need more than four frames, but if you do the process remains the same. Once you can do it with a small number of frames, you have all the principle skills to allow you to do it with a larger number of frames.
Bonus Tips
To keep the content in the video concise and short I decided to only cover topics that were related to the process of creating the focus stack. For the readers of the blog though I’ve decided to give you a little extra value add by giving you a few extra tips.
The image with the finger - you will have seen in the video an image in the Lightroom film strip with my finger pointing up. What is this for? This image reminds me that the following images are part of a sequence. I use “finger up” for a focus stack sequence and “finger right” for a panoramic sequence. If you’ve captured lots of images, having these “finger” shots allows you to quickly pick out sequences of images in Lightroom.
Edit images before or after merging? - Should you apply your edits before you import the images to Photoshop, or after you have saved the stacked image? Personally, I make some very basic global edits before I load the images into Photoshop. Remember, if you change one image you will need to sync the changes to all the images you are going to use in the focus stack. After the photo merge in Photoshop, I will apply some local adjustments and any local/global sharpening.
Large files - depending on the number of images in the stack and size of the source files you may get a warning message from Photoshop when you save the file telling you that it is bigger than 2 TB. While you can save the file as a PSB I recommend selecting all the layers and flattening the image. This will make the resulting file much smaller but you won’t be able to modify the masking areas later without doing the focus stack again). It’s rare that I ever want to edit those masking areas again.
To Photoshop or Not - There are a number of dedicated focus stacking tools such as the excellent Helicon Focus but for most landscape focus stacks Photoshop does a good job. There’s no doubt that Helicon Focus is much faster and accurate, but this tends to only be a benefit with complex focus stacks (such as macro subjects).
Lightroom catalogue management and image editing - If you are interested on how I manage and edit my images in Lightroom, then check out my video on Lightroom Catalogue Management and Lightroom Image Editing.
That Focus Stacked Image
Here is the final image from the video so you can take a closer look.
Bowerman’s Nose Sunrise #7, Dartmoor, Devon - Nikon Z7, Nikkor Z 14-30mm f/4 at 17mm, 1/25th sec at ISO 64, f/8, Kase Filters K9 Polariser, 4 image focus stack.
Want a More Detailed Tutorial?
If you'd like to watch a more detailed video on focus stacking, and how to use the focus shift feature found in recent Nikon cameras, and deal with more complicated post processing scenarios, then check out my other video on focus stacking which you can see here.
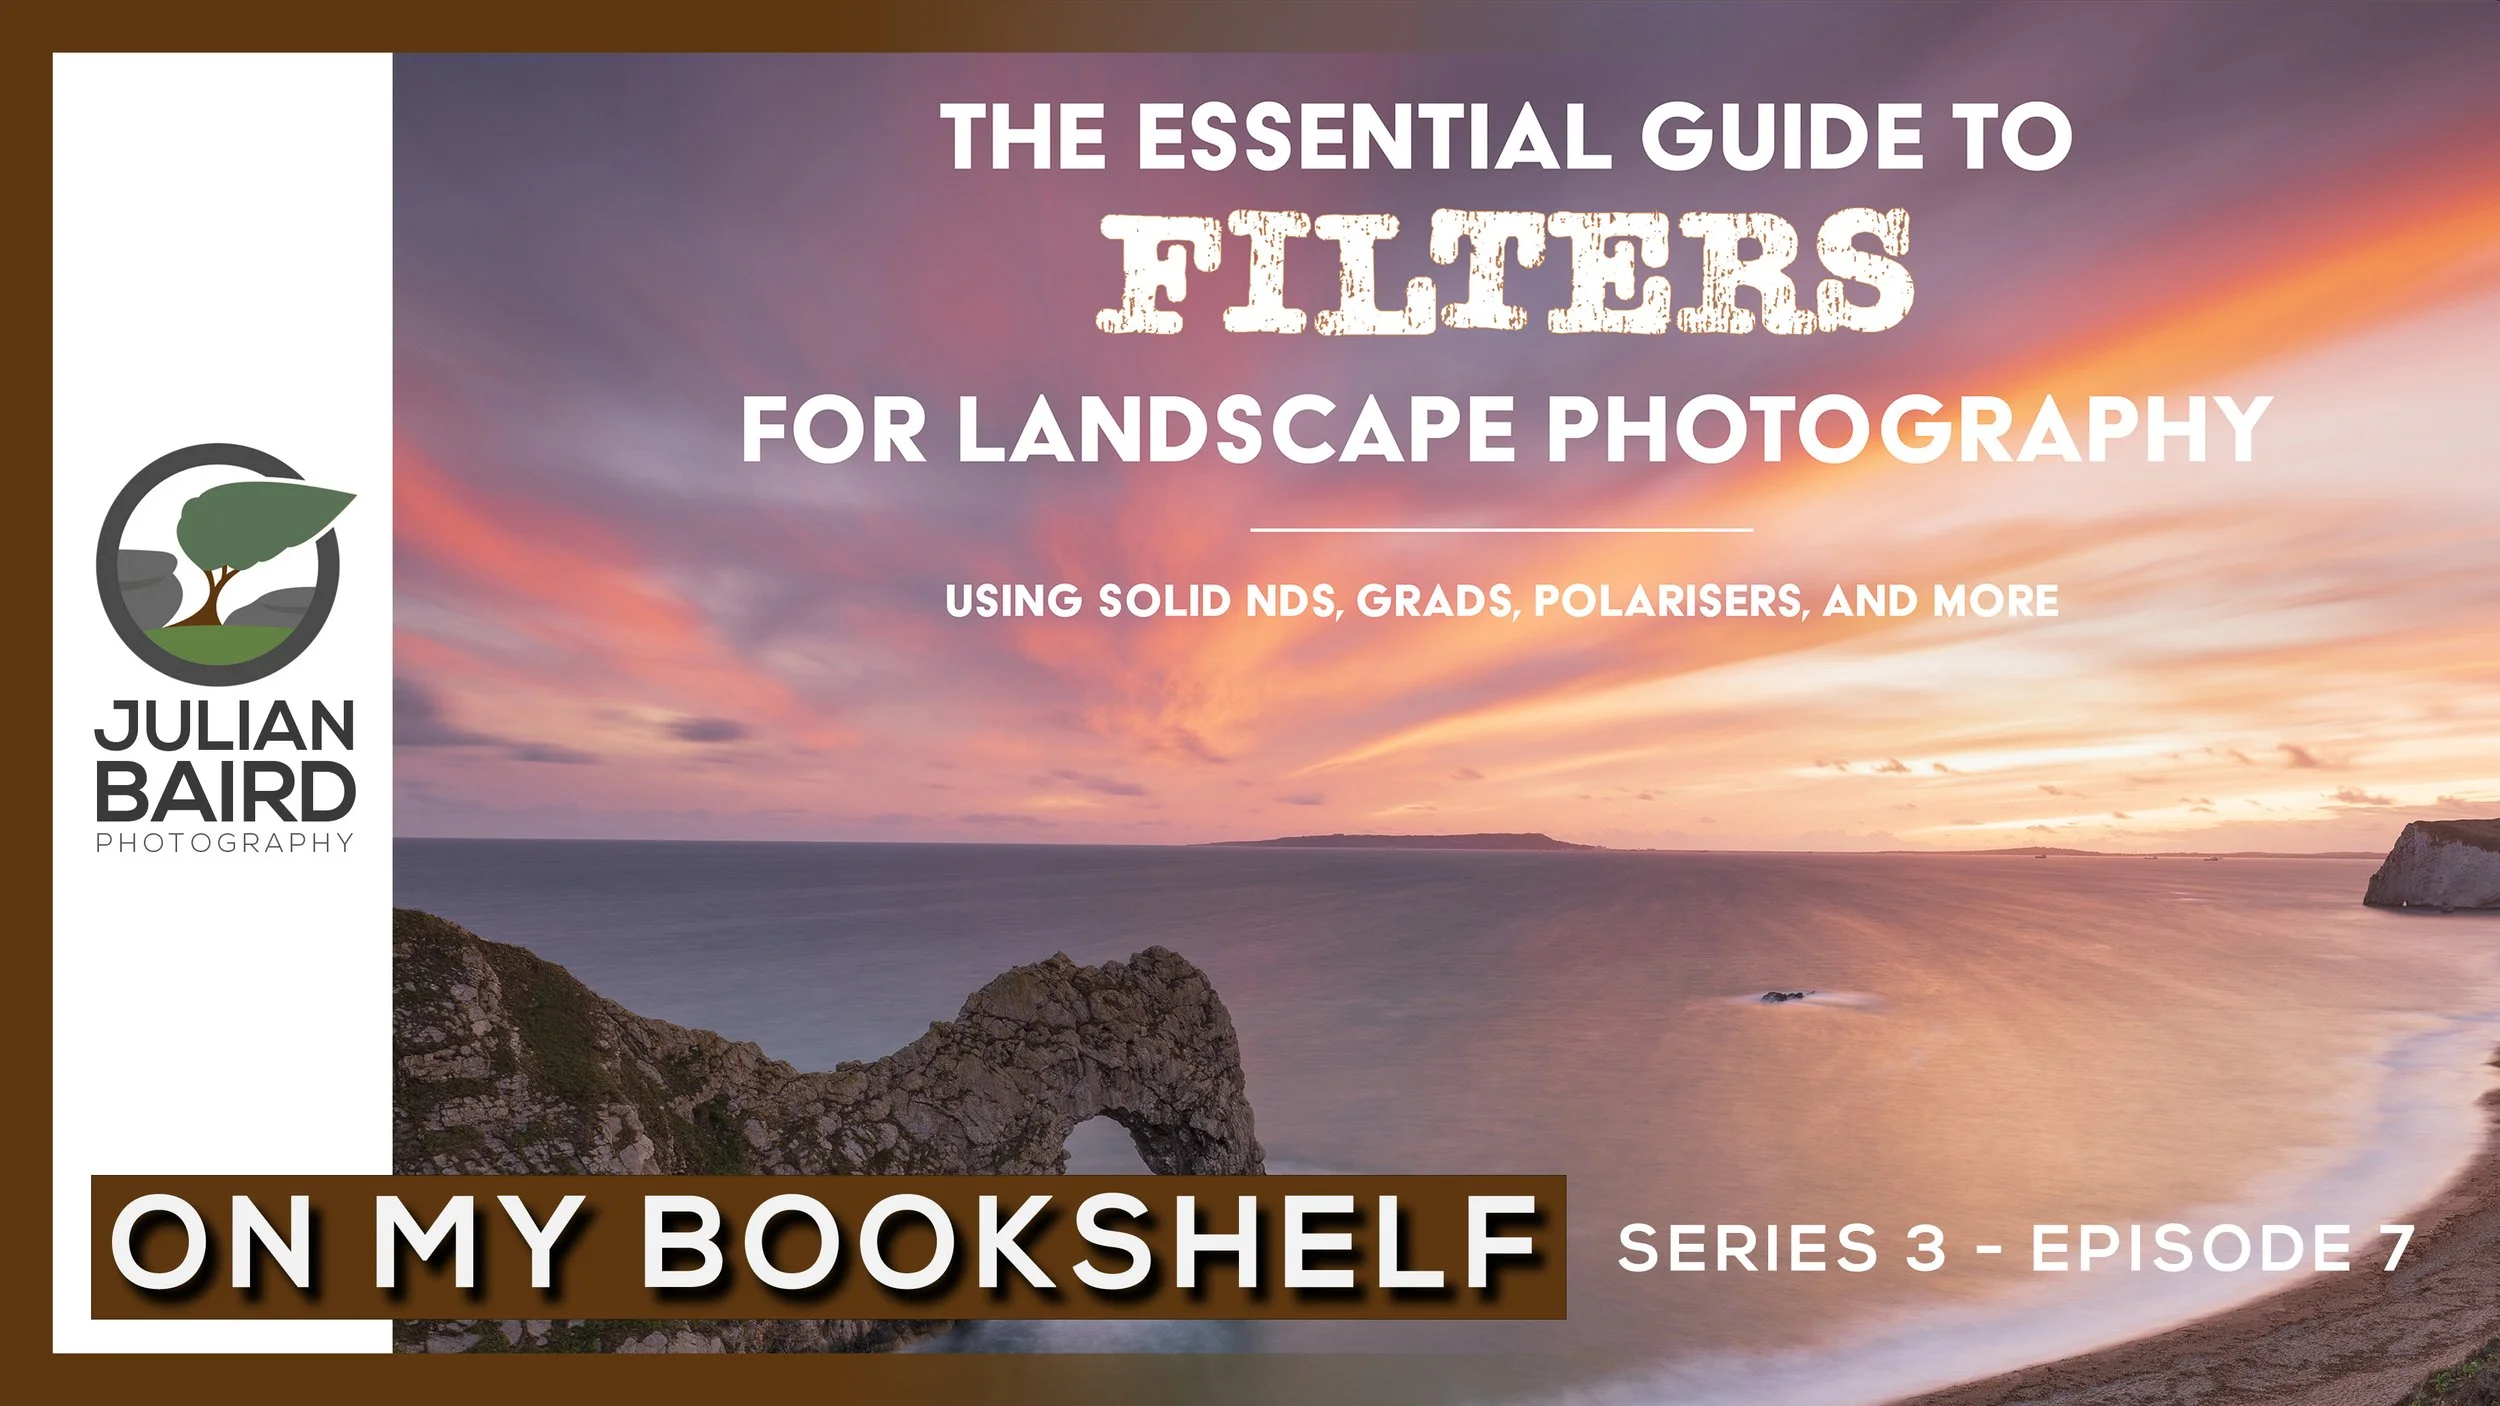
Essential Guide to Filters for Landscape Photography by Hoddinott & Bauer - On My Bookshelf S03E07
What are filters? Do I need filters? Which filters should I buy? How do I use filters? If you need answers to any of these questions, then the latest book to hit my virtual bookshelf could be the answer.
What Filters Should I Use for Landscape Photography?
Questions about filters is the one topic I get asked about more than any other. What filter kit should I buy? What filters do I need? All good questions and I do try and take the time to provide answers. However, I only use the Kase Filter system (which is very good by the way!) and a handful of filters so my experience of other brands and other types of filters is somewhat limited.
Up until now, there hasn’t really been a single, up to date, and comprehensive resource on filters for landscape photography. It would be nice to send people to a single resource where they can get all the information they need on which filters to buy and how to use them.
When Nature TTL announced that they were publishing a book by established photographers and renowned authors Mark Bauer and Ross Hoddinott, I knew I wanted to get a copy. After reading the book and seeing how comprehensive it was I knew I needed to feature it in an episode of On My Bookshelf so you could see for yourself if it might be a title for your bookshelf.
I hope you enjoyed this episode of On My Bookshelf. I thought it was an excellent book on filters for landscape photography and it will be a book that I will now recommend to anyone that has questions about filters. You can get a copy of the book right here.

I Lost My Enthusiasm for Photography
Have you ever lost your passion for photography? In this blog post, I tell you why I’ve lost some of my enthusiasm and passion for landscape photography, but more importantly, how I’m getting it back.
Photography Mojo - Lost and Found
This is going to be a short blog post. Well, short in terms of text! Most of what I’ve got to say is all in the video below. I’ve recently found that I’ve lost a little of my passion for photography. It took a little bit of time for me to work out the reasons why but as soon as I did, I knew how I was going to get my photography mojo back. I was sure I wasn’t the only photographer that had or will suffer from this, so I thought I’d make a quick video to share my thoughts. I hope the content of the video will resonate with a few of you.
Bowerman’s Nose
Some of you will recognise the location I made that video. It is, of course, Bowerman’s Nose on Dartmoor National Park. While I was filming the video, I naturally spent some time capturing landscape photographs. I hope they provide you with a little inspiration.


