
Gitzo Carbon Fibre GT3532 Mountaineer Tripod with GH3382QD Ball Head Kit Review
In this video I review the Gitzo Carbon Fibre GT3532 Mountaineer Tripod and the Gitzo GH3382QD Ball Head Kit (GK3532-82QD). I talk about the engineering, build quality, features and what it’s actually like to use in real landscape photography situations.
A Professional Tripod Built to Last
Answering the question “which tripod should I buy” is becoming increasingly difficult. Over the years the number of manufacturers selling tripods has gone through the roof. There is everything from simple cheap aluminium tripods costing less that £100 al the way up to more complex tripods with self-levelling technology. While they all might do roughly the same thing, how they go about it, how stable your camera will be and how long it will last all vary greatly from tripod to tripod.
I have talked about a number of tripods on this website, from budget friendly tripods to heavy duty carbon fibre tripods. But there is one tripod that has remained a constant in my kit bag, and that is my Gitzo Mountaineer GT2532. I purchased it over 7 years ago at The Photography Show in Birmingham. Even though I got a show discount, it was still expensive, but it has lasted and not let me down.
When Gitzo asked if I wanted to review the model up from my GT2532, the GT3532, I was more than happy to talk about a product range that I have so much experience with. With 7 years experience with the GT2532 I knew I could add some extra value to a video review.
So here it is, my review of the Gitzo GT3532 Carbon Fibre Mountaineer Tripod and GH3382QD Ball Head. Let me know what you think in the comments below.
More Information and Purchase Links
🛒 Purchase the Gitzo Mountaineer GK3532-82QD kit - from Wex or Amazon
🛒 Purchase the Gitzo GT3532 Mountaineer Tripod only - from Wex or from Amazon
🛒 Purchase the Gitzo GH3382QD Ball Head only - from Wex or from Amazon
✔️ Read the full specifications of the Gitzo Mountaineer GK3532-82QD kit (tripod and head) - https://www.gitzo.com/uk-en/tripod-kit-mountaineer-series-3-3-sections-gk3532-82qd/
✔️ Specifications Gitzo Mountaineer GT3532 tripod only - https://www.gitzo.com/uk-en/tripod-mountaineer-series-3-3-sections-gt3532/
✔️ Specifications Gitzo GH3382QD Ball Head only - https://www.gitzo.com/uk-en/center-ball-head-quick-release-series-3-gh3382qd/
✔️ See wall the tripods in the Mountaineer series https://www.gitzo.com/uk-en/tripods/mountaineer/
Lowepro ProTactic BP 350 AW III Review
Looking for the best camera backpack for outdoor and event photography? In this video, I review the Lowepro ProTactic BP 350 AW III, one of Lowepro’s most popular modular camera bags designed for professional photographers and content creators. But is it the best option?
I’m struggling with this one…
Bags, bags, bags. I have a lot of camera bags. I almost have one for every situation now. But I also recognise that because I have a photography-based YouTube channel with a reasonable reach, brands will ask me to review their products. I don’t say yes to everything. In fact, I more often than not say no. Either the product isn’t related to photography, or I have no use for it.
There is something about camera bags though. Someone how I can find a reason to test another because there is a “gap” in my bag line up. So, when Lowepro asked to try out their Lowepro ProTactic BP 350 AW III I said yes. I’m not sure what gap I was trying to fill but I’m glad I decided to look at this one because it’s very good. However, I found myself struggling with one particular part of this video review. What? You’ll just have to watch to find out.
✔️ Learn more about the Lowepro ProTactic BP 350 AW III - https://www.lowepro.com/uk-en/protactic-bp-350-aw-iii-lp37505-pww/ or the 450 version - https://www.lowepro.com/uk-en/protactic-bp-450-aw-iii-lp37483-pww/?___store=lowepro_uk_en
🛒 Purchase the Lowepro ProTactic BP 350 AW III from Amazon - https://amzn.to/46r36Ew or WEX - https://wex.pxf.io/JK666E
🛒 Purchase the Lowepro ProTactic BP 450 AW III from Amazon - https://amzn.to/3Wa1xG4 or WEX - https://wex.pxf.io/WyeWm3
Please note that these are affiliate links (but not paid links or ads). By buying through these links I may receive a commission for the sale. This has no effect on the price for you.
✔️ Check out my review of the Manfrotto Befree GT PRO Carbon Tripod - https://julianbaird.com/blog/2024/10/22/manfrotto-befree-gt-pro-carbon-tripod-review
🎞️ Check out my review of the Lowepro PhotoSport Backpack PRO AW III
Canon imagePROGRAF PRO-1100 Review and Setup Guide
Are you thinking about purchasing the Canon imagePROGRAF PRO-1100? Or have you just purchased it and want to know how to set it up? In this video I’ll show you how to set it up, make your first print, use ICC profiles, talk about ink costs and give you some ideas for displaying your prints.
Going Bigger and Being More Cost Effective with the Canon imagePROGRAF PRO-1100
If you’ve been reading this blog or watching my YouTube channel over the years you’ll know what a passion I have for printing. My love for printing was further fuelled at the weekend when I attended and hosted Fotofest in Bristol. It was a fantastic event and being in a community of like-minded photographers reminded me of how important printing is to so many people.
A few months ago I changed from a Canon imagePRO-GRAF PRO-300 to the new Canon imagePROGRAF PRO-1100. There was nothing wrong with the print quality of the Pro-300 but I wanted to have the capability to print A2 and to make my ink consumption more cost effective.
Over those last few months, I’ve been putting the printer through it’s paces and I’m now ready to share my PRO-1100 video. So no matter if you are thinking about purchasing a Canon imagePROGRAF PRO-1100, or have you just purchased one and want to know how to set it up, my video should have you covered. In my video -
I'll share the key details on the Pro-1100.
Tell you why I bought it and where from
Show you how to set both the hardware and software
Talk you through how to make your first print
How to manage paper types and ICC profiles using Canon’s Media Configuration Utility
Show you how to find out how much your prints cost using Canon’s Accounting Manager software
I’ll Print some glorious A2 images
Show you some options for displaying your prints.
And finally share my thoughts and comments on this printer
I hope you found this video useful. If you did or just have a question or comment, do let me know below in the comments section.
You can of course expect lots more printing content from me, so please make sure you stay tuned to my YouTube channel and the blog. Thanks for watching and all just below you’ll find links to everything I mentioned in the video,
Useful Links from the Video
Purchase the Pro-1100, Inks and Tech Specs
🛒 If you are considering a purchase of the Canon imagePROGRAF PRO-1100 you can do so from Fotospeed - https://fotospeed.com/canon-pro-1100-a2-printer-12-inks.html
🛒 Canon Pro-1100 inks - https://fotospeed.com/printers-inks/desktop-printer-inks.html?default_brand=Canon&dit_printer=Canon%20Pro%201100
🔗 Check out the full specifications of the Canon imagePROGRAF PRO-1100 - https://www.canon.co.uk/printers/imageprograf-pro-1100/
More of my printing videos worth watching
🎞️ Fotospeed Spring Back Binders - https://youtu.be/IRXr6VuRYwE
🎞️ Designing a Custom Frame from Picture Frames Express - https://youtu.be/FJYOckTLbyA?si=RSoVSVb7z6Ii91gu&t=443
🎞️ How to Become a Fearless Printer - https://youtu.be/mbB1WdLFF_s?si=pI620VKr0qnXEXix
🎞️ Using a Nikon D80 to Create an A3+ Print - https://youtu.be/6X_vK5lts5c
🎞️ Why and How I Calibrate My Monitor - https://youtu.be/ozPuGrXQfeU
Other Useful Links
🔗 Fotospeed Generic Profiles for the Canon Pro-1100 - https://fotospeed.com/profiles/printer/ink/ink/62/
🔗 Fotospeed Custom Profiling Service - https://fotospeed.com/support/
🔗 Fotospeed Art of Printing eBook - https://fotospeed.com/ebook/artofprinting
🔗 ICC Profile Toolkit - https://icc-profile-toolkit.software.informer.com/
🔗 Canon PRO-1100 sotware including Professional Print & Layout, Media Configuration Utility, and Accounting Manager - https://www.canon.co.uk/support/business/products/wide-format-printers/imageprograf/pro-series/imageprograf-pro-1100.html
Papers Used in this Video
Use the discount code Julian15 and get 15% off Fotospeed papers at Fotospeed.com
🛒 Fotospeed Test Packs - https://fotospeed.com/paper/test-packs.html
🛒 Fotospeed PF Lustre 190 - https://fotospeed.com/lustre-190.html
🛒 Fotospeed NST BW 315 - https://fotospeed.com/nst-bright-white-315.html
🛒 Fotospeed Smooth Cotton 300 - https://fotospeed.com/smooth-cotton-300.html
🛒 Fotospeed Platinum Cotton 305 - https://fotospeed.com/platinum-cotton-305.html
🛒 Fotospeed Natural Smooth 310 - https://fotospeed.com/fotospeed-natural-smooth-310.html
🛒 Fotospeed Legacy Gloss 325 - https://fotospeed.com/legacy-gloss-325.html
🛒 Fotospeed Matt Baryta 310 - https://fotospeed.com/fotospeed-matt-baryta-310.html
🛒 Fotospeed Platinum Baryta 300 - https://fotospeed.com/platinum-baryta-300.html
🛒 Fotospeed Panoramic Paper - https://fotospeed.com/papers/panoramic-papers.html
🛒 Canon A3 Pro Luster Photo Paper - https://amzn.to/4g6dINz
🛒 Canon GP-501 Glossy Photo Paper 4x6"/10x15cm (100 Sheets) - https://amzn.to/3I3i1fW
Print Display Options
🛒 Fotospeed Spring Back Binder - https://fotospeed.com/presentation/springback-binders.html
🛒 A2 White Self-Adhesive Foamboard - https://amzn.to/4oVsqLc
🛒 A3 Self-Adhesive White Foamboard - https://amzn.to/4m0EWGP
🛒 A4 White Self-Adhesive Foamboard - https://amzn.to/4lSwLvX
🛒 3M Command Picture Hanging Strips - https://amzn.to/4p3SYtT
🛒 Picture Frames Express - https://www.pictureframesexpress.co.uk/
🛒 Ikea MOSSLANDA Picture ledge - https://www.ikea.com/gb/en/p/mosslanda-picture-ledge-white-90292103/
🛒 Ikea Drawer unit on castors, white, 67x66 cm - https://www.ikea.com/gb/en/p/alex-drawer-unit-on-castors-white-80485423/
Please note that some of these links are affiliate links (but not paid links or ads). By buying through these links I may receive a commission for the sale. This has no effect on the price for you.

Summit Creative Metropolis Backpack Review
In this video I look at the Summit Creative Metropolis 16L Backpack. Learn more about this bag, how I’ve been using it, what I like, and what I disliked to see if this is a camera bag you should consider.
Small but Perfectly Formed
Camera bags come in many different shapes, sizes and price brackets! It’s also hard, if not impossible to find one camera bag to suit all your needs or one that you might consider perfect. There is always compromise to be had somewhere. So always be weary of a review that says a camera bag is perfect or it’s the “most amazing camera bag ever”.
I’ve recently identified the need to have a small camera backpack in my gear cupboard. Something that is lightweight, carries a decent amount of gear, is comfortable and can be used for more than just carrying camera gear about.
While I was at the Photography Show in London in March, I spotted a new brand of camera bag, Summit Creative. I’d never heard of them, but by being able to pick it up in person and have a proper look at it, it did at least on paper seem to fit my needs.
Fortunately for me the distributor for Summit Creative bags in the UK is Photo Specialist UK, the company behind Kase Filters UK. I am a Kase Filters partner, so I already have a working relationship with Photo Specialist UK. The team there very kindly gave me a Metropolis 16L so I could put it to good use.
Over the last 8 weeks I’ve been using the bag for all sorts of photography and non-photography related activities and I’m now ready to share my thoughts with you in this review video. I create these videos not to try and convince you to buy this bag, but because many of you ask questions about the gear I use so it helps to have a video. Enjoy!
🛒 You purchase the Summit Creative Metropolis 16L Backpack here - https://summitcreativebags.com/product/metropolis-16l-backpack/?ref=jbairdexp
🔗 Check out my review of the tripod you saw in this video - https://julianbaird.com/blog/2024/10/22/manfrotto-befree-gt-pro-carbon-tripod-review

Manfrotto Befree GT PRO Carbon Tripod Review
A good tripod provides should provide a stable platform for a landscape photographers camera. In this blog post I head to the Scottish Highlands to test out the Manfrotto Befree GT PRO Carbon Fibre tripod. Will it do the job I need it to?
Why I Have the Manfrotto Befree GT PRO Carbon Tripod
As I recently mentioned in my review of the Manfrotto PRO Light Backloader Backpack, tripods and camera bags are one of the photographic accessories you will likely replace the least often. A well-made, solid tripod should span the lifetime of more than one camera.
For most photographers the inclusion of one tripod in their kit bag is enough to cover most of their photographic needs. I on the other hand normally need access to a 2nd tripod. This might be a tripod that I carry in addition to my main tripod to allow me to create video content at the same time as taking photographs, or it might be a lightweight tripod I use when hillwalking in Scotland.
Unlike my primary tripod which has remained consistent for longer than I can remember, it's my secondary tripod that I've struggled to settle on. I've found it challenging to find something that is lightweight, versatile and stable. So when Manfrotto reached out to me and asked if I'd like to review their Manfrotto Befree GT PRO Carbon Tripod, I jumped at the chance.
In this blog post I'm going to tell you a little bit about this tripod, and I'll share my real-world experience of using it.
Before I go any further though, I must say that Manfrotto sent me this tripod free of charge in exchange for writing this review. However, they have not asked me to say anything and everything I write here are my own thoughts (good and bad). They will see this review for the first time when I publish it here.

The Manfrotto Befree GT PRO Carbon Tripod high up on the hills around Glencoe in Scotland.
Where To Buy the Manfrotto Befree GT PRO Carbon Tripod
If you'd like to buy the Manfrotto Befree GT PRO Carbon Tripod, it's available just about anywhere, including:
Please note that the Amazon and WEX links are affiliate links. I may receive a small commission if you purchase through those links, but it does not affect the price that you pay.
Features of the Manfrotto Befree GT PRO Carbon Tripod
In this review I'm going to talk about most of the features and specifications of the Manfrotto Befree GT PRO Carbon tripod, but if you want a full breakdown of everything this tripod has then check out all the specifications over on the Manfrotto website. This tripod is also part of the Manfrotto Befree collection so many of the same features in this tripod apply to the other tripods in the range. If you like the look of this tripod but it doesn't quite match your requirements, do check out the other tripods in the collection.
Tripod Legs
The tripod is made of carbon fibre and weighs approximately 1.55 kg (including the supplied head). Closed down the tripod length is 43 cm, extended it is 138cm and with the centre column extended it reaches a maximum height of 162 cm. Closed down the tripod is both small enough and light enough to carry by hand or it can be attached to your camera bag (or inside a checked bag if flying).

The Manfrotto Befree GT PRO Carbon Tripod attached to the Manfrotto PRO Light Backloader Backpack
Each leg comprises of 4 sections that can be extended or contracted using a twist lock style mechanism. The angle of the legs can also be independently adjusted.
Other features include:
The legs have rubber feet.
The tripod supports a maximum weight of 12kg.
There is a hook should you wish to hang something off it like a camera bag.
The tripod has a Manfrotto Easy Link connector allowing you to add accessories such as lights.
A tripod carrying case is supplied.


Tripod Head
My tripod came as a kit which means the box contained both the tripod legs and a Manfrotto Advanced 496 Aluminium Centre Ball Head. The ball head has three controls. There is an independent panoramic knob that allows the head to pan 360 degrees without adjusting the position of the camera on the ball head. The other two controls are for the ball mechanism itself. The first control allows you to adjust the position of the camera on the head, and the other control allows you to adjust the friction level of the head.
You mount your camera to the tripod head using the included Manfrotto quick release plate, the RC2.


Using the Manfrotto Befree GT PRO Carbon Tripod in the Real World
What Is the Real World?
For me, the main function of this tripod is for landscape photography and video content creation. So, it will either be my primary tripod for my landscape photography when I need something compact and lightweight, or my video tripod when I'm creating content for YouTube. As this review will mostly focus on my use of this tripod for landscape photography, I decided to put it to use on a recent trip to the highlands of Scotland. With cold, wet and windy weather, and plenty of hills and mountains to climb, it's a great real-world environment to test this tripod.
Carrying the Befree GT PRO

Closed down the Befree GT PRO tripod is easy to carry.
At just 43cm closed down, and a weight of 1.55kg the Befree GT Pro is easy to carry around. For the most part I had the tripod attached to the side of one of my camera bags. Once on my bag I barely noticed it was there. It's not heavy so I didn't feel it pulling the bag to one side, and it's shorter than my camera bags so it fits neatly on the side as well.
Moving about with the tripod in your hands is easy as well. With the legs still extended it's easy enough to walk short distances, and if I need to walk a bit further it's compact and light enough to carry by hand.
Extending and Closing Down the Befree GT PRO
If a tripod is difficult to extend or collapse and fold away, you are much less likely to use it. I didn't have any problems with the twist locks on this tripod. The locks were easy to twist and unlock, releasing the legs to be extended. I didn't experience any sticking, and I was able to use them with cold hands and with gloves on. I could extend all three legs to their maximum length in no time at all.
The centre column can also be extended, and this has a separate mechanism at the top of the tripod.


Equally, closing down the tripod was a simple affair. It takes slightly longer as you need to turn each twist lock separately, but it's hardly an arduous task. You then have the option of folding the closed legs up towards the tripod head to make it even more compact, but this also requires you to extend the centre column as well. For me, this small bit of extra effort isn't worth the few centimetres in height it saves. It is something I would consider doing if I was travelling with the tripod though.
Tripod Heads
I'm not a big fan of ball heads as I much prefer the precision nature of a geared head. However, ball heads are often smaller and lighter and therefore they are often a better choice if you are spending the day walking in the mountains. I was pleasantly surprised with the Manfrotto 496 head that is included in this kit. Yes, it lacks the total precision of a geared head, but thanks to the addition of the friction control knob it's possible to dial in just the right amount of friction for the weight of your camera and lens. This means it is a lot easier to control the movement of the head when you do release it. This doesn't make me a ball head convert, but it does make the choice of taking a ball head instead of a geared head a lot easier.
But the good thing about this tripod is that the head isn't fixed to the legs so you can remove it. This opens up a whole world of different tripod heads (with 3/8" mounting) that you can fit to the Befree GT Pro. For me, I was able to use my favourite geared head, or when I really wanted to keep the weight to a minimum, I have an even lighter weight Manfrotto ball head (though it lacks the friction control of the 496 head).
For video work, I can also mount my Manfrotto video head.
Load, Balance and Stability
The primary purpose of a tripod is to provide a stable platform for your camera. If it can't do this then there is little point in carrying it about with you. However, the stability of a tripod is greatly affected by factors such as camera system weight (body and lens), environmental conditions (wind), and the types of photographs you will be taking (e.g. long exposures).
All reviews are subjective, but tripod reviews are particularly so. What is a good tripod for me, might not be for another person. So, bear in mind if I think this tripod provides a good stable platform, that's subjective and based on how I use it. If you shoot wildlife with an 800mm lens, your milage may vary!
With all that said, I used this tripod for landscape photography which means I was using my Nikon Z8 with either a Nikkor Z 14-30 f/4 S lens or Nikkor Z 24-120mm f/4 S lens. This gives me a maximum system weight of approximately 1540g, plus maybe bit extra for filters. All well within the weight limit of 12kg for the tripod.

The Befree GT PRO with my Nikon Z8 and Nikkor 24-120mm f/4 S
In a horizontal orientation I experienced no issues with balance, even with my 24-120mm lens fully extended. With the camera in a vertical orientation, I still didn't experience any issues, though I do tend to be a bit more wary and may adjust the angle of one of the legs to provide additional balance. This is one of the reasons why I prefer my geared head as I can use my camera L-bracket to put the camera in a vertical orientation rather than using the ball head to do it.
For a lightweight tripod stability is good and I didn't experience any wobbles even when the wind was a bit breezier. I was also able to confidently capture some long exposure photographs. But this is a lightweight tripod, and it will have limits. I haven't found those limits yet, but there will be occasions where the wind is very strong and longer exposures will be challenging. In very windy conditions I would avoid extending the centre column to much (but this goes for any tripod with a centre column).
But based on my experience I would be confident with the stability of this tripod in most of the conditions I would be willing to be out in with my camera.

The ability to independently adjust the angle of the legs of the Befree GT Pro provides additional stability on uneven ground like this hillside.
Things I Would Change
No product is perfect, and the Befree GT Pro is no different. There are just a couple of minor things I would change:
Tripod spikes - I would like to have seen Manfrotto include spikes as well as rubber feet. While I believe you can buy a set of Manfrotto spikes, these are a proprietary fit and so you can't use standard 3rd party spikes. I'm a big fan of spikes as these can really improve the stability of a tripod.
Manfrotto 496 Head - Many of the Manfrotto heads require your camera to have an RC2 plate attached rather than the more universal arca-swiss style mounting (such as the one found on my L-bracket). It is possible to attach the RC2 plate to my L-Bracket, and then I attach it to the head, but I don't find this to be a versatile solution. Additionally, if you are shooting vertically, you really need to make sure the RC2 is tightly attached, or you may find the camera slipping on the plate (especially during long exposures).
Long Term Durability
The one thing I haven't been able to test is the long-term durability of the tripod. However, given it's manufactured by Manfrotto, and it comes with a 2+8-year warranty, I can't see any reason why it wouldn’t give me many years of happy use.
In Summary
I am very happy with my experience so far with the Manfrotto Befree GT Pro tripod. It's lightweight, compact, and sturdy. It's the perfect tripod if you are trying to keep your kit weight to a minimum and it easily attaches to my camera bags without becoming a burden. It's even the type of tripod I'd be happy to take out on family walks to capture those special group shots. Nothing bores the family more than waiting 10 minutes as you set up your tripod!
If your camera is mirrorless or generally lightweight, you'll find the maximum payload of 12kg more than enough even to make this your only tripod.
The tripod feels like a quality product and the legs extend and collapse easily making it a tripod you will want to use on a regular basis. The ball head is surprisingly nice to use, and proprietary plates aside, is a good addition to the legs.

The carbon fibre legs provide a stable platform for longer exposures.
As I said earlier in the review, there's no such thing as a perfect tripod and what's good for me, might not be good for you. It's always worth carefully considering how you will use any tripod and what camera you will be putting on it. But for me, Manfrotto Befree GT PRO is the perfect companion for me and my Nikon Z8 and those beautiful long walks in the Scottish Highlands.
I hoped you enjoyed this review of the Manfrotto Befree GT PRO backpack and if you have any questions, please leave me a comment below.

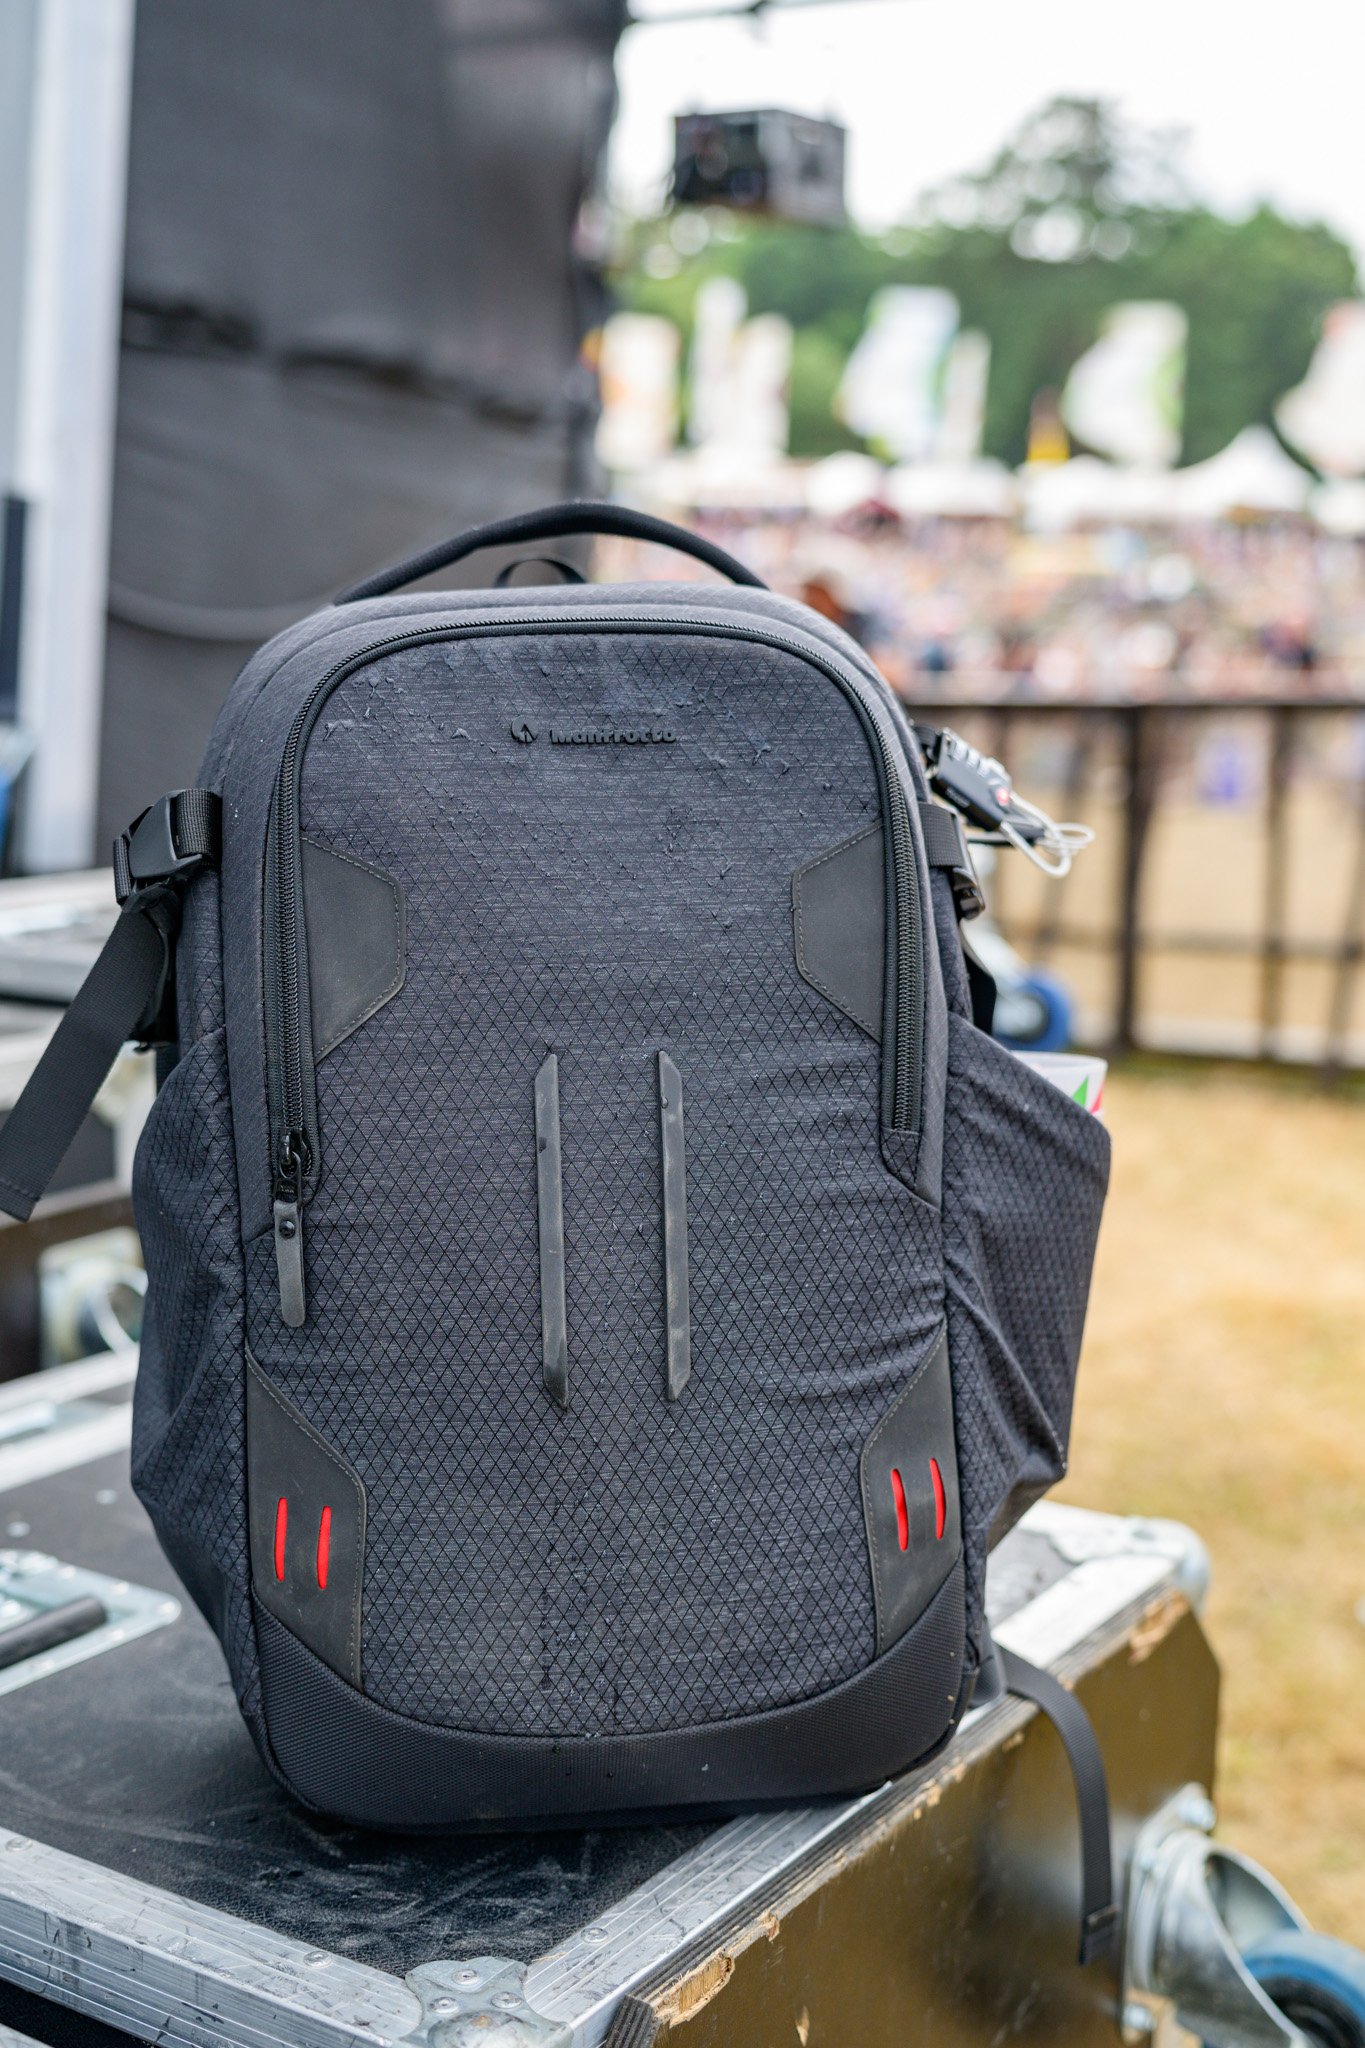
Manfrotto PRO Light Backloader Backpack Review
Nothing tests the protection of your camera bag quite like a British music festival! In my latest blog post I look at the Manfotto PRO Light Backloader bag to see how it performs while I photograph Devon's biggest festival.
Why I Have the Manfrotto PRO Light Backloader Backpack
Like tripods, camera bags are probably the one item of photography equipment you replace the least. A good camera bag should last you a long time.
However, all bags will eventually need replacing. Nothing lasts forever and unfortunately my previous bag had a zip failure and was no longer fit for purpose. While it's not the main bag I use for my landscape photography adventures, it did get used a lot. And I mean a lot! It was multi-purpose, serving as a camera bag and a general backpack. It went everywhere from my local beaches daytrips to holidays in Iceland. It had a hard life and when it died, it owed me nothing.
Back in the day when I bought that bag, camera backpack choices were more limited than they are today. If you do a Google search now for "camera backpacks" you are presented with a dizzying array of choices. However, with a music festival in my photography schedule rapidly approaching, I needed a new bag to carry and protect my camera gear.
As if by divine intervention, Manfrotto got in contact and asked if there was anything in their product range that I would like to review. Well, funnily enough there was! The Manfrotto PRO Light Backloader Backpack S looked like a good fit for me and it was from a reputable brand. A few days later I had one in my hands.
So, in this blog post I'm going to tell you a little bit about this backpack, the features that are relevant to me, how I plan to use the bag, and I'll share my real world experience of using it.
Before I go any further though, I must say that Manfrotto sent me this bag free of charge in exchange for writing this review. However, they have not asked me to say anything and everything I write here are my own thoughts (good and bad). They will see this review for the first time when I publish it here.
Where To Buy the Manfrotto PRO Light Backloader Backpack
If you'd like to buy the Manfrotto PRO Light Backloader S, it's available just about anywhere, including:
Please note that the Amazon and WEX links are affiliate links. I may receive a small commission if you purchase through those links, but it does not impact the price that you pay.
Features of the Manfrotto PRO Light Backloader Backpack
I'm not going cover all the specifications and features of the Manfrotto PRO Light Backloader S, only those that are relevant to how I will use the bag. If you want a full list of all the features, you can see the bag on Manfrotto's website here. This bag is also part of the Manfrotto PRO Light collection, so many of the same features in this bag apply to the other bags in the range. If you like the look of the bag but it doesn't quite match your requirements, do check out the other bags in the collection.
Exterior Dimensions
Let's start with the outside of the bag first. It weighs approximately 1.6kg and it measures 51 x 13.5 x 43 cm. This should mean that it will fit within most airlines cabin baggage/carry on limits. However, these restrictions can vary so please do check with your airline of choice.

External Materials and Protection
The backpack is made of water-repellent RipStop nylon/polyester fabric with that is reinforced in key areas. The material is not only water repellent, but it also looks good. Given the conditions this backpack is likely to find itself in (e.g. a muddy festival field), I'm glad the bag is all black in colour. It also helps the bag be a little more inconspicuous when I’m in crowds.
I'm very pleased to see that Manfrotto has also included a raincover with the bag. Anyone who's been to a UK music festival will know that rain is an ever present threat, so it's good to know the raincover is there when you want more than protection from rain or mud. Cleverly though, if you turn the raincover inside out so the silver side is on the outside, the cover will deflect direct sunshine and prevent overheating of the contents.
The bag aslo features a SAS-TEC bottom that provides extra absorbance which is very reassuring.


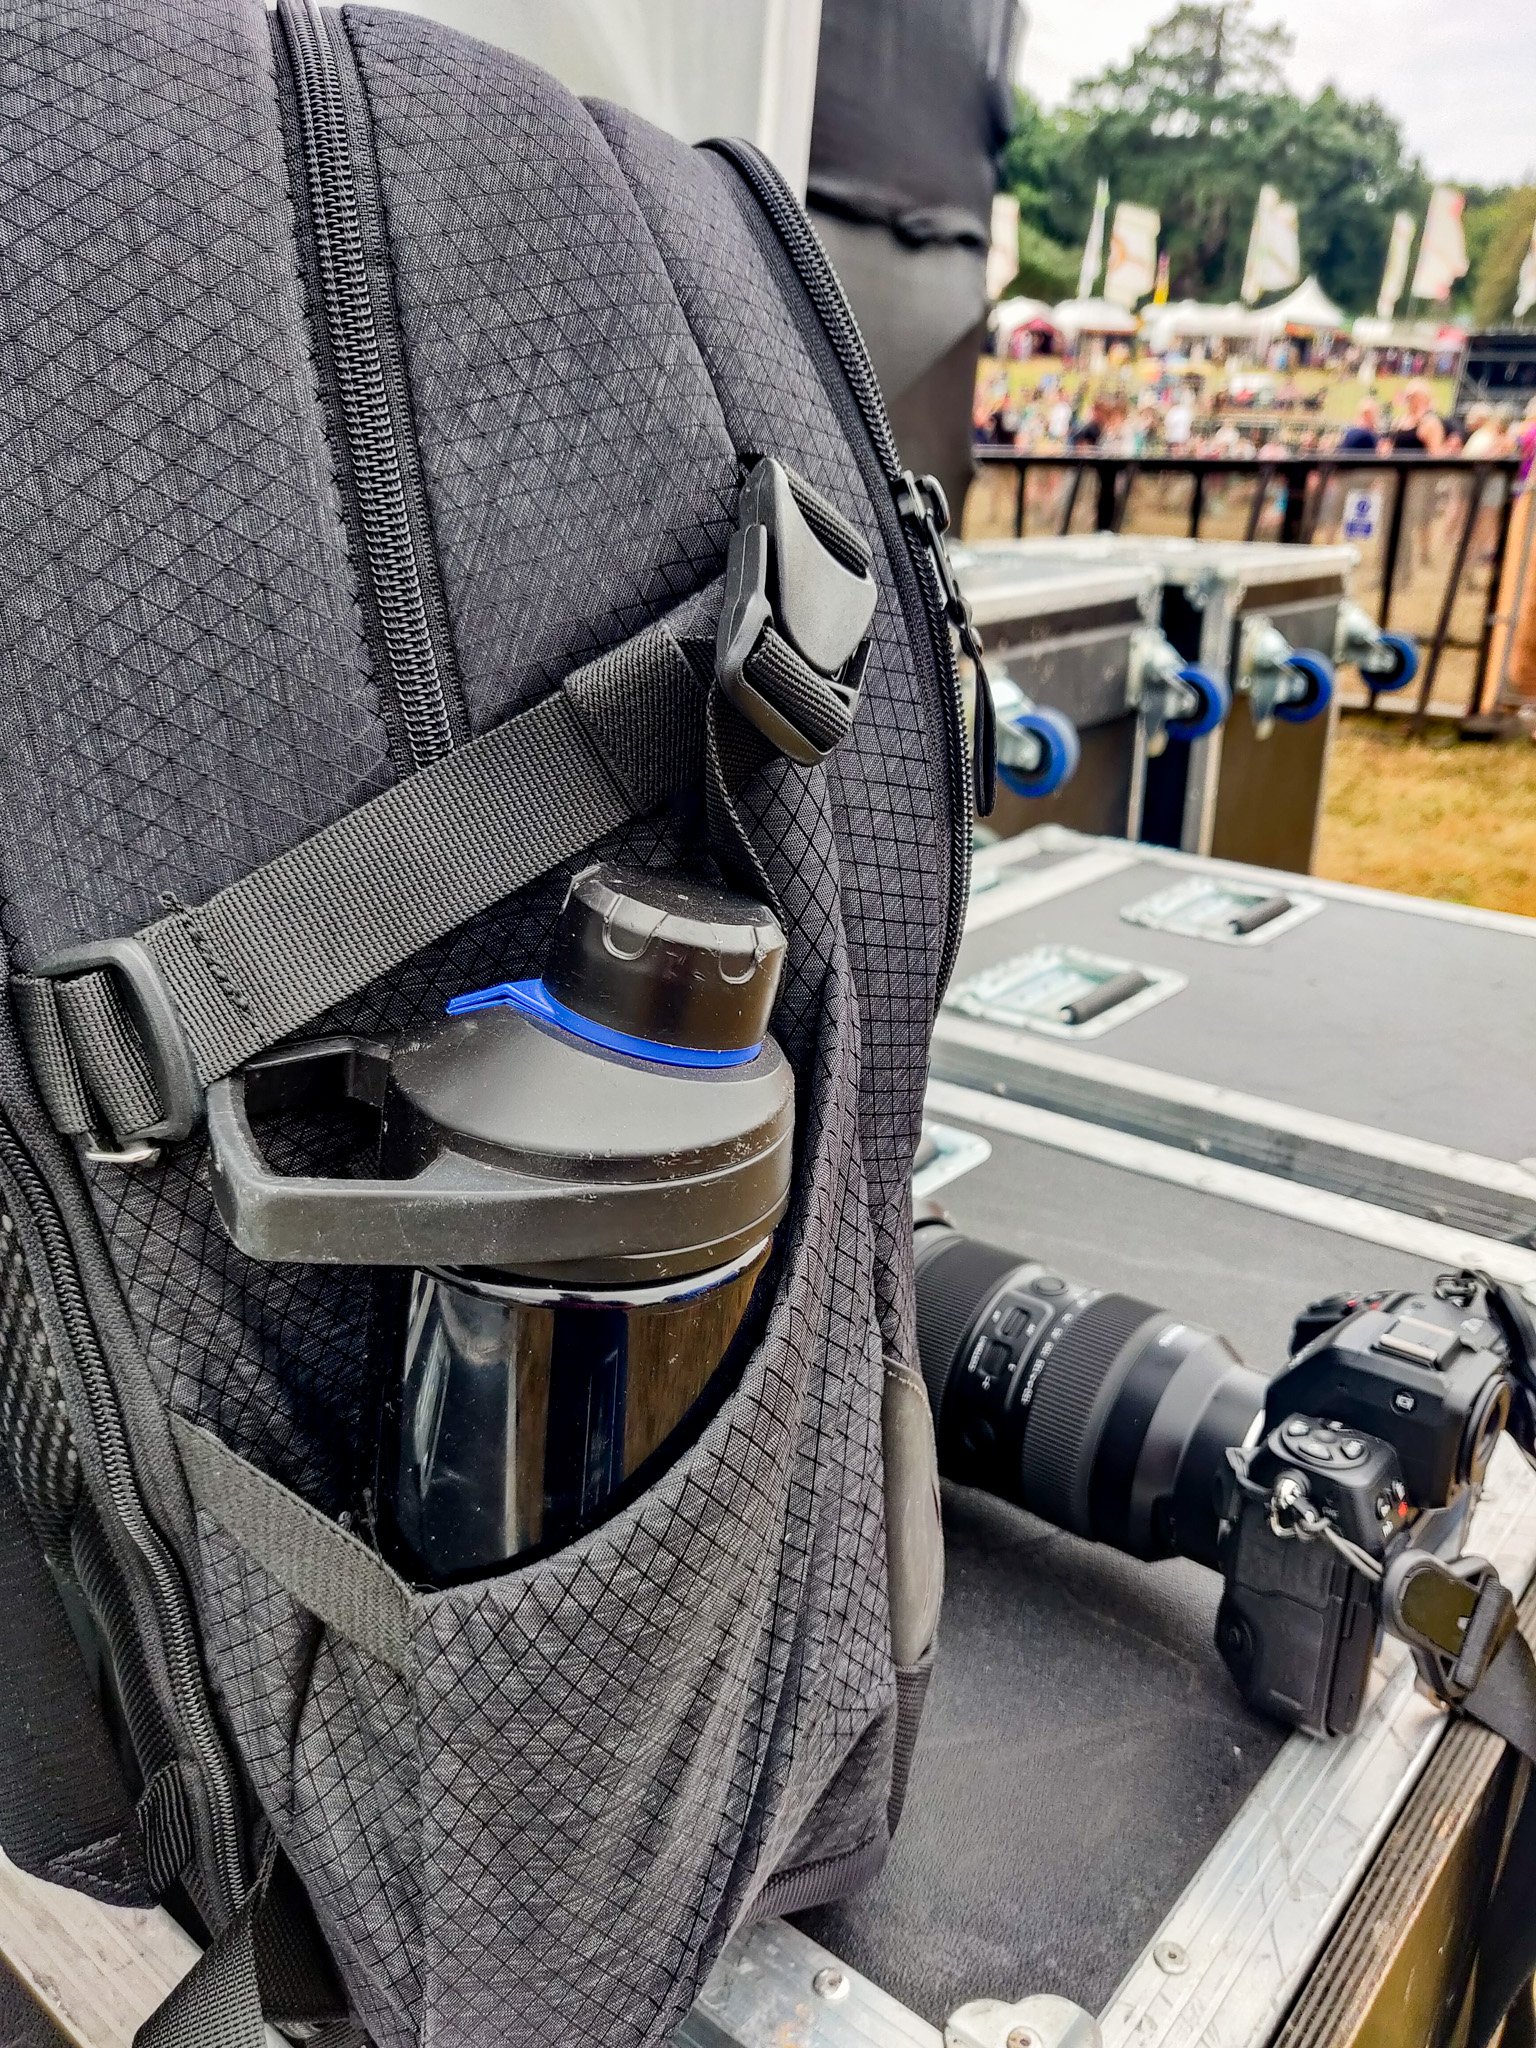
Exterior Side Pockets
There are two side pockets with compression straps should you want to mount a tripod. It's not often I'll use a tripod with this bag so I will more likely use these pockets for storing drinks such as a water bottle. The pockets are of a generous size as well.
Bag Carrying and Shoulder Straps
There are two well padded shoulder straps. While the position of these straps can’t be adjusted the can be pulled tight. Both shoulder straps will also allow you to attach something like a Peakdesign Capture Clip should you need to keep you camera at hand. The bag also has a mesh ventilated area at the bag to prevent your back getting too sweaty (on those rare warm festival days!)
There are pickup handles on both the top of the bag and the side. The latter being useful should you want to place the bag over luggage handle.


Zips
The zips are high quality YKK zippers but the really interesting thing here is that the zippers for the main compartments have metal loops. Why? This is so you can loop them into the integrated TSA approved padlock. While it won't stop someone walking off with your backpack, it will prevent someone sneakily opening your bag and removing the contents.
Exterior Compartments
There is a large compartment at the front of the bag. It's deep compartment so ideal for stashing clothing items but you'll also find two mesh pockets which you can use for smaller items.
There is also a top opening to the bag where you can directly access some of your camera gear, but if you change the interior layout of the main camera compartment, you can make this top opening a separate compartment from your camera gear. This makes it very handy for storing items that you want quick access to such as snacks or a rain jacket.


Rear Access (Camera) Compartment

The Manfrotto PRO Light Backloader Backpack S has plenty of room to store gear. I have changed to layout of the interior to give me space at the top of the bag for personal items.
The main compartment is accessed at the back of bag, has two zips, and is full of storage goodies. There's a laptop sleeve (up to 15" and well padded), and three mesh compartments (one of which is large and zipped).
But the main function of this area is for storing your camera gear. Manfrotto say it will hold 2 to 3 mirrorless bodies (without battery grips) plus multiple lenses. This far exceeds any of my requirements for cameras and lenses so it still leaves lots of room for camera accessories such as batteries and lens cloths. As I mentioned earlier, you can change the size of this compartment to make a separate compartment at the top of the bag.
Finally, the camera compartment can be adjusted to suit your combination of camera equipment thanks to the M-Guard dividers. The provide a lot of flexibility on how you use the available space and because they are made of high-density EVA foam the provide very high levels of shock absorption but yet they are slim enough not to consume valuable space.
Using the Manfrotto PRO Light Backloader Backpack in the Real World
What Is the Real World?

The Manfrotto PRO Light Backloader Backpack S also stood up well to the harsh environment of a wet Scottish island walk.
No, I’m not going to ask you to take the red pill or green pill, but I thought I’d let you know how I’ve been using this bag in the real world. Most of my real world experience with this bag has been at a multi-day music festival in the UK. Generally speaking, these aren’t the friendliest environments for camera gear. Even though I was there as Press and I had a pit pass, I still have to deal with bad weather, bringing my own supplies (food & drink), and accept that my bag will be subject to the odd knock!
While most of my experience with this bag has been in a festival environment, I have also been using it as a day bag for family adventures, and when I needed a more lightweight landscape gear setup. Needless to say, the bag has proved to be very capable and versatile.
What I Packed in the Bag
One of the key reasons I decided on the Manfrotto PRO Light Backloader Backpack S is that it allows you to change the amount of space you dedicate to camera gear and personal items. This is important to me as the amount of camera gear that I take with me is relatively small. Most of what I need for a festival is food, drink and protection from the elements! Here's what I take:
Camera Gear
Nikon Z8 - check out all my Z8 videos (including my review) here
Tamron 35-150mm F2-2.8 Di III VXD - this is a recent addition to my kit bag. With a fast aperture and good zoom range, it's ideal for festivals. If you want to see a review, let me know in the comments. (You purchase this lens from Amazon or Wex.
Nikon Z 14-30mm f/4 S - handy in case I need a super wide shot!
2 x Spare EN-EL15 batteries
Spare memory cards - 1 x CF Express Type B, 1 x xQD, 1 x SD
BLACKRAPID Camera Strap
Peakdesign Capture Clip
Lens clothes - you can never take too many of these!
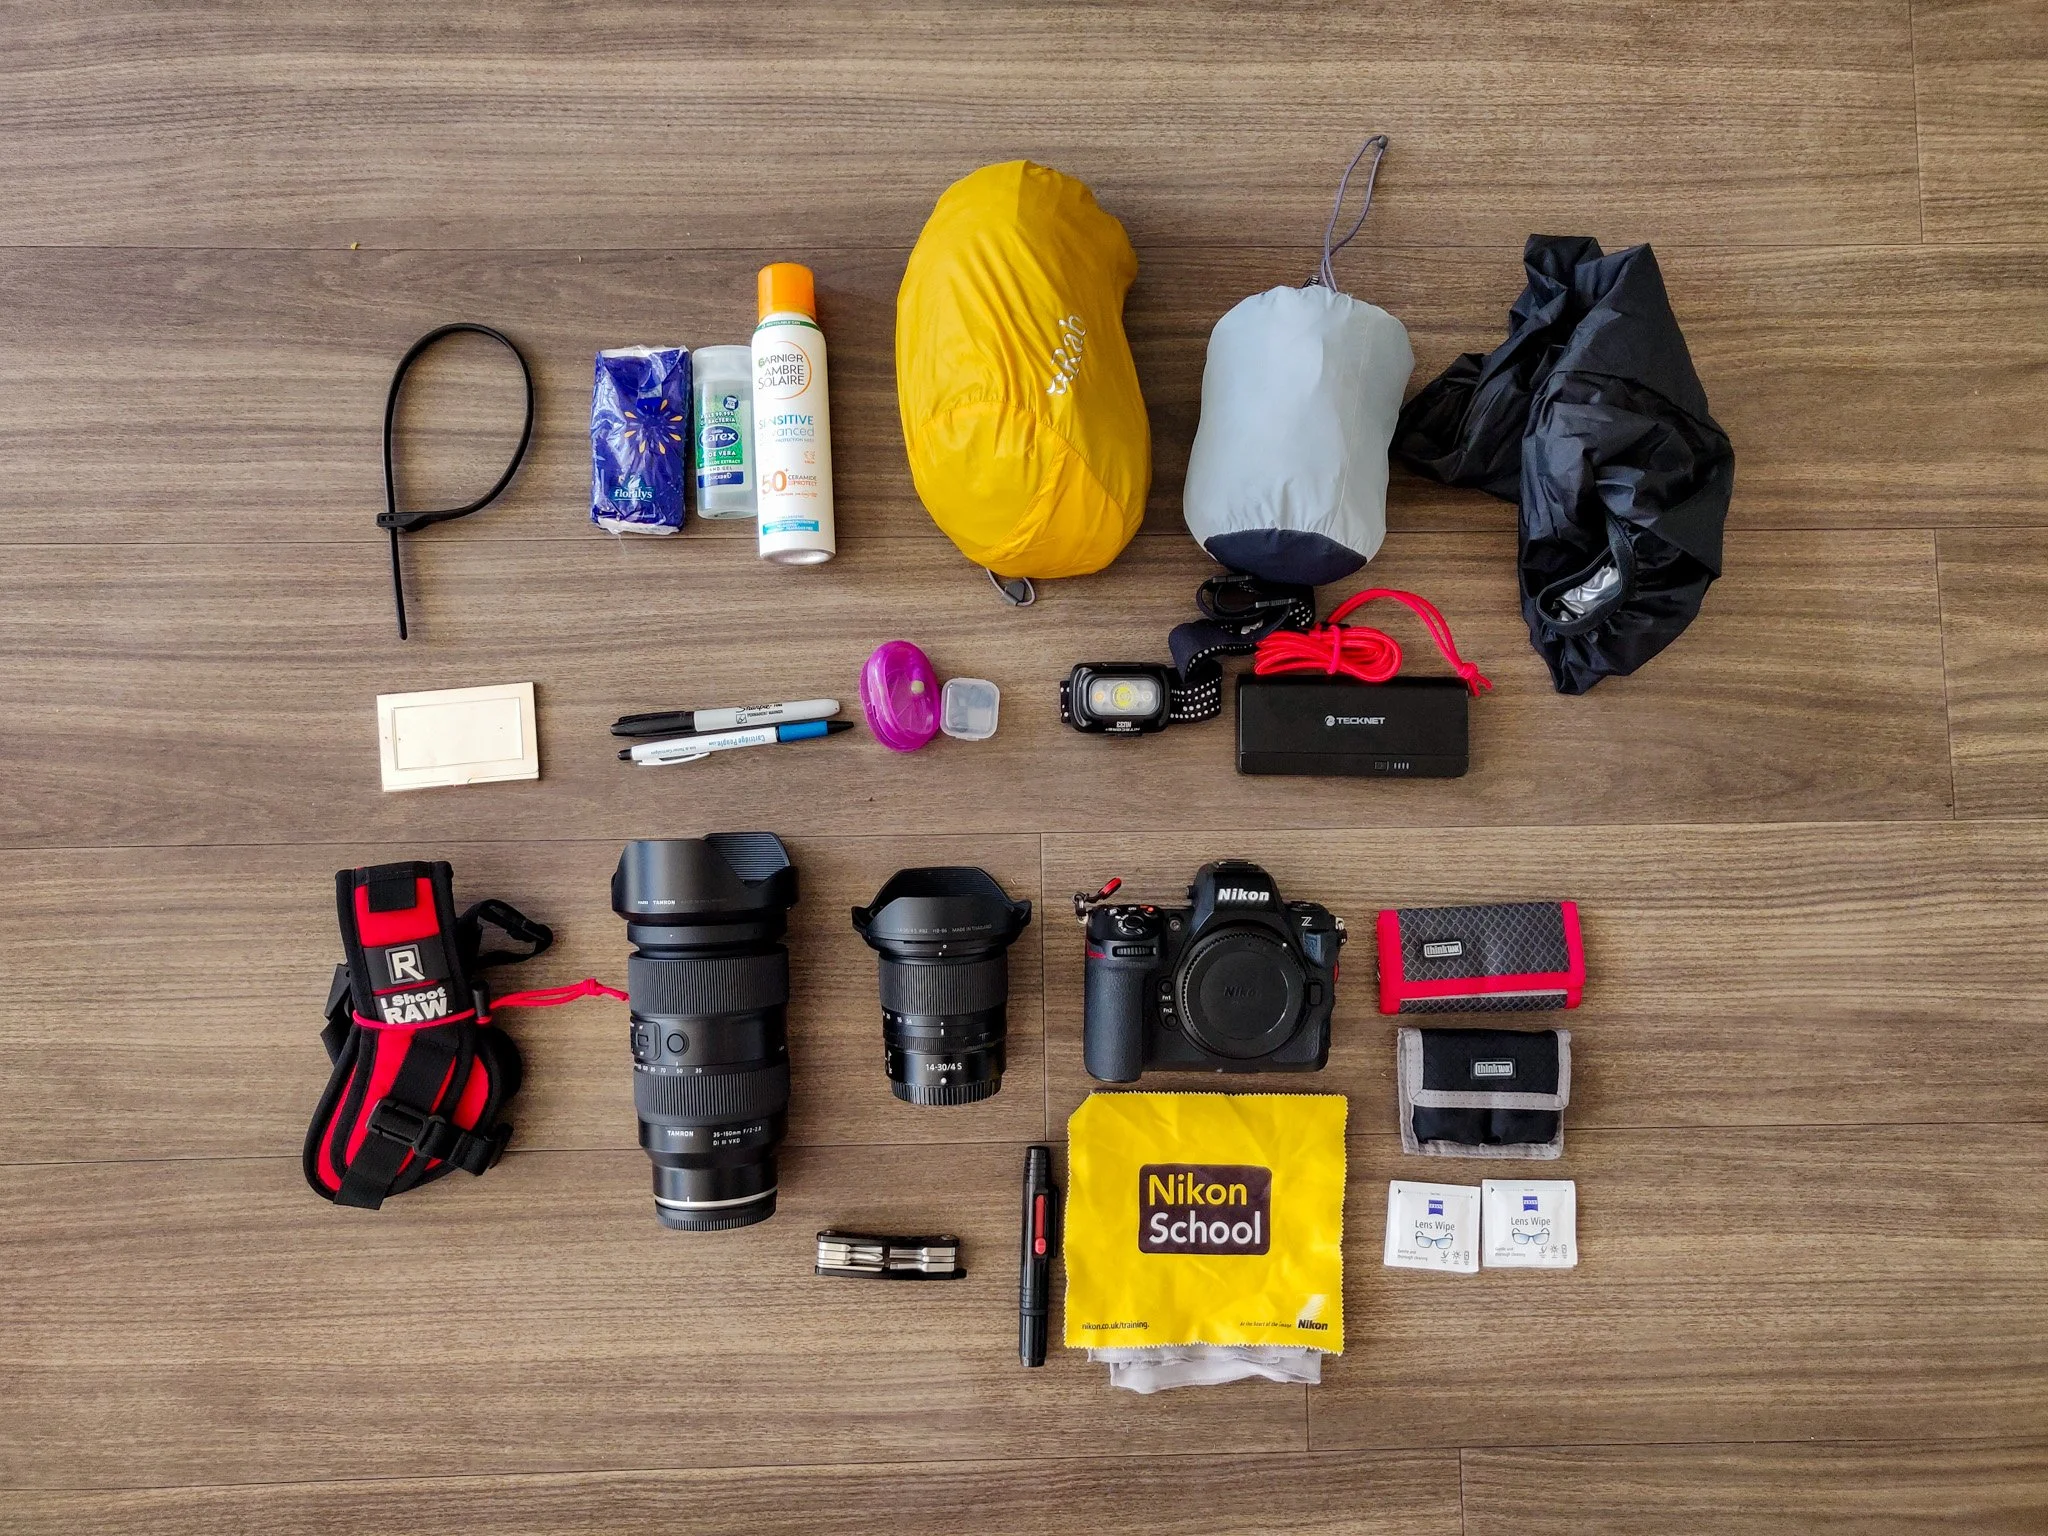


Other Essentials
USB Battery bank - just in case!
Sunblock
Business/contact cards
Ear Plugs
Hiplok Z LOK Armoured Security Tie - useful for securing the bag to a solid object
Water Bottle (750ml)
Snacks!
Waterproof Trousers
Waterproof Jacket
You'll notice that I don't take a laptop. For this particular festival I was able to return home each night and upload my photos to my computer. Any photos that I needed to publish immediately I would do on my phone using a combination of Nikon SnapBridge and Lightroom Mobile. However, the bag does have a laptop sleave so if I do need to take my laptop in future, there is still plenty of room.
With or without a laptop, the Manfrotto PRO Light Backloader Backpack S offers lots of space to carry everything I need. Plus the M-Guard dividers offer plenty of flexibility on how that space is used. I have no complaints around the capacity of the bag, and I particularly like the flexibility in how I size and format the main compartment.
Accessing and Securing Your Gear
There's no point in having a spacious bag that protects all your gear if you can't access it easily. As the name suggests, the Manfrotto PRO Light Backloader is a rear access style bag, so to get to the bulk of your camera gear, you need to take the bag off your shoulders. Depending on how you are using your camera bag you will see this is as a good thing or a bad thing. Fortunately, Manfrotto offer a range of bags so if you prefer a different style of gear access, there's likely to be a bag for you in the range.
For me though, the rear access is just what I want. When the camera is in the bag and I have the bag over both shoulders, no one can access the main compartment as it is against my back. As well as shooting from the pit, I will also be walking between stages and performances through busy crowds. It's good to know that anyone following me can't sneakily open the bag.
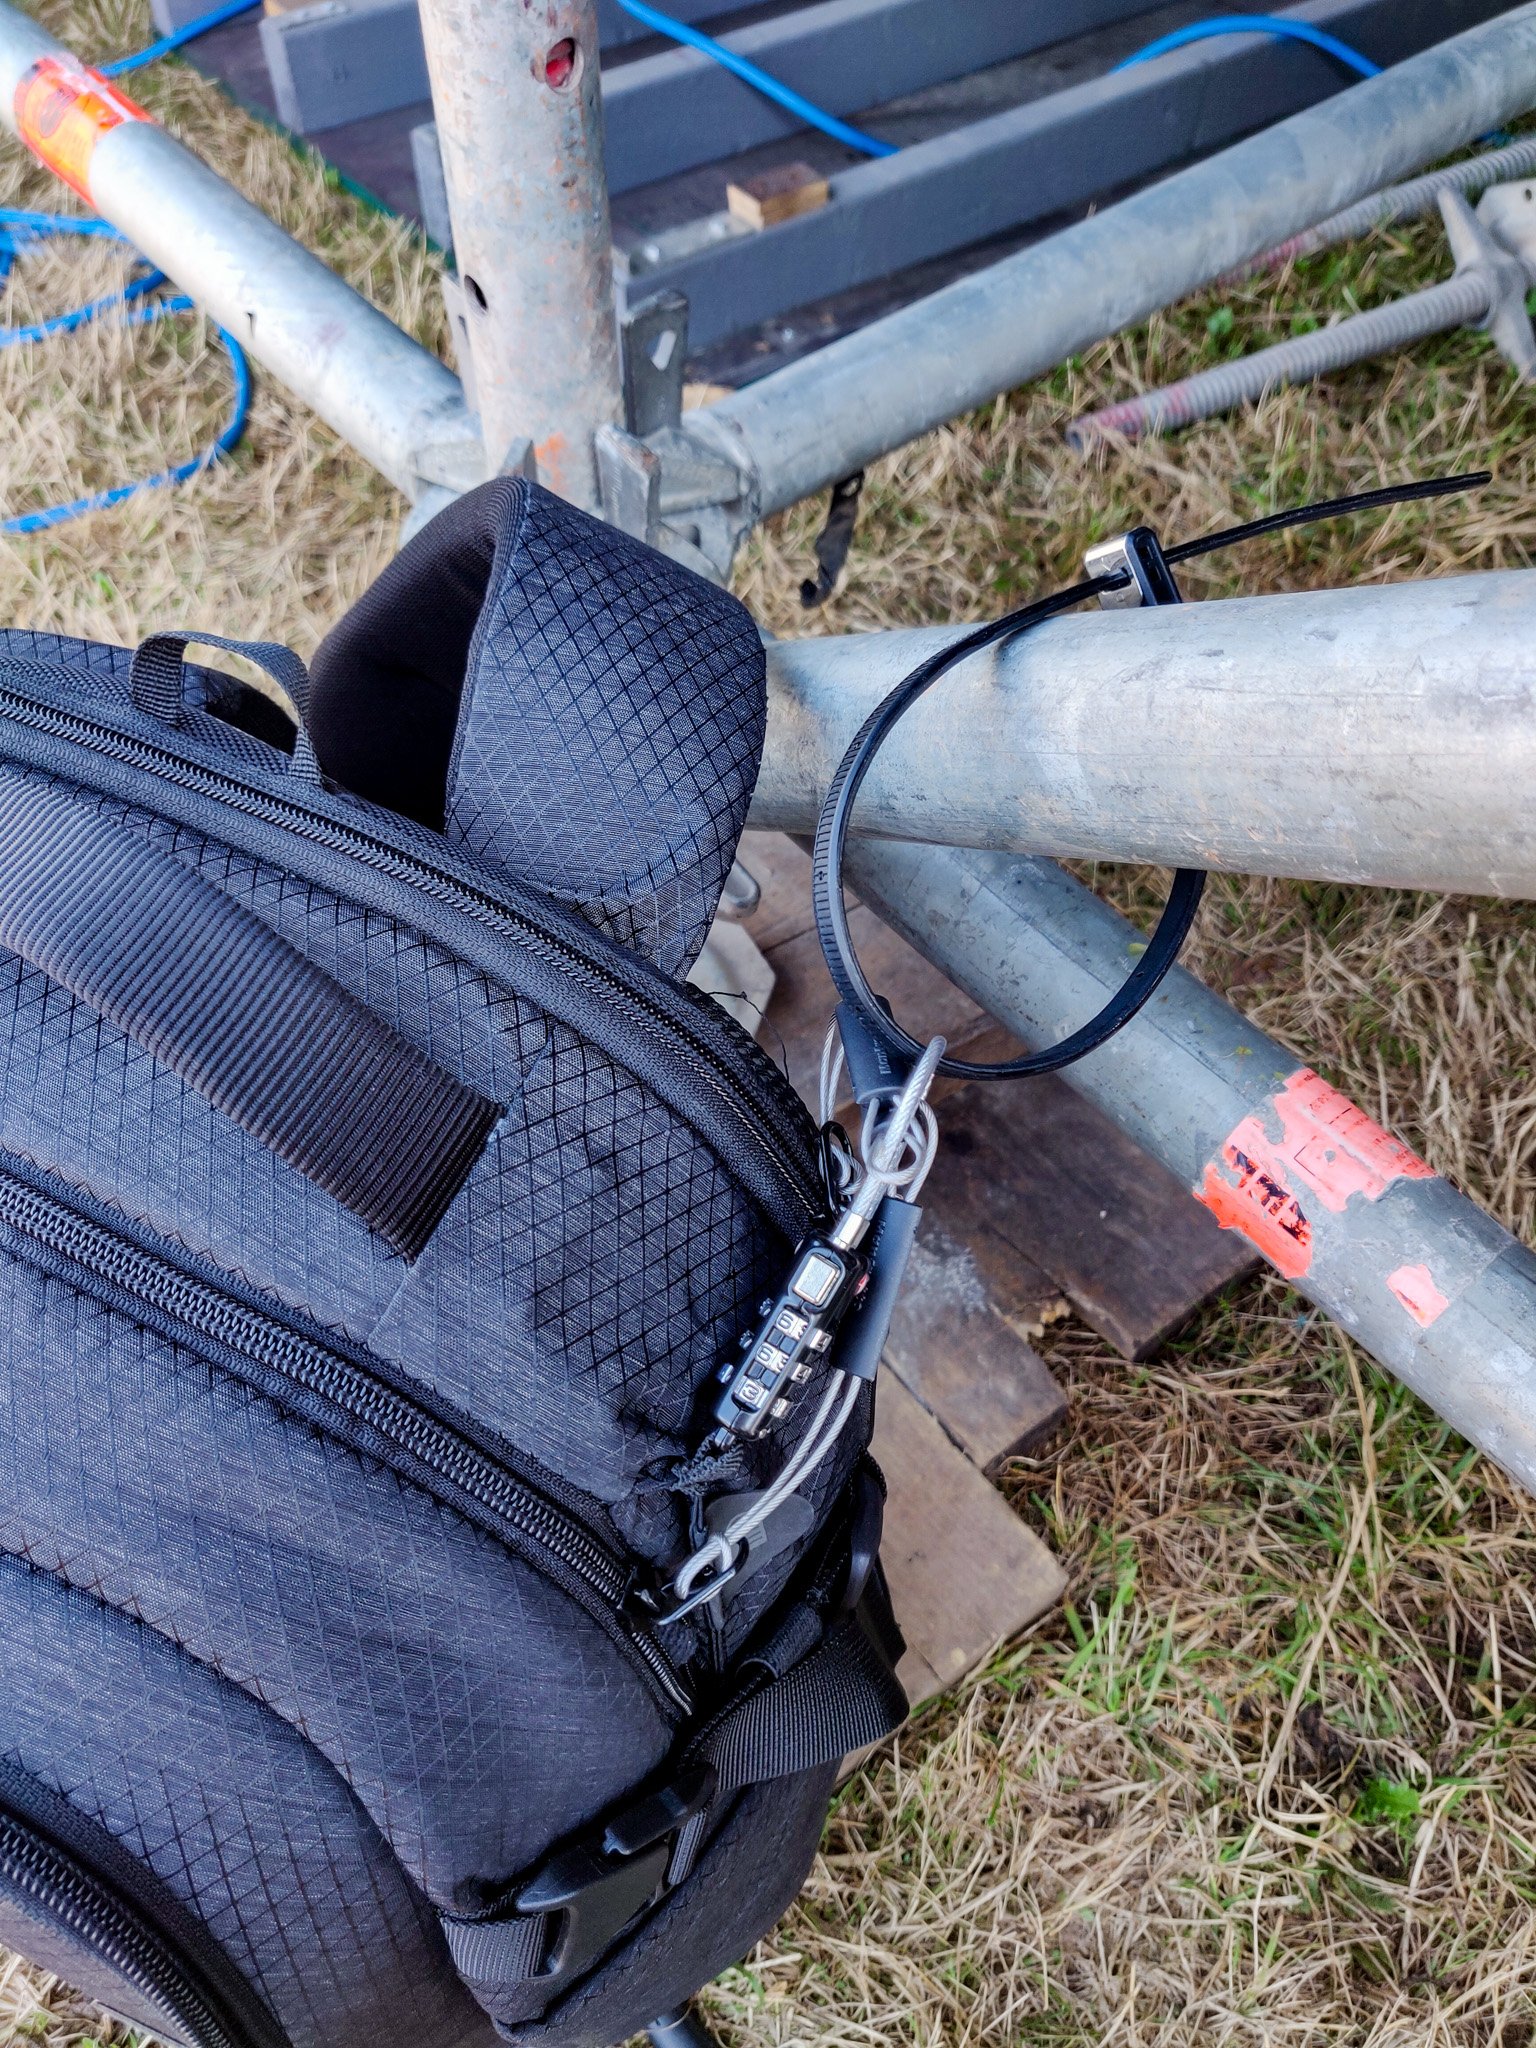
Securing the Manfrotto PRO Light Backloader Backpack S bag to the stage with the integrated TSA lock and a Hiplock Security Tie.
Sometimes the walk between stages leaves me tight for time so being able to access my gear efficiently is important. Getting the bag of my shoulders and onto the ground is a simple process. I also had no concerns putting the bag on the ground, even when the ground was wet and muddy. Thanks to the large metal loops on the rear compartments zips, finding them easy allowing me open the bag quickly. I could then quickly get at my camera and start taking photos.
In a busy pit area, it's either prohibited or at least bad etiquette to take your bag into the pit. This normally means leaving it at the side near the entrance of the pit. If I arrive with time to spare I will stow my bag under the stage. I will use one of my Hiplock Security Ties to attach the bag to something immovable like a bit of stage scaffolding. This combined with the integrated TSA lock on the bag gave me the reassurance that people can't access the critical areas of my bag, nor simply just walk off with it.
Overall, I found I had no issues accessing my camera quickly and easily, and with the backloading system and the integrated TSA lock my gear also felt secure.
Comfort
If you talk to anyone who has photographed a festival, they will tell you that it involves a lot of walking and waiting about. During that time you will inevitably have your backpack on. Even when you are carrying a modest amount of equipment, you’ll want that experience to be as comfortable as possible.
My initial concern with the Manfrotto PRO Light Backloader was that it didn't have a hip belt. A hip belt takes some of the load from your shoulders and distributes it to your hips. However, I'm carrying less gear and lighter gear these days so my worry about the lack of a hip belt in the end wasn't justified.
The shoulder straps are well padded and even after a full day of the bag being on my shoulders I wasn’t in any discomfort. The area of the bag that sits against your back is also well padded and ventilated. While it won't stop your back sweating in the heat, it is comfortable, and it does allow some air to flow.
The shoulder straps don't have a huge amount of adjustability. They can be adjusted so they are pulled tight, and with the sternum strap I was able to achieve a snug but comfortable fit. There's no way to adjust the position of the shoulder straps but that's not entirely unexpected with a bag this size.
he Manfrotto PRO Light Backloader Backpack S was comfortable enough to wear all day and into the night.
I would have preferred to see slightly wider shoulder straps with some storage pockets though. Being able to store items such as mobile phones, access/press passes, emergency snacks and festival maps would have been very useful.
That aside, I did find the bag comfortable to wear. There's no escaping the fact that carrying a bag full of equipment all day is a tiring experience, but at least with this bag it doesn't have be an uncomfortable one.
Durability and Protection
Music festivals are harsh environments even when they are rain and mud free. Any bag will get knocked as you walk through crowds, drinks get spilt as you walk by, and despite your best intentions, sometimes you won't always put your bag down as gently as you should. Some of these things are within your control and others you just can't help. It's the nature of carrying a bag at a festival.
You therefore want a bag that can protect all your precious gear against those bumps, spills and weather. I'm pleased to say that the Manfrotto PRO Light Backloader is a backpack that I can confidently say handles the harshness of a British music festival. My camera gear was well protected inside thanks to protection of the M-Guard dividers. The bag is also well padded on the outside, but the addition of high impact strips on the front and base of the bag meant I was a little less worried when I "dumped" my bag on the ground.

The Manfrotto PRO Light Backloader Backpack S material is water repellant.
The outer material is also well suited to outdoor environments. The RipStop fabric meant that I was less concerned on where I put my bag or it catching it on some fencing or in a narrow space (which I did a couple of times). While the material isn't waterproof (you need the included raincover for that), it is water repellent meaning I was comfortable enough getting it wet during most rain showers.
Even in the driest of music festivals, you can almost guarantee there will be mud somewhere, and normally where you put your bag! While keep the bag looking new isn't a top priority, it looks like keeping this bag looking smart is an easy enough job. Using a damp cloth I was able to wipe any mud off at the end of the day.
The Manfrotto PRO Light Backloader certainly gives me the confidence that my gear will be well protected but what about the durability of the bag. I've only had the bag for a few weeks so at the moment I can't comment on the long term durability of the bag. But from what I have experienced, the quality of materials, and that it is a Manfrotto bag, I have little concern that long-term this will last every bit as long as my last one.
In Summary
I'm very happy with how the Manfrotto PRO Light Backloader has performed over the time I have been using it. There are lots of things I like about it. The materials are excellent, it offers lots of flexible storage space, it protects my gear, it has some nifty security features, and it's comfortable to wear.
My only slight criticism is that I would have liked a hip belt and slightly wider shoulder straps with pockets but given the size of this bag it's not a total surprise these things aren't there. I would have also liked to have seen a mechanism to securely attach keys inside the bag.
But overall, I love this bag, and it will continue to get heavily used. It will be my go to bag for gigs and festivals, a bag for those lighter weight landscape photography adventures and it will also serve as a general use day pack.
I hoped you enjoyed this review of the Manfrotto PRO Light Backloader backpack and if you have any questions, please leave me a comment below.

Creating an 8K Landscape Photography Video with a Pergear CFexpress Type B Card
What's the point of publishing one of my landscape photography videos in 8K? Well, I got the idea when @Pergear asked me to try out their updated 2023 Prime CF-Express Type B Memory Card. I thought the best way to put a card like that through its paces would be to shoot an entire video in 8k. And if I shoot it in in 8K, why not publish it in 8K!
What’s the Point of 8K Video?
One of the first things I did when I got my Nikon Z8 was to get a CFexpress Type B card. Not only did I want to be able to capture 8K video, but I wanted to use both card slots in the Nikon Z8 (see why here). The latter is a crucial point, because using a CFexpress type B card isn’t just for those wanting to shoot 8K video.
As part of a series of videos I produced on the Nikon Z8, I created a video on my initial choice of CFexpress card. I think most of you will agree that one video on CFexpress cards is enough. So, when Pergear reached out to me to see if I create a video featuring their CFE-B Prime CFexpress Type-B Memory Card, my initial response was no.
However, I soon changed my mind. I’d heard a lot of good things about the Pergear cards and I’d always wanted to publish a video in 8K. Rather than just talking about the cards in my office, I could revisit the topic of CFexpress Type B cards, film it on location, and shoot and the whole lot in glorious 8K! It would be a real-world test of the card’s capabilities.
Ever since getting the Nikon Z8 I have been capturing 8K video but for the most part this was b-roll. I would then place the 8K footage on a 4K timeline so that I can pan and scale without loss of quality. The difference this time would be that I would publish the video in 8K! I am fully aware though that most of the people that watch YouTube do not have monitor or TV that supports a resolution of great than 4K. So, the publication of this video in 8K is just for fun. I just wanted to do it once. But I would be interested to hear if any of you do watch it on a resolution great than 4K.
And if you are bored of me talking about 8K video, I don’t blame you! It’s still a niche video resolution. The video below though does contain some information on why using a CFexpress Type B card is still useful if you are a stills photographer and as with all of my on- location videos, I do also spend some time capturing landscape photographs! So, I hope you find something in this video to enjoy!
Purchasing the Pergear Prime CFexpress Type B Cards
You can purchase the card and card reader directly from Pergear (free shipping to almost all locations worldwide) -
🛒 Pergear CFE-B Prime CFexpress Type-B Memory Card 2023 Upgrade Version - https://www.pergear.com/collections/pergear-cfexpress-card?ref=GdYvo
🛒 Pergear CFexpress Type-B Card Reader USB 3.1 Gen 2 10Gbps Adapter - https://www.pergear.com/collections/pergear-cfexpress-card/products/card-reader?ref=GdYvo
Between 2nd March 2024 and 31st March 2023 you can get 25% off with the code 9E00WSYAQ2X2
You can also purchase the card and card reader from amazon.com -
🛒 Pergear CFexpress Type-B Memory Cards 2023 - https://www.amazon.com/promocode/A2ONRYIGSBNRBY?maas=maas_adg_E47C949D656DC40F57EF433E5641B046_afap_abs&ref_=aa_maas&tag=maas
Between 2nd March 2024 and 31st March 2023 you can get 25% off with the code 25LPIW7H
PLEASE NOTE - The discount code will only work on amazon.com (sorry).
If you wish to order from amazon.co.uk you can do so here
🛒 Pergear CFexpress Type-B Memory Cards 2023 - https://amzn.to/3wEcw1n
Sorry, no discount code for amazon.co.uk!
Please note that these are affiliate links (but not paid links or ads). By buying through these links I may receive a commission for the sale. This has no effect on the price for you.
Landscape Photographs of Belstone Tor on Dartmoor
Belstone #1, Dartmoor, Devon - Nikon Z8, Nikkor Z 14-30mm f/4 S at 16mm, f/11, 1/20 sec at ISO 64.
Belstone #2, Dartmoor, Devon - Nikon Z8, Nikkor Z 14-30mm f/4 S at 22mm, f/11, 1/5 sec at ISO 64.
Belstone #1, Dartmoor, Devon - Nikon Z8, Nikkor Z 14-30mm f/4 S at 15mm, f/13, 1/13 sec at ISO 64.
A Note on Publishing 8K Video to YouTube
A quick note on publishing 8K video on YouTube. While it is supported, it’s not easy. It’s not the file sizes (12GB for this video), or how long it might take to upload (about 45 mins on my connection), it’s that there is no way to check the progress of 8K processing by YouTube.
In YouTube Studio you can check the progress of the processing for the SD, HD, and 4K versions of your video, but there’s no status for 8K. You just kind of have to hope it’s happening and keep checking back (which you do by playing the video and seeing if the 8K option is there).
For your information, it takes a few minutes for 4K processing to complete, but it took nearly two days for the 8K processing to complete. I get the reason for this. YouTube don’t want to allocate lots of processing power for a resolution that not a lot of people will view! But it is frustrating you can’t see the progress. Anyway, not a problem for many of you I would expect!
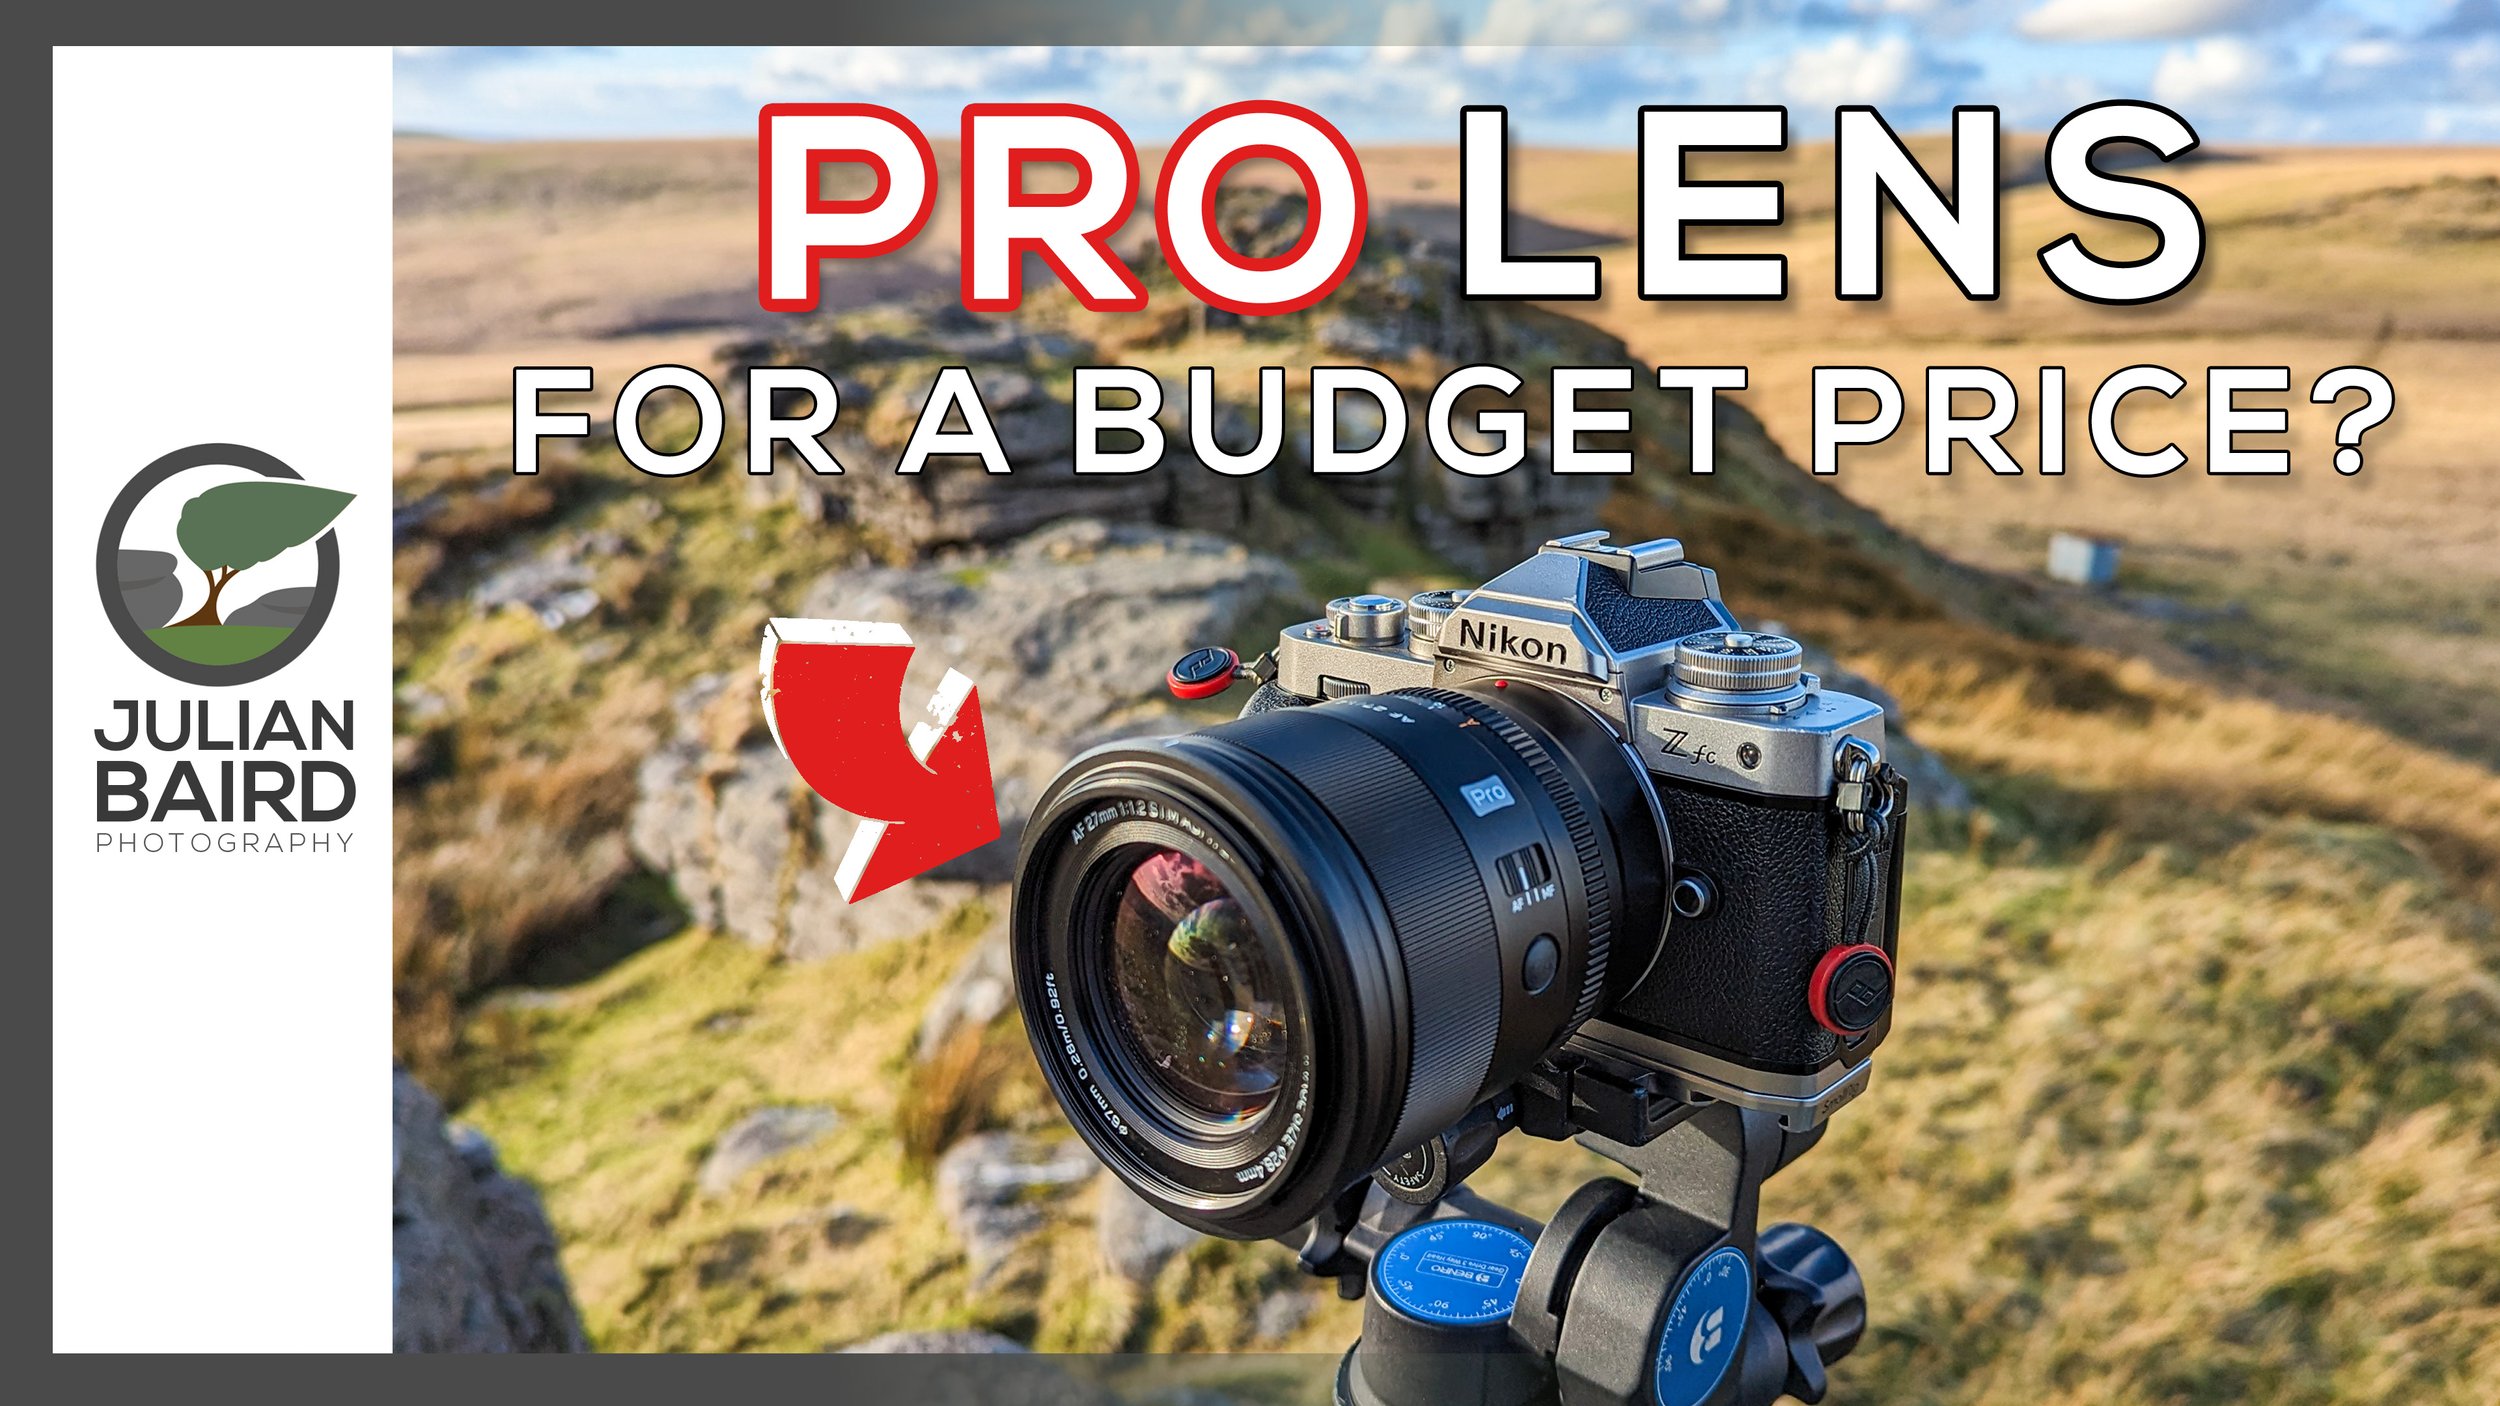
Real World Review of Viltrox Pro AF 27mm for Nikon Z
In this video I head out into the REAL WORLD to capture landscape photographs and shoot video with the new Viltrox PRO AF 27mm f/1.2 for Nikon Z mount. Can you really get a pro lens for a budget price?
A Pro Lens for a Budget Price
Is it possible to get a pro spec lens for a budget price? It’s an interesting question and it’s also a question fraught with problems. Both the “pro” and “budget” terms are highly subjective. Ask two different photographers what features they expect in a professional lens, and you’ll get two different answers. The term “budget” has even more scope for varying definitions!
However, in this case, I believe using those terms is justified. Ignoring the fact that the lens does have the word “pro” in the product name, it does have many (but not all) the professional grade features I personally look for in a lens. And given the price, it’s hard to argue it doesn’t fit into the budget category.
While defining terms is useful, the thing that’s really important is how the lens performs and for me the only way to do that is to put it to use in the real world. And that’s exactly what I’ve done in my video review of the Viltrox Pro AF 27mm. I head out to Dartmoor to capture some landscape photographs and I also use the lens to film large parts of the review to test its video capabilities.
The goal of my video isn’t to necessarily convince you to buy this lens. I just want to share my personal experience of using this lens which will hopefully give you enough information to make your own personal purchasing decision.
Even if you aren’t considering buying this lens, I hope you enjoy the video anyway! So, enjoy!
Buy the Viltrox Pro AF 27 Lens
If you’d like to purchase this lens you can do so directly from Viltrox (affiliate link).
Viltrox Pro AF 27mm Gallery
Landscape Photographs
Beardown Tors #1, Dartmoor, Devon - Nikon Z fc, Viltrox Pro AF 27mm f/1.2 at f/13, 1/13 sec at ISO 100.
Beardown Tors #2, Dartmoor, Devon - Nikon Z fc, Viltrox Pro AF 27mm f/1.2 at f/11, 1/30 sec at ISO 100.
Beardown Tors #3, Dartmoor, Devon - Nikon Z fc, Viltrox Pro AF 27mm f/1.2 at f/11, 0.5 sec at ISO 100.
People and Dogs
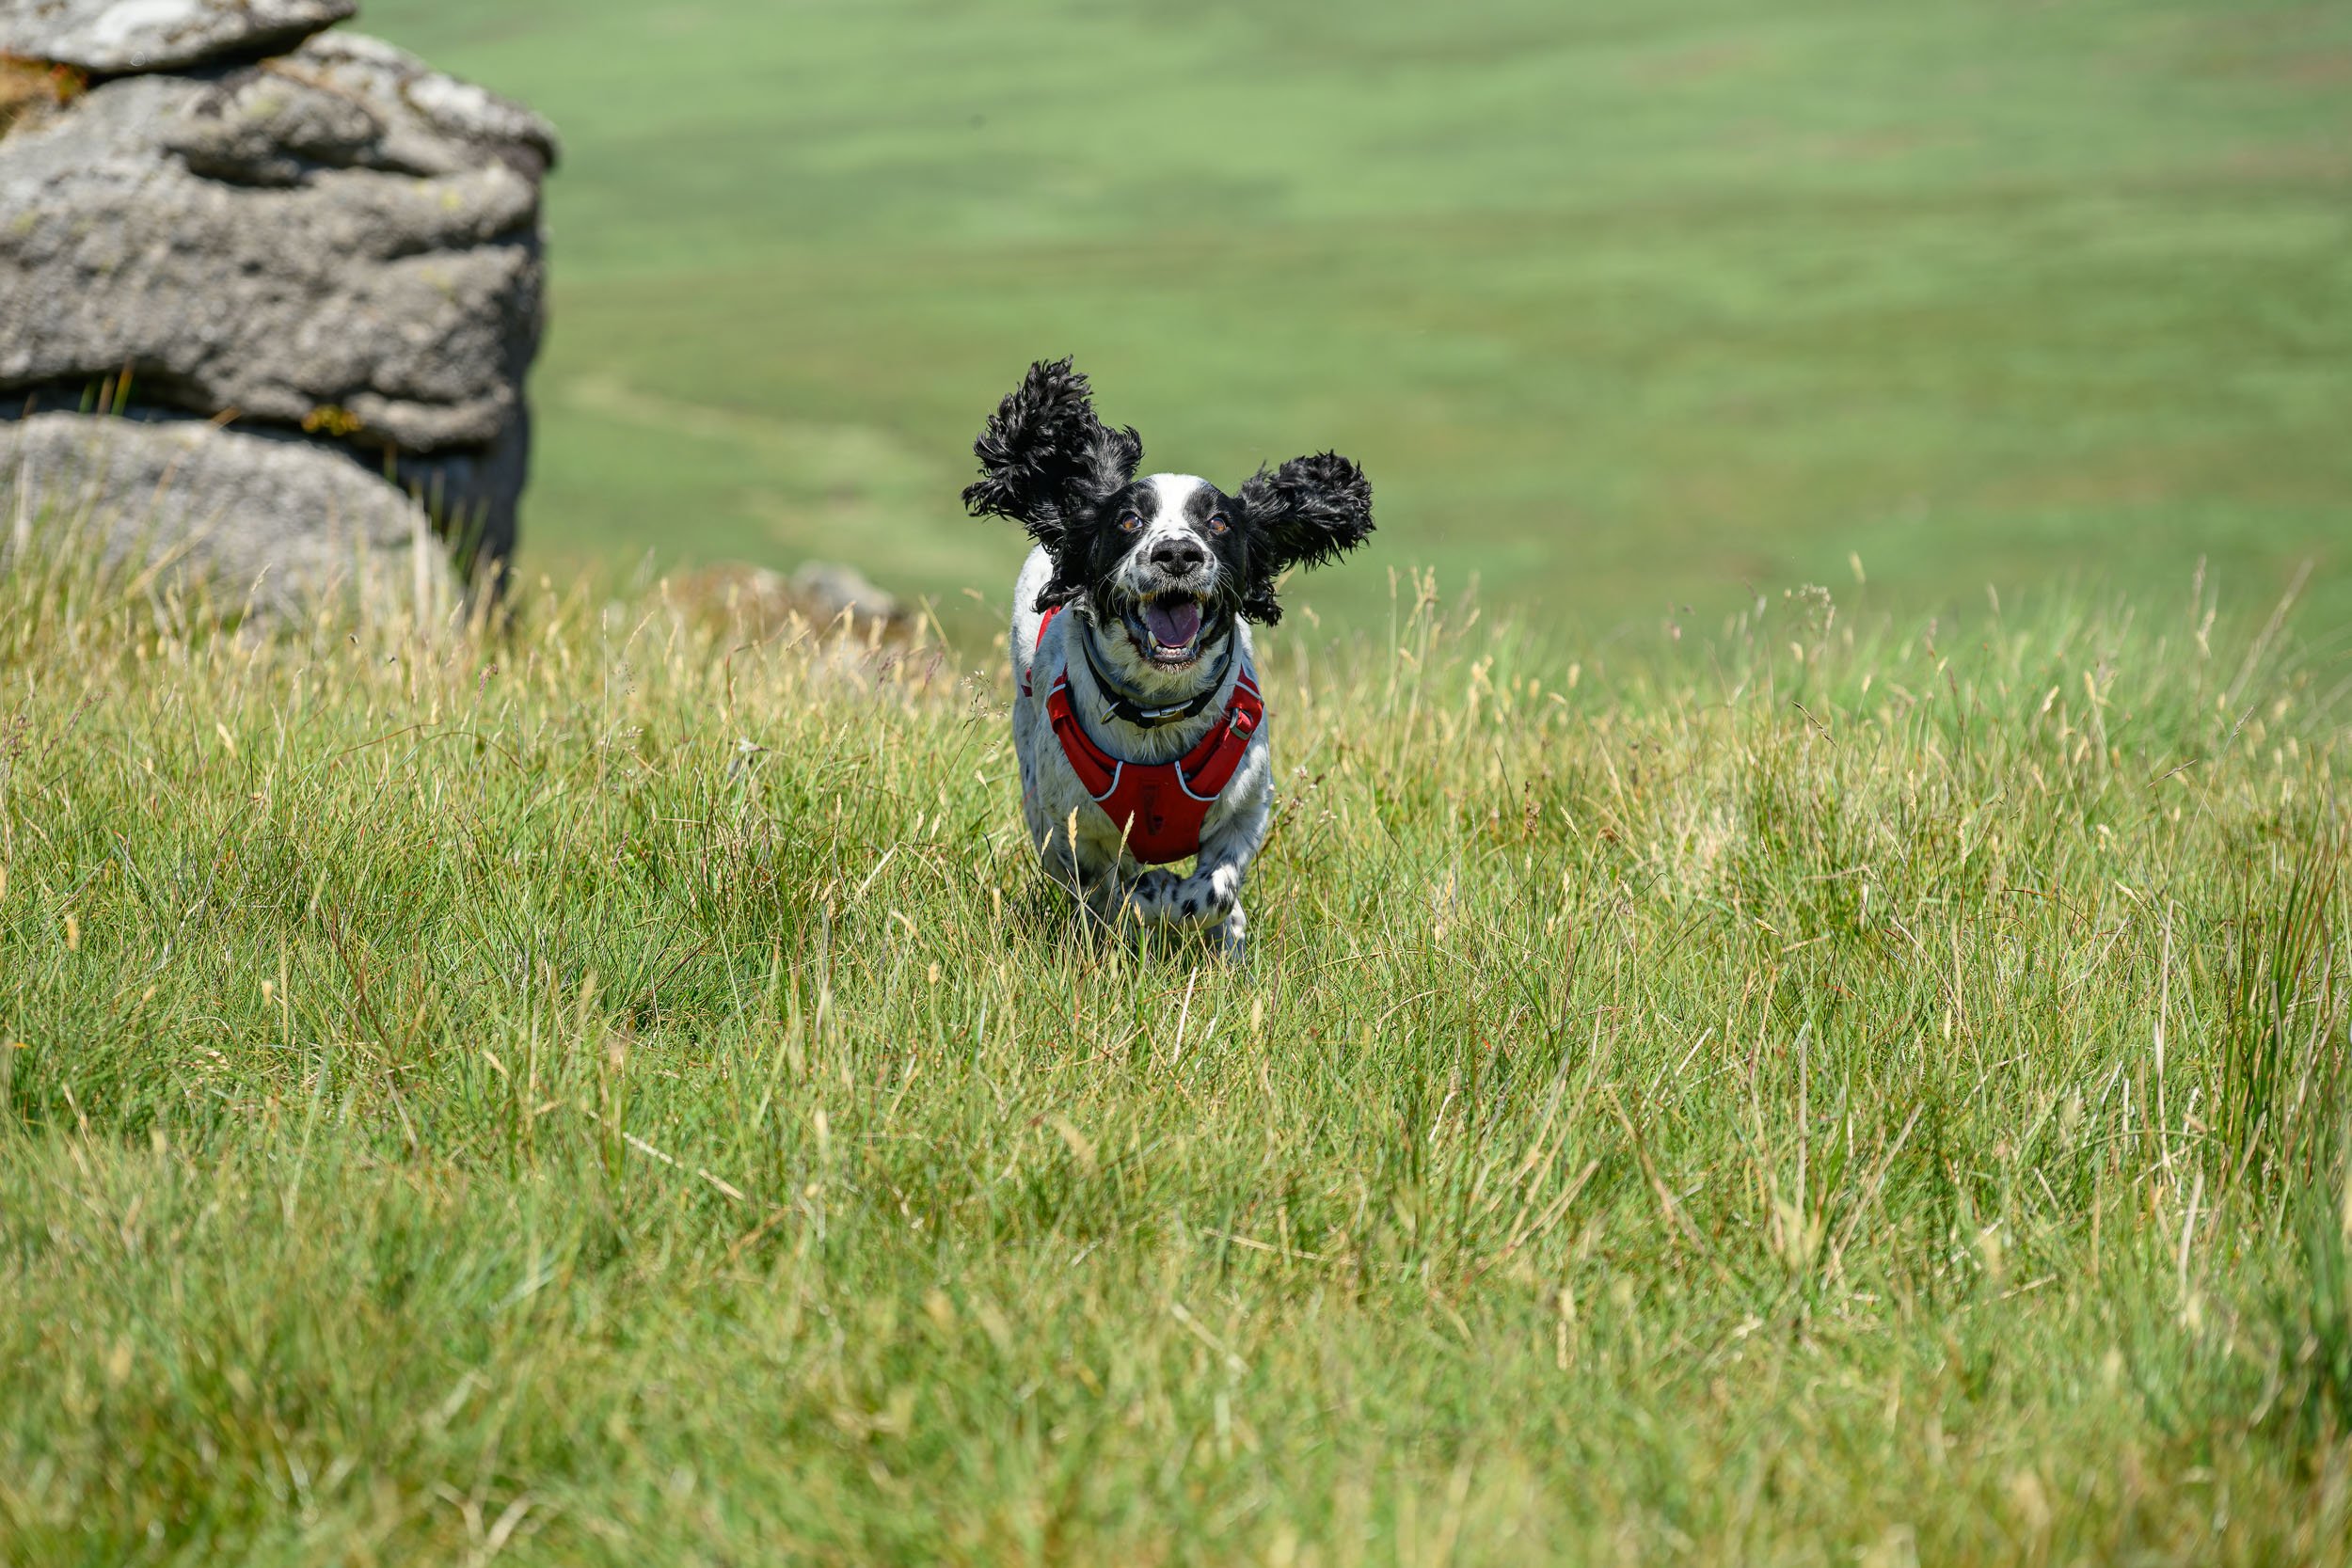
Nikon Z8, Viltrox Pro AF 27mm f/1.2 at f/2.2, 1/250 sec at ISO 2000.
Nikon Z8, Viltrox Pro AF 27mm f/1.2 at f/1.2, 1/250 sec at ISO 640.
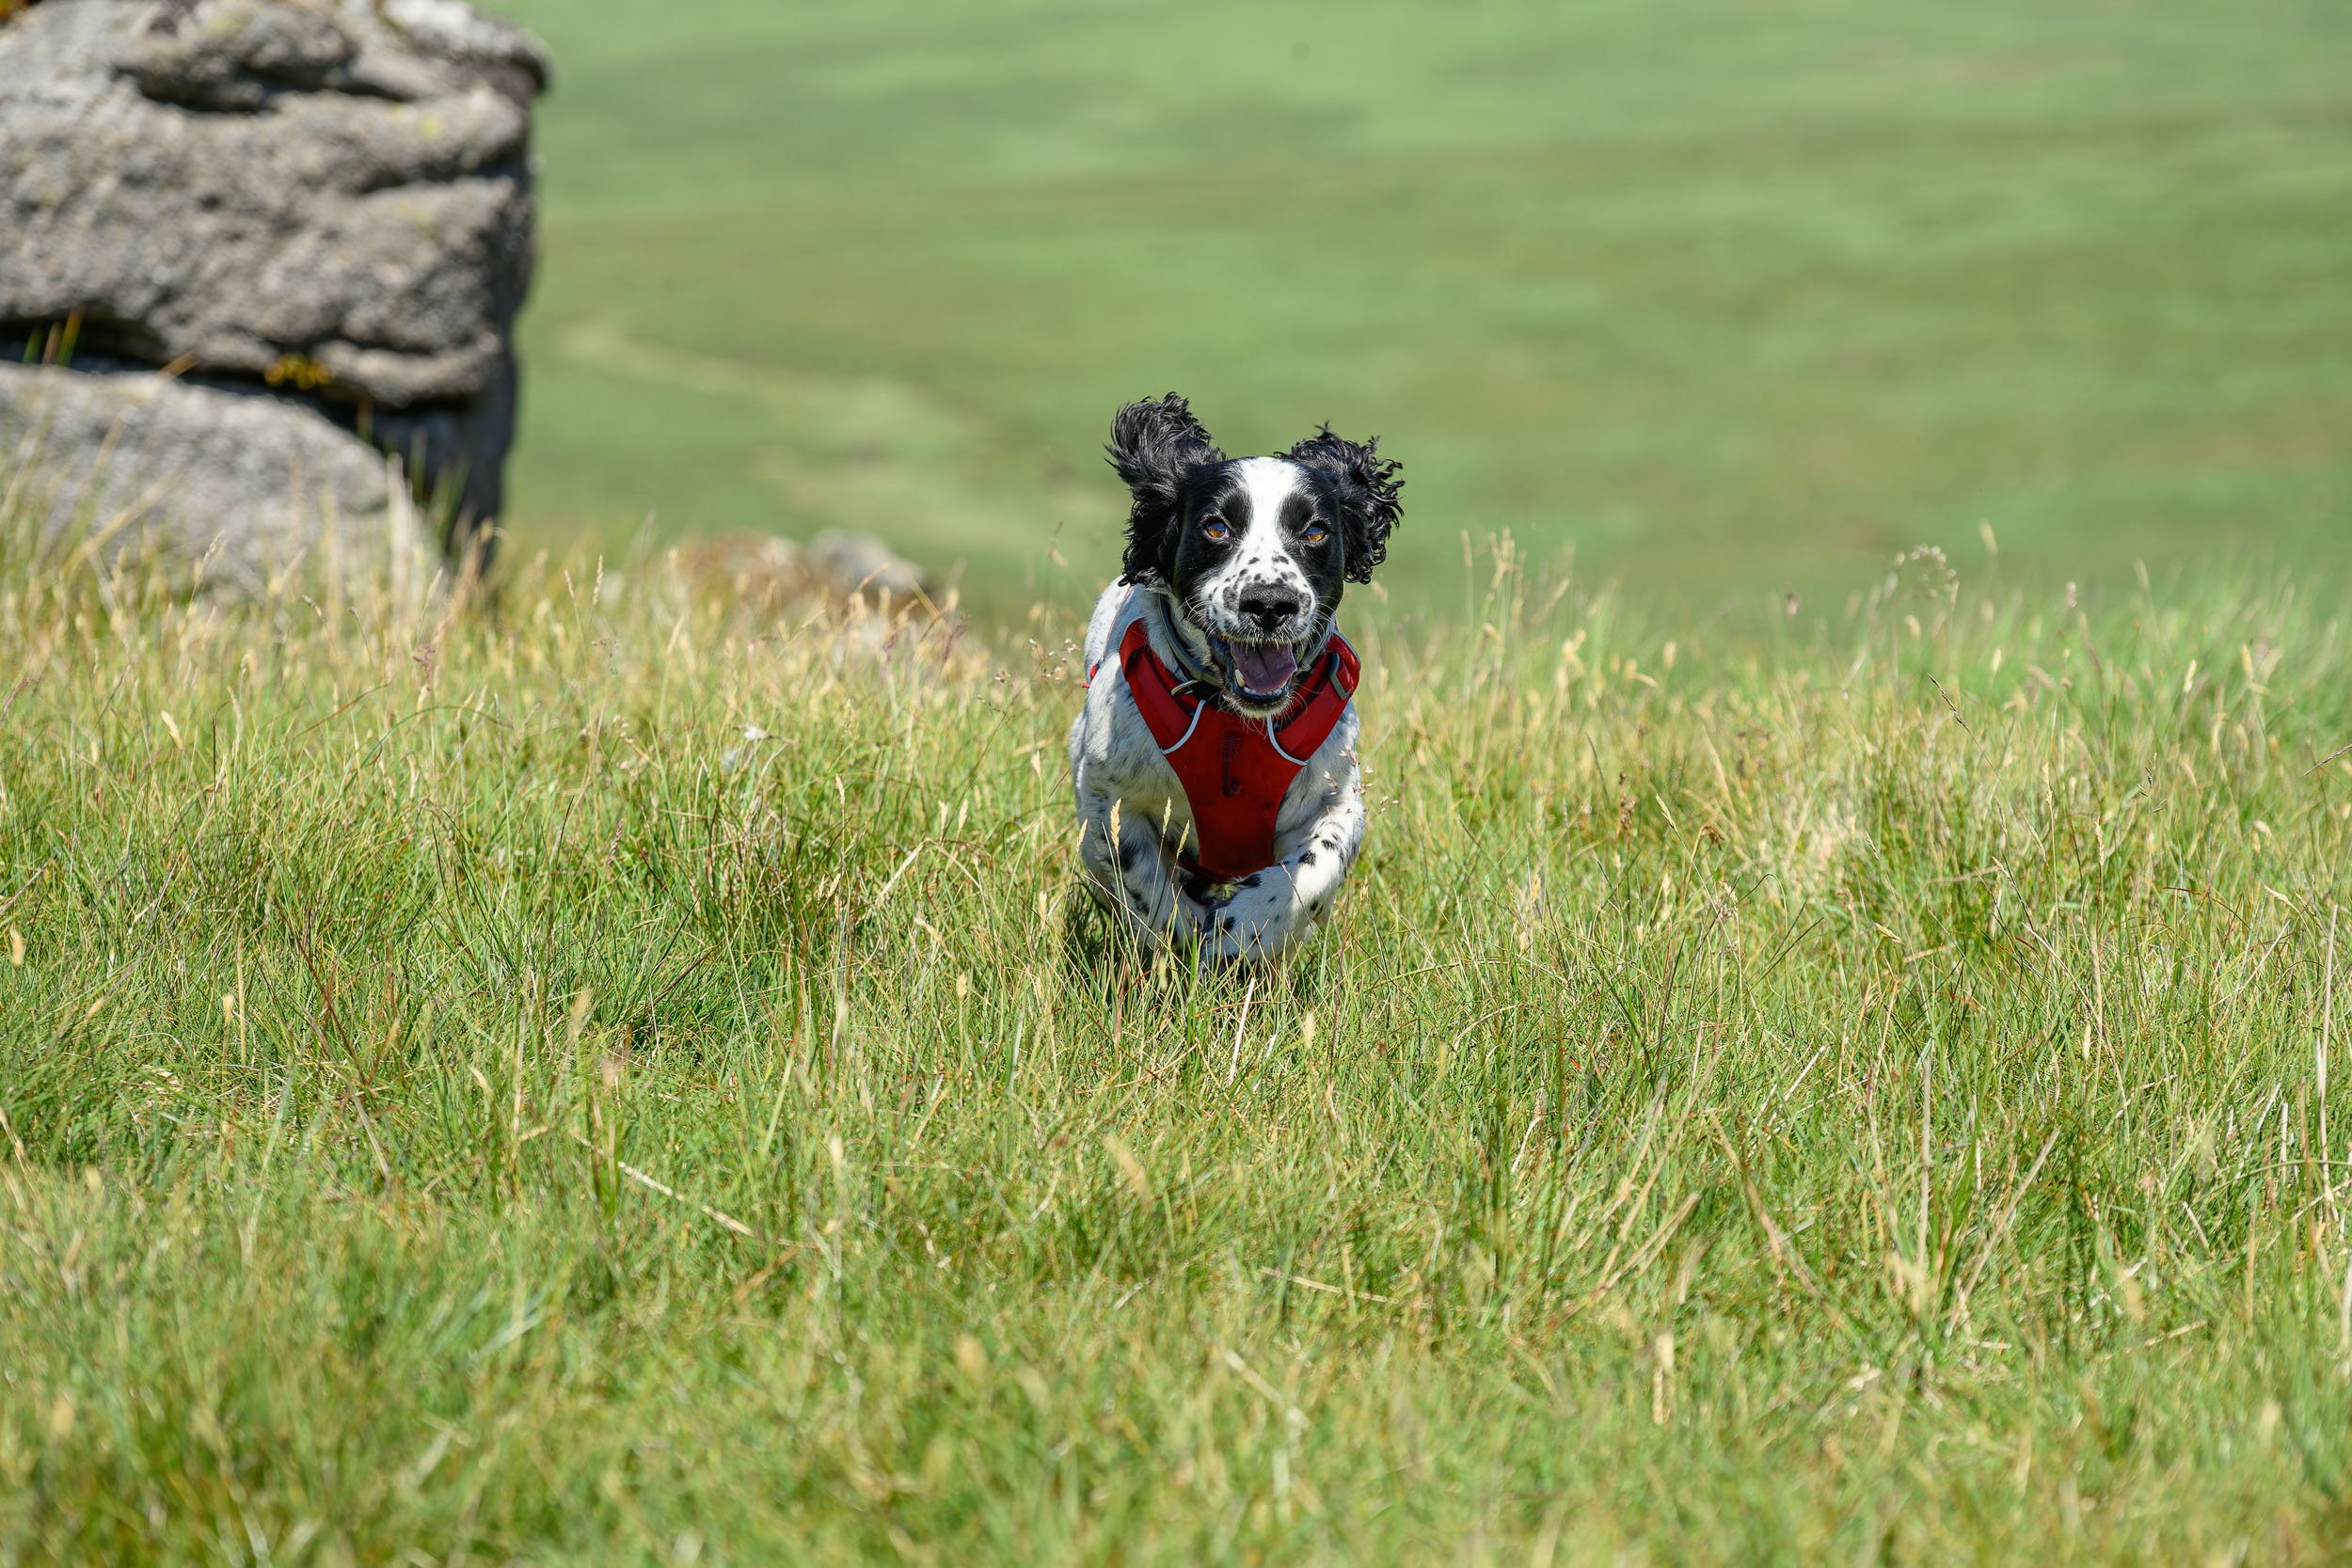
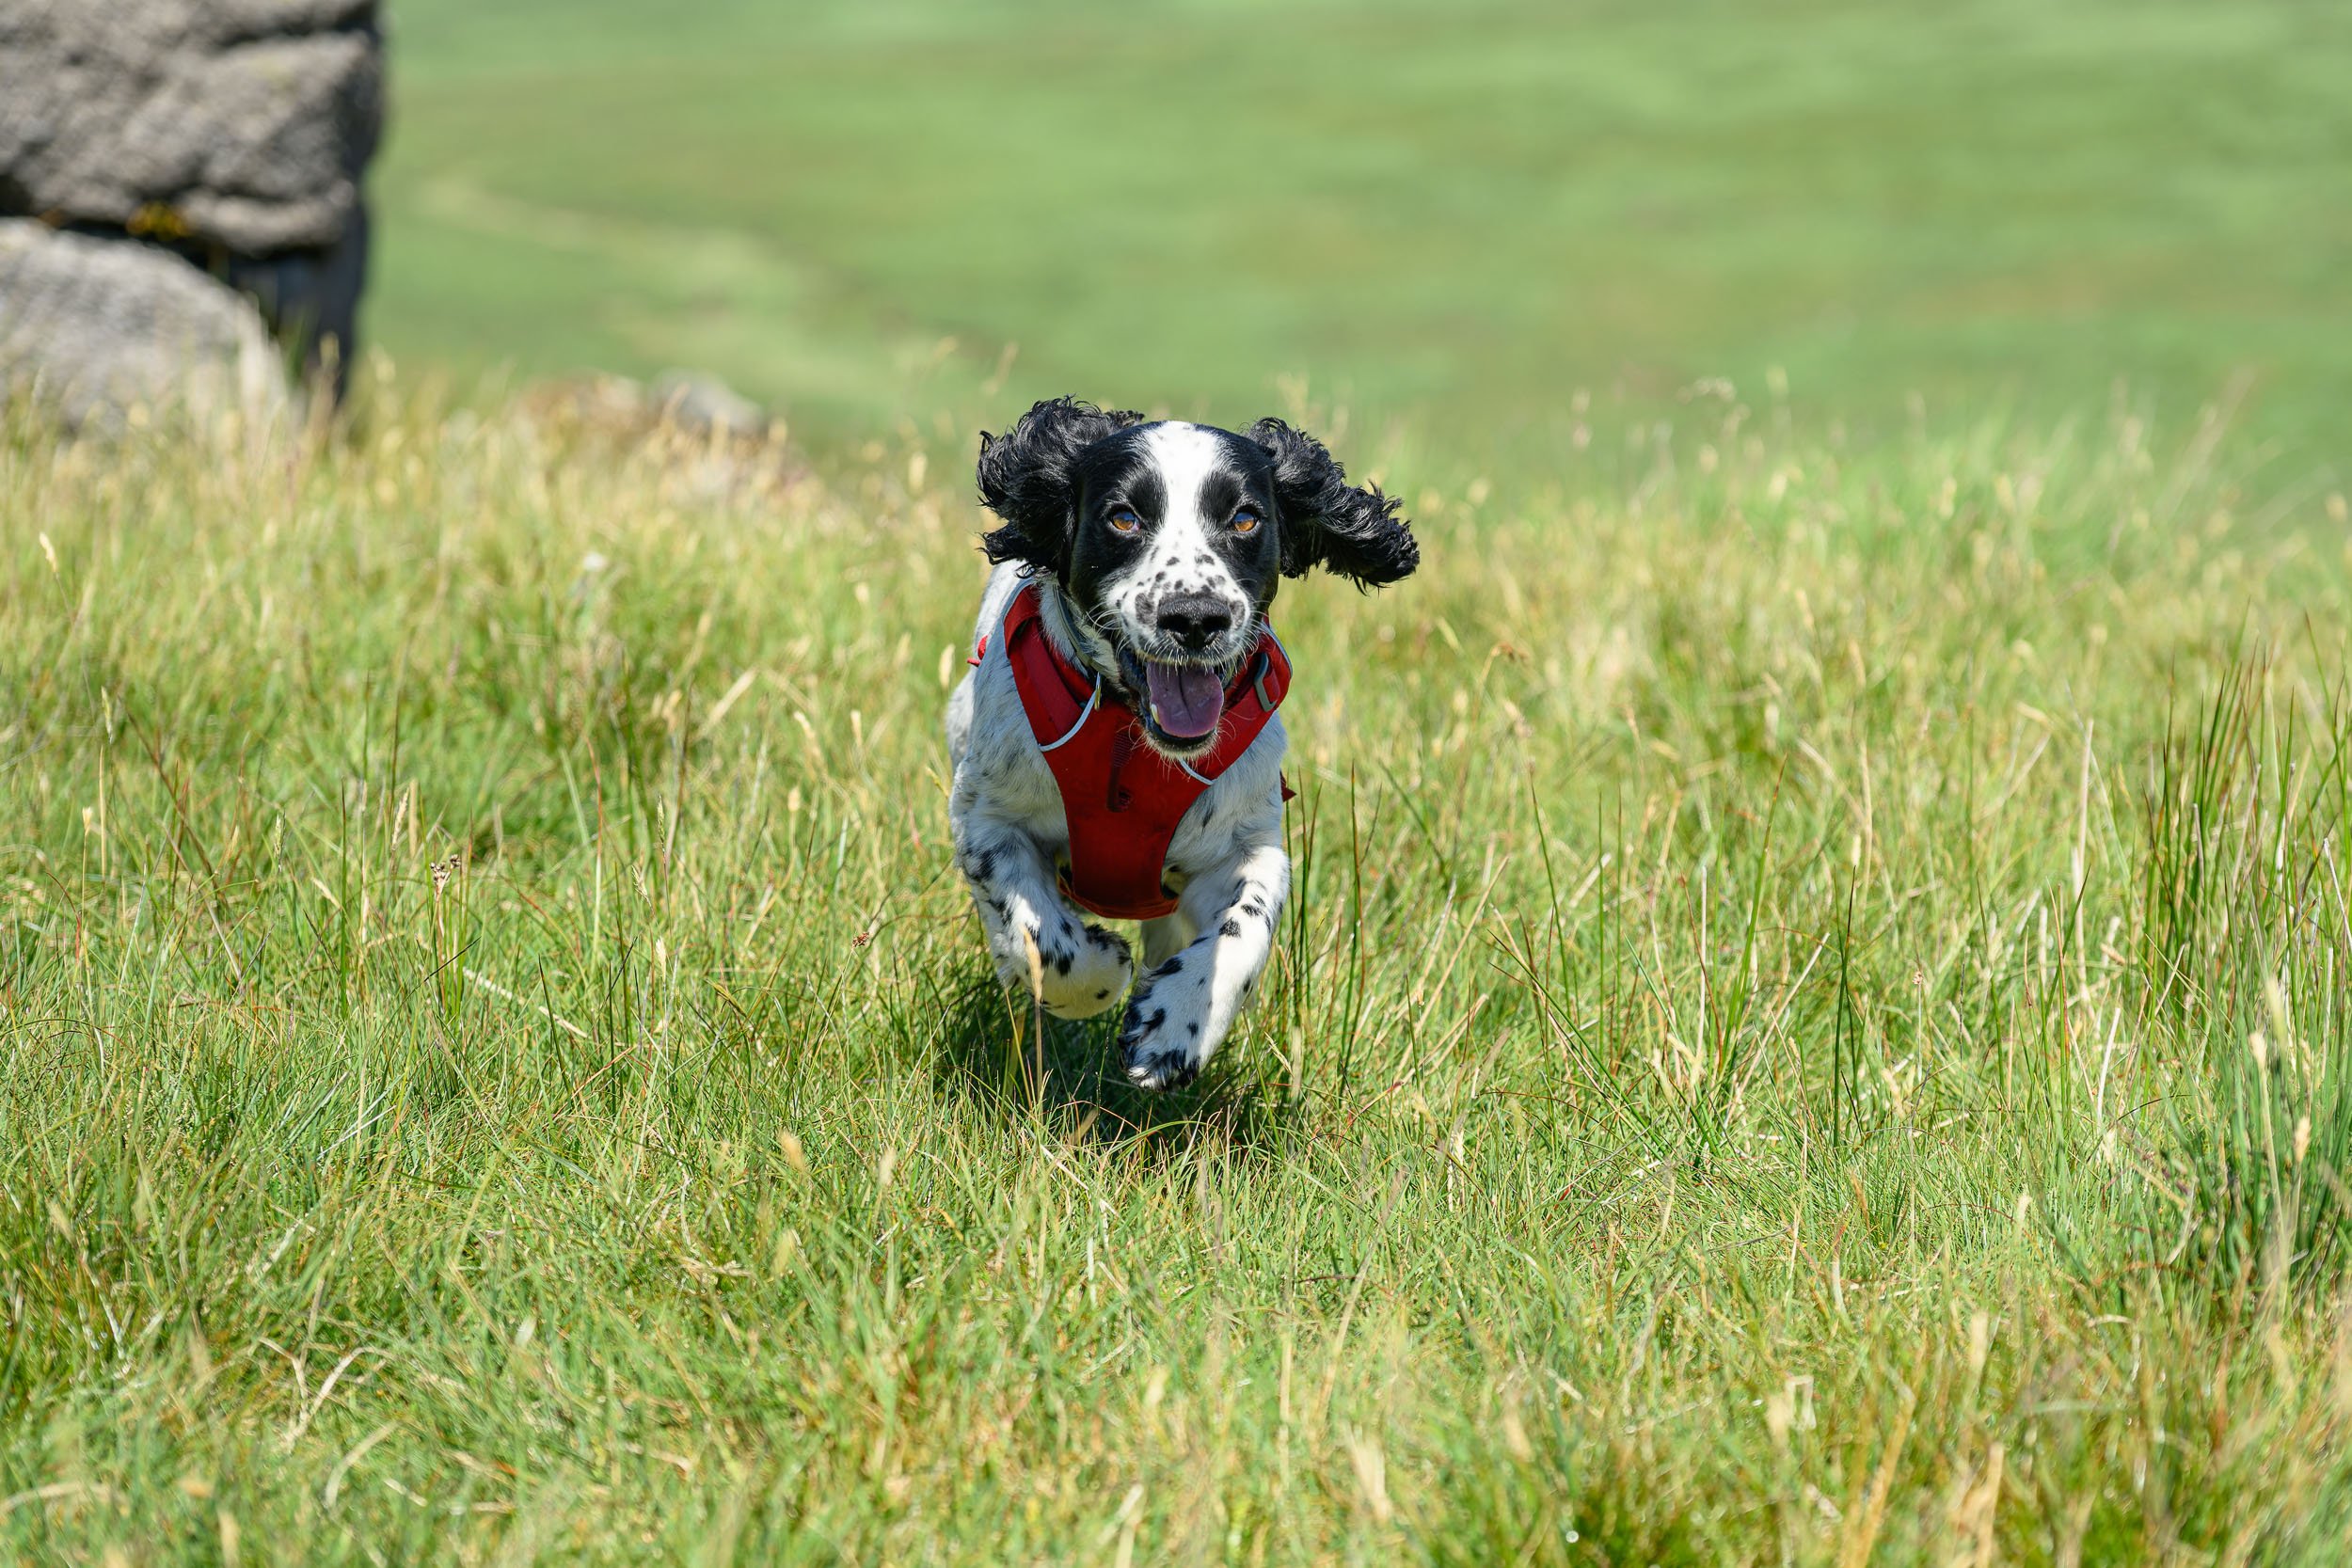
Nikon Z8, Viltrox Pro AF 27mm f/1.2 at f/1.2, 1/500 sec at ISO 250.
Nikon Z8, Viltrox Pro AF 27mm f/1.2 at f/1.2, 1/500 sec at ISO 250.
Nikon Z8, Viltrox Pro AF 27mm f/1.2 at f/1.2, 1/500 sec at ISO 250.

The MUST HAVE CAMERA for all photographers!
New year, new camera and this one is a MUST HAVE for ALL photographers! And this one is guaranteed to being a smile to your face and have you reaching for your credit card!
Just for Fun
Photography can be such a serious business sometimes. Lots of talk about expensive and complicated gear, far flung locations, quality of light and social media followings! Sometimes you must need to sit back and enjoy the simple things in photography, like a back-to-basics camera. While I think the camera in this video can be enjoyed by any photographer, you do need to still have childlike imagination and a sense of fun. What is it? Well, I’m not going to spoil it for you. You’ll just have to watch the video!
Where To Buy the Camera
🛒 You can buy it from Amazon - https://amzn.to/41PMyDA
🛒 Or direct from - https://bit.ly/4b1K4pG

Photographing a Snowy Dartmoor with the NEW Vallerret Skadi Gloves
Landscape photography, a new pair of thermal gloves, Dartmoor, snow, and my Nikon Z7. What's not to love. So, join me in my latest video as I photograph a snowy Dartmoor and tell you all about my new @Vallerret Skadi Zipper Mitt LRS Gloves.
The Best Photography Gloves - Improved!
Best is of course a subjective term. Different conditions can require different gloves. Perhaps I’d be better describing my Vallerret Skadi Zipper Mitt PSP gloves as my favourite winter photography glove. Well, that was until Vallerret released the Skadi Zipper Mitt LRS gloves <INSERT AFFLIATE LINK>! A new and improved version of their deep winter mitts.
In the video below I not only photography Dartmoor with a rare dusting of snow, but I also share with you my thoughts on these new gloves from Vallerret.
If you’d like to purchase a pair of the Vallerret Skadi Zipper Mitt LRS gloves you can do so directly from Vallerret right here.
Where Are the Landscape Photographs?
It’s normally at this point in the blog post that I share the photographs I captured in the video, and you may be wondering where they are. There’re not here because I’ve already published them in the blog post Photographing Dartmoor in the Snow earlier this year. The reason for the time gap between video and photographs is that the video featured gloves that Vallerret hadn’t announced yet, so I kept the video back until now.
Be sure to check out the blog post Photographing Dartmoor in the Snow to not only see the photographs from that video, but some of the other snowy photos I captured from Dartmoor back in January.

Nikon Z8 SmallRig L-Bracket and Cage Review
If you're still using the plate that came with your tripod to mount your Nikon Z8 then you are missing out on the benefits of an L-bracket or a video cage. In this video, I look at two products from SmallRig that are custom designed for the Z8, their L-bracket (3942) and their video cage kit (3941). Which one should you buy for your Nikon Z8?
Does Your Nikon Z8 Need a L-Bracket or a Cage?
Since getting my first l-bracket back when I got a Z7 I now can’t imagine using a camera for landscape photography without one. The ability to switch from a horizontal orientation to a vertical orientation without adjusting your tripod is essential to me. So much so that when I took the delivery of my Nikon Z8 that I had to buy a generic fit l-bracket just to keep me going till something custom designed was released.
Fortunately, that time has come and the company that has produced the goods is SmallRig. However, not only have they released an l-bracket, but they have also designed a cage for the Nikon Z8. You might now be asking what a cage is, do I need one, and should I get that instead of a l-bracket.
In the video below, I aim to answer that question by talking you through the benefits of both products. I’ll talk you through the features of each product, where there is some overlap, and why you might pick one over the other. Enjoy!
🛒 SmallRig L-Bracket for Nikon Z 8 3942
🛒 SmallRig Cage Kit for Nikon Z 8 3941
🛒 SmallRig Cage for Nikon Z 8 3940
🛒 SmallRig Cage for Nikon Z 8 with MB-N12 Battery Grip 3982
🛒 SmallRig L-Shape Grip for Nikon Z fc Camera 3480
What No Photos?
In most of my gear review videos I like to film them on-location and include a little bit of landscape photography. Well, that was the plan for this video, but it was a busy morning for wild camping. I visited West Mill Tor, Yes Tor and Black Tor and they all had tents in the middle of any potential composition. Nothing wrong with wild camping, I do it myself, but that’s the reason there are no photographs from this video!
Nikon Z8 - My Real-World Review for Landscape Photographers
My Nikon Z8 real world review is here! In the video I talk about why I bought the Nikon Z8, what I like about the Nikon Z8, what I don't, plus lots more, including my Nikon Z8 landscape photographs. And I’ll be doing all this on location from Dartmoor!
A Subjective or Objective Review of the Nikon Z8?
When I’m lucky enough to get a new camera, lens, or other bit of photographic gear, I like to share my thoughts on it. I love the art of photography but there also a part of me that loves the techy side of photography, so I do like to create videos about my landscape photography gear. Creating these types of videos also helps answer questions I get when people see me using a particular item of gear.
I don’t necessarily like titling those videos as a “review” as the views I share are personal and not necessarily that objective. I also don’t have access to lots of other gear to compare the item I own to. I also only take landscape photographs so I often have a limited perspective on what a particular item of photographic gear can do. So, my review videos can be subjective but there really isn’t a better word than “review” to describe them, so that’s what I call them!
A Slow Start with the Nikon Z8
New camera day is always very exciting, and I wanted to get a Nikon Z8 as soon as I could. When the Nikon Z8 was listed on my retailer of choice I immediately pre-ordered it and hoped I would get one from the first batch of deliveries. My eagerness to buy a Nikon Z8 paid off and I did indeed receive one on the day the camera got released.
When the Nikon Z8 arrived the first thing I wanted to do (apart from setup all the menu options) was to head out into the landscape and start taking photographs. However, if there’s one thing you can guarantee is that if I’m getting a new camera (purchased or loaned), the weather will be rubbish for landscape photography. A couple of months ago I got a free loan of a Canon R5 plus lenses for the weekend. The weather was so bad that weekend I sent the camera back on the Monday having not taking a single landscape photograph with it (hence why you never saw a video about that camera).
Well, as is my luck, when the Nikon Z8 arrived it was in the middle of a spell of hot and sunny weather. Great weather for sitting out in the garden sipping on a Gin & Tonic, but absolutely rubbish for landscape photography. Not to panic I thought. This is my Nikon Z8, and I own it, so it doesn’t matter if I spend a few days in the garden and walking the dog.
After two weeks of “sunbathing” I’d just about had enough! Fortunately for me the opportunity to use the Nikon Z8 to photograph Muse, one of the biggest rock bands in the world, presented itself and I jumped at the chance. You can read all about that experience here.
Eventually I gave up on solely basing my decision to go out based on what the weather forecast was saying. At this rate it was going to autumn before I took my first landscape photograph with the Nikon Z8.
The Nikon Z8 - A Familiar Camera
When I finally headed out with the Nikon Z8 to capture landscape photographs I was right at home. Yes, the Nikon Z8 has new features and capabilities, but at the end of the day it’s still a Nikon. Some buttons might be in a slightly different place, but it took no time at all before using the camera became second nature.
Once that first landscape photograph was captured with the Nikon Z8 I just gave up on waiting for the perfect conditions and got on with the job of capturing photographs for my review.
The Nikon Z8 – A Landscape Photographers Review
Despite a slow start, I’m finally ready to share my Nikon Z8 review. It was a great to film it on location on Dartmoor. It’s where I’ll be using the camera the most, so it seemed fitting to film it there. I had to get up REALLY early to be on Dartmoor for sunrise, but it was worth it (you’ll see why in the video). As much as I enjoyed filming the video, it was also a fantastic morning for a walk. Over the 6 hours I was out on Dartmoor I walked over 12km across some of my favourite areas of Dartmoor.
As I said at the start of this blog post this is a very subjective review. Whatever you do with the information in this video I hope you at least find it useful and/or entertaining! Enjoy!
Nikon Z8 - Landscape Photography Review Showcase
Bowerman’s Nose - Dartmoor
Sunrise at Bowerman’s Nose #1, Dartmoor, Devon - Nikon Z8, Nikkor Z 14-30mm f/4 S at 17mm, f/13, 0.4 sec at ISO 64, Kase Filters CPL.
Sunrise at Bowerman’s Nose #2, Dartmoor, Devon - Nikon Z8, Nikkor Z 14-30mm f/4 S at 17mm, f/13, 1/4 sec at ISO 64, Kase Filters CPL.
Daymark Tower, Devon
Daymark Tower #1, Devon - Nikon Z8, Nikkor Z 14-30mm f/4 S at 17mm, f/13, 1/40 sec at ISO 800, Kase Filters CPL.

Daymark Tower #2, Devon - Nikon Z8, Nikkor Z 14-30mm f/4 S at 14mm, f/13, 1/50 sec at ISO 1000, Kase Filters CPL.
Brentor Church, Dartmoor
Brentor Church on a Clear Evening, Dartmoor, Devon - Nikon Z8, Nikkor Z 14-30mm f/4 S at 19mm, f/13, 1/15 sec at ISO 400, Kase Filters CPL.
Great Staple Tor, Dartmoor

A Clear Evening at Great Staple Tor, Dartmoor, Devon - Nikon Z8, Nikkor Z 14-30mm f/4 S at 16mm, f/13, 0.6 sec at ISO 64, Kase Filters CPL, 4:5 crop.

Clouds Over The Tower #3, Dartmoor, Devon - Nikon Z8, Nikkor Z 14-30mm f/4 S at 18mm, f/11, 0.4 sec at ISO 64, Kase Filters CPL.
The Night Sky, Great Staple Tor, Dartmoor

The Milky Way over Great Staple Tor #1, Dartmoor, Devon - Nikon Z8, Nikkor Z 14-30mm f/4 S at 14mm, f/4, 10 sec at ISO 12800.

The Milky Way over Great Staple Tor #2, Dartmoor, Devon - Nikon Z8, Nikkor Z 14-30mm f/4 S at 14mm, f/4, 10 sec at ISO 12800.
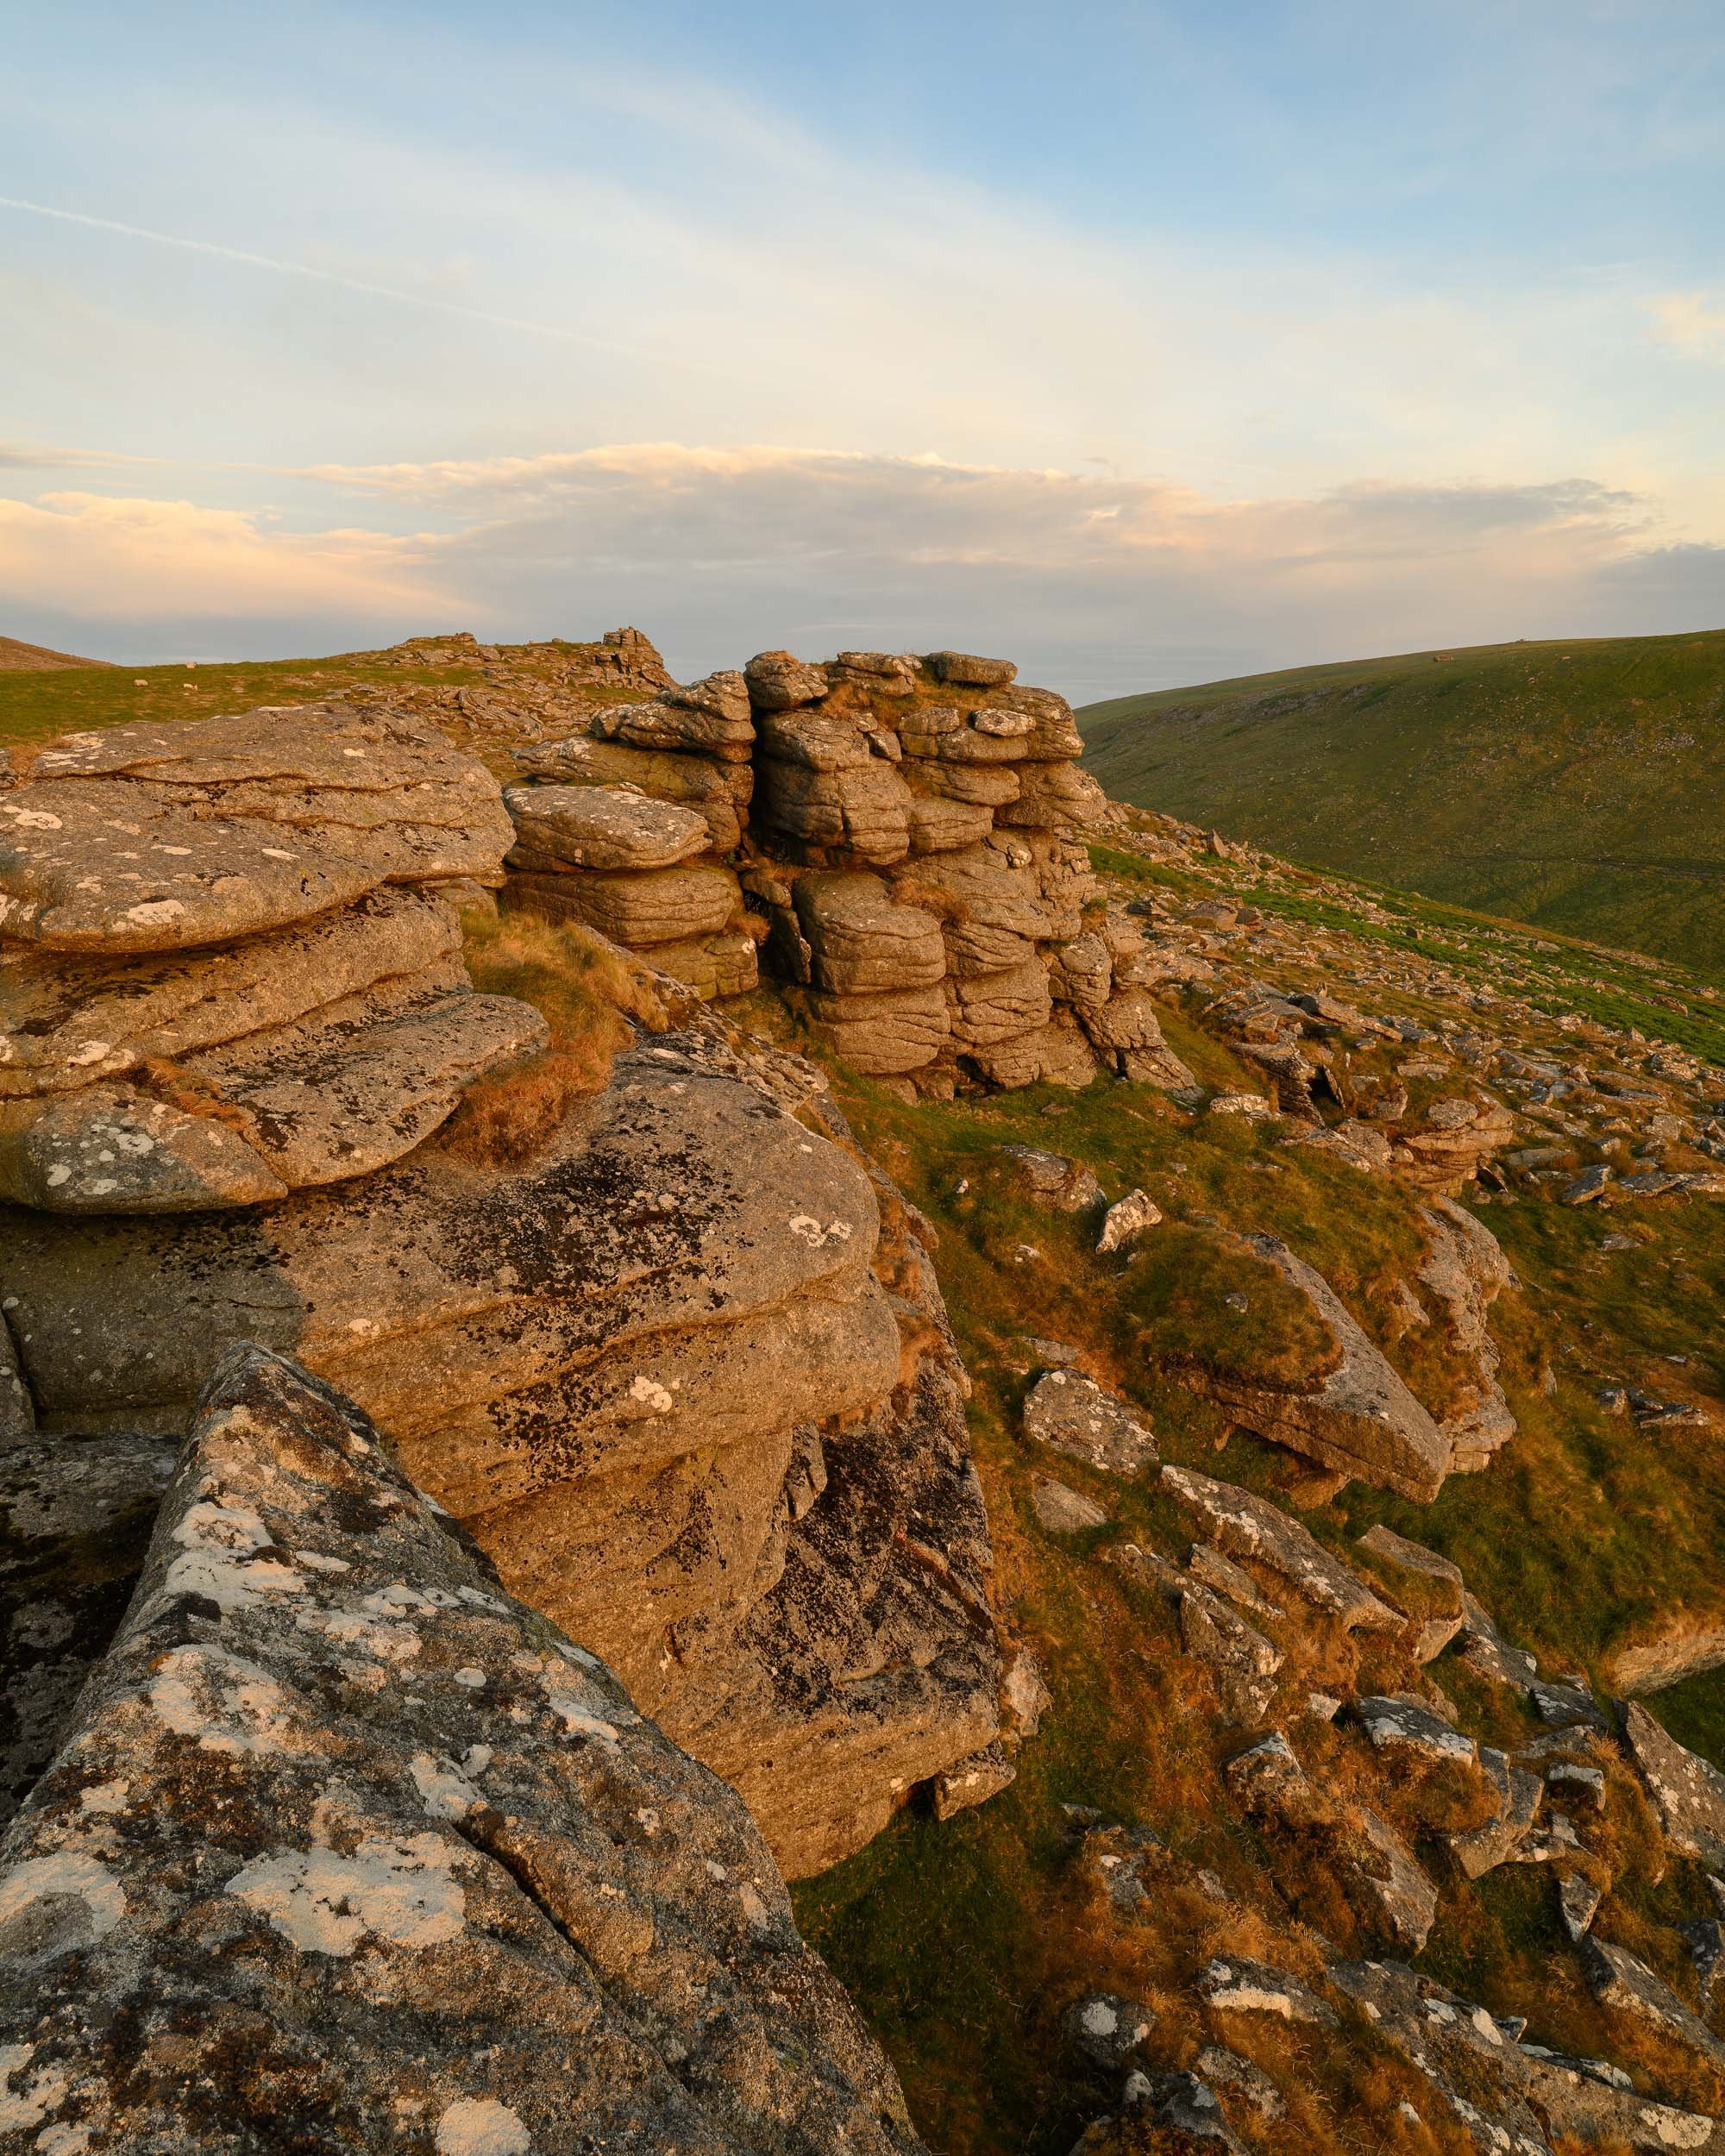
Belstone Tor, Dartmoor

Belstone Tor, Dartmoor, Devon - Nikon Z8, Nikkor Z 14-30mm f/4 S at 14mm, f/13, 1/10 sec at ISO 100.
Oke Tor, Dartmoor

Oke Tor, Dartmoor, Devon - Nikon Z8, Nikkor Z 14-30mm f/4 S at 15mm, f/11, 1/20 sec at ISO 64.
Black Tor, Dartmoor

Black Tor #1, Dartmoor, Devon - Nikon Z8, Nikkor Z 14-30mm f/4 S at 14mm, f/13, 0.4 sec at ISO 64.
Black Tor #2, Dartmoor, Devon - Nikon Z8, Nikkor Z 14-30mm f/4 S at 20mm, f/14, 0.4 sec at ISO 64, 4:5 Crop.
Fur Tor, Dartmoor
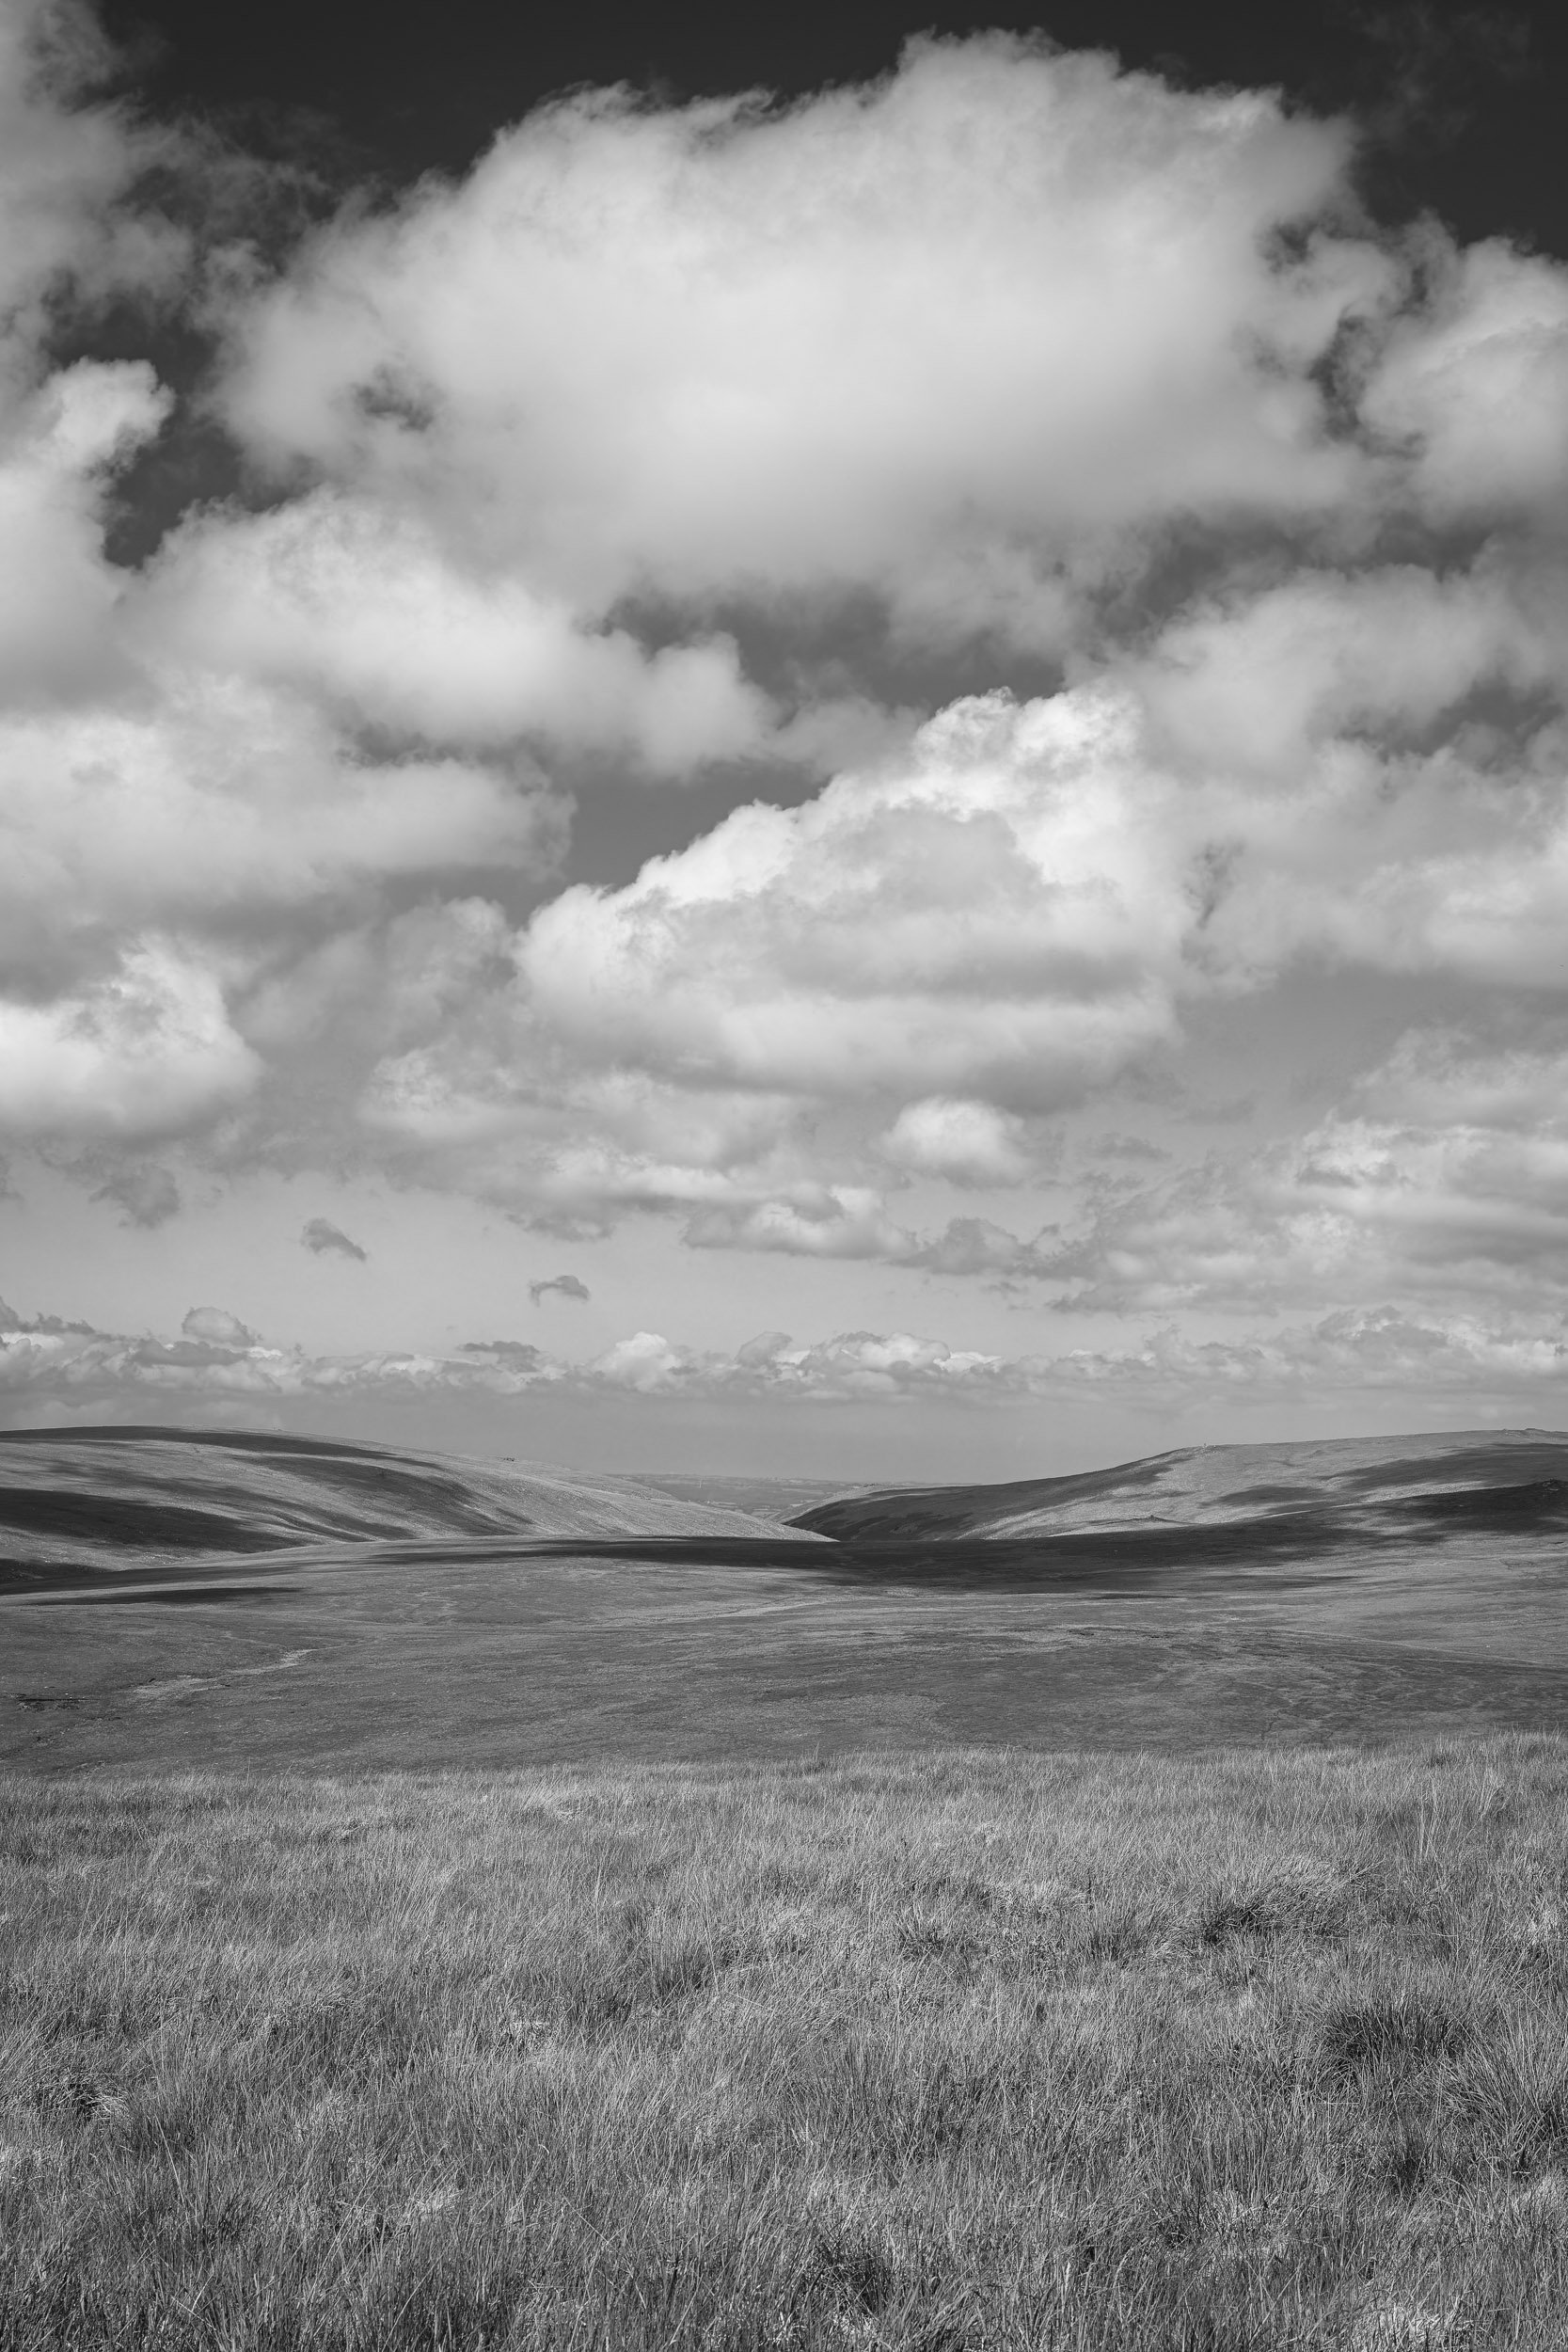
Big Sky Dartmoor Near Fur Tor, Dartmoor, Devon - Nikon Z8, Nikkor Z 24-120mm f/4 S at 58mm, f/11, 1/200 sec at ISO 64, black and white conversion, handheld.
Brat To, Dartmoor

Brat Tor, Dartmoor, Devon - Nikon Z8, Nikkor Z 14-30mm f/4 S at 26mm, f/9, 1/80 sec at ISO 64, black and white conversion.
Arms Tor, Dartmoor

Arms Tor, Dartmoor, Devon - Nikon Z8, Nikkor Z 14-30mm f/4 S at 16mm, f/13, 1/5 sec at ISO 64.
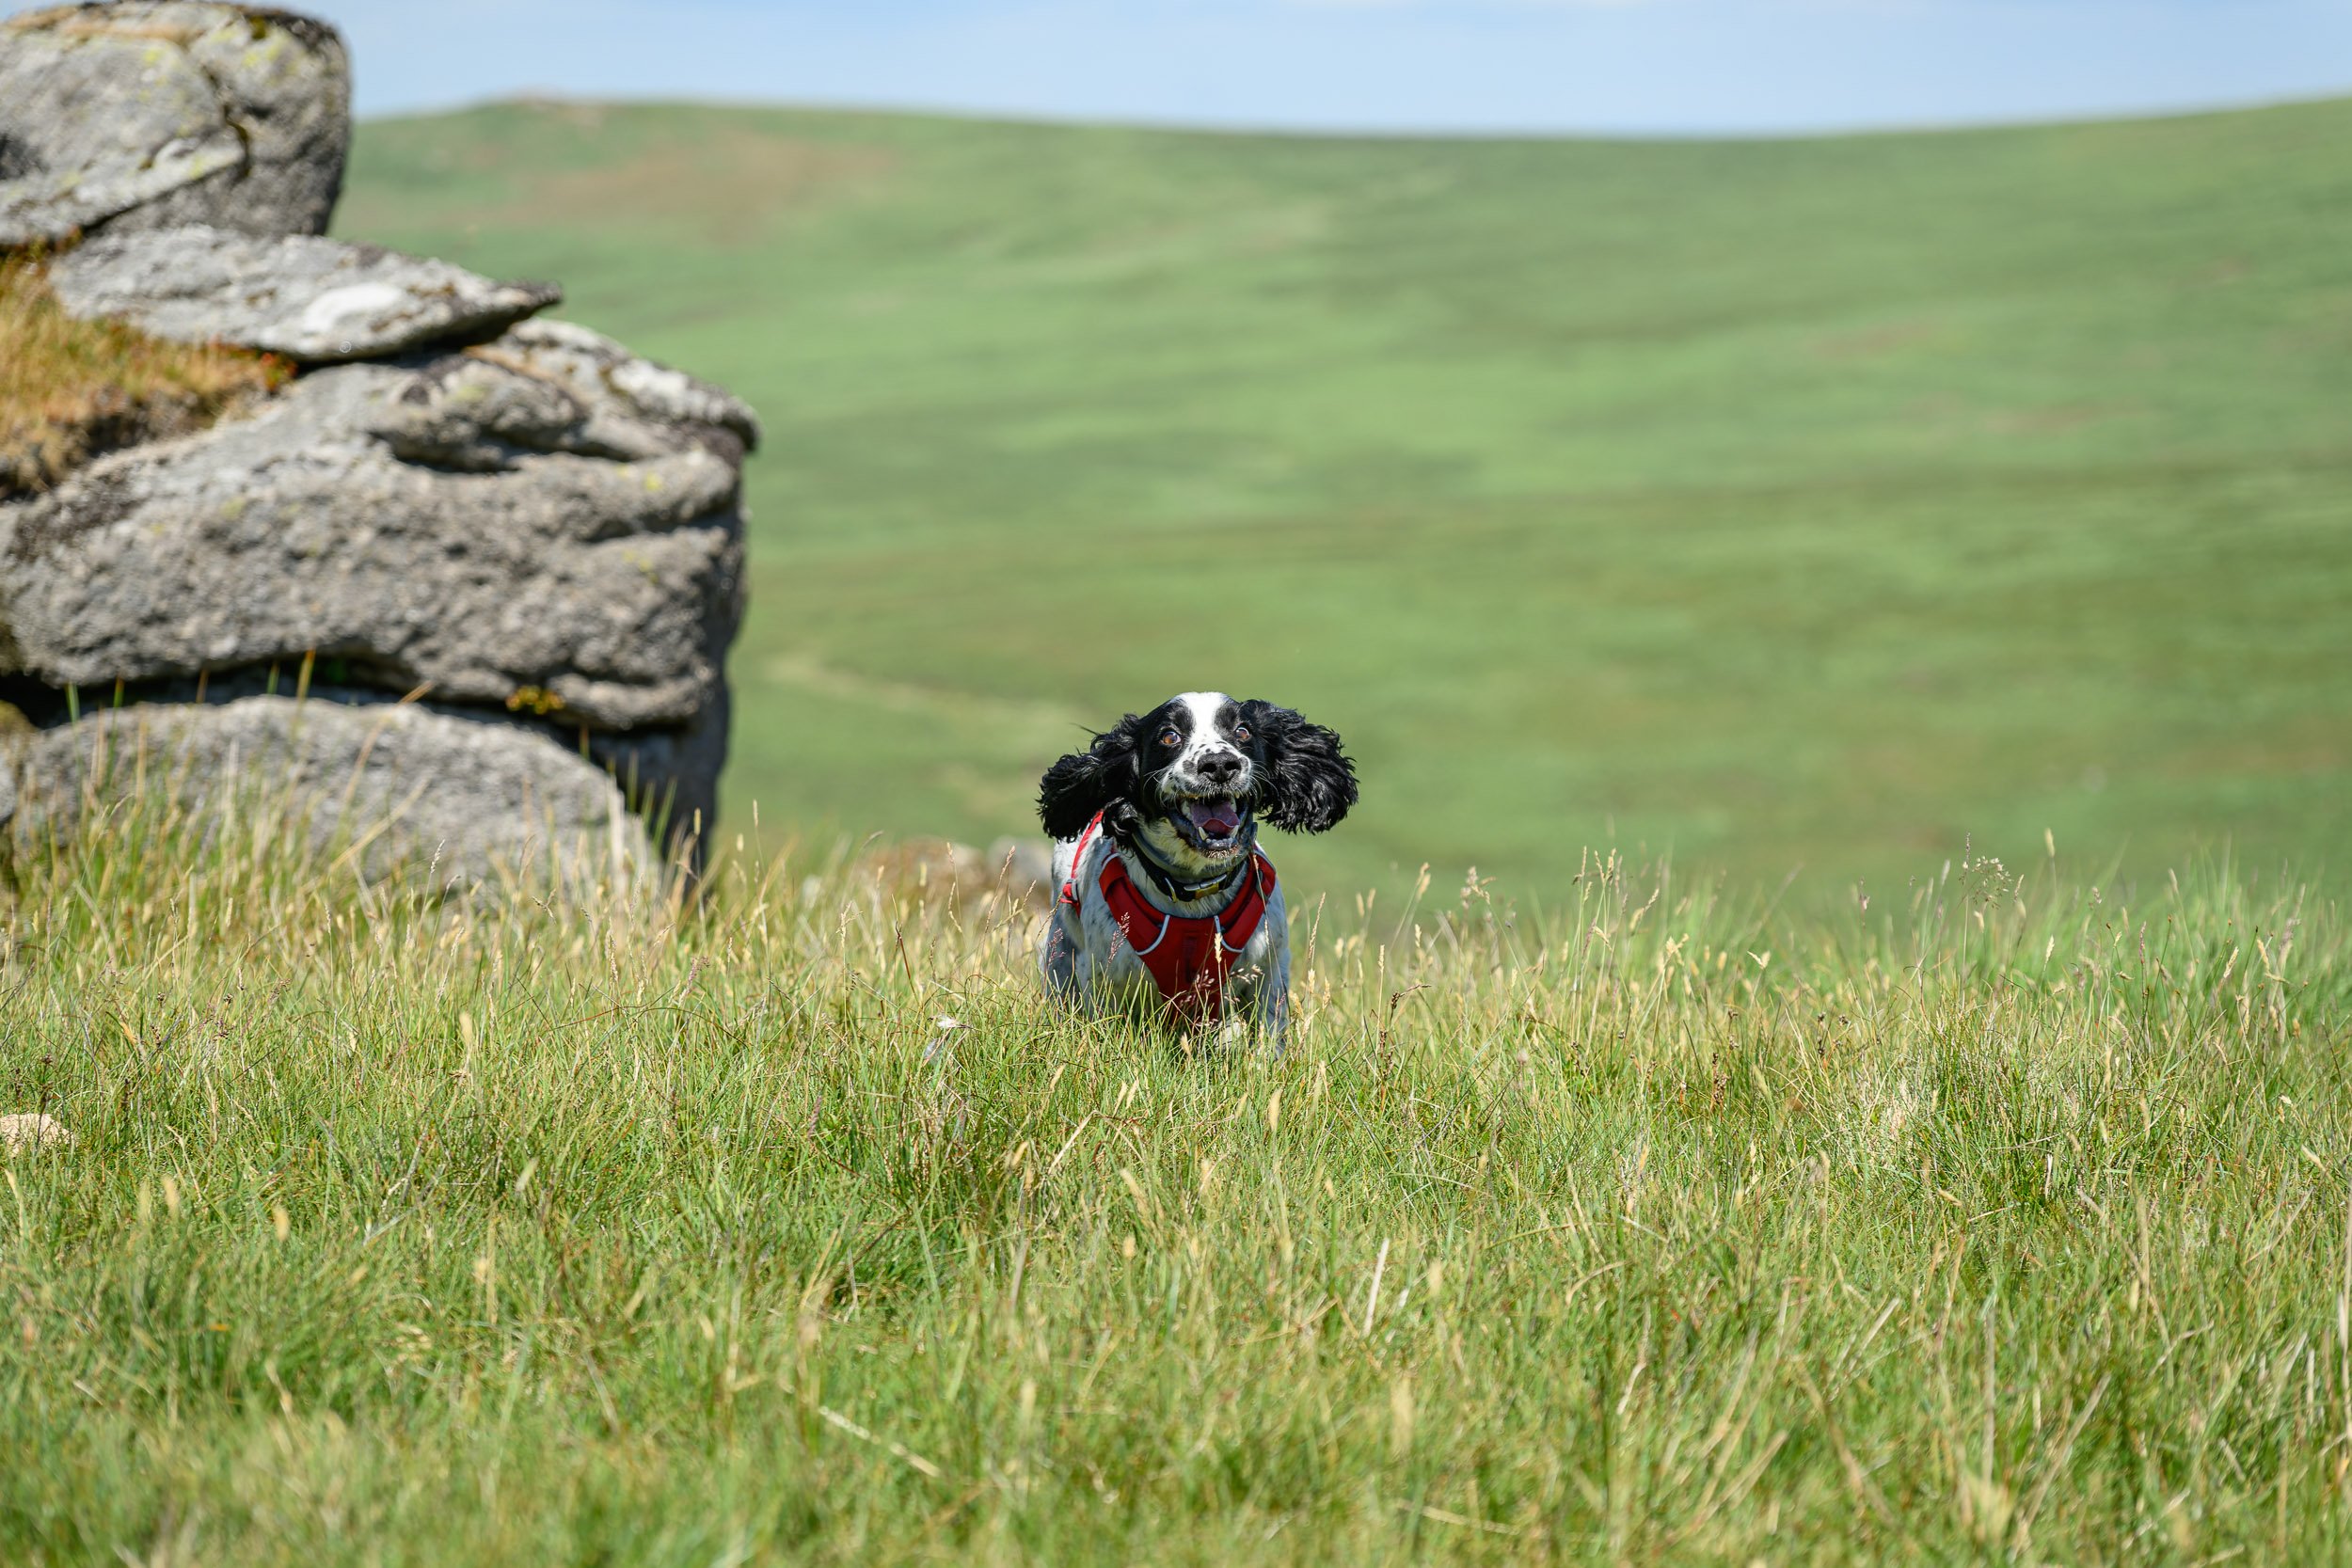
Monty!

Monty on Black Tor, Dartmoor, Devon - Nikon Z8, Viltrox AF 24/1.8 Z at 24mm, f/1.8, 1/500 sec at ISO 64.

Monty on Black Tor, Dartmoor, Devon - Nikon Z8, Viltrox AF 24/1.8 Z at 24mm, f/1.8, 1/500 sec at ISO 64.

Monty on Fur Tor, Dartmoor, Devon - Nikon Z8, Nikkor Z 24-120mm f/4 S at 120mm, f/4, 1/2000 sec at ISO 100.

My Nikon Z8 Review Announcement
After saying goodbye to my Nikon Z7 yesterday I'm extremely excited to welcome the Nikon Z8 to my camera bag. I will be producing a real-world review of the Nikon Z8 but in the meantime here is a little unboxing video to get you excited
The Nikon Z8 is Here!
Following on from yesterday’s blog post and video where I said goodbye to my Nikon Z7, it should come as no real surprise to you that my new camera is the Nikon Z8.
Over the next few weeks, I’ll be taking the Z8 out to some of my favourite locations to capture landscape photographs. I’ll then publish my real world, on location, video review!
If you have any questions or there is something you want me to cover in the review, just let me know in the comments below. It will have to be something related to landscape photography though. Don’t ask me what it’s like for bird photography!
In the meantime, here’s a short unboxing video to whet your appetite.
No Tripod Head Photography - Kingjoy C85 Tripod & RB-40 Review
Most landscape photographers use a tripod. But what if I suggested you don't need a tripod head? In this video, I head out on location to capture landscape photographs with the Kingjoy SolidRock C85 Carbon Fibre Tripod and RB-40 Compact Head. Is it really practical to capture landscape photographs with no tripod head?
Have You Lost Your Head?
The idea of using a tripod without a ball or geared head for landscape photography sounds a bit odd doesn’t it. But the suggestion of leaving a bulky or heavy tripod head behind is exactly what tripod manufacturer Kingjoy is now giving you as an option. You may remember the name Kingjoy as I reviewed their C83 carbon fibre tripod recently.
The RB-40 Compact Head (yes, I know it’s still a head) isn’t like any other tripod head I’ve seen before. It’s small, flat, and light. The reason it can be this small is that aside from have an arca-Swiss style slot, and the ability pan, it does nothing else. It can’t tilt or tip. So, with the head locked flat, and therefore the camera as well, how do you adjust your composition?
This is where the Kingjoy C85 tripod comes in. The C85 has a levelling bowl as standard, allowing free movement of the surface area where the RB-40 attaches. To tilt or tip the camera, you simply do so by adjusting the levelling bowl (plate). But is this system any better than a traditional head? Will the limitations on the amount of tilt and tip be, well, too limiting for landscape photography?
To find out I head out on location to review and put to the test the Kingjoy SolidRock C85 Carbon Fibre Tripod and RB-40 Compact Head.
What do you think? Let me know in the comments below.
If you’d like to purchase either or both items, you can do so using the links below:
💳 You can purchase the Kingjoy SolidRock C85 Carbon Fibre Tripod HERE.
💳And you can purchase the Kingjoy RB-40 Compact Head HERE.
🎥 And you can watch a video review of the Kingjoy SolidRock C83 Carbon Fibre Tripod HERE.
Use the code kjbaird5 and you'll get a 5% discount.
Dartmoor Landscape Photographs - Belstone Common
Here are the photographs you saw me capture in the video.
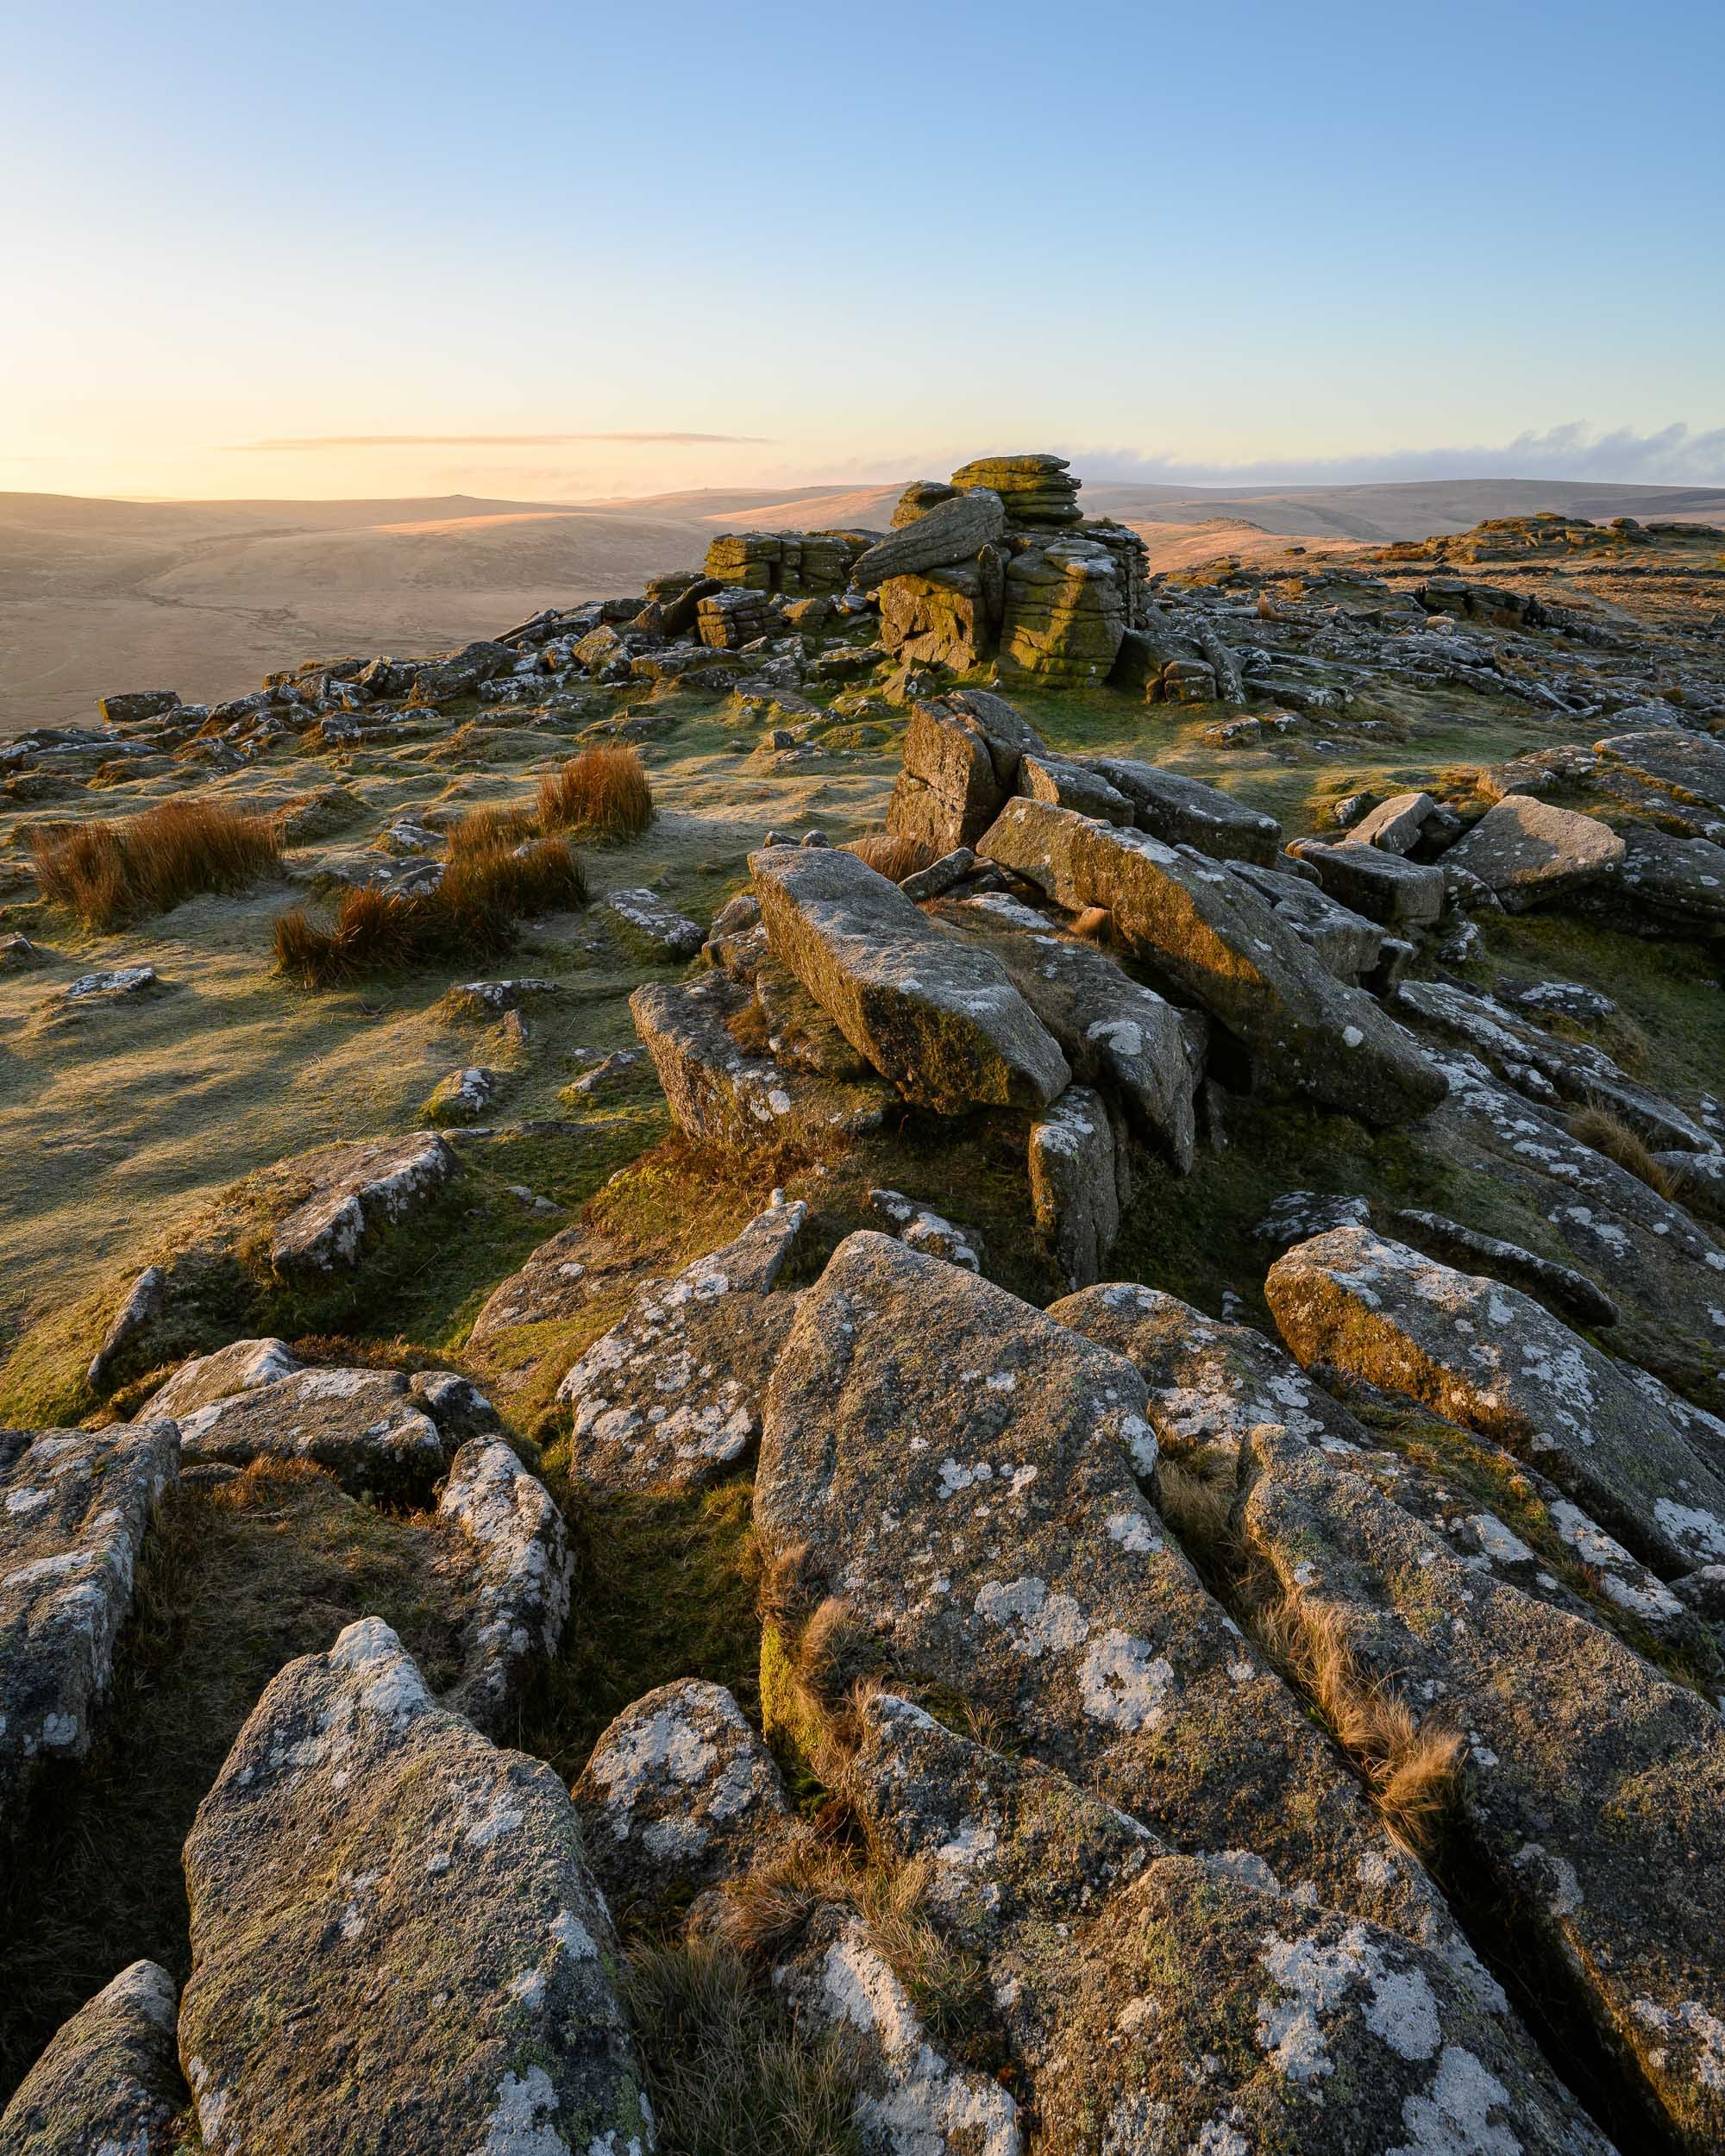
Belstone Tor #1, Dartmoor, Devon - Nikon Z7, Nikkor Z 14-30mm f/4 S at 18mm, f/13, 1/15 sec at ISO 64.

Belstone Tor #2, Dartmoor, Devon - Nikon Z7, Nikkor Z 14-30mm f/4 S at 18mm, f/13, 1/30 sec at ISO 64.

Irishman’s Wall, Dartmoor, Devon - Nikon Z7, Nikkor Z 14-30mm f/4 S at 26mm, f/13, 1/50 sec at ISO 64.

A Dartmoor View #1, Dartmoor, Devon - Nikon Z7, Nikkor Z 14-30mm f/4 S at 15mm, f/13, 1/50 sec at ISO 64.

A Dartmoor View #2, Dartmoor, Devon - Nikon Z7, Nikkor Z 14-30mm f/4 S at 16mm, f/13, 1/20 sec at ISO 64.
On Location Review of the Kingjoy C83 Carbon Fibre Tripod
All tripods are the same right? Not exactly. While they all have three legs, some are better than others. When it comes to landscape photography you need something that is lightweight, stable and easy to use. In this video I review the Kingjoy SolidRock C83 Carbon Fibre Tripod out to Dartmoor to see if it can fit my needs as an outdoor photographer!
The New King of Tripods?
It’s very easy to assume that all tripods are the same. They all have three legs, and they support your camera. However, if you are a landscape photographer a tripod is an essential item and your tripod needs to be lightweight, stable, and easy to use.
I’ve had the same two tripods for years and it’s only recently that I’ve been looking about for something new. Why two tripods I hear you ask? One for stills photography, and the other for video. And yes, I need to do both at the same time otherwise I couldn’t make my YouTube videos. The reason I’m looking for something new is that as my cameras and lenses change, so do my requirements for tripods.
For my current setup of cameras and lenses I needed something robust, stable, and well built, but not at Gitzo level prices. I had heard some good reports about Kingjoy tripods but it’s not a brand I immediately think of when considering a new tripod. But when they reached out to me and asked if I wanted a loan of their C83 carbon fibre tripod I said yes. I’ve got nothing to lose and I might find myself pleasantly surprised.
With my loan C83 in hand, I head off to Dartmoor for some landscape photography to see if this is a tripod that I would buy.
If you’d like to buy a Kingjoy SolidRock C83 Carbon Fibre Tripod, you do so direct from Kingjoy UK here - https://kingjoyuk.com/products/kingjoy-solidrock-c83-carbon-fibre-tripod?sca_ref=2948686.NWDrPIWIBg
*** Use the code kjbaird5 and you'll get a 5% discount ***
Landscape Photographs of Beardown Tors
Beardown Tors Sunset #5, Dartmoor, Devon - Nikon Z7, Nikkor Z 14-30mm f/4 S at 16mm, f/13, 1/25 sec at ISO 64, Kase Filters CPL.
Beardown Tors Sunset #1, Dartmoor, Devon - Nikon Z7, Nikkor Z 14-30mm f/4 S at 21mm, f/13, 1/8 sec at ISO 64, Kase Filters CPL.
Beardown Tors Sunset #2, Dartmoor, Devon - Nikon Z7, Nikkor Z 14-30mm f/4 S at 17mm, f/13, 1/6 sec at ISO 64, Kase Filters CPL.
Beardown Tors Sunset #3, Dartmoor, Devon - Nikon Z7, Nikkor Z 14-30mm f/4 S at 30mm, f/13, 0.6 sec at ISO 64, Kase Filters CPL, 4:5 crop..
Beardown Tors Sunset #4, Dartmoor, Devon - Nikon Z7, Nikkor Z 14-30mm f/4 S at 15mm, f/13, 1.6 sec at ISO 64, Kase Filters CPL.
Photography and Wild Camping on Dartmoor with the Lowepro PhotoSport Backpack PRO AW III
Is there a backpack designed for photographers & videographers that can also be used on multi-day hikes, adventures, and wild camping? Lowepro thinks they have one with the PhotoSport Backpack PRO AW III. In this video review, I put it to the real-world test by taking it on a landscape photography and wild camping adventure on Dartmoor.
A Bag for My Wild Camping Photography Adventures
As you may have read recently on my blog, I have taken the bold step into the world of wild camping. Not only does this change the way I can approach my photography, but it also means I need to carry a lot more gear. My dedicated camera bag doesn’t have the capacity to carry sleeping bags, tents, and overnight provisions.
In a stroke of luck, as I was having a look around the internet for possible bag options, Lowepro got in touch and asked if I wanted to test out one of their PhotoSport Backpack Pro AW III bags! If I hadn’t taken up wild camping I would have said no, but as I had a real need for a bag like this, I knew I could put it to good use and produce a video review based on real-world experience.
In the video below, you can join me as I take landscape photographs of Dartmoor, share with you the joy of wild camping and hear all my thoughts on the Lowepro bag.
If you want to purchase this bag you can do so here:
Watch this before you buy so you can see how the bag fits - https://youtu.be/fm228Mn78CY
Landscape Photographs from Dartmoor
Belstone Tor, Dartmoor - Nikon Z7, Nikkor 14-30mm f/4 at 20mm, f/11, 1/60 sec at ISO 64.
Oke Tor, Dartmoor - Nikon Z7, Nikkor 14-30mm f/4 at 17mm, f/11, 1/60 sec at ISO 64.
Steeperton Tor #1, Dartmoor - Nikon Z7, Nikkor 14-30mm f/4 at 30mm, f/11, 1/50 sec at ISO 64.
Steeperton Tor #2, Dartmoor - Nikon Z7, Nikkor 14-30mm f/4 at 24mm, f/11, 1/15 sec at ISO 64.
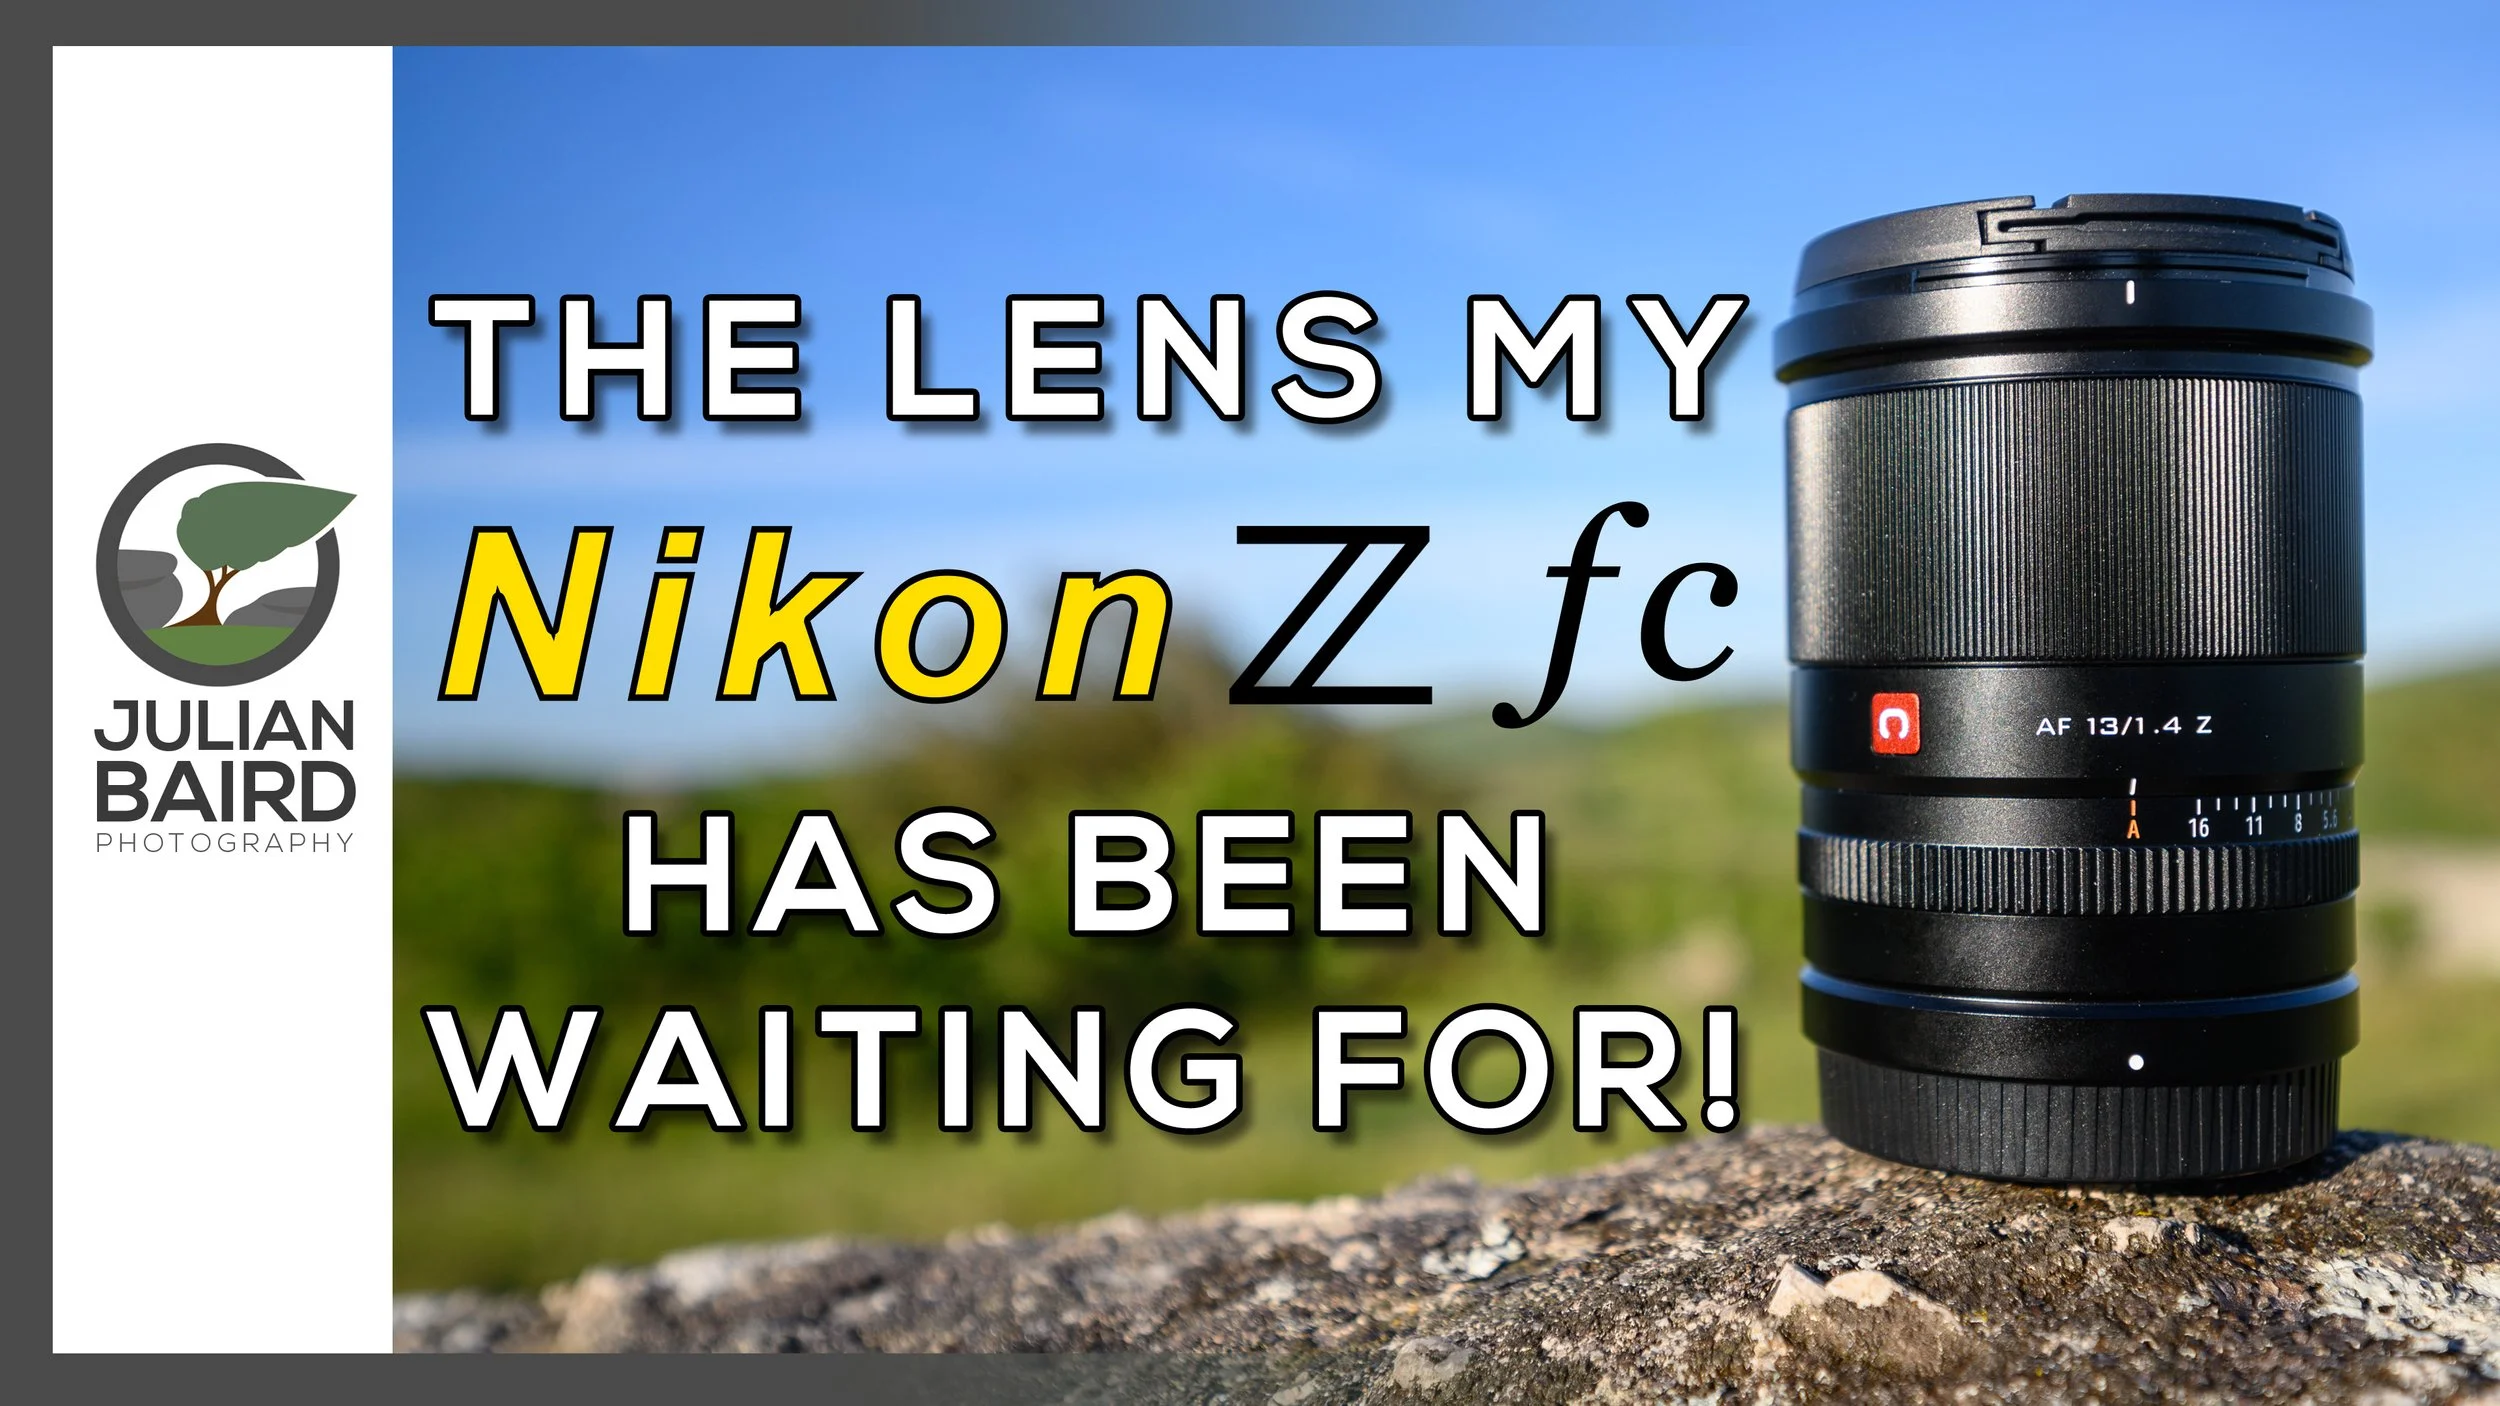
Viltrox Ultra-Wide 13mm f/1.4 Auto-Focus for Nikon Z Review
There's only one way to review a lens like the new Viltrox 13mm f/1.4 Auto-Focus lens for Nikon Z mount crop (DX / APS-C) cameras and that is to take it out in the real world. In this video, I will be using this lens with my Nikon Z fc to capture landscape photographs from Dartmoor National Park. I've also filmed this video using the lens, so I'll also share my thoughts on how it performs with the Nikon Z fc for video capture.
Filling a Gap in My Lens Collection
I’m lucky enough to own all the lenses that I need for my Nikon Z7 for landscape photography (like the excellent Nikkor Z 24-120mm f/4 S). Anything else that I need to do something specific I will just rent. The lens line up for Nikon’s Z crop sensor family of cameras is a different matter though.
I love my Nikon Z fc, but the range of Nikon Z DX lenses is sparse, to say the least. Fortunately, companies like Viltrox have stepped up and are producing some excellent budget prime lenses for the Nikon Z mount. A firm favourite of mine is the Viltrox 23mm f/1.4 for the Nikon Z fc. I have used this lens extensively, both for creating my videos and for capturing family photographs.
However, I’ve always wanted a wide-angle version of the Viltrox 23mm. So still fast aperture, but a little wider so that video creation on location is a little easier. It would also make for a great lens for those times when I only take the Z fc out to capture landscape photographs.
When Viltrox told me about the 13mm f/1.4 AF lens for Nikon Z fc (and Z50), and they asked if I wanted to review it, I jumped at the chance. And now I’m ready to share my video review with you.
I hope you found this video useful and if you want to see the photos from the video again, you’ll find them just below.
Landscape Photographs with the Viltrox 13mm f/1.4 AF
Trevose Head, Cornwall
Trevose Head Lighthouse at Sunset #1, Cornwall - Nikon Z fc, Viltrox 13mm f/1.4 AF, f/11, 1.6 sec at ISO 320.
Trevose Head Lighthouse at Sunset #2, Cornwall - Nikon Z fc, Viltrox 13mm f/1.4 AF, f/11, 5 sec at ISO 100.
Belstone Tor and Common, Dartmoor
Belstone Sunset #1, Dartmoor - Nikon Z fc, Viltrox 13mm f/1.4 AF, f/11, 1/25 sec at ISO 100.
Belstone Sunset #2, Dartmoor - Nikon Z fc, Viltrox 13mm f/1.4 AF, f/11, 1/8 sec at ISO 100.
Belstone Sunset #3, Dartmoor - Nikon Z fc, Viltrox 13mm f/1.4 AF, f/16, 1/10 sec at ISO 100, 16:9 crop.

Irishman’s Wall Sunset #1, Dartmoor - Nikon Z fc, Viltrox 13mm f/1.4 AF, f/11, 1/8 sec at ISO 100, 16:9 crop.
Irishman’s Wall Sunset #2, Dartmoor - Nikon Z fc, Viltrox 13mm f/1.4 AF, f/11, 1/8 sec at ISO 100, 16:9 crop.
Belstone Sunrise #1, Dartmoor - Nikon Z fc, Viltrox 13mm f/1.4 AF, f/11, 1/3 sec at ISO 100.

Belstone Sunrise #2, Dartmoor - Nikon Z fc, Viltrox 13mm f/1.4 AF, f/11, 0.6 sec at ISO 100, 4:5 crop.

Belstone Sunrise #3, Dartmoor - Nikon Z fc, Viltrox 13mm f/1.4 AF, f/11, 1/4 sec at ISO 100.
Bowerman’s Nose, Dartmoor
Bowerman’s Nose Sunrise #1, Dartmoor - Nikon Z fc, Viltrox 13mm f/1.4 AF, f/11, 1/3 sec at ISO 100.
Bowerman’s Nose Sunrise #2, Dartmoor - Nikon Z fc, Viltrox 13mm f/1.4 AF, f/11, 1/5 sec at ISO 100.
Bowerman’s Nose Sunrise #3, Dartmoor - Nikon Z fc, Viltrox 13mm f/1.4 AF, f/13, 1/6 sec at ISO 100.
Bowerman’s Nose Sunrise #1, Dartmoor - Nikon Z fc, Viltrox 13mm f/1.4 AF, f/11, 1/10 sec at ISO 100.
Bowerman’s Nose #1, Dartmoor - Nikon Z fc, Viltrox 13mm f/1.4 AF, f/11, 1/100 sec at ISO 100.
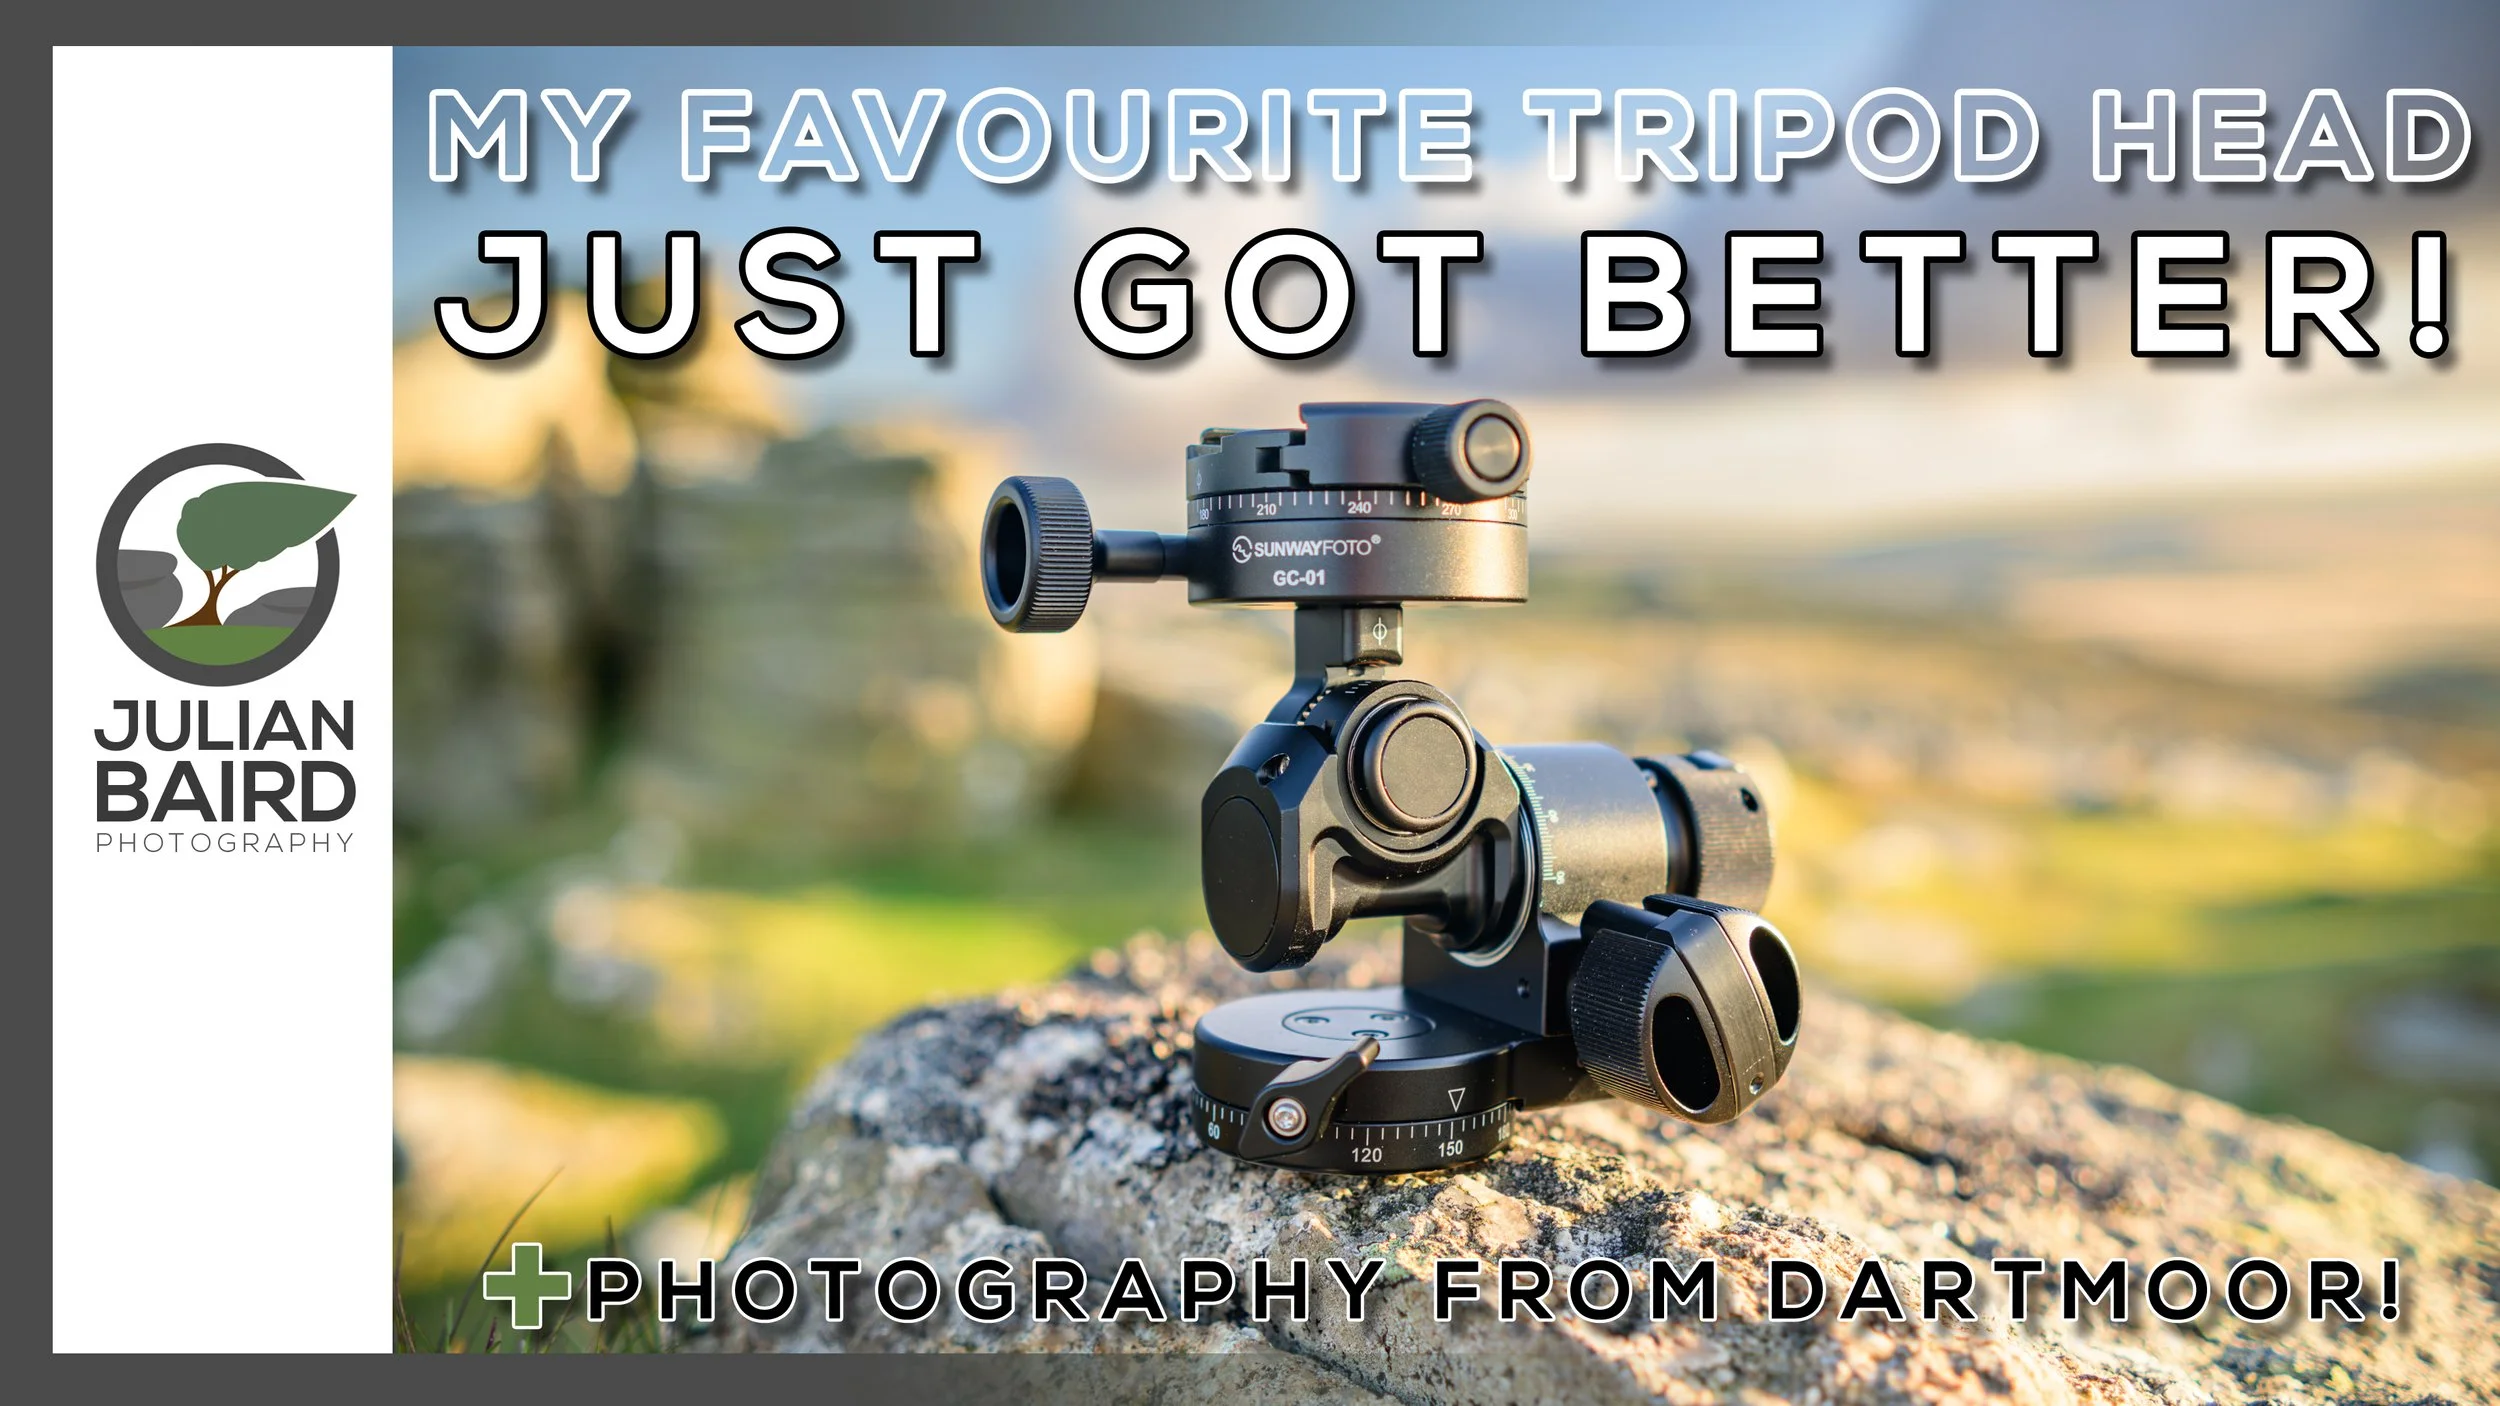
Reviewing the SunwayFoto GH-PRO II + Geared Head on Location at Dartmoor
Why use a geared head? What's so good about the Sunwayfoto GH-PRO II+? What's new with the + version? Is this the best geared head for landscape photography? Join me on Dartmoor as I answer all those questions and I also capture landscape photographs in some unexpected conditions.
One Knob Makes All the Difference
When I published my video review of the Sunwayfoto GH-PRO II geared tripod head I was sure I’d found the perfect tripod for my landscape photography. So, when I heard that they had released the GH-PRO II+ I wondered how they might have improved it. What do you get in the + version that you don’t get in the previous version?
Fortunately for me, the team at Sunwayfoto were more than happy to send me out a GH-PRO II+ to review. With a new geared tripod head in hand, I set off to film my video review on Dartmoor. As always, if I am going to do a gear review video, I like to do it on location and do a little landscape photography at the same time.
While it came as no surprise that Sunwayfoto had improved my favourite geared head by simply adding just one knob, the real surprise of the evening was the beautiful, and very unexpected conditions I was able to photograph as the sunset.
In the video below you can hear all my thoughts on GH-PRO II+ geared head, why I use a geared head and you can see me capture all those wonderful images from Belstone Tor.
Landscape Photography from Belstone Tor on Dartmoor
Belstone Tor #1, Dartmoor, Devon - Nikon Z7, Nikkor 14-30mm f/4 at 15mm, f/13, 1/13 sec at ISO 64, Kase Filters CPL and pre-processed in Dxo PureRAW.
Belstone Tor #2, Dartmoor, Devon - Nikon Z7, Nikkor 14-30mm f/4 at 20mm, f/11, 1/8 sec at ISO 64, Kase Filters CPL and pre-processed in Dxo PureRAW.
Belstone Tor #3, Dartmoor, Devon - Nikon Z7, Nikkor 14-30mm f/4 at 14mm, f/11, 1/10 sec at ISO 64, pre-processed in Dxo PureRAW.
Belstone Tor #4, Dartmoor, Devon - Nikon Z7, Nikkor 14-30mm f/4 at 14mm, f/13, 0.5 sec at ISO 64, pre-processed in Dxo PureRAW.
Belstone Tor #5, Dartmoor, Devon - Nikon Z7, Nikkor 14-30mm f/4 at 14mm, f/13, 0.5 sec at ISO 64, pre-processed in Dxo PureRAW.
Belstone Tor #6, Dartmoor, Devon - Nikon Z7, Nikkor 14-30mm f/4 at 18mm, f/13, 1 sec at ISO 64, pre-processed in Dxo PureRAW.
Belstone Tor #7, Dartmoor, Devon - Nikon Z7, Nikkor 14-30mm f/4 at 17mm, f/13, 1 sec at ISO 64, pre-processed in Dxo PureRAW.