
My Year So Far...
In this blog post I'm taking a brief look back at my first half of the year as a landscape photographer.
Holidays!
In this blog post, I'm going to take a brief look back at my first half of the year as a landscape photographer. I would normally do this type of blog post at the end of the year but as I'm on holiday at the moment I haven't been doing much photography so I don't have any photographic adventures to tell you about. By the time you read this though I'll be back in the UK and weather permitting I'm back out shooting the landscape. Normal service should be resumed next week!
The Good
It's been a good year for me so far as a landscape photographer. I've been working hard and I'm out shooting more than I've been in any other year. The effort has paid off and my work is getting viewed by a much wider audience now. This is thanks to successes such as:
South West Coast Path 2018 Calendar Competition - though I didn't win the overall competition it was still great to get placed and you will be able to see my image of Start Point as the January 2018 photograph. You can pick up a copy from the SWCP Shop.
YouTube Channel - though I started my landscape photography channel last year, it is the first half of this year that I've have seen a significant growth in subscribers and video views. My video of my adventure in Glencoe gave me a great boost, and my video on printing, and my 5 Minute Photo Adventure series have helped the channel to keep growing.
Outdoor Photography Magazine - I've had a few images published in Outdoor Photography magazine this year. This has included images in their monthly competition and in their Locations Guide section where I had to author the text as well as provide the images.
Improve Photography - I also started writing articles for improvephotography.com this year. I've written about a wide range of topics so be sure to head on over there and read my articles such as this one on printing at home.
The Not So Good
I'm going to keep this bit short. I don't like to dwell on the negatives too much. Unfortunately, it was another year of not making the shortlist in Landscape Photographer of the Year. Despite the lack of success I still value competitions like this as they help inspire and drive my photography. You can read why in this blog post I wrote last year: The Pain and Joy of Photography Competitions.
My Favourite 3 Images
Finally, I'd like to share my favourite 3 images of the year so far. This is a tough choice as I have a decent pool of images to pick from thanks to numerous trips out with the camera.
Porth Nanven

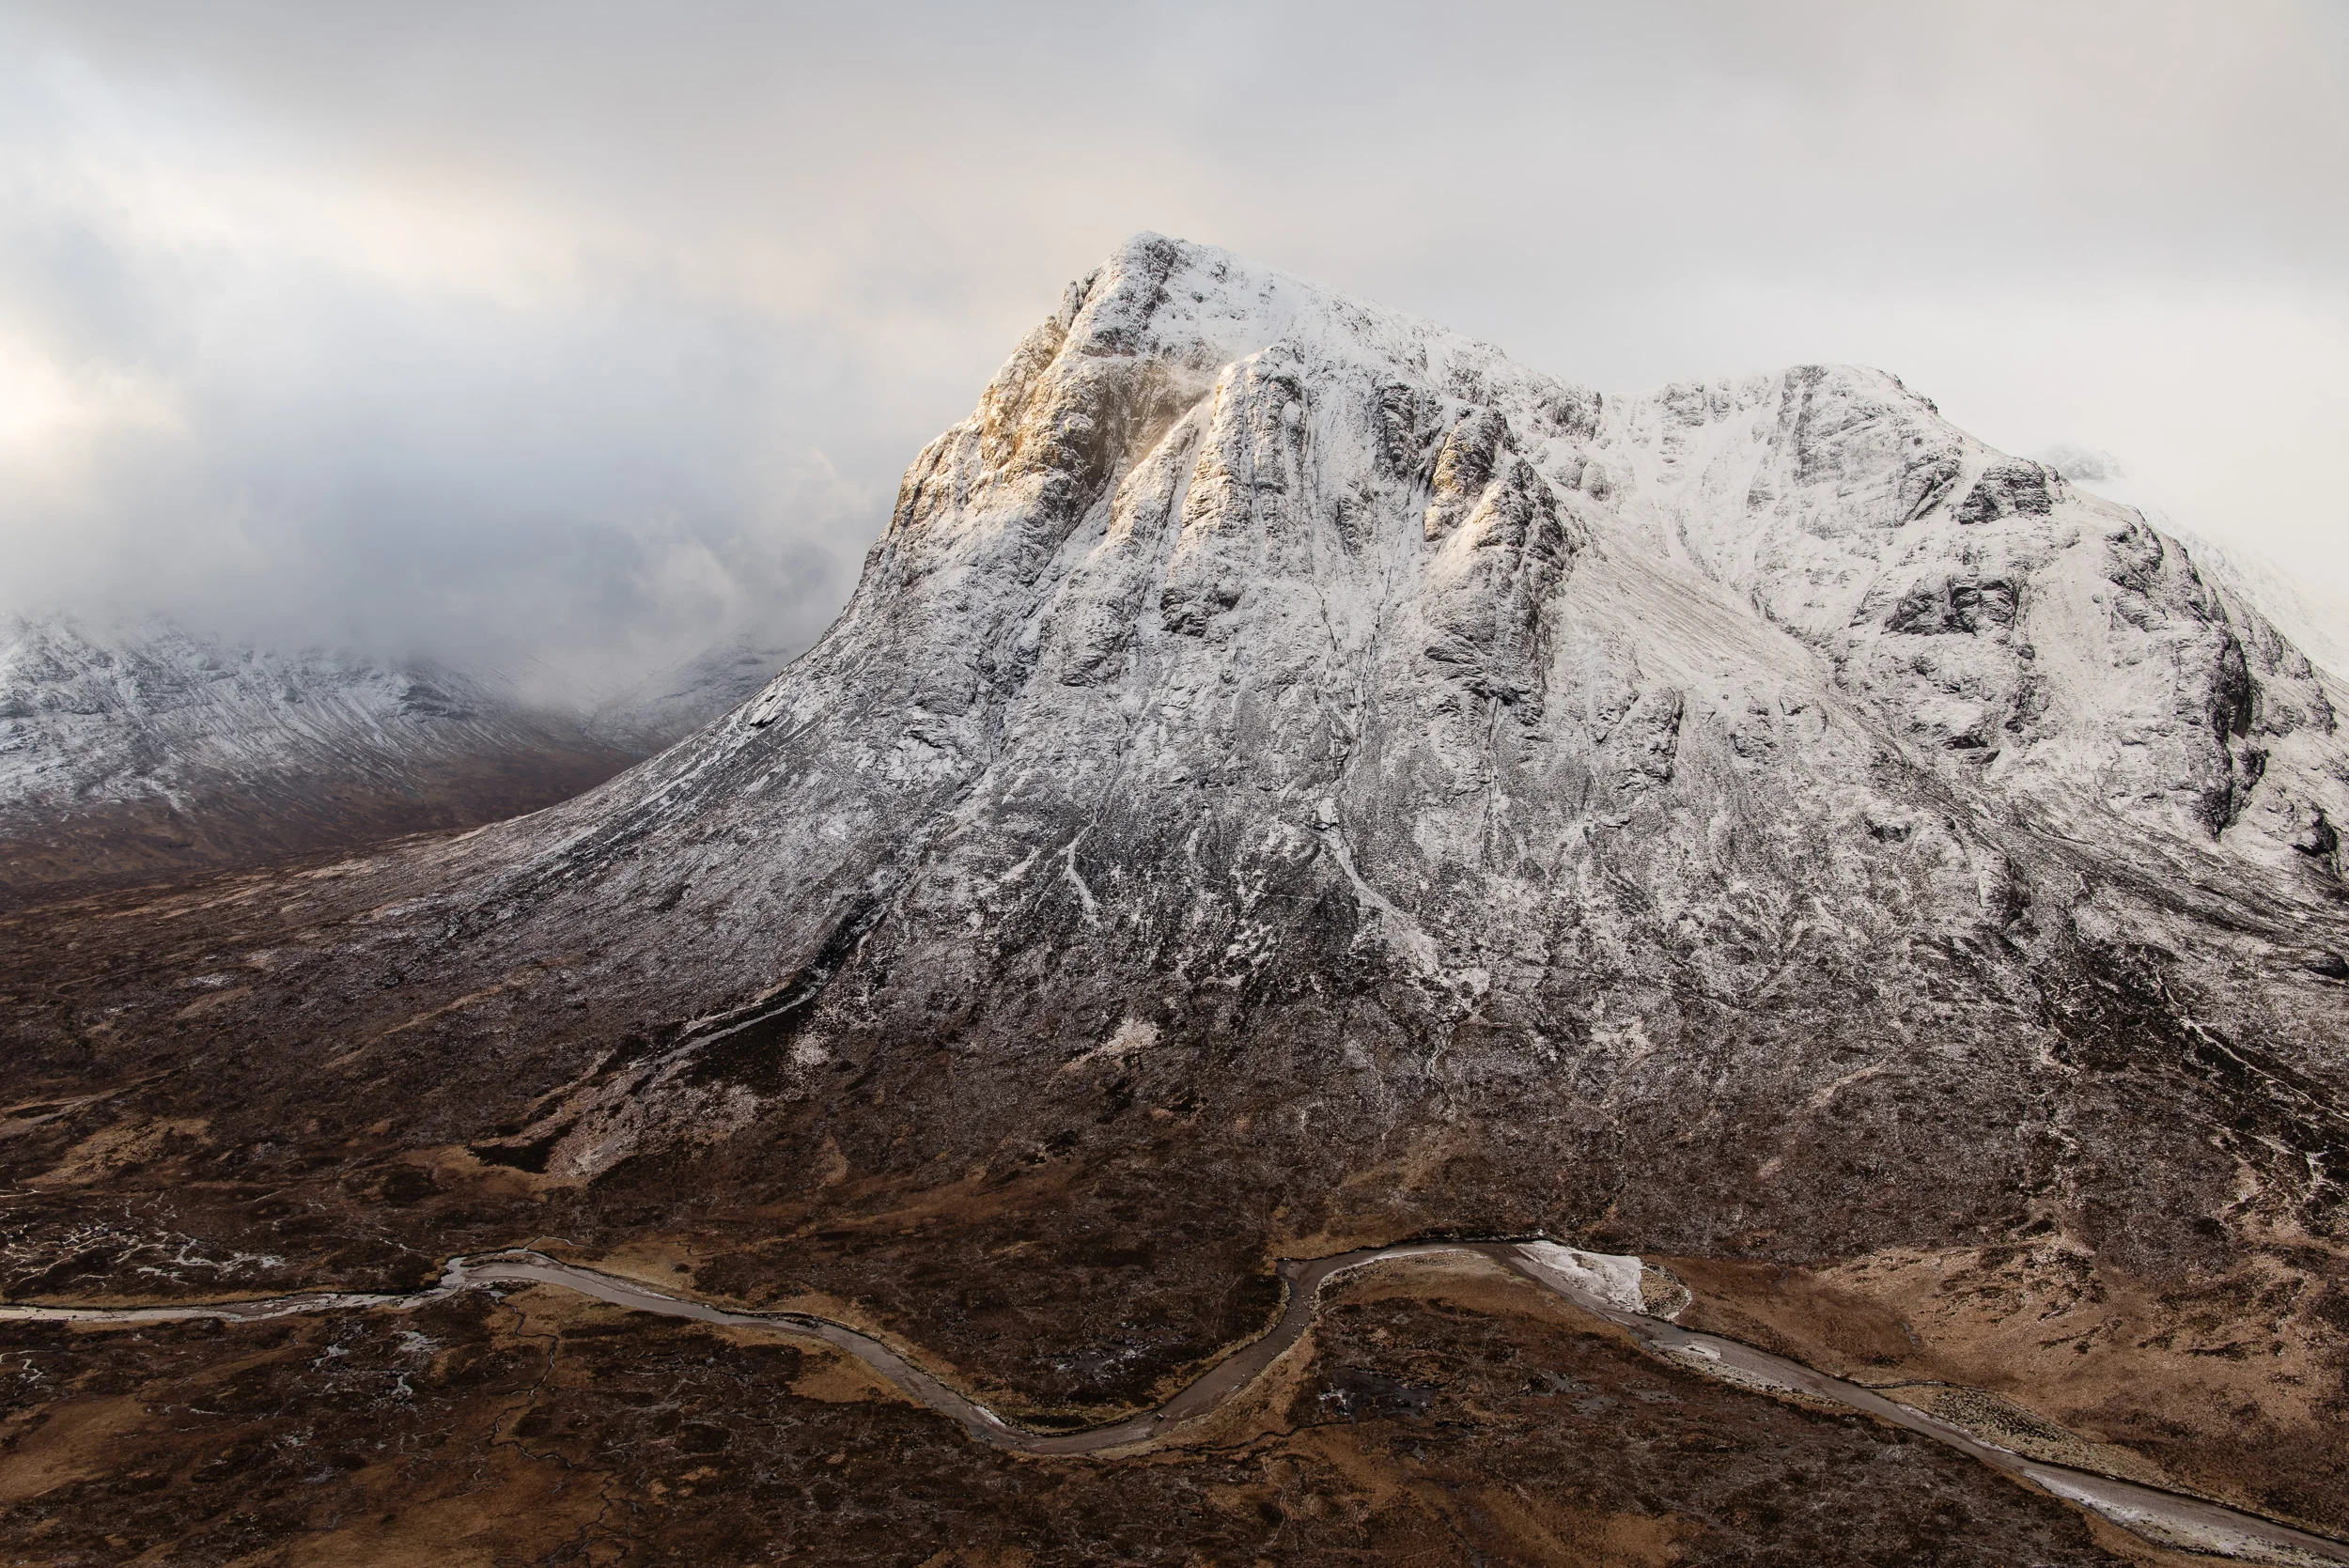
Glencoe
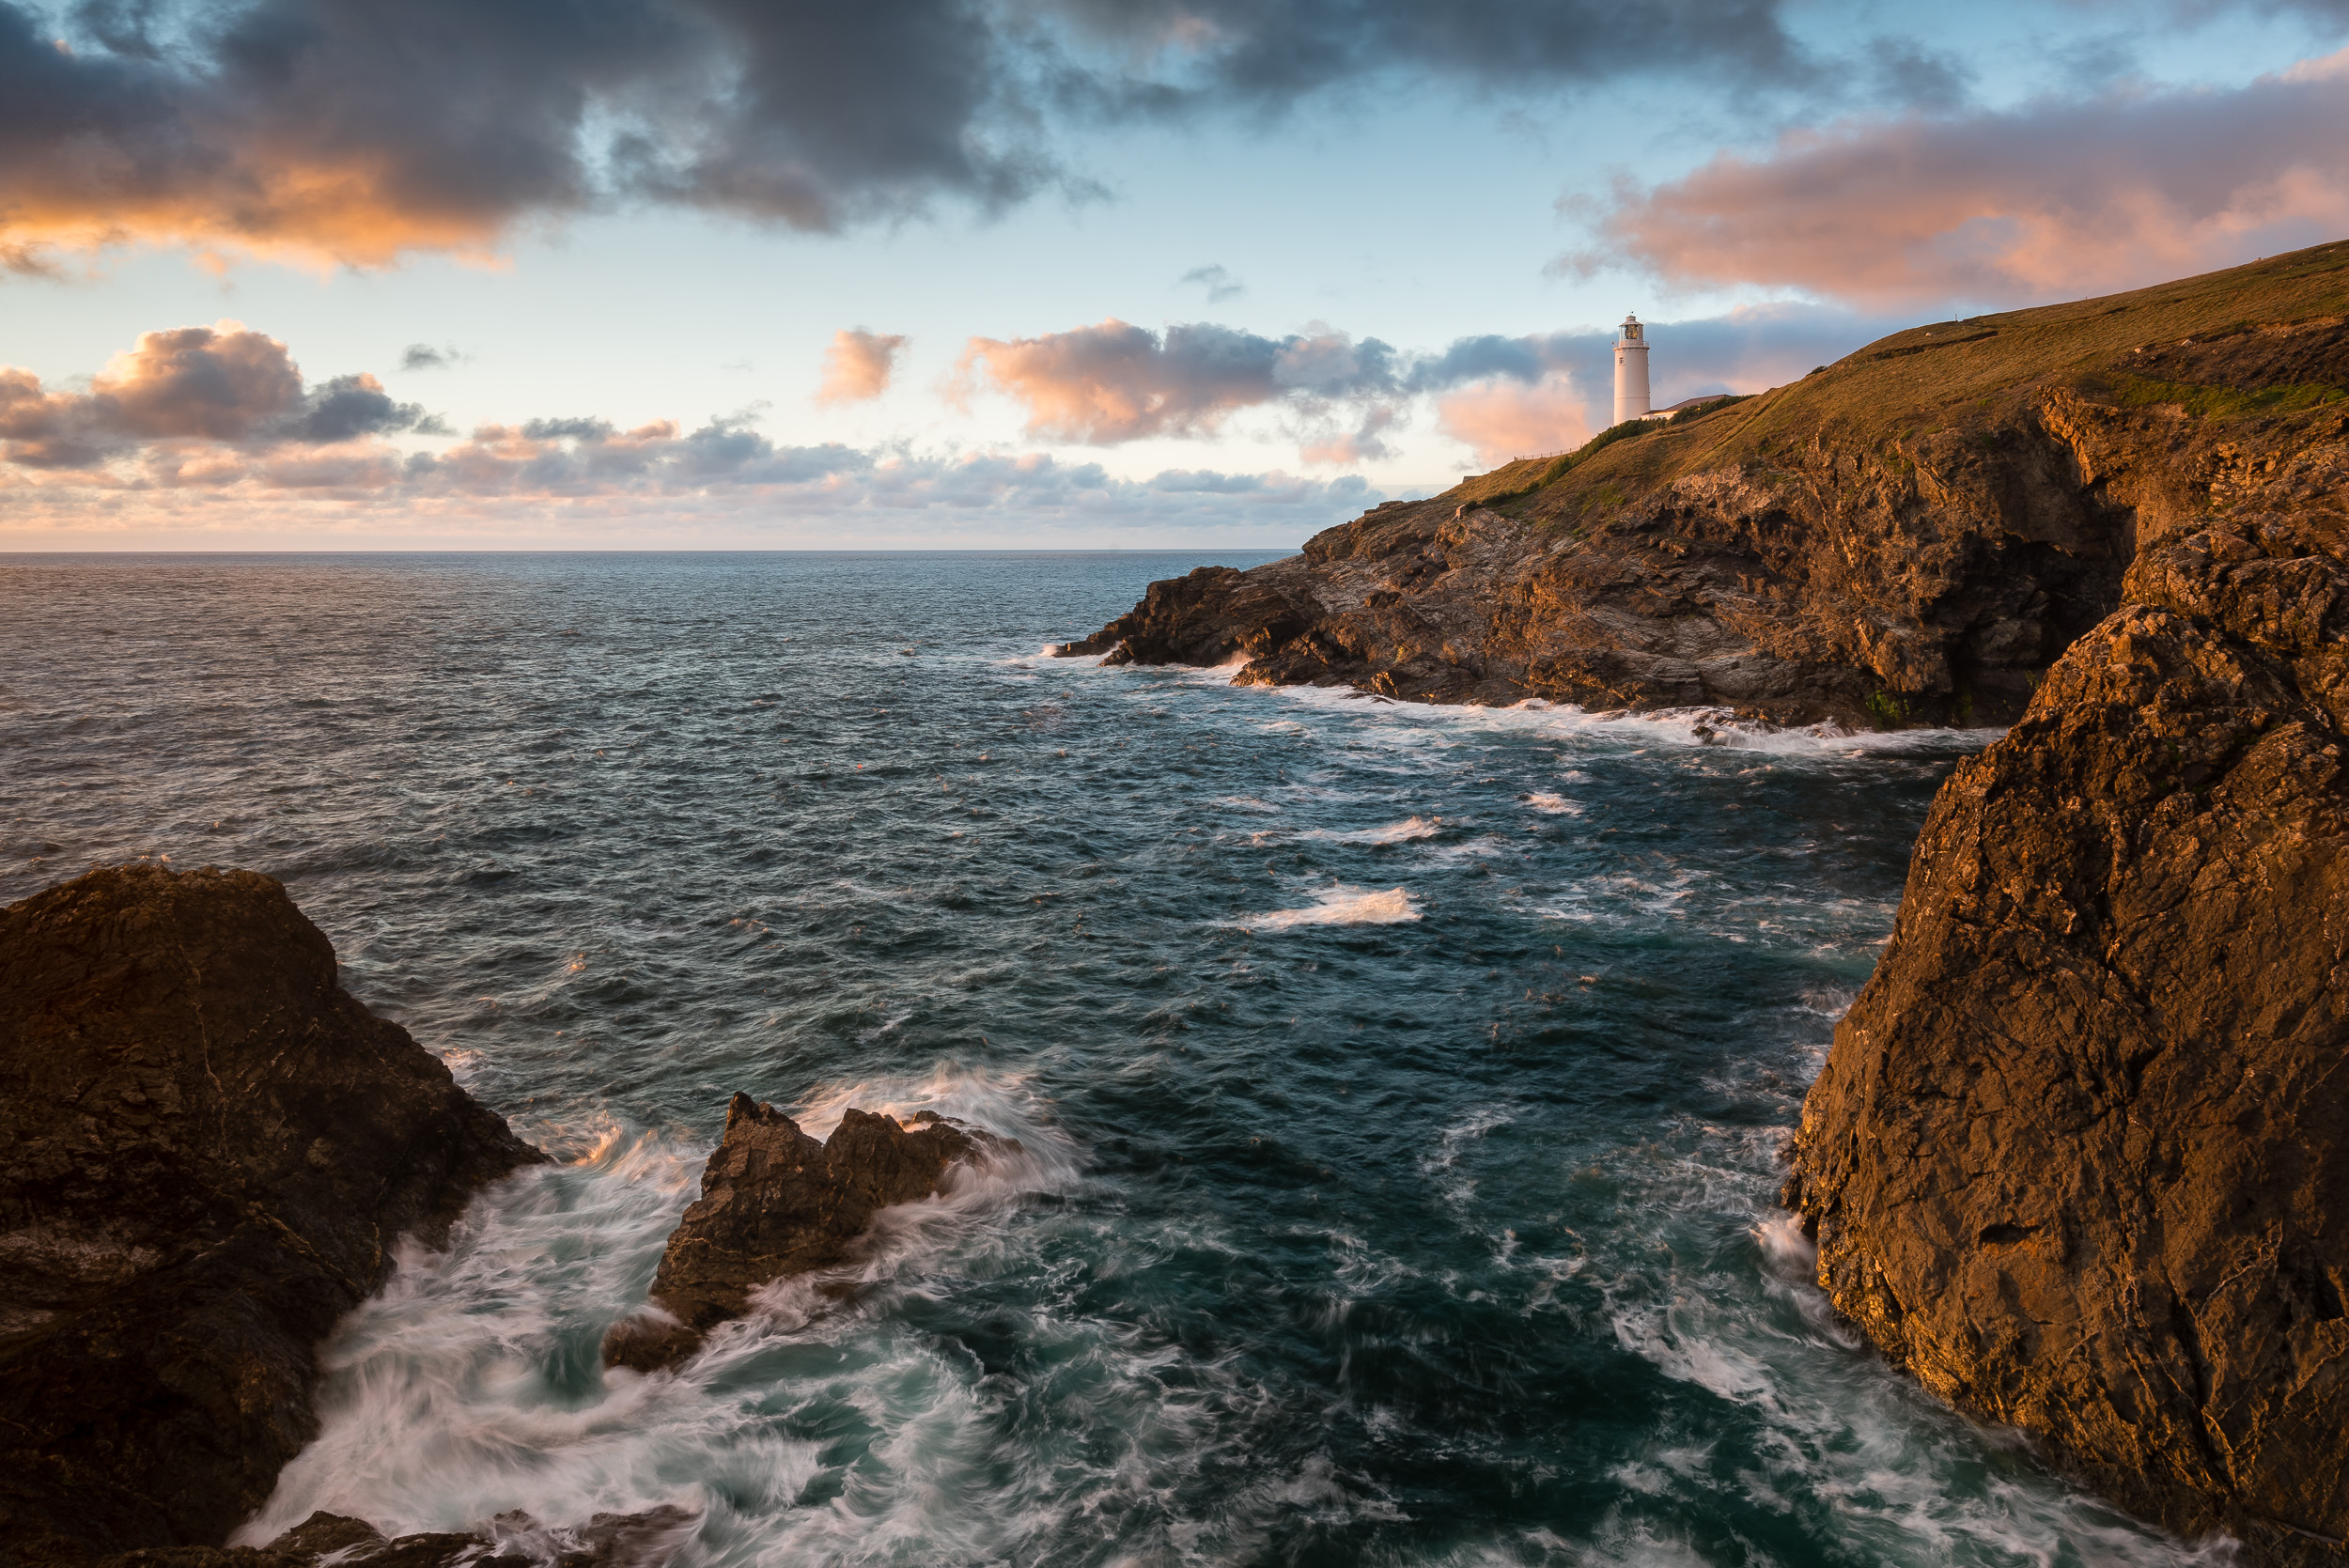
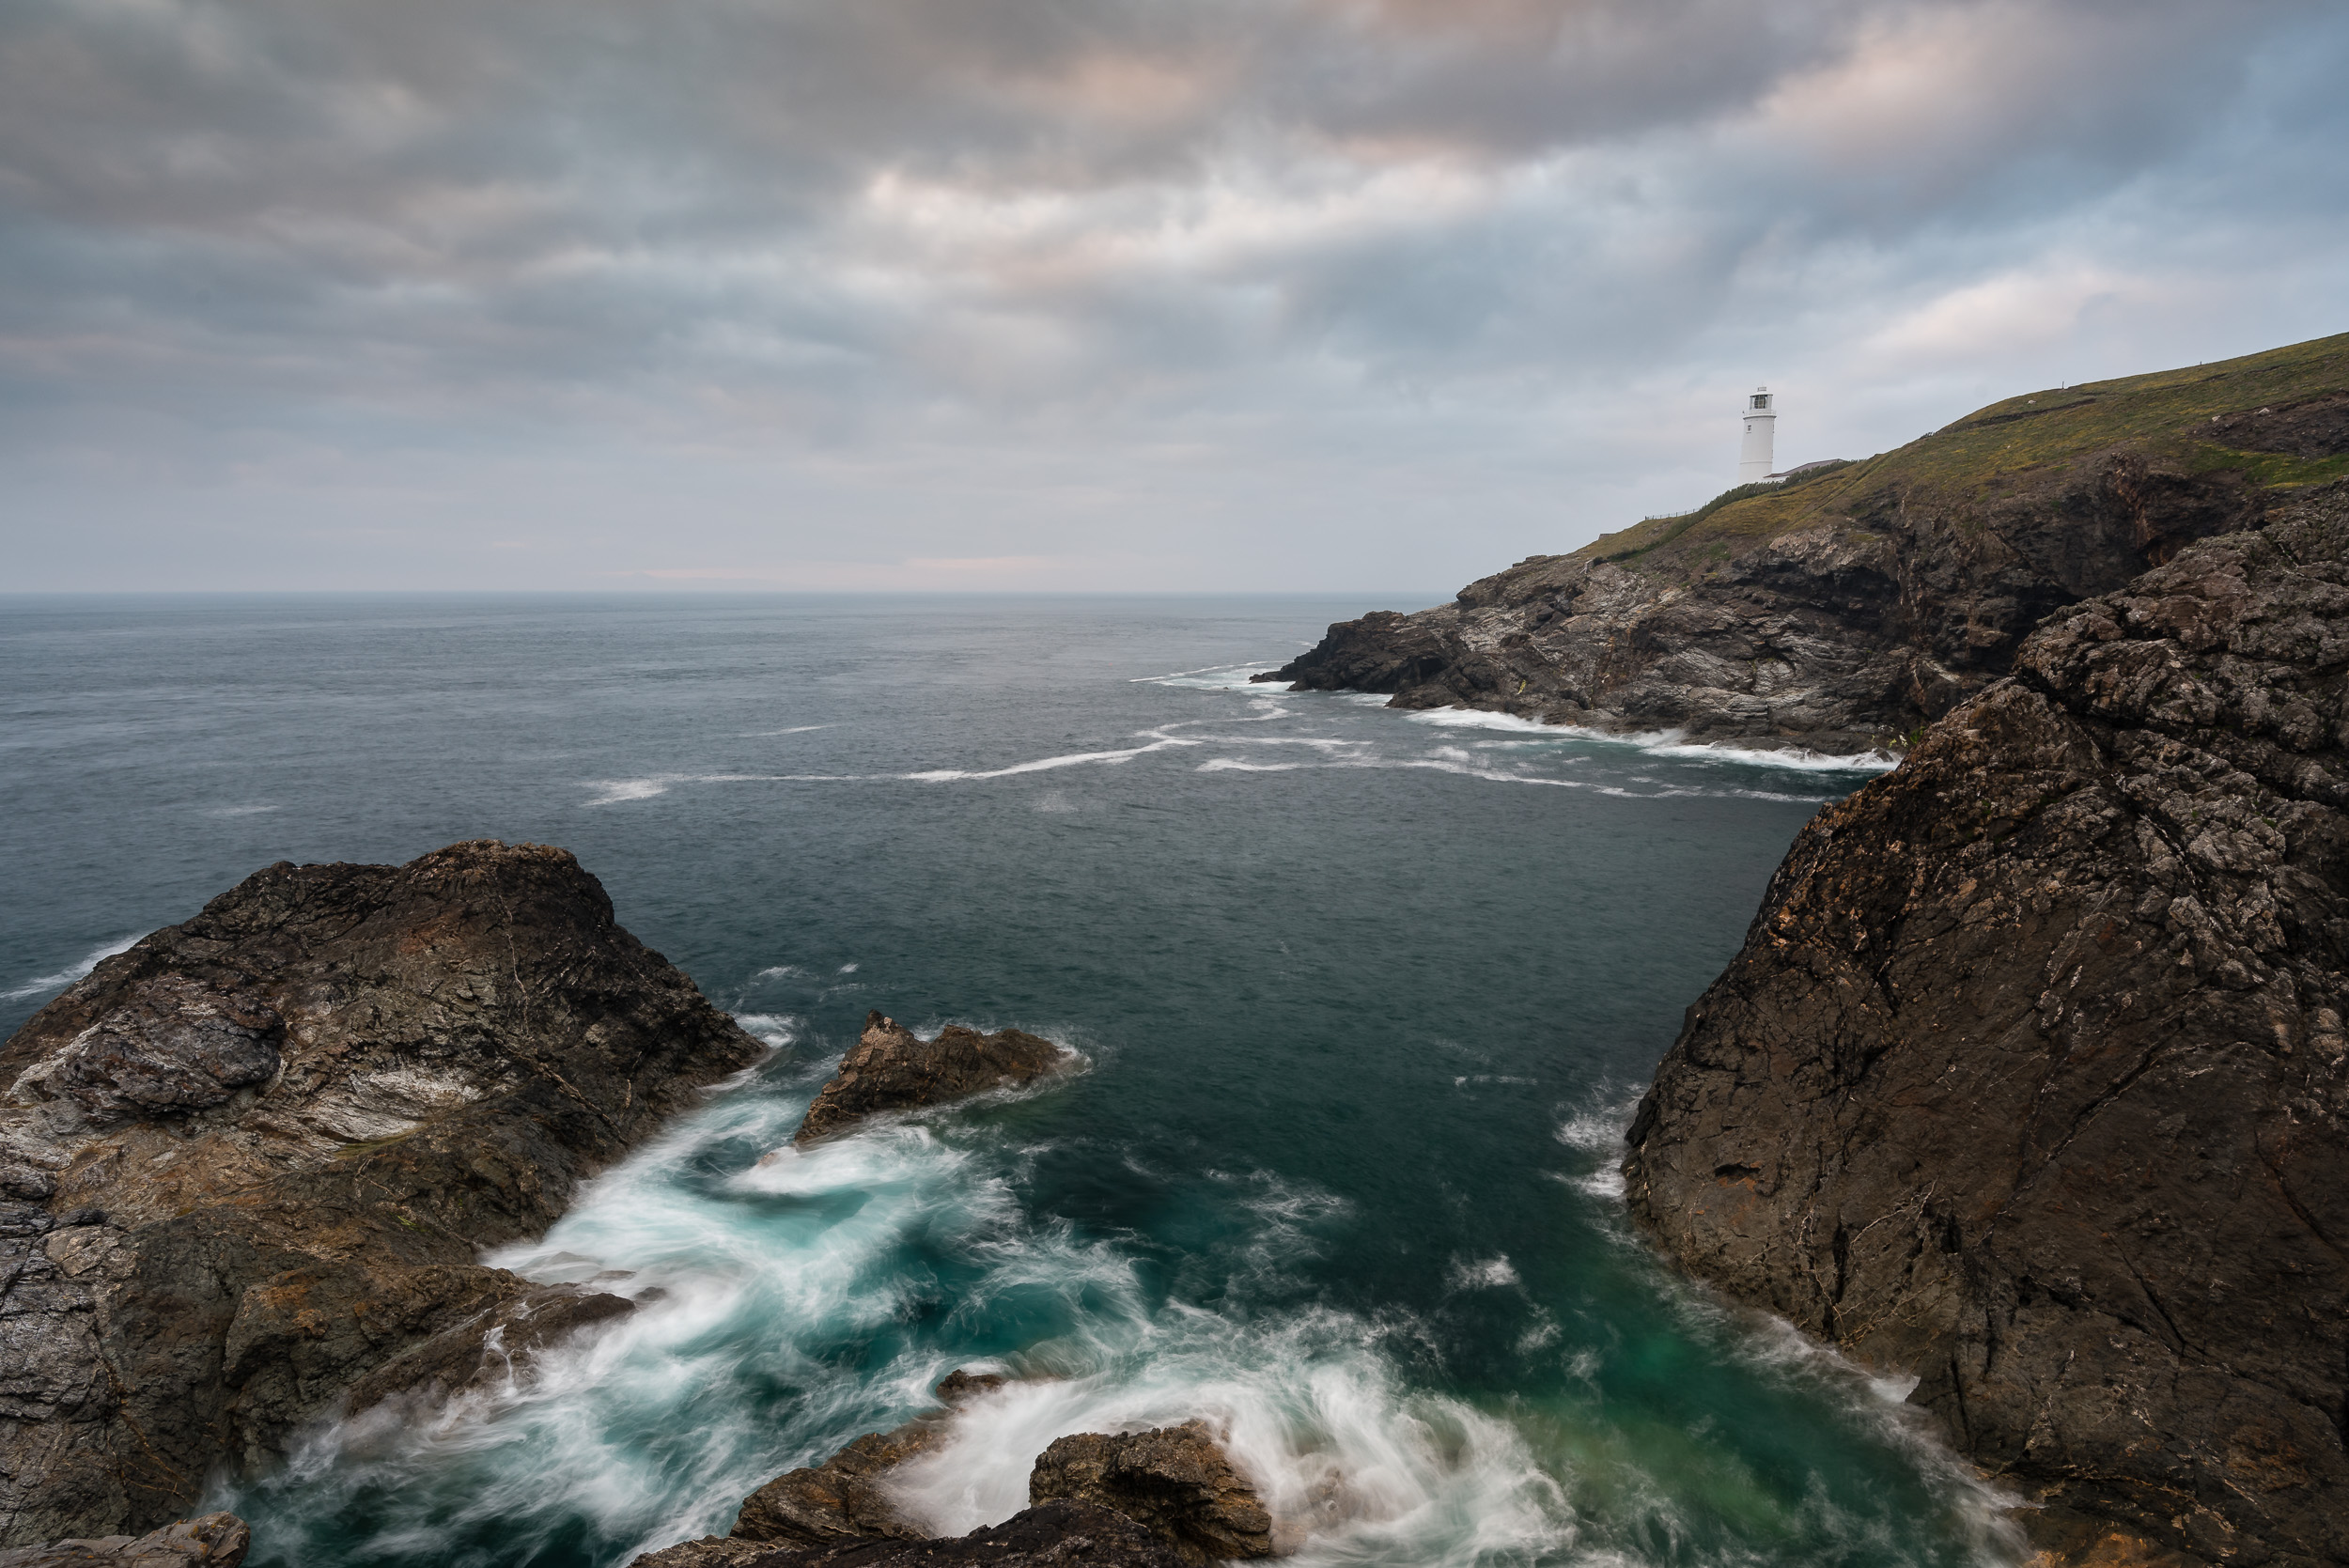
Trevose Head
So there you have it. It's actually been a positive exercise writing this blog post. With the lack of success in LPOTY putting a bit of a damper on my photography, looking back at my photographs and other success I feel recharged and ready for the remainder of the year. Autumn is just around the corner and I've got a couple of photography adventures in the planning stage so there is plenty to look forward to!
Have you had a good year with your photography so far? Do you have any big plans for the remainder of the year? Let me know in the comments below.

Same Spot, Different Photo
In this blog post I discuss why I was back photographing Trevose Head again and how despite putting my tripod legs in almost exactly the same spot as before I ended up with a unique image.
The Perfect Location?
I like shooting at Trevose Head on the north Cornish coast. I never seem to leave that location without having taken a decent photograph. Sometimes I even leave there with a great photograph. I also just enjoy being there. It's an amazing bit of coastline with its lighthouse, rocky cliffs and crashing waves. It can get very windy, and salt spray on your equipment can be a challenge, but just being there and watching the sunset over the coast is a pleasure.
If you want to see what I'm talking about then you should check out my 5 Minute Photo Adventure video from Trevose Head.
But what makes Trevose Head so special? Why do I keep putting my tripod legs in the same spot? I think one of the great appeals with Trevose Head is that it works in a variety of weather conditions. It doesn't seem to matter if the weather is good or bad, overcast, windy, or even what season it is. Don't get me wrong. It's not the perfect location. No location is. However, if you can vary your technique and adjust your style to the conditions then it's one of those locations where you stand a good chance of making a decent image.
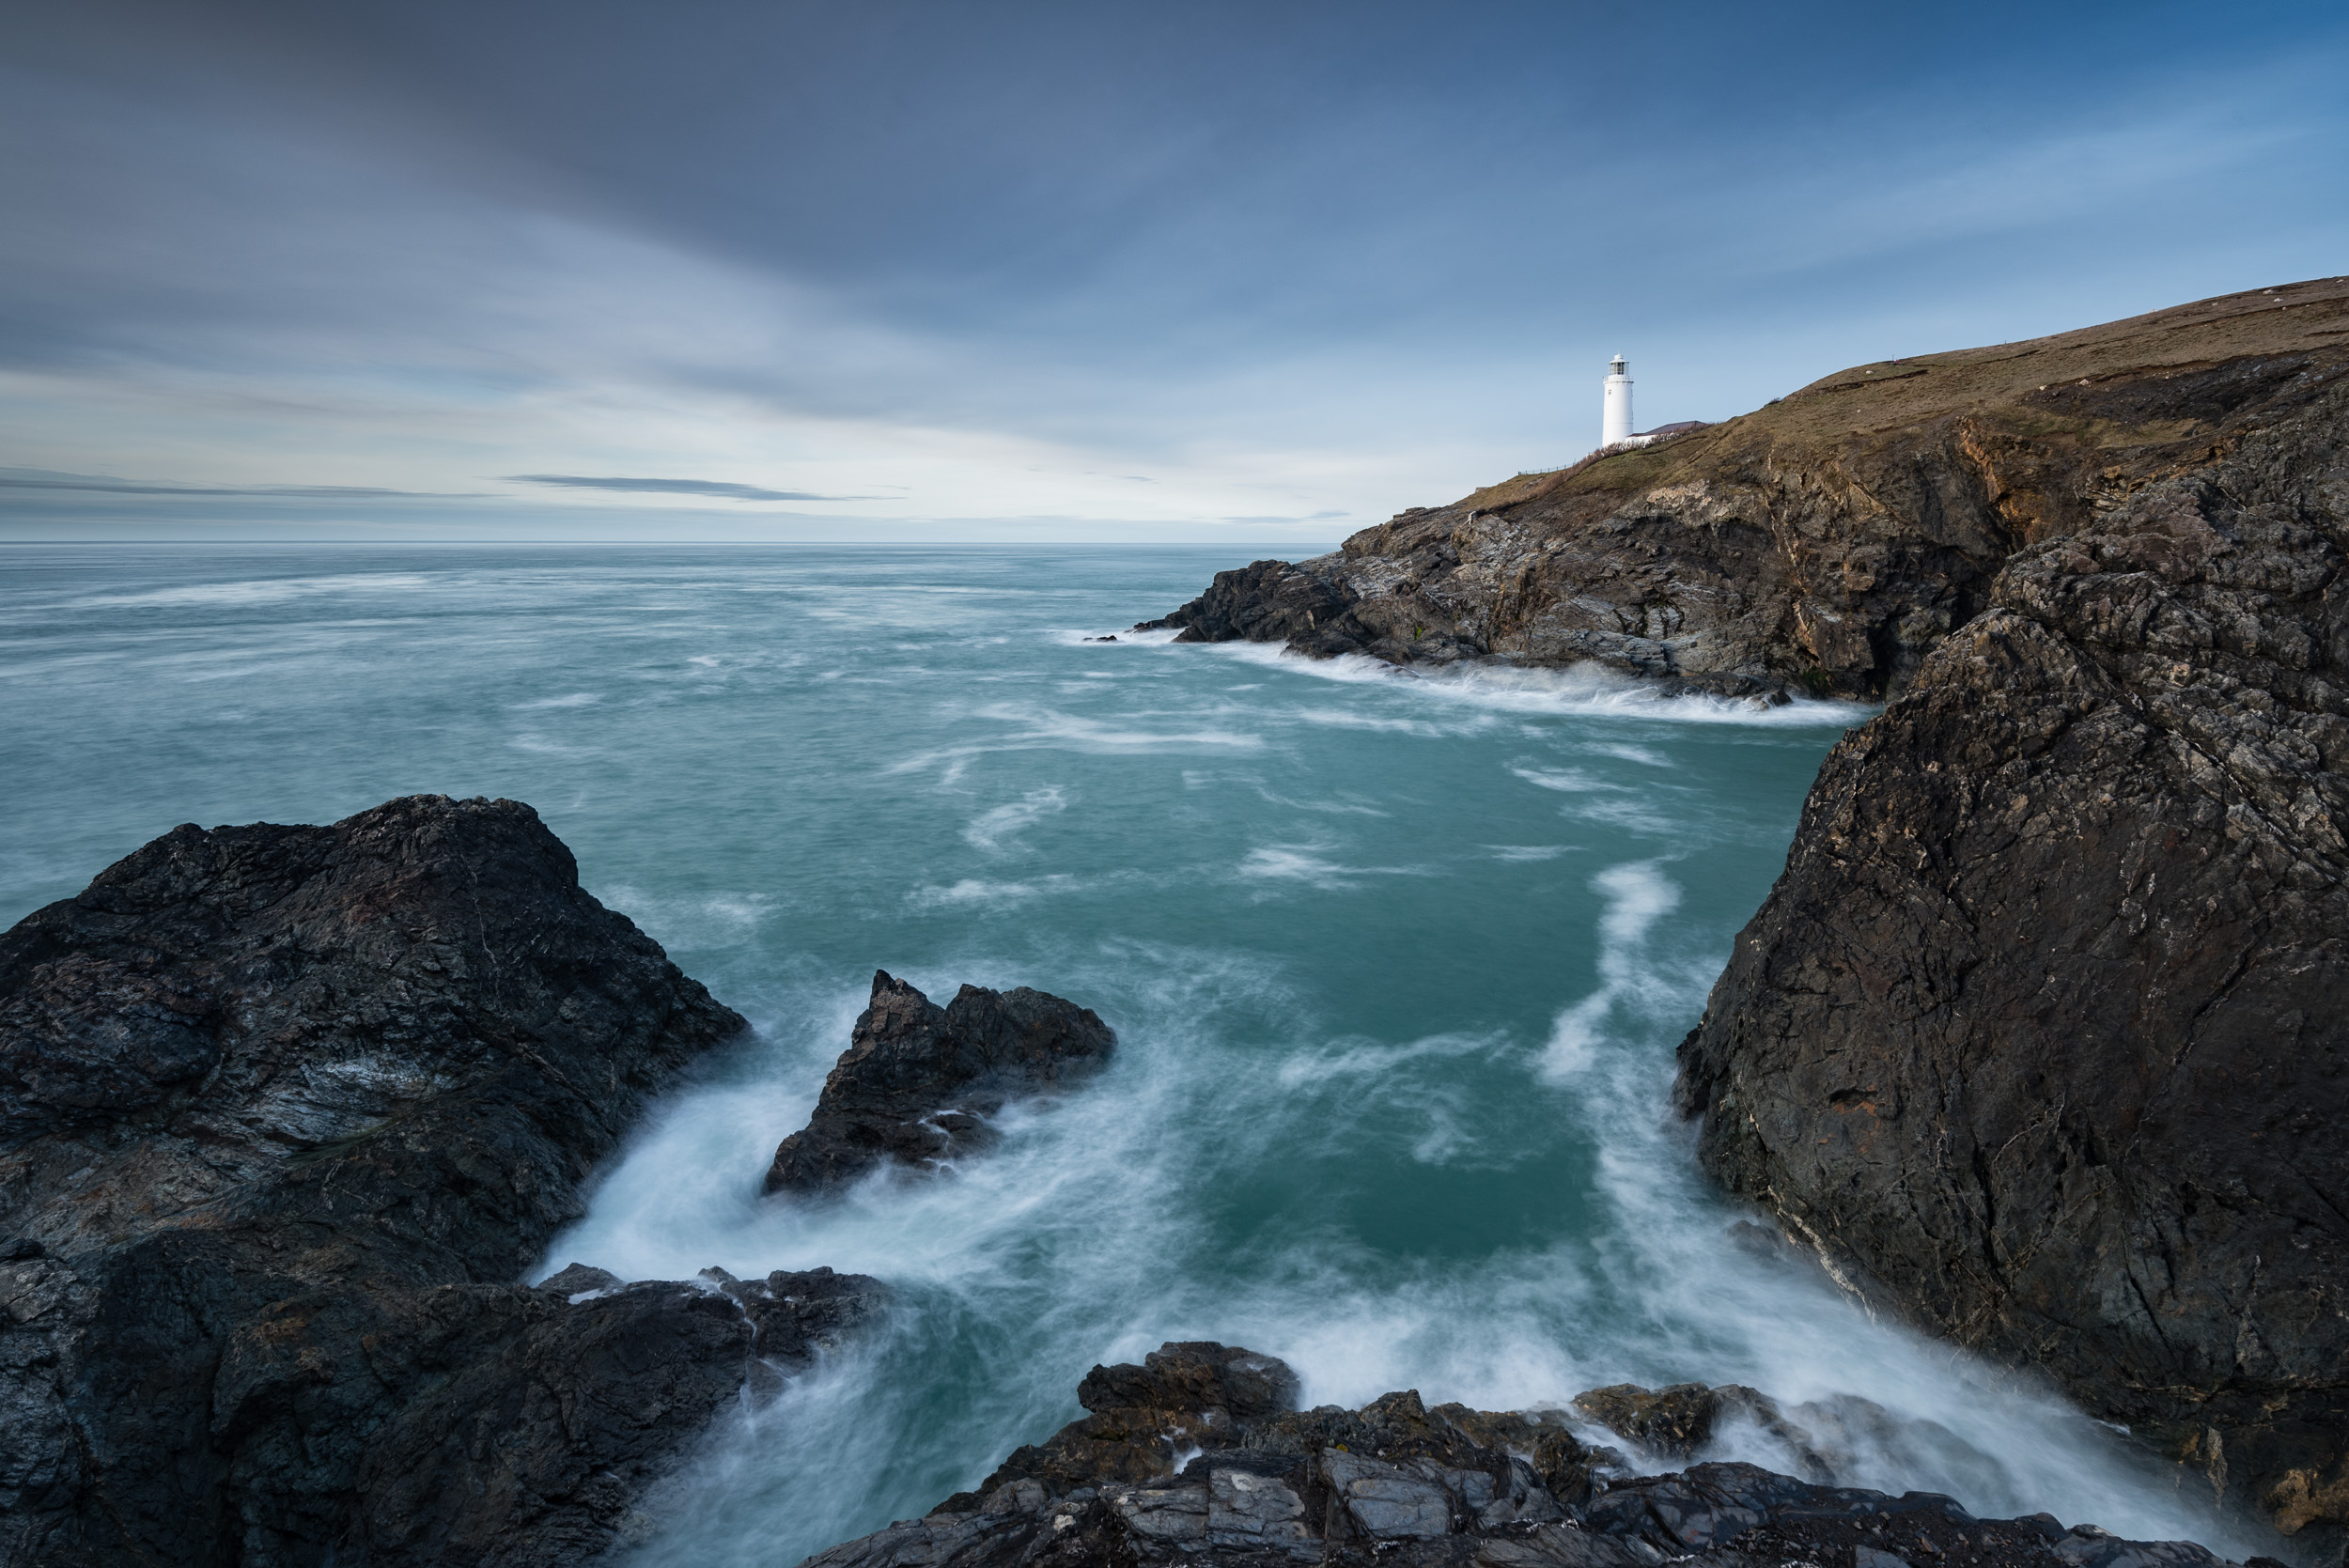
Here are some of my previous images from Trevose Head.

Whose Tripod Holes Are They?
I've just returned from another visit to Trevose Head and the image I captured there inspired me to write this blog post. Though I've previously captured some images that I'm really happy with from Trevose Head, I still thought I could capture something new. So when my friend asked me if I wanted to join him for an evening's shoot at Trevose Head there was only one answer.
It was going to be tough to get there before sunset though. The earliest I could leave home was 7 pm, and given that it is around a 90-minute drive that would only leave me about 40 minutes to jump out the car, make the short walk, setup, and capture something. But the weather forecast looked good and based on my previous experience from that location, I knew the journey would probably be worth it.
When I got there my friend had been shooting for a while and after a quick catch up, I got to work. For me, the best location to shoot Trevose Head is from Stincking Cove looking north east towards the lighthouse. Being a cliff top location there isn't a huge amount of room to move about, so my tripod legs were probably placed in the same spot as they usually are. However, even with my inability to move around a lot there is still plenty of variation to be had by shooting different focal lengths and exposure times.
What made my image different this night was the light. Photographers, including myself, do talk about the "light" an awful lot, but hopefully in this image you can see what a difference the light can make:
Nikon D750, Nikkor 16-35mm f/4 @ 22mm, 0.5 sec, ISO 100, f/16, Lee Filters circular polariser, ND grad.
I'm not saying this image is necessarily any better than some of my other images taken from the same spot, but it is a very different image from my darker, moodier images that I've taken there previously. The light was only there for a few minutes but I love the way it reflects off the sea, the cliffs and the lighthouse. It just shows you that every visit to a location can be unique and therefore produce a unique image.
To ND or Not To ND
I'm a big fan of the ND filter. I use them a lot and you can see how I use them in this video. That doesn't mean I will use them in all my images though. I try to use them creatively if I think the image will benefit from a slightly longer exposure. I do tend to go for longer exposures for my seascapes as I like the resulting smooth water or the patterns that are painted by the moving water. You'll maybe have noticed though that the image I've just shared above isn't a long exposure. At the time I felt that smoothing out the water wouldn't be the right thing to do for the image I wanted to create. I liked the choppy water and the way the light reflected off the tops of the waves.
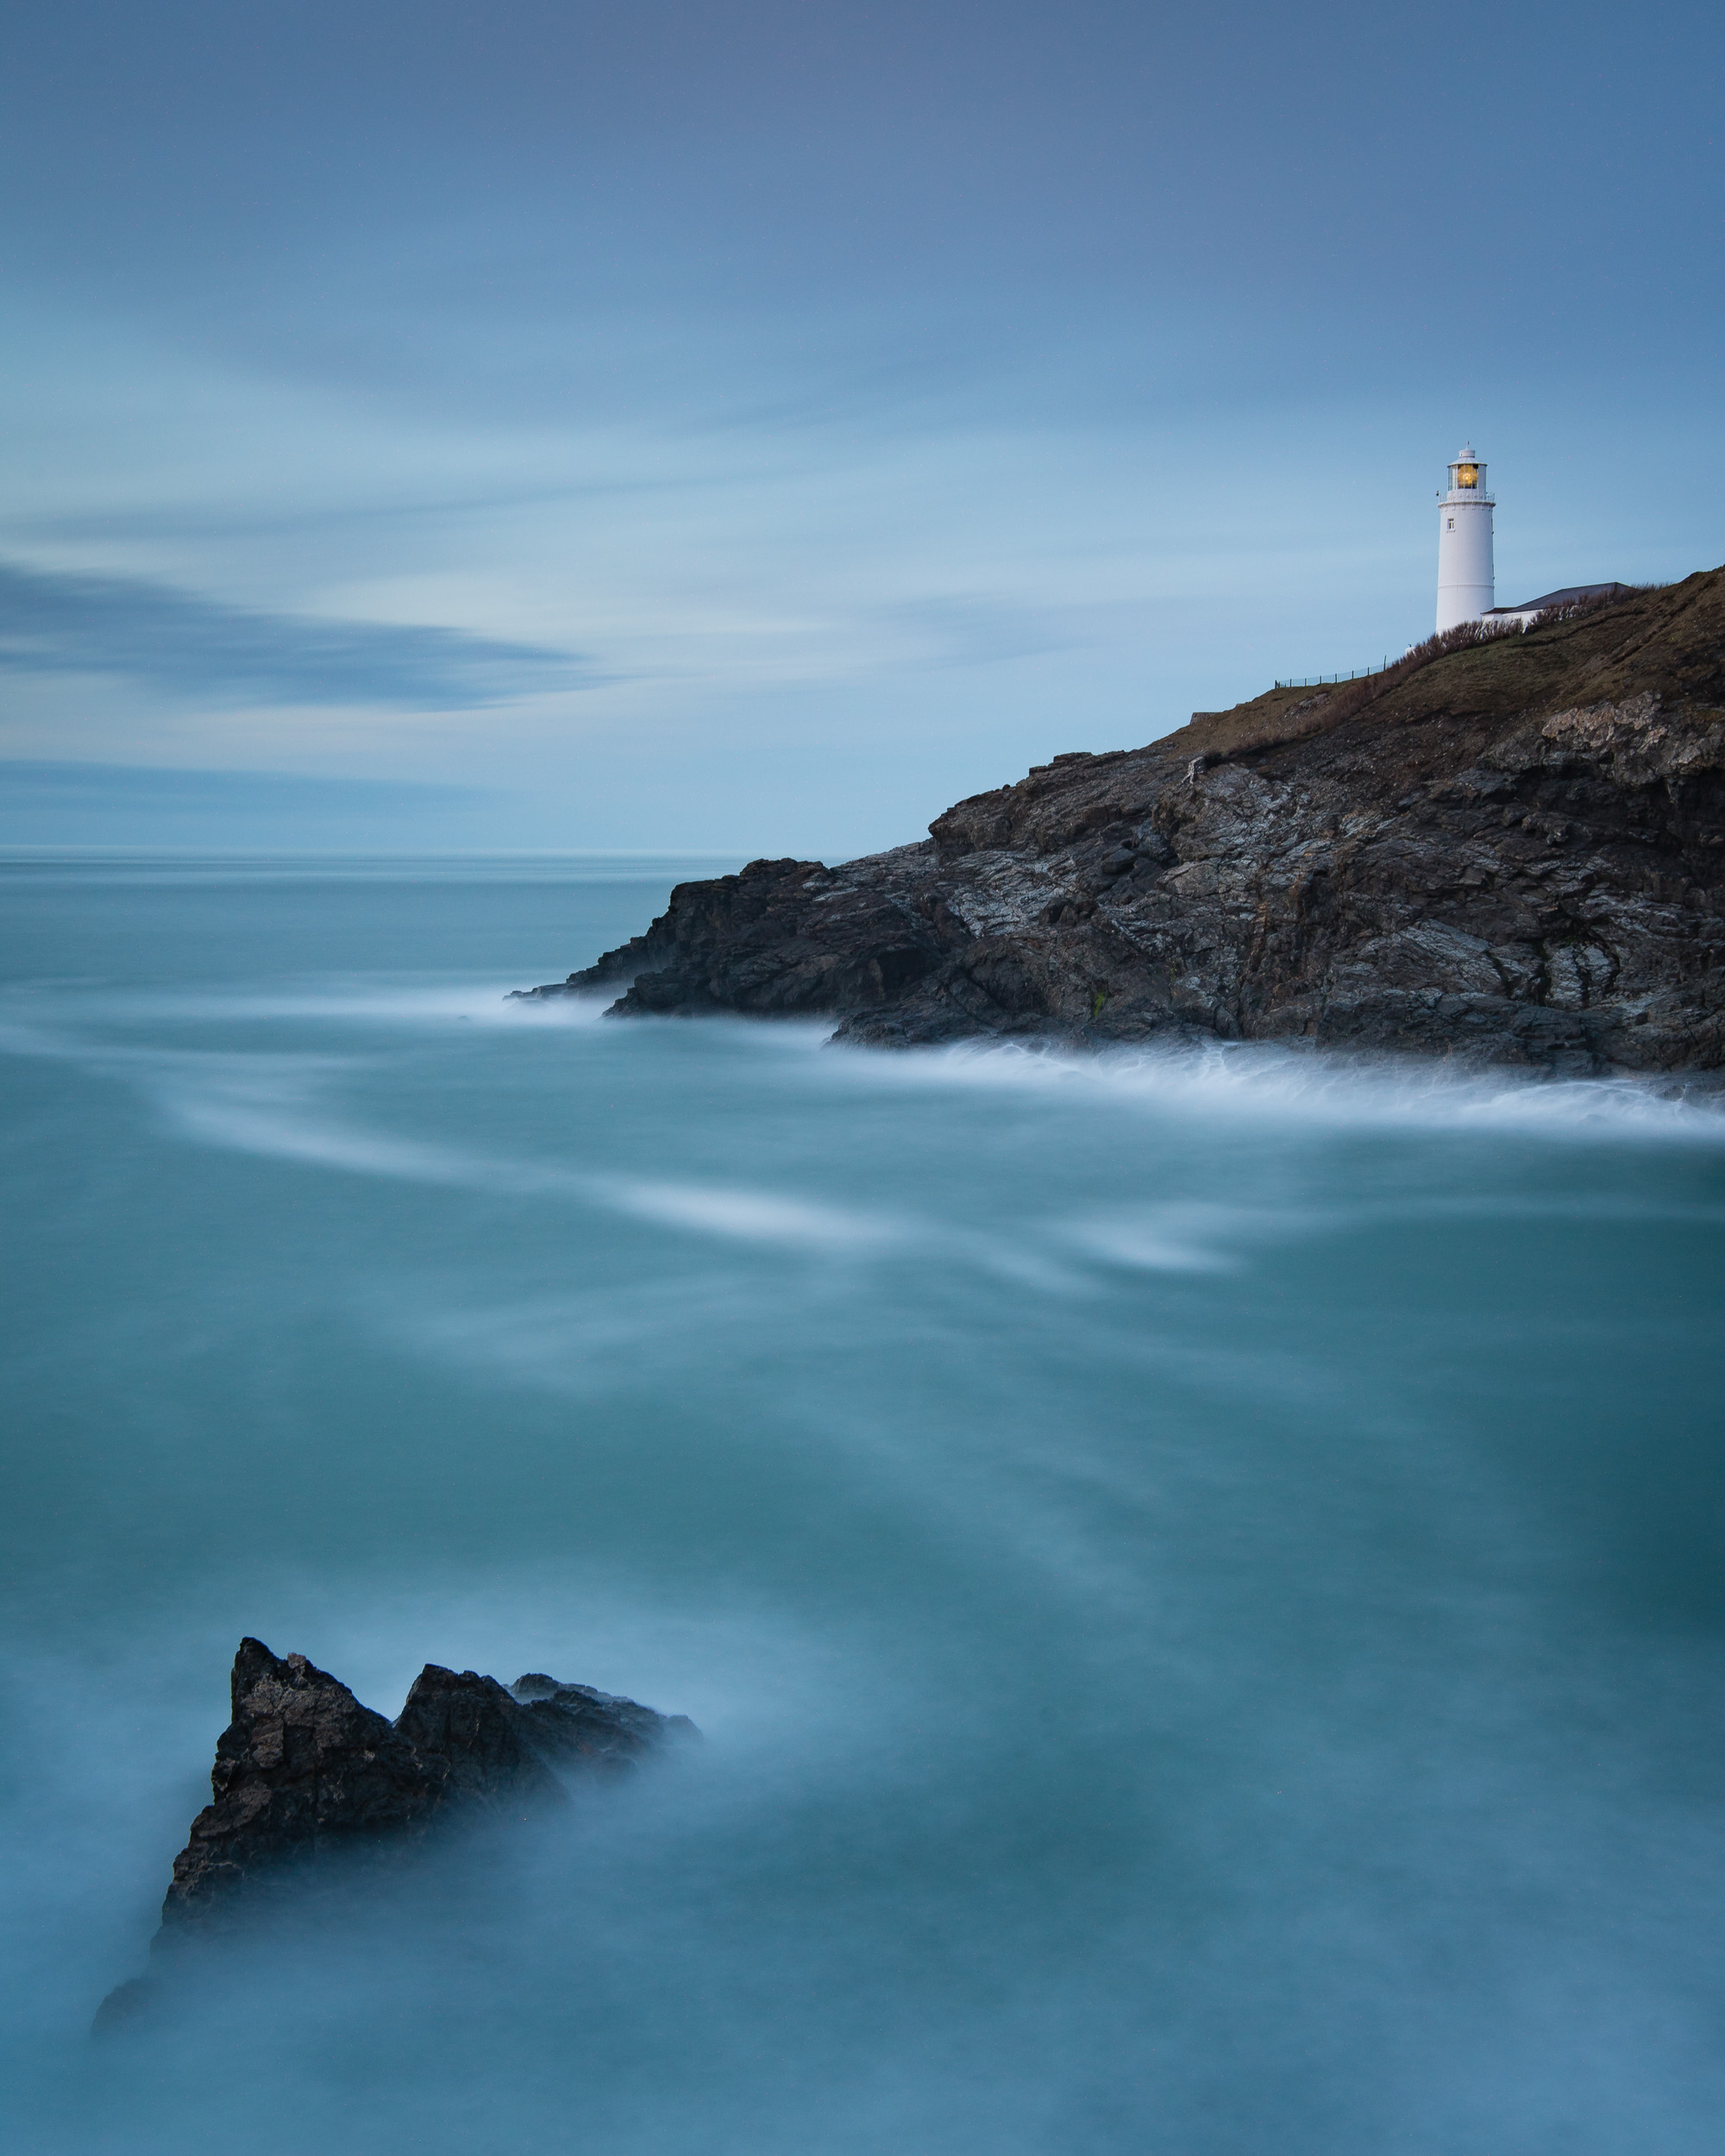
I did take a long exposure and while I am of course very happy with it, I still very much prefer the shorter exposure.
Nikon D750, Nikkor 16-35mm f/4 @ 22mm, 30 secs, ISO 100, f/16, Lee Filters circular polariser, ND grad.
Ignore Those Who Say...
All this talk of returning to a location to take the "same" picture reminds me of a Twitter post that I saw recently. I can't remember what it said exactly but it seemed to involve a number of photographers talking about a photograph of a few sets of tripod legs all crammed into the same spot. The general gist of the conversation was that these photographers lacked any original thought and were just copying each other or those that were there before them.
Though I didn't reply to the Twitter post, I couldn't have disagreed more for two reasons. Firstly, who's to say that just because a photograph has been taken from a spot before that another photographer can't take a similar image. If you are just starting out in photography I would actively encourage you to visit locations that you've seen in other peoples images. I even don't see any problem with trying to replicate the composition. It's often a good way of learning. If you have been inspired by an image you have seen then why not try your hand at that location.
I bring this topic up now because even though I have visited Trevose Head a few times and taken photos from the same spot, I get different results each time. So I would encourage you to put your tripod legs where my legs were and take the same photo. Your image will be unique and hopefully special to you.
The other reason I disagree with that Twitter post is that if you put two photographers in the same location at the same time you'll likely end up with two different images. An example of this was when I met a very nice photographer called Johnny Baird during a trip up to Scotland to photograph Glencoe. We both stood in the middle of the River Coupall, photographing Buachaille Etive Mor at sunset and despite the close proximity of our tripod legs, we shot very different images. Just because we were in the same location at the same time, how we choose to interpret the scene, choice of equipment and setup all meant we ended up with different images.
Don't let anyone tell you that a location has been overshot or that you must find a unique location for your photograph to be worth anything. So next time you're in Dorset, go to some of its most iconic locations such a Durdle Door and join the dozen other photographers that will be there and get your very own image.
Do you have a location that always delivers results for you? Did you prefer the long or short exposure that I took? What are your thoughts on visiting well shot or iconic locations? Let me know in the comments below.

Brentor Church
In the blog this week I head off to Brentor Church on the edge of Dartmoor. Read about how the cold weather almost sends me home early but by sticking around for a break in the weather I was treated to some lovely evening light.
A Bit of Inspiration
I often look for inspiration using my personal locations map that I created using Google Maps. One evening I was looking for something local to shoot when I noticed a map pin on Brentor (St Michael de Rupe) Church on the edge of Dartmoor. I've shot the location a few times but never got an image that I was really happy with, so I thought this would be a good time revisit the old church on the hill.
The weather forecast was for broken cloud and no rain, and the direction of the sunset was favourable for good lighting along the side of the hilltop and church. I had been stuck in the office all day and I was looking forward to getting outside into the fresh air and taking some images.
Wild Dartmoor
The weather at home that day had been very summery so when it came to outdoor clothing I decided to keep things light and I left the thermals and down jacket at home.
When I arrived at Brentor things were a little different than they were at home. Why I should be surprised by this I don't know! It is Dartmoor after all and having four seasons all in one day isn't exactly unheard of. Certainly not to be put off I got my bag out of the car and made the short walk to the viewpoint.
To say that there was a bit of breeze up there would be an understatement! It's not necessarily the height of the location but more that it is very exposed. It wasn't long before I had put on my lightweight jacket, shortly followed by hat and gloves (which I always keep in the bag, fortunately). With the skies being overcast and my body temperature dropping, I was soon feeling uncreative and considering making an early exit and going home.
Game On!
If there is one thing you can count on when photographing Dartmoor is rapidly changing conditions. While I was sitting there gradually getting colder I was keeping an eye on the weather behind me. I could see in the distance some significant breaks in the cloud which I was hoping would lead to more interesting skies and give the sun a chance to break through. So I toughened up and waited!
I got the camera all set up and ready. Breaks in the cloud and splashes of light can be fleeting, so I needed to be ready. I then waited patiently and watched with eagerness as the rays of the sun that were breaking through the cloud gradually got closer and closer.
When the weather did break over Brentor it did so for only 10 or so minutes. I captured a few frames keeping an eye on the cloud converge over the old hilltop church and how the light was breaking on the hillside.
Nikon D750, Nikkor 16-34mm f/4 @ 18mm, ISO 100, 1/6 second, f/13, no filters.

The quality of the light can change dramticaly over a short space of time.
The quality of light can really make or break an image and without light from the setting sun as it broke through the cloud this image would have been much flatter. It's not to say that this image is perfect, far from it, but given the conditions I was working with I was happy with the results.
I tried a few variations on my composition and I even tried increasing the ISO for a shorter shutter speed. I thought that the shorter shutter speed would freeze the grass blowing in the wind, but I decided that keeping the movement of the grass better reflected the mood I was looking for.
So my evening up on Dartmoor was a bit of a roller coaster. Nothing hampers your creativity more than being cold and I really should have known better to head up to Dartmoor without a warm jacket! But I'm glad I stuck it out as at the end of the day as I got some nice images and a lung full of fresh air.
So have you photographed Brentor church before? Would you like me to make a 5 Minute Photo Adventure video there? Have you ever been out with the camera without suitable clothing? Let me know in the comments below.

The Rumps - 5 Minute Photo Adventure
In this blog post I take you on another 5 Minute Photo Adventure. This time I'm back in Cornwall to photography the twin headland known as the Rumps. This is a great coastal sunset location and offers fantastic views of the surrounding coast. Read the blog and watch the video to see why.
Seeing More
The more 5 Minute Photo Adventure videos that I make the more I realise how amazing the coastline around the south west of England is. Over the last few years of photographing my local coastline, I've discovered many wonderful and dramatic locations. I am indeed very lucky to live in a place where I can access a wide range of beautiful photographic locations.
By shooting these videos I have started to discover more about the locations I photograph. For each video, I try to shoot lots of B-Roll so that I have additional footage to help tell the story of the location. This could be me walking around the location or using the drone to capture some aerial footage. It's from this aerial footage that I have seen some amazing coastal sights and views. It could be the elevated view or the view that would otherwise be inaccessible that provides me with a new way of looking at a location. A great example of this would be my previous 5 Minute Photography Adventure video from the Valley of the Rocks (insert link).
When I get home from shooting a video and I look at the B-Roll I often see how much more that location has to offer. Sometimes I get very focused on making an image that I forget to look around me and see what else there is. The B-Roll not only adds the video itself but also reminds me to keep my eyes open when I'm on location and not to just look through the viewfinder.
The Rumps
With so many great locations to pick from in the South West, it was hard to decide where to shoot my next video from. So, as I often do I checked out my custom Google Map and spotted the location known as The Rumps. The weather forecast was looking OK, but I thought it would be worth the risk so I packed my gear and headed out in the car. Here is what happened:
The Images
In the video, I showed you just one of the three images that I took that evening. Here are all three for you to look at:


While these images are pleasing enough, I don't feel any of them stand out. When shooting one of my 5 Minute Photo Adventure videos it's always nice to get a standout image to finish the video with, but the video is more about my desire to share the location with the viewer, tell them about my process of shooting the image, and hopefully inspire them to visit the location. So I don't necessarily consider it too much of an issue not to have a portfolio class image at the end of each video. It would be nice if every trip out with the camera did produce a portfolio class image but this simply isn't the case. For me, any time out with the camera is time well spent. Getting an awesome image is a bit of a bonus.
Looking at the images now I don't think the compositions work particularly well. Sure, not having great light didn't help, but I'm not entirely sure nice side lighting or a pink sky would have helped. The images lack balance and in some cases, they need more negative space in the lower part of the foreground.
So while these images might not necessarily be my best work, they are still important. Every image I take, good or bad, I will personally critique to see how I might improve next time. Photography is a journey of constant learning and improvement, but one that I still very much enjoy.
Looking back at my previous visits though, I think I prefer this viewpoint. This image was taken south of the viewpoint in the video and shows a bit more of landscape around The Rumps.
Have you been to The Rumps before? How much do you critique your own images? Are there any locations you like to me make a 5 Minute Photo Adventure video on? Let me know in the comments below.

Valley of the Rocks - 5 Minute Photo Adventure
In the blog this week I head off to the Valley of the Rocks in north Devon to shoot another 5 Minute Photo Adventure video. See the images I took at this dramatic coastal location and be inspired to visit yourself as I show you grandeur of this location from the air.
Drama!
Photographers will often use the word dramatic to describe the coastline of the south west of England. I've even been know to use the word once or twice in my own videos! While it is true that much of the coastline in the area is indeed dramatic, there are few such locations as the Valley of the Rocks in North Devon that have really earned that title.
No matter if you are a photographer or not, walking along the South West Coast Path as it cuts through the valley is a sight to behold. On a good day you can see out over the channel and onto Wales, or just appreciate the steep and rocky cliffs as you stroll along the path at what appears to be a dizzying height.
But enough of me waxing lyrical about the location, take a look at my latest 5 Minute Photo Adventure video to see what I'm talking about.
On Location
I hope you feel inspired to visit the Valley of the Rocks. I shot a little more drone footage than I probably would have for one of these videos, but sometimes you need more than 15 to 30 seconds of video footage to help tell the story of a location.
I opted to shoot from an elevated position so that I could get a long view down the valley and hopefully get some nice evening light across the rock faces. These are two of the images I took, just taken a little time apart.
Nikon D750, Nikkor 16-35mm f/4 @ 22mm, ISO 100, 1 second, f/16, Lee Filters circular polariser and ND grad.
Nikon D750, Nikkor 16-35mm f/4 @ 22mm, ISO 100, 1.3 seconds, f/16, Lee Filters circular polariser and ND grad.
I'm reasonably happy with both images. They are probably the best images I've captured there. However, being the picky photographer that I am, there are a couple of things I would like to have been a little different. Firstly it would have been nice for the golden light to be a little stronger and more widespread. You can just about see the golden light coming through on the foreground rocks, but having more it along the valley would have been nice. However, it did light up the sky very nicely.
While things like the light are sometimes out with my control, the composition is my job. It's not that I'm unhappy with the composition of both photos, but for the first image, I should have shot just a little wider. Perhaps around 17 or 18 mm. The setting sun in that image is very close to the edge of the frame. I should have either excluded it all together or given it more room. I was probably concentrating on other elements around the frame or just waiting for the sun to go from the frame. It might have been that this was a test shot while I was waiting for the sun to leave my composition. It's strange how sometimes that an image you never intended to be the "one" can end up being the favourite from a shoot.
Go Explore
Though I only photographed from one location that evening, there are numerous spots along that part of the South West Coast Path to shoot from. It's well worth getting there a little early just to have a wander and take in the location. No matter what you shoot with or what you like to photograph you should find something inspiring. It might even be the wondering goats or the cricketers playing a match on the valley cricket field!
So have you been to the Valley of the Rocks? Did the video and images give you the inspiration to visit this stunning location? Let me know in the comments below.
And before you go....

Oh, and one last thing. I'm very happy to be in Feedspots Top 75 Landscape Photography blogs. Why not check out out the other 74! There are some top names in there so it's well worth checking out.

Trevose Head - 5 Minute Photo Adventure
In this blog post I take you on another 5 Minute Photo Adventure. This time I'm off to Trevose Head on the north Cornish coast. This amazing location has a lot to offer the landscape photographer. Read the blog and watch the video to see why.
As a landscape photographer I'm extremely lucky to live in the south west of the UK. Even if I didn't have Exmoor and Dartmoor, I would still have over 630 miles of the South West Coast Path to photograph. With so much to choose from I couldn't possibly pick a favourite location, but when it comes to Trevose Head, I'd have to say it's up there in my top 10 Cornish coastal locations to photograph.
So what makes Trevose Head so special? Well, for me it's the drama of the location. It's got the lighthouse perched on a cliff edge, the rocky inlet where the waves come crashing in and it makes for a great sunset location just about all year round. And did I mention you can drive within 200m of the best spot to shoot from?
On the downside it is very exposed and getting blasted by rain, wind and sea spray isn't to be unexpected, so sometimes it's nice to have the car nearby after you've been battered by the elements!
If this sounds like the kind of location you might want to photograph, why not check out my 5 Minute Photo Adventure video below:
Padstow Lifeboat Station
As I showed in the video, the lighthouse isn't the only spot to photograph at Trevose Head. Located not farm from the lighthouse is Padstow Lifeboat station. As you can see on the map below both locations are close together and so if you have time it's worth visiting.
This was my first time visiting the lifeboat station. I remembered it after looking at the area on my custom Google Map while I was wondering about. It's not that easy to photograph if you want to include the surrounding elements such as the stairs down to the entrance, but with the right lens and a bit of moving about, a good image can be made.
Nikon D750, Nikkor 16-35mm f/4 at 22mm, ISO 100, 30 seconds, f/13, Lee Filters circular polariser, Little Stopper and ND grad.
Trevose Head Lighthouse
Though the forecast for Trevose Head was to be for relatively clear skies, as you can see from my first image this wasn't exactly the case.
Nikon D750, Nikkor 16-35 f/4 at 19mm, ISO 100, 2 seconds, f/11, Lee Filters circular polariser, 3 stop ND and ND grad.
While I do like this image what I was really hoping for was for some golden light from the setting sun (off to the left) to illuminate the rock faces. This would have really lifted the tone of the image. However, sometimes you just have to work with the light you have so I decided to adopt a slightly different style.
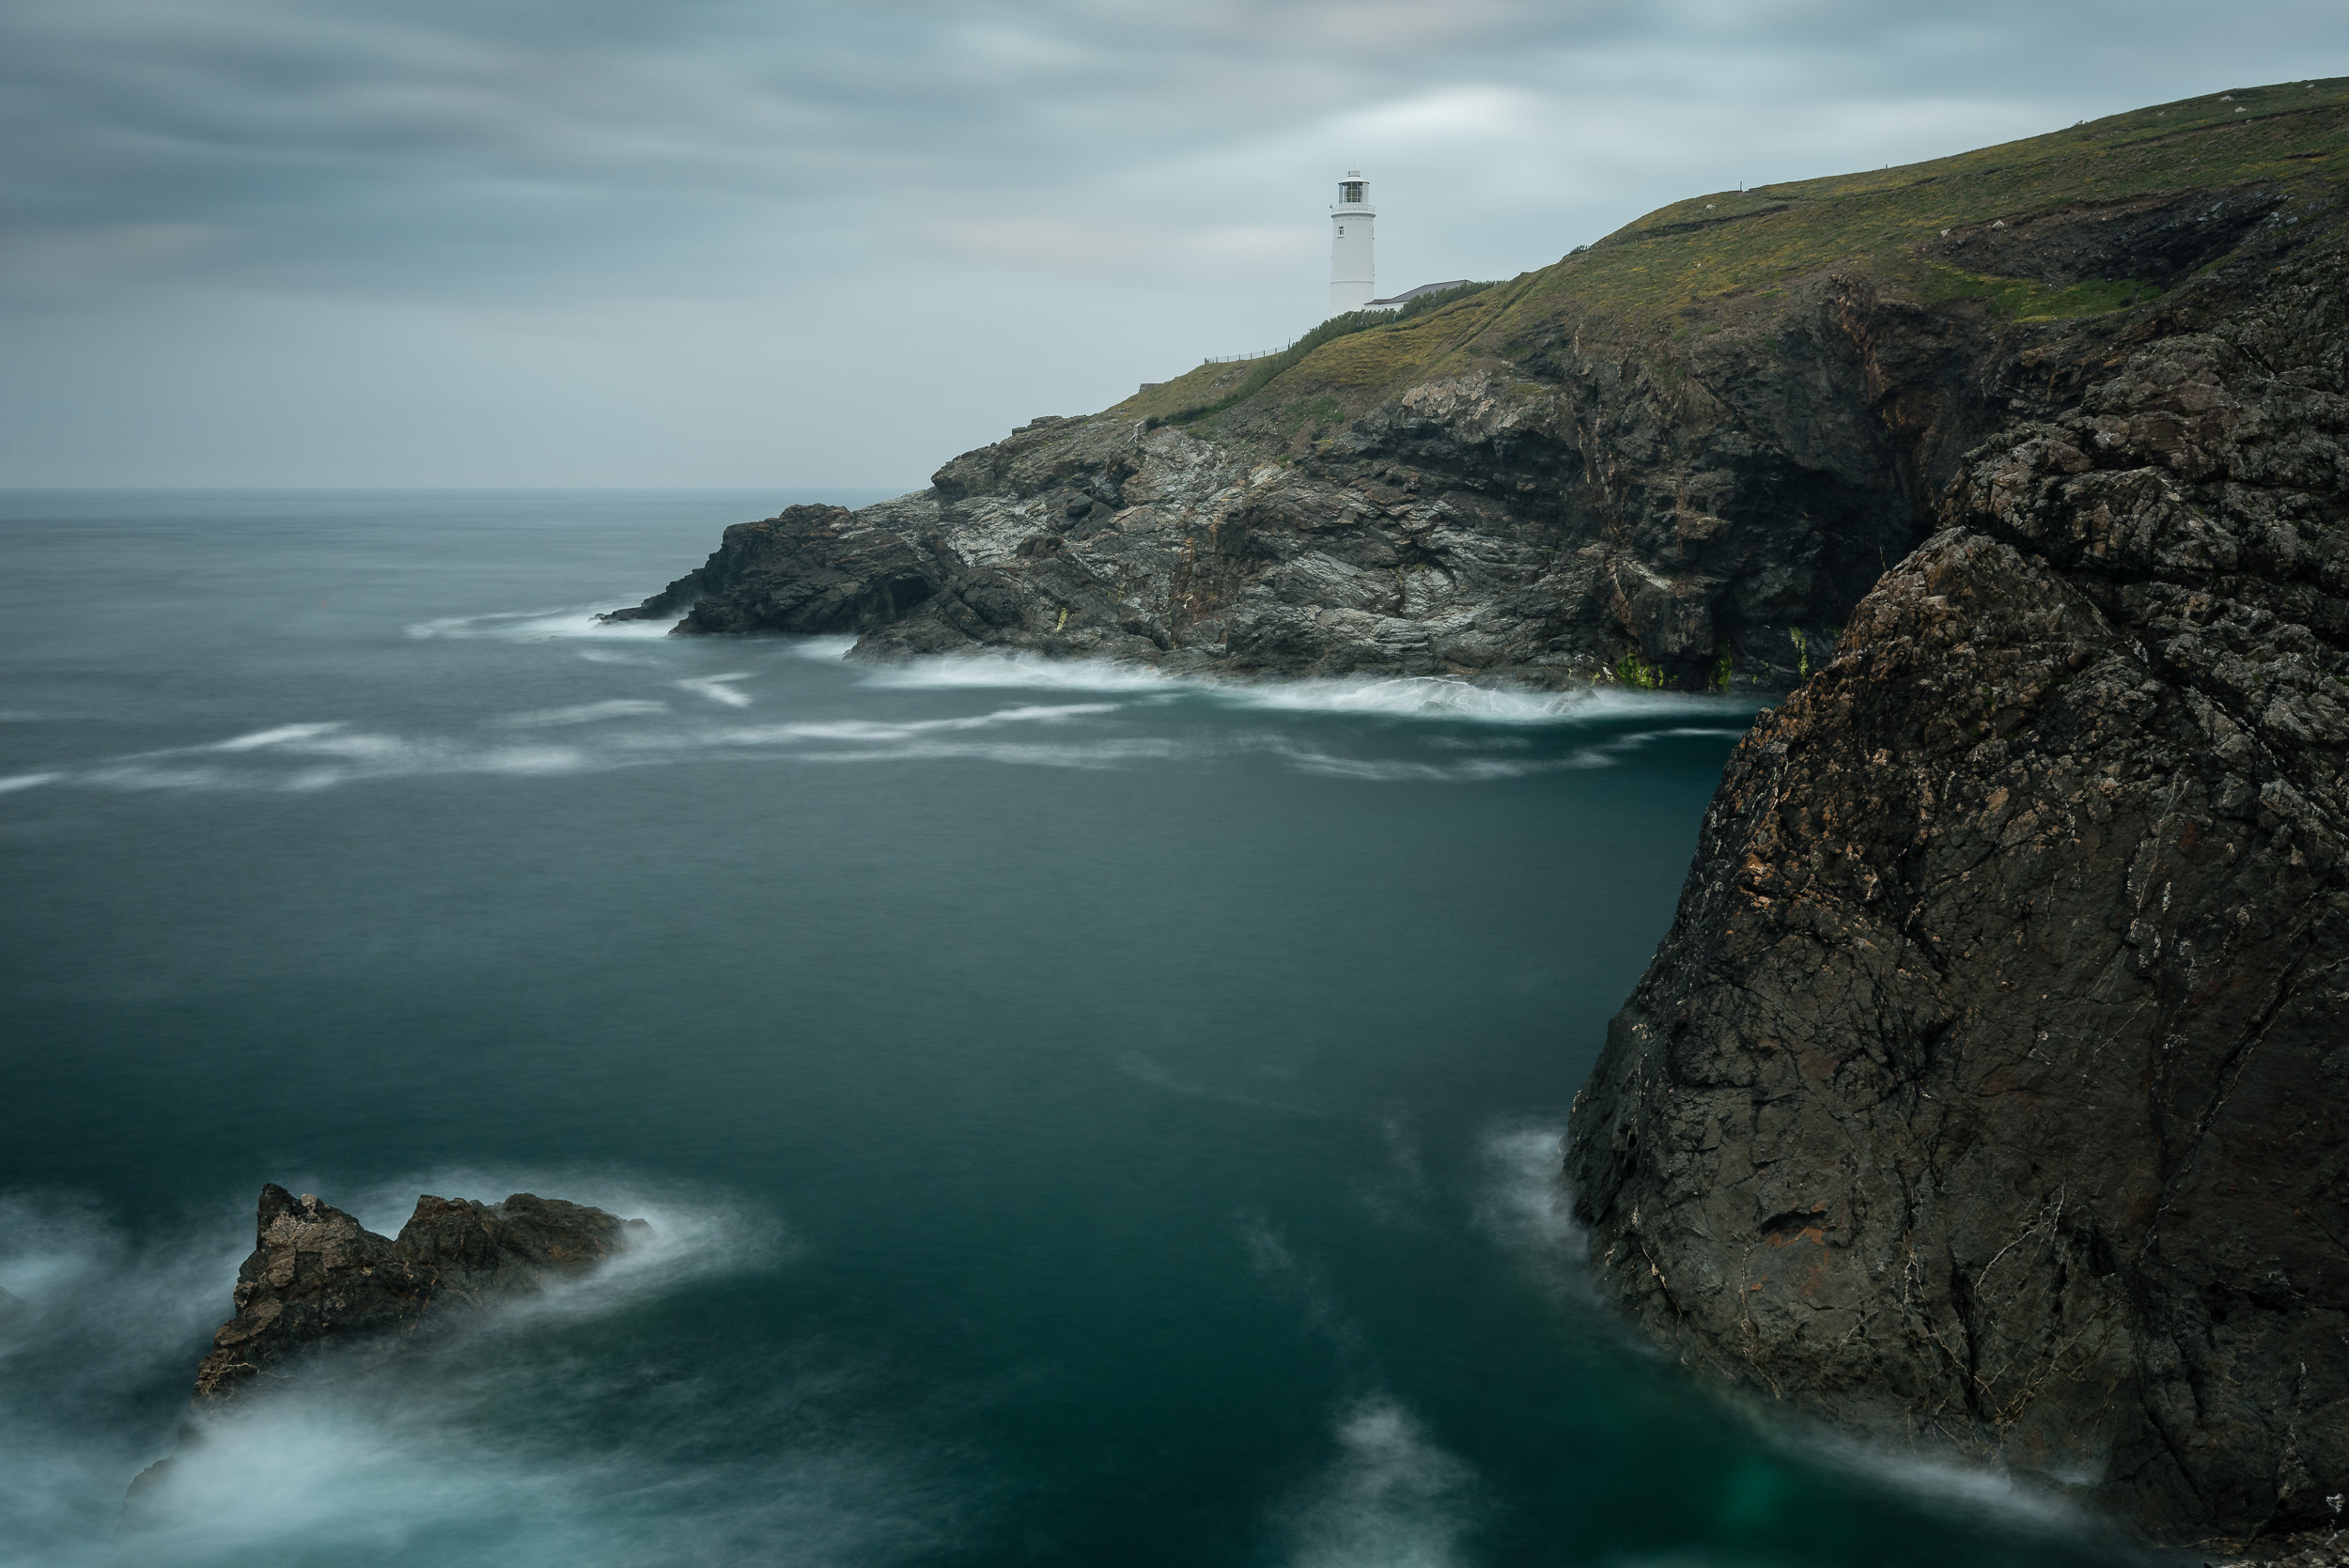
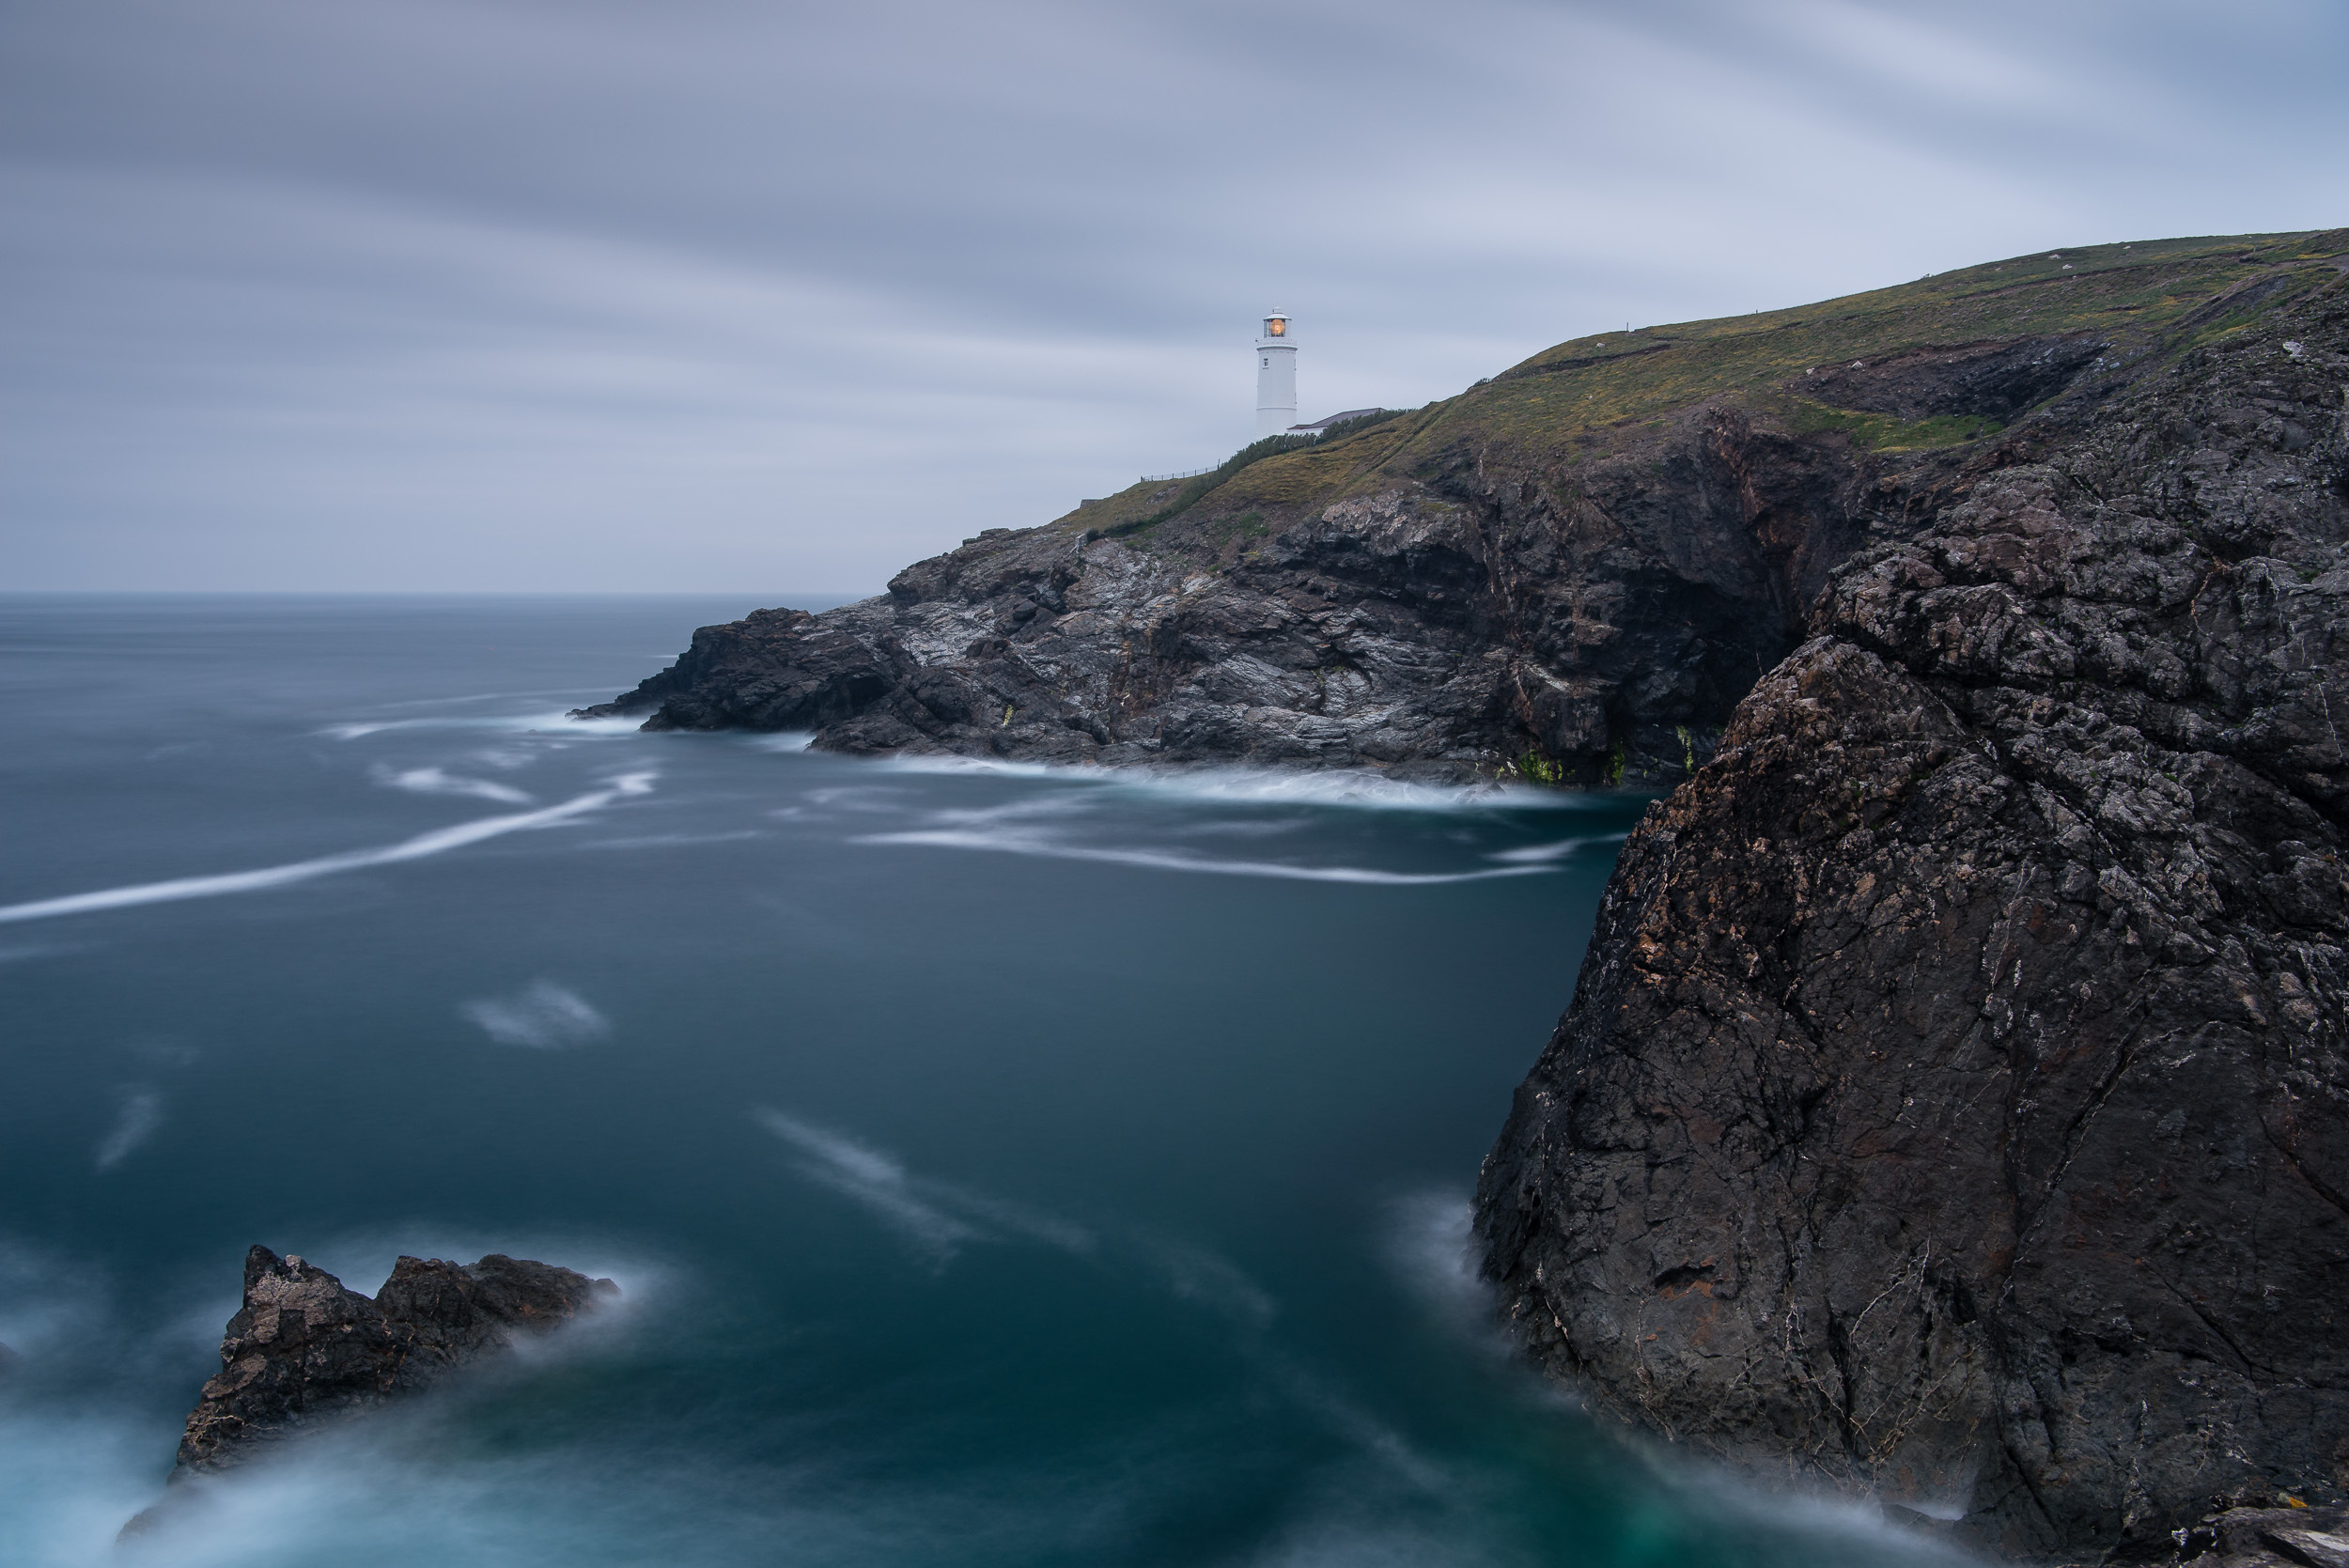
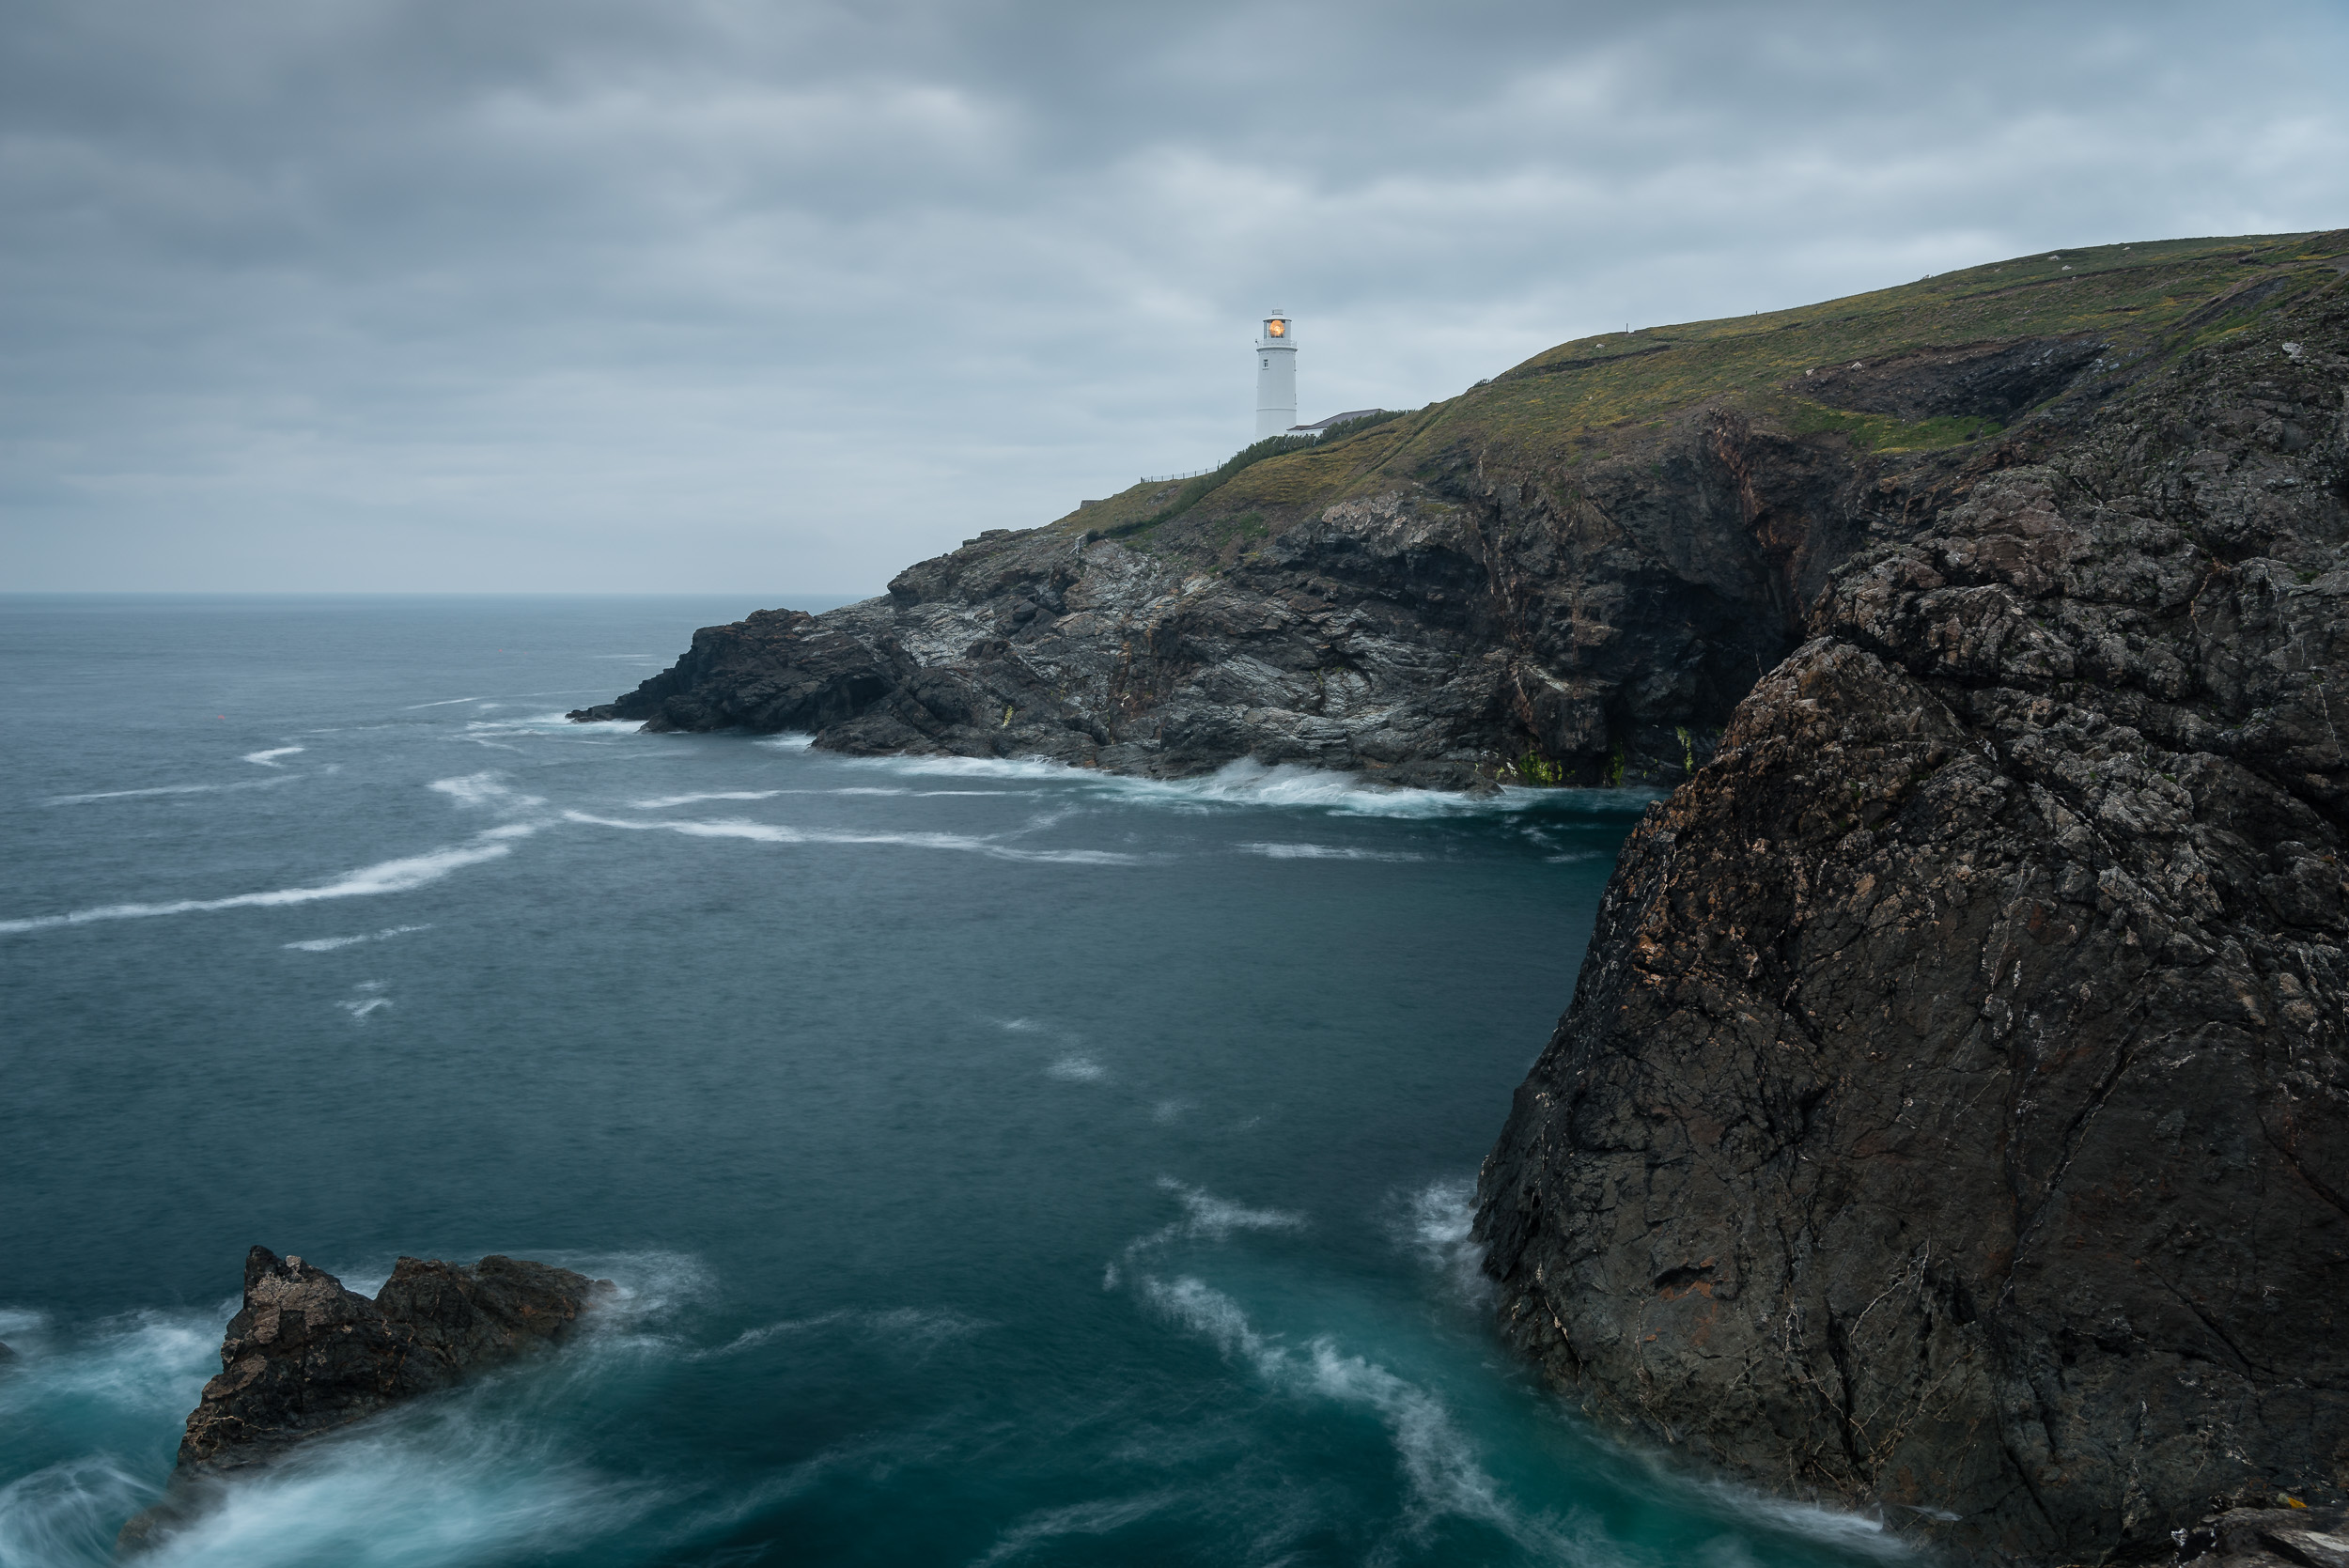
By embracing the grey and opting for longer exposures I was able to create a set of darker and moodier images. I also varied the exposure times by choosing different ND filters. The longer exposures allowed the crashing waves to paint white lines and create shapes on the image.
I'll be back...
Though I didn't manage to create the image I had planned for I still came away with some images that I'm very happy with. I also got a chance to to photograph Padstow Lifeboat station, so it was good to get two locations for the price of one! One thing is for sure, I'll be heading back to Trevose Head again in the near future.
So have you been inspired to visit Trevose Head? Have you photographed this location before? Let me know in the comments below.

Trying Something New at Daymark Tower
It's always good to expand your photographic horizons and so on a recent visit to Daymark Tower in Devon I decided to try some new techniques and styles. Read on to see how I got on!
Every Visit is Unique
Over the last few weeks I have been finding myself to a number of locations where I have previously taken some of my favourite images. There is of course nothing wrong with this as I'm a firm believer that even if a 1000 people have already placed their tripod legs on a particular spot, there are still new and exciting images to be had on every visit.
Most recently I wrote about my visit to Venford Falls in an effort to improve on a photograph I took there last year. Shortly after that I returned to the same location and was pleasantly surprised to discover a little more about that location by photographing Venford Brook.
The point I'm trying to make is that even if a location has been well photographed either by yourself or any other photographer, each visit to a location is unique and therefore you can get a unique image.
Returning to Daymark
I recently visited Daymark Tower to shoot on of my 5 Minute Photo Adventure videos. Though I didn't manage to get any portfolio class images from that particular shoot I knew that if I returned a few weeks later when the crops had grown a little more I could try again.
I had a number of goals for a return visit. Firstly I wanted to see if I could improve on one of my portfollio images from last year.
Could I improve on this image from last year?
The image above that I took last year benefited greatly from good light. The setting sun illuminated the tower nicely and added a warm glow to the crops swaying gently the breeze. It's rare that the image you have in your head before you go to a location is actually the image you get.
So what was I hoping to improve on? Well, to be honest, I'm not exactly sure. I think the main element I would like to have seen improvement in is the sky. A beautiful Devon sunset sky with pink or red clouds would have been lovely.
Unfortunately for this particular visit though, the sun disappeared early behind a bank of distant cloud so I never really got a chance to make the most of the golden hour.
Nikon D750, Nikkor 24-70mm f/2.8 @ 44mm, ISO 100, 1/60 second, f/13
Fly Away Drone
I mentioned earlier that I had a number of goals I wanted to achieve on this visit. Another goal was to take some aerial photographs of the tower and crops using my DJ Mavic Pro. This didn't go as planned! Being a coastal location there is always a little wind and though it was breezy on this particular evening, I thought it was within the limits of the drone.
Shortly after take off I soon realised that the wind was a bit stronger than I had thought. Despite turning around my drone and applying full power it was slowly drifting away from me. I had a fly away drone on my hands! As a private pilot I've learned not panic in these situations, so knowing that the wind would probably be weaker lower down I reduced to height of my drone to just above the crops.
The wind was indeed weaker lower down and I was able to return the drone back to its starting point. The aerial photos would have to wait for another day!
Something New
My final goal was to try and take some intimate landscape images. The crops in the field around Daymark Tower look beautiful as they gently move in the breeze. However, could I translate what I saw into a good image?


So while I'm reasonably happy with the result, I still have a lot of work to do to create compelling images in this style. This isn't a style of landscape photography I'm used to and I need to train my photographic eye a little more for this type of photography. However, it's always good to try something new and with a little more practice who knows what I can produce in the future.
Have you been to Daymark Tower? Do you photograph intimate landscapes? Have you had your drone fly away from you? Let me know in the comments below.

Summer Solstice in Devon
In this blog post, I share my Summer Solstice Landscape Photography in Devon video. Join me as I head to two classic Devon locations, Dawlish Warren beach and Dartmoor, and take images either end of the longest day.
Summer Solstice Plan
I'm always thinking about what my next YouTube video will be about. I keep all these ideas in a notebook so that when I'm looking for a fresh idea I have some inspiration. I was looking through the list the other day and I spotted something that I had added some time ago. The idea was relatively straightforward. On the day of the summer solstice, I would shoot one dawn photo and one sunset photo.
With sunrise on the day being around 5 am I needed to go somewhere local. I like to get to a location 1 hour before actual sunrise so wherever I was going to be I would need to be there for 4 am. Now, I like getting up in the morning as much as the next landscape photographer, but even I was going to struggle to get up that early in the morning!
So I looked at my custom Google locations map and spotted a favourite local location, Dawlish Warren beach. Sure I would still need to get up at 3:15 am, but the weather forecast was good and the sun would rise from a direction that would give me some good light (hopefully).
For the sunset location, I would also need to go somewhere local. I knew that when I returned from Dawlish Warren beach that I would still have the school run to do, then a full day of work, and then I had some family commitments. In all likelihood, it would be nearly 8 pm before I headed out. Even with sunset being around 9:30 pm, that didn't leave me a lot of time to get somewhere. To be honest, even if I was able to get out earlier I didn't want to have a big drive to do when I'd already been up since 3:15 am!
I'm really fortunate that I live near Dartmoor so this seemed like a great place to go. I was thinking about going to Bowerman's Nose, but as I had just recently shot a video there, I decided that a good option would be Emsworthy Tor. Though Dartmoor would be busy in the evening with people watching the summer solstice sunset, Emsworthy Tor is a little bit further off the beaten track so should be a little quieter. It's a classic Dartmoor location and if I were to get some good evening light I could be onto a winner.
So how did I get on? Let's take a look at the video:
As I said in the video you can take a look at the images (plus a couple of bonus ones) in a bit more detail below.
Dawlish Warren
5:12 am, Nikon D750, Nikkor 16-35 f/4 @ 30mm, ISO 100, 4 seconds, f/13, Lee Filters Circular Polariser.
5:41 am, Nikon D750, Nikkor 16-35 f/4 @ 19mm, ISO 100, 30 seconds, f/13, Lee Filters Circular Polariser and Little Stopper.
Emsworth Tor
9:14 pm, Nikon D750, Nikkor 16-35 f/4 @ 24mm, ISO 100, 0.8 seconds, f/13, Lee Filters Circular Polariser.
9:22 pm, Nikon D750, Nikkor 16-35 f/4 @ 18mm, ISO 100, 1 second, f/13, Lee Filters Circular Polariser.
I hope you enjoyed watching the video and looking at the images. Did you go out for Summer Solstice to do some photography? What's the earliest you've ever got up in the morning to take a photo? What's the latest time you've seen the sunset? Let me know in the comments below.

Bowerman's Nose - 5 Minute Photo Adventure
In this blog post, I show you my 5 Minute Photo Adventure video of Bowerman's Nose on Dartmoor. I also discuss the image I took there and how it compares to the previous images I took of this unique location.
I have a bit of a long history with Bowerman's Nose on Dartmoor. I last wrote about this location back in October 2016 in a post entitled Perseverance - Photographing Bowerman's Nose. In that post, I talked about my desire to capture an image that I felt did this unique location justice. On paper, it shouldn't be too difficult to shoot but it's a location that needs good light. I've come close a couple of times and last time I got pretty close to what I was looking for.
Probably my best image of Bowerman's Nose.
But there's more to this location than just my desire to create an image that meets my vision. Simply put I like shooting there and I think you would to. To help inspire you I thought I would create one of my 5 Minute Photo Adventure videos.
You can see the Bowerman's Nose video right here:
Near Epic Conditions
As you'll have seen in the video, I had near epic conditions. It was looking like I wasn't going to get any good light when all of a sudden the sun dropped below a cloud and bathed the moor in a bright orange light. It was spectacular.
If only the light had reached Bowerman's Nose... Nikon D750, Nikon 24-70mm f/2.8 @ 35mm, ISO 800, 1/50 second, f/16, Lee Filters ND 0.9 soft edge grad.
What that image is really missing is light on the side of Bowerman's Nose. The light being scattered on the trees in the background is lovely and if it had just reached where I was it could have lifted the image from OK to spectacular. Just take a look at the image at the top of this blog post to see what a difference good light can make to Bowerman's Nose.
I've seen Bowerman's Nose in all sorts of light, and this last visit to shoot my video has actually inspired me even more to visit it again. I know this location has all sorts of potential and I hope you have seen that to. As I said in the video, Dartmoor is one of the best places to come as a landscape photographer and if haven't already been hopefully this video will give you that extra nudge.
Have you photographed Bowerman's Nose? Have you experience near epic conditions? Let me know in the comments below.

Venford Brook
After a heavy rainfall, I decided to head off to Venford Falls again to see if I can't improve on the images from my last visit. I also discover that there is plenty more to photograph around Venford Falls as I go exploring downstream and take some intimate landscapes.
It was only a few weeks ago that I wrote about a visit to Venford Falls. In the blog post I told you how I attempted to improve on an image of the falls that was in my portfolio. Though the area around the falls was lush and green, the lack of rain had made it look a bit dry. So while the image was good, and a little different from the image of last year, I wasn't sure it was any better.
Back to the Falls...Again
If you read that blog post and saw the images you may have thought there would be little point in returning so soon and at the same time of year. However, not only did I want to take an image of the falls after a rainfall, but I also wanted to explore the area around the falls a bit more.
Fortunately, as is the way in the UK, I didn't really have to wait to long for the next downpour of rain and soon I was heading back to Venford Falls. With the ground being a bit wetter the walk down the steep hillside tot the falls was a little treacherous, but I was happy to see the green on the rocks was looking, well, rather moist!


So looking at the 3 images it's still hard to say which is better. My most recent image improves the image from the 9th of May thanks to the rainfall, but I'm not sure it's better than the image from 2016. I prefer the size and placement of the foreground rock in the most recent image, but I still prefer the look and clarity of the pool from the 2016 image. Honestly, I still think there is room for improvement so I may just have to go back and try again!
Just before I move on to Venford Brook, there was another shot that I wanted to take on this visit.
Nikon D750, Nikon 16-35mm f/4 @ 20mm, ISO 100, 2 seconds, f/16, Lee Filters Circular Polariser.
As you can see this is a much wider angle of the falls adding some trees and sky to the top of the composition. I'm not sure these elements add too much to the image, but they do provide a better sense of scale and place. What do you think?
Venford Brook
With my waterfall shots in the bag, I decided that I was going to follow the brook downstream to see if there was more to shoot than just the falls. I was happy to find that I didn't have to wonder to far to find something interesting.
Nikon D750, Nikon 16-35mm f/4 @ 30mm, ISO 400, 0.6 seconds, f/16, Lee Filters Circular Polariser.
The brook had carved an interesting flow down the moss covered rocks and I thought it might make for an interesting intimate landscape image. This kind of landscape photography isn't normally something I go for. I'm normally a big vista type of photographer, but sometimes you see something and you know you need to make an image from it.
Nikon D750, Nikon 16-35mm f/4 @ 31mm, ISO 400, 0.5 seconds, f/16, Lee Filters Circular Polariser.
If you've read the shooting details of those images you will have noticed that I shot the images of the brook using ISO 400. With this type of shot it's easy just to extend the exposure as long as you can but with water in rivers and streams, 0.5 seconds is just about right. So raising my ISO shortened my exposure time without any noticeable loss of image quality.
I was glad that I'd spent the time doing a bit of exploring around Venford. While the falls are very attractive and make for great photographs, it's important not to get too attached to a specific location, particularly if there are good images to be had just downstream!
So what did you think of the images of the waterfalls? Do you have a favourite? Do you take intimate landscapes? Let me know in the comments.

Plan B Photography
In my blog this week I talk about the importance of having a plan B. On recent visits to Hartland Quay and Trevose Head I ended up shooting something different from what I had originally planned. I might have come away with nothing if I hadn't had a plan B!
Always Have a Plan B
My recent trip to Porth Nanven in Corwnall was a very successful one and I managed to capture a new image for my portfolio. The weather gods had been kind to me that evening and the conditions were ideal for that location. With the weather looking reasonably settled for the next couple of weeks I hoped I could build on that success and get a few more portfolio shots at some locations I had been itching to get back to.
As is always the way with landscape photography though, things didn't go exactly to plan.
Trevose Head
My first and until recently, my only visit to Trevose Head, was a very successful one. On my previous visit had managed to get a number of great images of the the lighthouse in a variety of different lighting conditions using varying exposure lengths. It was one of those trips out with the camera where things just seem to go right for you.
However, even though I had some quality images from that trip, I still wanted to go back and try and get an even better image of the lighthouse and cliffs in even better, more dramatic light.
When I arrive at Trevose Head on my most recent visit things were looking good except that the wind was howling! This is hardly a surprise as Stincking Cove (where I was going to shoot from) isn't exactly sheltered so a bit of wind is to be expected. Not to be deterred though I got setup and got shooting.
It soon became obvious though that the wind was much stronger than my last visit. Even with my heavy duty tripod, and a relatively short exposure time, the camera was getting a battering from the wind. It was looking unlikely that I would get a stable image. There was no chance that I would be getting the Little Stopper out! This was a shame as the light was looking good. Time for plan B!
On my walk over to Stincking Cove I had noticed there was some thrift flowering on the cliff edge. It was a lot more sheltered over there so I decided to head back and shoot something different. I hadn't planned to go to Trevose Head and shoot the thrift but persevering with wind wasn't going to get me anywhere.
While the shot below might not be one for the portfolio, it's a pleasing image and I'm glad that I took it rather than I just went home feeling glum that I hadn't taken any decent photographs.
Nikon D750, Nikkor 16-35mm f/4 @ 19mm, f/16, 1/13 sec., ISO 100, Lee Filters Circular Polariser and ND Grad.
Hartland Quay
A very similar thing happened to me when I went to Hartland Quay about a week later. This time it was almost the reverse though. I had gone to Hartland Quay to photograph the thrift only to change my mind and shoot Screda Point. Unlike my trip to Trevose Head though, I was at least able to capture an image of the scene that I had originally thought about.
The image below of thrift and the bay at Screda Point is pleasing enough but forecasted cloud coverage wasn't there and so I feel the sky lacks interest. The colour and light are there, but it's just missing that something extra in the sky. Realising that things weren't going to improve, I decided to go for plan B!
Nikon D750, Nikkor 16-35 f/4 @ 18mm, f/14, 0.5 sec, ISO 100, Lee Filters Circular Polariser and ND Grad.
For my plan B image, I decided to put on my 24-70mm f/2.8 lens and go in tighter to focus more on the dramatic rocks of Screda Point. Though the sky still lacks the cloud coverage I would have ideally liked, I do prefer this image over my image of the thrift. I like shooting long exposures on the coast so maybe I'm slightly biased towards this image, but I like the lines of the rocks on the beach, the pastel colours of the sky and the simplicity of the image.
Unlike my trip to Trevose Head though, I probably would have left Hartland Quay happy with the photo of the thrift. However, I'm still glad I had a plan B!
So do you always have a plan B? Do you decide before you go somehwere or wing when you get there? Let me know in the comments below.

Venford Falls
In my blog this week I tell about a recent trip to Venford Falls where I hoped to create an even better version of the image that's in my portfolio. Would an additional 12 months of Photography experience help me achieve this goal?
A Favourite Location
There's no doubt in my mind that Venford Falls is one of my favourite locations. Ever since I saw an image of it over on Flickr, I knew I had to shoot it. Well, as soon as I managed to find it that was! I liked it so much I featured it my video My 5 Favourite Landscape Photography Locations in Devon.
History has taught me that Venford Falls is best shot around May time when the foliage is green and lush. So when I started planning my shoots for May, Venford Falls was on my list of must do locations for the month.
Not Enough Water
The great thing about Venford Falls is that it is feed by a stream that is fed by Venford Reservoir. This means that it almost always has a constant flow of water and together with its sheltered location it makes it an ideal location to shoot anytime of the day. However, upon my arrival at Venford Falls one sunny May evening, one thing became immediately apparent. There was a lack of water!
It wasn't a lack in water in the falls themselves but a lack in moisture on the face of the falls. Between to the waterfall flows themselves there is a rock wall which is typically covered in moss and other green plants. Due to the recent dry spell all that green was dry as a bone. If you hadn't visited Venford Falls before you might not have noticed, but it stood out for me. So while everything was green, it didn't have that lush look I was after.
Making a Better Shot
Aside from being one of favourite locations, I've also produced one of my favourite images there (which you can see on my portfolio page). One of my goals with this trip though was to try and make an even better image. This looked unlikely given the lack of moisture in the surrounding ground, but maybe I could work the composition to see I could minimise that area in the frame.
So did I make a better image? If I'm honest, no. It's a very similar image in terms of composition but when I compare the detail that dry area in the image still stands out. The image that is currently in my portfolio is better. It's not perfect though, so I will be heading back to Venford Falls as soon as it has rained!
I also took some test shots of some wider compositions. I didn't connect with them when looking at them on the back of the camera, but now that I've seen them on the computer I'm changing my mind. I've always like the tight shots of the waterfalls as the sky rarely adds anything to the image, but I think they are worth revisiting if I'm honest. I can't wait to get back to Venford Falls!
So have you been to Venford Falls? Did you shoot wide or get in closer? Have you ever improved on one of your favourite shots? Let me know in the comments below.

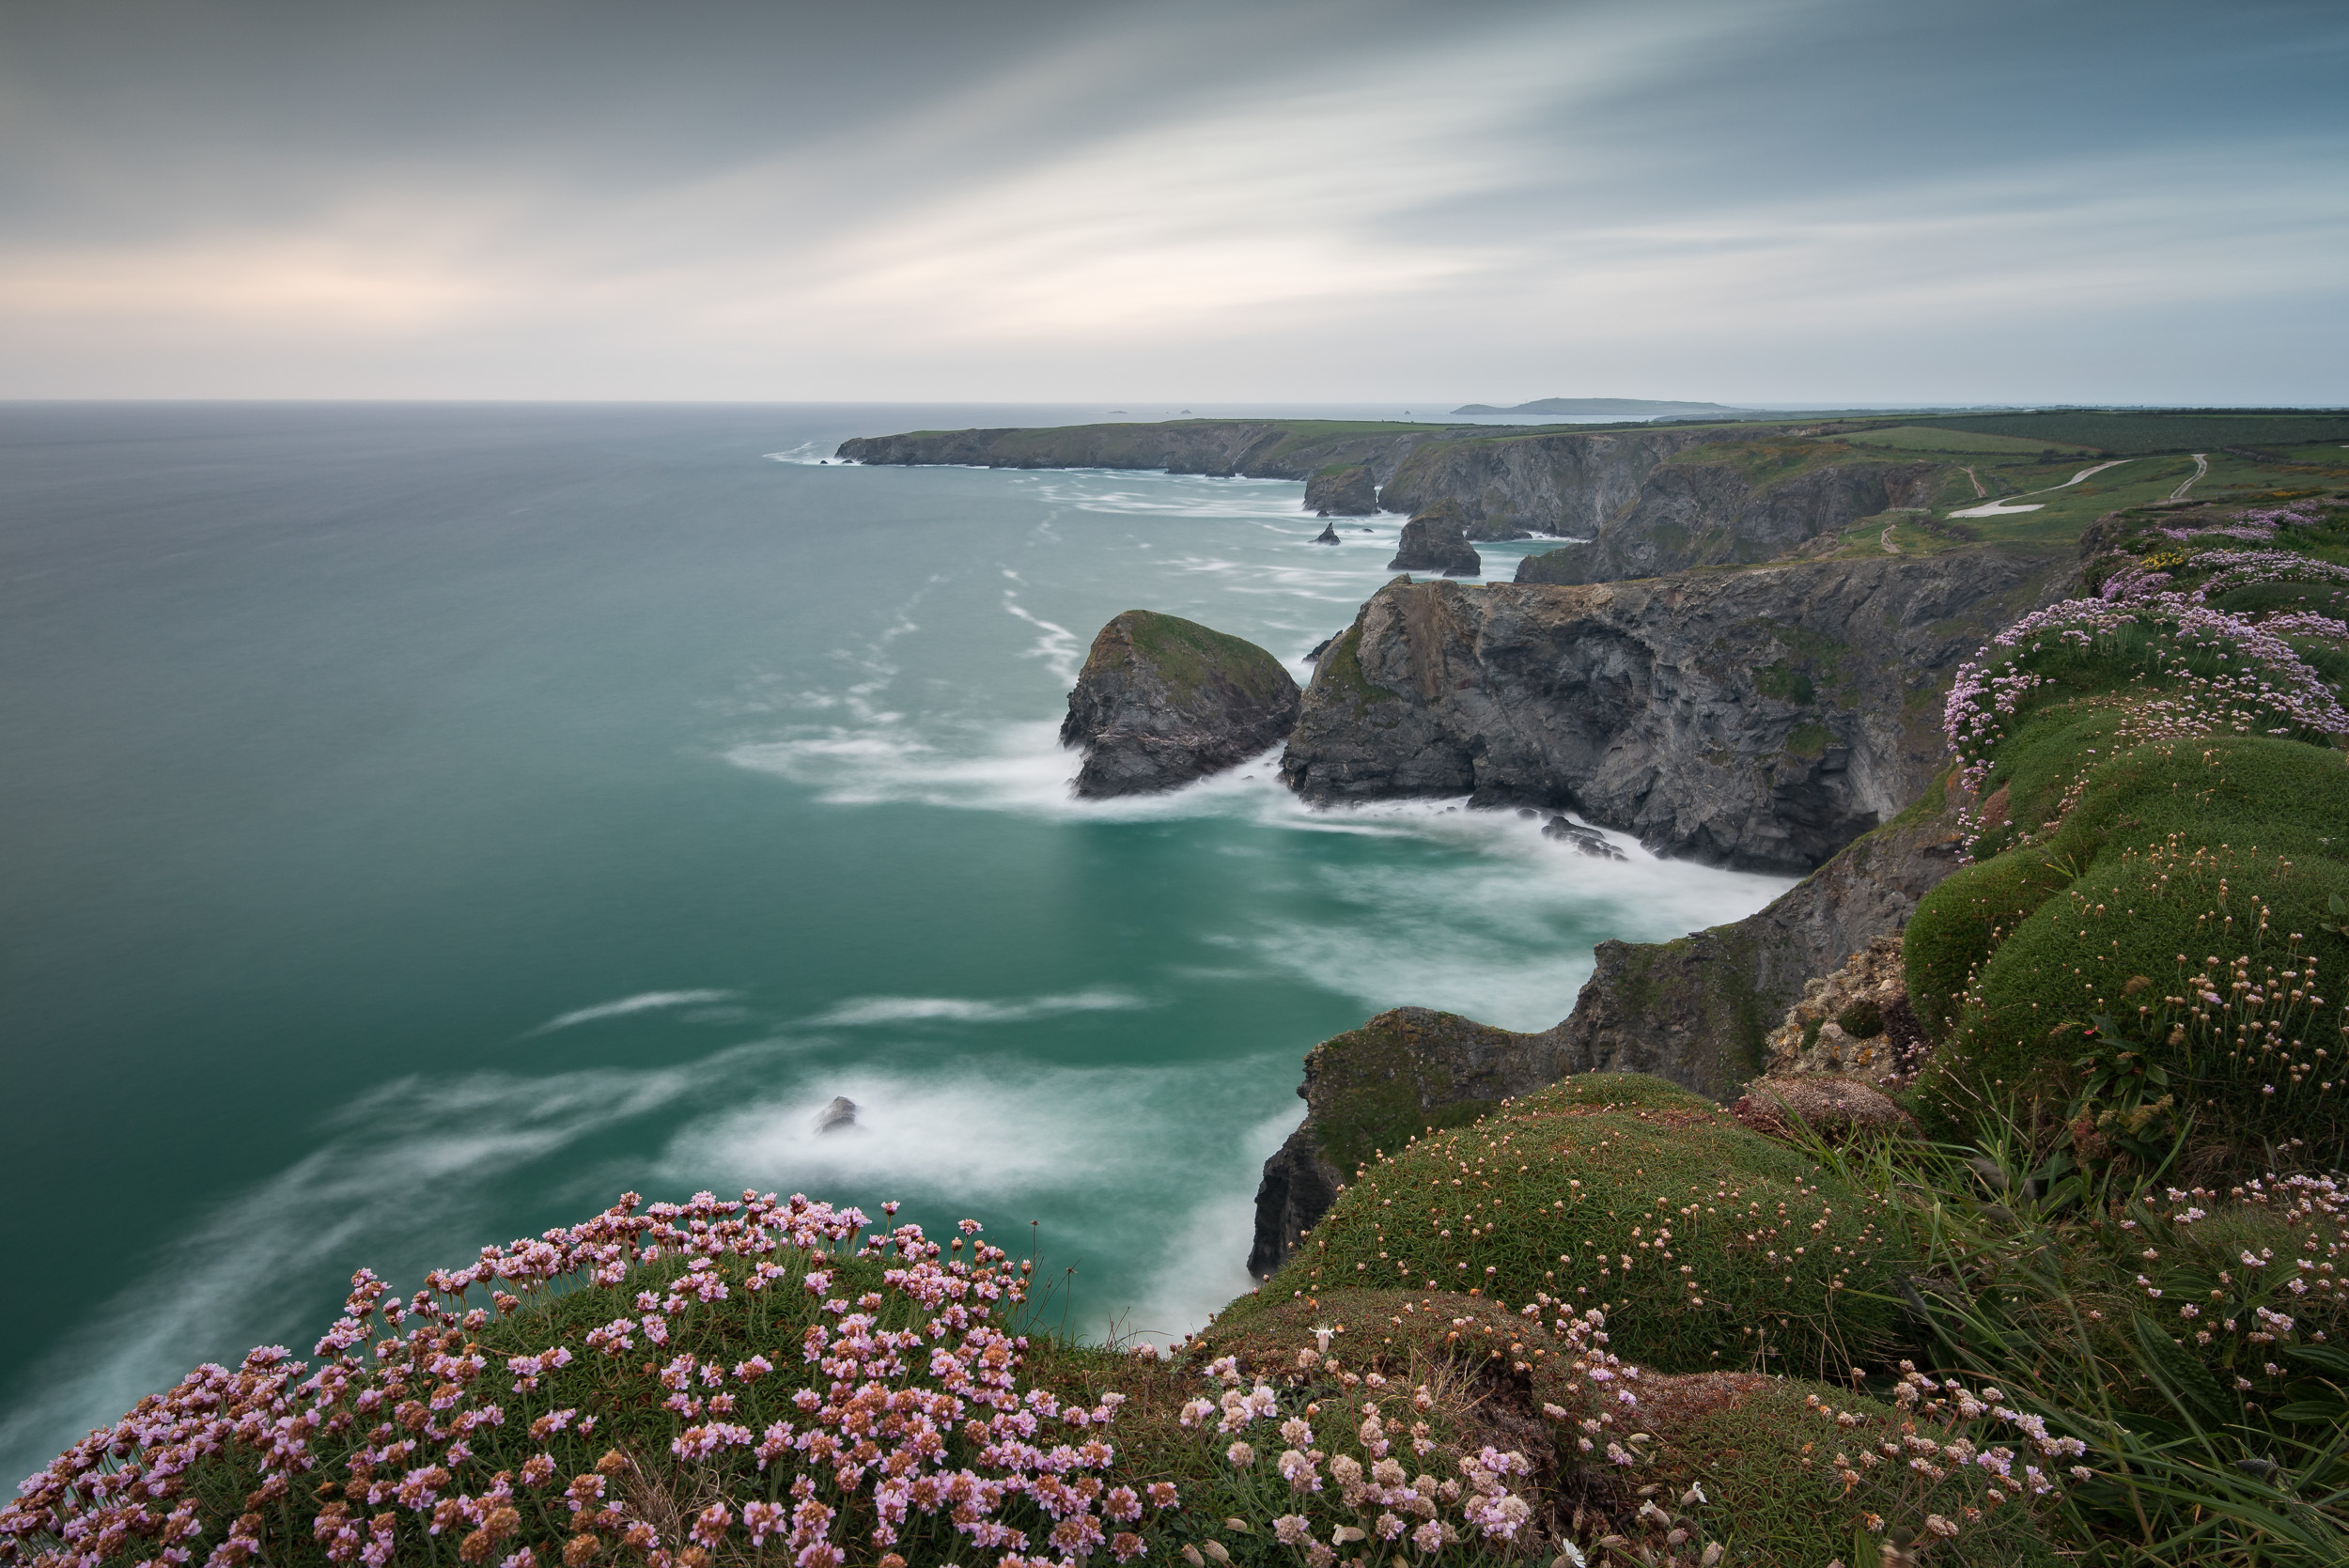
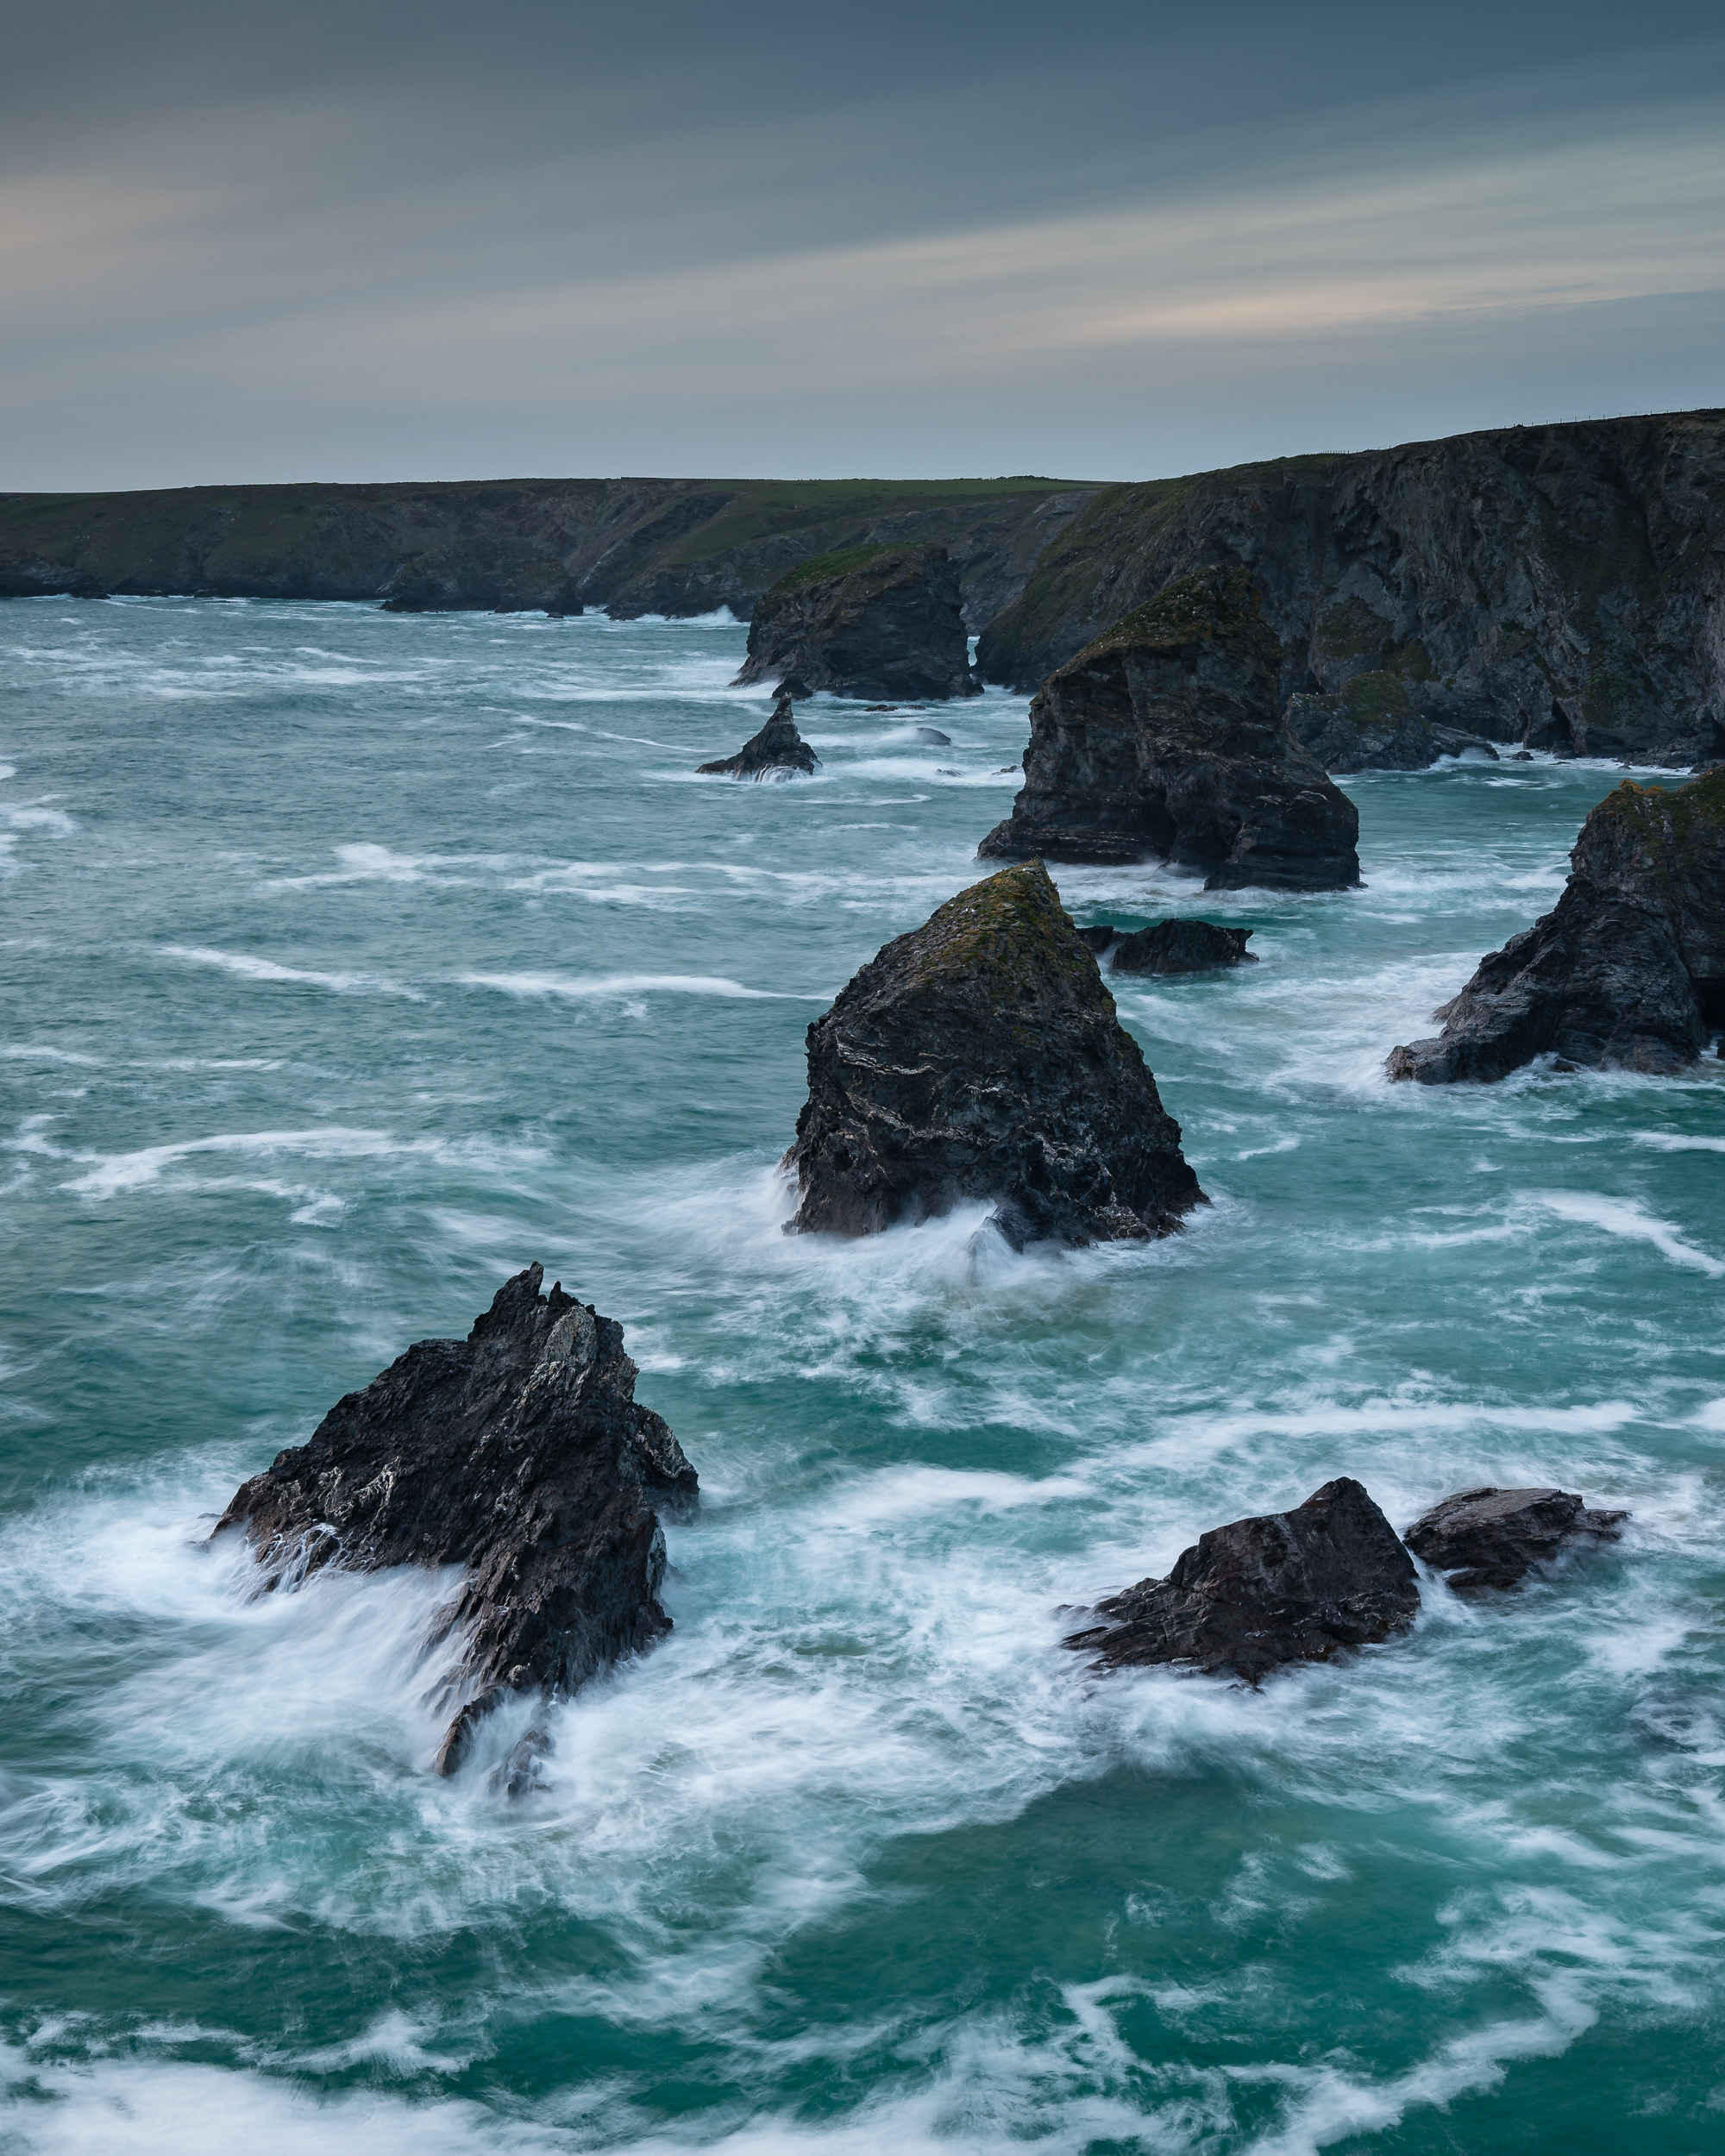
Bedruthan Steps Photo Adventure
In the blog this week I share with you the story of my latest trip to Bedruthan Steps to photograph the coastal thrift. Not only will you see the images from that trip, but I also share with you my top tips for photographing Bedruthan Steps. And if that wasn't enough for you, I also share with you my latest 5 minute photo adventure video!
Why Shoot Bedruthan Steps
I have a great many locations on my custom Google map, many of which can be shot at any time of year. There are a few however that are best shot at particular times of the year. Bedruthan Steps on the north Cornish coast is one such location. It has plenty to offer the photographer with golden sand beaches (at low tide) and miles of dramatic Cornish coastline.
It's spring time though when Bedruthan Steps comes to life. Like many areas along the coast, springtime brings on the flowering of the thrift, a beautiful pink flower that likes to cling to the side of the coastal cliffs. If you can find a nice clump of thrift and you are lucky enough to get some great morning or evening light, you'll have everything you need to produce an amazing image.
While there a number of locations to shoot the thrift in Cornwall, my favourite place to shoot them is at Bedruthan Steps. There is nothing quite like seeing the thrift flowering all along those stunning coastal cliffs.
The Clock is Ticking
The thrift flowers in spring but it may only be in its prime for a couple of weeks. This unfortunately isn't exactly the same time every year so knowing when to go isn't easy. Bedruthan Steps is a 1 hr 40 minute drive so I want to be reasonably assured of good conditions if I go. I would also need to the good conditions to match up with a free evening for photography!
However, time was ticking for me. I had started to see some spectacular shots of the thrift at Bedruthan Steps on Instagram so I was starting to panic that I was going to miss the best of the thrift this year. Luck had not been with me. When I had a free evening the weather was rubbish, and when the weather was forecast was good I didn't have free time. I was getting frustrated!
As mid May rolled round I came to the conclusion that I would have to go now or forget about for this year. So with a dubious Sunday evening forecast I decided to put caution to the wind and go for it regardless of the conditions.
A 5 Minute Photo Adventure
As I announced in my recent blog post for Daymark Tower, I've started a new series of videos that aim to give the viewer an introduction to a location and inspire them to photograph it. So for the 2nd of my 5 Minute Photo Adventure videos I've created this video of Bedruthan Steps which I filmed on my recent trip there:
I hope you enjoyed that video and that it has indeed inspired you to visit Bedruthan Steps. If you want to see the images from the video in a bit more detail you'll find them below.

So if that has inspired you to visit Bedruthan Steps, here are my 3 top tips to help you make the most of your visit:
Lenses - Take a wide angle lens for shooting the thrift, but also take a medium telephoto (like a 24-70mm) and shoot and isolate some of those rocky sea stacks.
Walk the Walk - Though there are a couple of great viewpoints just a short walk from the National Trust car park, you'll find so much more by walking along the coast path. So give yourself sometime to explore the area. The beach at Bedruthan Steps is also worth checking out, but only at low tide and you don't mind the steep descent.
Be Careful - It should go without saying, but do be careful on the cliffs, especially when photographing the thrift. It's all too easy to get very close to the edge in search of some nice thrift, and if it's windy up there you don't want to loose your balance.
Though I was keen to get to Bedruthan Steps to photograph the thrift, it is a location I will visit at anytime of year. The coast line is beautiful and spectacular there and given the right like it can make for some epic photographs.
So have you visit Bedruthan Steps? Have you photographed thrift before? Let me know in the comments below.

Beautiful Boscastle
In the blog this week I tell you about my most recent trip to Boscastle, show you the images I took, and share a few tips should you decide to visit this picturesque Cornish coastal village.In the blog this week I tell you about my most recent trip to Boscastle, show you the images I took, and share a few tips should you decide to visit this picturesque Cornish coastal village.
Classic Cornwall
Even if you aren't a photographer there is a lot to love about Boscastle. This picturesque little village in Cornwall is always busy with tourists enjoying the village, wondering along the harbour and ascending the surrounding hills for some fantastic views of the coastline. It has everything you would typically look for in a Cornish fishing village.
The things that make this village a popular tourist spot also make it popular for photographers. From happy mobile phone shooters to those who take their photography a little more seriously there is something for everyone to shoot.
The Photographers View
For me though, I go to shoot the harbour. The entrance of the harbour has dramatic cliffs on either side and the beautiful turquoise water snakes its way into the village to meet the River Valency. There are paths on both sides allowing you to walk the length of the harbour, but for those who have a little more puff in their lungs, there are paths leading up the hills. This is where I like to shoot from.
On this visit to Boscastle, I decided to take the path on the north side of the harbour. The view up there really allows the photographer to make the most of the S-shaped harbour entrance. With the sun setting in a westerly direction I was hoping that the last of the light would illuminate the hillside on the opposite bank with nice evening light. The weather forecast was looking good and with an incoming tide, I was optimistic.
Subtle Changes
After a short ascent to the top of Penally Hill, I just had to stop for a little while and admire the view. It's all too easy to get to your location, unpack your gear, and get shooting, but sometimes you need to pause and take in the scene. Though I have photographed this scene a couple of times now, each visit has been unique and I wanted to walk about a little to see how I might shoot it differently this time. I was hoping to see some Thrift flowering but unfortunately, there wasn't any. Well, you can have everything, can you?
After taking in the view I decided on two compositions, one vertical, one landscape. Both would include the S-shaped harbour entrance and the foreground rocky ledges, but I would shoot the landscape picture closer to sunset and include Meachard island in the composition.
Nikon D750, Nikkor 16-35mm f/4 @ 20mm, f/13, 30 secs, ISO 100, Lee Filters Circular Polariser, Lee Filters 0.6 ND Grad, 4:5 crop.
Though the light isn't fantastic in the above image I do like the composition. To get it right I had to make a number of minor adjustments. If I was too low down, the flow of the harbour water is cut off at the bottom of the frame and if I went too far to the left the curvy pier gets lost behind the foreground rocks. Too far to the right and the headland (Penally Point) on the north side is cut out of the frame and you lose the S shape of the harbour.
I also had a to take into account the foreground rocks which play an important part of leading the viewer out into the rest of the image. Overall, I had to make a lot of small tripod changes to get things just right.
Nikon D750, Nikkor 16-35mm f/4 @ 19mm, f/13, 56 secs, ISO 100, Lee Filters Circular Polariser, Lee Filters 0.0 ND Grad, 4:5 crop.
It was a similar story for the landscape orientation image above but as you can see I then had to take into account the placement of Meachard island. These aren't necessarily difficult compositions to get but you do need to pay attention to where everything is in the frame in order to get the most out this view.
Unfortunately, as you can see by the images, I didn't get the light I was looking for but I never come away from Boscastle feeling like it was a wasted trip. It's a lovely location and even in less than optimal weather conditions you can still get good images. It also makes you work at your composition skills as you try to get all the most interesting elements into your frame.
So if this blog has inspired you to visit Boscastle, here are my three top tips for shooting the view from Penally Hill.
Take a Polariser - The waters of the harbour are a beautiful turquoise colour and using a polariser will help you take the glare of the water and emphasise those colours.
Explore the Hill - There are a number of compositions to be had up on Penally Hill. Try shooting up into the harbour and village as well.
Thrift - If you can time your visit, try and go there when the Thrift is flowering. There isn't a lot of it up there, but adding it when it is can really add something to a composition.
If you want to see how I went about shooting these images, check out my latest 5 Minute Photo Adventure video on Boscastle.
I'm going to try and get back to Boscastle again soon. I've been a few times but never managed to truly capture in the way that I would like. I have a number of compositions I like from Penally Hill but so far I have always missed out on some great light. As with Colmer's Hill and Bowerman's Nose, I will just have to persevere until I get an image that meets my vision!
So have you photographed Boscastle before? What viewpoints do you shoot there? Let me know in the comments below.

Daymark Tower
In the blog this week I share with you my video on shooting Daymark Tower on the South Devon coast. You can also read my top 3 tips on shooting at this fantastic location.
A Brief History
I started this blog back August 2016 and shortly after that, I posted my first video over on my YouTube channel. When I made that first video it was just something I wanted to do and I didn't really have a plan for growing and developing a YouTube channel.
However, after posting a few more videos I realised that I enjoyed the process of creating video content so I decided to keep it going. I then started getting some positive feedback and my subscriber count grew. I've always been committed to my website and blog, but I now also wanted to develop and grow my YouTube channel. Soon I had a long list of video content that I wanted to shoot.
I remain committed to my blog which is my primary output channel for my landscape photography stories and as long as I'm out taking pictures I normally have something to write about. Creating video is a different ball game though and while I have some grand ideas and themes for my videos, producing them takes time, so the rate of delivery is going be slower than the blog.
A New Video Series
So this brings us nicely onto this video I've just made on shooting Daymark Tower. I decided to shoot it as I've just had the following image used in Outdoor Photography this month (issue 208, June 2017, page 55).
I thought it would be useful if I shot a brief video on the location so other photographers could get a better idea of what the location is like before they visited it. It's only a short video and unlike most of my other forthcoming videos it will be about one location only so it will be quicker to produce. So this video marks the start of what I will hope will be a series of short videos that introduce photographers to locations they may not have visited before. A little dose of inspiration!
My website and my blog will always be my home and I will continue to produce regular content there as I have done before, but by producing more frequent video content I hope to share my landscape photography journey with an even wider audience.
The Daymark Tower
So onto my first location in this new series, The Daymark Tower.
I hope you enjoyed that video and that it's given you a better idea of what it is like to shoot there. Here is the final image I captured there in a bit more detail:
Nikon D750, Nikkor 24-70 mm VR f/2.8 @ 45 mm, f/13, ISO 100, 1/15 sec, 4:5 crop.
Unfortunately I didn't get the light I was after to produce a really stunning shot but hopefully, you've seen enough from my images and the video that you too will be inspired to visit this great location. If you do decide to go, here are my top 3 tips for shooting the Daymark Tower:
Shadows - While shooting at sunset will work at most times of the year you will be casting a long shadow if it is behind you. So if you want to include the path in your composition, check which direction the sun is setting so your shadow isn't cast along the path. Something which I failed to check in my planning for this video!
Wide Angle Correction - If you are shooting with a wide angle lens be aware that the tower may be distorted in the frame. This is generally easy to correct in post production, but it normally involves the image being cropped. So be sure to include some extra room around your composition so you don't lose anything critical when the image is corrected and cropped. Though I spend 99% of post processing life in Lightroom, I found the wide angle correction feature in Photoshop to be much better at correcting the distortions in the tower.
Timing - My preferred time of year to shoot Daymark Tower is when the crops are approaching harvest. I shot the video a little early which still works very well, but by around, mid-May the crops swaying in a gentle breeze looks very nice indeed.
I hope you enjoyed reading about and looking at the Daymark Tower. Hopefully by the time you read this I will have already shot the video for the 2nd location. I should also be well on my way to shooting some of those bigger videos that I have planned. If you want to know when those videos are published you can of course subscribe to my YouTube channel or you can follow me on the Instagram, Twitter, Facebook, Flickr and Google Plus where I will also post notifications when new video content is posted up. The video and additional content will always be available here on the blog as well.
Do you include man-made elements in your landscape photography? Are there are any locations in the South West that you would like me to make a short video on? Let me know in the comments below.

Mentoring and Porth Nanven
I'm constantly striving to improve my skills as a landscape photographer and in this blog post I tell you about my latest meet up with my mentor and share with you the photographs I took while we were at Porth Nanven in Cornwall.
Long Overdue
I have previously written about how important it is to continue developing my skills as a photographer. Sometimes I do this by attending a workshop or by getting some 1-2-1 training. Though I had been on a workshop recently it had been nearly a year since I had a 1-2-1 session with my photography mentor. I had been very busy with my landscape photography over the last year so I had a lot to discuss and a good number images to review.
So we got a date booked in the diary and as the day got closer the weather forecast was scrutinised carefully. After all, we couldn't possibly meet just to discuss photography, we would definitely have create some images as well.
Image Review
For the first part of the day we went through the best of my images I had taken since our last session. This is a really important part of the session for me as it's probably the only time I can really get some honest and open feedback about my images. But it's not just about the feedback around the composition but I also get useful feedback on the processing. "Have you tried a square crop", or "try cooling this image down". Critique is often just one person's opinion but getting other people's opinion or view of your images allows you to see them in a different way which should mean you grow as a photographer.
All this reviewing of images is hard work so we did it over lunch at Strong Adolfos, a fantastic cafe on the A39. So if you are ever in the area it's highly recommended!
Life as a Photographer
On our way to Porth Nanven, our chosen location for photography that evening, we discussed all things photography. We chatted about everything from other photographers work, to the state of the photography market, and to our gear. One thing we were both keen on seeing was some new FX (full frame) Nikon bodies. Our camera bodies (D810 and D750) are 3 years old now and we're ready for some new tech!
Aside from just chewing the fat over the world of photography it was really good to talk about my continuing journey as a landscape photographer. Since our last session I had started this blog and created my YouTube channel so there was a lot to talk about. Both these forms of self publishing are hard work but I enjoy producing content for them.
However I have recently been concerned that they might be impacting my development as a photographer. Was I focusing more on delivering content rather than creating images? Was I going to locations that suited my content plan rather than where I would get the best images? It was good to talk about these concerns and how it might impact my goals as a landscape photographer.
After much discussion on photography we headed to Porth Nanven so we could create some fresh new images.
Porth Nanven
I first photographed Porth Nanven in March of 2015 and since then I've been back once. So when the conditions looked good for a sunset shoot at this popular location I was keen to go back. Porth Nanven is near to Lands End so it's a bit of drive, but sometimes you need to go that extra mile if you want to get some extra special. Due to the limited number of spots to shoot the beach of Porth Nanven we decided we would get there early as being a Friday evening it was sure to be a popular location for photographers.
Arriving some 2.5 hrs before sunset we found what we thought the ideal spots would be and started to eat our doughnuts and pasties as we chatted about Star Wars and Game of Thrones. After all, sometimes there is only so much photography you can talk about!
As the sun began to set more photographers arrived so we were glad that we had made the decision to get there early. We started getting our gear setup and discussed compositions. Anyone who has been to Porth Nanven will tell you about the wonderfully large, smooth boulders that cover the back of the beach. Using these boulders and the water from the stream flowing out to sea seemed to be a great first composition of the night.
Nikon D750, Nikkor 16-35mm f/4 @ 16mm, 4 sec, f/16, ISO 100, Lee Filters 0.6 medium grad.
As the tide continued to go out some beatufiful patterns started to appear in the sand so we moved from shooting the more traditional boulder shot to a more minimalist composition.
Nikon D750, Nikkor 16-35mm f/4 @ 24mm, 10 sec, f/16, ISO 100, Lee Filters 0.6 medium grad, 3 stop ND.
I was really happy with these last two compositions. Porth Nanven is known for its big boulders so if you look up the location on Flickr for example you will see most of the shots will include boulders. So I found it really satisfying and interesting to make images that are a little different. As I mentioned in my recent post about Colmer's Hill, it can take many visits to really get to know a location. Next time I visit Porth Nanven I will now have a number of different compositions that I could shoot allowing me to vary my plan on the fly.
Satisfied with our shots we started the long drive home.
A Good Day
Overall it was a fulfilling day. As always it was really useful to have a portfolio review and to review my progress and goals as a landscape photographer. My personal development as a landscape photographer is more than just about creating beautiful images. Having a mentor allows me to develop not only my creative skills but my skills in the business of photography. It was almost a bonus to capture some lovely images from Porth Nanven!
Have you photographer Porth Nanven before? Have you ever had a 1-2-1 session with a photographer? How do you develop your skills as a photographer? Let me know in the comments below.

Making the Print
In this blog post I tell you about my experience of printing, packing and posting my first print.
A Special Request
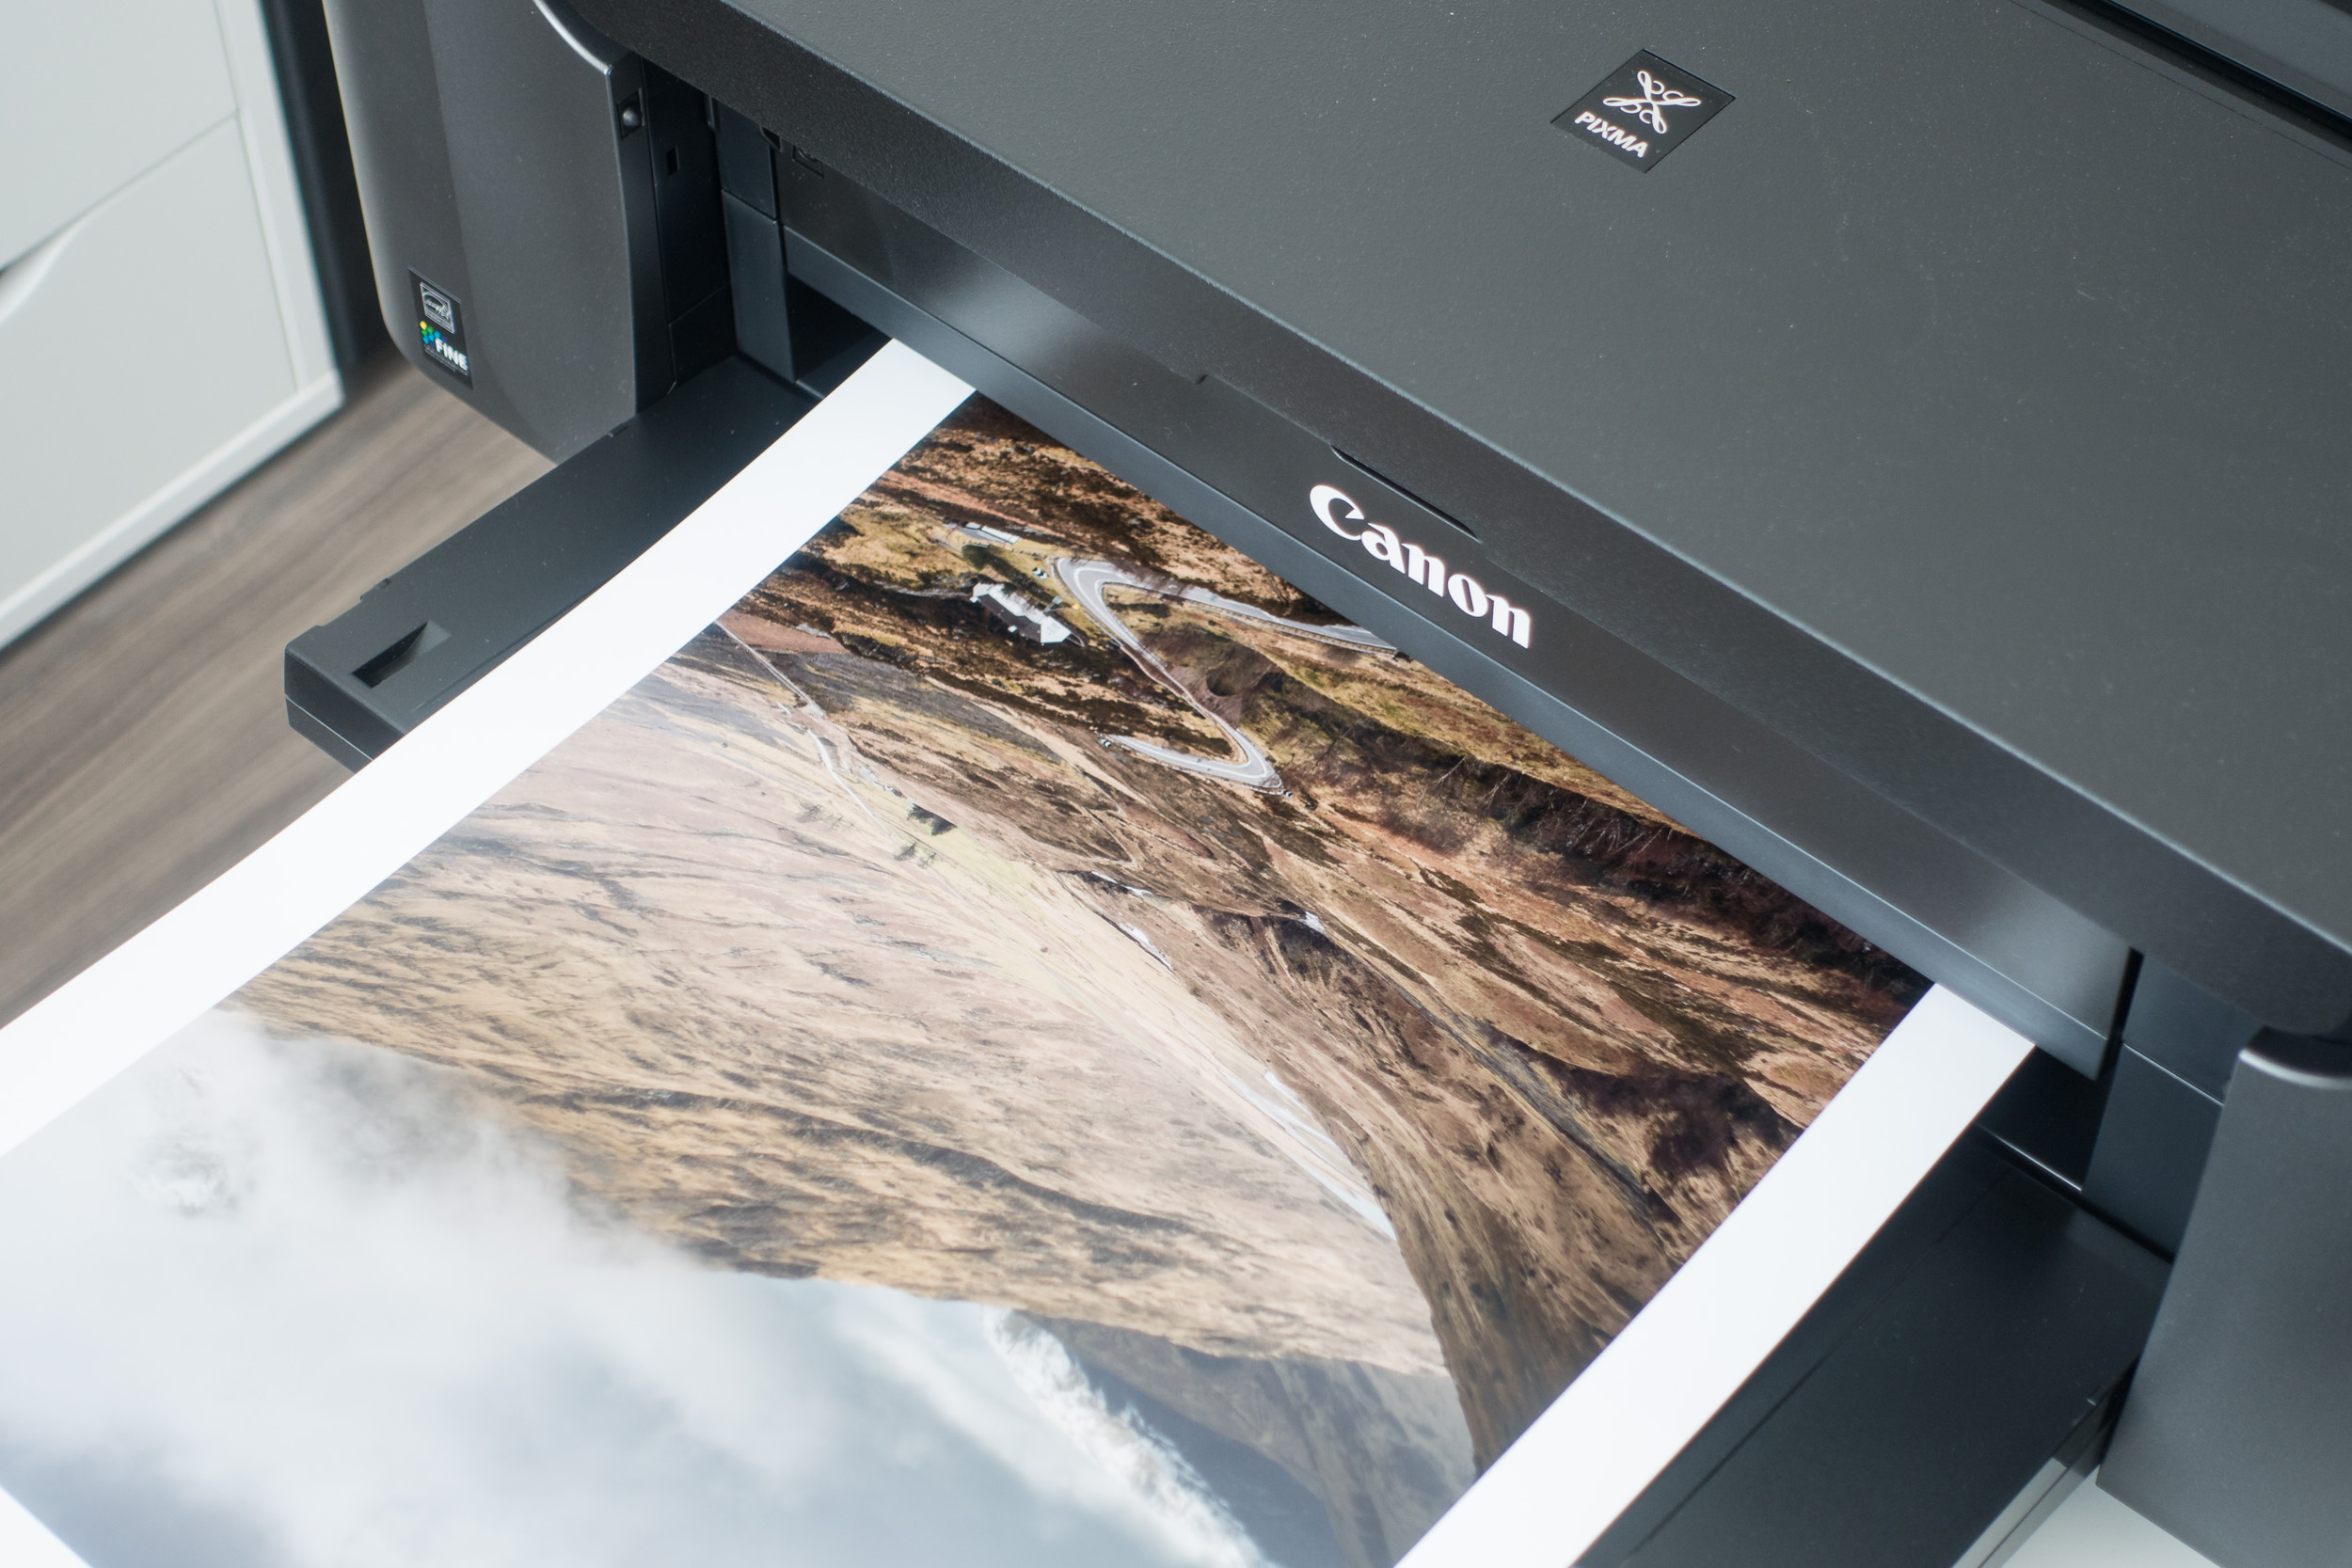
On the blog recently I told you about how I have discovered the joy of printing. Adding printing to my photography workflow is something I've been wanting to do for a while and since picking up my Canon Pixma Pro-10S I've very much enjoyed printing out my work.
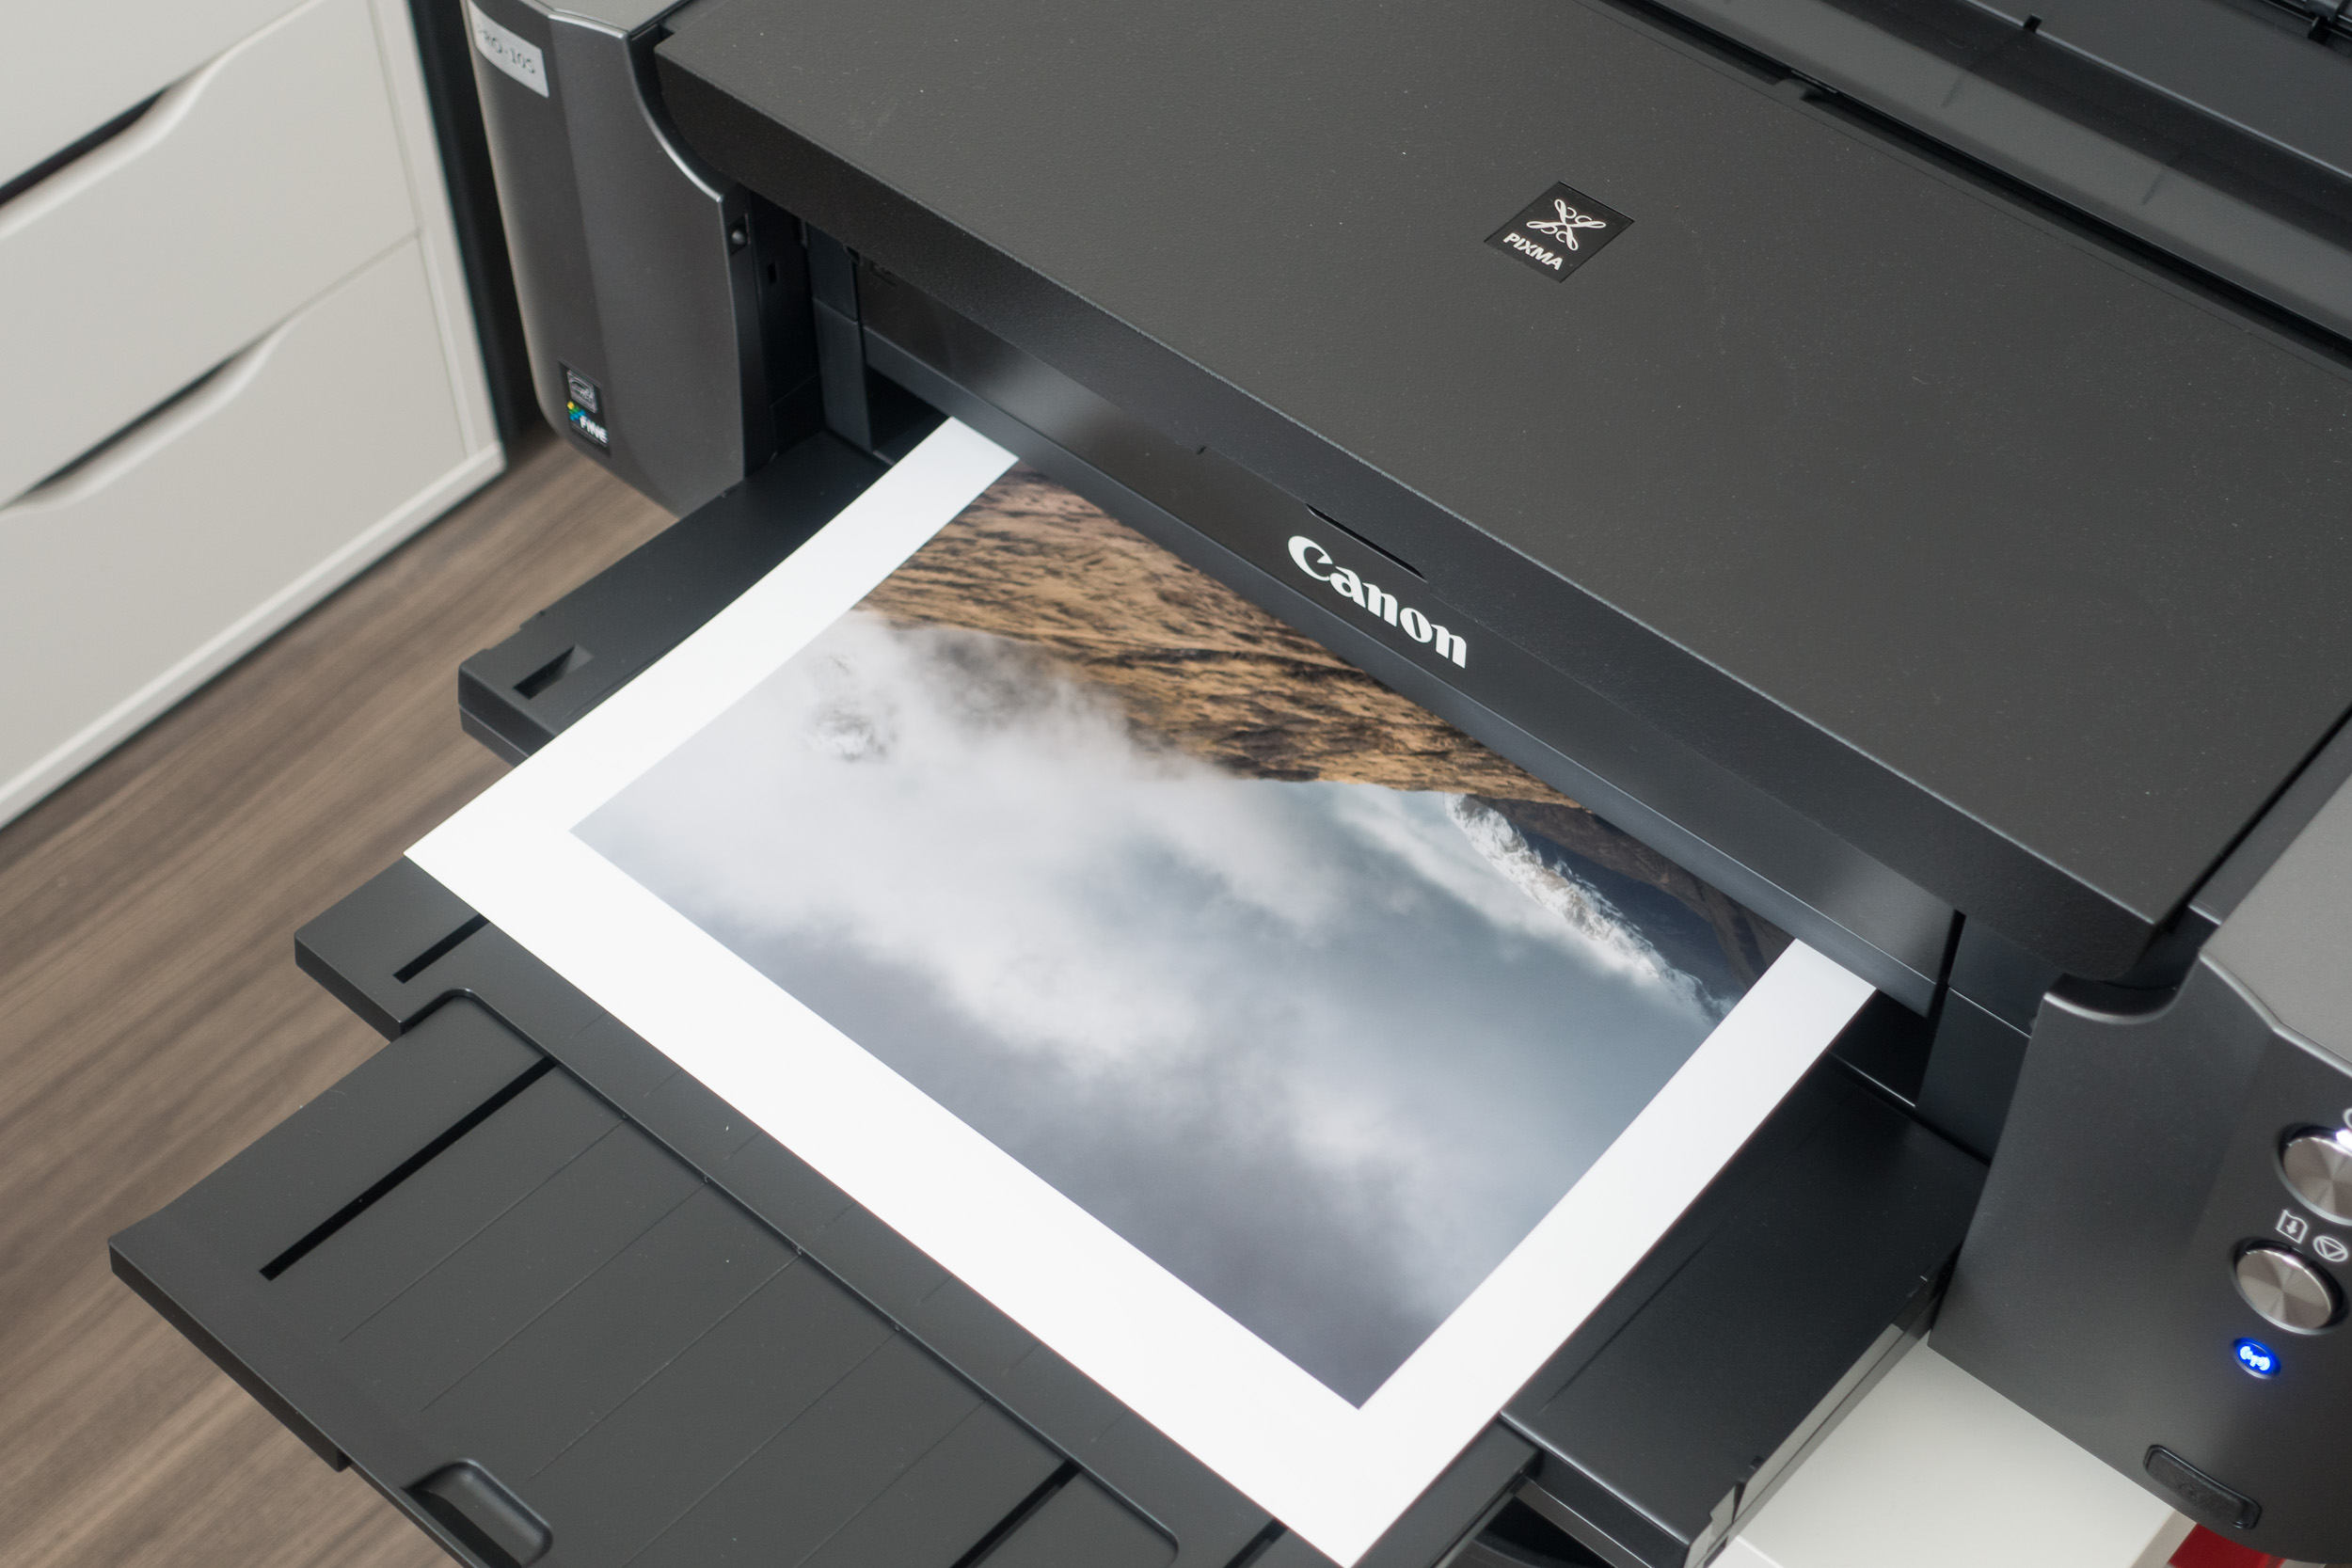
As if by some happy coincidence a friend of mine who lives in Sweden asked me to create her a print of an image that I took while on a workshop in Glencoe. I was of course delighted by the request. What better way to put the printer to use than to create an A3+ print of this image for a friend.
Pass of Glencoe
As I live in the UK and she lives in Sweden, I would also need to learn how to package and ship my prints. Time to get to work!
Printing the Image
As I said in my video Discovery the Joy of Printing, getting a high quality print from the Canon is fairly straight forward. By using the Canon Print Studio Pro software it was just a matter of setting the correct options:
Set media type to Photopaper Pro Platinum
Paper size to A3+
Set quality to high
Set "clear coat the entire image" - this ensures the entire image, even where no ink as been laid, has an even glossiness.
Set printer profile to match paper
Set layout to bordered - as requested by my friend
Set brightness to +15.
Canon Print Studio Pro - simple and straightfoward to use.
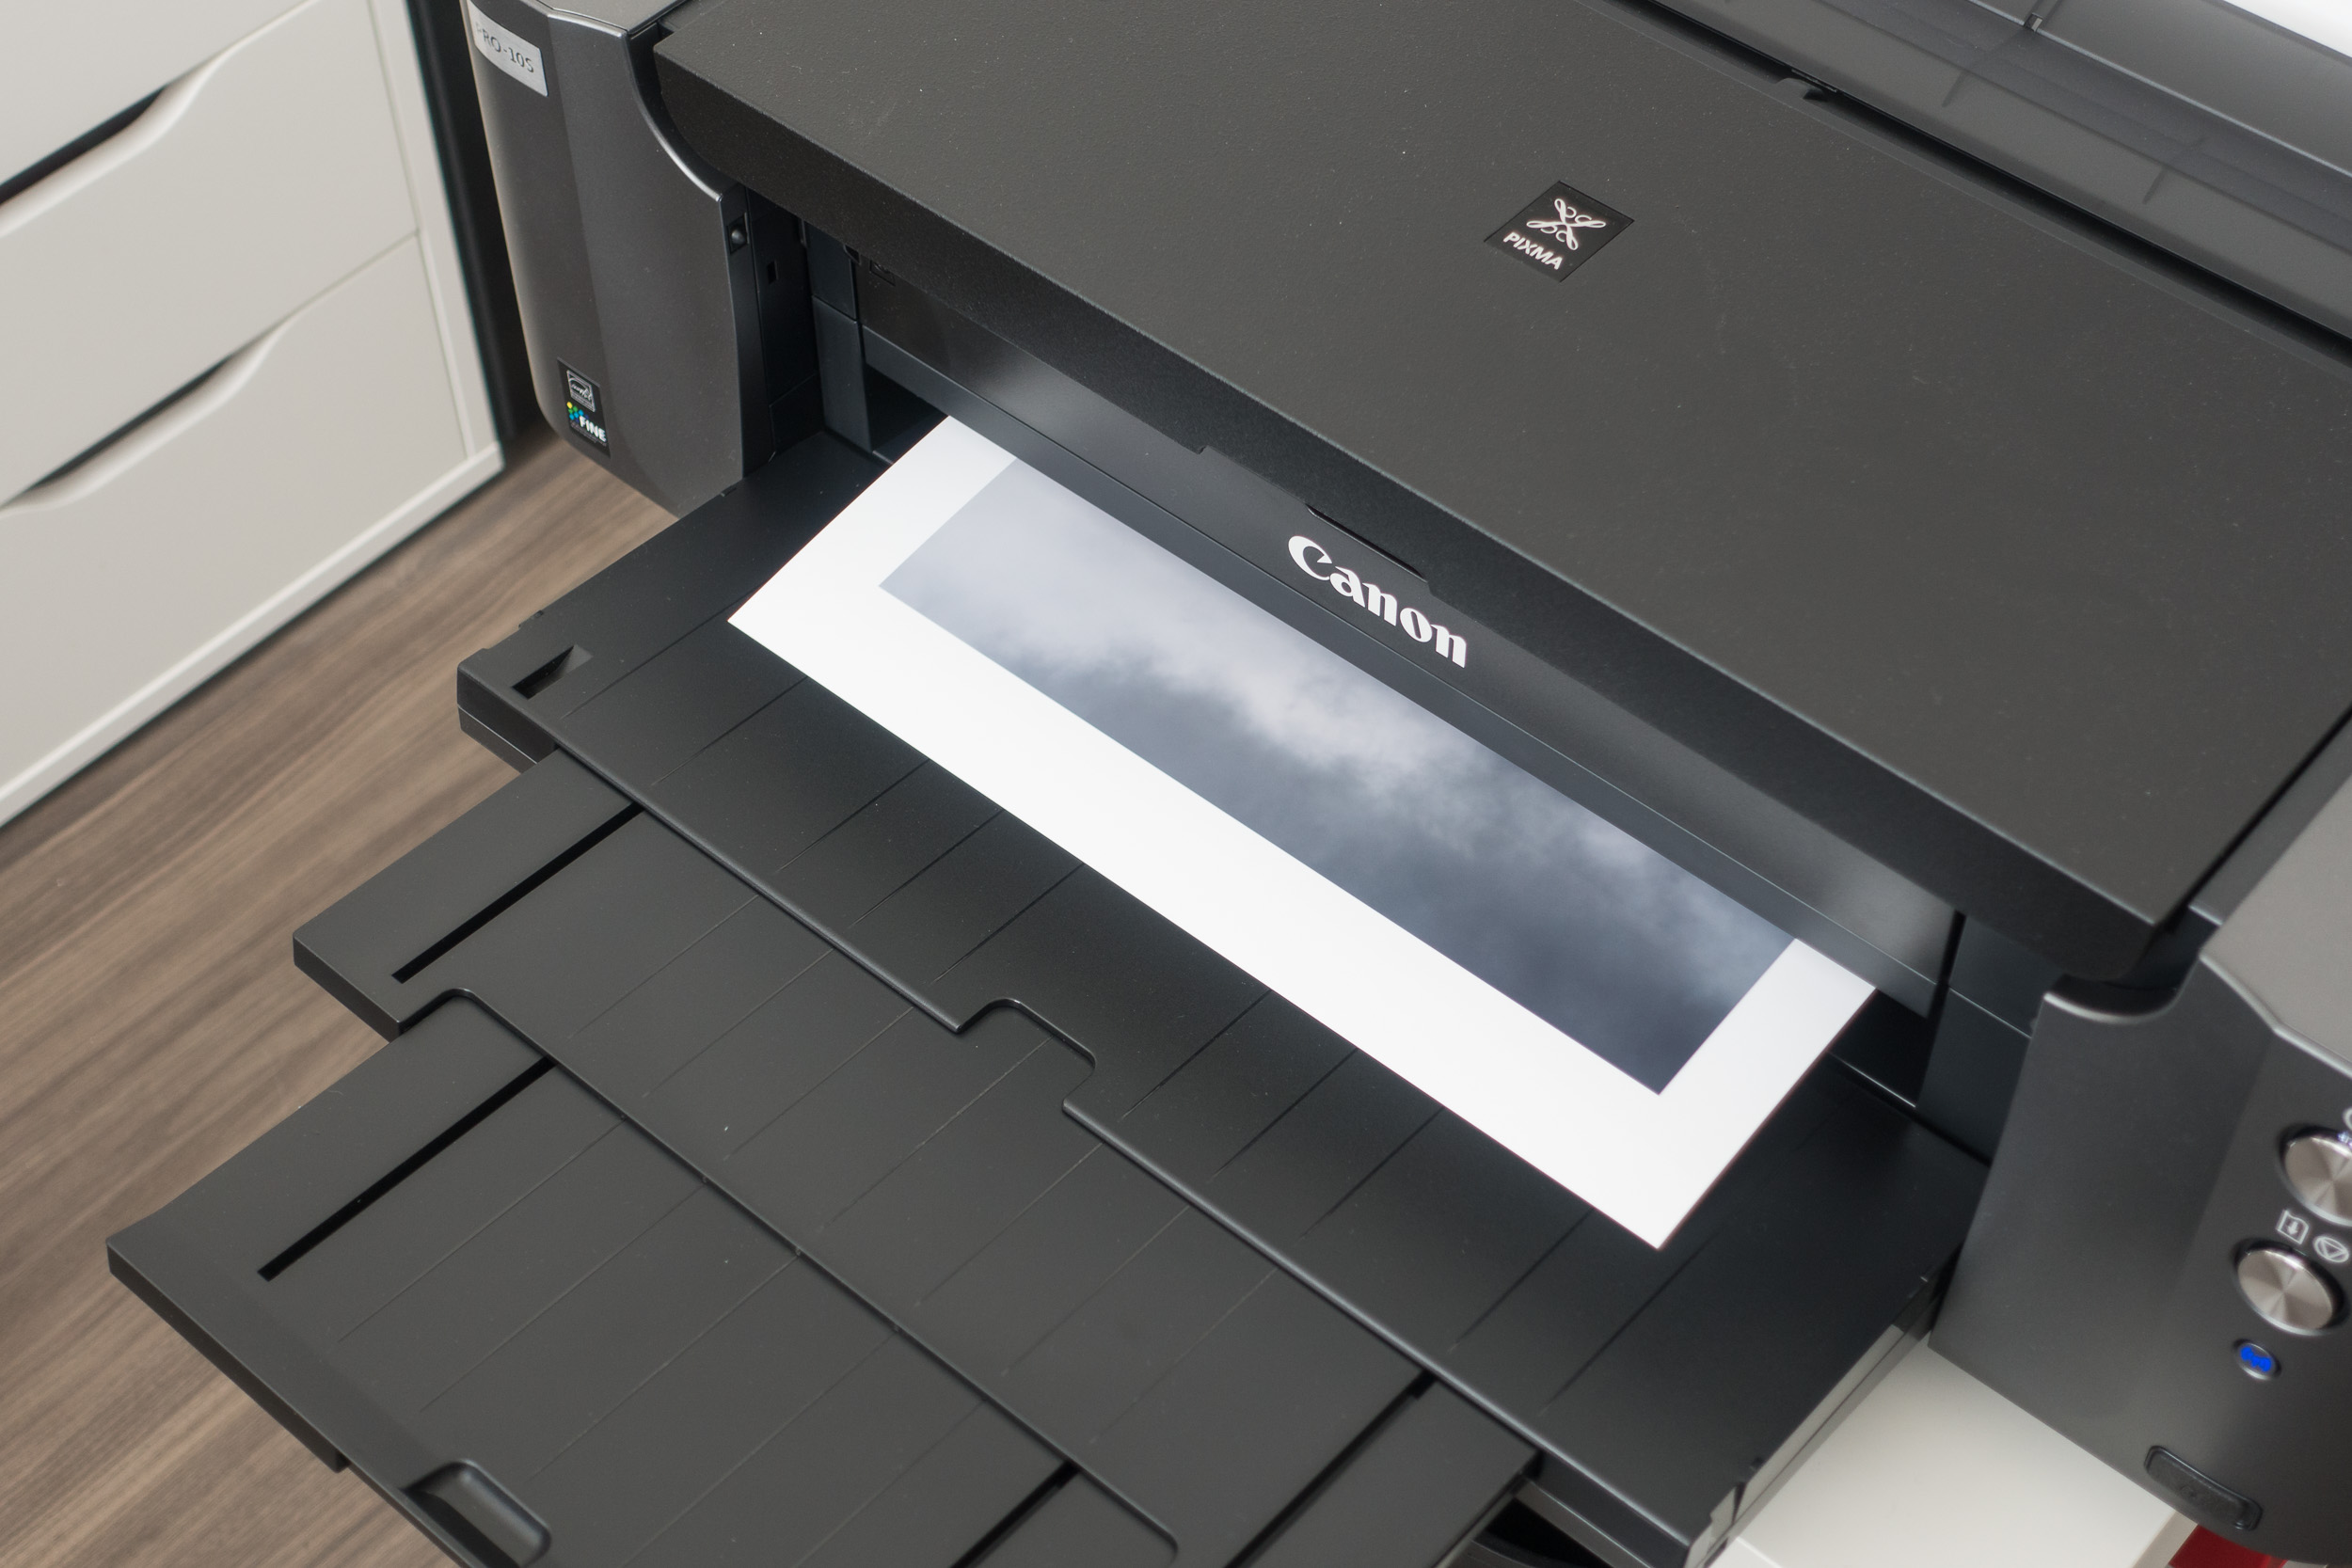
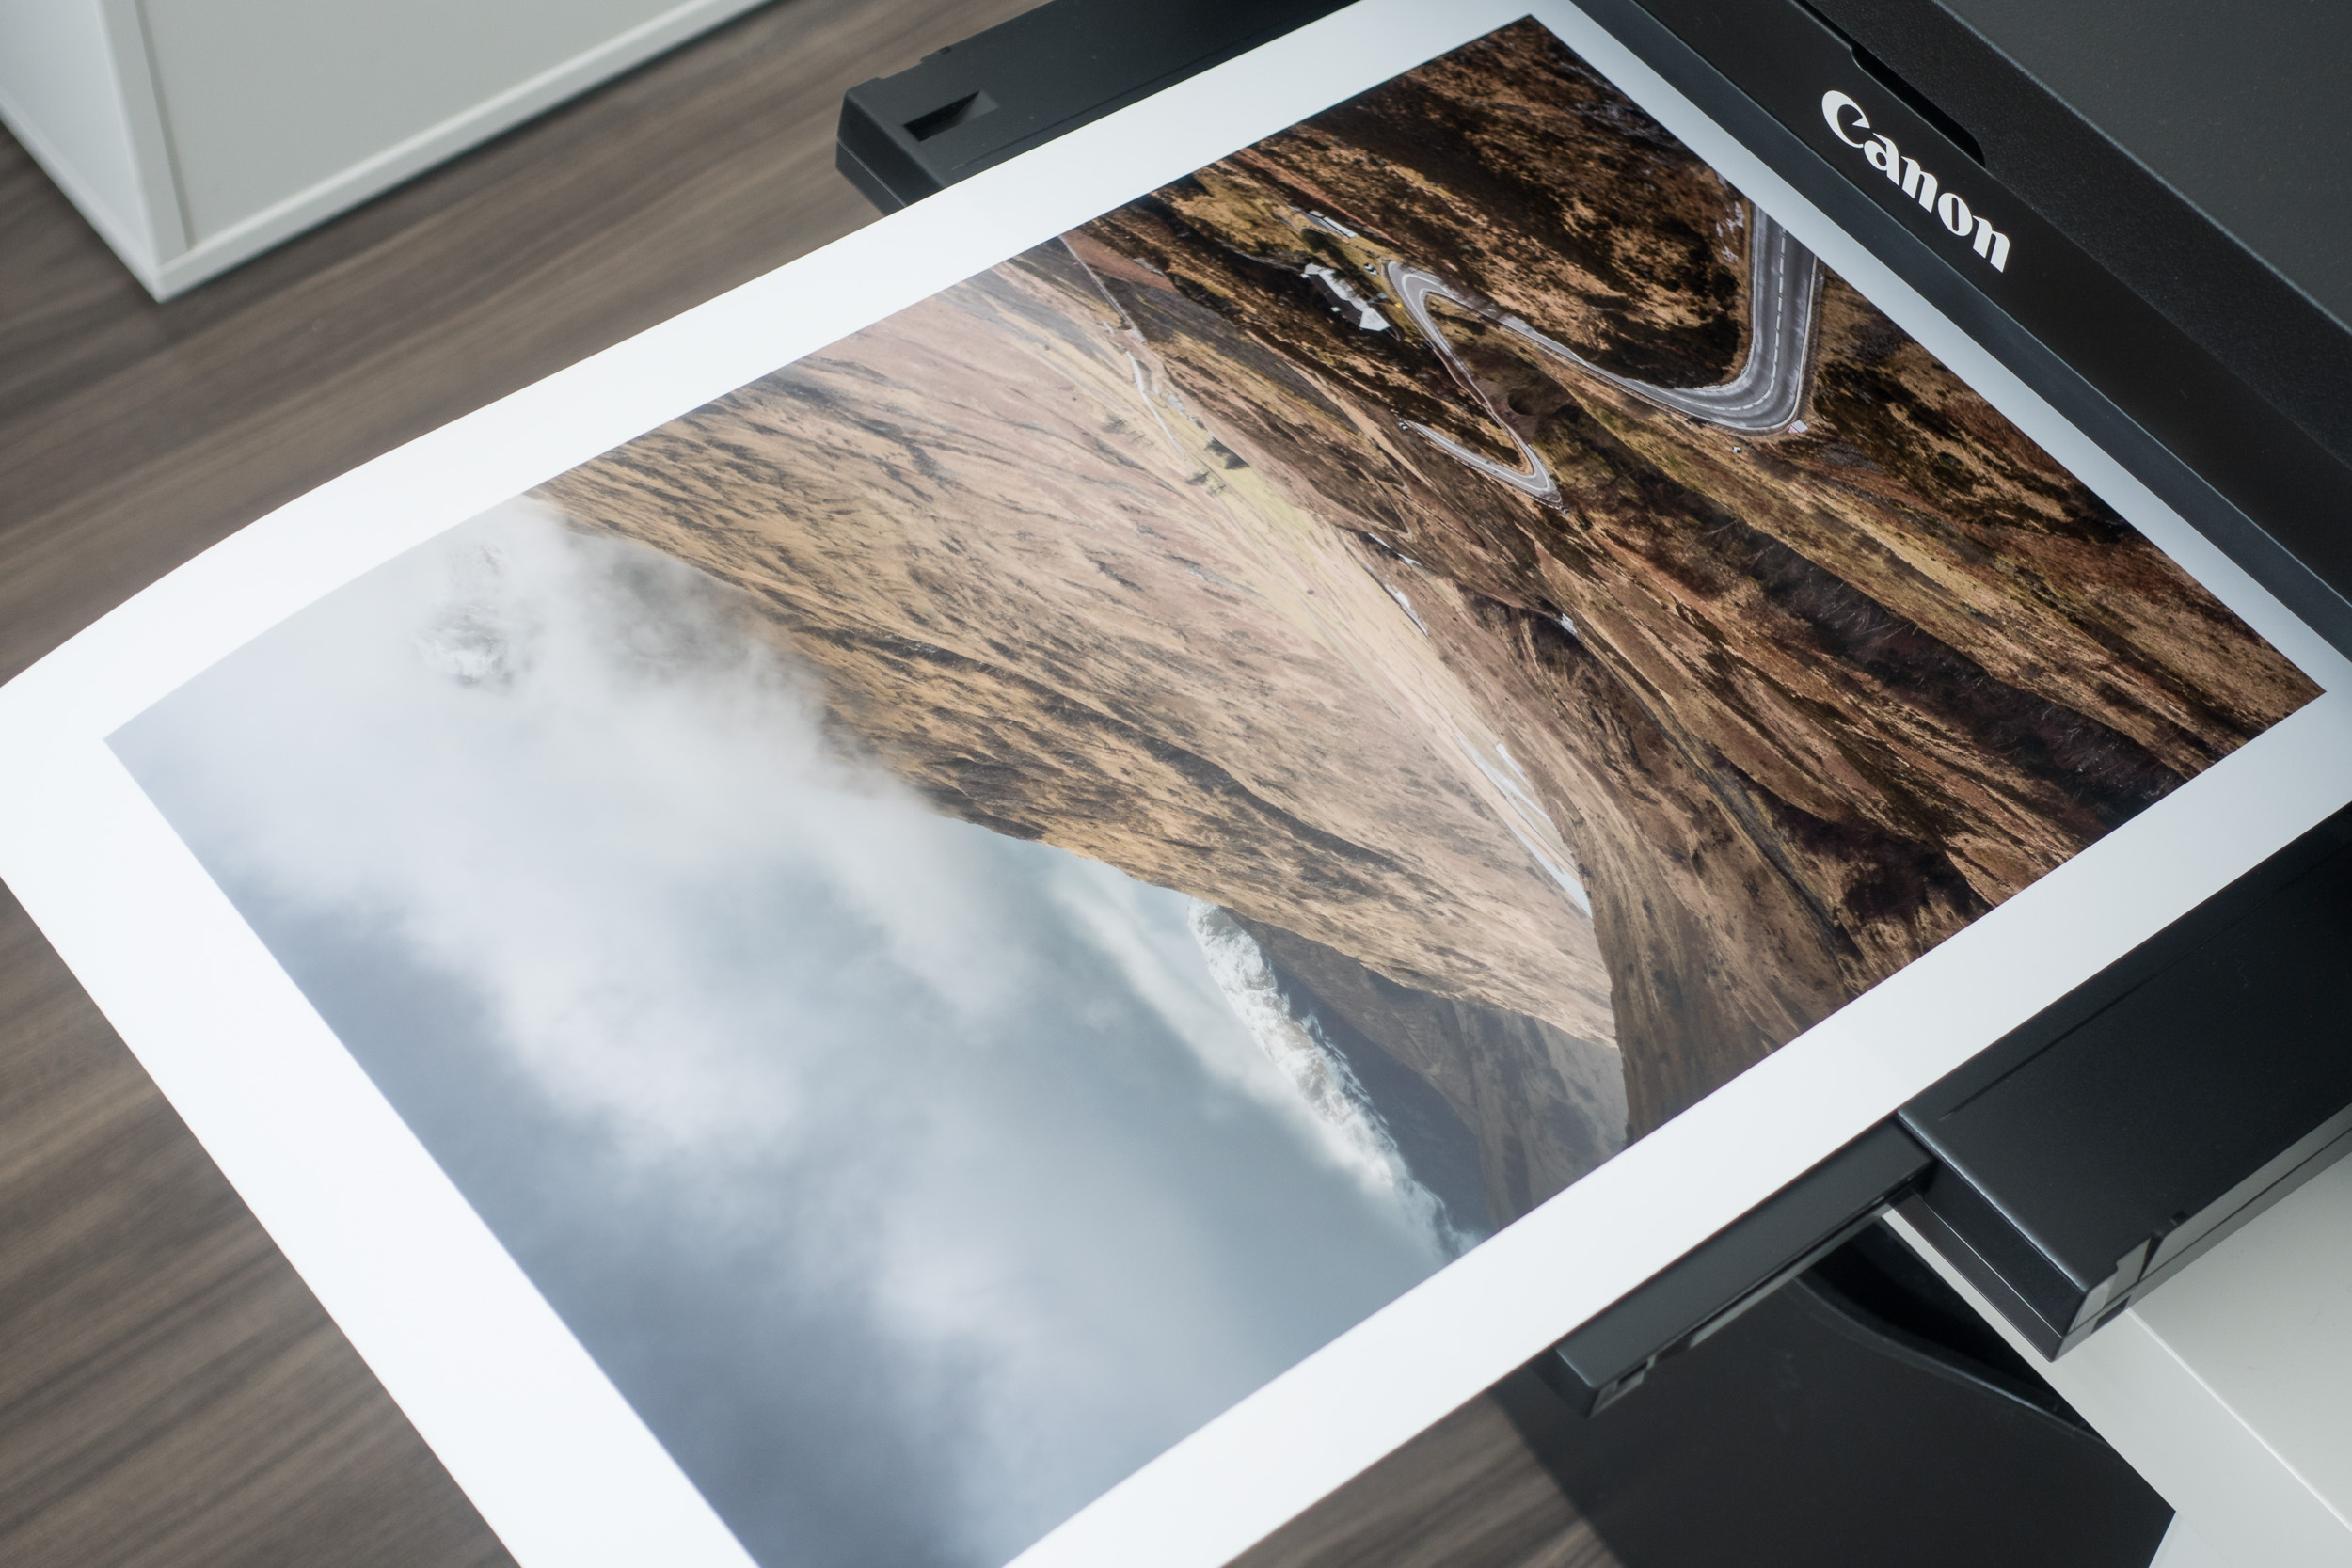
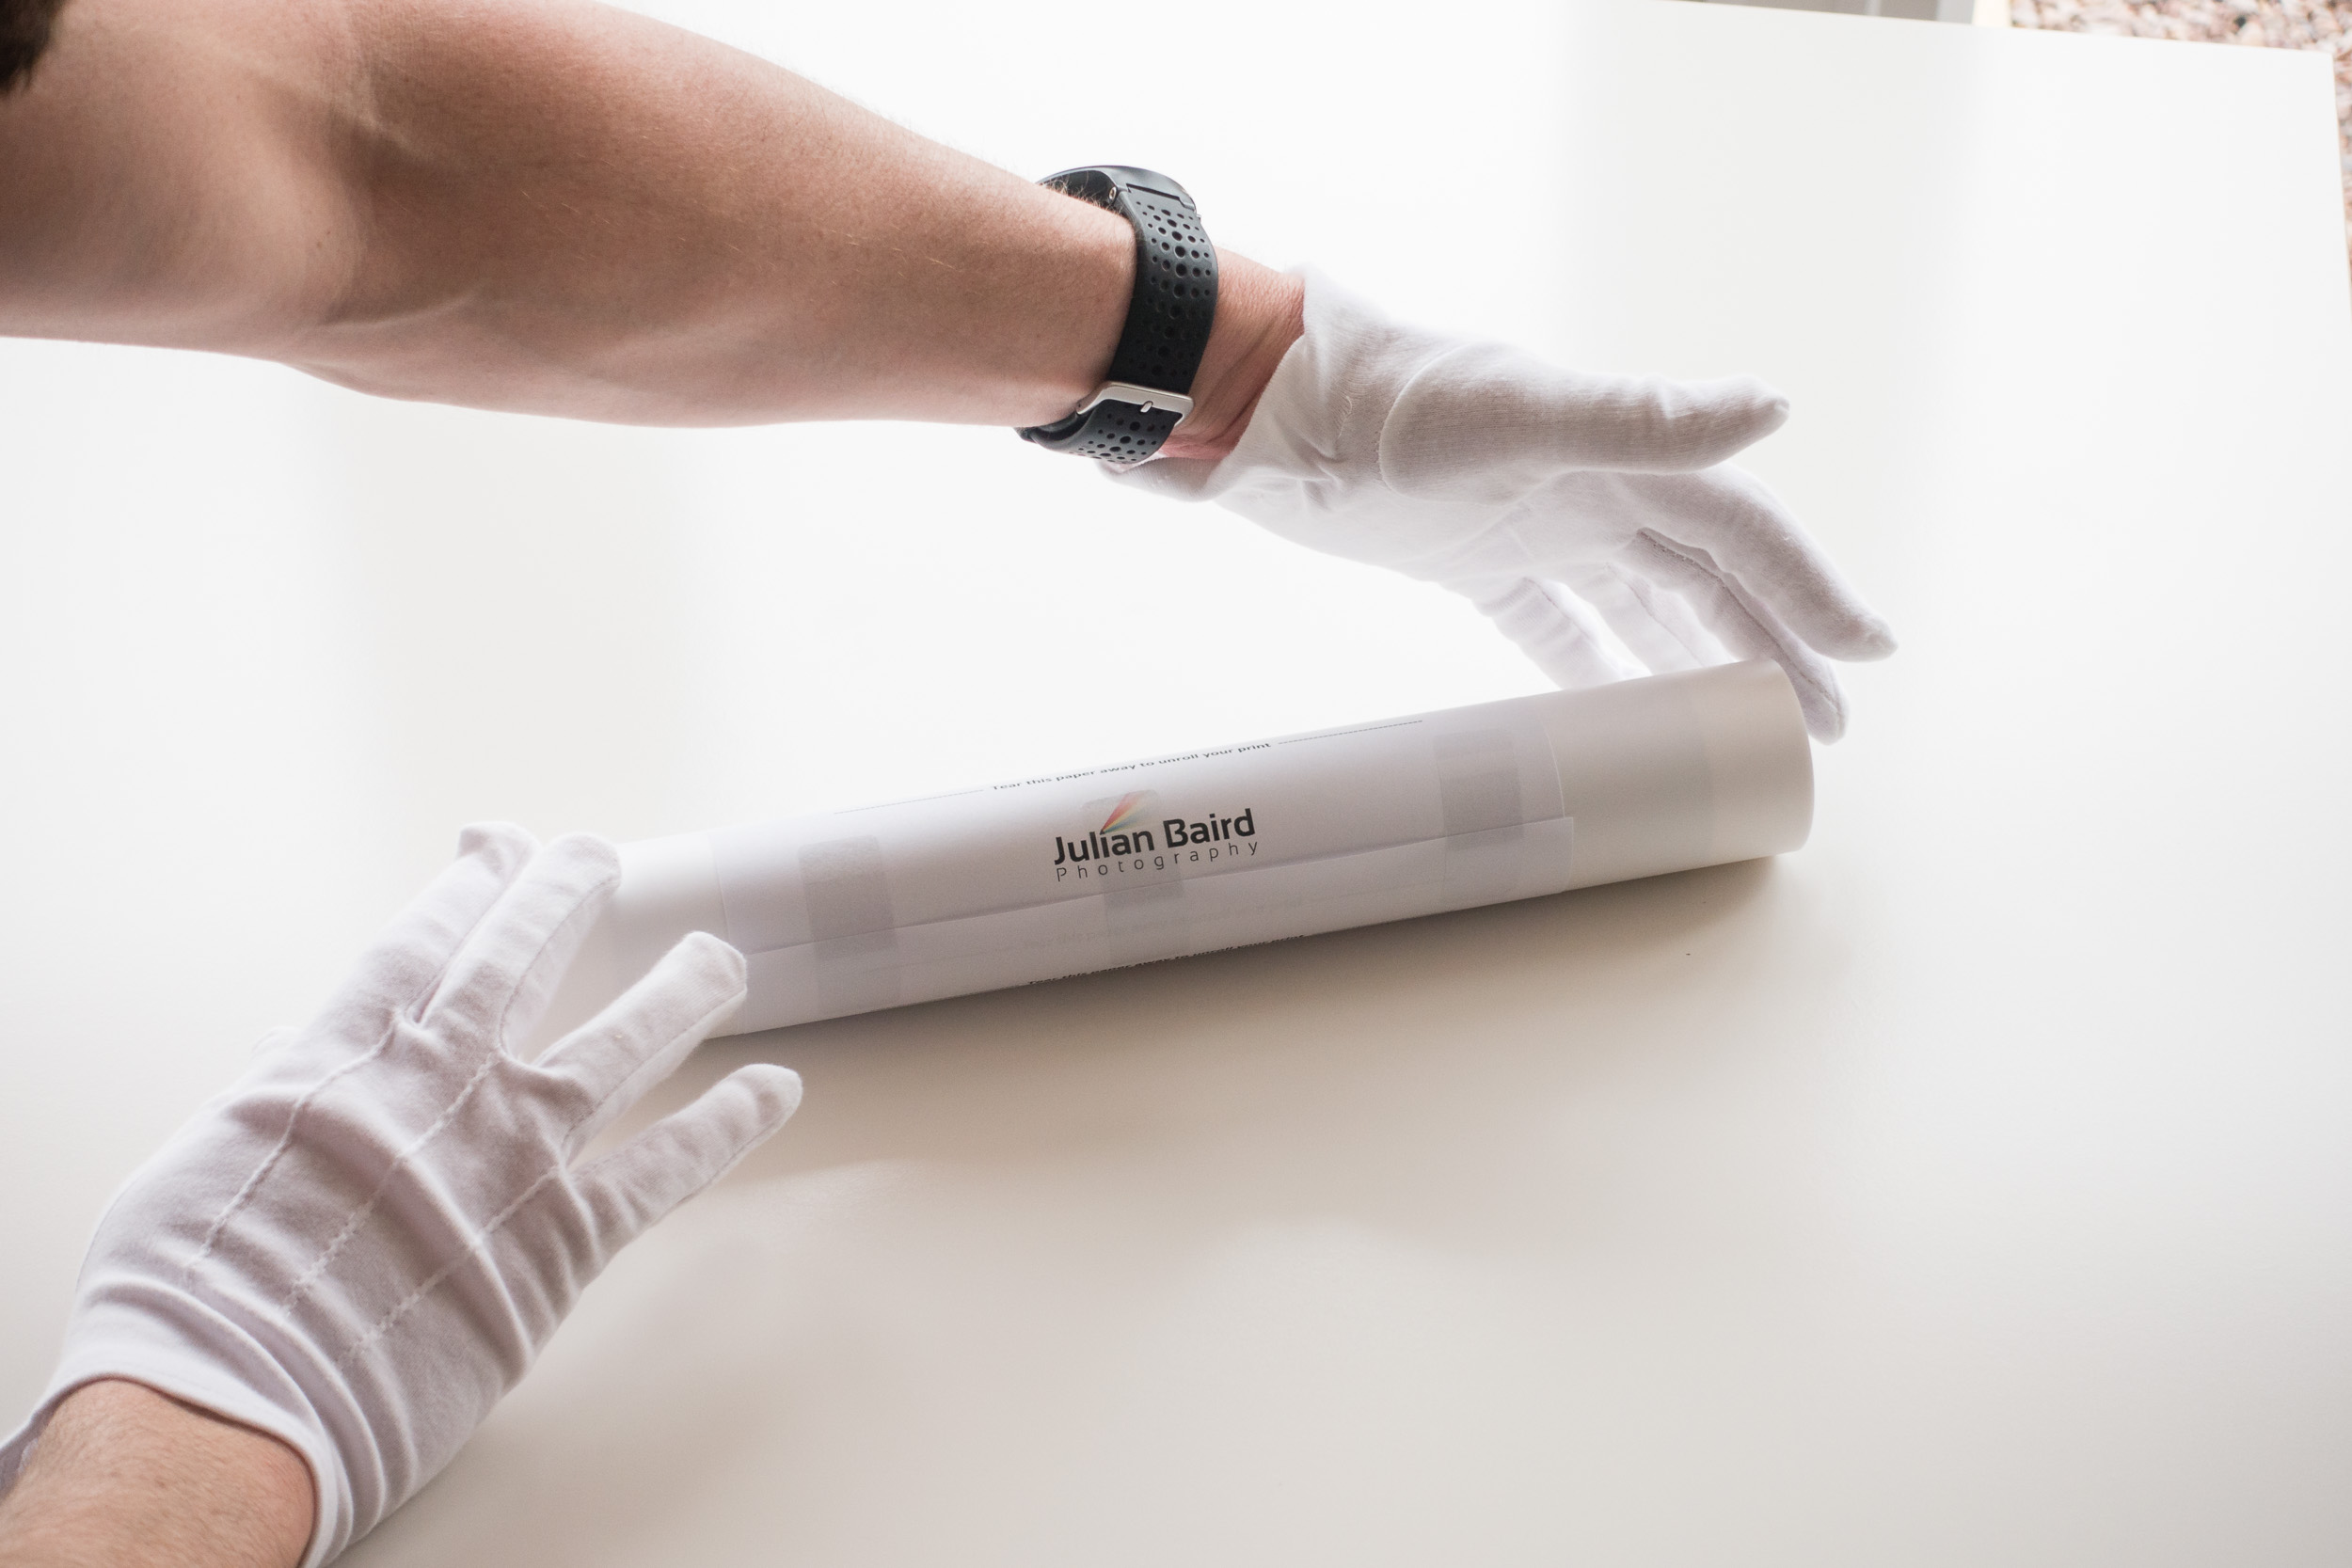
The next step is to load the A3+ paper into the rear tray. As you'll see in this image I am using white cotton gloves so I don't leave any residue from my fingers on the paper. I will use white gloves thoughout the process whenever I am touching the photo paper.

Then you just hit the Print button and wait for your image to take physical form!
Packing the Print
For this part of the process, I really have to thank Martin Bailey for his very informative and detailed blog post and video, Rolling Fine Art Prints for Shipping. Following Martin's workflow I got the following items:
Tracing paper - to put over the print to protect it when rolling. Martin used some Canon paper but tracing paper should be sufficient.
Tear away paper - this is used in the final stages of rolling and using sticky tabs holds the roll to the size you make. This stops the rolled print expanding once it is in the tube.
White gloves - to stop my fingers marking the print
Business card - with my contact details and website address
Bubble wrap bung - these are used at either end of the tube to stop the print banging off the ends when the tube is slightly longer that the print.
Shipping tube - as Martin pointed out you need to make sure its strong tube so it doesn't get crushed in transit.

Once I had everything I needed, I covered the print in tracing paper and then gently started the roll.
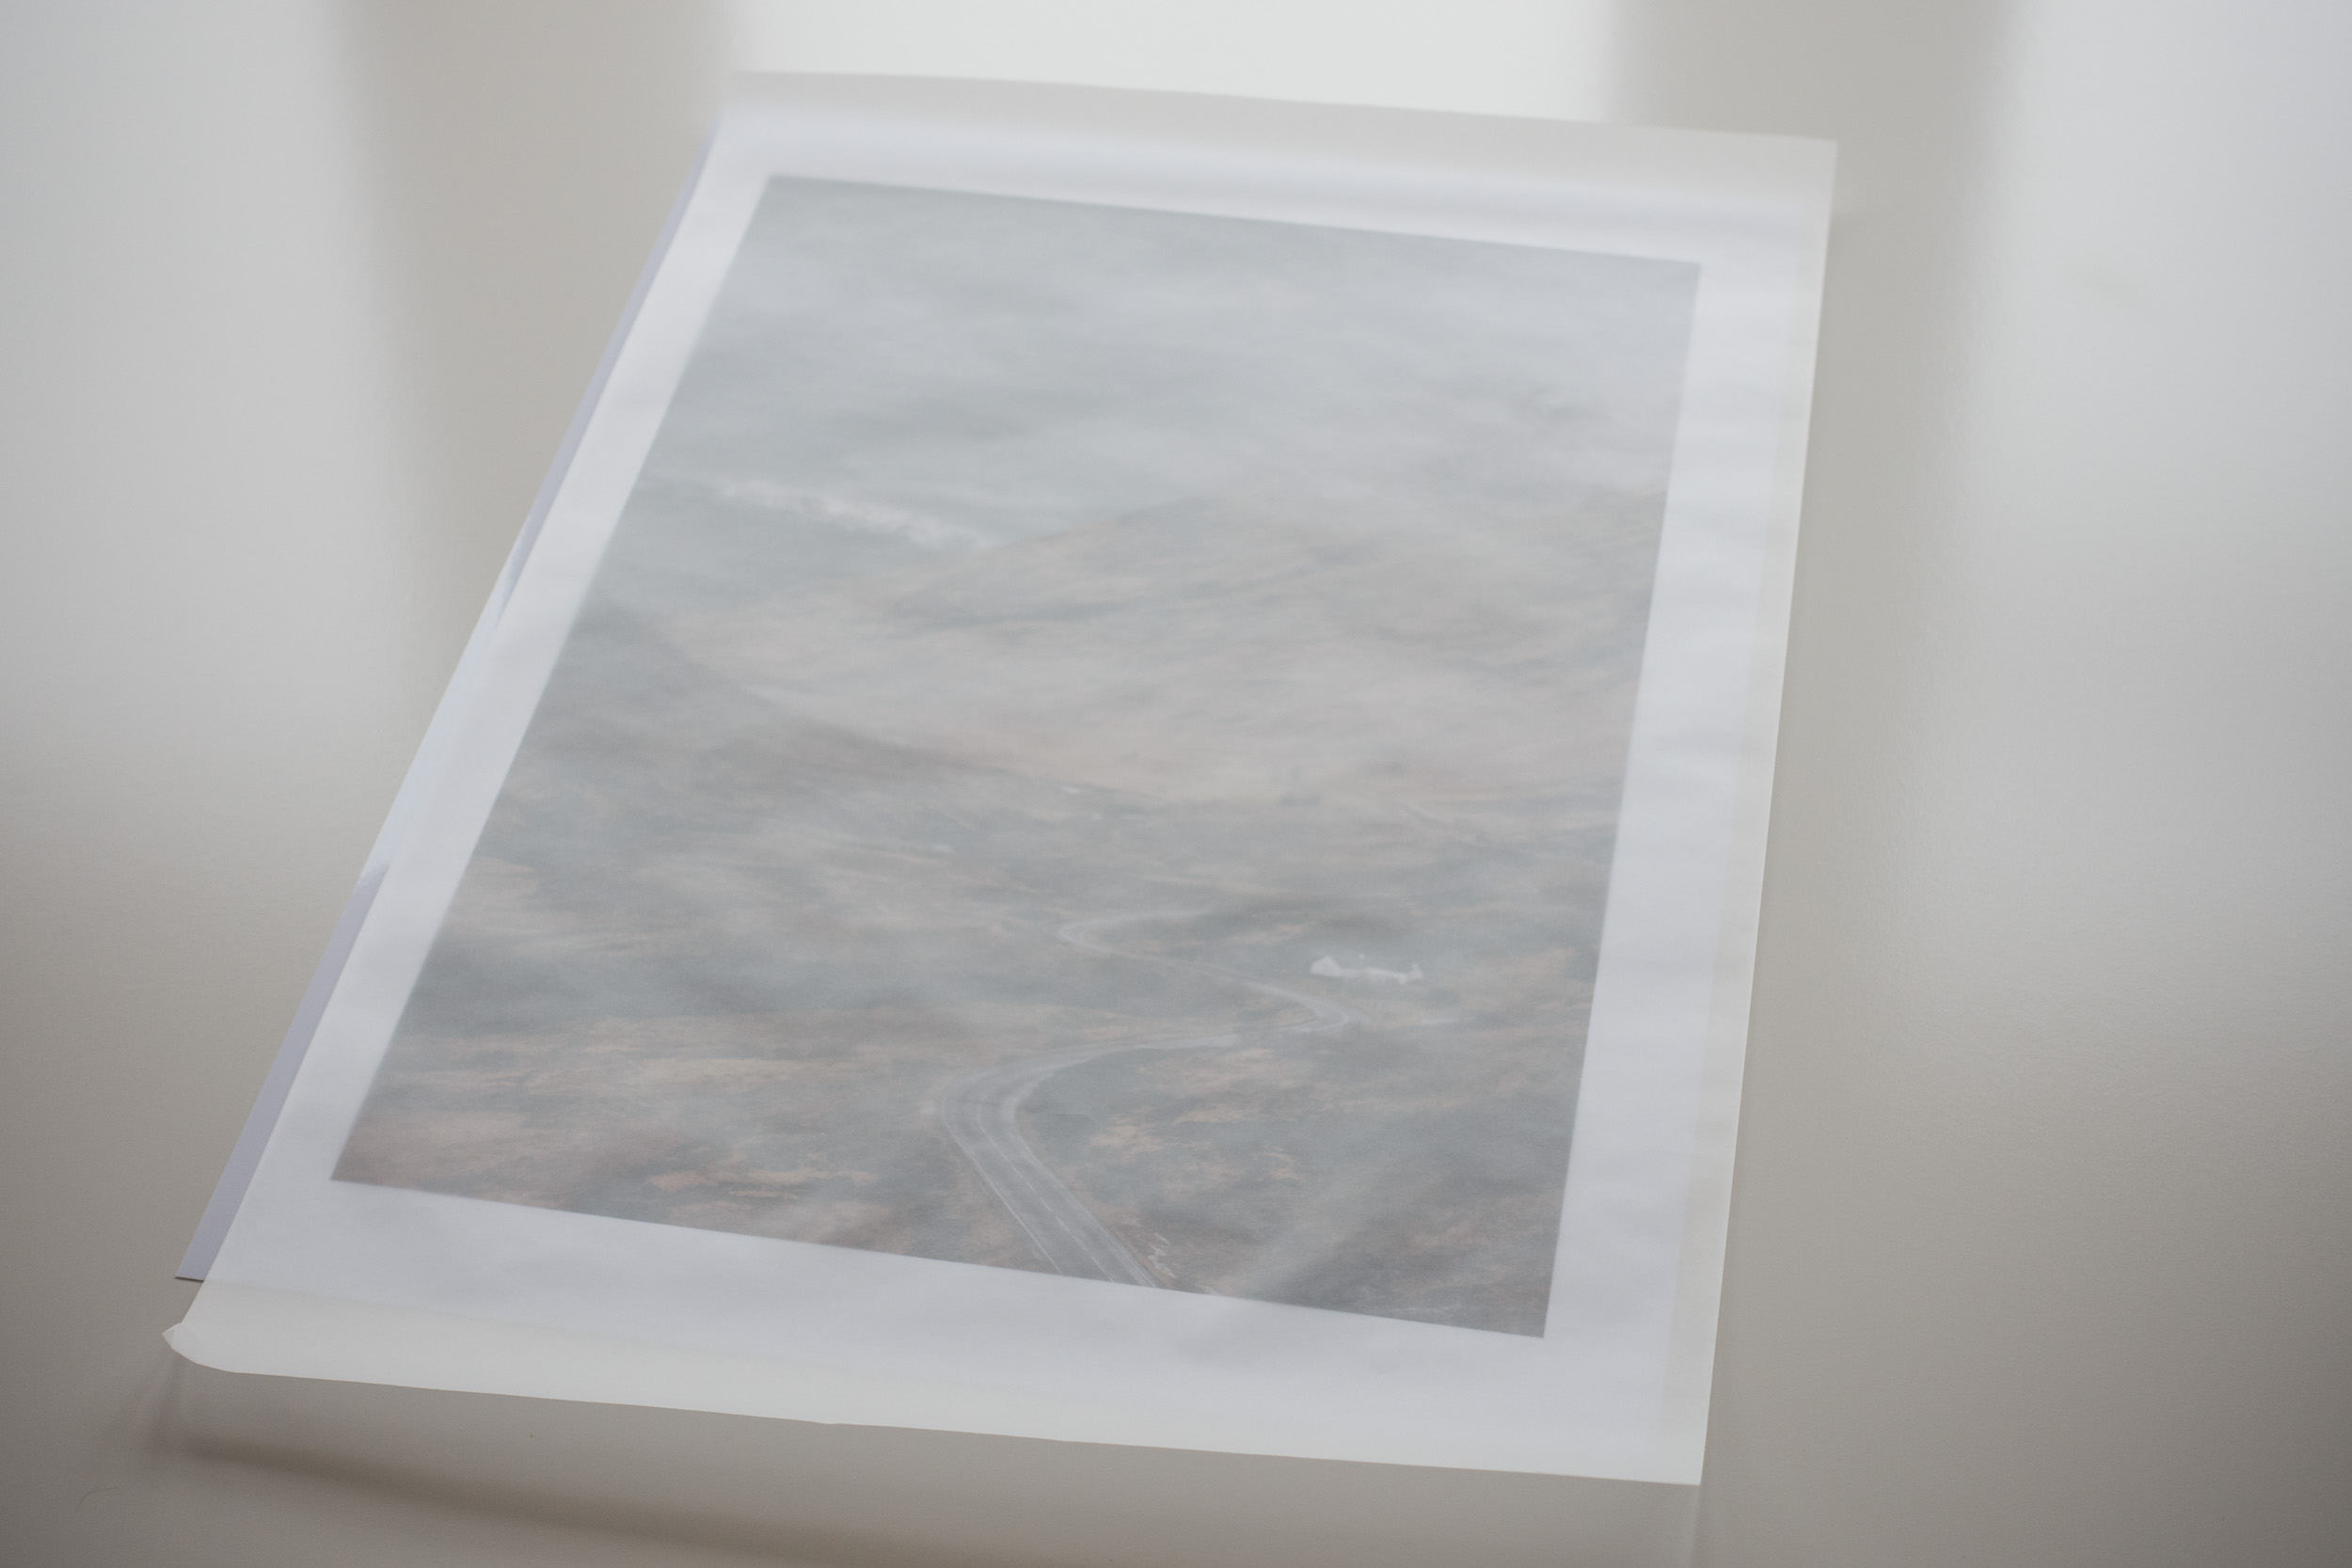
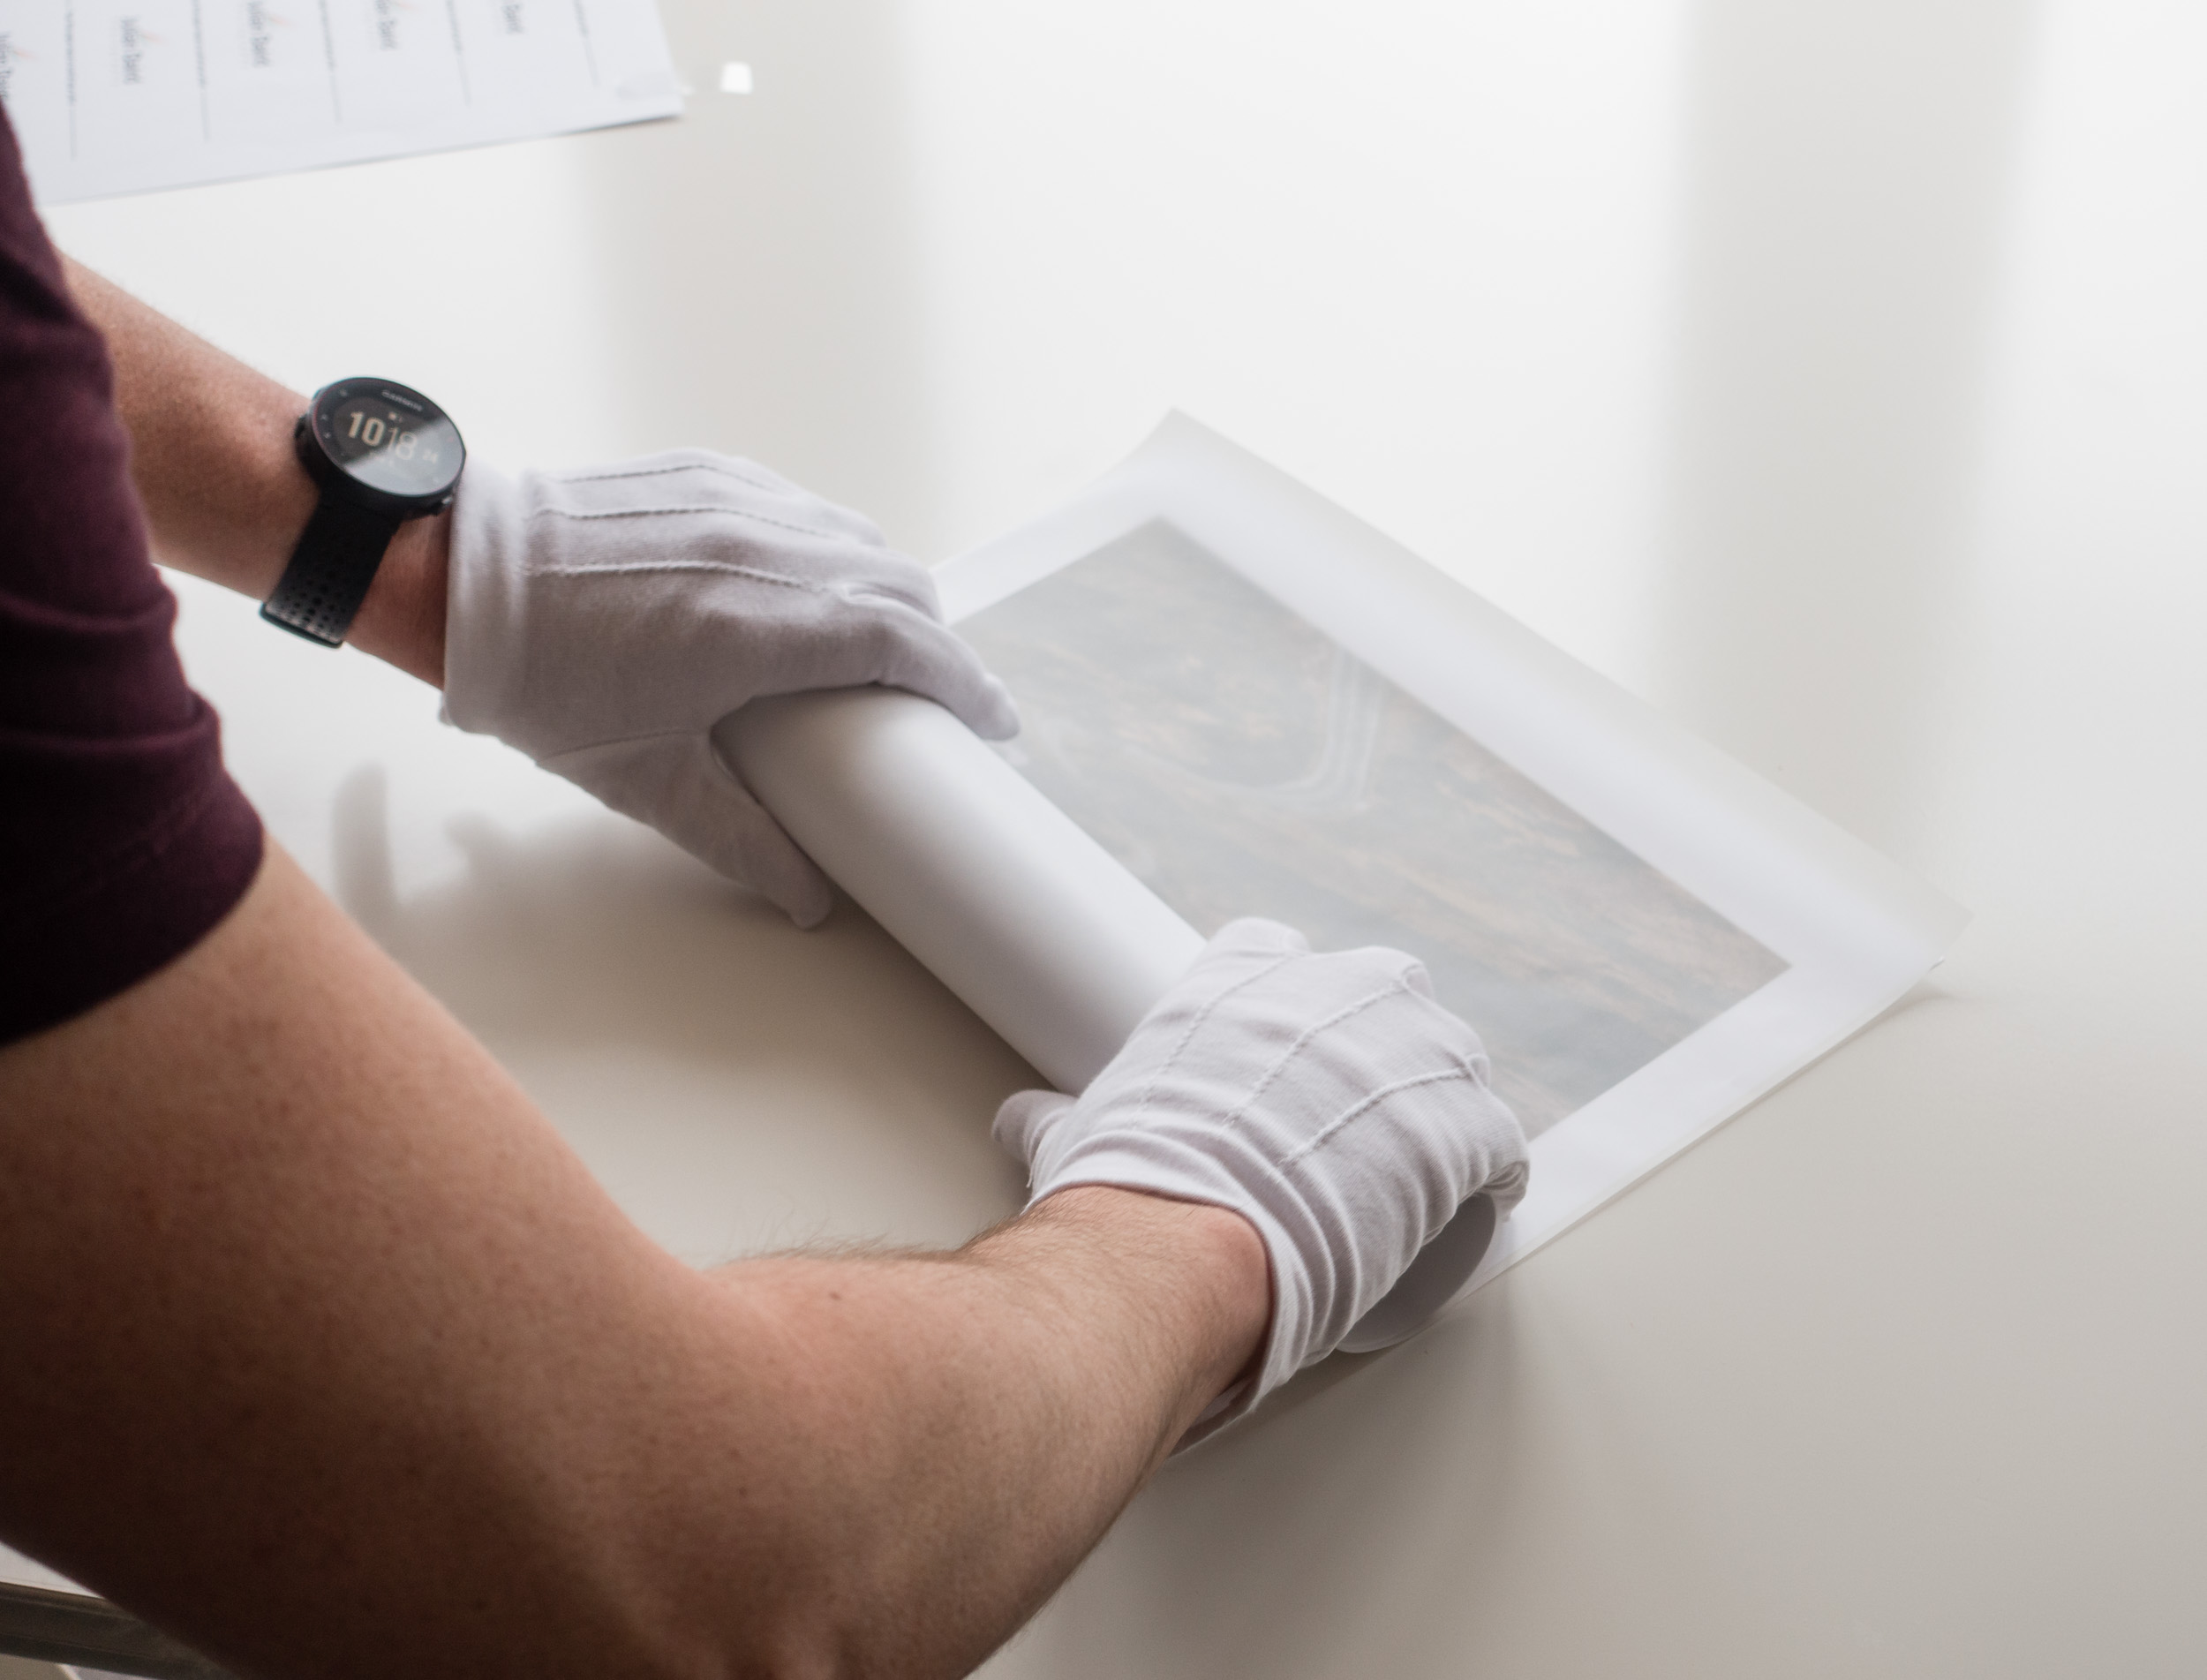
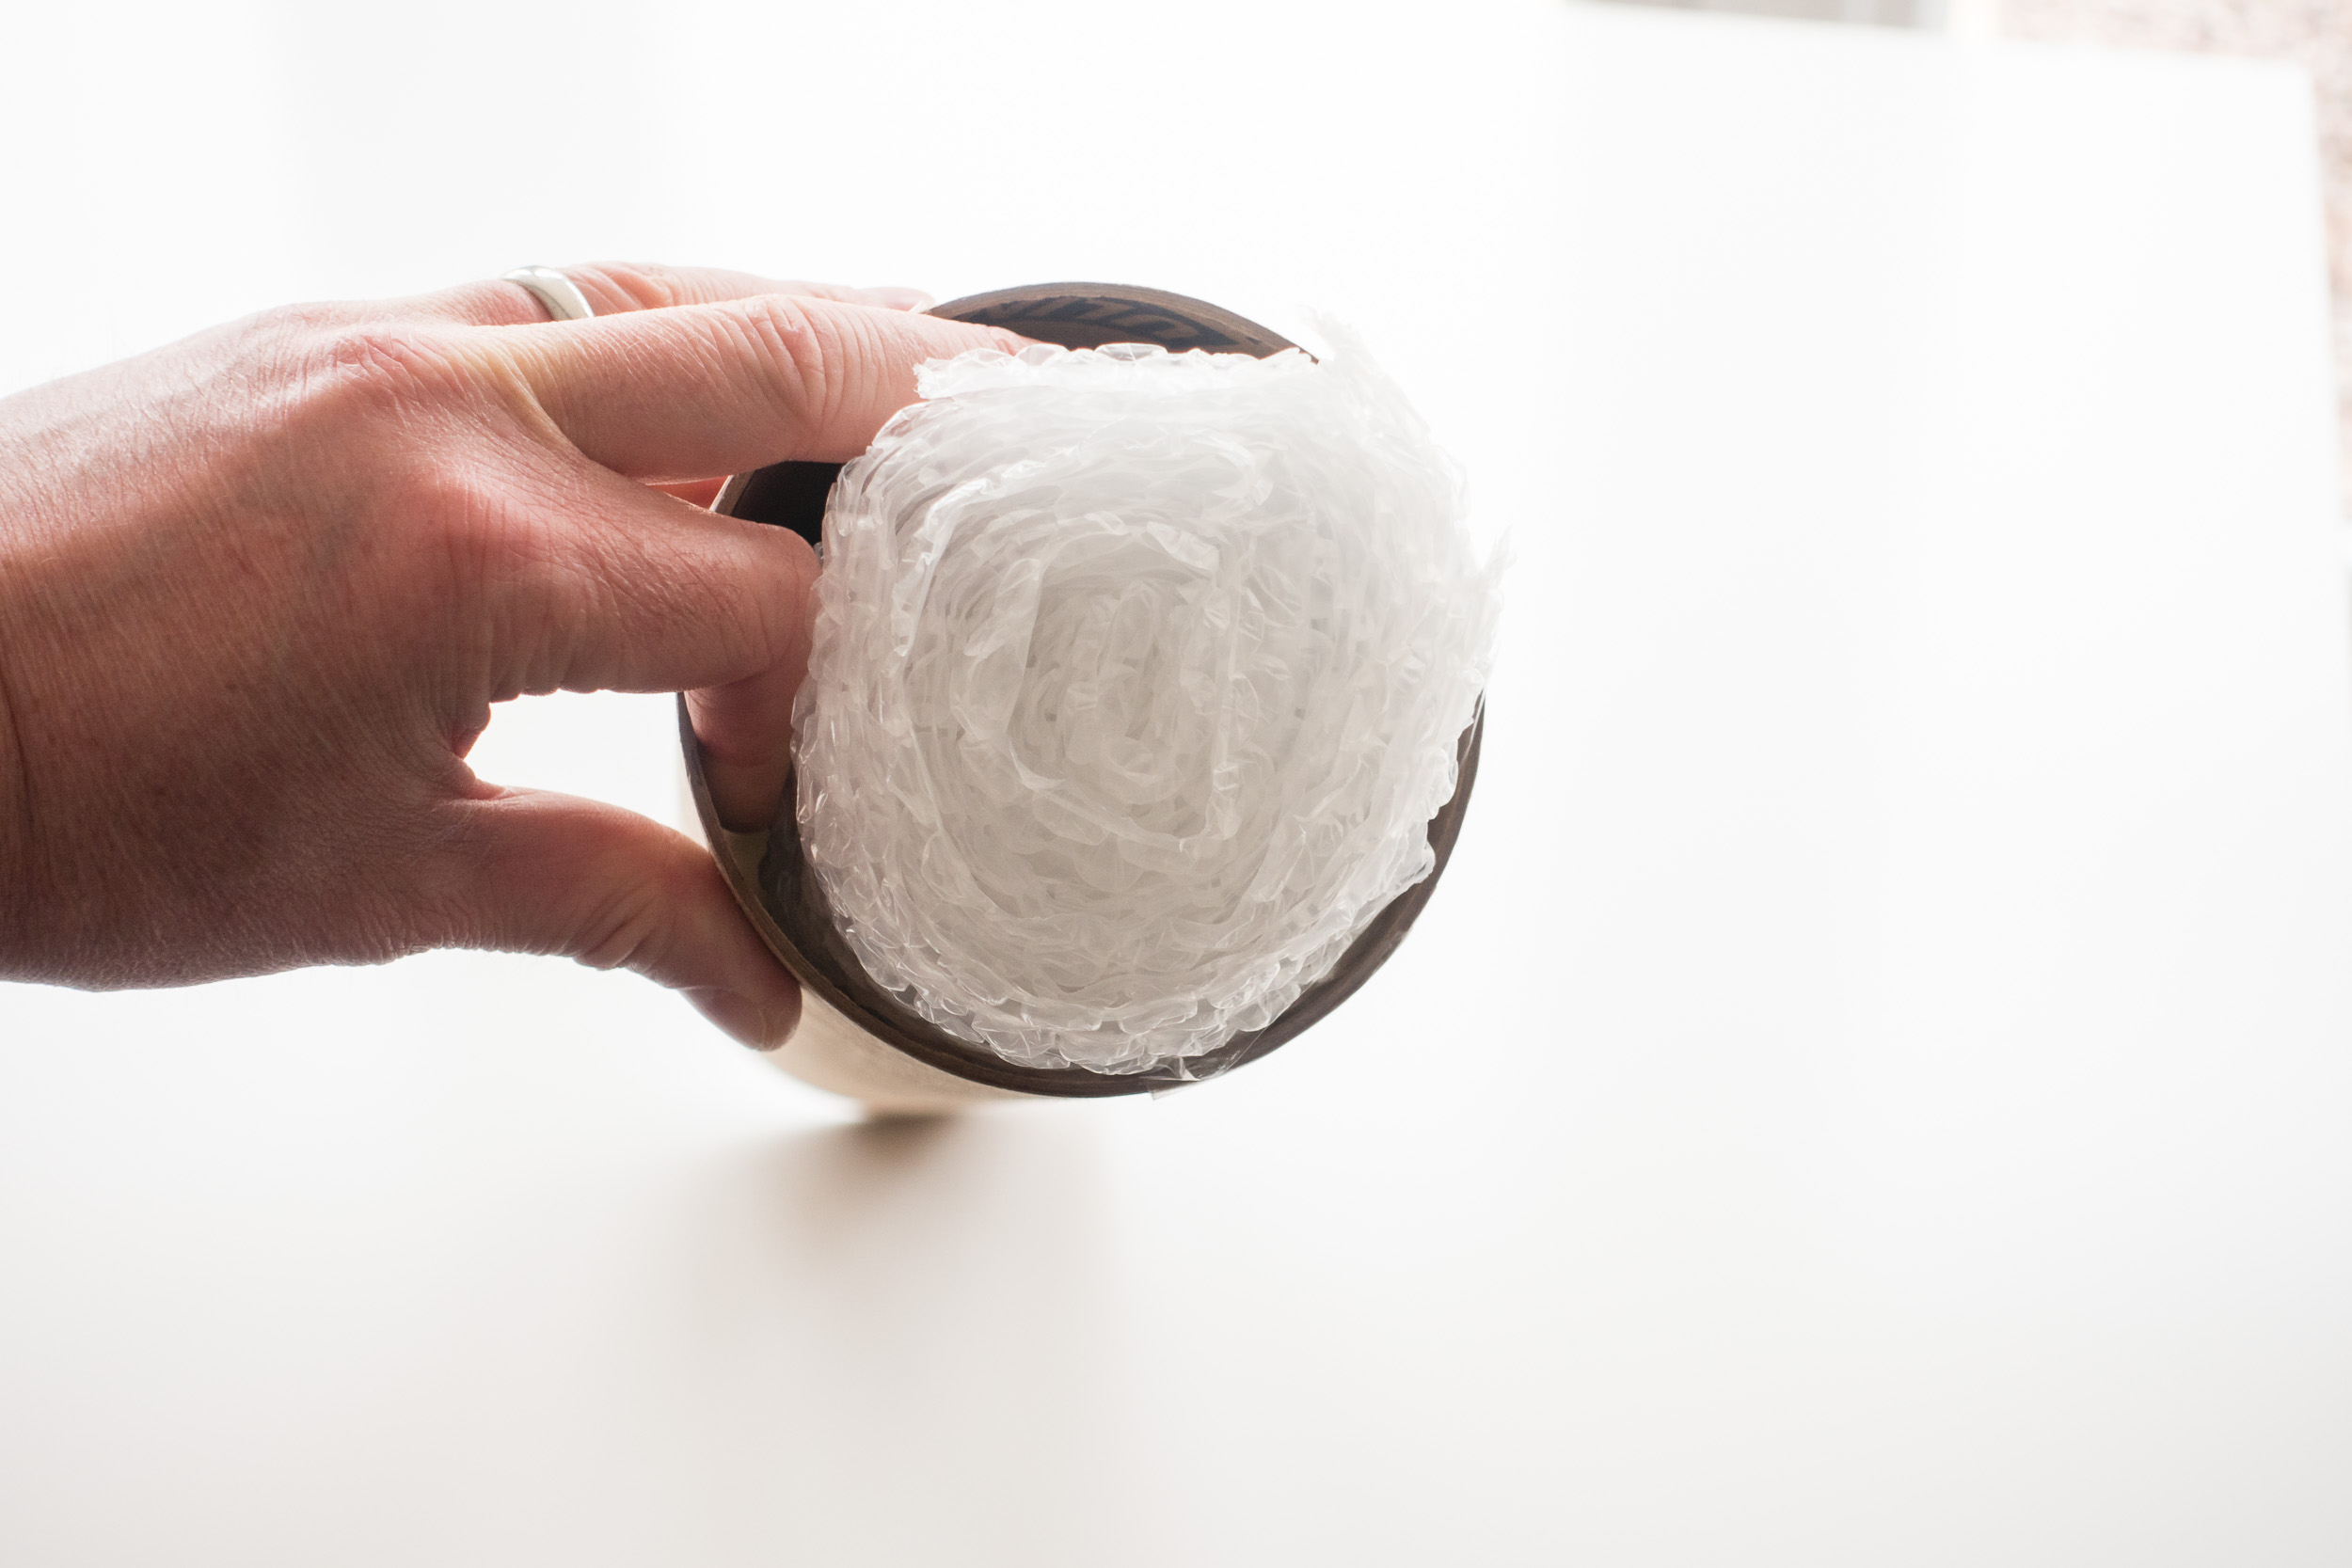
The rolling is the most difficult part of the process and you need to be careful not to damage the print, but after that, it's really just a matter of putting it in the tube along with one or two bubble wrap bungs and a business card.
Once the tube has been addressed and sealed it was off to the Post Office so the print could start its journey to Sweden!
Enjoying the Process
I suspect this whole process of printing and shipping isn't for everyone. After all, you can go to a printing lab online, upload your image and have it shipped directly to where you need it. However, for me at least, part of the enjoyment is doing it all myself. There is the satisfaction of owning the entire process from taking the image to printing it to shipping it. I like the fact that recipient of the print knows that I personally did all the work.
So do you print your own work? Do you sell and pakage your own prints? What personal touches do you put into the process? Let me know in the comments below.

Getting to Know Colmer's Hill
In this blog post I tell about my 3rd visit to Colmer's Hill and how despite the experience of the previous 2 visits I still have a lot to learn about this fantastic Dorset location.
Third Time Lucky?
On paper Colmer's Hill is a relatively straightforward location to shoot. Its conical shape makes it stand out from the rest of the landscape luring the photographer into some obvious but pleasing compositions. However, as I've just learnt the most obvious composition isn't always the best.
My most recent visit to Colmer's Hill is my third this year. The previous two visits had largely been unsuccessful but I was putting both those visits down as exploratory shoots while I looked for the optimal position. On my third visit, I decided that I would opt to shoot the hill from a less elevated viewpoint so that the top of the hill would be above the horizon. On my previous visits, I had adopted a position on top of the hill opposite Colmer's Hill. This drops the top of the hill below the horizon which, based on the images I've seen, work best when mist surrounds the hill leaving just the peak visible, similar to this image I took on my first visit in January of 2017.
The weather forecast for my most recent visit wasn't for any mist but it did show signs that the high-level cloud could be well illuminated by the rising sun. These predicted conditions together with the plan but of shooting from a lower elevation I thought would provide me with the best chance of getting a good photo. With my plan decided I set the alarm for 04:30!
On my arrival at Quarr Lane at 05:45 the conditions were already looking promising so I quickly headed to my chosen spot. Sure enough, the top of Colmer's Hill was placed nicely above the horizon and I was sure I know had the best spot. So I started to set up my camera and waited for the cloud and light show to start. And start it did. Just not where I wanted it to be. Sure there was sufficient cloud above the top of the hill but the real action was happening just 45 degrees to my right.
Not Quite the Right Spot
The most glorious show of pink clouds was happening just above the spot where the rising sun was. As a personal preference, I don't shoot straight into the sun so I had positioned myself so that it would be excluded from the frame. It seemed like a good plan at the time, after all, the good colour in the sky is not often limited to a single spot. However if I had selected a more northerly position, so the sun was rising directly behind the hill, I would have been able to include the dramatic clouds in my composition.
However, landscape photography is a combination of luck, planning and experience. I had done my planning and luck I can't really control but having little more experience at the location may have allowed me to assess the conditions more effectively and possibly change the spot I was shooting from. It would have been a bit of a walk and might have needed a brisk run but it probably would have been worth it.
However the morning wasn't wasted as I still got out with the camera, enjoyed a lovely sunrise and managed to get this pleasing image.
Nikon D750, Nikkor 70-200mm f/2.8 @ 70mm, f/11, 1/13 sec, ISO 100, Lee Filters ND 0.9 soft grad.
Understanding Your Location
So what did I learn from this trip out with the camera? Well, despite the experience of my previous two visits, and planning for the third, I found that I still had plenty to learn about shooting Colmer's Hill. As I described in my previous blog article, Perseverance - Photographing Bowerman's Nose, it can take many, many trips to a location before you really get to know it and get an image that is worthy of the location. In some cases, you might never really know a location and it will continue to throw you a surprise or two. To be honest, that's probably a good thing though.
Even though I've been there three times I will certainly be going back again. Each time I go though I will understand the location a bit better and I will be able to make the necessary adjustments to increase the likely hood of success.
My Top 3 Tips for Colmer's Hill
So if you fancy a trip to Colmer's Hill, and why wouldn't you, here are my three top tips:
Take a long lens. You'll want something in the range of 24-70mm, but if you have it take a 70-200mm (or something can reach past 100mm).
Explore. You can shoot Colmer's Hill from a number of spots, covering a range of elevations and distance. You might need to go a few times to understand which spots work best and when.
Check Weather and Direction of Light. Colmer's Hill is both a sunrise and sunset location, and it works in a variety of weathers. Choose your spot(s) based on the conditions, but be prepared to change them.
If you'd like to see more of Colmer's Hill why not check out my 5 Minute Photo Adventure video that I shot while I was there. You can see how I created the images above and give you an idea of what it's like to shoot there.
So have you shot Colmer's Hill before? Do you have a favourite spot to shoot it from? Do you have a favourite location that you've visited many times but you still feel you are getting to know it? Let me know in the comments below.

The Power of Failure
In this blog post, I tell you why I had to ditch a mornings work because I failed to check the setup of one of my cameras. It was a tough lesson but one I will learn from.
Not What I Had Planned
In this blog post, I was originally going to tell you about a new video I was making for my YouTube channel and how I got on when I visited my first location for the video. However, not only did the photography not go exactly how I hoped, but I also made some mistakes with shooting the video.
With my planned blog post not looking worthwhile, I was going to bring forward next week's planned blog post to this week. Then this morning I accidentally deleted a folder full of video and it got me thinking about mistakes and failures. We all make them but what is important is that we learn from them. So in this blog post, I'm going to tell you about my mistakes and what I've learnt this week.
Check Your Camera Settings
So this week I was going to tell you about a new exciting video project I was working on. It involved visiting a number of great locations where I would shoot some video, take some photographs and hopefully inspire you to visit these locations. As you'll read though, the shoot at my first location, The Cobb in Lyme Regis didn't exactly go to plan.
Let's start with the photography. The forecast and tide had looked promising, but as most landscape photographers will tell you, that doesn't necessarily mean that's what you'll get or that you'll get a good image.
At The Cobb I generally prefer the morning sun to come from the side, but on this morning it was rising directly in front of me. However, the forecast said there would be a bit of cloud about and I hoped the rising sun and clouds would mix to give me a beautiful sky.
Unfortunately, it didn't quite happen that way as you can see from the image below, which was probably the best of the morning.
So while the image itself isn't one for the portfolio, together with the video I was shooting it still would have told the story that I needed it to.
As I started to edit the video from The Cobb, something quickly became apparent. It's wasn't the shots from the DSLR, or the video from the Sony RX100M4, or even the audio from Zoom H1. What I had failed to do was to check the settings on my DJI Mavic Pro. All the video I had shot with the drone was low resolution and at the wrong frame rate. The drone footage was very important in showing the viewer more about the location. Unfortunately, the drone footage would not work well with the other video I had captured.
I'm not entirely sure why the drone camera was configured incorrectly, but that isn't really the point. I should have checked the settings before I started shooting. I always check the camera settings on my DSLR and Sony RX100M4 so why on earth wouldn't I do the same for my other cameras!
I like to put out quality work, and while the still image I captured was suitable, when I had realised I had made a mistake with the video I decided I would rather go back and shoot the whole thing again. I've been working hard to increase the overall production quality of my videos so I wasn't willing to let this pass quality control.
So what have I learnt? I need to check each and every camera I use, each and every time I use it! I put a lot effort in my content, and the time I have to do it is very limited, so I need to make sure I don't waste time by not checking all my cameras on each shoot.
I will of course not let this little setback deter me from making the planned video!
I Just Deleted All My Video Content
This morning, while cotemplating this particular blog post, I decided I would "tidy up" some of my unused, but still potentially useful, video clips I have. Trouble was that I deleted all my current video content, including some highly valued footage!
Here I have some good news though. I run a rigorous and regular backup process so while the deletion of the data was a drag I knew I could restore it quickly enough. Sure enough, I just inserted the hard disk with my last backup and restored the data with one click. My backup routine is far more extensive than a single hard disk so if you are interested in hearing more about it let me know in the comments below.
So do you check your settings before each shot? Have you taken a bunch of photos with camera incorrectly setup? Let me know in the comments.

Discovering the Joy of Printing
In my this blog post and video I tell you why I have decided to start printing my work and what it was like to print my first A3 image using a Canon Pixma Pro-10s printer.
Why Print?
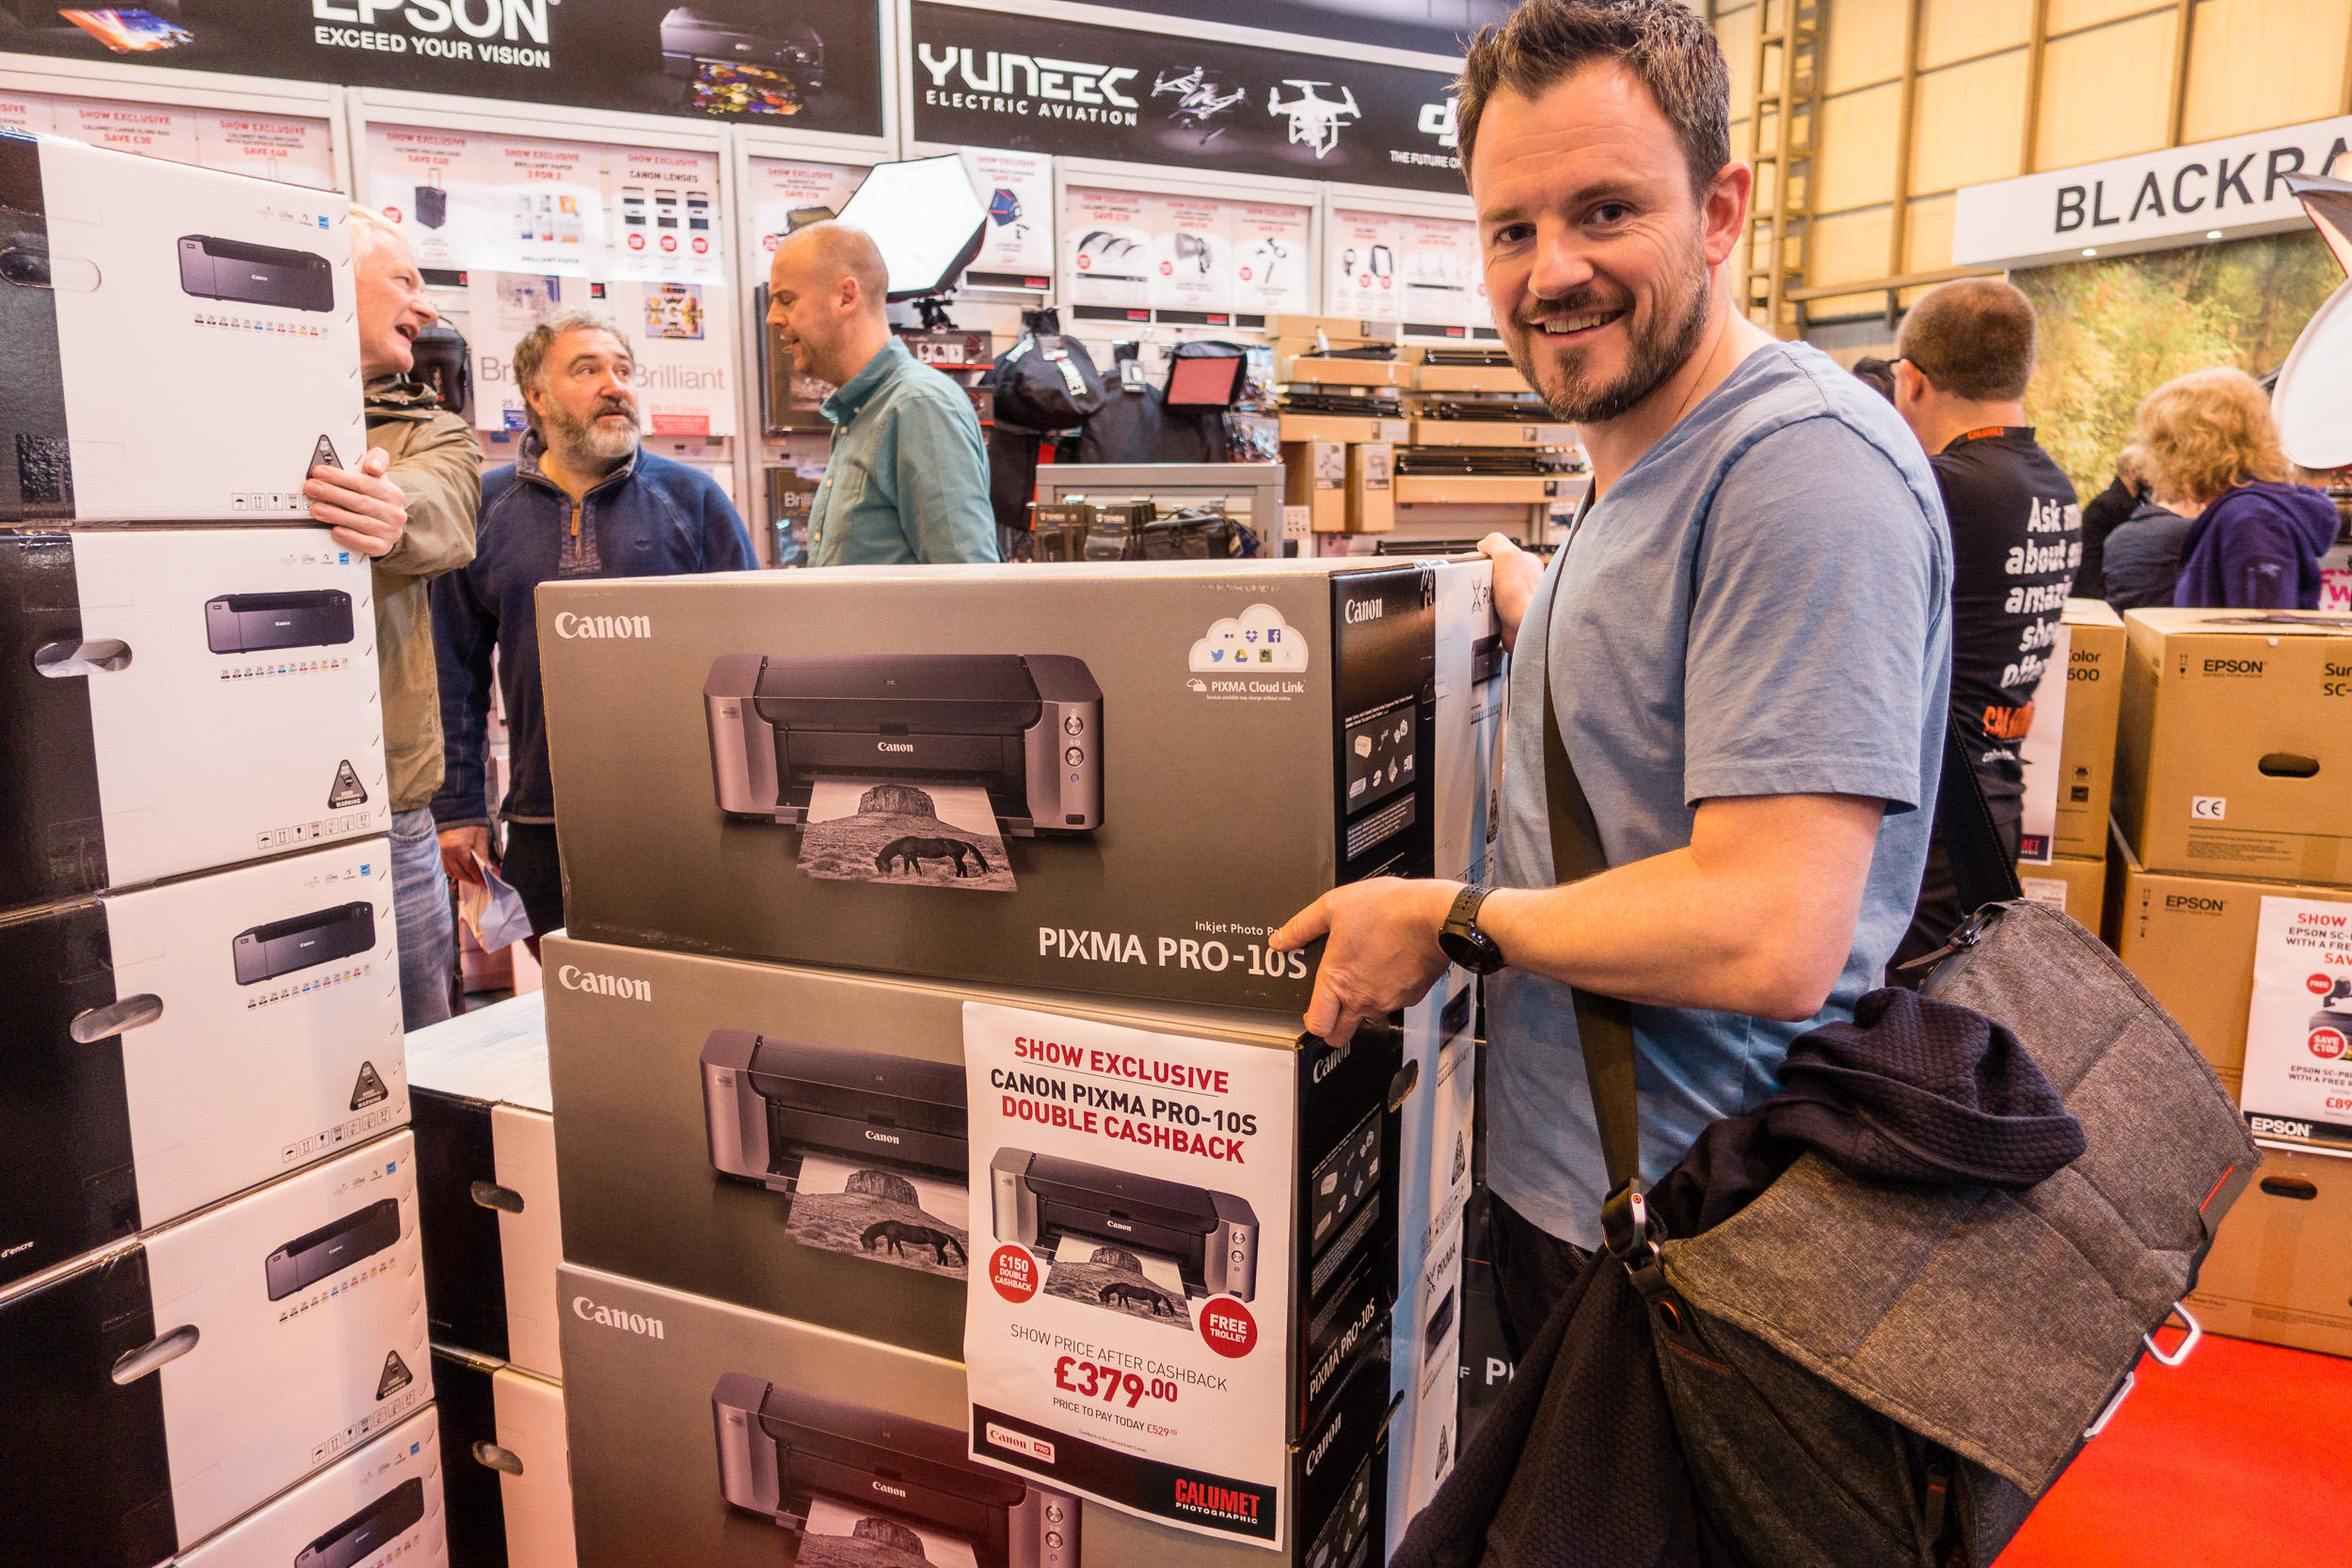
I was at The Photography Show at the Birmingham NEC a few weeks ago and while I was there I picked up a Canon Pixma Pro-10S printer. Every year I hope to pick up a bargain from the show and this year was no different. When I saw that Canon was offering double cash back on their range of Pixma Pro printers I went straight to the Calumet stand and grabbed myself Pro-10S.
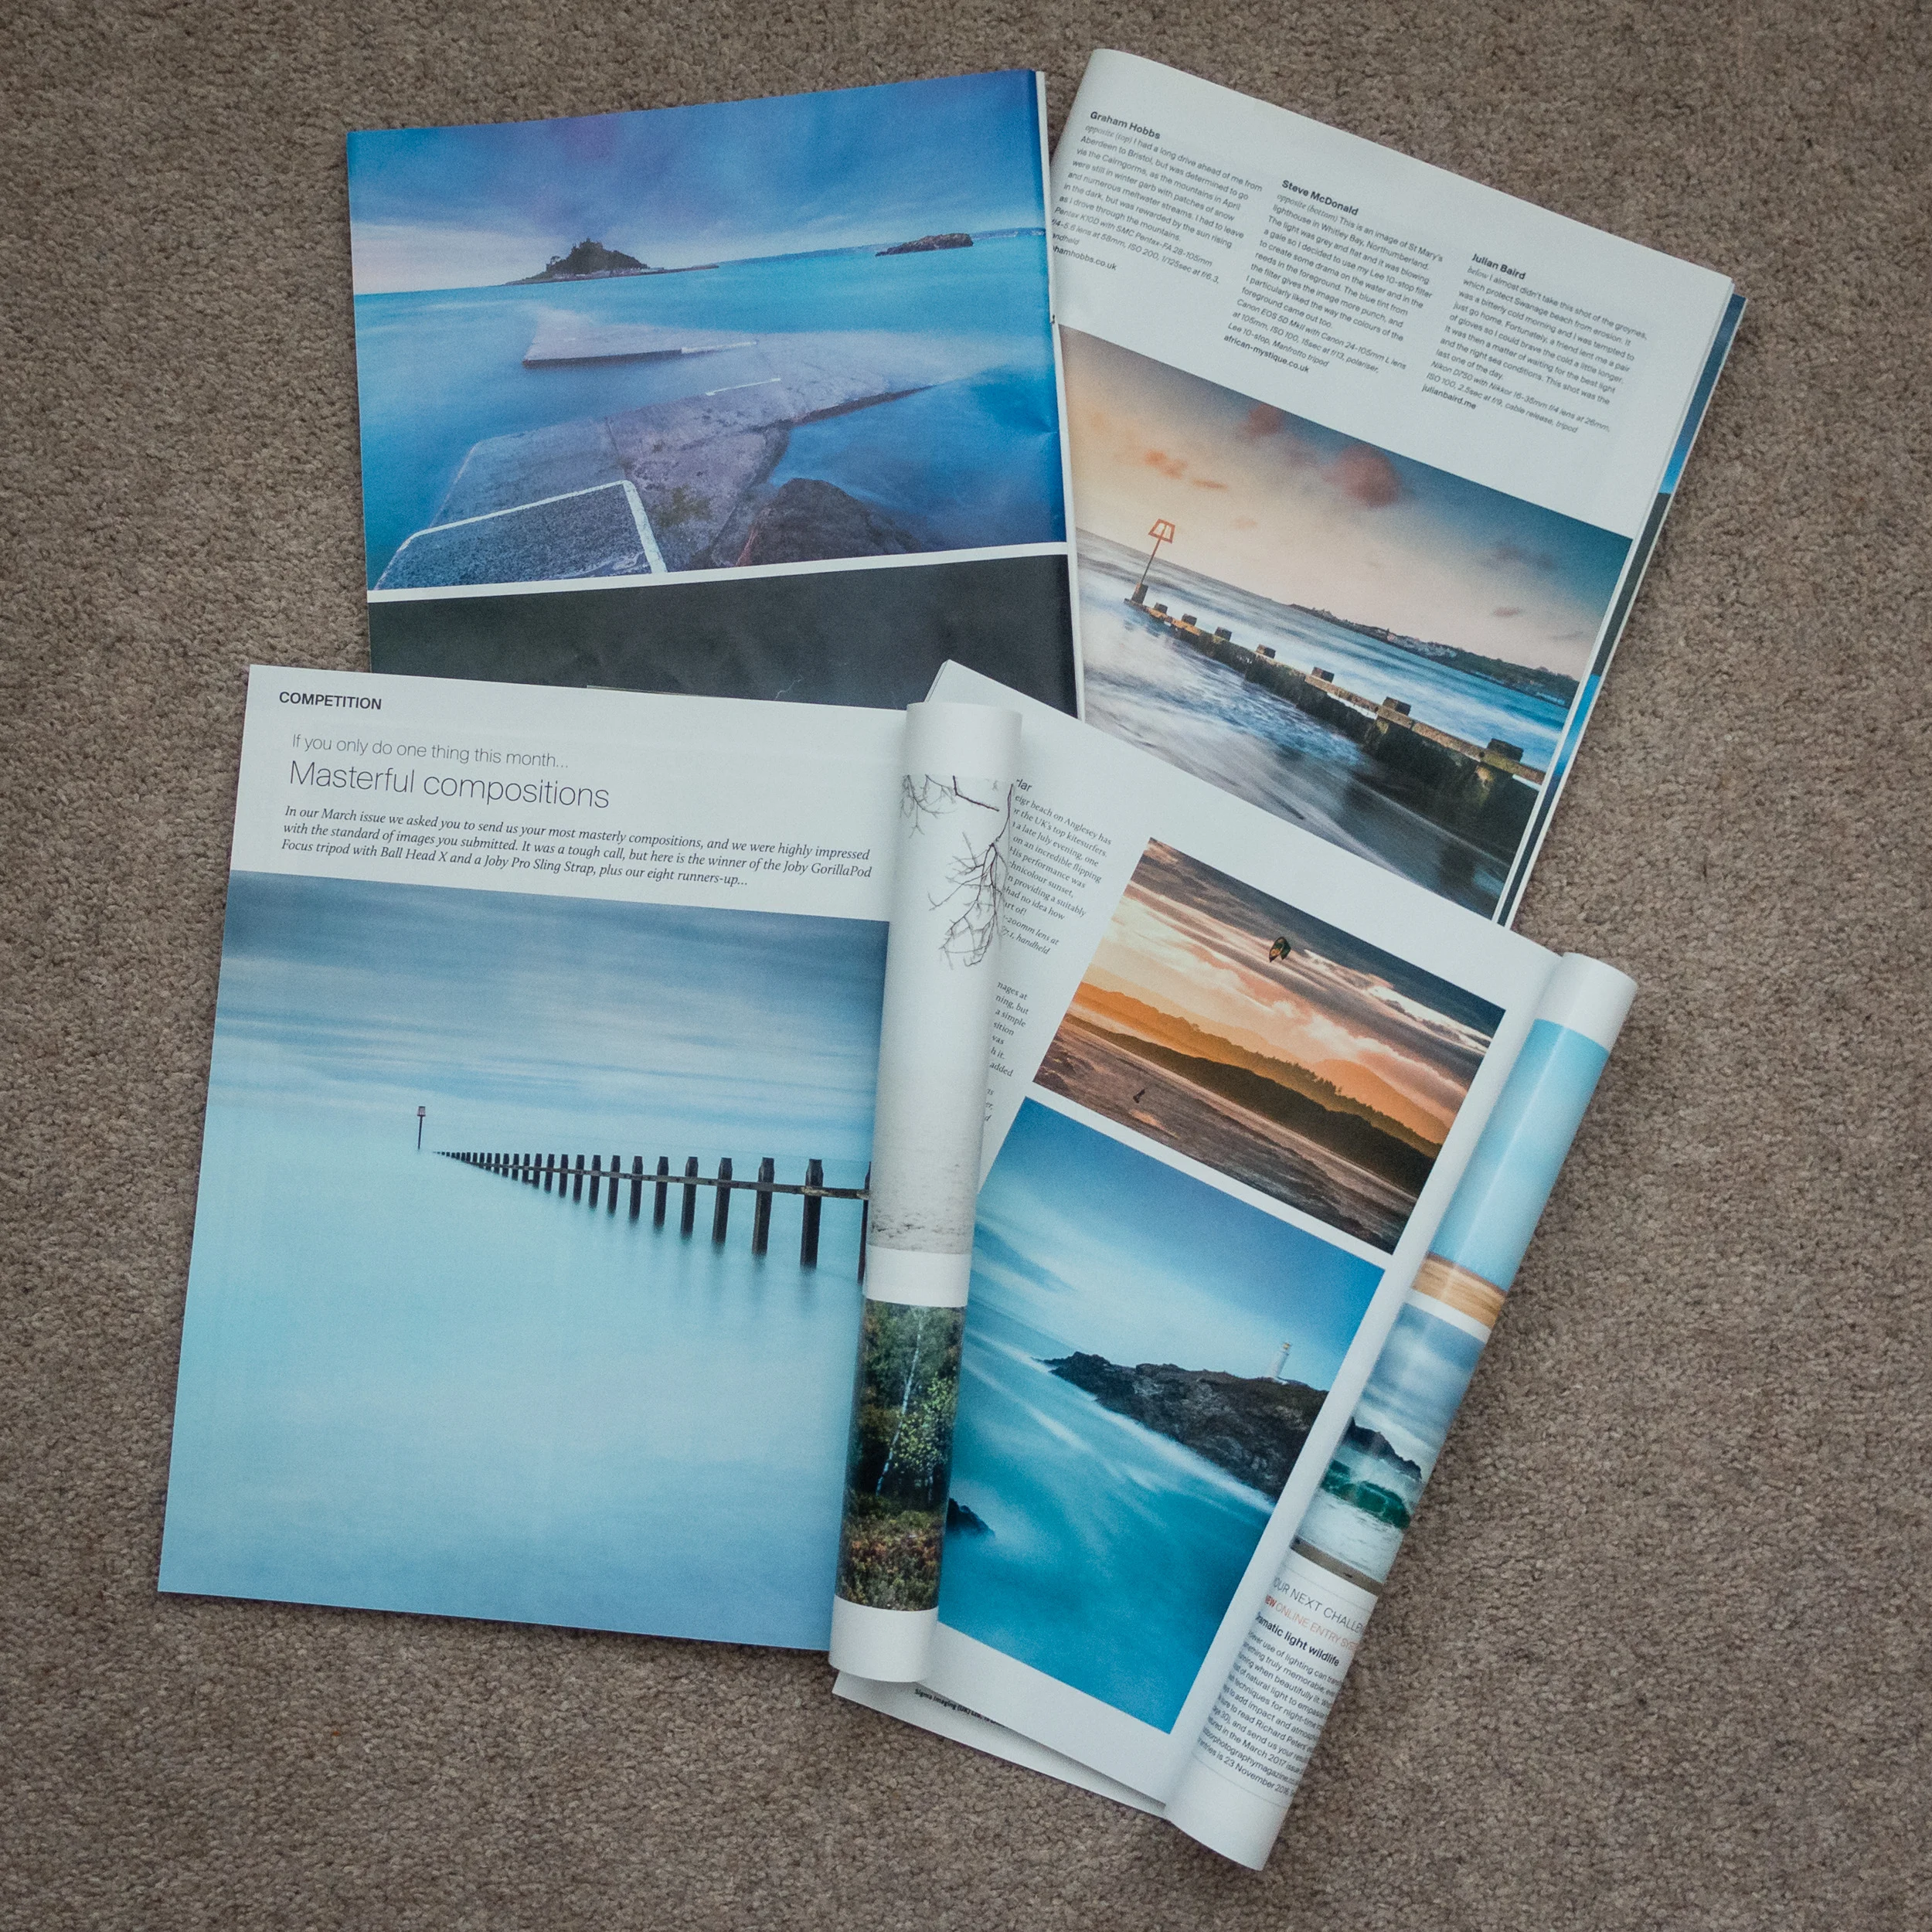
Though this may sound like a spontaneous decision, it was not. For at least a year now I've wanted to extend my workflow to include printing. There are a couple of reasons for this decision. Firstly, seeing some of my images printed in Outdoor Photography magazine has made me realise how wonderful it is to see one of your images in print.
I have also been influenced by a couple of photographers that I follow online that are big proponents of printing, Martin Bailey and David duChemin. Martin wrote and excellent ebook on printing Making the Print and David has an excellent video on Ideas for Living With Your Photographs.
I wanted to live with my work a bit more. Why should my images gather dust in a digital archive? I want to see what my images looked like in physical form.
Printing at Home
So why would I go to all the hassle of printing at home? Why not just send the images to a lab and have a professional do it? This is a valid question but for me, half the fun is the process of the print. There is a sense of excitement as the printer slowly prints out one of your images. The anticipation of seeing the final result. Printing is the last step in a complete end to end photography workflow that starts with capture and ends in print.
This isn't to say that I wouldn't use a lab. Labs are great, especially if you need an unusually large print, need framing or need to print on other materials. But for me, I want that tangible experience of doing the print myself and hanging it on my wall.
What about the cost? Isn't printing at home expensive? I'll be absolutely honest with you, I have not concerned myself with how much each print will cost. That's not to say that I don't care, it's just that the cost per page isn't something that has influenced either my decision to print at home or the decision to buy this specific printer.
I've always owned Canon printers and my current office printer is a Canon so I was very comfortable with my decision to buy the Canon Pixma Pro-10S. Also, given the volumes of printing that I was going to do, I could treat myself to an A3 print every now again. Compared with all the other money I have spent on photography over the years, the cost of a print seems a small price to pay to further my enjoyment and experience of photography.
My First Print
I was excited to make my first print with my Canon Pixma Pro-10S. One of the first things I needed to do was to get some paper. There is a dizzying range of paper types and sizes out there. I thought I would make my life easy to start with by selecting from Canon's own range of pro papers. After watching David Noton's videos on A guide to Fine Art and Photo Printing and Fine Art and Photo Printing I knew the Canon paper types would already have the relevant ICC profiles installed which should make my first print easier. He also made some good suggestion on which paper types to use.
So I got onto Amazon.co.uk and ordered some Canon Pro Platinum A4 and A3+ glossy paper. I was ready to start printing. If you want to see how I got on with my first print, from setup to final output, I've made a short video of my experience.
Impressive, Fun and Simple
To say that I was impressed by the output would be an understatement! The accuracy of the print compared to what I saw on the monitor was remarkable. The colours, tones and contrast all looked amazing on the glossy A3 paper. My black and white image from my Live Music portfolio was also stunning with the printer producing a punchy and detailed print.


I was also pleased how simple it was to make a successful print. I was already calibrating my monitor but I was worried that I might have to extend that to include printing, but Getting an accurate print was no more difficult than selecting the correct paper type in the Canon Print Studio Pro.
However, almost as important as the quality and simplicity of the process was that it was fun. There really was something very special about watching one of your favourite images gradually appear from the printer. When I held up that first print to the light I realised that I had definitely made the right decision to get into printing. The whole experience of looking at your images in print is so vastly different from seeing them on a monitor, even one as good as my Eizo monitor. Printing now as a permanent home in my photography workflow and I can't wait to print more of my images.
So do you print your work? Do you print at home or use a lab? Let me know in the comments below.