

My Top 5 Tips to Improving Your Landscape Photography
In this blog post I share with you my latest video in which I tell you what my top 5 tips are to improving your landscape photography.
Tips for Landscape Photographers
I've been shooting landscapes since I got my first DSLR back in 2006. However, it's probably only in the last few years that I've started to really progress as a landscape photographer.
In this vlog, I share with you the 5 things I think will help you improve your landscape photography. This is a personal list, and not even necessarily the only 5 things you should do. It's just 5 things that I did that had a direct impact on my landscape photography. Hopefully, some of them will work for you also!

In Summary
I explain the tips in the video, but for those of you who are currently unable to watch the video, the tips are:
Practice - Make sure you practice your photography. Practice lots!
Be Inspired - Have plenty of sources of inspiration!
Get Involved - Go on a workshop or enter for a magazine feature!
Get Sharing - Share your work or enter a competition!
Adventure - Get out there and go on a photography adventure!
And there is a bonus tip, but you'll just have to watch the video for that one!
So do you have any tips you want to share? What things did you do to improve your skills as a photographer? Which of my tips are you going to follow? Let me know in the comments below.
Glencoe Adventure - Part 2, The Vlog
In this 2nd of two special Glencoe blog posts, I'll share with you my vlog of the 24hrs I spent in Glencoe before the workshop. It was a busy and tiring time but the effort I put in resulted in some special images!
Maximising your Time
Last week, in part 1 of my Glencoe Adventure blog, I shared with you the images and stories from my time at the Dawn 2 Dusk Glencoe photography workshop. This week, in part 2, I will be showing you what I got up to with the 24hrs I had between arriving in Glencoe and the start of the workshop.
I had booked the workshop more than 12 months in advance so I had plenty of time to organise and plan my trip. Though the workshop started at 1 pm, the risk of being delayed if I decided to travel up on the day was just too great. So the only option was to travel up the day before. Rather than opt for a mid-morning departure from Devon and arrive early evening in Glencoe, I decided that a very early start was in order.
If I left at 5 am and undertook the 520-mile journey, I could feasibly make Glencoe for about 3:30 pm, just in time to get some sunset pictures! I then also had the morning to do a dawn shoot, with perhaps some post-breakfast shooting and all before the start of the workshop. My plan had been hatched!
Rather than write about the 24 or so hours I had in Glencoe, I've documented my adventure in my latest vlog. Check out the video below, and if you haven't subscribed to my YouTube channel then what are you waiting for!
Needless to say, I did not regret that 4:30 am alarm call!
Image Gallery
The gallery below is a collection of the images that I took during my 24hr adventure in Glencoe. They are in the video but sometimes it's nice to see them in a bit more detail so click on an image to bring them up in a lightbox.


A Good Book to Pass the Time
The video is just a snapshot of my 24 hours before the workshop so here is a few stories that weren't in the video.
Firstly, while the journey from home to Glencoe took around 10 hours, it didn't feel like a very long drive. The principle reason for this is entertainment. I've been a long time subscriber to Audible and listening to a good audiobook is a great way to pass the time on those long car journeys. For the journey, I started a new book called Fear the Sky by Stephen Moss and read by R. C. Bray (who also read the other excellent sci-fi book The Martian). I had a feeling it was going to be good (as it was recommended by the same person that recommend The Martian to me), but I was engrossed from the moment the story started. Let's just say that I almost didn't want the journey to end!
Most landscape photographers drive a lot and if reading any of the Game of Thrones novels seems like an impossible task then why not pass the time with a good audio book.
Waders and Being Social
One of the shots that I wanted to get while I was there was a sunset shot of Stob Dearg (Buachaille Etive Mor) from the River Etive. To get the shot that I wanted I would need to wear a pair of waders (as inspired by this Thomas Heaton video). I borrowed my father-in-law's waders and put them in the boot of the car, unsure whether I would actually need them or not. When I arrived in the layby near my planned shooting location I felt a bit silly putting on waders to go out and take images. No one was about though so I set off on the short walk to the location where I would shoot.
However, as I approached the spot I could see another photographer there. This is generally not an issue and I'm always up for a bit of a chat but what would this person think if they saw me wearing waders to take photographs! Well, imagine my surprise when he also was wearing waders! All of a sudden it didn't feel that odd to be wearing a pair of waders to take photos.
The chap in question was Johnny Baird and we joked about what the odds would be that there would be two photographers named Baird, wearing waders, taking landscape photographs from the middle of the river that evening! Landscape photography can be a solitary pastime so it's nice sometimes when you meet a like-minded individual and you can chew the fat over photography while standing in the middle of a river!
Johnny has a wonderful portfolio of landscape images and I strongly suggest you check out his Facebook page.
A Missed Opportunity
After my epic early morning of photography shooting Stob Dearg from Beinn a'Chrulaiste I was hugely satisfied with my morning's work. After breakfast though I thought I go and see if there was anything else I could shoot before the workshop started in the afternoon. I also thought it would be a good chance to properly test out my latest addition to my kit bag, the DJI Mavic Pro.
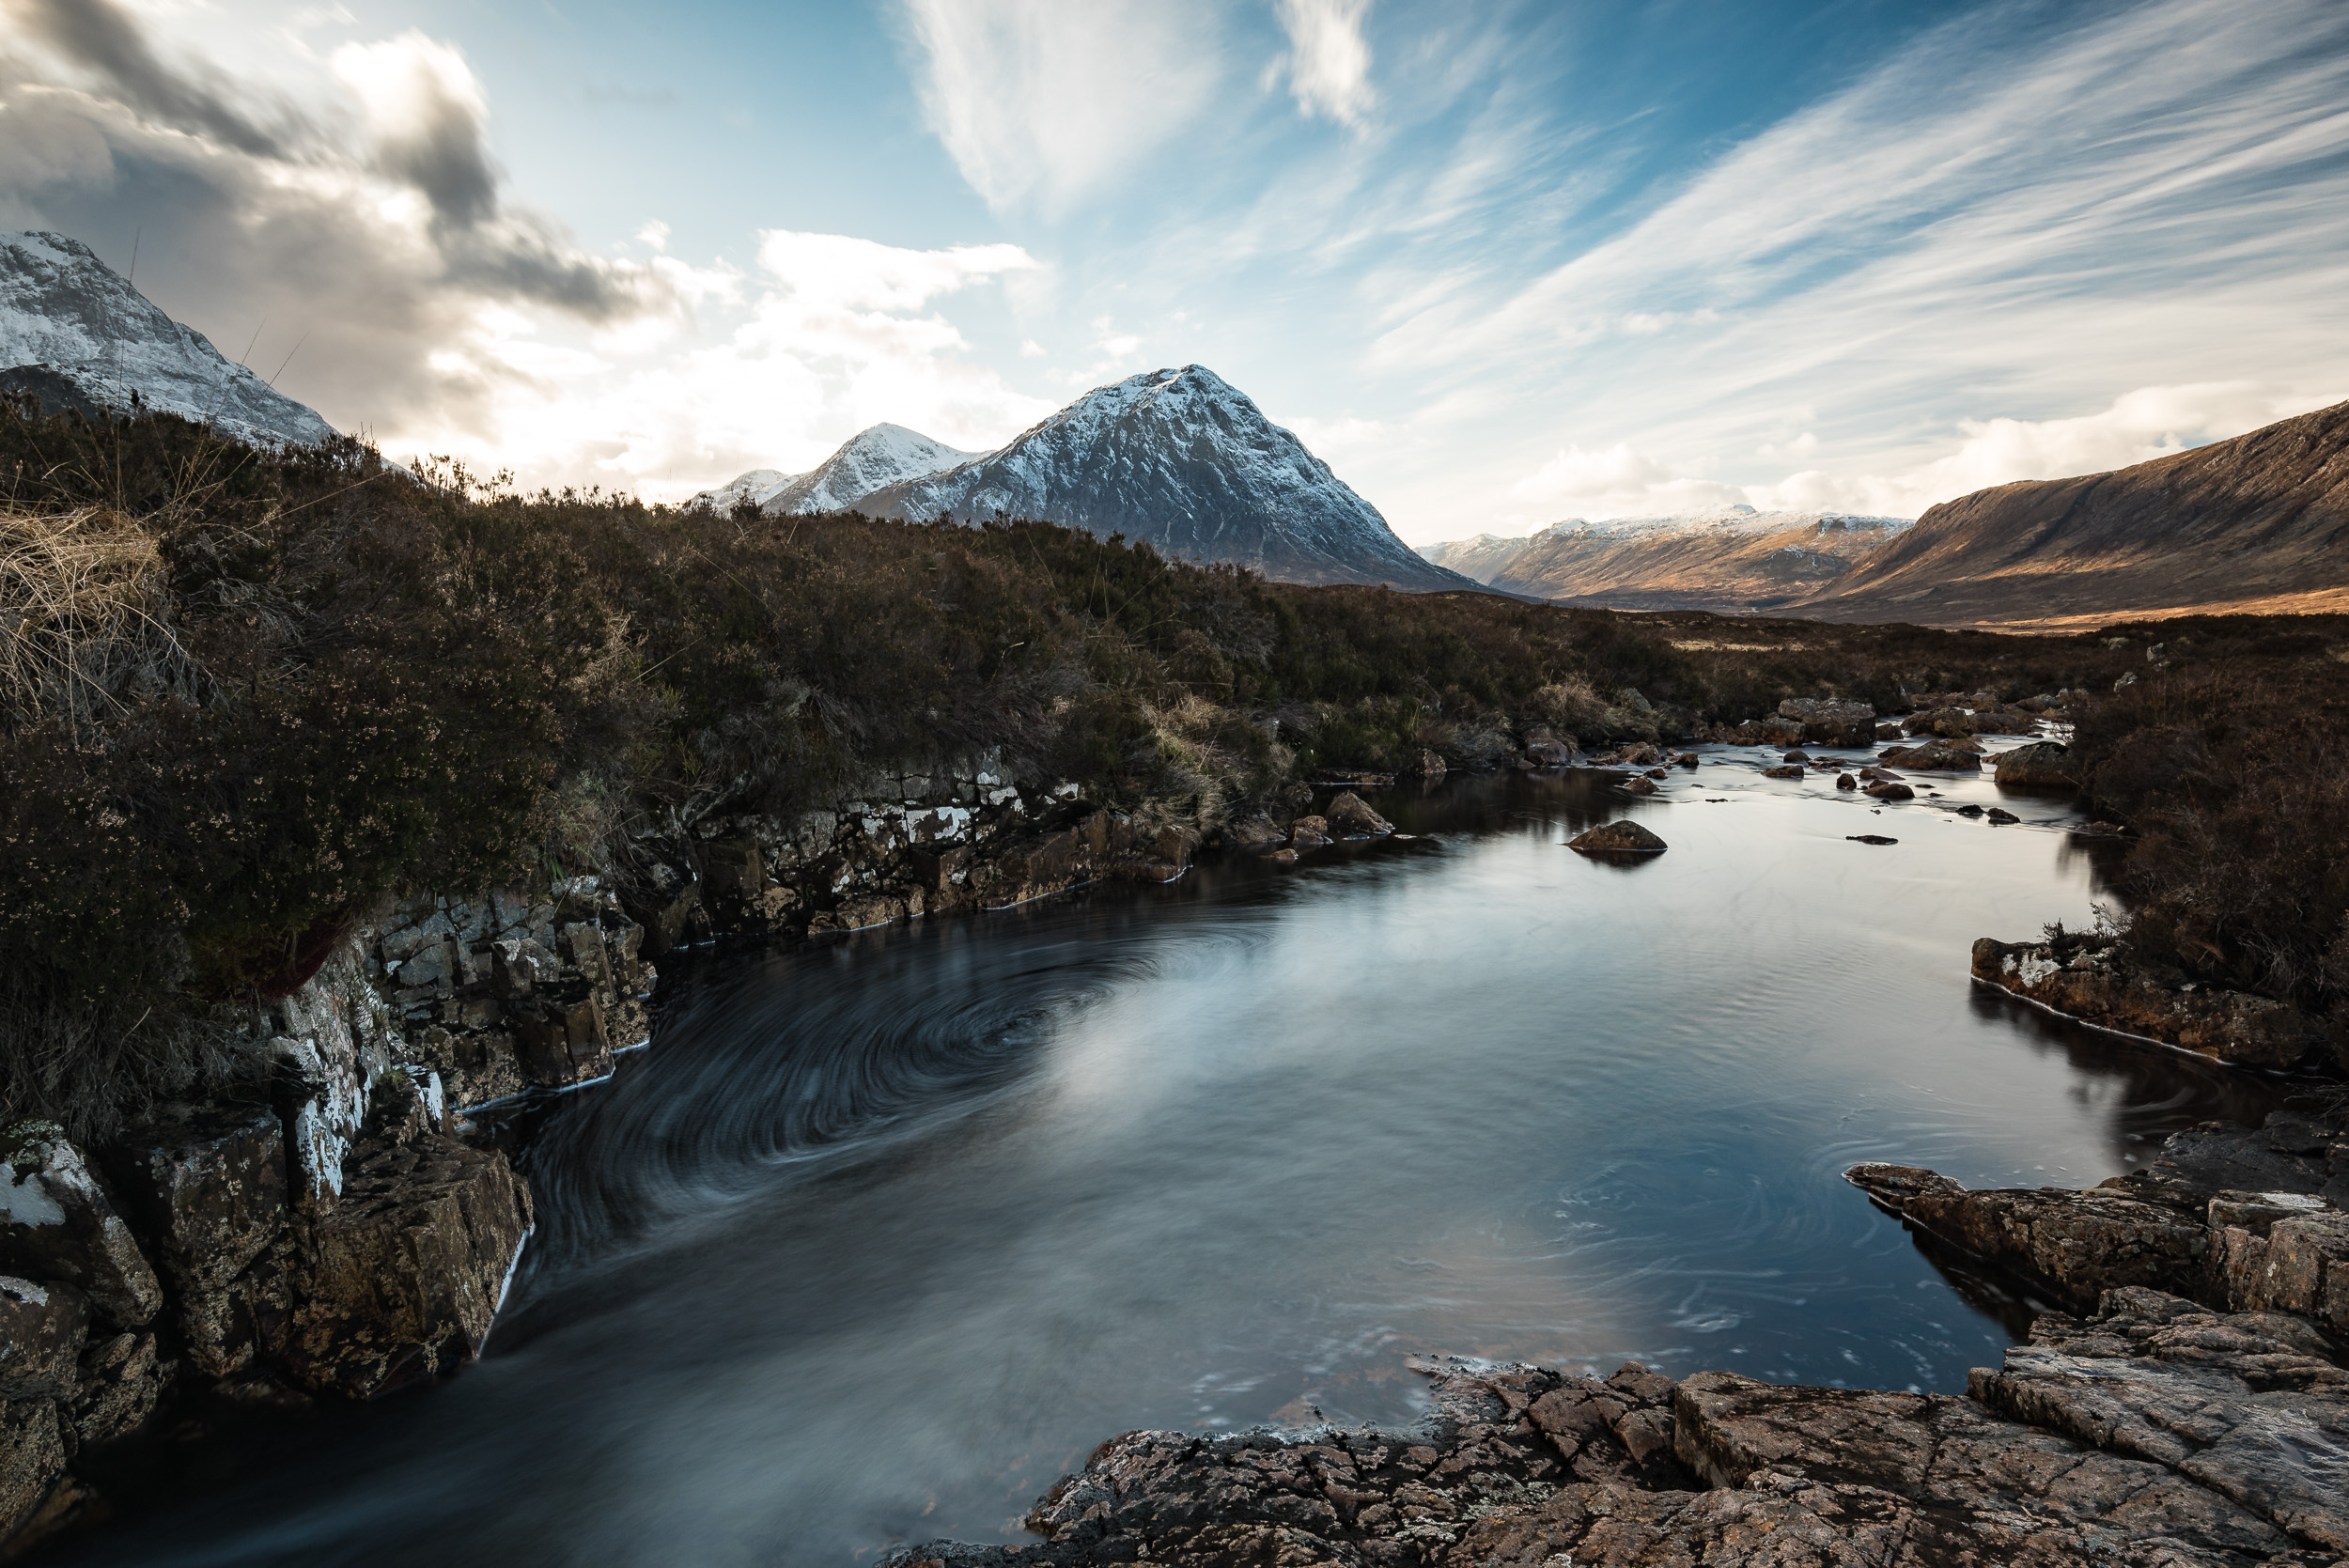
One of the locations I visited was the spot where you can photograph Stob Dearg and the River Coupall. As this is such a hugely popular spot for landscape photographers I was not surprised to see another couple of photographers there already. I didn't want to spoil these photographers experience of the location so I did ask if they didn't mind if I flew the drone around the area. It wasn't a problem and as the drone is often a talking point we also got chatting about drones and photography in general.
The conditions at the location were also ideal for stills photography. The snowy peak of Stob Dearg was clearly visible, there was some cloud in the sky and plenty of water in the river. All I had to do was walk the very short distance back to the car and get my DSLR. Except I didn't. I already knew that we would be visiting this very location in a couple of days during the workshop so why would I bother shooting it now. After all, I'll get the same shot when I return.
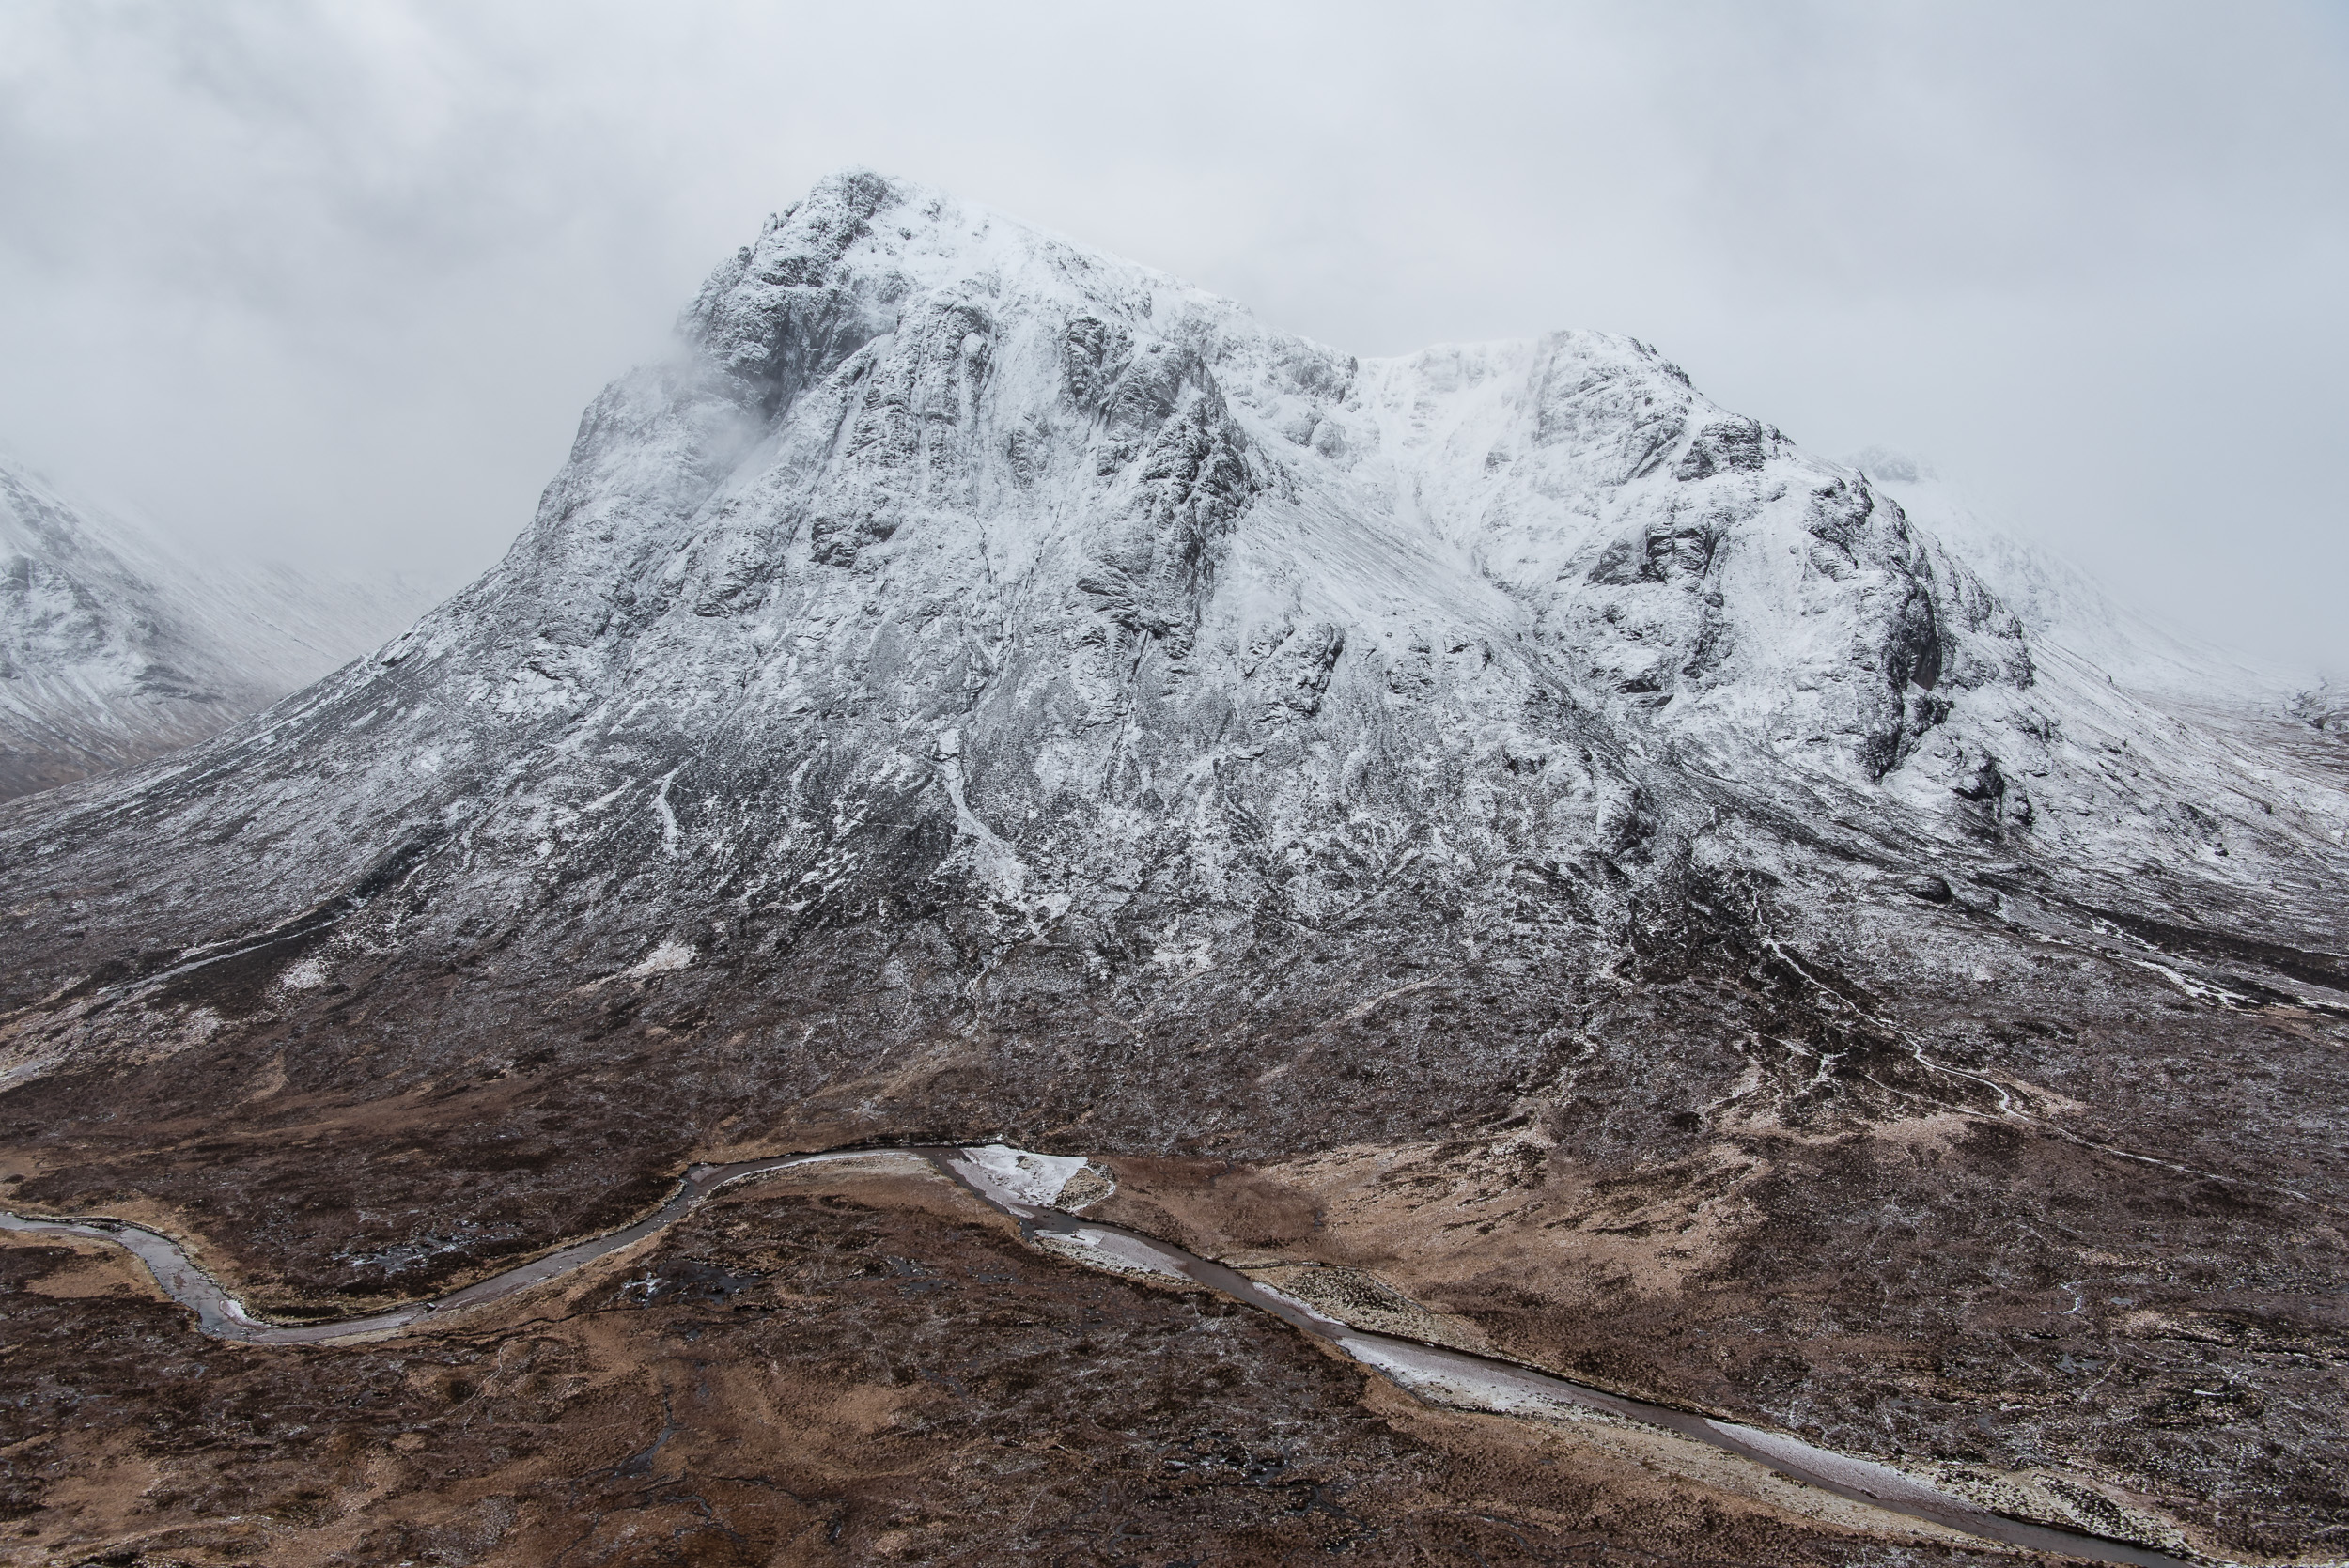
Having grown up in Scotland I really should have known better. After all, Scotland is well known for having weather that produces all four seasons in one day. Sure enough, when I did return with the workshop group the conditions were totally different. One of the main focal points of that spot is the visibility of Stob Dearg but when I returned it was covered in cloud. Though I waited and waited for the cloud to clear it never completely cleared, leaving me regretting my rather silly decision of not shooting the scene when I was there earlier! Lesson learnt.
An Epic Adventure
Even if I'd only had those 24 hrs in Glencoe it would have been a worthwhile trip. As I said in the intro of the video it's important to go on an adventure every now again and push the boundaries of your landscape photography.
It took time and effort to get up Beinn a'Chrulaiste at dawn to get those shots of Stob Dearg but it was worth every step to have the pleasure and simplicity of shooting up there. The previous few weeks shooting in my local area hadn't been hugely successful and this trip to Glencoe gave my passion for landscape photography a well-needed boost.
So if you are struggling with what to do next with your landscape photography take a few days off work, grab your camera and go somewhere where you've never been before. It will be time and money well spent!
So when was the last time you went on an adventure with your photography? What's the furthest you've driven to get a photograph? Let me know in the comments below.

Glencoe Adventure - Part 1, The Workshop
In this first of two special Glencoe blog posts I'll share with you my images and stories from the Dawn 2 Dusk Glencoe workshop that I attended recently. It was a fantastic few days of photography. Though the weather was typically Scottish at times, the variable conditions resulted in some awesome images.
The Importance of Adventure
I have talked about the importance of practising the art of photography on this blog a number of times. For me, and I expect this is the same for many photographers, most of this practice will take place in your own back yard. Not literally of course, but most of the time you are out with a camera it will be in your local area. For me, this is Devon with the occasional visit across the border to Cornwall or Dorset.
While there are many benefits to shooting locally, such as time and familiarity, there is nothing quite like the challenge of pushing the boundaries of your photography by going on an adventure! Adventure means different things to different people, but for me, it's the excitement of travel, of meeting new people and of course photographing something new. All these elements can really push your photography in a way that you sometimes just can't get locally.
Though I have visited Glencoe a number of times and even grew up not far away, this will be my first time in the area as a dedicated photographer. So while the area might be familiar, the prospect of photographing it was exciting, to say the least. Well worth the 3 days off work (plus the weekend) and the 10 hours drive each way!
This week, in the first of two Glencoe blog posts, I will be sharing my memories, thoughts and photographs of the Dawn 2 Dusk Photography Glencoe photography workshop that I attended. Next week, in part 2, I will be sharing the images and video that I took with some of the extra time I had in Glencoe.
Why Workshops are Important
So why didn't I just spend all the time I had in Glencoe doing my own thing? Well, for me at least, workshops provide a number of unique benefits that I can't get by shooting on my own:
Practical and Artistic Development - Tuition is still a big part of my development as a landscape photographer and for the Glencoe workshop, I had access to two of the UK's leading landscape photographers, Ross Hoddinott and Adam Burton. Having access to this level of photographer not only helps with the artistic side of my photography but also with some of the more practical aspects of photography (read how later in the blog post).
Being Social - The life of a landscape photographer can be a solitary existence, especially if you favour early mornings like me. However, every now and again it's just good to be around like-minded individuals. Just by chatting during the day you can not only learn about how your photography looks to others, but also learn from their photography. At night, normally around the bar, it is a great chance to share those funny, odd, or disastrous trips out with the camera.
Local Knowledge - There is only so much planning and preparation you can do on the computer. In order to maximise time with the camera when you arrive at a new location, it's sometimes useful to have access to some local knowledge. For me, workshops provide me with an introduction to the photographic possibilities of an area and while I could do this myself I don't always have the extra time.
So now that we've talked about the importance of adventure and the value in workshops, let's get into the most important aspects of this adventure, the photographs!
Day 1: Castle Stalker
The 2.5-day workshop started with a briefing at our base of the Clachaig Inn just outside Glencoe village. Adam and Ross managed to suitably embarrass me by remembering my birthday with a chocolate cake and singing happy birthday! After the very sociable start of coffee and cake, we all headed down for a sunset shoot at Castle Stalker on Loch Linnhe.
Nikon D750, Nikkor 70-200mm f/2.8, @ 200mm, f/8, 1/60th second, ISO 100, Lee Filters ND Grad, 16:9 crop.
As you can see from the shot above, the descending sun illuminates the side of the castle rather nicely. I was hoping to get a similar shot to this with water surrounding the island, but as the tide came in the light became flat thanks to some heavy cloud where the sun was setting.
It was still a good start to the workshop and we all headed back to the hotel for some well-earned food and drinks.
Day 2: Lochan na Fola and Stob nan Cabar
As you might expect with a landscape photography workshop it was an early start to the 2nd day. Fortunately, the drive to our next location of Lochan na Fola wasn't far from our hotel so the alarm call wasn't too early.
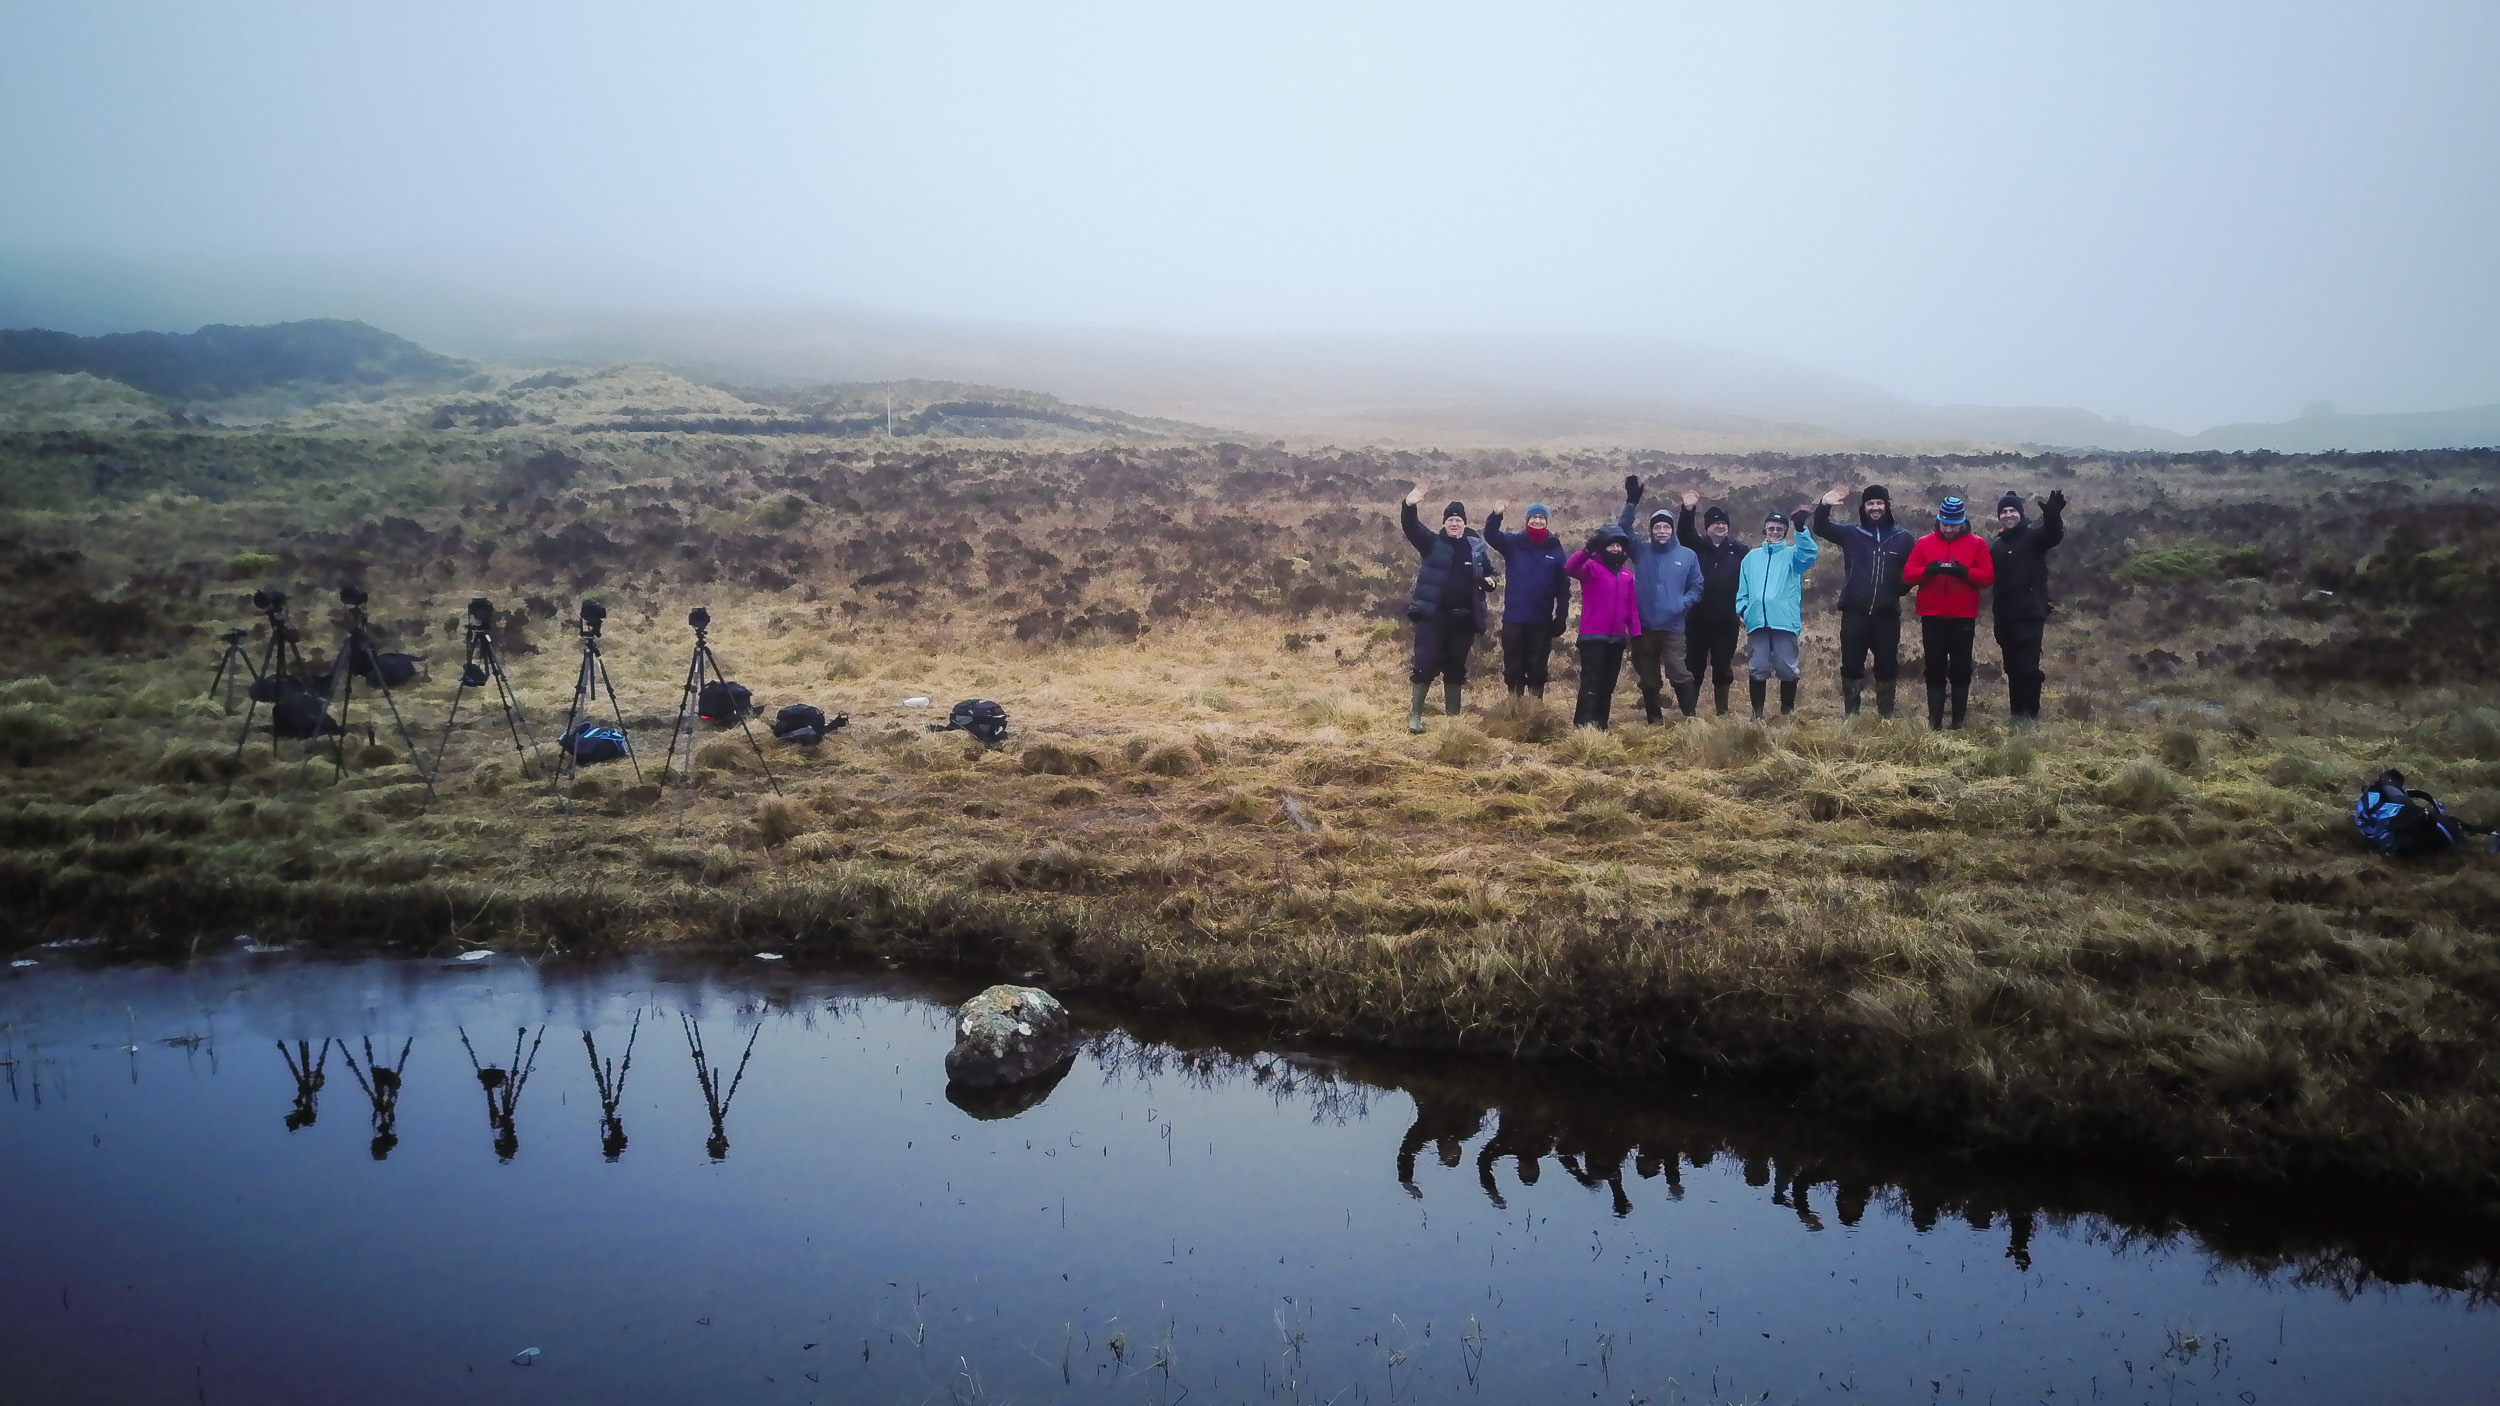
When we arrived at Lochan na Fola the water was beautifully still giving us some wonderful reflections of Stob nan Cabar. Just as we setup though some cloud rolled in blocking the view of the mountain. As we waited I decided to try out my new drone the DJI Mavic Pro. The arrival of the drone caused a bit of excitement amongst the group as I demonstrated some of its capabilities. While I couldn't get find a gap in the cloud to fly a little higher, I did get the chance to grab a quick group shot.
We didn't have to wait to long for the cloud to clear though and all of sudden it was battle stations as we were presented with some truly epic scenes!
Nikon D750, Nikkor 16-35mm f/4 @ 18mm, f/11, 1/20th second, ISO 100, Lee Filters Circular Polariser.
Nikon D750, Nikkor 16-35mm f/4 @ 26mm, f/11, 1/20th second, ISO 100, Lee Filters Circular Polariser.
I can't decide which of the two images above I like the most. Both of them greatly appeal to me with their near perfect reflections and frosty reeds in the chilly lochan. It would have been so easy just to go back to the hotel and have an early breakfast when the cloud came in, but everyone was glad they stuck it out.
Day 2: Lochan na h-Achlaise and Loch Ba
After a very successful morning and a big Scottish breakfast, we headed up to Lochan na h-Achlaise. Shooting around midday is always challenging though and coupled with the bright blue sky I did struggle a little bit to get some images.
However, by exploring along the shore line of Lochan na h-Achlaise I did find this interesting composition.
Nikon D750, Nikkor 24-70 f/2.8 @ 34mm, f/13, 30 seconds, ISO 100, Lee Filters Circular Polariser and Big Stopper.
Exploring just a little further I found this scene just off the road at Loch Ba. This is a more pleasing image thanks to the horseshoe arrangement of the foreground rocks and the reflection of the mountain in the water.
Nikon D750, Nikkor 24-70 f/2.8 @ 40mm, f/13, 2.5 seconds, ISO 100, Lee Filters Circular Polariser and Little Stopper.
I also had just enough time to try and capture a panorama of the area using my DJI Mavic Pro.
DJI Mavic Pro - 7 images stitched and processed in Lightroom.
Day 2: Blackrock Cottage
Blackrock Cottage is probably one of the most photographed locations on Glencoe, but it would have somehow seemed rude not to photograph it. After all, we were passing it on our way to get coffee from the cafe at the ski centre.
I rarely convert to black and white but in this case, the image seemed to work better without colour. The texture on the mountain (Buachaille Etive Mor) really stands out.
Nikon D750, Nikkor 24-70mm f/2.8 @ 62mm, f/11, 1/25th second, ISO 100.
Day 2: Glen Etive
Towards the end of day 2, we headed down the long and windy road of Glen Etive towards the head of Loch Etive. Here the stunning mountains reach right down into the sea loch and it's an ideal location for capturing the last light as it touches the tops of the mountains.
As I waited for the light I was still able to capture some striking images of the north east shore of Loch Etive.
Nikon D750, Nikkor 24-70mm f/2.8 @ 26mm, f/11, 198 seconds, ISO 100, Lee Filters Big Stopper, ND Grad and Circular Polariser.
As I've written on this blog before it's always important to see what is going on behind you. It appeared that the sun was shining on the mountains diretly behind me!
Nikon D750, Nikkor 70-200mm f/2.8 @ 150mm, f/8, 1/5th second, ISO 100, Lee Filters Big ND Grad.
In my hurry to get to the head of the loch to capture last night on the mountains I completely missed another great composition. It wasn't until I was heading back to the car that I found a few of my fellow photographers shooting this interesting scene.
Nikon D750, Nikkor 16-35mm f/4 @ 19mm, f/11, 20 seconds, ISO 100, Lee Filters Circular Polariser and ND Grad.
I had actually walked by this location in my hurry to get to the head of the loch. Perhaps I should have taken just a little more time to explore this area before settling into my chosen location.
Day 2 was certainly a busy one. Would day 3 be just as good?
Day 3: The Study
After the successes of day 2, the weather had a change of heart and went typically Scottish. Lots of low clouds, and lots of rain. Our initial plan was to do a pre-breakfast shoot of Buachaille Etive Mor. We would go down to the river Coupall to shoot the waterfalls with the mountain in the background. Only trouble was you couldn't see the mountain or anything really. Reluctantly we headed back for an early breakfast and discuss our next move.
With the weather forecast predicting a stop to the rain, our tutors suggested we shoot from The Study, a slightly elevated viewpoint with excellent views of the mountains (The Three Sisters). Sure enough, the rain stopped and we were back in business.
I don't often shoot panoramas but this viewpoint seemed like the ideal location to do so. Fortunately, Adam Burton was on hand to give me some excellent tuition on how to setup the tripod correctly and the best way to rotate the camera. Taking my new found knowledge I managed to capture this image of The Three Sisters.
Nikon D750, Nikkor 24-70mm f/2.8 @ 24mm, f/11, 1/100th second, 10 vertical images stiched and processed in Lightroom CC.
I then decided to opt for a much tighter composition giving me one of my favourite images from the workshop.
Nikon D750, Nikkor 70-200mm f/2.8 @ 90mm, f/11, 1/40th second, ISO 100, Lee Filters ND Grad.
Day 3: Stob Dearg and the River Coupall
There is no doubt that this location has been photographed a lot. However, that doesn't make it any less worth shooting. There are always new compositions to be had, different weather conditions to manage and personal style to put into an image.
The key element for this location is a visible Stob Dearg (Buachaille Etive Mor), something that was missing that afternoon. This made my decision a couple of days earlier not to photograph this very scene because "I'll be back in a couple of days", even more heartbreaking.
However, with probably an unjustified amount of optimism, I put on my wellington boots, got into the river and set up my shot. All I needed was for the cloud to clear from the mountain. So I waited, and waited, and waited. It came so very close to being completely clear, but as the sky darkened I knew it wasn't going to happen.
Though you can't see the whole of the mountain in this image, I still like the end result.
Nikon D750, Nikkor 16-35mm f/4 @ 19mm, f/13, 0.8 seconds, ISO 100, Lee Filters Circular Polariser and 0.3 ND Grad.
Though it had been a challenging day with the weather, it was still a successful day out with the camera.
Workshop Summary
At the start of this blog post, I mentioned the three things that I look for on a workshop; personal development as a photographer, social interaction, and local knowledge.
There is no doubt that my artistic eye has developed a little bit more and that I'm now better prepared to shoot panoramas. I also got to spend a couple of days with a great group of people who shared my passion for landscape photography. We all shared some great stories in the bar! And finally, thanks to some excellent planning and local knowledge, the weather and conditions rarely caused a problem with the flexible itinerary.
I've come away with some great images and some even better memories, so it was definitely worth a few days off work and a very long drive!
In Part 2...
In part 2 of my Glencoe Adventure blog post, I will tell you about the images I took during the spare 24 hrs I had before the workshop started, including a video of my very early and snowy ascent of Beinn a'Chrulaiste!

Prawle Point with a Point and Shoot
Can you shoot good seascape images with a compact camera? In my latest blog post and video I go out to explore the coastline around Prawle Point in south Devon to capture some seascape images. I also leave all my DSLR gear at home and decide to shoot only with a compact camera. Read more to see how I got on!
Packing Light and Exploration
I've photographed Start Point <insert link to previous blog post> on the south Devon coast a few times but I've never really ventured further west towards Prawle and Salcombe. My father-in-law had suggested a few times that this area of the coastline was worthy of investigation, so when a free Sunday morning came up I decided to do just that.
Summerleaze beach in Bude. The manual controls on the Sony RX100 M4 allowed me to create this long exposure.
After deciding that I would go to Prawle Point I also considered if I should pack all my DSLR gear and go for a sunrise shoot. I have to admit that going somewhere new and trying to find a composition for sunrise was exciting, but my head overruled my heart. The weather forecast was for high winds and 100% cloud coverage so I decided I would take a more leisurely approach and have breakfast first and go out after sunrise.
I already knew the conditions weren't going to be ideal for seascape photography but I didn't want to go out with no camera at all so I decided to go out with my light weight setup of my Sony RX100 M4 and Manfrotto BeFree carbon fibre tripod. The Sony RX100 M4 looks like a point & shoot camera, but this little compact camera can be a real powerhouse. It has lots of manual controls, and while it does have it's limitations, it is capable of capturing some wonderful images.
So with a new area to explore, and very lightweight setup, I decided to make a video to see if I could capture a good seascape image while out exploring Prawle Point. I was going to test the theory The Best Camera is the One That's with You. Check out the video below to see how I got on.
Results and Conclusions
As I said in the video I'm certainly not about to give up all my Nikon gear but that's not to say that I can't capture good images with a compact camera. Yes, I was off to a little bit of a head start with advanced capabilities of the Sony RX100 M4 but it is more about understanding your gear and having a good technique that allows you to get results.
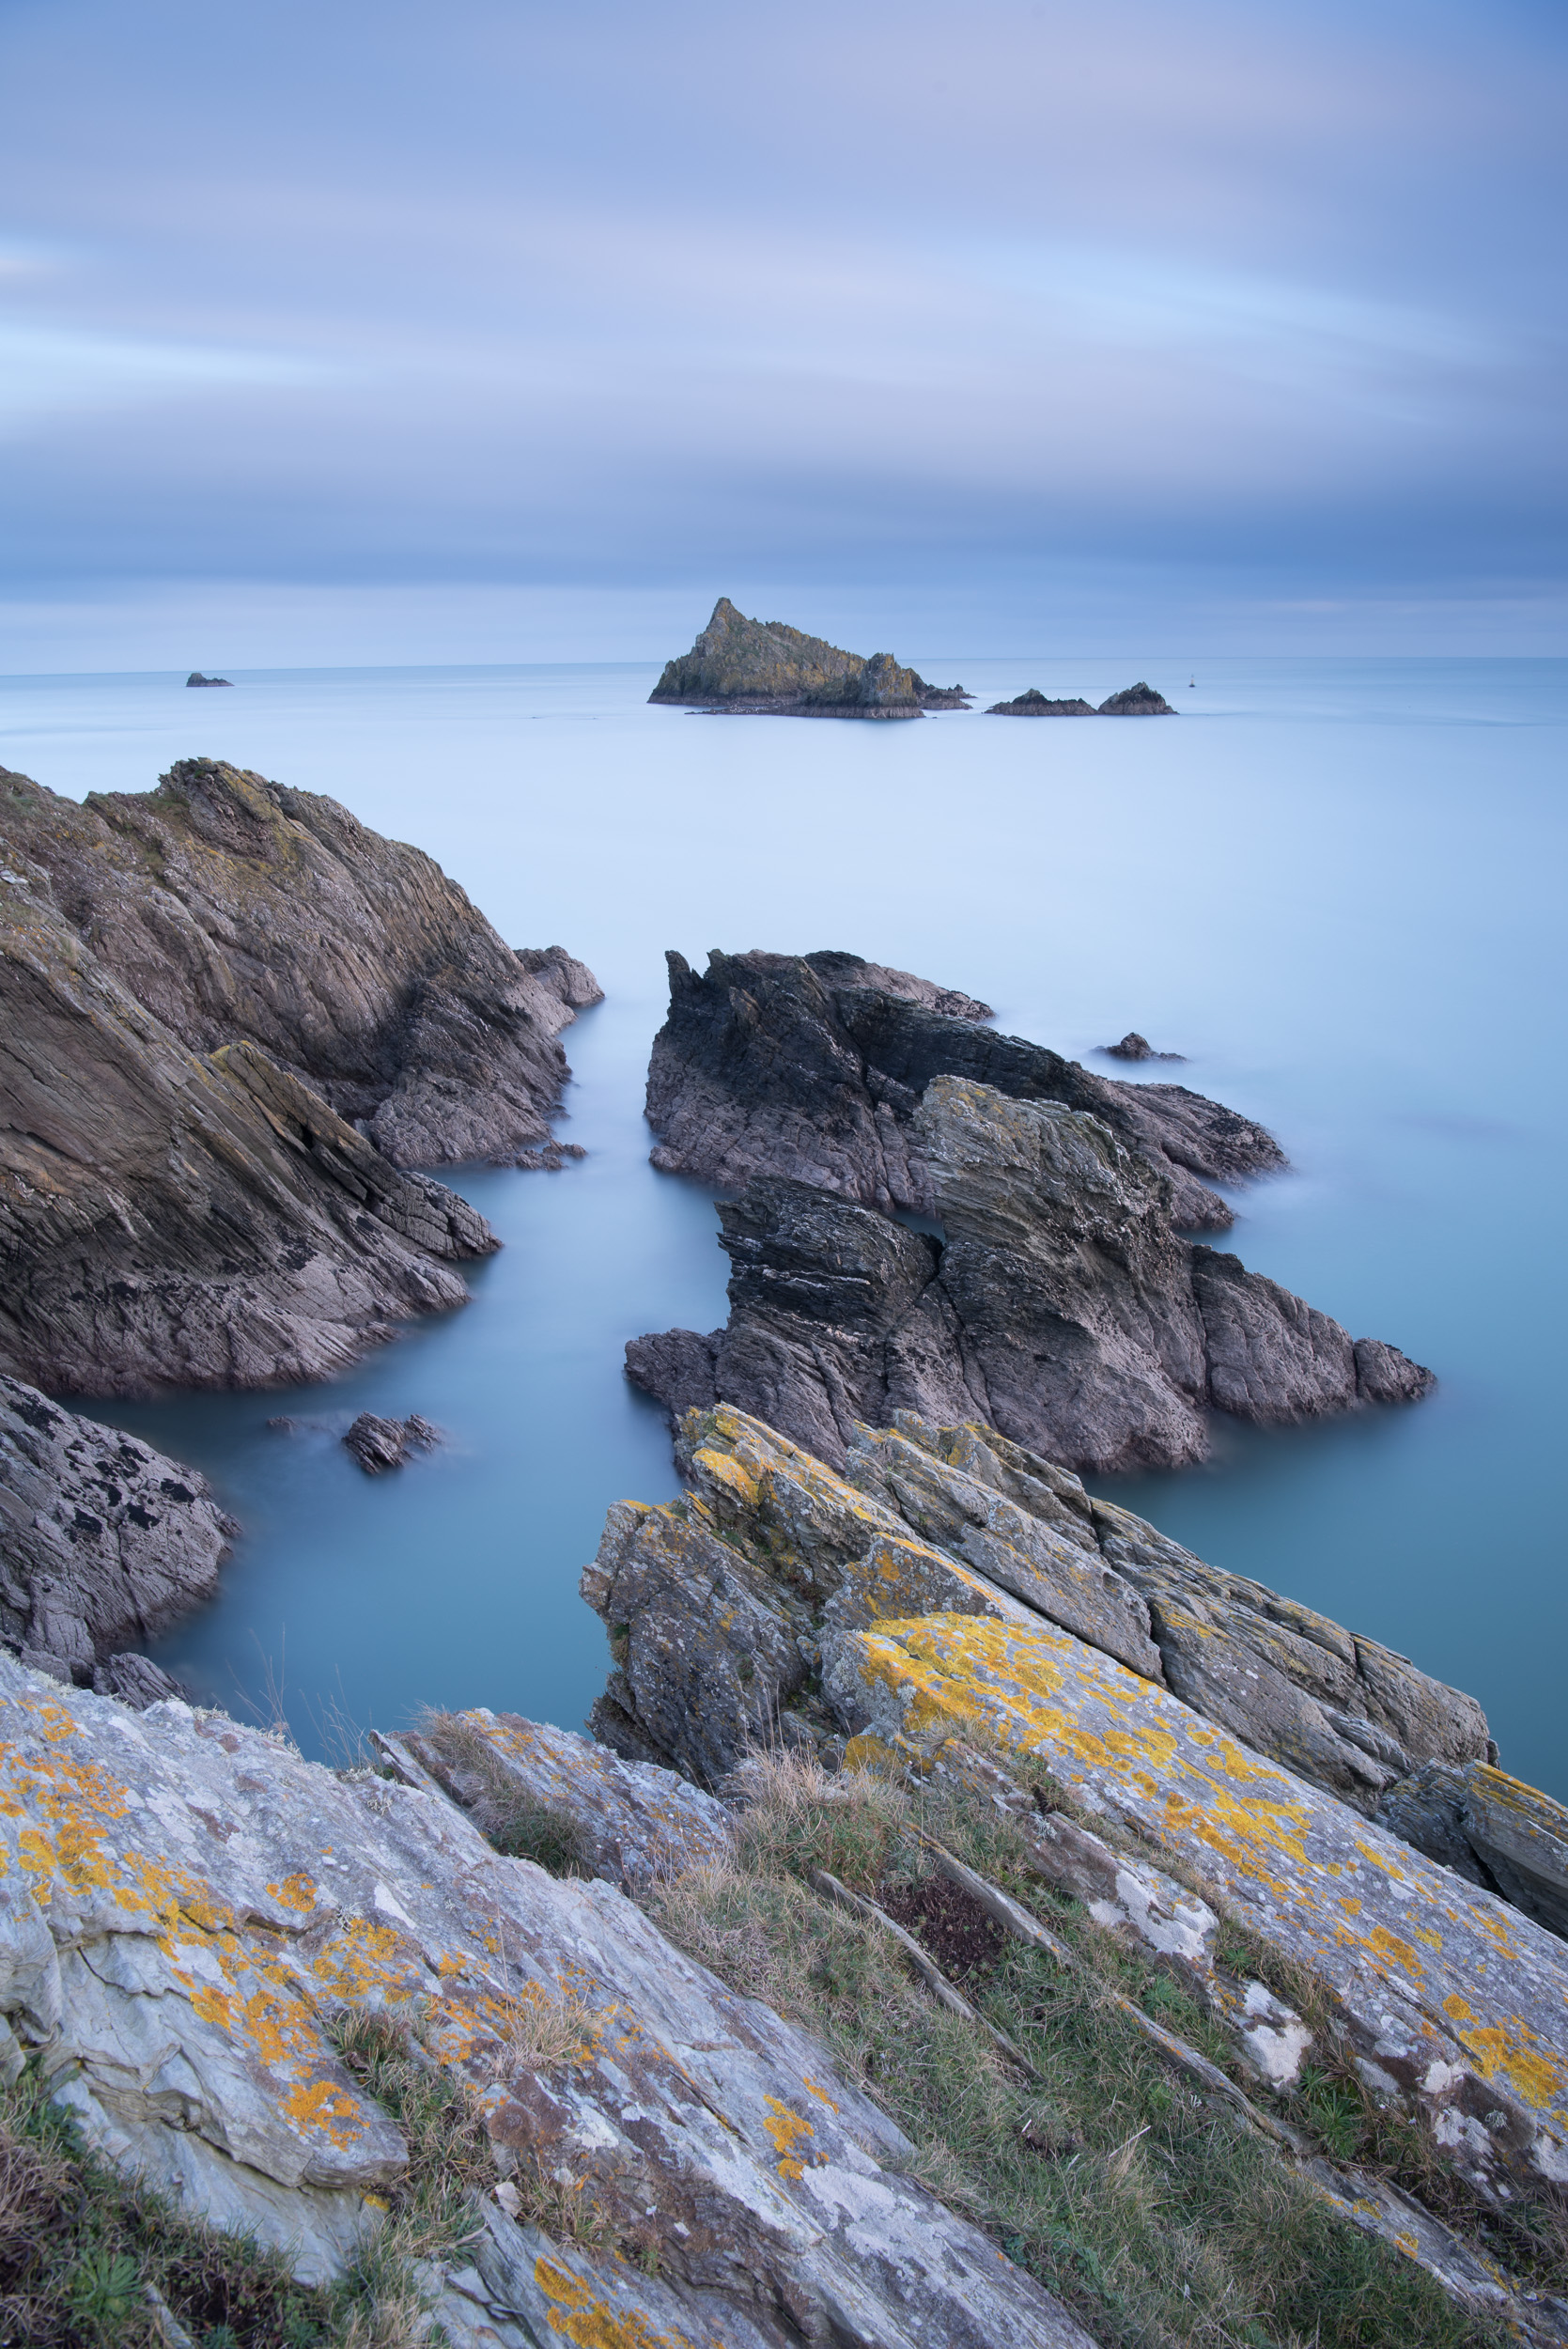
Sony RX100 M4, 8.8mm (24mm @ 35mm equiv), 1/4 sec @ f/11, ISO 80, in-camera ND filter on. Processed and converted to black & white in Lightroom CC.
Sony RX100 M4, 8.8mm (24mm @ 35mm equiv), 1/4 sec @ f/11, ISO 80, in-camera ND filter on. Processed in Lightroom CC.
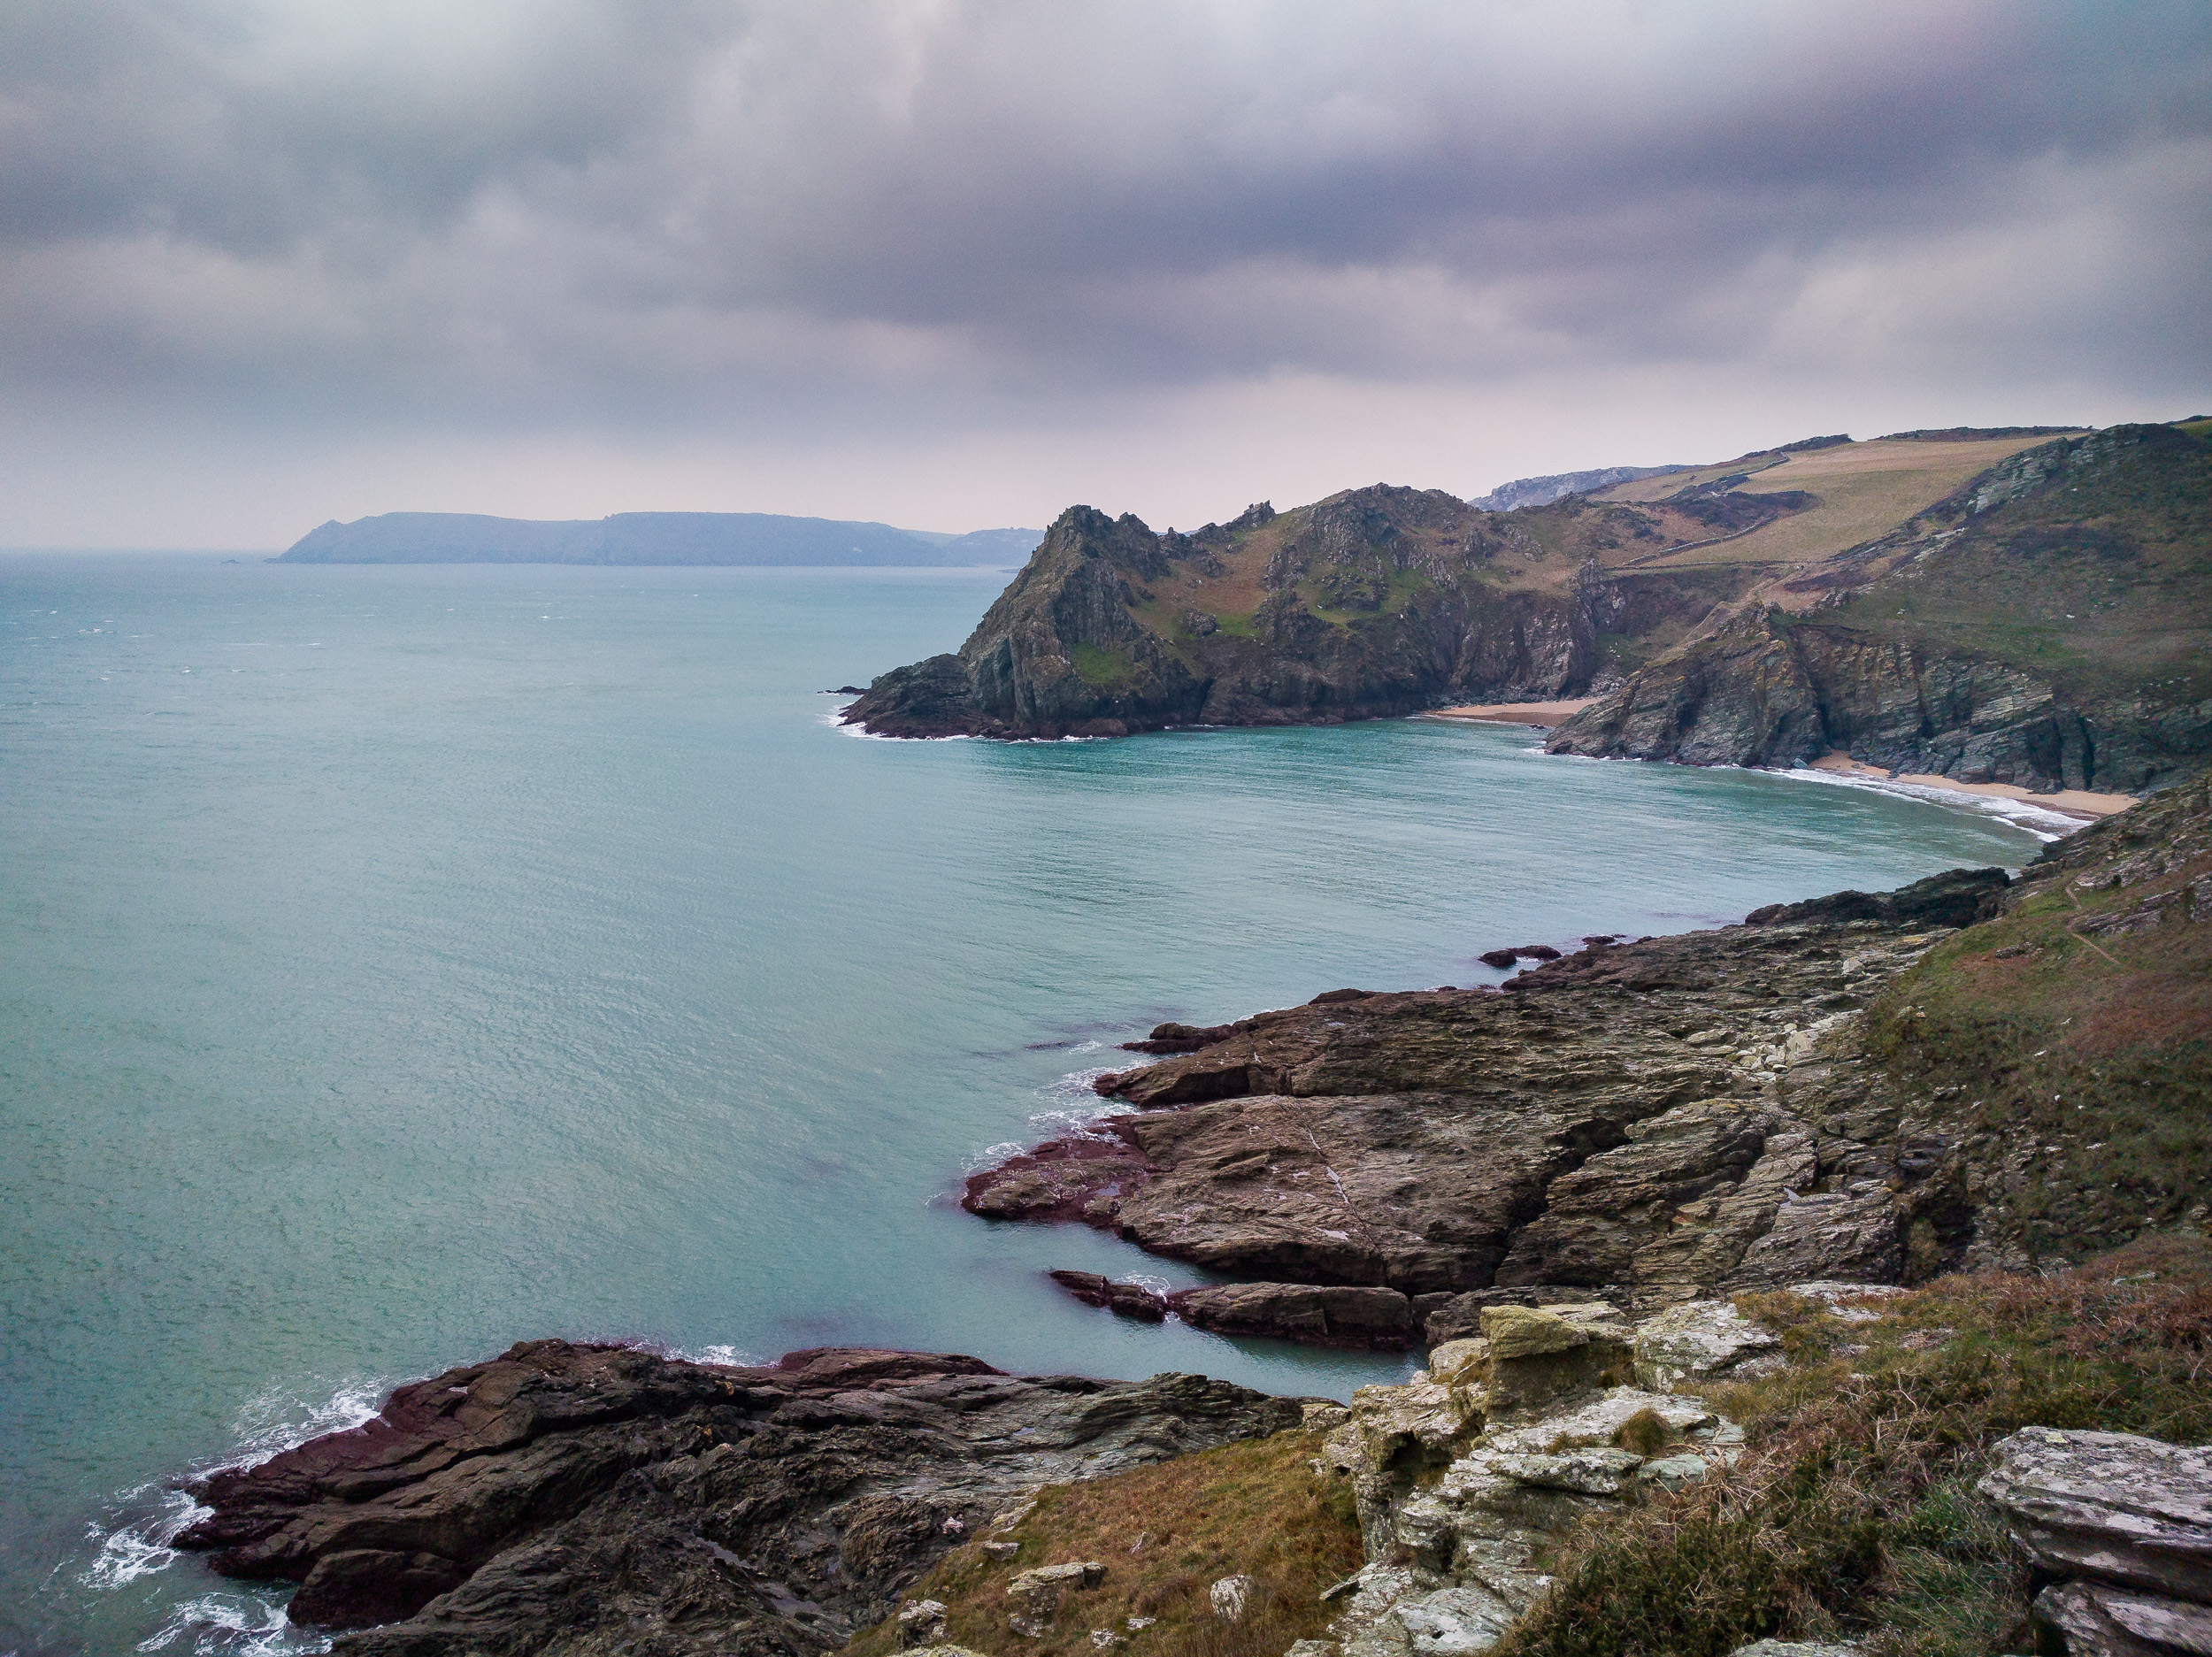
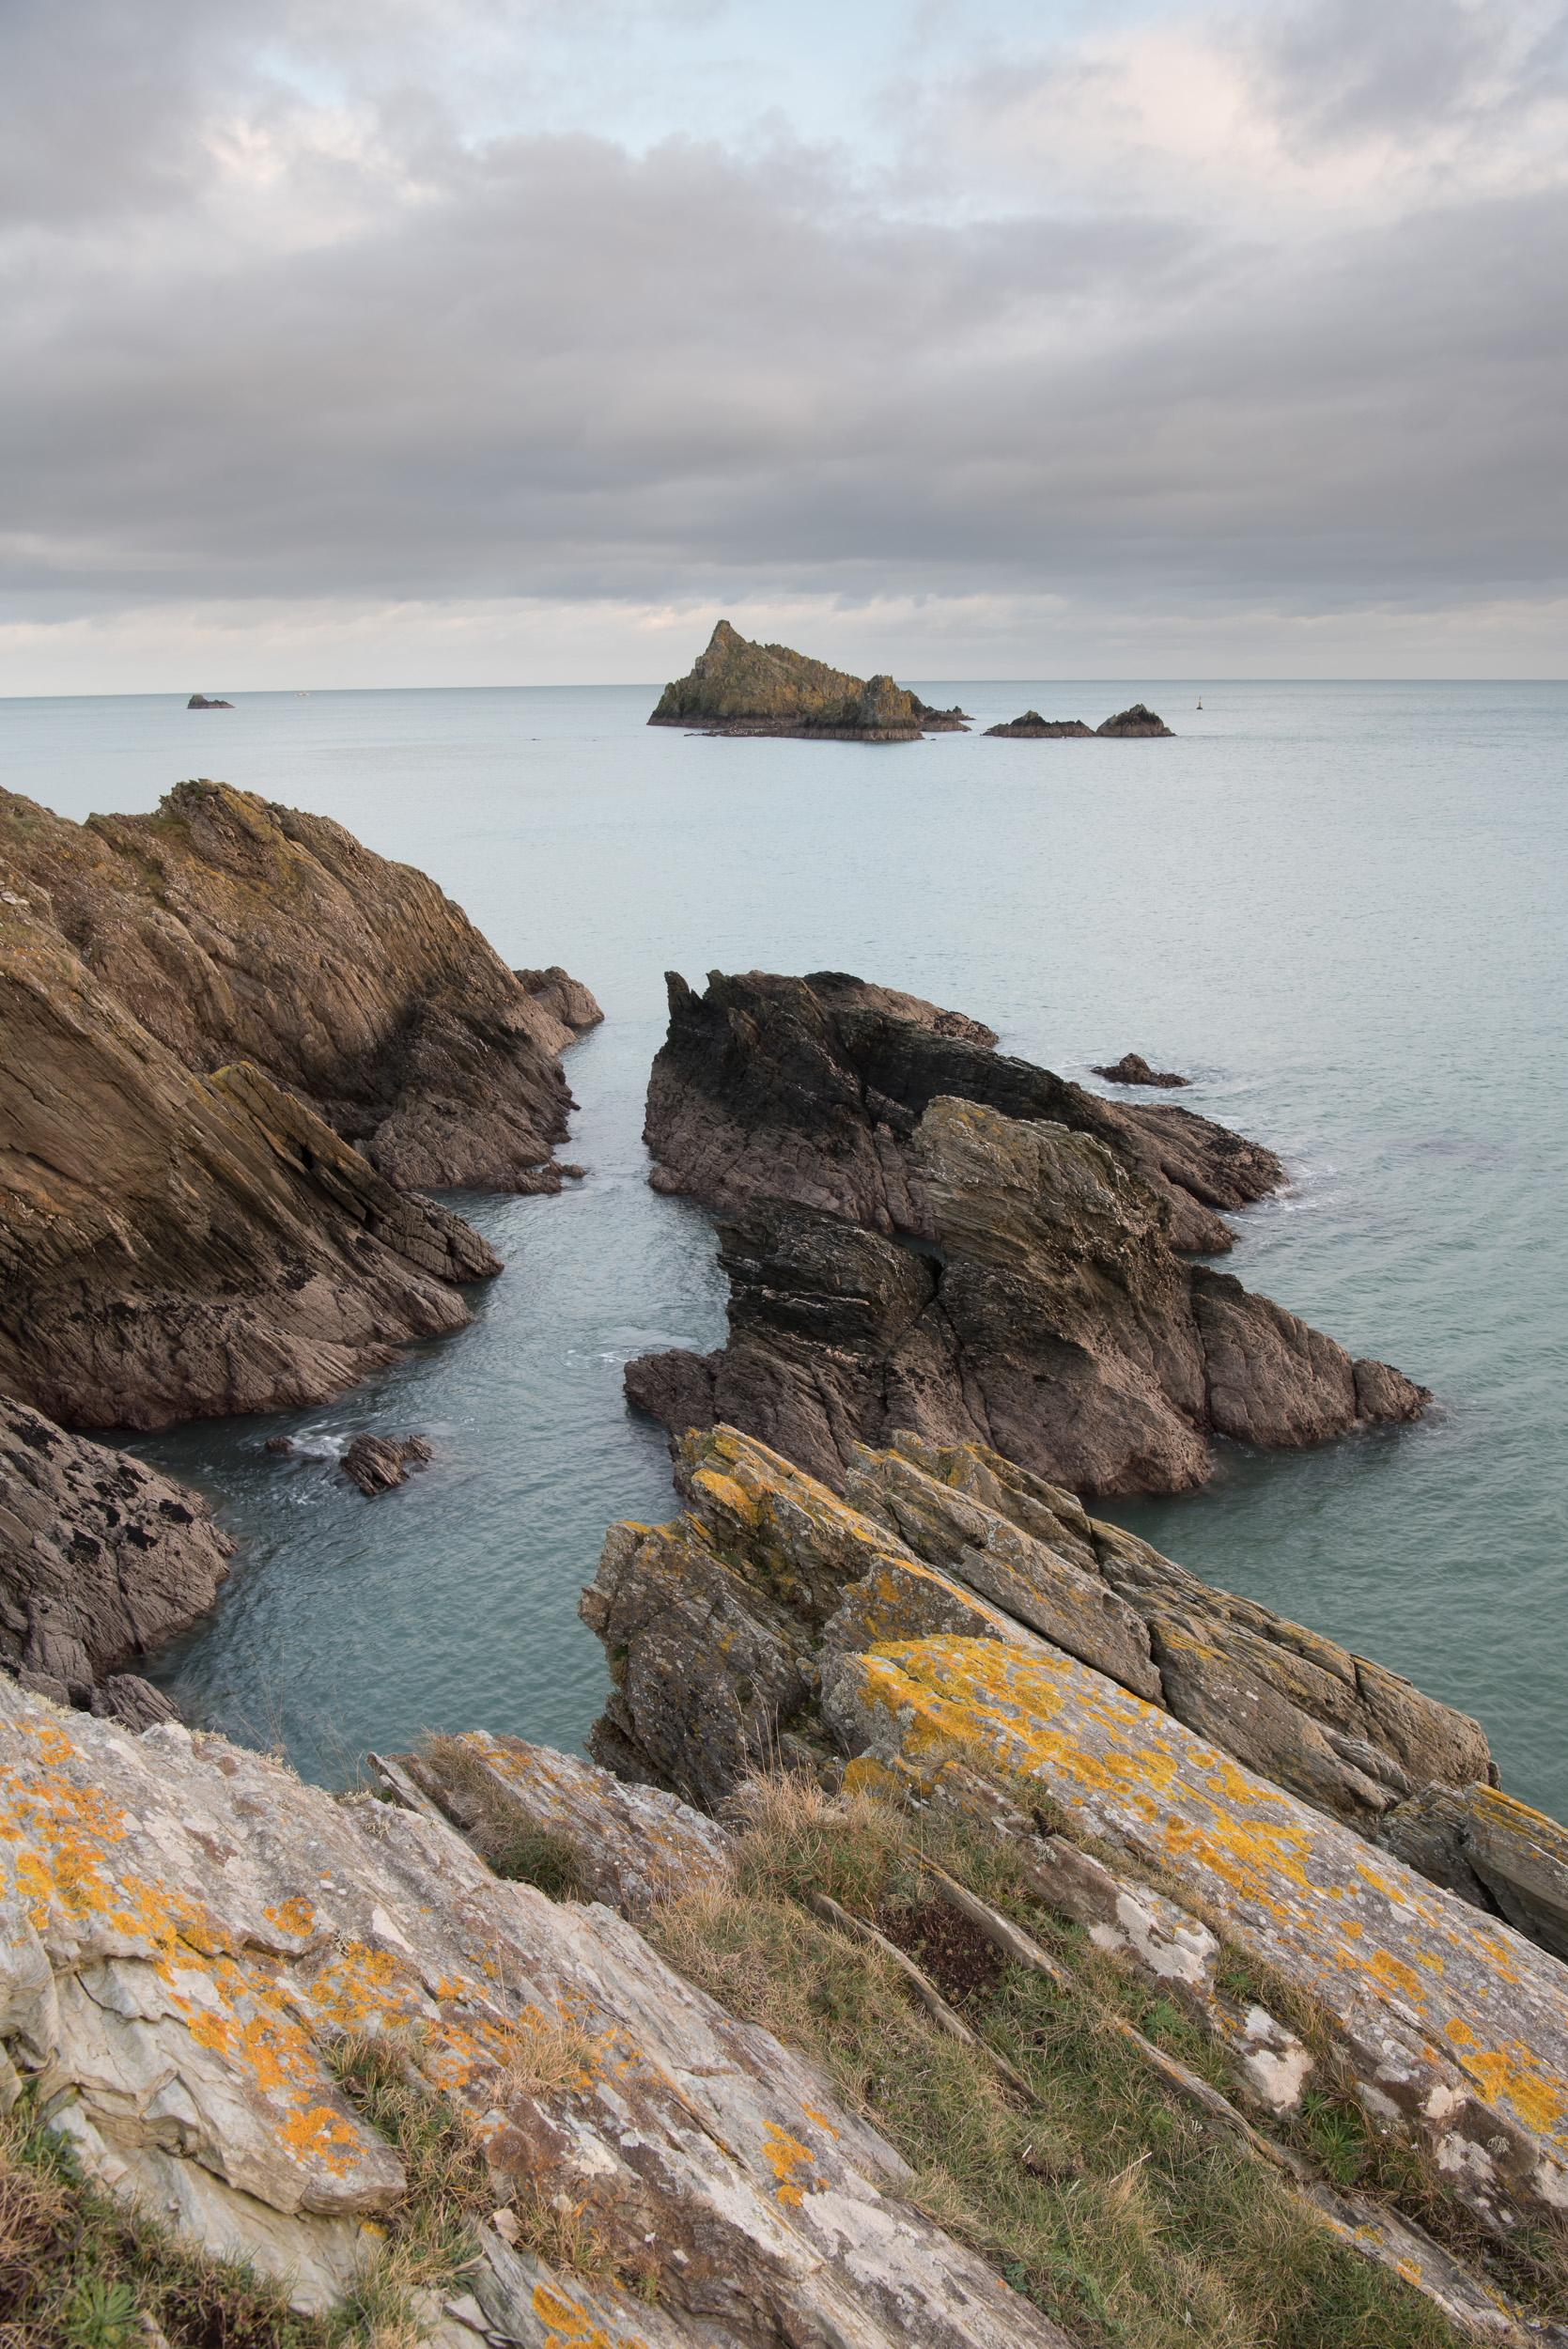
A reference shot facing east from Prawle Point lookout. Taken with my Nexus 6p phone.
While I'm not considering these images for my portfolio, given the weather conditions and the fact it was a new location for me I'm relatively happy with the results. While there is no doubt that my Nikon camera, lenses and Lee Filters provide me with a superior level of control and quality, I'm still confident I could capture good images with my Sony RX100 M4 if I needed to. It's also nice to travel light every now and again!
I'm also very much looking forward to exploring to the east of Prawle Point. The coastline seems more dramatic and there are a couple of very nice looking beaches. Once I've got some locations marked out I'll return with my Nikon and also shoot some video there with the drone.
So, do you prefer to go out with a light weight setup? How important is gear? Is good photography technique just as important as the camera? Let me know in the comments below.
A Technical Footnote
The video I shot at Prawle Point was also an opportunity to test out my new audio/video rig. Audio is a critical component of good video, and I've struggled to get good audio for my videos. The Sony RX100 M4 captures wonderful 4K video, but without a mic input, I've had to depend on onboard audio which isn't great. Now that I'm using an external audio recorder and a lavalier mic I can consistently capture high-quality audio. In fact, I wouldn't have been able to capture good audio at Prawle Point without my new rig as the wind was so strong.
If anyone is interested in the setup let me know in the comments and I'll either do a blog post of video on my personal setup. However, I do have to thank Ted Forbes and his YouTube channel The Art of Photography which originally showed me how I could use a Sony RX100 M4 and an external audio recorder in a single rig setup.
And thanks to Ted, I also learnt how to sync the audio as well.
Please do subscribe to The Art of Photography. It's a wonderful photography channel that discusses so many aspects of photography from technical side of things (as above), to the artistic side of photography.
And of course, don't forget to subscribe to my YouTube channel.

Storms, Sunset and Start Point
In this blog post I tell you about how a passing storm at Start Point in Devon forced me back to my car but in the end it added a new dramatic element to my composition.
Favourite Location, New Viewpoint
In my video Top 5 Locations in Devon to Shoot Landscape Photography I took you to Start Point on the south Devon coast. I've shot there numerous times and thanks to the coastal weather I've come away with a wide variety of images. All my visits to Start Point do have one thing in common, they have been shot at dawn and all, roughly speaking, from the same viewpoint.
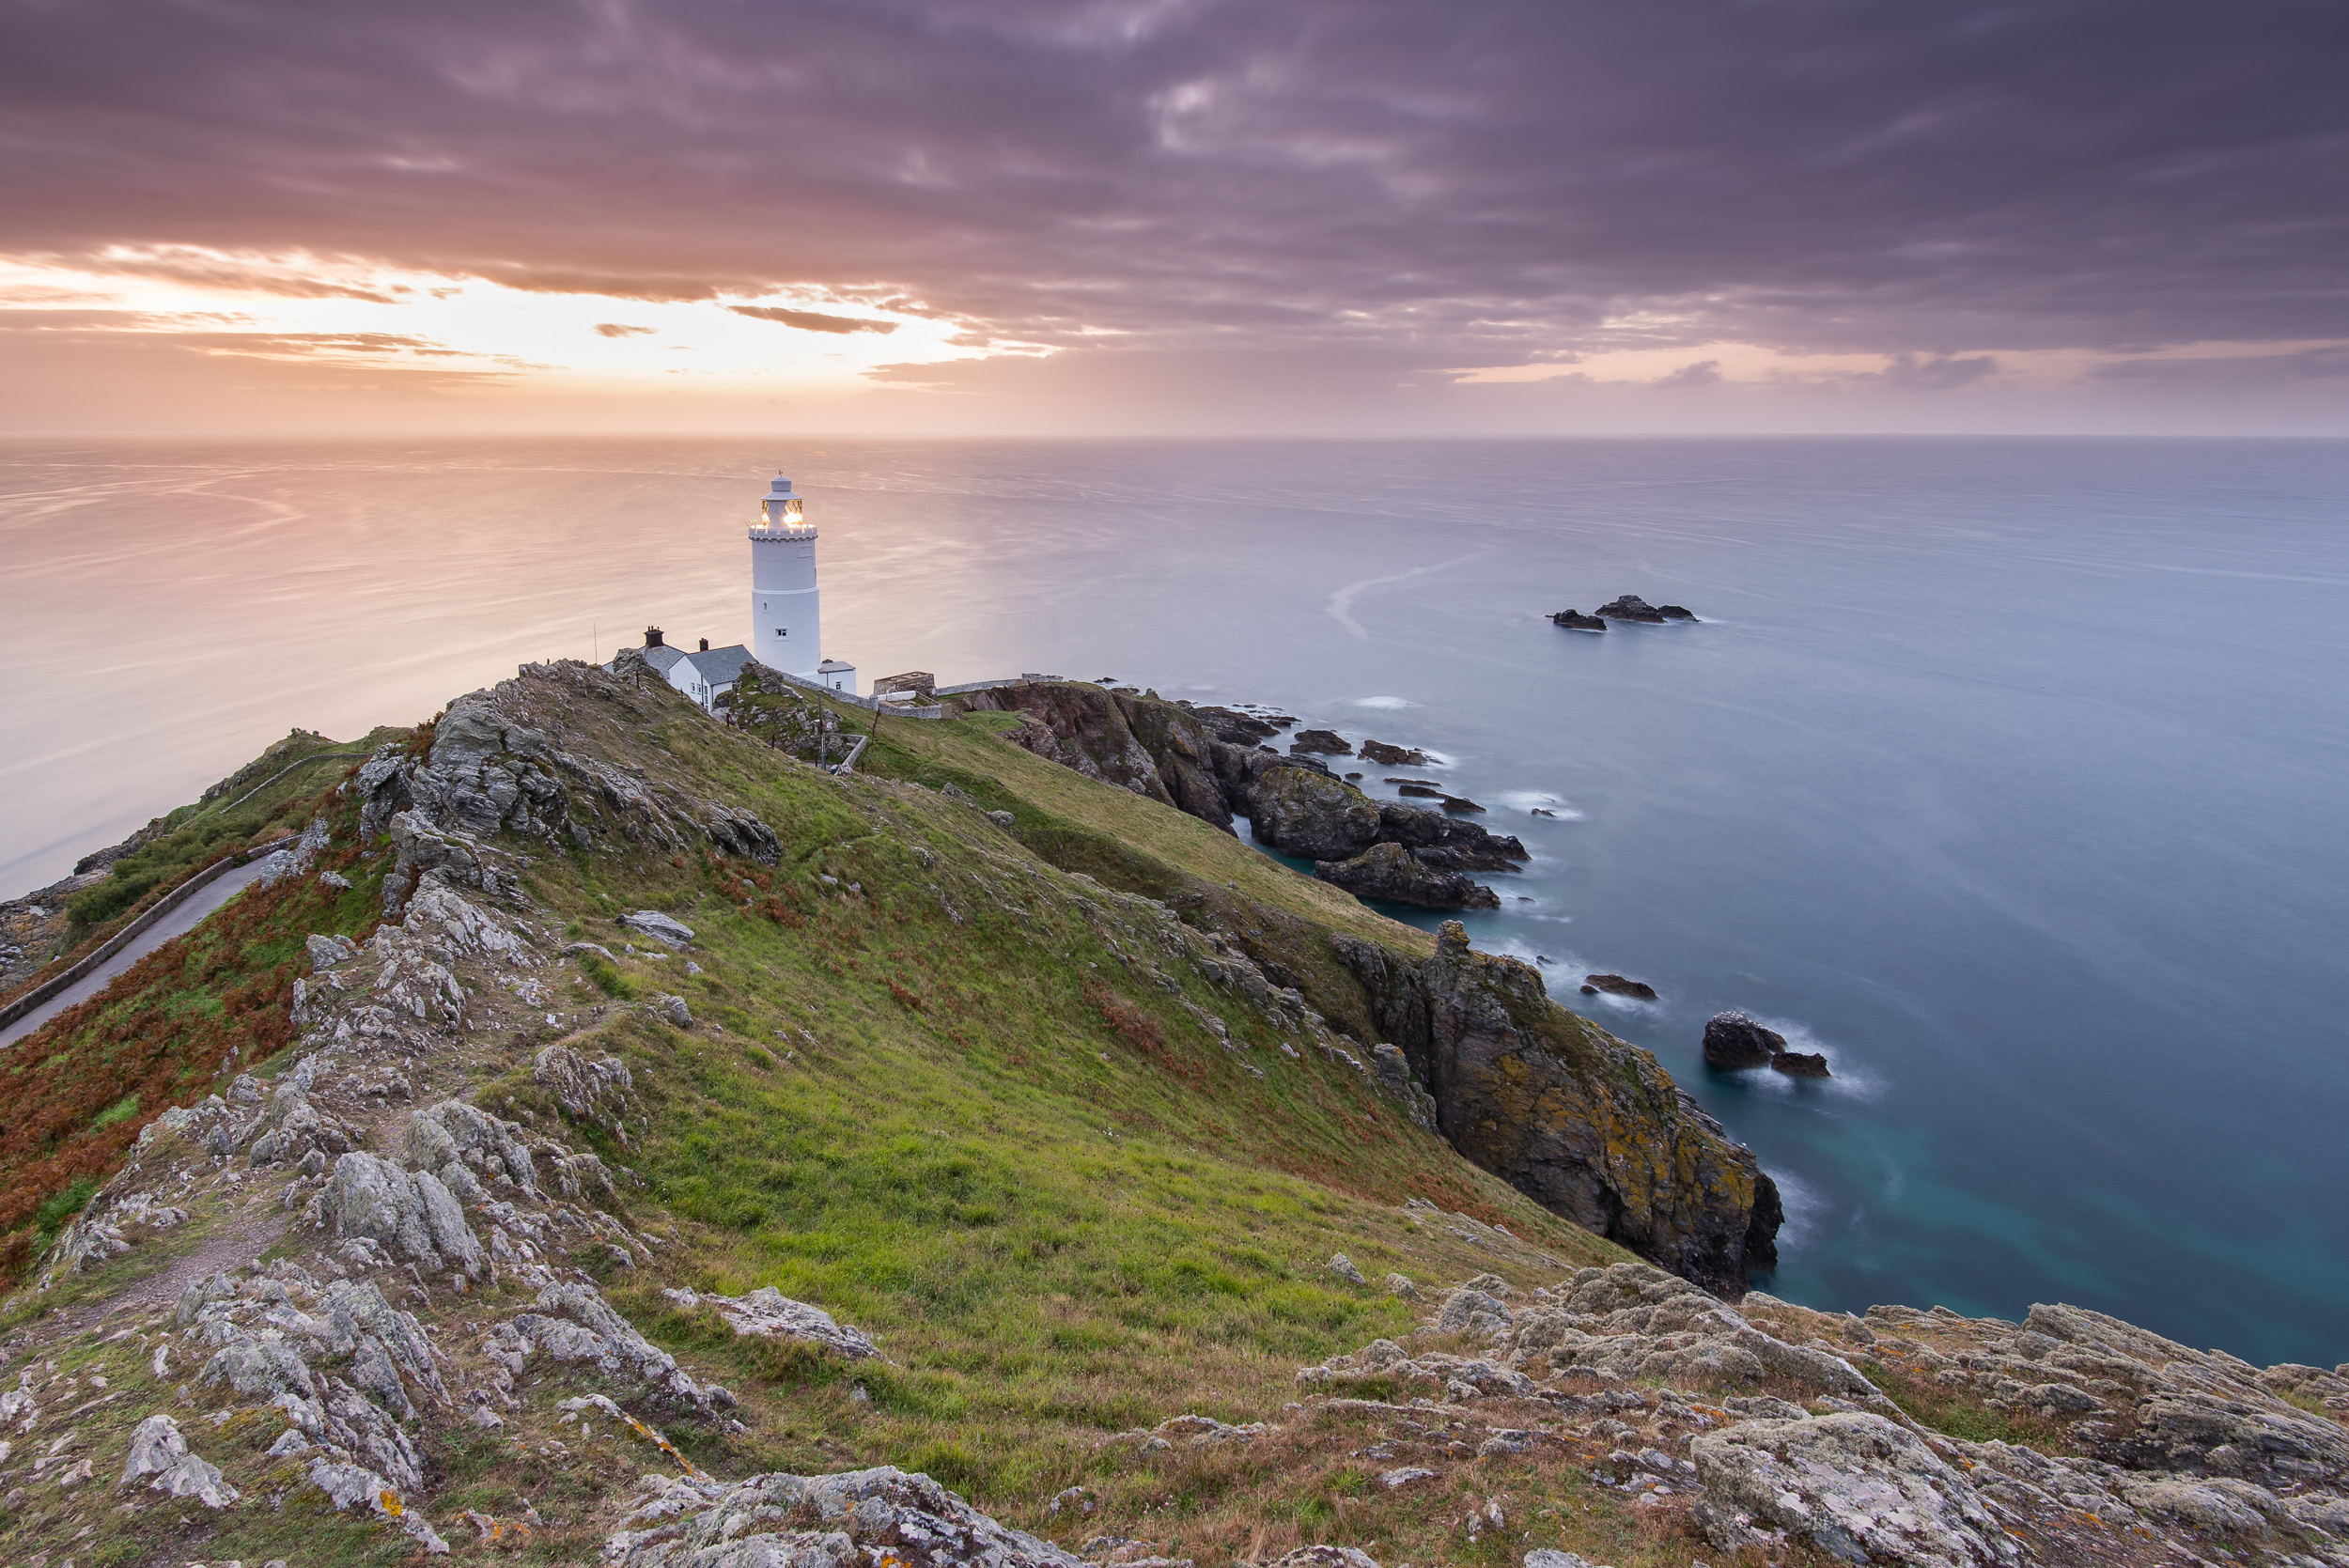
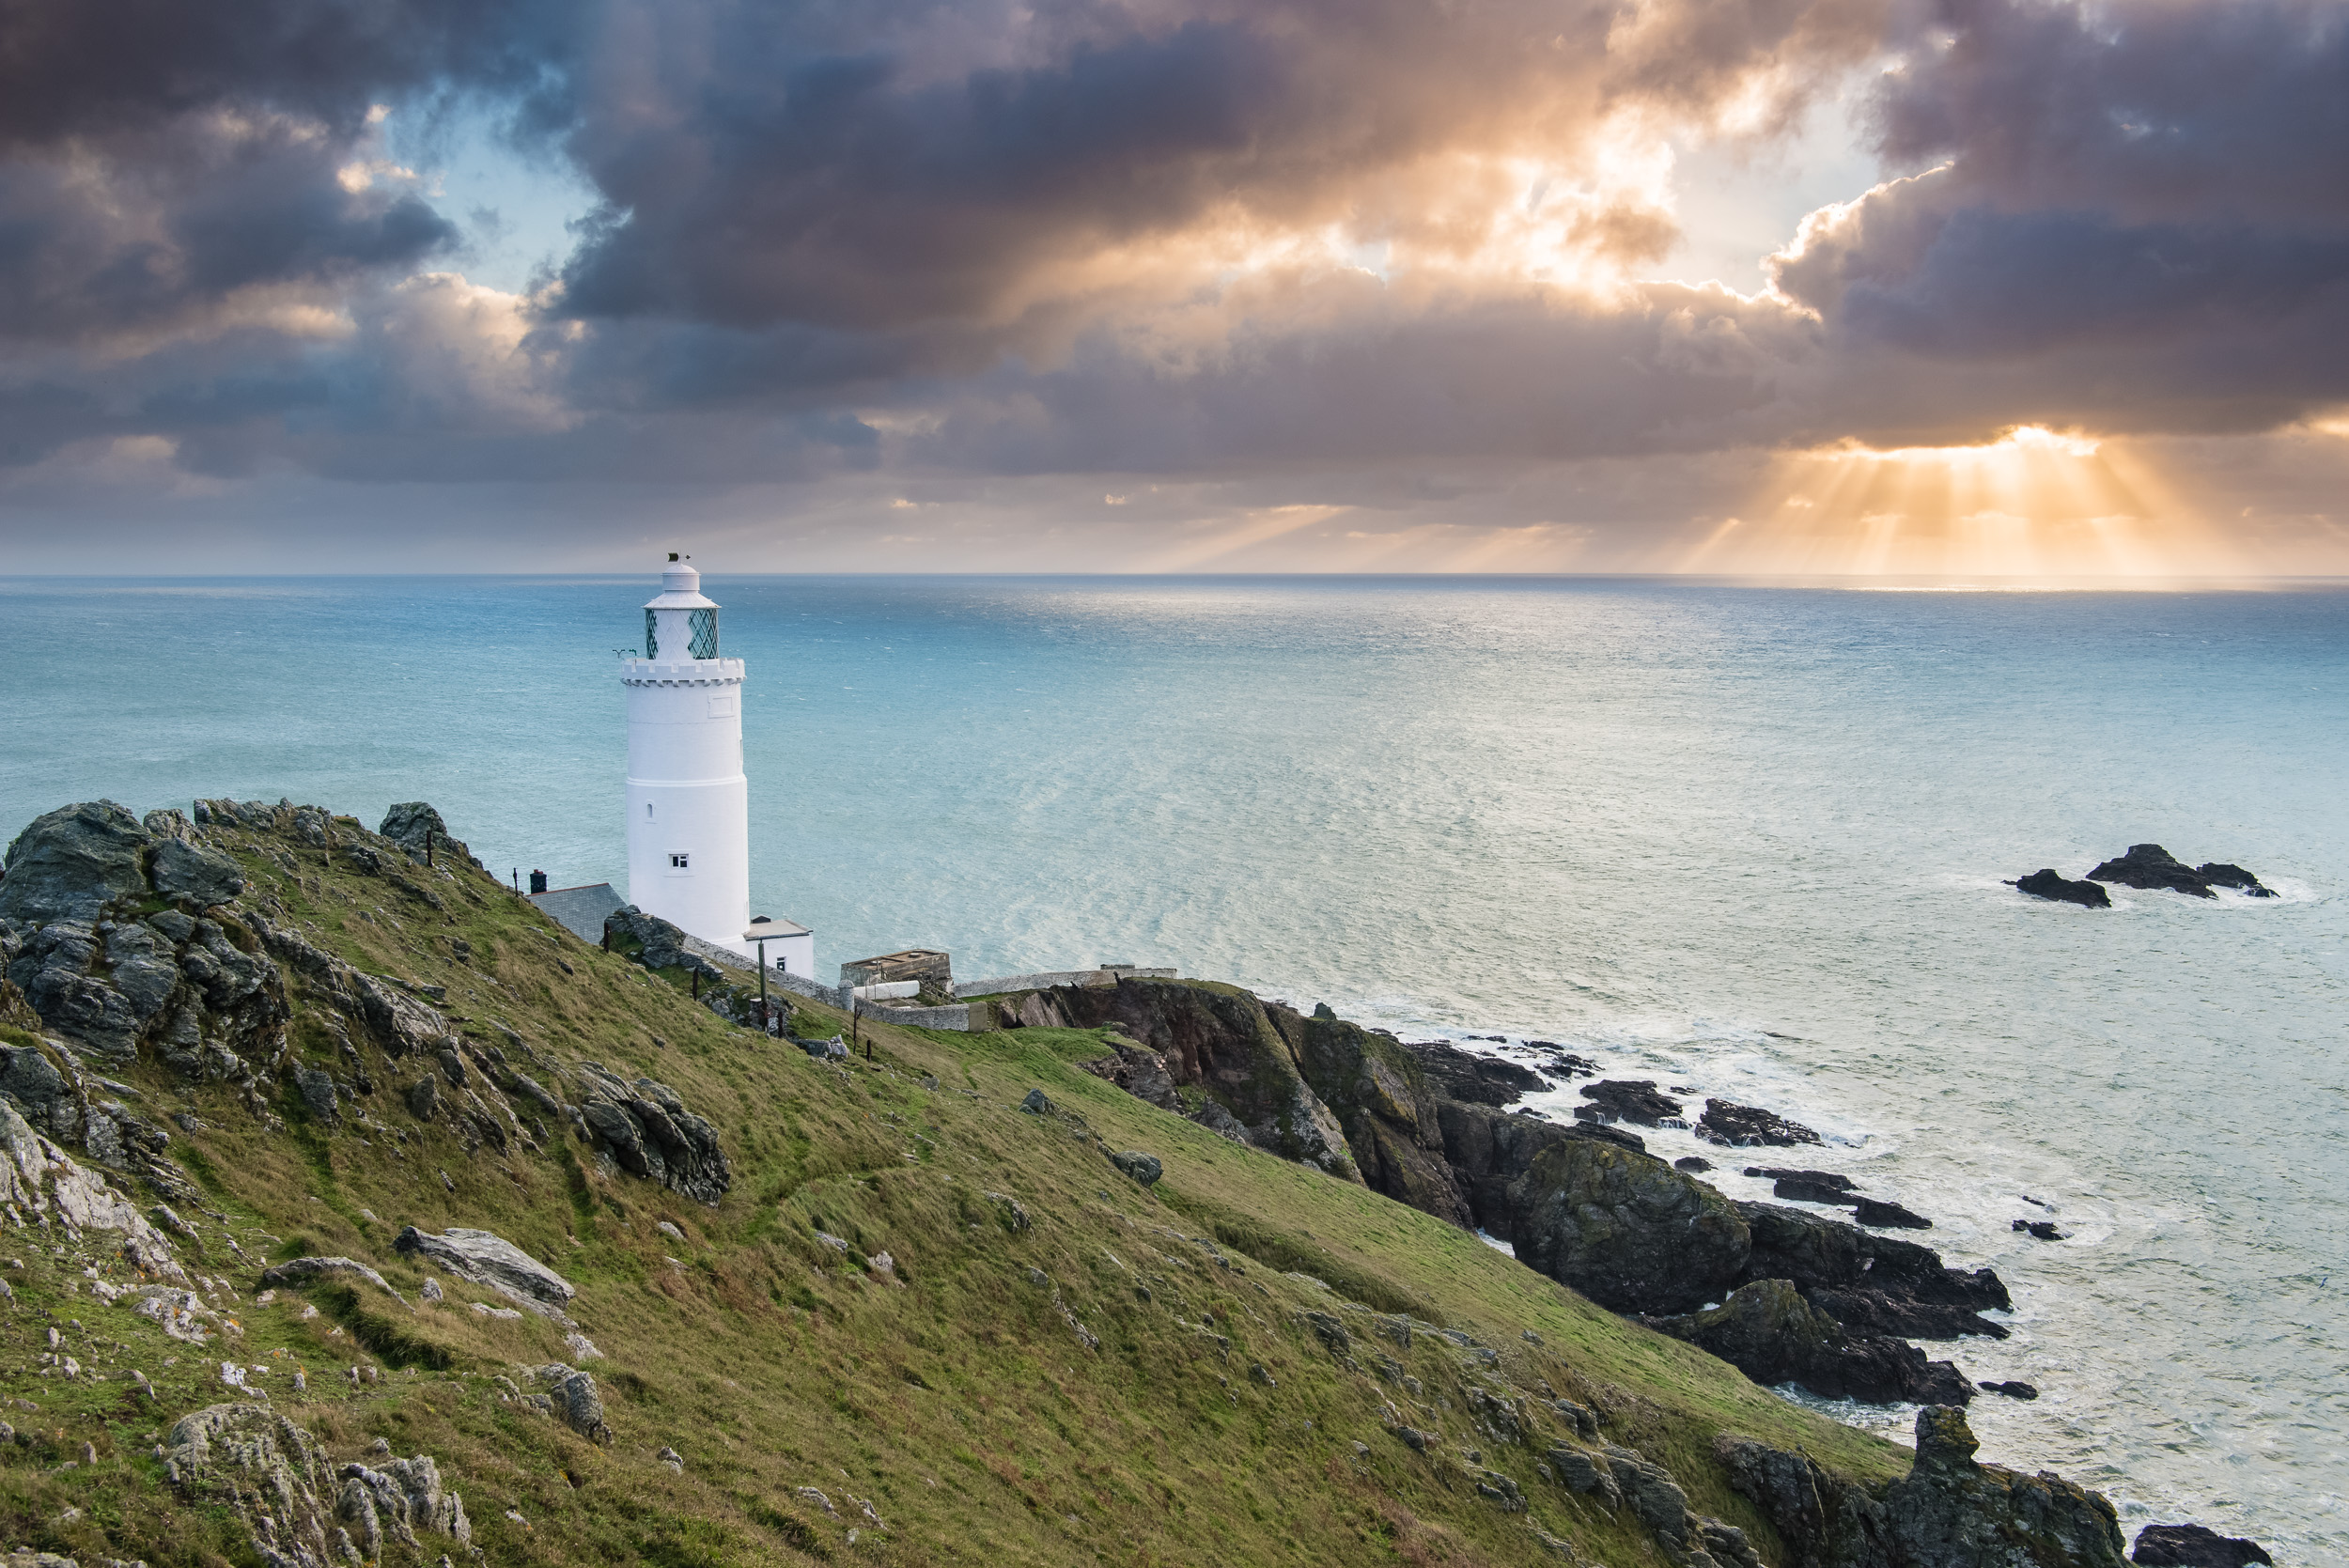
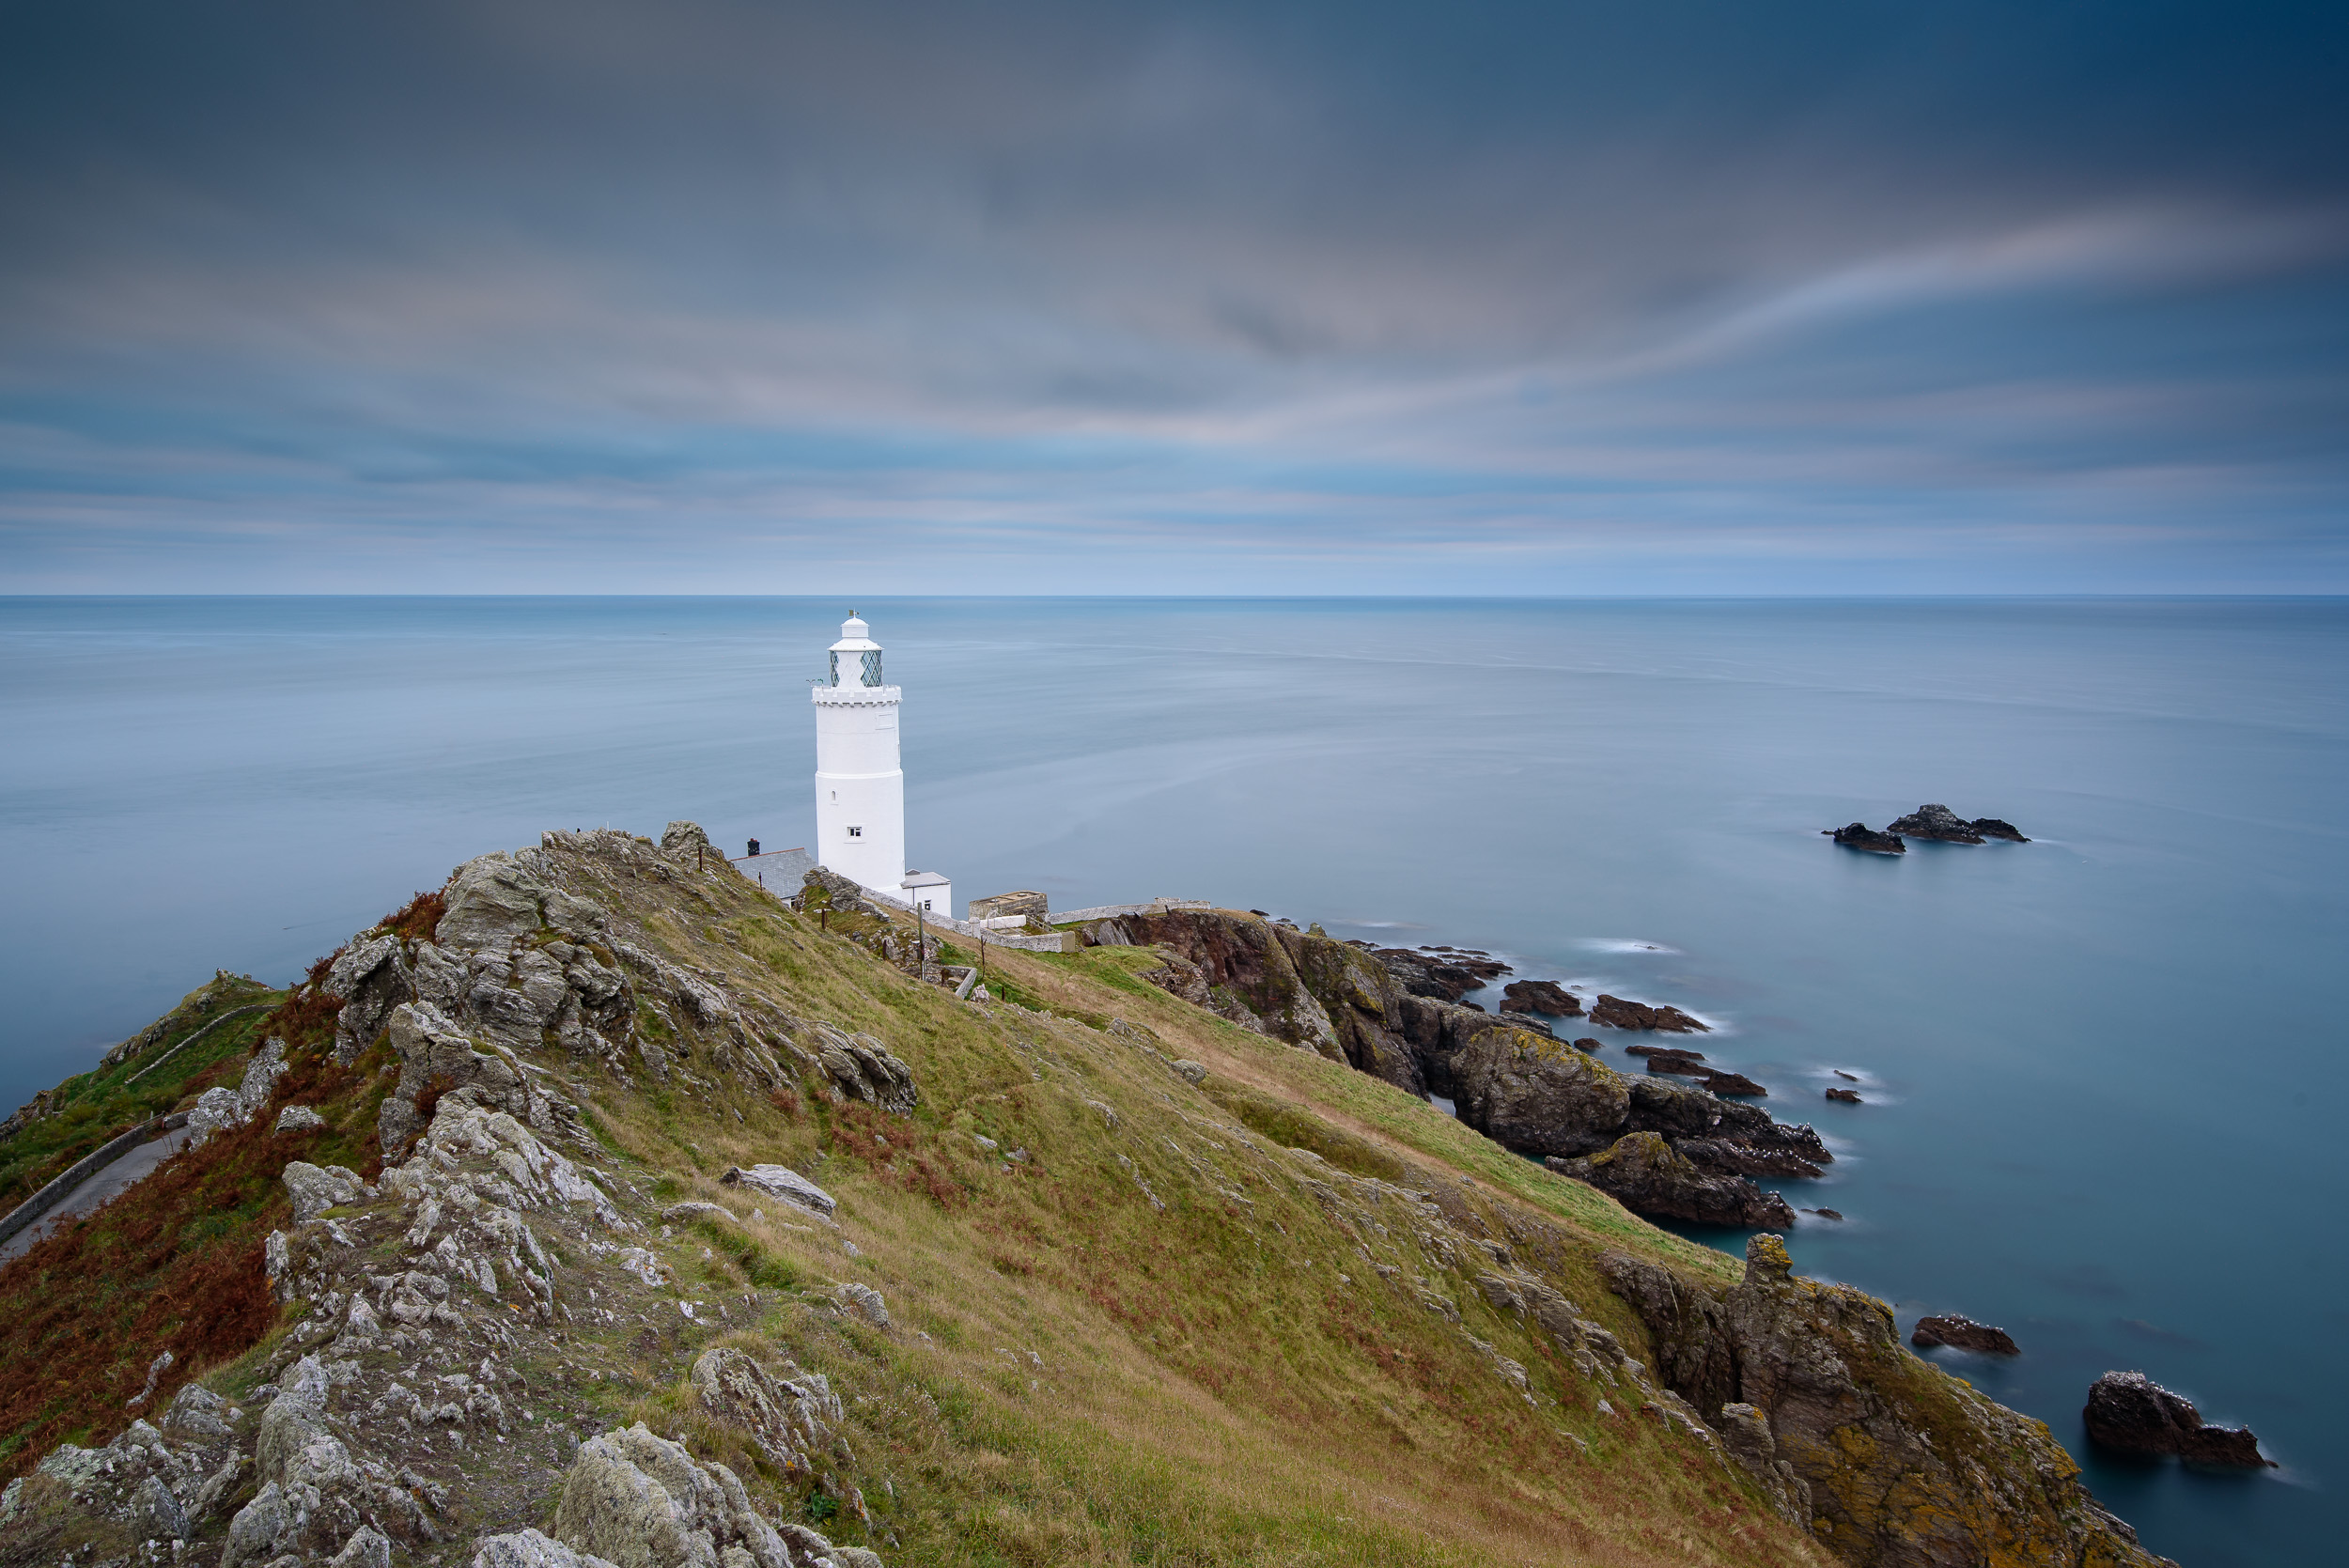
Just recently though I was inspired to shoot Start Point from a slightly different location. I've written about the power of inspiration on this blog before and how important it is to my development as a photography. However, it was a post by one of my favourite local photographers Matt Davis on Instagram that showed me a viewpoint that I hadn't considered before. It was still clearly Start Point, but you could see more of the rugged coastline and it was ideal for shooting at sunset. I had a plan!
Incoming!
It's about 1hr 15m drive from home to Start Point and while it's not that far as the crow flies, it does involve the navigation of a few of the smaller country roads that Devon has to offer so it often feels like a longer drive. With the weather forecast predicting cloud at different heights I felt the drive would be worth it for a great sunset and some drama in the sky.
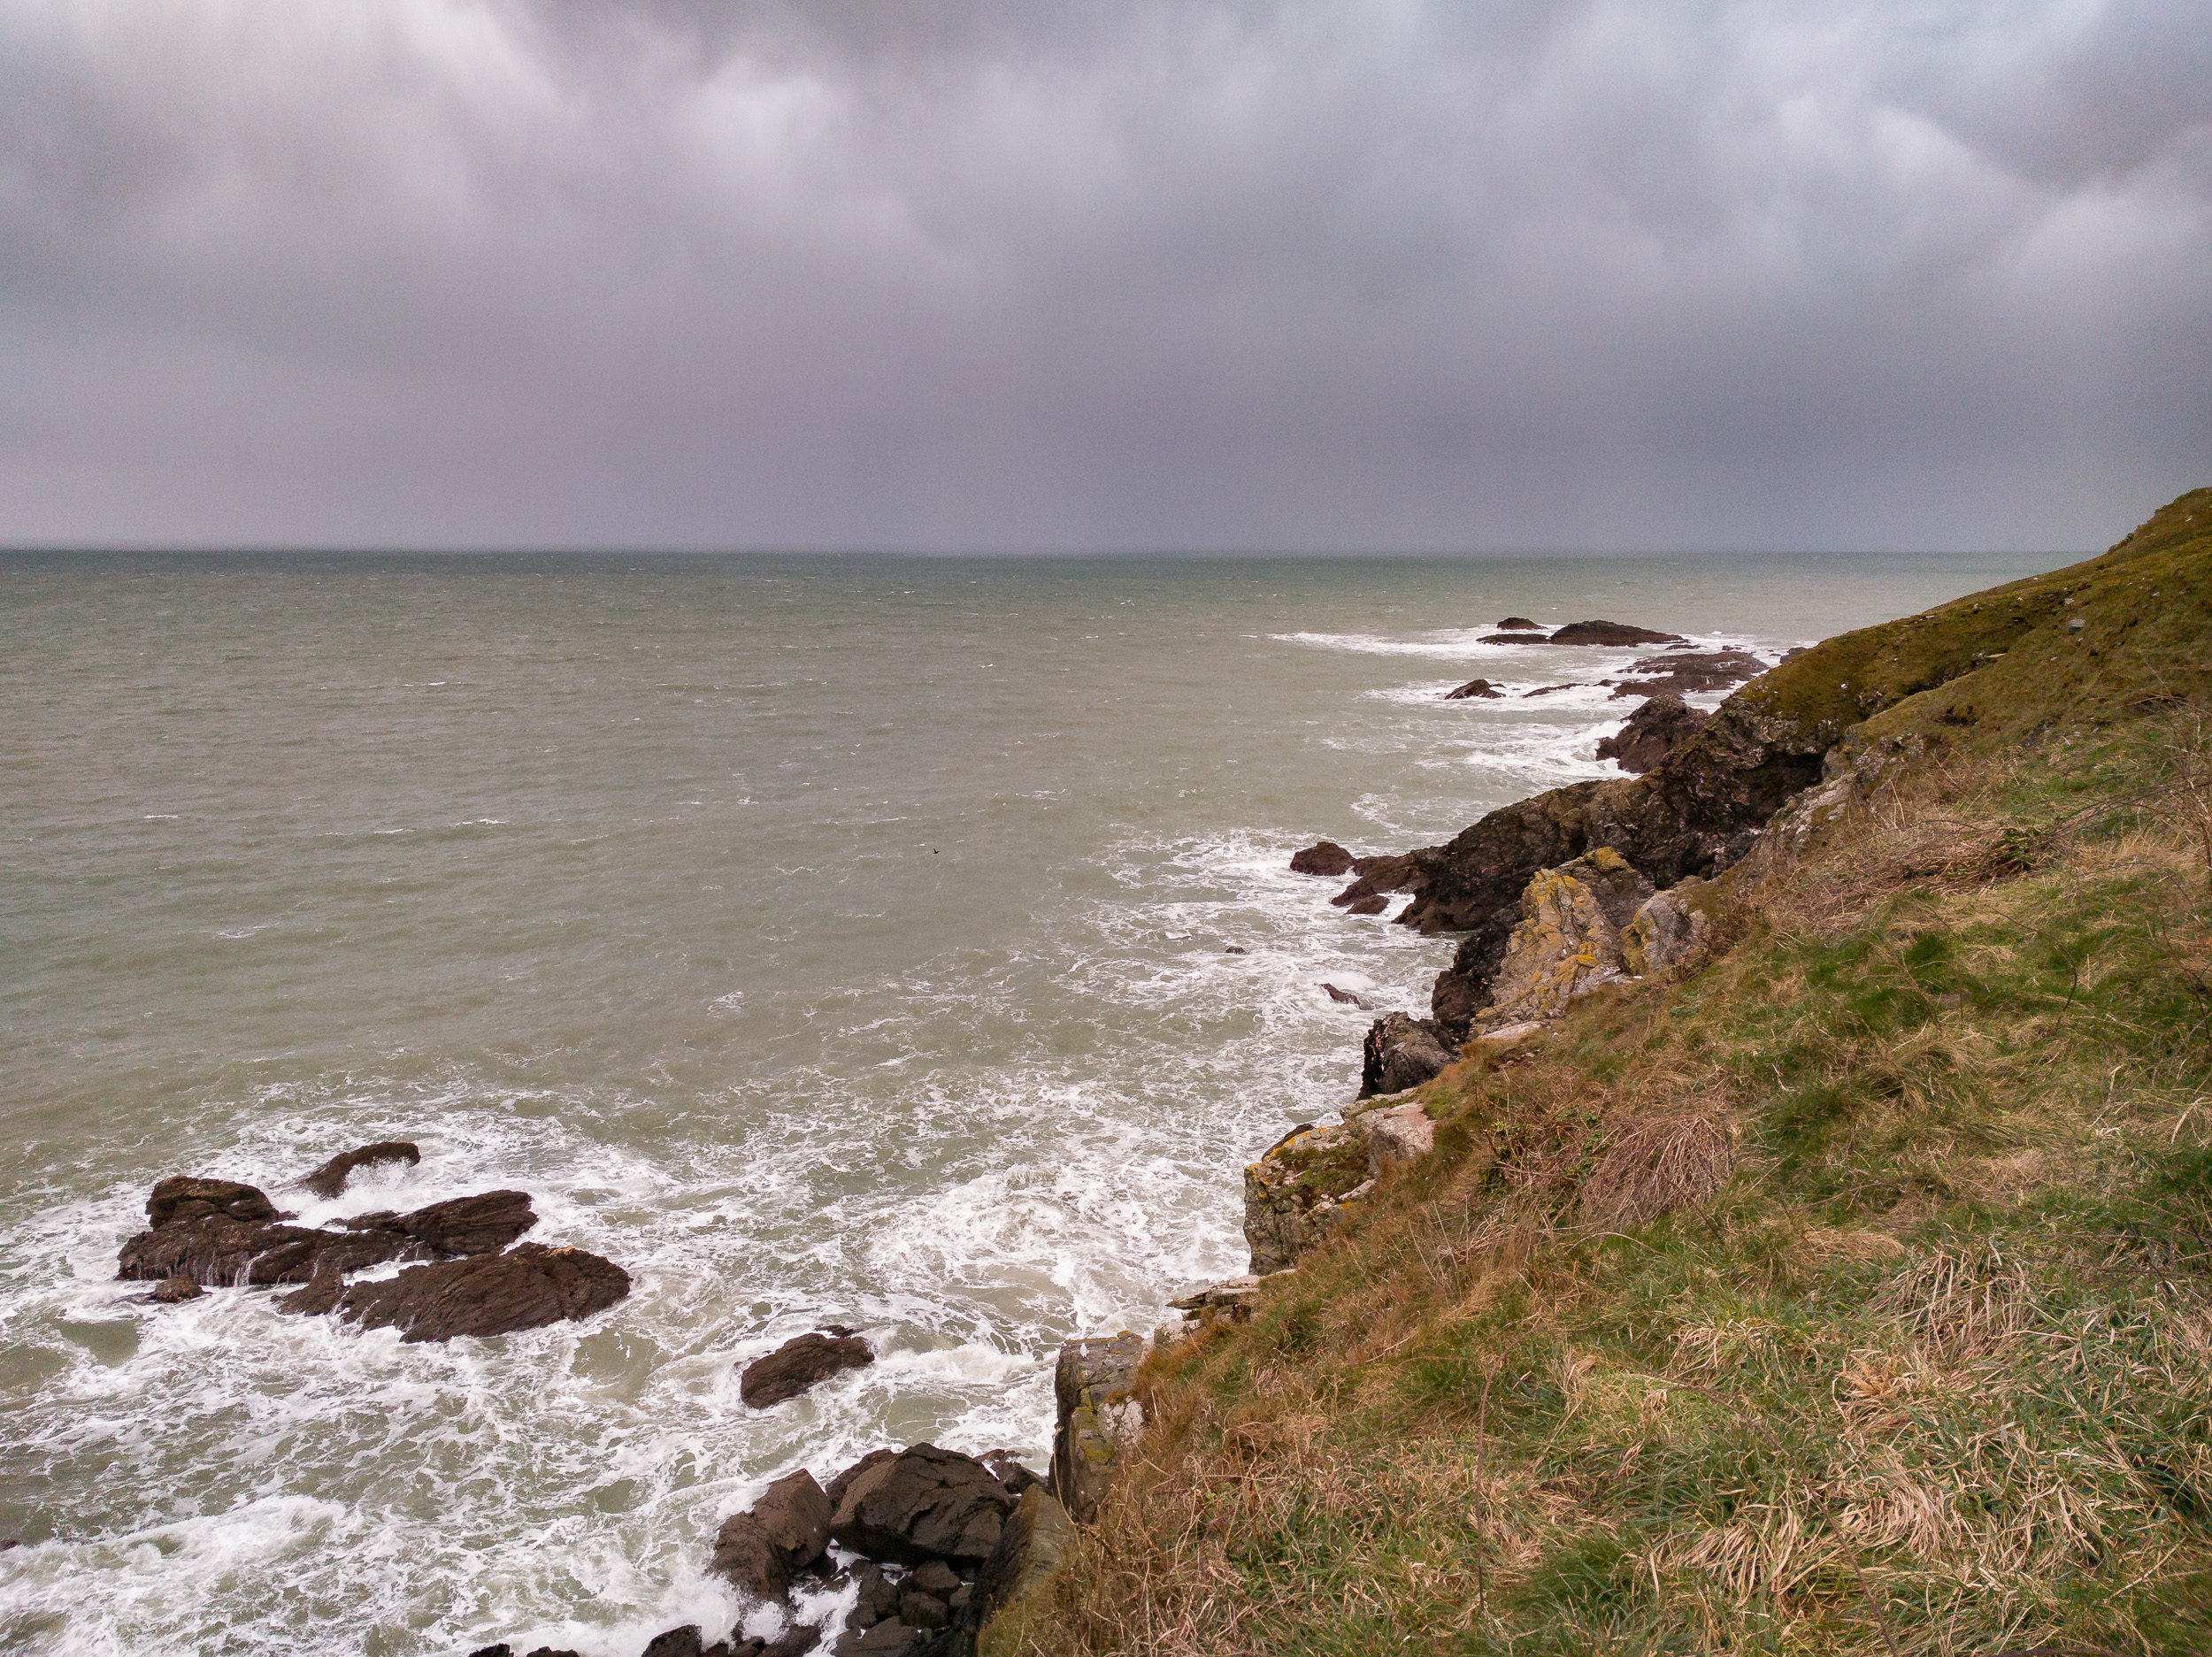
Watching the storm approach from the west.
I arrived at the Start Point car park, got my bag, and headed down to the view point. As I looked west and out to sea I could see a very large rain shower coming my way. I knew from the forecast there might be the odd bit of rain but this looked a little more than just a shower. I stuck to my location, kept my camera in the bag, and waited. Firstly the wind picked up, then the rain started, and then the rain got very heavy!
Determined not to be put off though I decided to shelter on the other side of the ridge that runs down to Start Point lighthouse. It was a lot less windy by still wet. I got my phone out and checked my favourite rain app, Rain Today. All I could see over my location was a big, dark blue blob, indicating heavy rainfall. the good news was that it was only forecast to last 30 minutes, and once it had passed I would still have 30 minutes before sunset.
So I did the sensible thing and went back to the car, had a cup of coffee and ate some chocolate.
Run Julian, Run!
As I sat in my car drinking my coffee I could see what was going on in most directions. To the east, the direction the storm was going, it was looking very dark. To the west, it wasn't really looking much better. I was beginning to think I might not even take a single frame. Then the thunder and lightning started and it was at that point I was very happy to have made the decision to wait it out in the car.
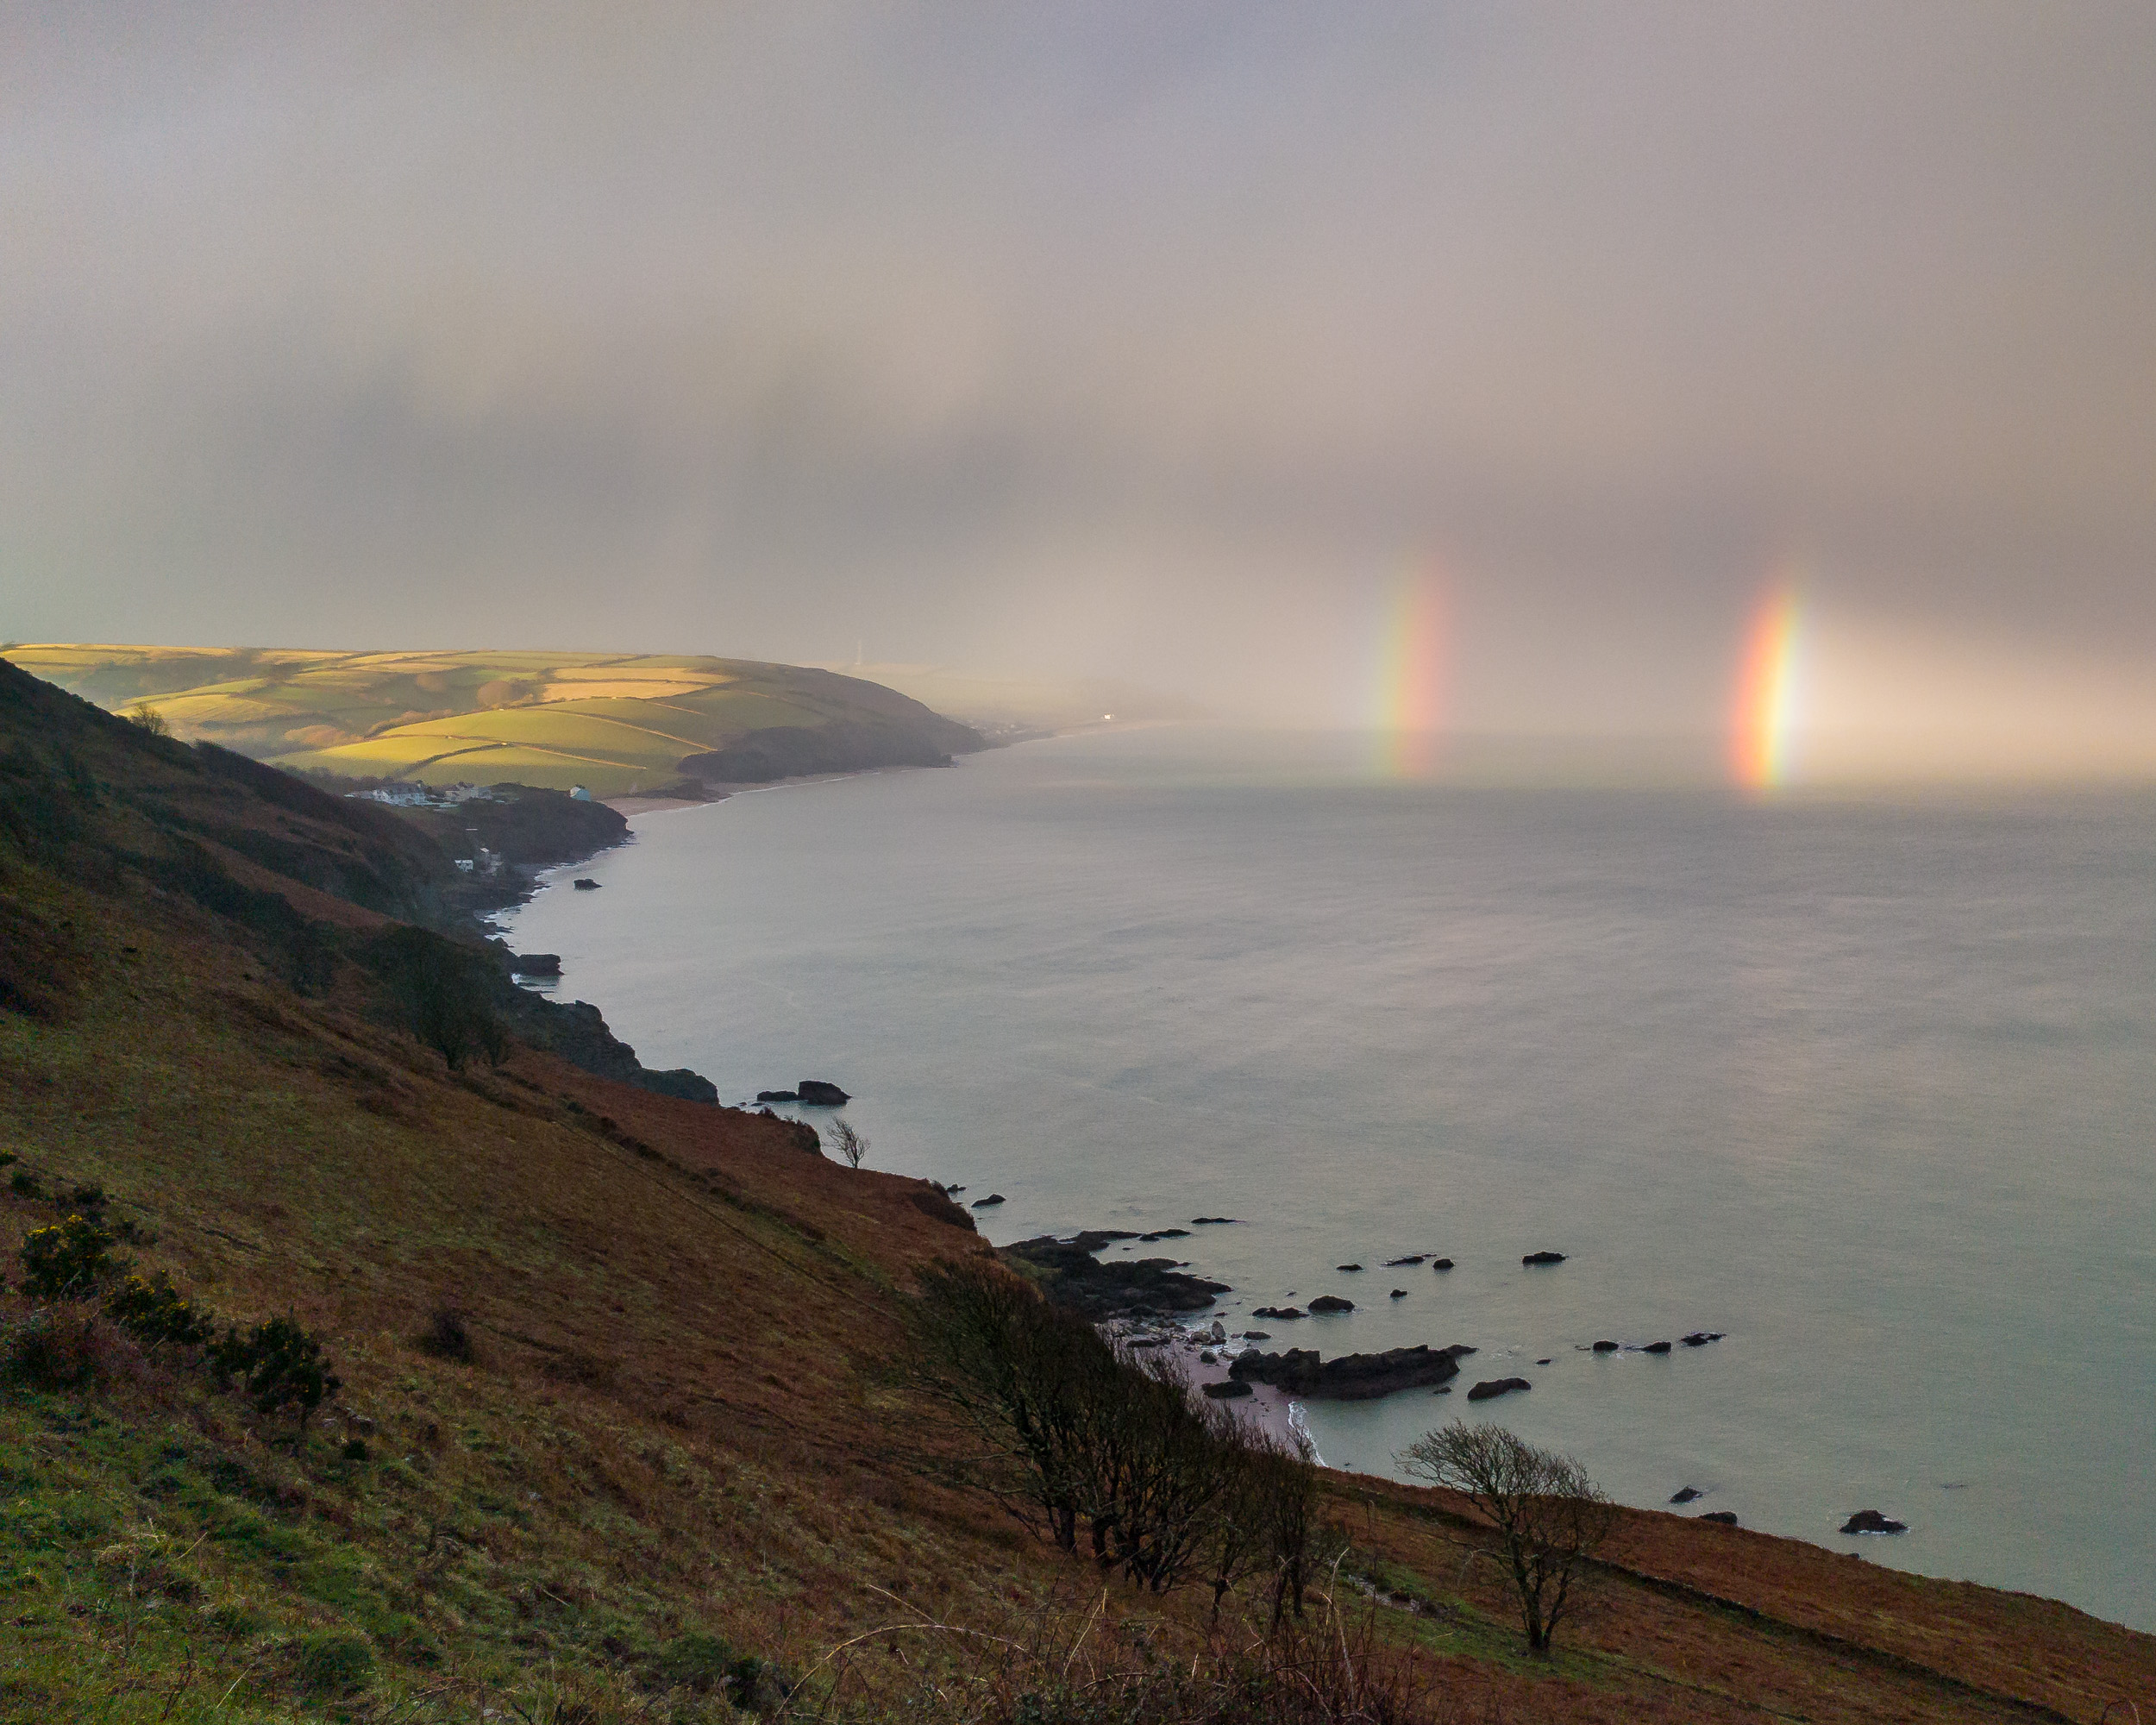
Spectacular conditions immediately after the storm had passed. I had to be quick just to grab this shot with the phone.
As forecast, I could eventually start to see a break in the cloud to the west. I waited to the rain had stopped and then I grabbed my stuff and went for it again. As soon as I got outside I spotted a double rainbow out to sea. It looked spectacular. Photographers often say you get some of the most dramatic conditions for photography just after a storm and from what I could see this was certainly the case.
I knew these conditions wouldn't last too long so I instinctively grabbed my phone and grabbed a shot. I then got to work getting my DSLR out and all the associated gear. As I feared, by the time I actually got all setup the best of the action had gone. Not to worry, I still had time to get back to my original viewpoint and shoot the lighthouse and dark sky, but I would have to run. Which isn't that easy with the amount of gear I had and the muddy ground but if I didn't get there in time I would only regret it.
Drama Everywhere
I got to my view point and frantically got to work getting my shot ready. There was still plenty of drama going on. The sky was still dark and brooding, and the rugged cliffs along Start Point were getting pounded by the sea. Over to my right (to the west) the clouds were breaking and the low sun was producing some lovely colours. That particular bit of action was still just out of frame, so while I had a long exposure running I grabbed a quick panorama with my mobile phone.
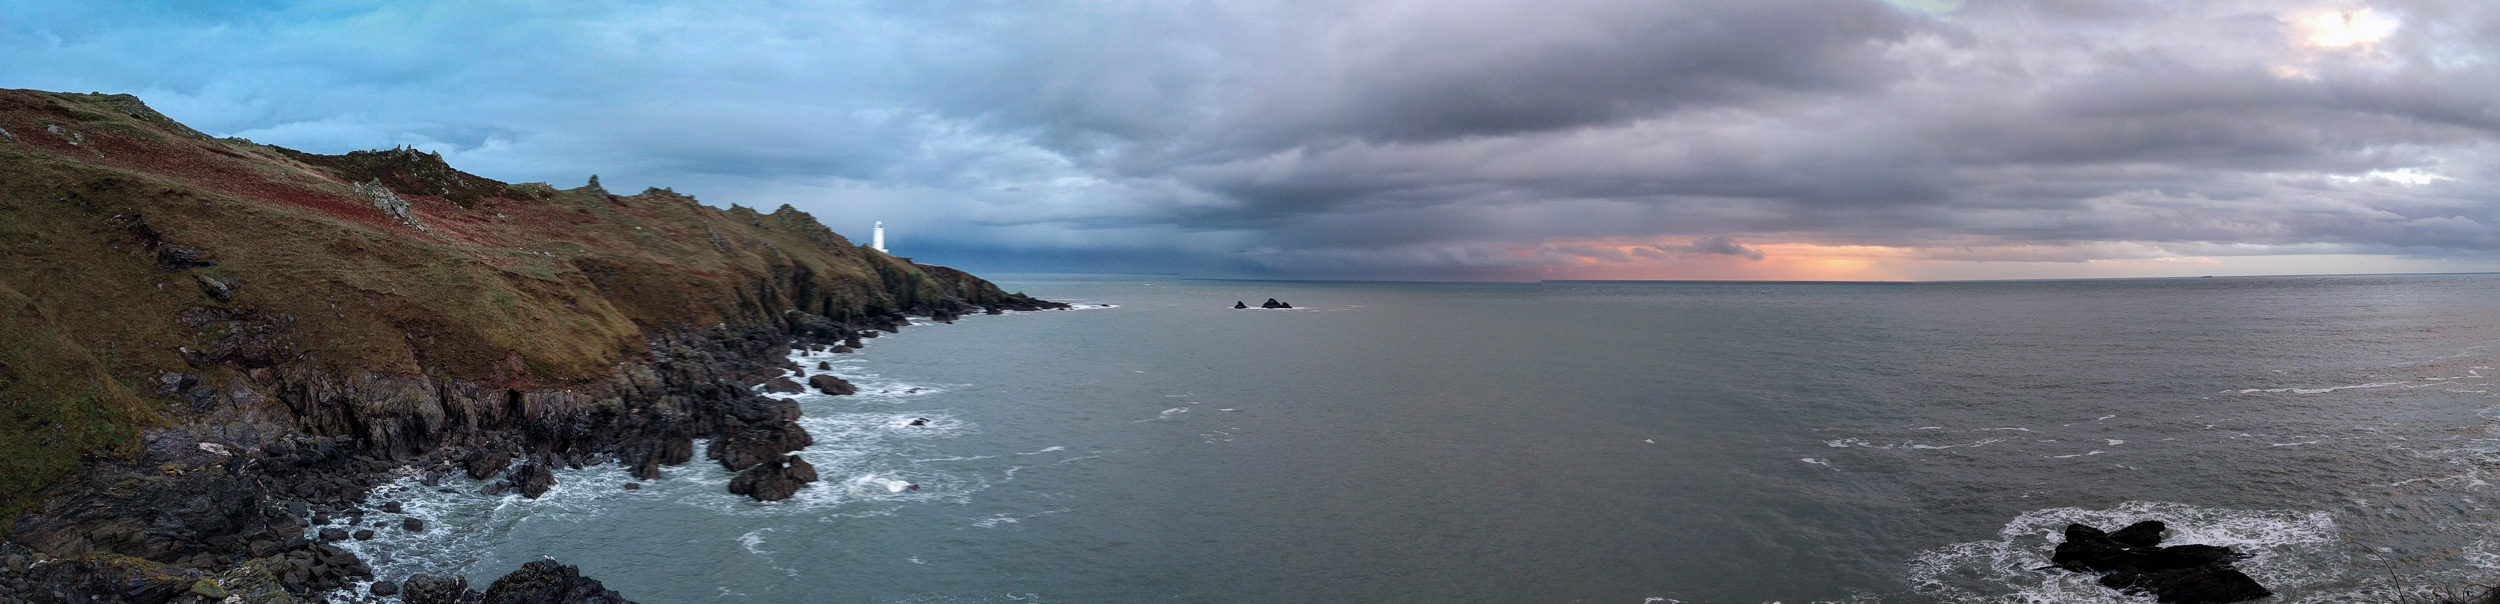
I managed to grab this quick panoramic using my Nexus 6p phone. It's not perfect but it shows the scene as it was.
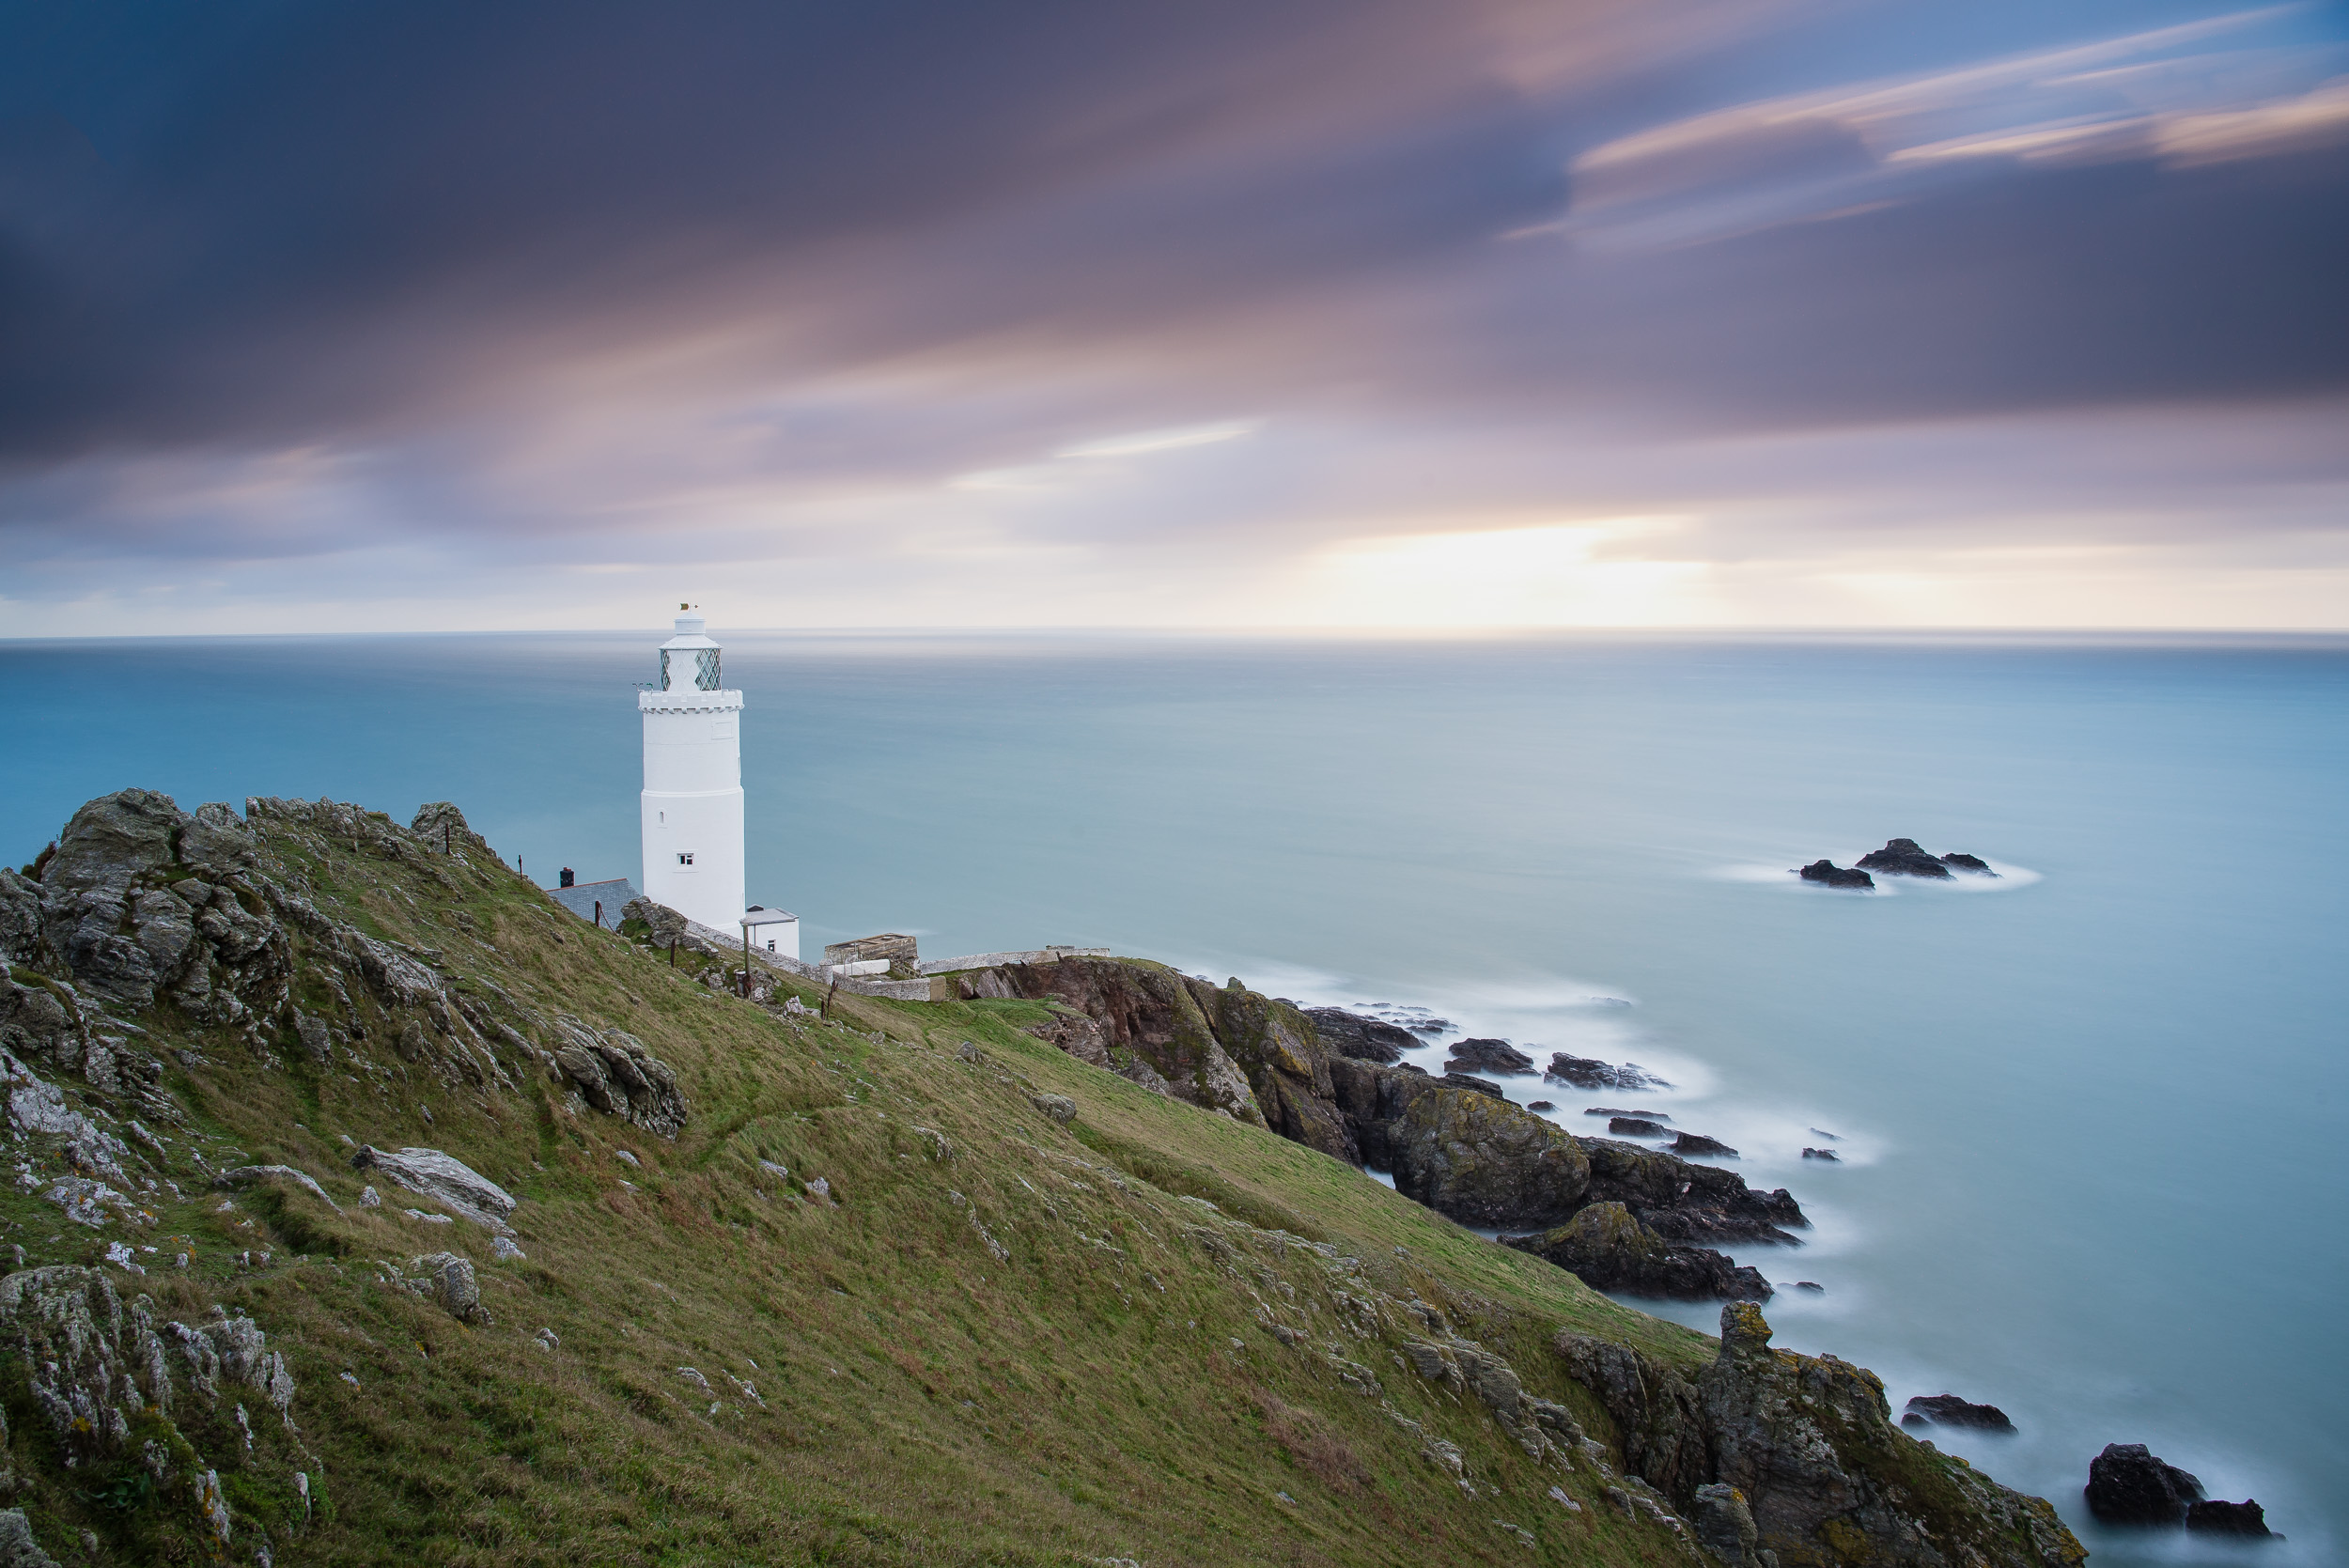
I kept shooting, varying my compositions slightly but the break in the cloud was just too far over to make for an interesting composition. In hindsight, I probably should have shot a panorama with the DSLR, but there was a lot going on and I didn't have much daylight left. However, I was still very happy with the moody shots I was getting like this one.
Nikon D750, Nikkor 24-70mm f/2.8 @ 40mm, f/11, 129 seconds, ISO 100, Lee Filters Circular Polariser, Lee Filters Little Stopper.
I Must Be Mad
I have to admit that when the rain really started to chuck it down and I went back to the car to wait it out, I did question my sanity. It was looking like it was going to be one of those days where not only do I not get a decent image, but I don't even get the camera out of the bag. However, having read so many times about how some of the best images were captured right after a storm I decided to hold out. And I'm so glad I did.
Perhaps the only thing I should have done would be to have left the car when I had started to see the sky clear, and not when the rain had stopped. This would have given me a bit more time to get back to my location and start shooting immediately after the storm had passed. However, given that I still wouldn't have been able to get a break in cloud or light from the setting sun into my scene I was pretty happy with the results.
Nikon D750, Nikkor 24-70mm f/2.8 @ 27mm, f/9, 60 seconds, ISO 100, Lee Filters Circular Polariser, Lee Filters Little Stopper.
Have you ever stayed out in horrible weather only to be treated for your perseverance? Do you sometimes think that landscape photographers are a little mad? Let me know in the comments.

Back to Boscastle
In this blog post I tell you about my trip to Cornwall to shoot Boscastle one cloudy Saturday afternoon in January.
Decisions, Decisions, Decisions
It's been a reasonably busy start to my photography in 2017. January had already seen me visit Dawlish Warren, Dartmoor and Colmer's Hill in Dorset, so when faced with a photography free weekend I was content to stay at home and clock in some family time.
However, it appeared that the photography gods were looking down on me and unexpectedly my wife decided to take the kids to the cinema. So while the offer to go and see Sing was tempting, I was also offered the chance to go and do something myself. What could I possibly do with a few spare hours on a January afternoon….?
Well, it wasn't going to be DIY that was for sure so I got busy looking at my photography locations map and got to planning a shoot. I had already shot Devon and Dorset this year so I thought why not finish January by going to Cornwall. But where would I go? This is the good thing about keeping a locations map, it allows me to visualise possible shooting locations so I could see which of my Cornish locations would suit my time constraints, weather and time of day.
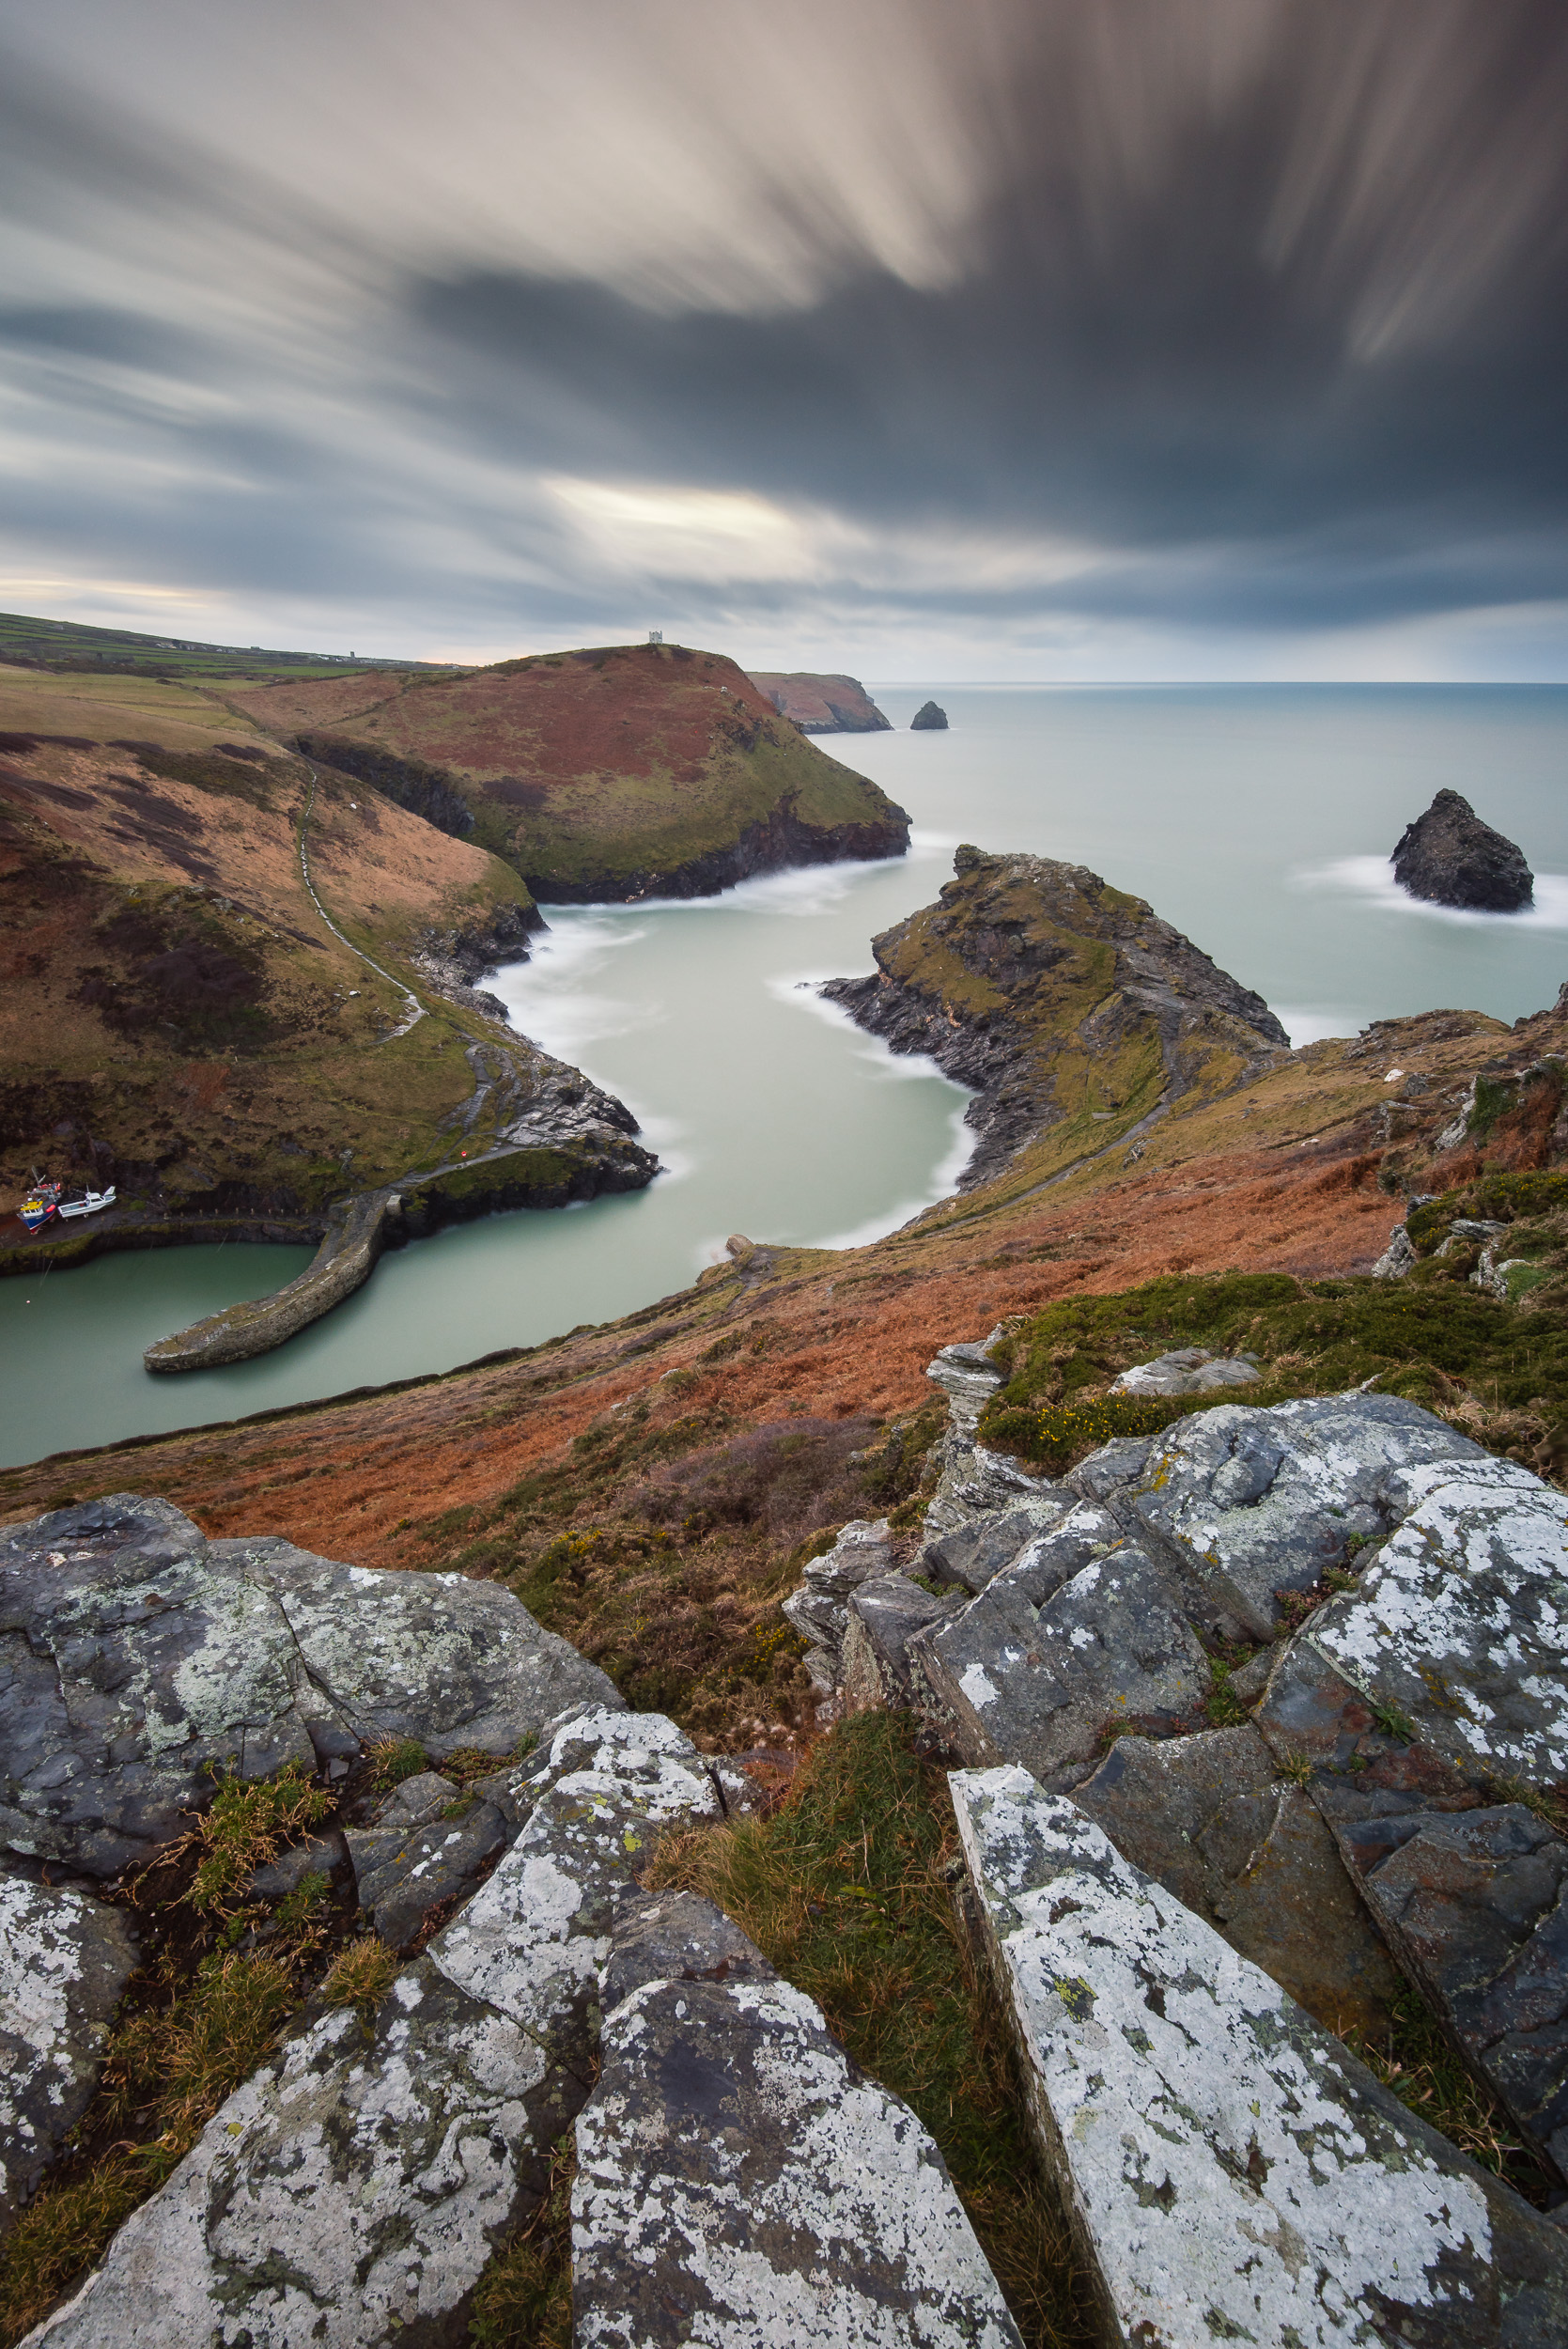
I eventually decided on Boscastle, a location I've shot a couple of times before. The high viewpoint above the curvy harbour entrance, dramatic coastline and forecast cloud cover would, I decided, make for an excellent sunset coastal location.
An image of Boscastle that I took in May 2016.
Taking a Friend
Landscape photography can often, for me at least, be a solitary past time. After all, getting up at 5 am to visit Dartmoor in freezing conditions in the off chance there is a good sunrise is not exactly on top of everyone's list of things to do. However, this was a Saturday afternoon and while it wasn't exactly a warm and pleasant day I did think my father-in-law would be up for a session with the camera. So I gave him a call and he jumped at the chance. So we packed our stuff and hit the road to Cornwall.
Dramatic Boscastle
It's just over an hour's drive to Boscastle from home so there was plenty of time to analyse the weather as we got closer to our destination. Things were looking very positive. The heavy, but intermittent rain showers meant the sky was full of cumulonimbus clouds as well as the odd thunderstorm cloud with high altitude anvils. As we drove we had visions of a setting sun illuminating these big clouds in a golden orange colour as they travelled along the dramatic Cornish coast. It might just be one of those great trips out with the camera.
It's a short walk from the harbour car park to the viewpoint, but it does require a small ascent to get an elevated viewpoint. It's worth the effort though and the excitement of the shoot gave us more than enough energy to get up the hill.
Once at the top we set up our cameras and got ready to start taking some epic images. However, as has been the way for me recently, I could spot a few problems. The big dramatic rain clouds had now for the most part all passed by leaving only small patches of cloud. There was also a big bank of low cloud on the horizon which I knew would block the last of light when the sun dipped down behind them. Still not to be put off I got shooting and took this image just as the sun dipped below the distant cloud line.
Nikon D750, Nikkor 16-35mm f/4 at 16mm, 0.8 seconds, f/16, ISO 100, Lee Filters Circular Polarizer, Lee Filters 0.9 ND Grad. Processed in Lightroom CC.
We kept shooting until sunset but the conditions obviously did not improve. Landscape photographers bang on about the quality of light all the time but for very good reason. I know Boscastle is a fantastic location for capturing images but in flat winter light, even the most dramatic of locations can look a bit drab. I tried taking a few long exposures which provided the movement in clouds I was looking for but without good light, the image remains flat and grey.
As it started to get dark we decided to call it a day and head back to the car. Though the conditions hadn't been as we had hoped, we had at least had a good old chat and most importantly been out with the cameras.
Being Positive
Though January hasn't resulted in the capture of any portfolio class images, I am, as always, very happy to have got out with the camera. Despite work and family commitments, I have managed to get out with the camera every weekend in January. I even managed to create a video on how I use ND filters.
I rarely consider a trip out with the camera to be wasted effort. I often talk about the value in practising the craft of photography on this blog and so if anything this trip to Boscastle was still time well spent. Photographers can often set unrealistic expectations on ourselves to capture amazing images each time we go out. However, unlike full-time photographers, my time out with the camera is set around work and family commitments rather than when the conditions are likely to be optimal. I can't always capture amazing images, but I can make sure I'm well prepared for when they are.
So how do you balance your photography with other commitments? Will you wait for the best conditions or head out for the fun of it? Do you like to go out shooting with a friend or prefer solitude when out in the landscape? Let me know in the comments below.

Exploring Colmer's Hill
In this blog post, I talk about my 2nd visit to Colmer's Hill and how I learnt to look for the wider perspective. I also look at the importance moving around to find different compositions of the same subject.
A Change of Plan
One of my photographic goals this year is to explore more of Dorset. I'm very lucky to live in Devon as not only do I have a lot to shoot in my local county, but I also have Cornwall and Dorset as neighbours. For no particular reason, I seem to have spent more time shooting in Cornwall than Dorset. So after reading Mark Bauer's new book Photographing Dorset, I was very much inspired to photograph more of Dorset in 2017.
My original plan for the shoot was to head to Old Harry Rocks near Swanage. However, the weather forecast wasn't concrete for the conditions I wanted. As it is a 2 hr drive there and a 2 hr drive back I didn't feel it was worth the risk on this occasion so I opted for something a bit more local. I had visited Colmer's Hill late last year and with it's close proximity to home I thought that would be a better option.
A Hint of Colour
I arrived at my location in plenty of time for sunrise. Arriving a good hour before official sunrise allows plenty of time to get set up and maybe even have a quick cup of coffee. From my vantage point, I could clearly see Colmer's Hill and the surrounding landscape which had some low lying mist on it and just a splash of colour in the sky. However, the only cloud in the sky was a thick blanket of low cloud far down the coast, exactly where the sun would rise. So unless conditions changed I would have a cloudless sky for my composition and the first light of the day blocked by some coastal cloud.
A New Perspective
The location I was shooting Colmer's Hill from typically requires a long lens to shoot with so the hill can be isolated. So the first few shots I took were with Nikkor 70-200mm f/2.8. Shooting at around 150mm provided me with the composition I was looking for, but the light was very flat and hazy so the shots weren't very inspiring.
As I often do when I'm waiting though I decided to take a few shots with my phone for my Instagram feed. Taking an image from my phone immediately made me realise that I was missing a very different composition. The phone gave me a much wider perspective of the scene and I realised that rather than just including Colmer's Hill I should be including the wider landscape.
A wider perspective. Nikon D750, Nikkor 24-70mm f/2.8 at 42mm, f/11, 1/15 sec, ISO 100.
By opting for a wider composition I could include the distant hills which were surrounded by mist. The sun had risen above the distant cloud by this time so there was just a little colour on the side of the hills and in the sky.
The tight composition I was so focused on getting had prevented me from looking around to see if there was a better composition to be had. If I hadn't decided to take an image with my phone I might well have missed out on a better image.
Same Location, Different View
While it is important to sometimes change lens to give a better composition, it is also important not to stay put in one spot. With some locations that can't be helped, but you can get a number of different views of Colmer's Hill by simply walking about.
A slightly different view of Colmer's Hill.
Based on the advice from Mark's book I took a little walk northwards to find some undulating ground which again, given the right light, would make for some interesting foreground for a wide angle composition.
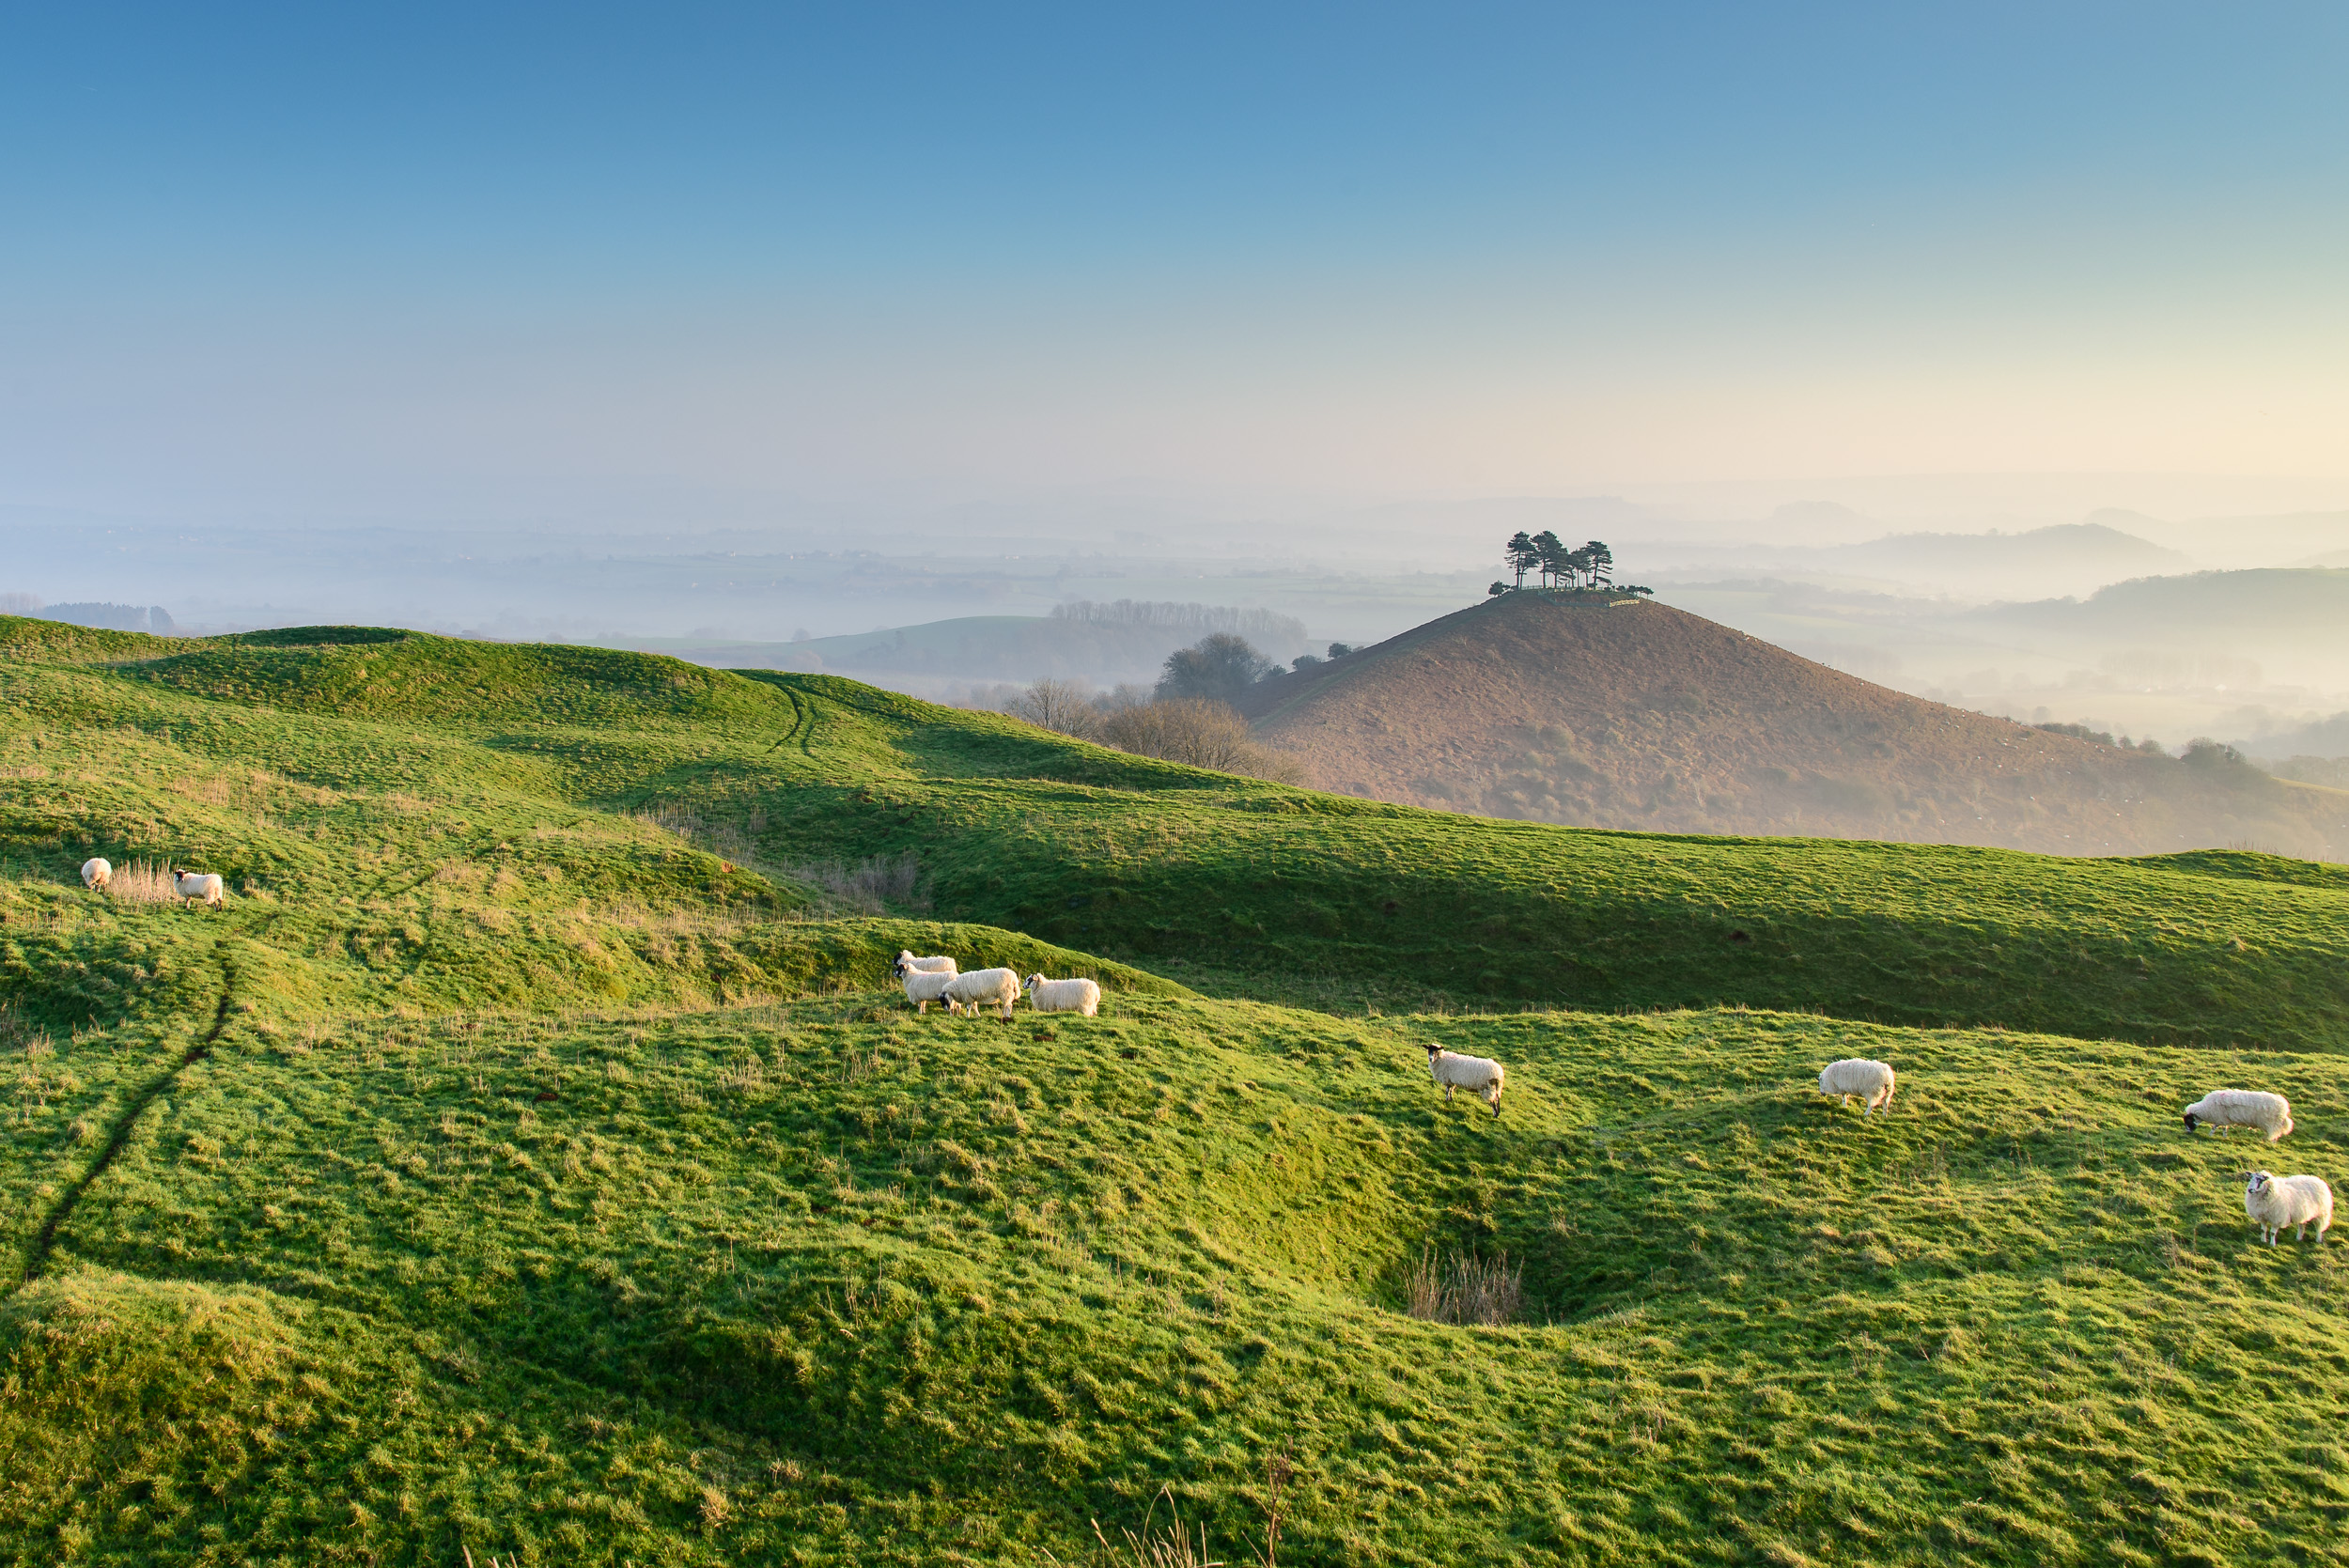
Though the sun was quite high by the time I set my shot up at this location I could see how it might work on another day. I would just some higher cloud and possibly a few less sheep!
I'll Be Back
It's not been the greatest of starts to the year for my photography. It's starting to feel like it's been a long time since I managed to capture a great image. However, I do need to remember that I can really only go out shooting when I have time, not when the conditions are optimal, so I can't expect great results every trip out with the camera.
As always, I will look for the positives from each trip out with the camera. Firstly I learnt not to get too focused on one composition using one lens. Getting the mobile phone out really helped me to see a different view! I've also learnt more about a location that I will probably visit a lot in 2017. It's good to have multiple spots from one location so you can move about a bit to suit the conditions.
Have you had a good start to your photography this year? Have you got some new locations you want to visit this year? Let me know in the comments below.

My Field Guide to Using ND Filters
In this blog post and video I take you out on a shoot to Froward Point in South Devon to take you through my workflow when using Neutral Density (ND Filters). It doesn't matter what strength of ND filter or even who makes it, my process is the same. Read the blog post and watch the video to find out more!
Control
Modern cameras are wonderful and amazing bits of technology. They allow us to turn our creative visions into beautiful images that we can connect with. We have a lot of control. We can change shutter speed, aperture, focus, ISO, and position, all with the aim of capturing that moment. One thing we can't control is mother nature and so sometimes we need a little extra help "control the light".
This image required an exposure time of 72 seconds. Generally speaking it would not have been possible to get an exposure of this length without an ND filter.
This is where filters come in. Now, there are such a dizzying array of filters available it would be slightly foolish of me to try and cover them all here, so I'm going to concentrate on the use of ND (Neutral Density) filters or to be more specific how I use ND filters.
Though I use ND filters in my landscape work, it is probably in my seascape work that I will use them the most. They allow me to creatively control how the water looks in the image. It could be that I want to lengthen the exposure to 1 or 2 seconds to show the path of a wave, or even 3 or 4 minutes to smooth out the texture of a choppy sea. Sometimes you just can't get exposures times like that just with the camera alone.
The Process
I have a range of ND filters in my bag, all made my Lee Filters (my filter manufacturer of choice). I have a 3 stop, 6 stop (Little Stopper), 10 stop (Big Stopper), and 15 stop (Super Stopper). The Super Stopper is a recent addition to my kit bag and you can read how I got on with it on my first trip out with it here.
No matter which ND filter I use, the setup and execution process I go through is the same. To show you what my process is I've created in this field guide video which takes you through my process while out on a shoot.
To recap from my video the process I follow is:
Composition - first things first, I need to have a composition. Get this right first!
Base image - take a shot with no filters. Check composition again, image sharpness and exposure. If needed adjust, shoot and check again.
Add other filters - if needed, add ND graduated filters or a polariser. Shoot the image again and do all the same checks.
Add ND filter - finally, add ND filter of choice and take the image. Do all the same checks again.

Once processed the final image looks like this:
Final image. Nikon D750, Nikkor 24-70mm f/2.8 VR @ 28mm, f/13, 202 seconds, ISO 100, Lee Filters ND 0.6 (2 stop) graduated filter, Lee Filters Big Stopper (10 stop ND), cable release.
I hope the reading about my process for using ND filters has been useful. Do you follow the follow the same process? Do you do things a little differently? Are ND filters part of your creative workflow? Are you considering getting some ND filters? Please let me know in the comments below.

Snow, Glorious Snow!
In this blog post, I tell you about a recent visit to photograph Dartmoor in the snow, how I learnt a little more about a favourite location, and how I can plan my shoots more effectively.
Weather Forecast Addict
Though I do whinge about winter with its short days and fewer opportunities for landscape photography, it is also the season for snow. Snow down here in the south-west of England is rare, especially at lower elevations, but every now and again some of the higher ground will get a coating of the white stuff.
All it took was the rumour of a possible snowfall to get me excited and straight onto regularly checking the snow forecast for Dartmoor. As the weekend approached the number of times I was hitting refresh on my browser steadily increased. The "snow risk" percentage went up, then down, then up again. Towards the end of the week I was also checking the Dartmoor Webcam desperately hoping to see a dusting of snow on the ground.
Do You Wanna Build a Snowman?
When I finally saw a little snow on the Dartmoor Webcam I decided that I was going to get up early the next morning and head to Dartmoor. Even without snow, the conditions up on Dartmoor can be arctic so the first step in getting organised was to get out all my winter layers. I know from bitter experience that if I found myself freezing cold that my enthusiasm for photography would be short lived and I would be home with a cup of coffee and bacon roll before sunrise.
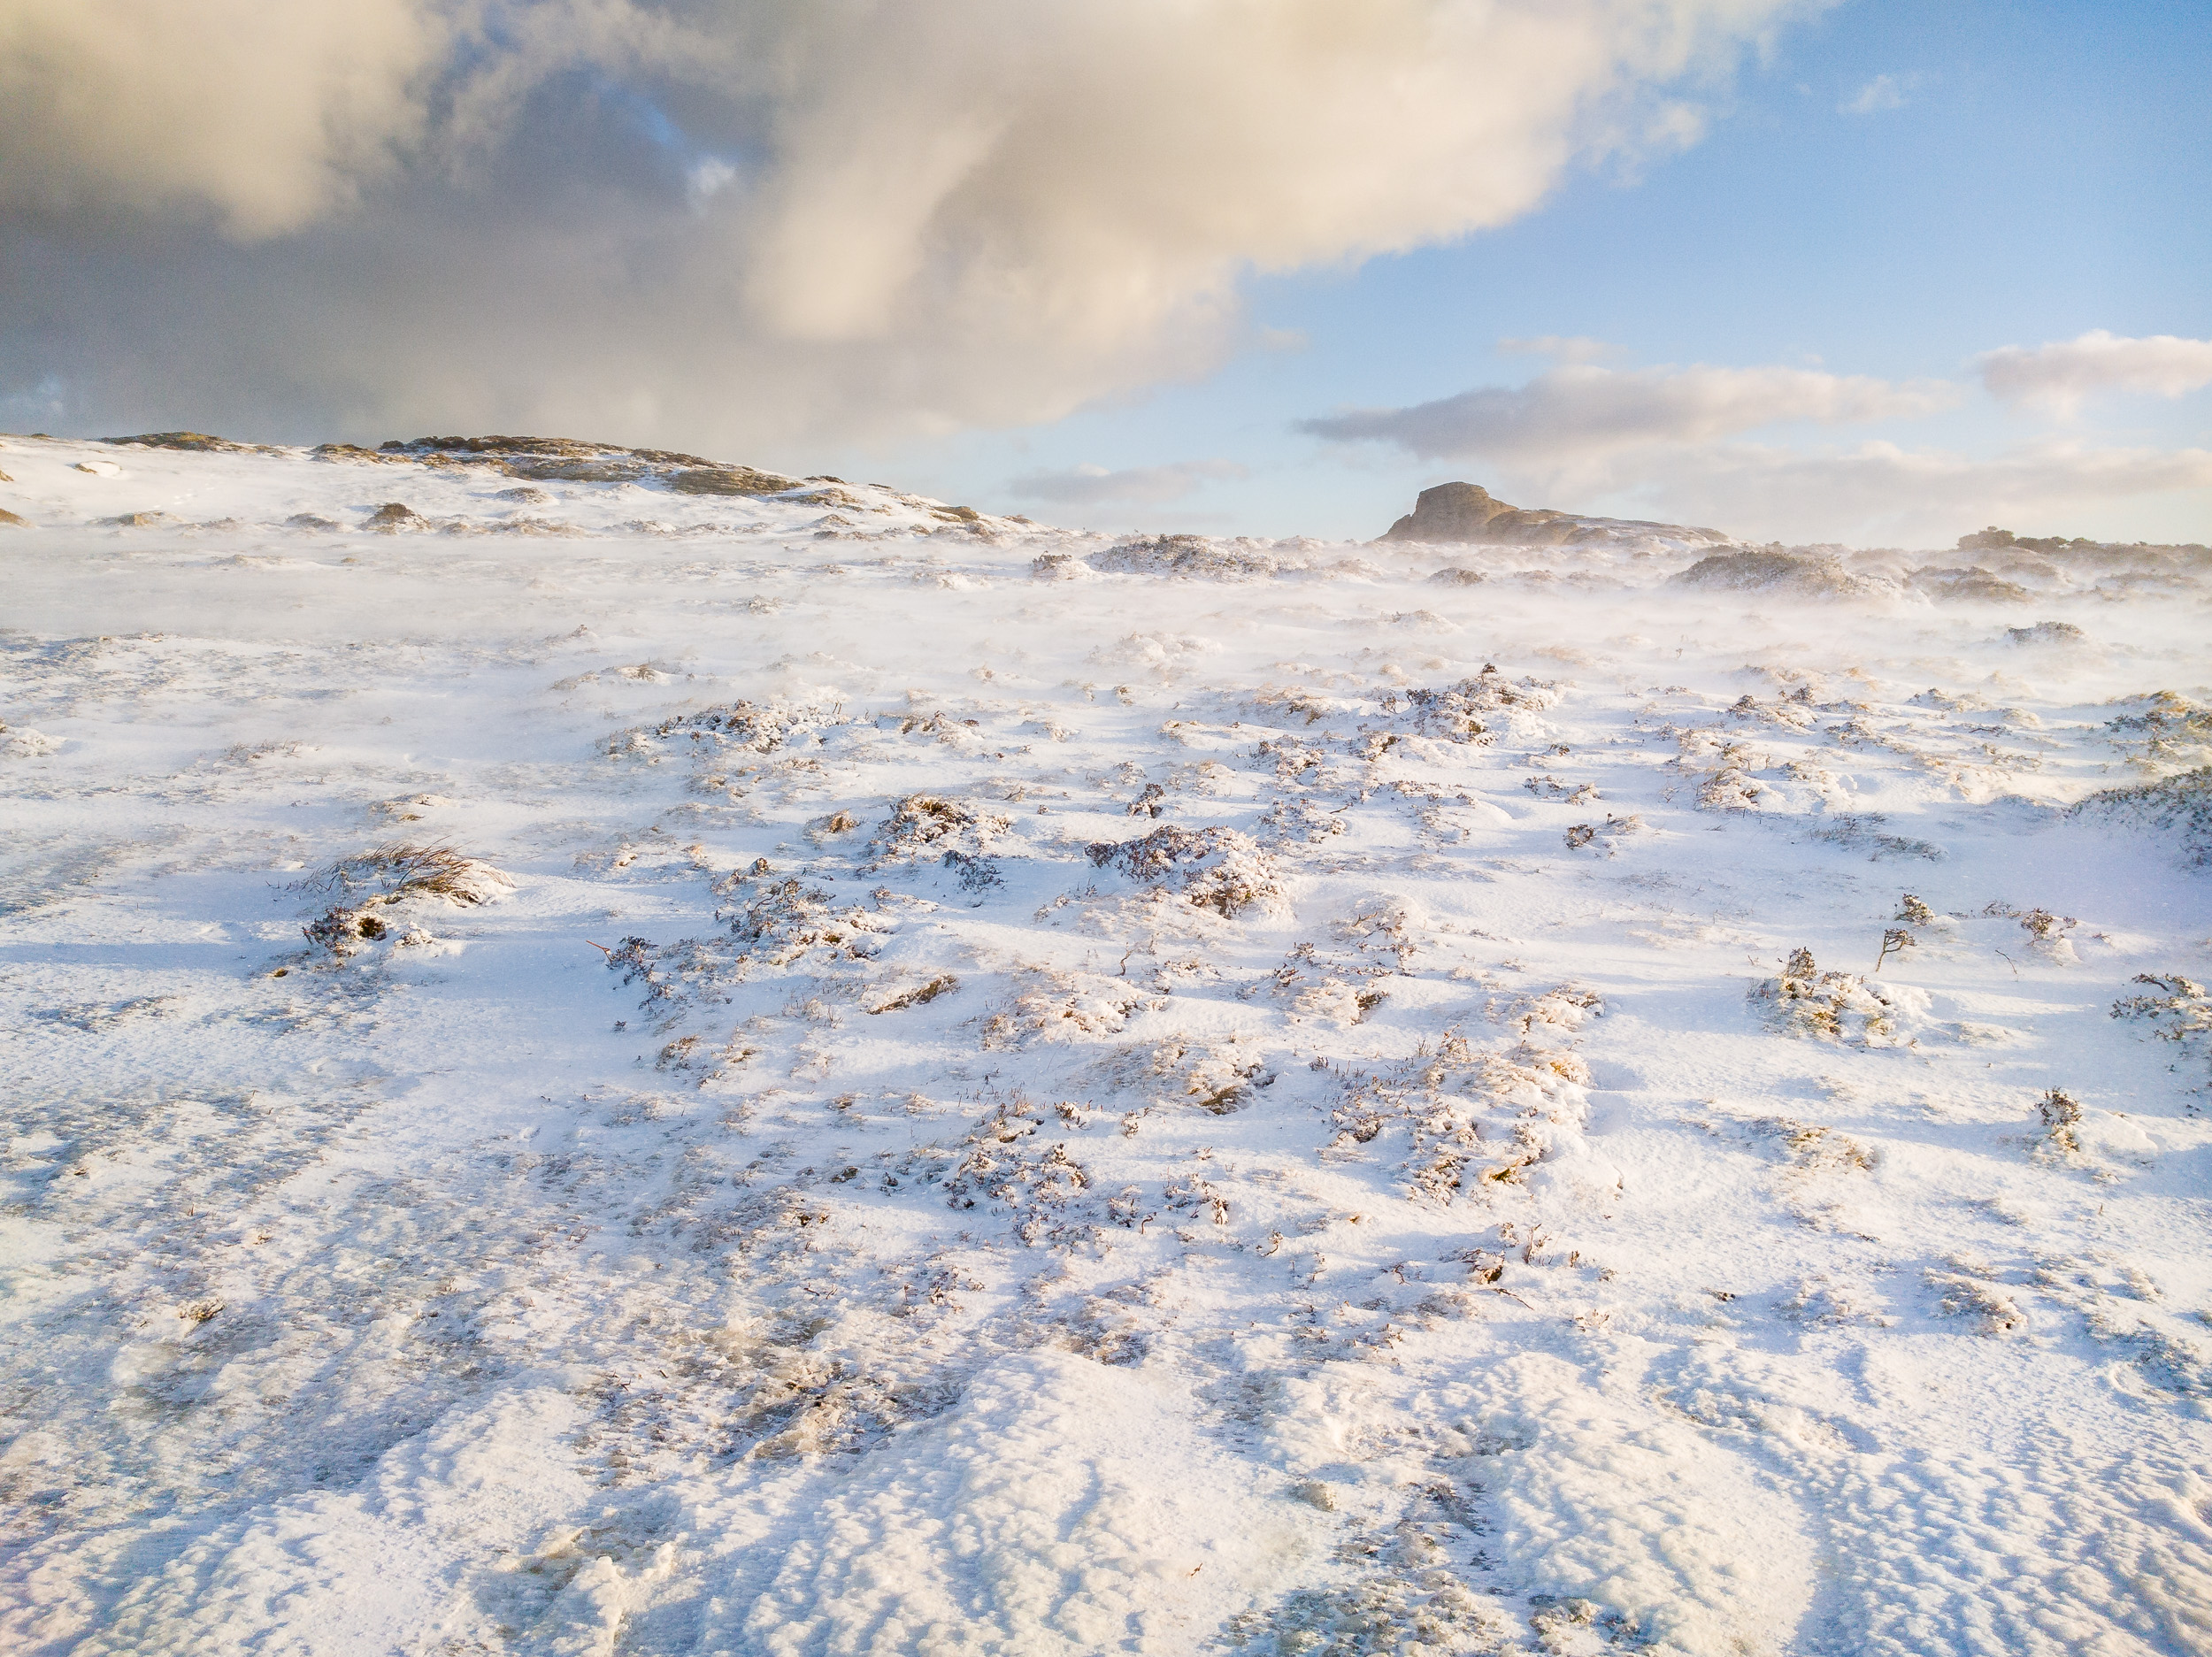
When I left in the morning there was no sign of snow but I already knew that I would have to go to higher ground. My planned location of Emsworthy (one of My 5 Favourite Locations for Landscape Photography in Devon) would probably be high enough so I wasn't overly worried. Sure enough just as I passed Haytor everything started to turn white. There wasn't a huge amount of snow, but I was sure there was enough to work with (or at least build a snowman).
Waiting for the Light

The signs looked good early on.
Naturally, snow on Dartmoor attracted a fair few photographers to come out so I wasn't overly surprised to be sharing my Emsworthy location with a couple of other local photographers. There's plenty of room at Emsworthy for three photographers so there were no issues over who was where and it was nice as always to have a chat and a coffee while waiting for the sun to come up.
My vision for the image I was hoping to get was relatively straight forward. In the foreground are small clumps of ground, which when illuminated by the rising sun would hopefully turn the snow a nice golden colour. This coupled with the tree and the tor in the foreground, and some dramatic clouds would make a good image. All I had to do was wait for the sun to rise and bathe the ground, tree and tor in golden light.
Always Learning
Landscape photography is rarely easy and conditions can change rapidly, for the better or for the worse. As I patiently waited for the sun to rise the cloud started to clear. Those nice big pink clouds that I thought would be a key feature of the image cleared from the sky leaving it almost clear. Not to be put off though I continued to wait.
Another problem was that when the sun had risen over the horizon, it wasn't high enough to shine over the hill behind me. What I hadn't taken into account was that during the winter months the direction of the sunrise meant it would be around 30 minutes before the sunlight would hit the foreground at my location. The problem with the sunlight 30 minutes later is it can be a bit harsh and will have lost some of its morning warmth as you can see with the image that I took below.
Nikon D750, Nikkor 24-70 f/2.8 VR at 38mm, F/11, 1/40 sec, Lee Filters ND Grad, post processed in Lightroom CC.
So while my first image lacks the punch I was hoping for I did learn something from the experience. I've shot Emsworthy a few times in the morning, but that doesn't necessarily mean that it's a good sunrise location all year round. Though I use The Photographer's Ephemeris to plan my shoots I've learnt that not only do I need to pay attention to the direction of sunrise, but the height of the surrounding ground.
Alyn Wallace has actually produced an excellent video on how he uses The Photographer's Ephemeris to plan around changes in ground elevation. I shall be watching his video a few more times! Also, be sure to check out Alyn's work, it's inspiring stuff.
Goodbye Snow
Unfortunately the arctic conditions didn't last the weekend.
The snow on Dartmoor didn't really last past that weekend so I was unable to go back out and try again. So while I was unable to get the image I was hoping for it was great, as always, to get out with the camera and practice the craft of photography. I also learnt something new about one of my favourite locations and how to plan a little bit better. So overall I call that shoot a success!
So have you been out with your camera in the snow recently? Do you use The Photographer's Ephemeris to plan your shoots? Let me know in the comments below.

A Positive Start to 2017
On my first trip out with the camera for 2017, I visited one of my favourite locations, Dawlish Warren beach. While the conditions didn't produce inspiring results it was still an important trip out with the camera. Read why in this blog post.
Stay at Home or Risk It?
For me, 2016 was a good year for photography. I got out a lot with the camera and when I reviewed My 5 Favourite Images of 2016 I was very pleased with the results. However, when I went out and Said Goodbye to 2016 in Dorset, the results from my final shoot of the year weren't exactly epic.
One thing I don't do is the let the disappointment of the last shoot put me off the next. Especially when it was the weather or conditions that stifled my creativity. When 2017 came around I was soon looking for the next available slot to get out there with the camera. To say that I was keen would have been an understatement.
It was this keenness to get out there that largely overrode my better judgement of the weather forecast and just risk it. After all, weather forecasts can sometimes be pessimistic, and Dawlish Warren beach is just down the road. What else was I going to do? Sleep?
Being Optimistic
Despite the dubious weather forecast I headed off to Dawlish Warren beach, one of My 5 Favourite Landscape Photography Locations in Devon. Sunrise on the coast can often yield dramatic results, despite weather forecasts, so I drove there feeling optimistic.
However, even the strongest sense of optimism isn't enough to change the weather or light available. I did take a number of frames, adjusting composition and exposure times, but sometimes the magic just isn't there. I feel this image is probably the best of the morning.
Nikon D750, Nikkor 16-35 f/4 at 29mm, f/8, 205 seconds, ISO 100, Lee Filters polariser, Little Stopper and ND Grad. Processed in Lightroom CC (including 4:5 crop).
A Wasted Trip?
So you may ask me if it was a wasted trip? Should have I stayed in the warmth of my bed for an extra hour? Well, no, of course not. Regular readers of my blog will know often I talk about the value in Practising The Craft of Photography. Though the conditions weren't what I hoped for, I want to make sure that when the conditions are amazing I'm prepared!
Being prepared means a couple of things to me. Firstly, I need to know my equipment. Can I set up my camera correctly and even more importantly, can I adjust the settings quickly to support changes in light and conditions? I also need to have my "photographic brain" fully engaged and exercised. I took a small break from landscape photography last year and it was amazing how quickly I had become rusty with finding and setting up compositions.
So while the image isn't going to win me any awards, my time at Dawlish Warren was still time well spent. The camera was out of the bag and I was pushing buttons, moving dials, checking histograms and using filters. I was also thinking a lot about compositions. What will my image look like if I move up, or left a bit, what if I change my lens? I was exercising my brain in preparation for the day when I do get those epic conditions.
So how has your 2017 started? Have you been out with the camera? Let me know in the comments below.

Creating a Locations Map with Google Maps
In this video I take you through process of creating your own custom Google map so you can record, track and visualise your landscape photography locations
Location Planning
Back in September I posted a blog article on planning for a landscape shoot. In the blog post and associated YouTube video I talked about a number of planning tools that I use for weather, tides, sunset / sunset timings etc. However, it was my use of a custom Google Map to record locations that I have either visited or plan to visit that seems to have generated the most interest from my readers / viewers.
Using Google Maps
Given the level interest I thought I'd produce a brief tutorial to tell you how to create your own map. So in this video I take you through the steps of:
Creating a map
Adding locations
Using colours, icons, and layers
Modifying locations with comments
Accessing your maps on a mobile device
I find it a really useful tool and I'm sure you will to. Check out the video below:
Hopefully you found this video useful. If so, please do subscribe to my YouTube channel! Don't worry if you don't, I always post a blog article here with the video embedded so you won't miss out.
Do you use Google Maps for any of your location planning? Do you have any tools that you recommend? If so, please let me know in the comments.

My YouTube Channel - Update #1 for 2017
I haven't posted a new video to my YouTube channel in a while so I wanted to give you a quick update on where I am with the channel and my plans for 2017!
Happy New Year!
Firstly Happy New Year to you all. I started this blog back in August 2016, and since then I've managed to maintain my goal of a new post every week. It's hard work but it also encourages me to get out there with my camera more often which is rarely a bad thing!
I've also received plenty of positive feedback and will continue to deliver new blog posts and content throughout 2017. I've got plenty of ideas for new posts but I just need the British weather to be a bit more cooperative! These winter months can be very restrictive.
My YouTube Channel
If you are a regular reader of my blog you will already know I've also got a YouTube channel. In 2016 I created the following videos:
It's been a couple of months since I last post a video on the channel, but it is far from abandoned! Unfortunately, as is always the case with landscape photography in the UK, the weather has made it difficult to execute some of the video ideas I have.
Not to worry, I have rolled those ideas into my 2017 content plan and with any luck, I'll be back juggling cameras in the field again very soon. I've posted a quick update video to my channel to keep my subscribers up to date but here it is for my blog readers.
If you aren't already a subscriber or viewer why not check out my YouTube channel and even better why not subscribe. Don't worry if you don't, I always post a blog article here with the video embedded so you won't miss out.
Is there anything you'd like to see from my YouTube channel? If so I'd love to hear about it in the comments below.
Till next time!

Saying Goodbye to 2016 in Dorset
For my last shoot and blog post of 2016 I head out to Dorset to shoot some new locations with a couple of different cameras.
Wishful Thinking
For my last shoot of 2016 I was hoping it was going to be a special one. However, hope and reality are rarely the same thing. Inspired by the images I had seen in Mark Bauer's new book Photographing Dorset, I thought I might try and capture a misty Colmer's Hill. It's a location which I've visited but never photographed and given that there was a lot of fog about and it was close to home it seemed like an ideal location.
The weather forecast was predicting some fog but also a lot of cloud. My concern was that though I might have the fog or mist, without some decent light from the rising sun the image might be a little flat. Filled with optimism and eagerness I decided it would be worth a punt though!
Colmer's Hill
Arriving at Colmer's Hill around 07:15 I had arrived in plenty of time. Sunrise wasn't for another hour, but there was still just enough light to walk up the hill opposite Colmer's Hill without the need for a head torch.

Plenty of mist but with flat light and invading sheep it's not the image I was hoping for.
At the top I got all my gear setup and tried a few compositions. Though there was plenty of fog around the surrounding hills, it soon became apparent that the low level cloud was going to block the light from the rising sun. So while I was happy with the compositions I was finding the flat light wasn't giving me results I craved and no amount of post processing was going to fix that.
Still feeling slightly optimistic I stayed around a bit longer. I've left a location too early before and regretted it so I didn't want to be too keen to depart. In this case things didn't get any better. In fact a herd of sheep decided they were going to play Pacman on Colmer's Hill putting an end to my hopes of a good image.
However, as I knew the risks of coming to Colmer's Hill based on the previous nights weather forecast, I had a plan B!
Golden Cap
While researching Colmer's Hill in Mark's book I also took note of a nearby location called Golden Cap. I thought this might make a good backup location should things not pan out at Colmer's Hill. It was only a short drive from my previous location so I had little to loose.
For this location though I was going for a change of camera. I switched from my trusty Nikon D750 to my DJI Phantom 3 4K with a view of taking some aerial shots of the coastline. I've shot coastal images with the drone before and I've really enjoyed the experience. You can see my first video on drone photography below.

A brief appearance from the sun provided some nice light on the land.
It was another hill climb up to Golden Cap, but given all the luxuries of Christmas, it was one I welcomed! After catching my breath at the top of the hill I soon got to work with capturing some images of the coastline.
One of the benefits of shooting the coastline with a drone is the ability to point the camera straight down. This often provides a unique and interesting perspective. However, for a brief time the sun did produce some interesting light on the land so I had to change the position of the camera and drone the get the shot.
I had a lot of fun flying the drone along the coastline looking for compositions but this is my favourite of the day:
The coastline around Golden Cap
Goodbye 2016, Hello 2017
So while my morning out in Dorset wasn't the big success I was looking to end 2016 with, it's always good to get out with the camera and practice. One thing is for sure I will be visiting Colmer's Hill again in 2017. Maybe it will be my new Bowerman's Nose!
So how was your 2016? Did you get out for one last shoot? What are your photography plans for 2017? Let me know in the comments below. Happy New Year to you all!

My Favourite 5 Images from 2016
As tradition often dictates I'm going to look back and show you my 5 favourite images that I took in 2016.
It's Been a Busy Year
Aside from starting this blog, 2016 has been a very busy year for my landscape photography. I have been out with my camera more this year than any other. In 2015 I went out 34 times to shoot landscapes but in 2016 I went out 46 times. Given that I have to fit my landscape photography in between work and family life I'd say that's not a bad effort. Of course that doesn't include the 20 gigs and music festivals I also shot in 2016. Yes, it's been a busy year.
I've been suitably motivated and inspired this year to get out and practice with my camera. Though I haven't been successful in two of the major landscape photography completions this year, it's still be a successful year for me.
So in a somewhat predictable manner I am going to show you my 5 favourite images I took in 2016. Yes I want to share my images with you but the process of selecting the images makes me look back at my catalogue so I can hopefully see an improvement over the previous year.
The Cobb
I won't easily forget this image. It was taken on a very cold morning in Lyme Regis. I had just about given up and was heading in for coffee and bacon rolls when the sun, which had been up for a little while, started to reflect beautifully off the side of The Cobb. For a magic few moments the light was perfect and I shot several frames, this one being my favourite.
The Cobb - Nikon D750, Nikkor 16-35 f/4 at 22 mm, f/13, 0.6 seconds, ISO 100, Lee Filters ND Grad
Trevose Head
My first visit to Trevose Head happened back in March and it was one of those shoots where everything seems to go well. I was feeling creative and the conditions were perfect for the type of image I wanted to capture. I knew it had been a good day when I got home because I had so many keepers to pick from.
The image below though never originally made the cut and I only recently discovered it while looking for a competition entry. Despite the how much I loved the other three images from that shoot I think this is now my favourite and definately a favourite from 2016.
Trevose Head - Nikon D750, Nikkor 16-35 f/4 at 19 mm, f/11, 8 seconds, ISO 100, Lee Filters Little Stopper, ND Grad.
Venford Falls
As I mentioned in my video My 5 Favourite Landscape Photography Locations in Devon, Venford Falls is one of my favourite locations. Hidden, but not difficult to get to, the twin falls are a bit of a magical location. I had been to the falls a couple times before but it wasn't until I visited in spring of 2016 that I got a shot that I was really happy with.
Though I had tried this composition before it was the lush green spring colour that lifted the image to make it an instant favourite.
Venford Falls - Nikon D750, Nikkor 24-70 f/2.8 VR at 24 mm, f/16, 10 seconds, ISO 100, Lee Filters Polariser.
The Daymark Tower
Though I had tried to photograph the Daymark Tower a couple of times before, I was probably doing so at the wrong time of year. The tower is surrounded by a farmers field so for parts of the year it's just a muddy field. I wanted to go when the field was full of fresh crops.
My vision was clear. I wanted the setting sun to illuminate the tower and I really wanted the fresh crops to be gently swaying in the wind. It's not often you get everything you want but everything came together rather nicely the evening I took this image. The light was beaufitul, the sky was lovely, and there was just enough wind to put a little movement into the crops.
Daymark Tower - Nikon D750, Nikkor 16-35 f/4 at 16 mm, f/13, 1/15 second, ISO 100.
Castlerigg, The Lake District
As I previously wrote in my blog, my trip to The Lake District was challenging. The weather was very wet making creative photography difficult. However, through all that I took an image that not only captures the beautiful Lake District landscape but the dramatic weather that is often present. It reminds that despite how bad the conditions can be, patience can often be rewarded.
Autumn Storm at Castlerigg - Nikon D750, Nikkor 70-200 f/2.8 VR at 78 mm, f/9, 1/60 seconds, ISO 100, Lee Filters Polariser and ND Grad.
So what do you think of my 5 images from 2016? Do you have a favourite? Have you selected your top 5 or top images from 2016? Let me know in the comments.

Using the Super Stopper in Sidmouth
The Lee Filters Super Stopper isn't exactly a filter you would use every day but it does have its uses. Read about how and why I used for a shoot in Sidmouth in my this blog post.
Free At Last
In my last couple of blog posts I may have mentioned that I'm finding it difficult to adjust to the short winter days. Opportunities to get out with the camera seem to be few and far between. Last weekend was different though. I didn't have too much on and the weather was looking favourable for some landscape photography.
Sidmouth Inspiration
My first challenge was to find a suitable location that I could shoot. In reality it didn't take too long. My decision to shoot the coast at Sidmouth in South Devon was driven by two things. Firstly I was inspired to shoot there. I've spoken about the importance of inspiration before on my blog before and how useful it can be.
My inspiration to shoot Sidmouth came from two photographers, atmoorehead and Neil Burnell.. Both of them had been shooting the curling stone groyne at the east end of the beach. I liked the images they had created so I wanted to go there and put my own spin on the location.
Super Stopper Time
The 2nd reason for choosing Sidmouth was that it was a coastal location that would be ideal for testing out my recently purchased Lee Filters Super Stopper. I'm a big fan of Lee Filters and use the Little Stopper and Big Stoppers in a lot of my images. When the Super Stopper was first announced I have to admit that I didn't really see the point but after seeing some of the images produced by Mark Bauer with the Super Stopper I pulled the trigger and picked one up.
My original plan was to shoot some midday long exposures during a recent Lake District trip but given the challenging weather it wasn't really the best time to try out this 15 stop monster. However, as I was planning my trip to Sidmouth it soon became apparent that this could be the perfect time to give the Super Stopper a go. I would be arriving around 2.30pm when there is still plenty of light, the tide would be coming in, and the light from the west would be illuminating the groyne. My only slight concern was the lack of cloud in the sky. It was apparently going to be very clear but I could live without the perfect conditions!
Setting Up For a Very Long Exposure
When I arrived at my location in Sidmouth things were looking favourable. The sun, which was already relatively low in the sky, was illuminating the inward curve of the groyne rather nicely and the tide, which was due be high at 16:08, was already a good way up the beach. I was glad I had got there early as the area was busy with people and where I was going to shoot from was a bit of a one tripod only location.

Base image with no filters. (Image unprocessed).
So with my tripod out I got to work on my composition. I had originally thought I would go for a vertical composition but it soon became apparent to me that a horizontal composition would work best as it provided more room for the groyne to curl out into the sea and into some empty space. With my composition locked in I took my base image. My base image is the image I take with no filters so I can easily check it for sharpness and exposure. Being a coastal location I reached for my Lee Filters Polariser as this would not only take off some reflections from the surface of the sea but it also removed all the reflections from the groyne where the water had been splashing.

The addition of the polariser reduces the reflections on the groyne and brings out a little more detail in the sky. (Image unprocessed).
However, the addition of the polariser always lengthens the exposure by a few stops so I had lengthen my shutter speed from around 1/80 sec (at f//11) to 1/25. Though I was happy with the effect the polariser was giving I was already concerned about how long the exposure was going to be when I added the Super Stopper. Using the Lee Filters app on my phone I worked out that a 1/25 second base exposure with a Super Stopper would require a 21 minute exposure. For my first use of the filter I felt this might be too long, but a Big Stopper would only give me 40 second exposure (which was not long enough for the image I wanted)
I had two options. I could either open up the aperture or increase my ISO. While opening up the aperture would have decreased my exposure time, I would have lost the depth of field I was looking for so I increased my ISO to 400. This effectively gave me a Super Stopper exposure time of around 8 mins. Much more manageable.
The Results
With everything set I got to taking some really long exposures. I modified my composition a couple of times which meant going through the whole setup process again but using the Super Stopper was never going to be a fast process. I also had to gradually increase my exposure length as the amount of light decreased. However there is a certain sense of excitement with really long exposures. I was investing 8 to 10 minutes for each exposure and the sense of not knowing exactly how the image would look was exciting.
Final image (processed in Lightroom). Nikon D750, Nikkor 16-35mm f/4 at 26mm. 641 seconds at f/11, ISO 400.
A Small Critique
I'm very happy with the end result and it's the image I had envisioned when I started planning this shoot. However, it's not perfect. Though I was shooting at a time very close to high tide, it wasn't quite high enough. I would have liked there to have been no beach visible in the lower right side of the image. There was a high tide of 4.06m so on my next visit I will try and plan it for when it's a little higher.
However, tide height aside, all the other elements came together nicely. The time of day and time of year were perfect to allow the golden light of the sun to reflect of the west side of the groyne. It's very rare that everything is perfect so for a Sunday afternoon shoot I'm still very happy.
Why Not Just Use a Big Stopper?
You might be asking yourself why I didn't just wait for sunset and then use a Big Stopper. Why purposely shoot earlier so you can use a Super Stopper? Well, it all had to do with the light. As the sun set the quality of the light reflecting off the groyne was nowhere near as nice as it was 45 minutes before. In order to realise my vision of a long exposure I need to have that 15 stop ND filter. So yes, while it was a specific set of conditions that required the use of the Super Stopper, it would have been an image that would have either not been possible to get or would have been more difficult. The Super Stopper is probably never going to be a filter that I use a lot, but now that I have it and have seen how I can put it to use, I'm glad I have it.
So are you a fan of long exposures? Do you own the Super Stopper? Are your creative ideas driven by the location you are visiting or by a vision of the image you want to create? Let me know in the comments below.

Finding a Gem in My Back Catalogue
In this blog post I talk about the value of looking back at your catalogue of images and how you might just find a little gem in there.
Super Dad 1, Photography 0
As I mentioned in last weeks blog post the winter months are playing havoc with my ability to get out and take pictures. However, last weekend it wasn't the weather or the short days that stopped me getting out with the camera. My wife was away for a well deserved break so I was left holding the fort with the kids. So unless you count some family snapshots as photography it was a shutter free weekend.
Competition Time
Not one to let the lack of camera action stop me from scratching my photography itch I decided I would get together my entries for this year's South West Coast Path photography competition. This is my first year entering this competition and it looks like a good place to hopefully show case one of my images. It's also good to see that they have respected landscape photographer Adam Burton on the judging panel.
The Power of the Catalogue
Fortunately a lot of my photography takes place along the South West Coast Path so I had a good range of images to work from. It was also really easy to find them. I'm a Lightroom user and I like to keyword my images. I don't keyword all my images on import, but any image that I complete editing on gets a full set of keywords. So when it came to finding all my 4 and 5 star images taken on the South West Coast Path it was a matter of just creating a dynamic collection and there they all were.

Creating a dynamic collection allowed me to find all my images from the South West Coast Path.
Finding A Gem
Winning images from the competition will be published in the South West Coast Path 2018 calendar and while the rules didn't preclude the inclusion of vertical orientation images I thought I'd stick with horizontal orientation. The slight problem was that I had a series of images from Trevose Head that I had taken earlier in the year and while I was very happy with them, they were all of vertical orientation.

I had a couple of options. I could either submit a vertical orientation image or bypass my Trevose Head images all together. I knew I would have taken images in both orientations so I right clicked the one the Trevose Head images and selected the collection it was in. (I add each photo shoot to it's own collection so it was easy to find).
Almost immediately I found what I was looking for. Best of all though the image had been mostly processed to completion. It only needed a bit of dodging and burning in the sky and it was ready to go. At the time I must have done a basic edit on it and then ditched it in favour of the vertical version. With a few clicks I had a new image and the competition entry I was looking for.
This is the image I found in my catalogue and have now entered into the competition.
Check Your Catalogue
Finding this image has made me think about what other images I might have lurking in the depths of my Lightroom catalogue. How many other images were culled during the editing phase in favour of a different composition?
What about you? Do you have a back catalogue of images with some hidden gems? Do you process your images straight away or leave them for a bit and come back to them at a later date? If you cull an image is it culled forever? Let me know in the comments.

My New Winter Friends
In this blog post I discuss the importance of having a close by location that you can shoot so that you can scratch that photography itch during the winter months and why it's still important to do a bit of discovery.
Winter Restrictions
Landscape photography in winter has a few advantages. Sunrise is later, sunset is earlier, and it might just snow. (Oh please let it snow on Dartmoor this year, please, please, please!). However, while sunrise and sunset are at much more sociable hours the days are very short and so are my windows of opportunity for photography. During the summer months I can spend all day at work, casually jump into my car, drive to Lands' End and still be there in plenty of time for sunset. I can go out photographing virtually any day of the week.
With winter things are very different. I still have to work and I still have a family life, but now I can't just pop out in the evening to go out and take photographs. The shorter days that come with winter are no different from any other year but this year I'm feeling the restriction more than any other year. I think this is largely due to the level of commitment I have given my landscape photography this year. This year I have committed more time than any other year to improving my art. Now all of a sudden I can't get out as much and if the weather is very bad I sometimes don't get out all in a week. I'm starting to find it frustrating!
My Old Friend
It's not all doom and gloom tough. It's not as if I can't get out with a camera, it’s just I can't get out as much. As with most working parents I have the school run to do. My responsibility is to get the kids to school every morning, except Friday. So if I'm organised and the weather is looking favourable I can just about get out for a dawn shoot on a Friday and still be back in time for work. This means that I have to go somewhere local and this is where my trusty old friend Dawlish Warren beach comes in.
Dawlish Warren is only about 25 minutes' drive from my house and as I said in my video My Top 5 Locations to Shoot in Devon, it's also one of my favourites. I've photographed the beach and the groynes many times but each visit offers something different. With variable weather conditions, changing direction of sunrise and tidal waters, each time I go I need to think how I'm going photograph it that morning.
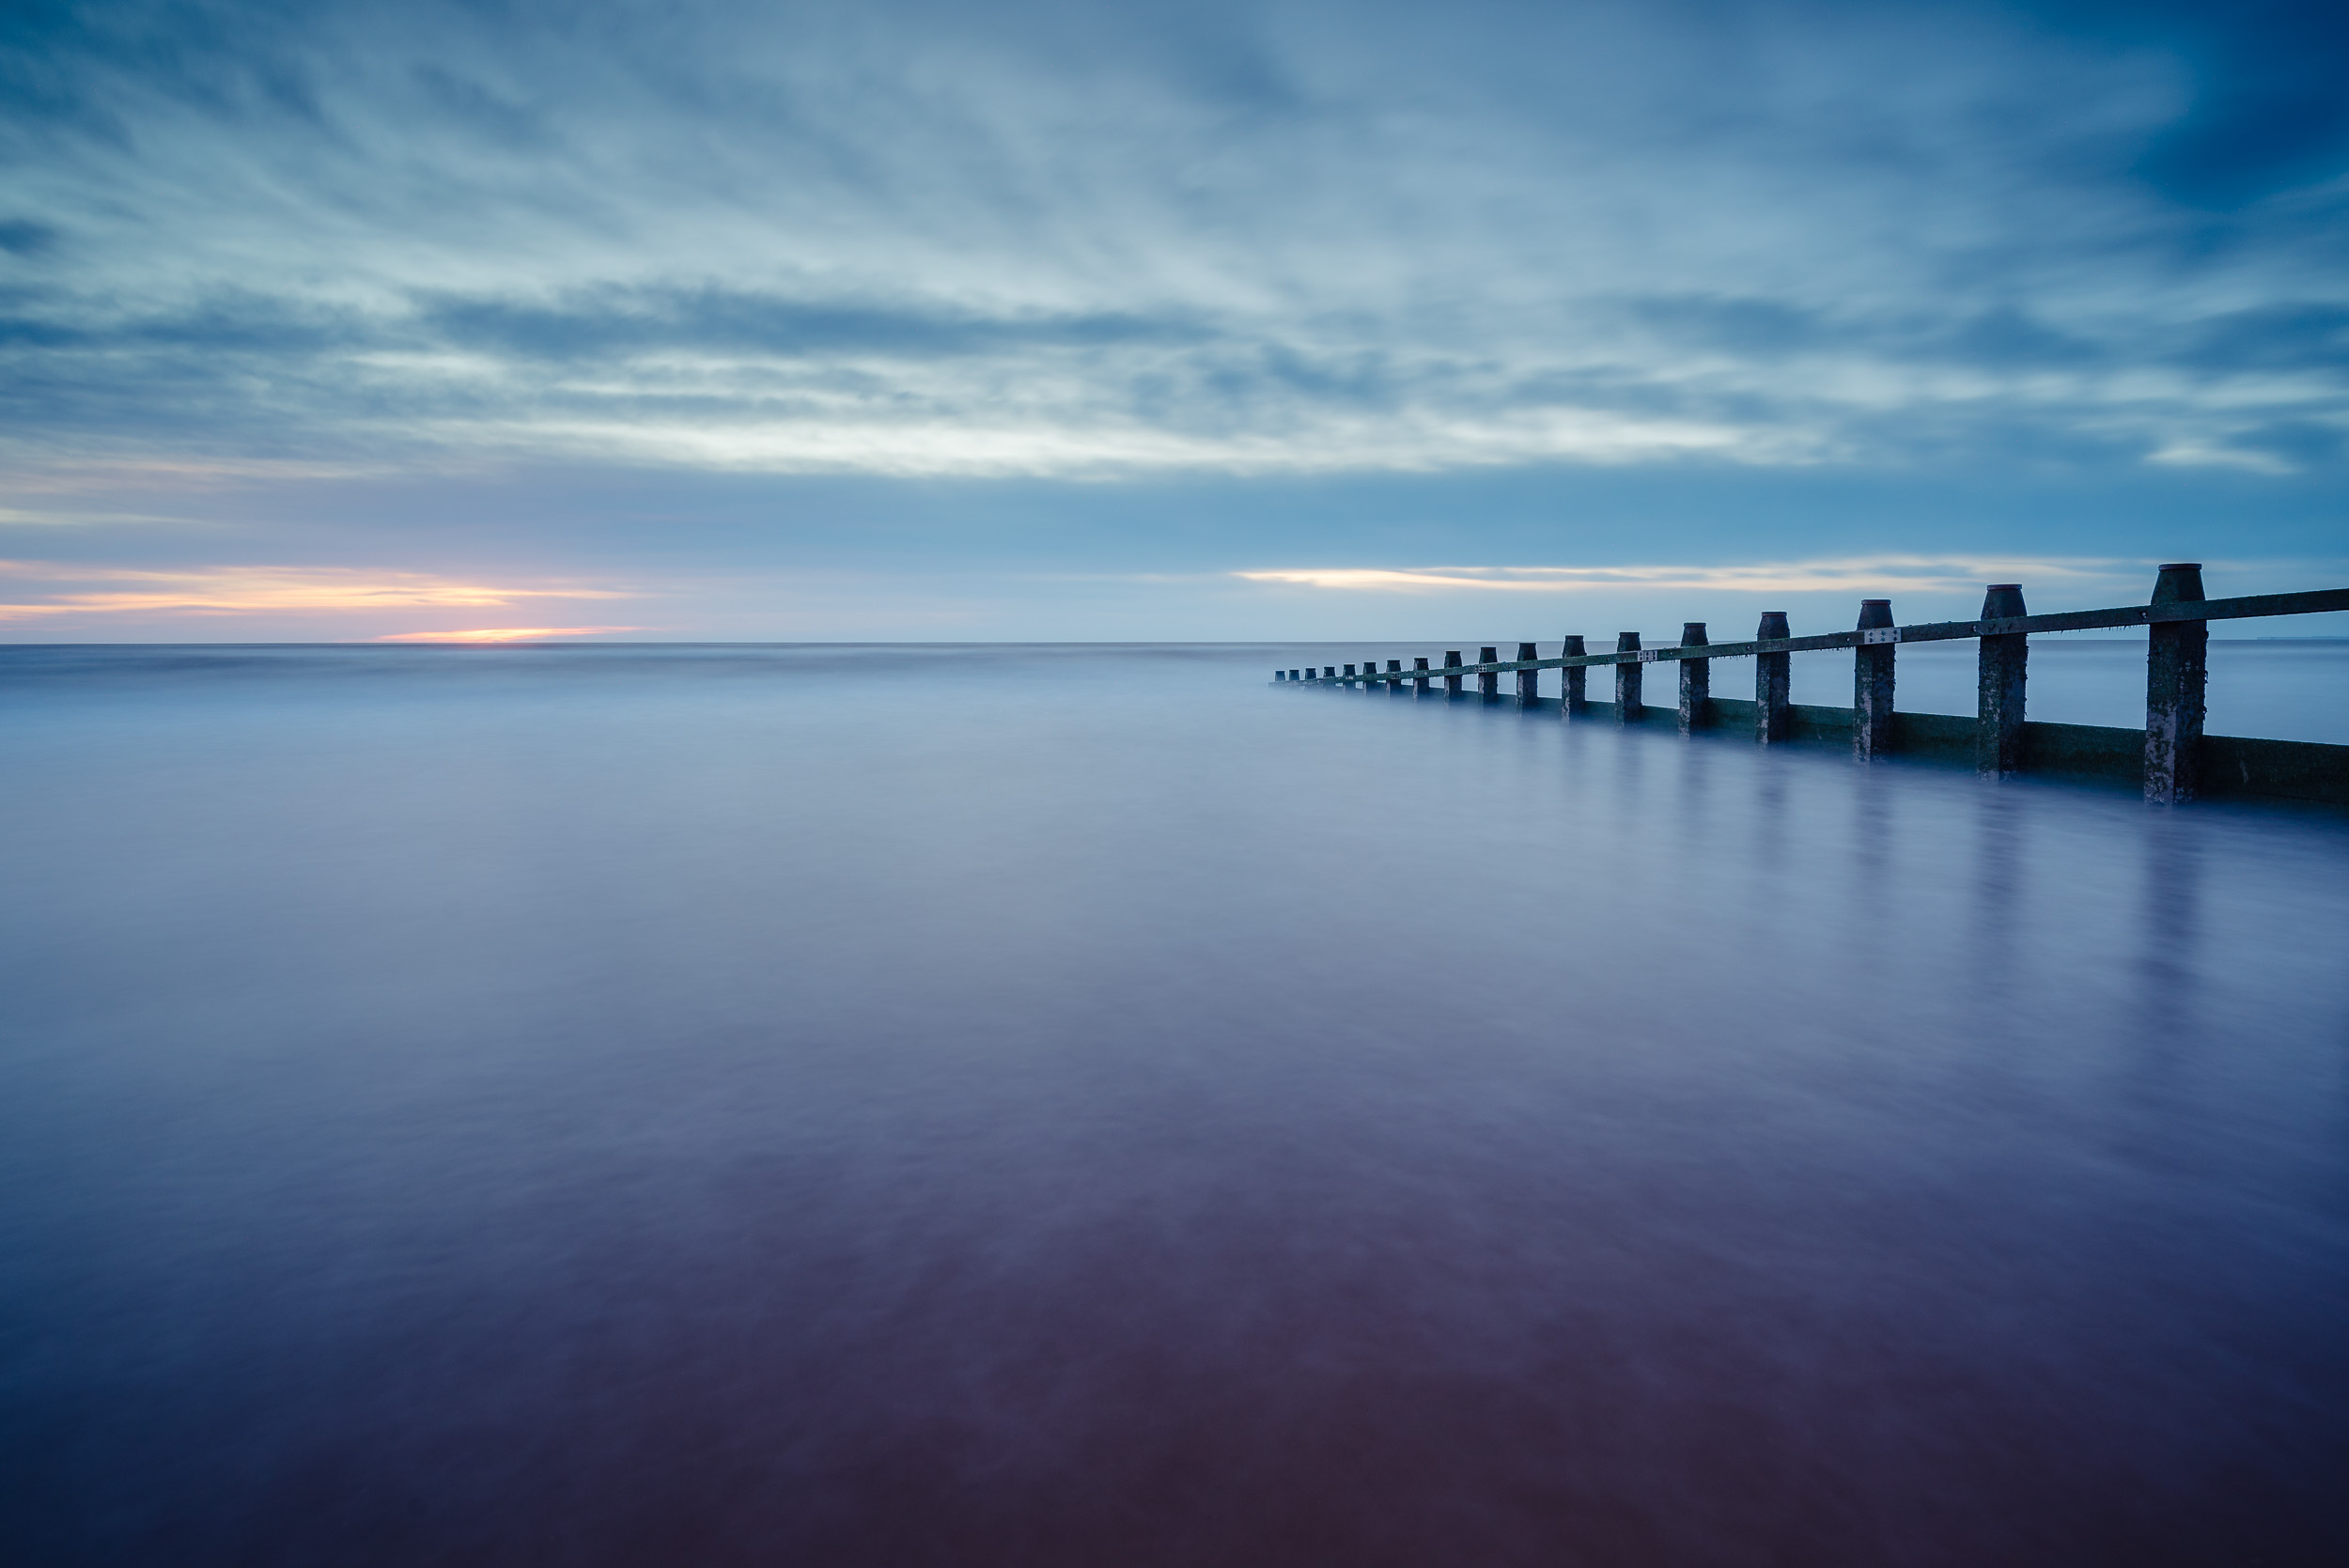
When I visited Dawlish Warren last week it was probably at the lowest tide I had seen so I had access to shoot some of the groynes I've never been able to access before.
Given the proximity of Dawlish Warren and my desire to still practice my photography as much as possible during the winter, I expect to be visiting my old friend a lot this winter.
My New Friend
While visiting on old friend is all very good, particularly when I'm really short of time, I also need to stretch my photographic wings a little. Though time at the weekends is really family time there are windows of opportunity and they need to be put to good use. There is the temptation to visit locations I've been before but winter is also a good time to go out and do a bit of discovery.
Last weekend I got up early and went to North Tor and Bench Tor on Dartmoor. These two tors are very close together and offer all round views of Dartmoor. I actually discovered this location by accident. I was looking through some old issues of Outdoor Photography and came across Bench Tor in the Locations Guide section (which is a great source of inspiration and ideas). I knew roughly knew the area as it's very close to one of my other favourite Devon locations to photography, Venford Falls.
Arriving at the car park in the dark I put on my head torch and began the relatively short walk up to Bench Tor. As with most dawn shoots in the cold I questioned my sanity but a blast of hot black coffee soon put me in the correct frame of mind. As most landscape photographers know it actually starts to get light around an hour before official sunrise so as I wondered about Bench Tor and nearby North Tor I could start to see lots of possibilities for compositions.
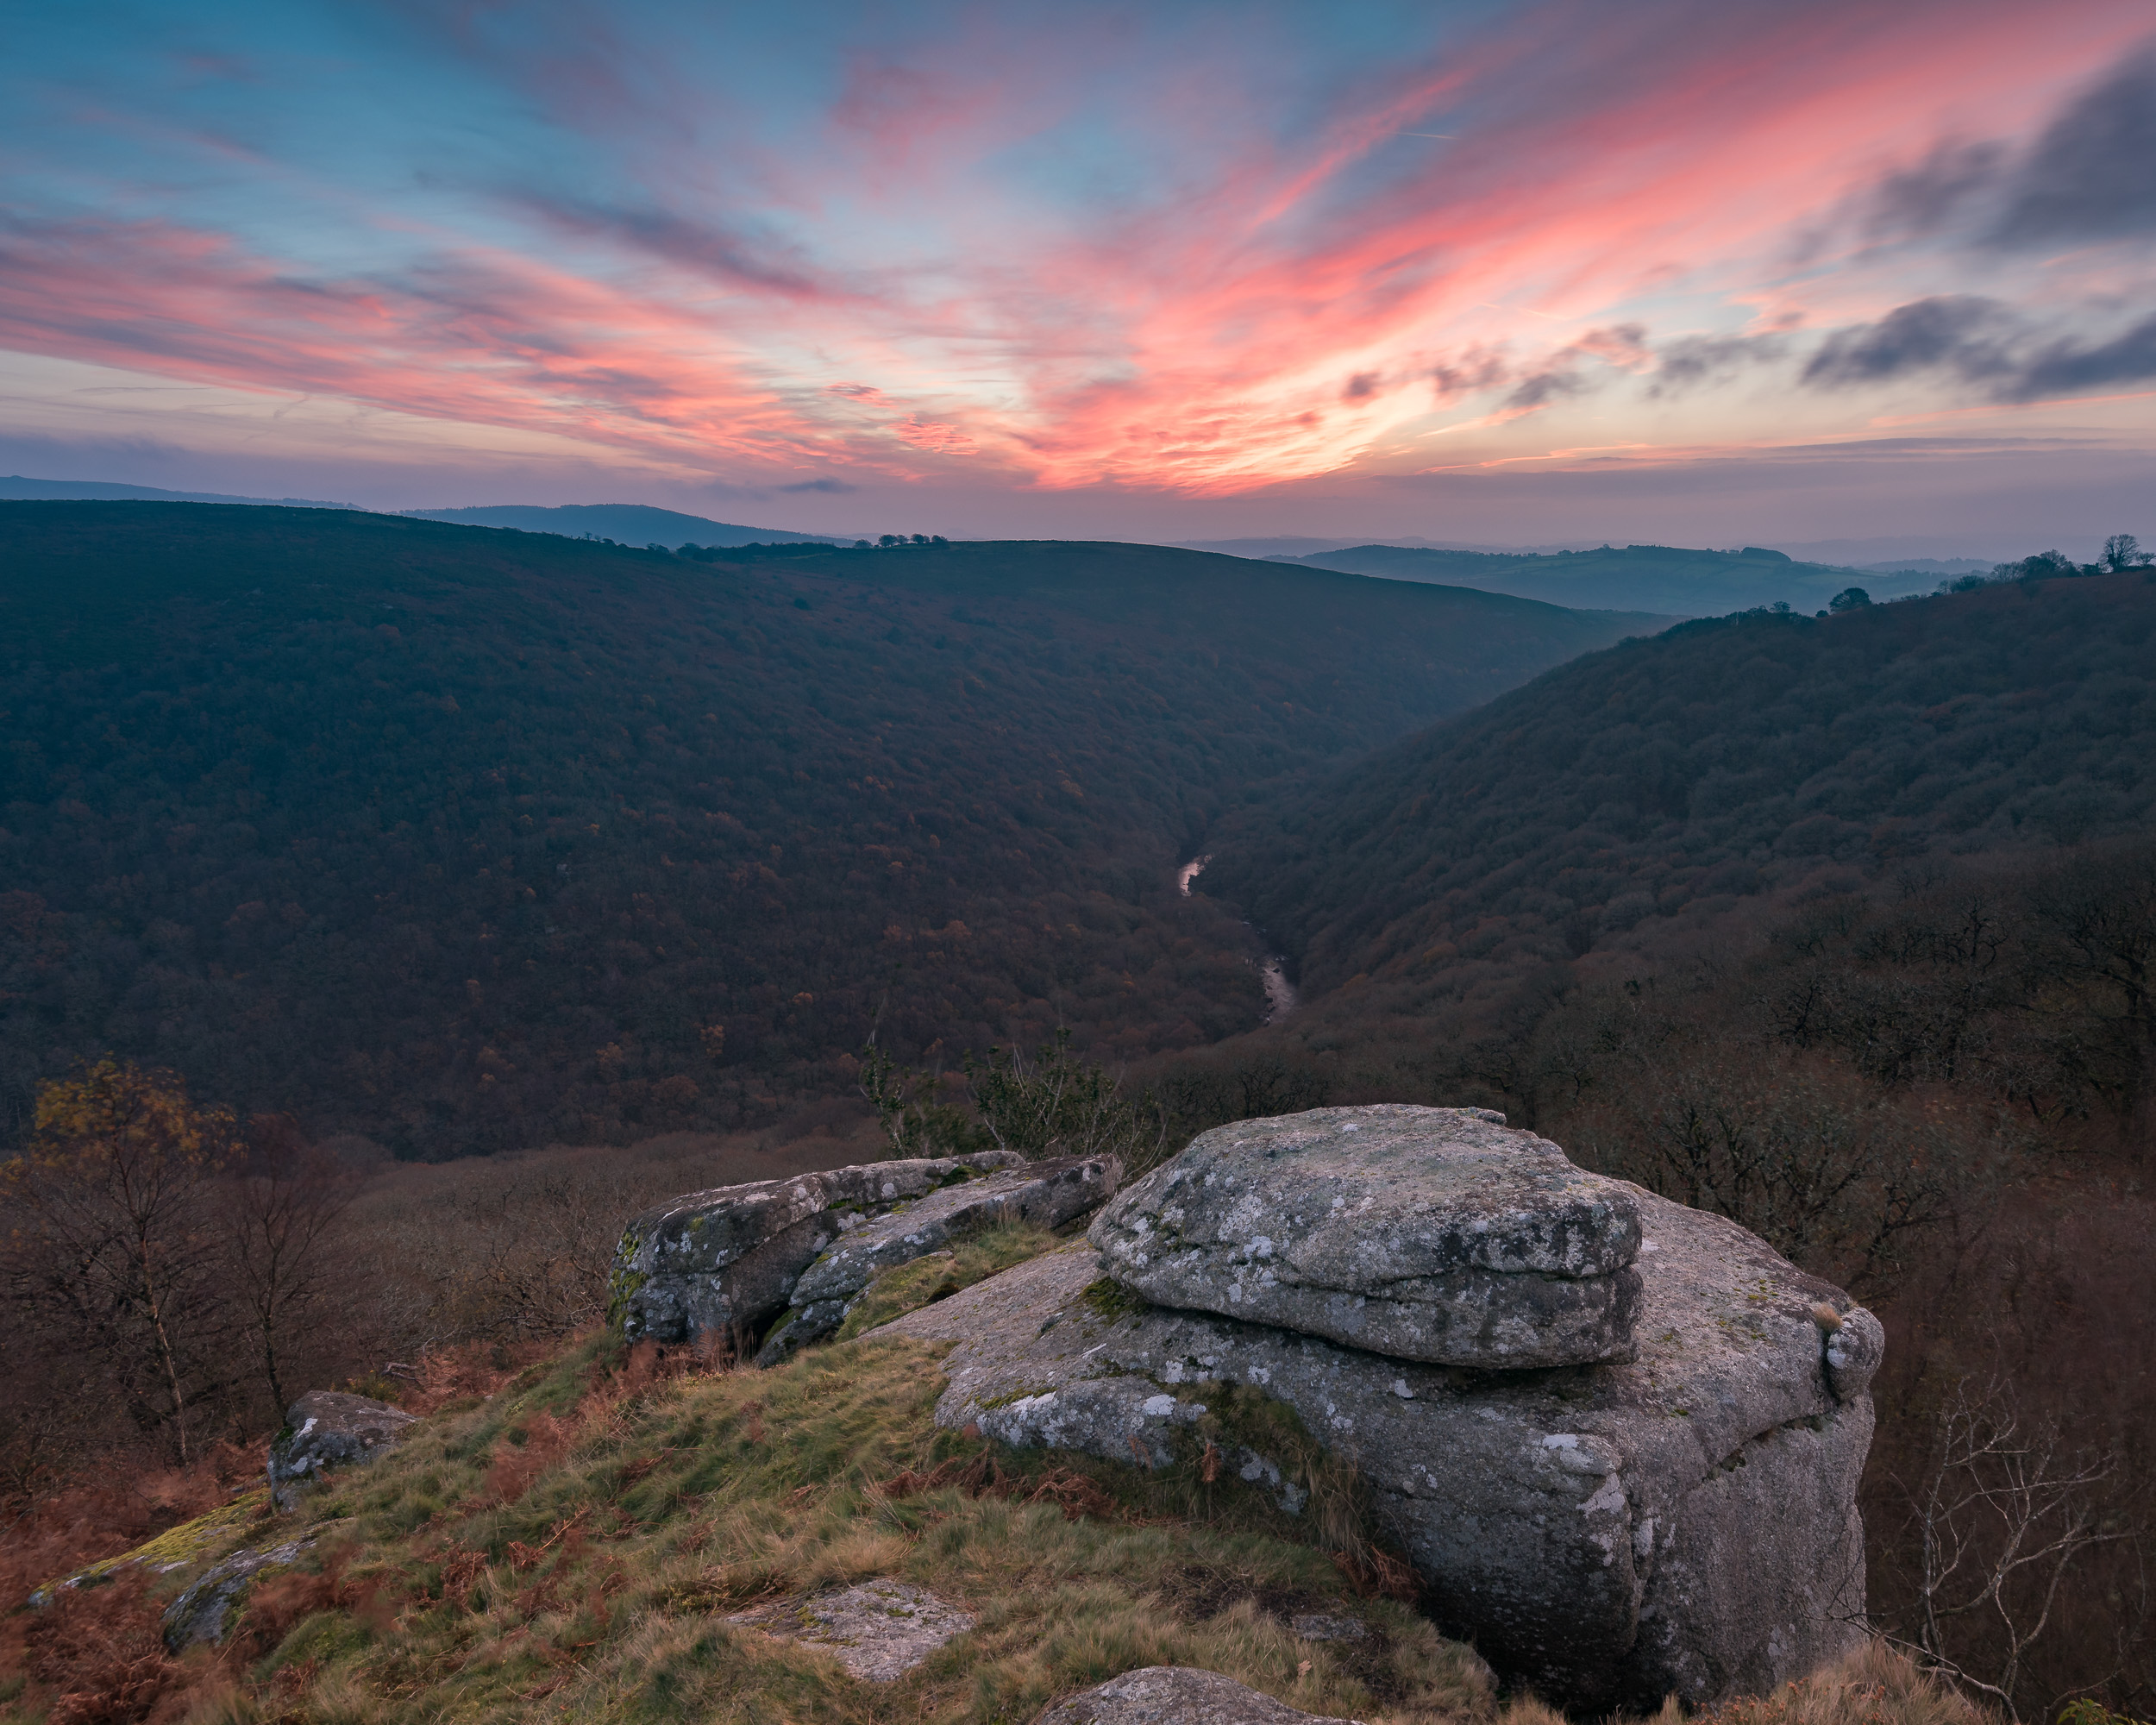
Very much an exploratory shot but as this was a new location for me I wanted to try and get a few shots for reference.
With so many possibilities, including options for sunrise and sunset shoots I think I have found a new friend for winter. Though I expect the best photographs will be had during spring and autumn months I think I will spend a bit of time up there working out how to make the most of it when winter finishes. That is unless it snows in which case the big views up there will be amazing.
So do you struggle to find time during the winter to get out with the camera? Do you have a go-to location that is nearby? Do you use the winter months to get out and discover new locations? Let me know in the comments below.

Landscape Photography from the Air
In this blog post I discuss how I try and integrate my passions for photography and flying.
The dream of flying
I was 24 years old when I first got on a plane for a work trip to London. It was a bit of an eye opening experience for me. Less than twelve months later though I was backpacking around Australia. One thing was for sure, I didn't have a fear of flying.
In 2004 I decided that I wanted to learn how to fly a plane for myself. So I joined my local flying club in Glasgow and so started a rather long, and expensive, journey to getting my Private Pilots License (PPL). I found the course challenging but some of my training flights took me over some of the most amazing scenery Scotland has to offer so it was also very rewarding.

Flying over the house where I grew up in the Highlands.
About the same time I started flying I also took up hill walking (I had so much more free time back then). As a result I was really beginning to build up an appreciation for the landscape around me. I was seeing it from so many different perspectives. With so much to see I also decided that I would take up landscape photography (I definitely had way more time back then).
A 3000 ft view
It wasn't until I moved to Devon that I completed my PPL training. Though Devon has a distinct lack of mountains it still offers some of the countries most dramatic landscapes. Though I was shooting landscape mostly on the ground, my flights over Devon and beyond opened my eyes to whole different view point.
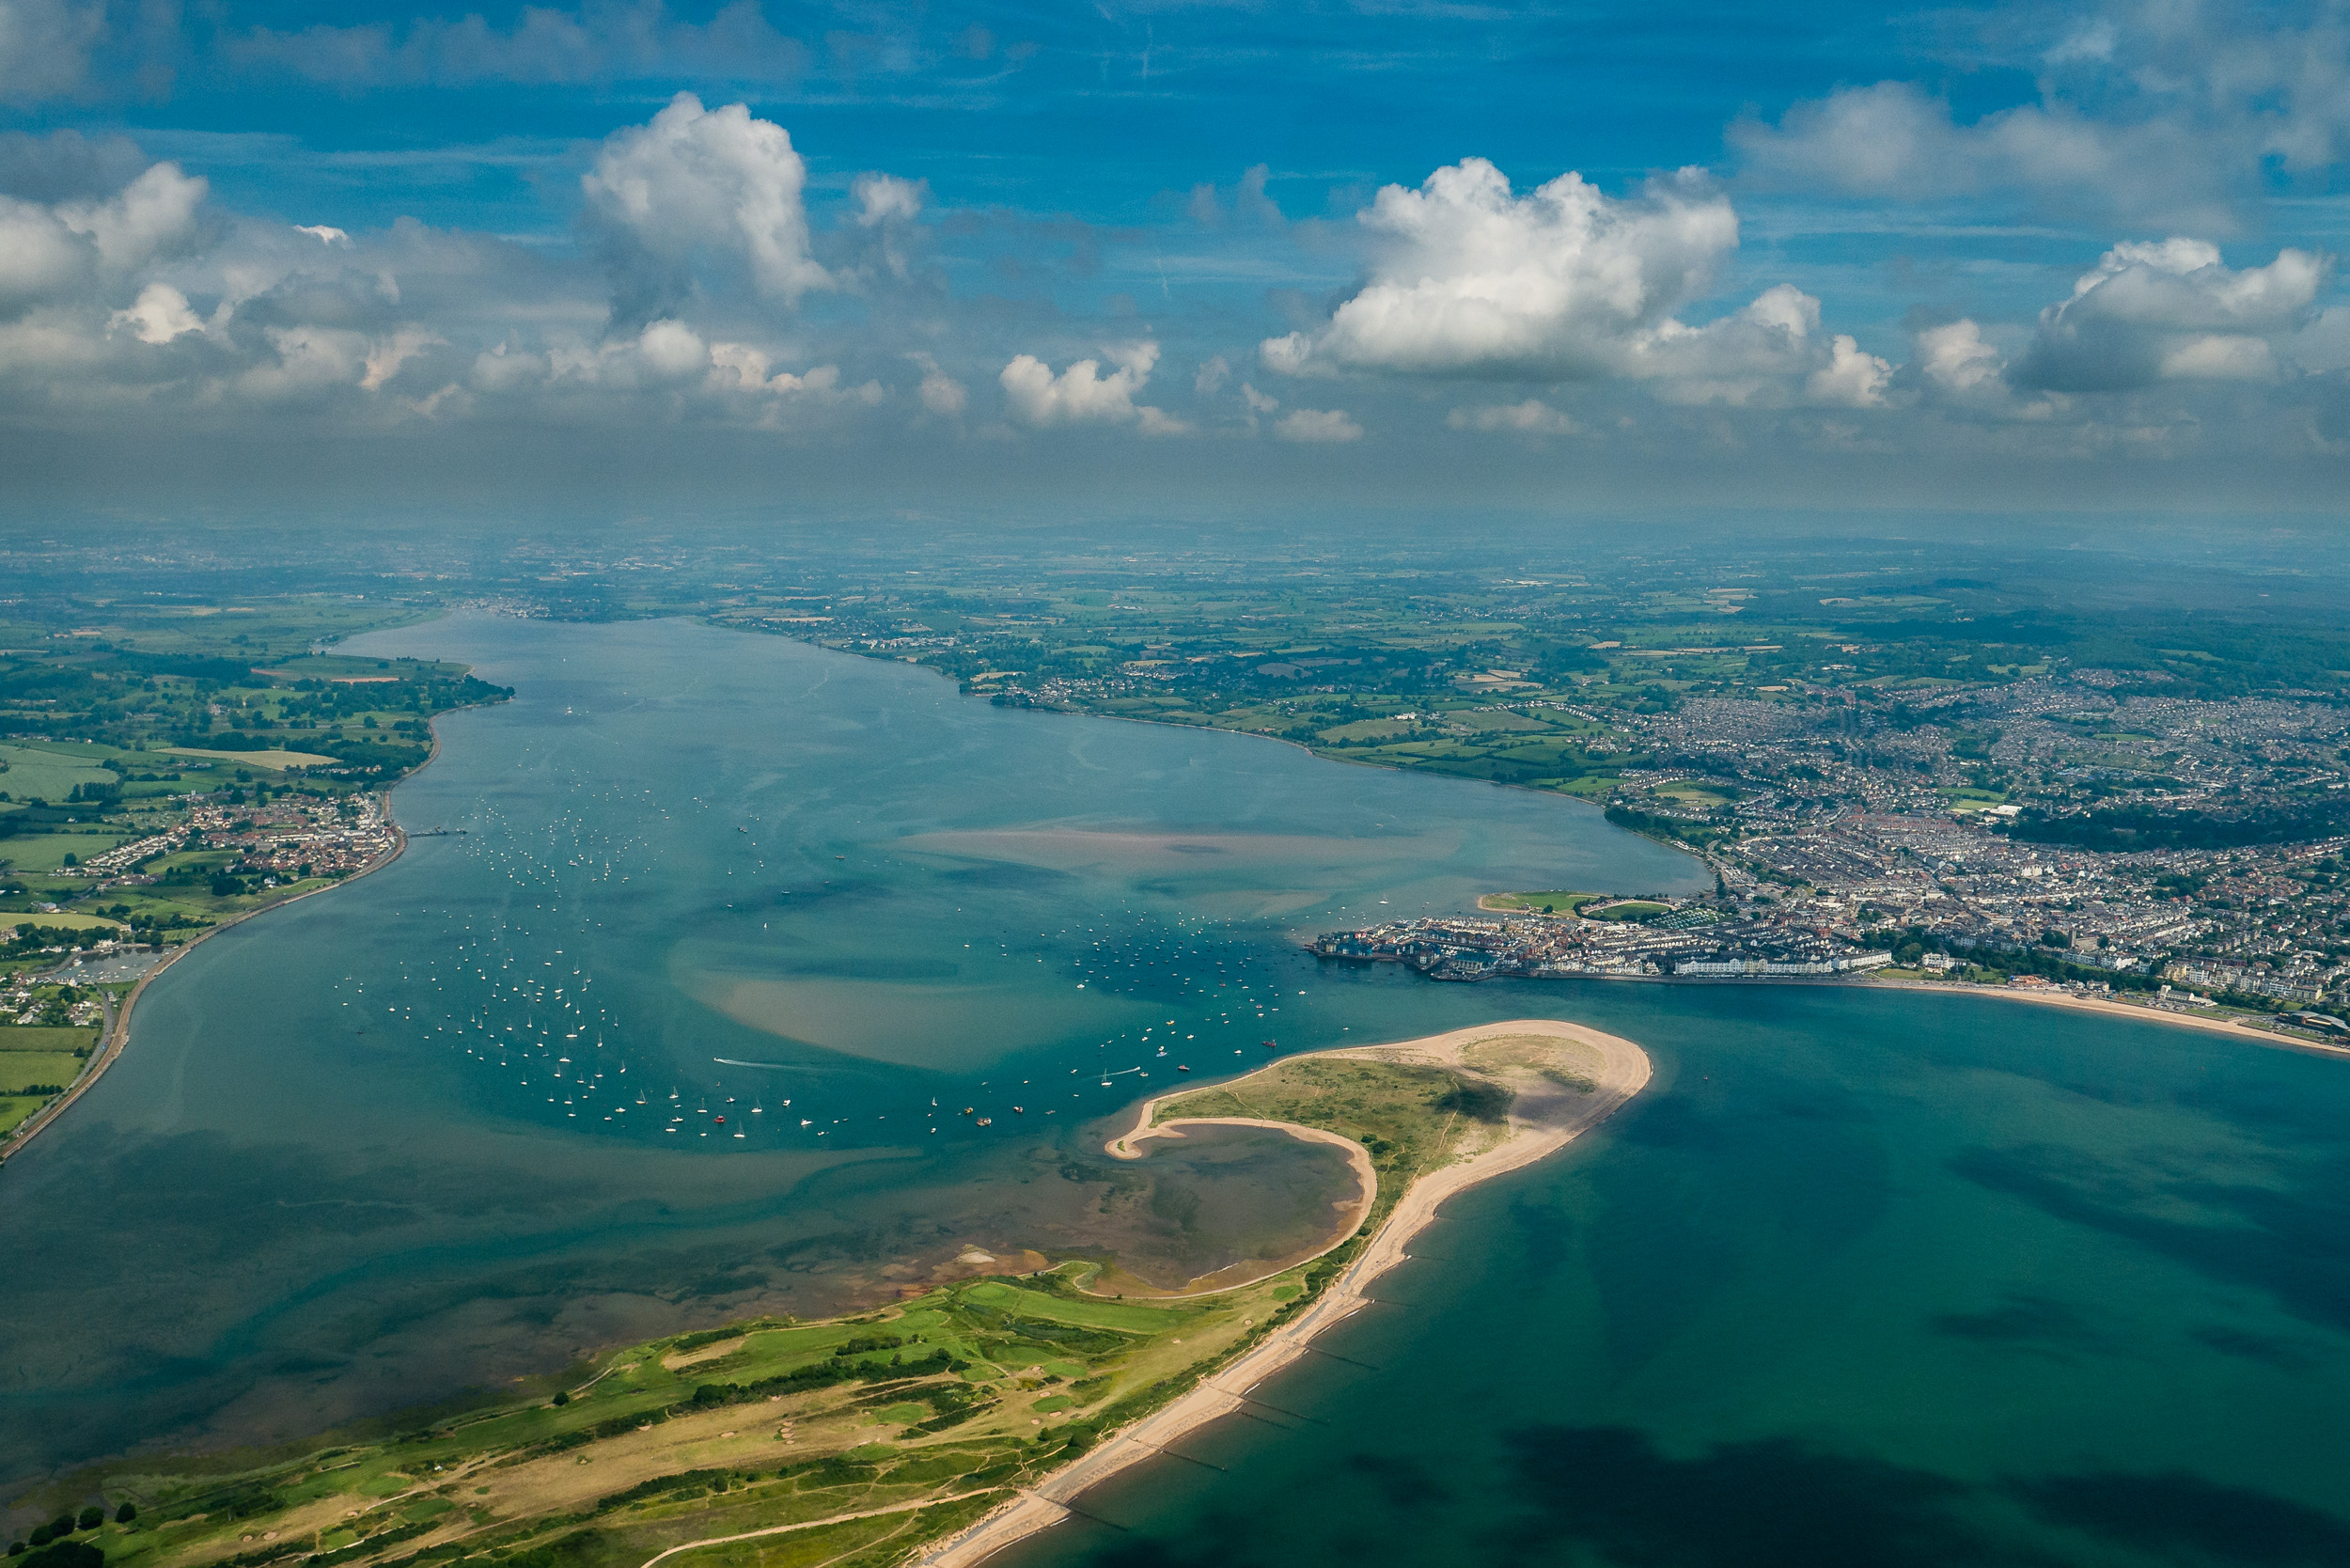
I've photographed the beach at Dawlish Warren a lot, but it's just as amazing from the sky.
Weather plays a key role in how and where I fly, but even if it is less than perfect flying conditions I can fly around Devon at 3000 ft and see so much. At this altitude you can still make out towns and villages, you can see the lines that rivers take, and you can see miles and miles of coastline ahead.
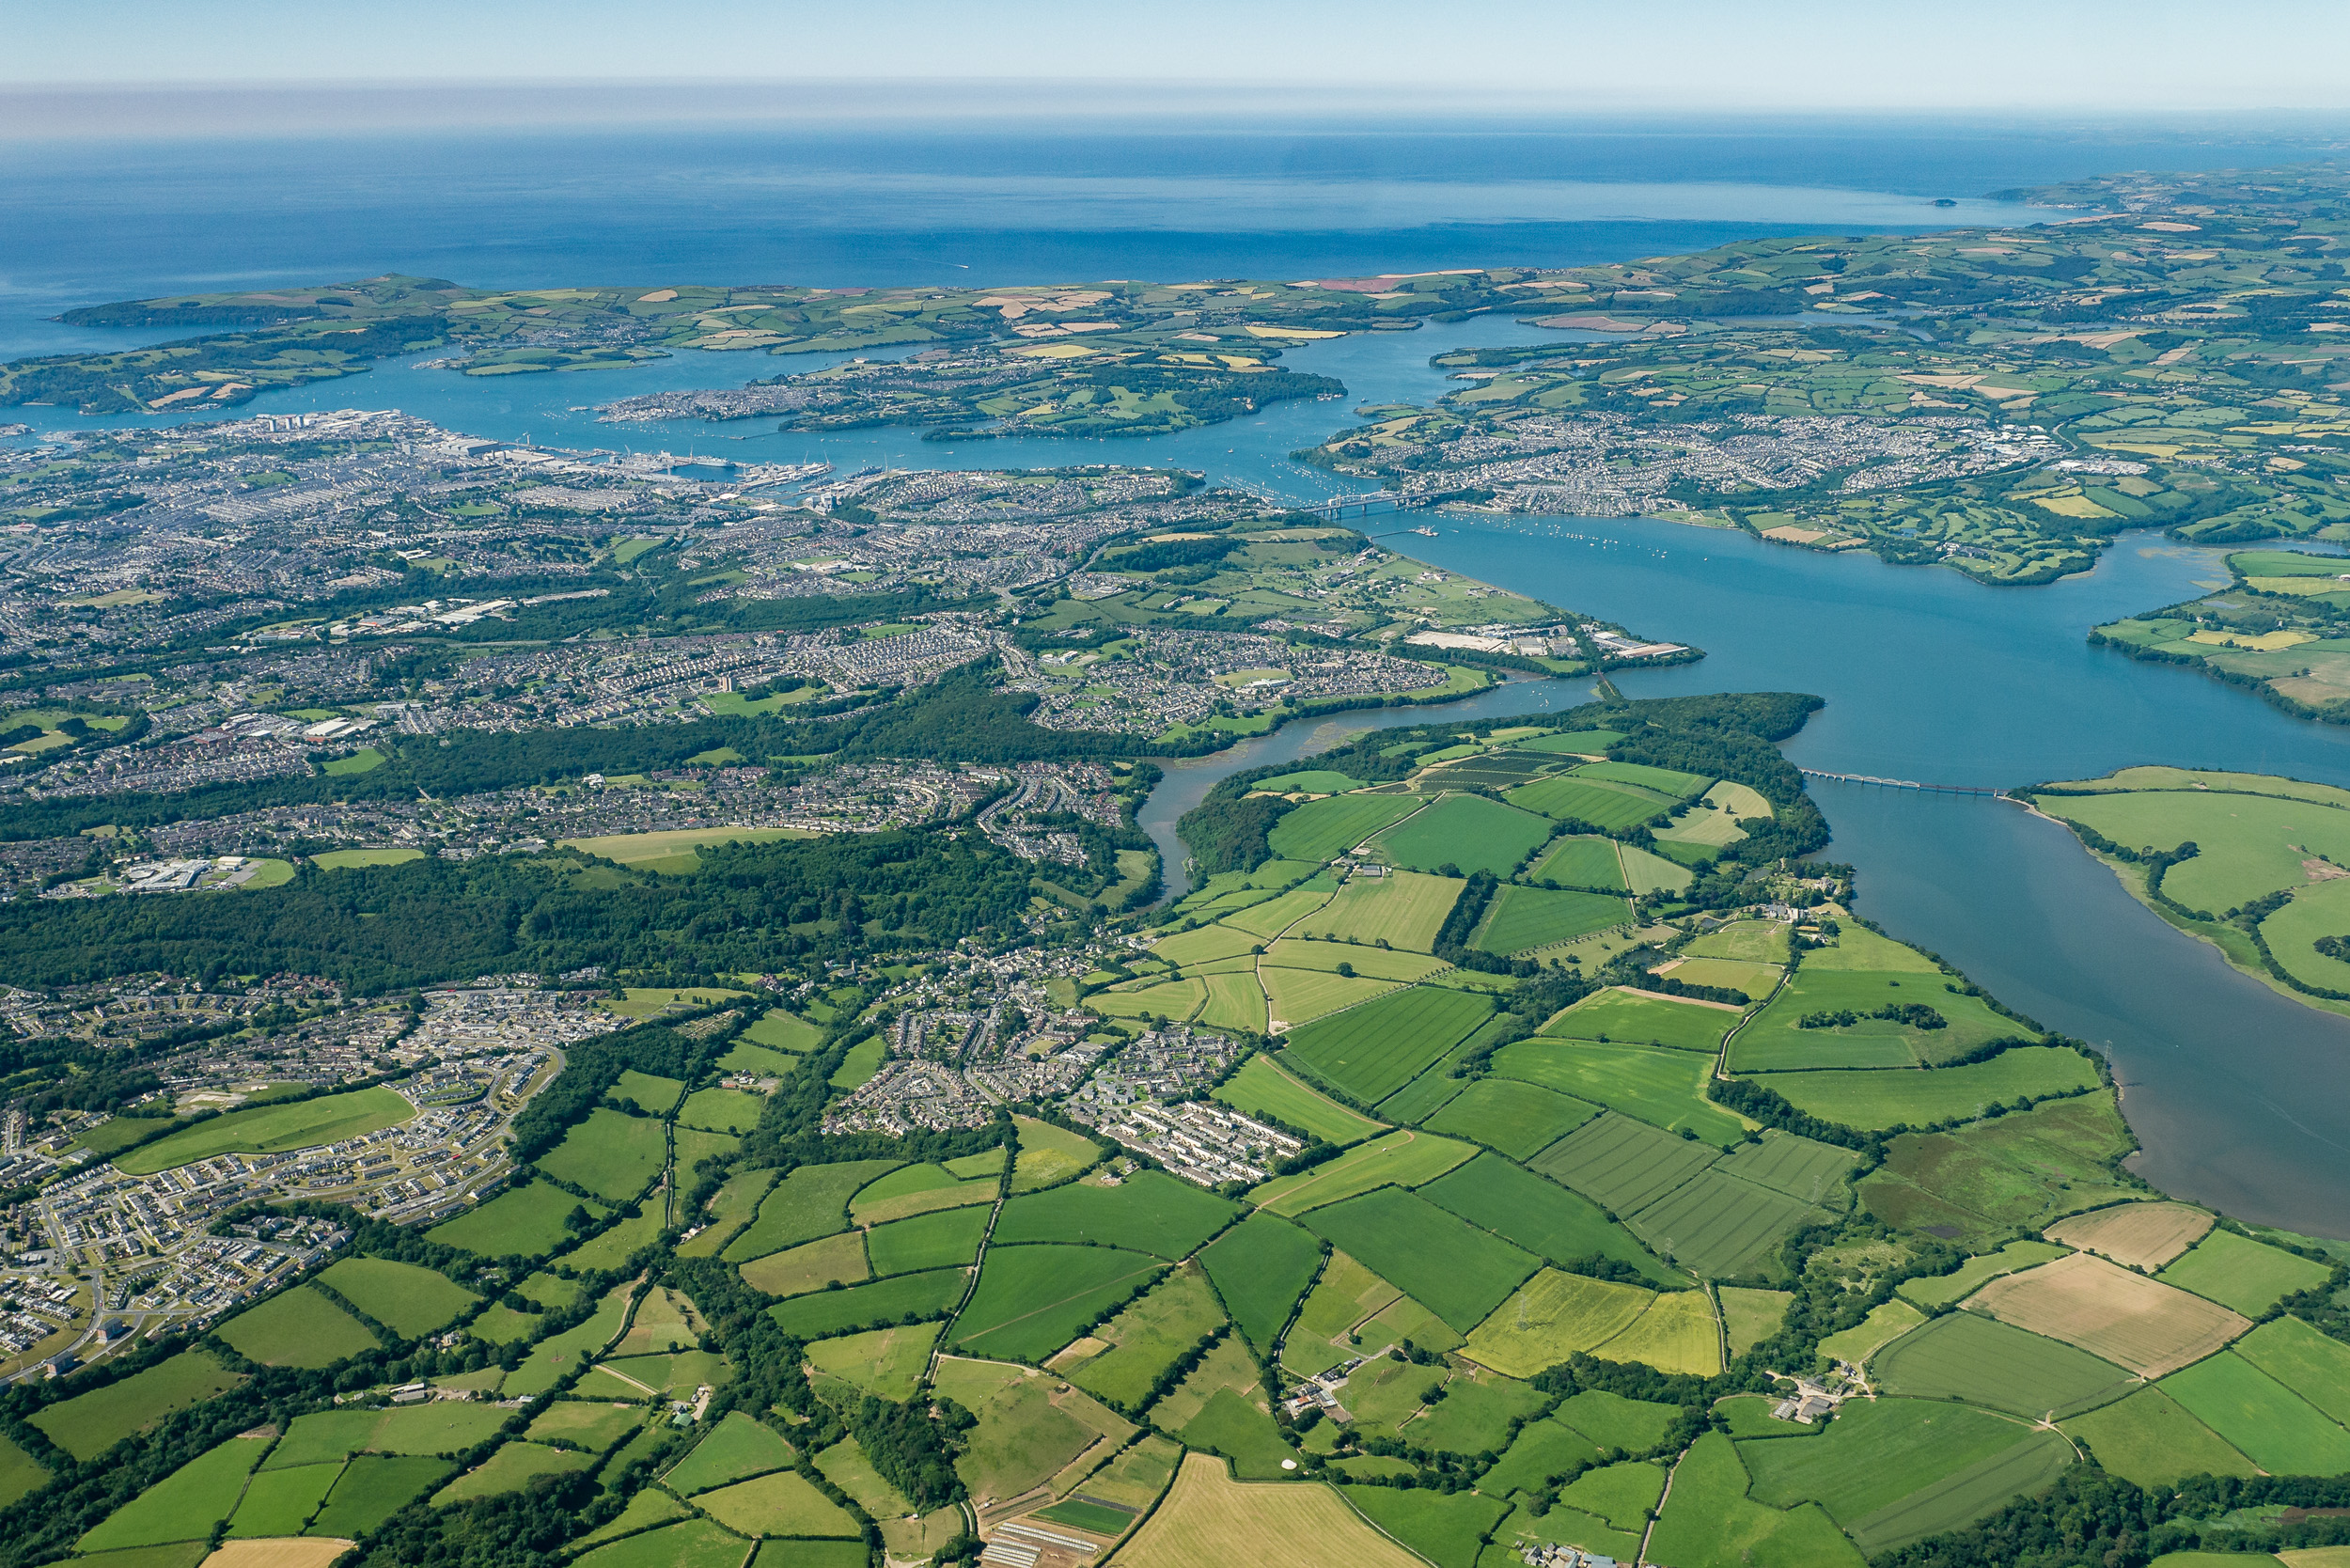
Plymouth from 3000 ft.
In the air the landscape is familiar, yet looks very different, therefore my approach to image taking is slightly different. After all, I don't really have a foreground to consider, but I still need to consider other elements of the composition such as leading lines.
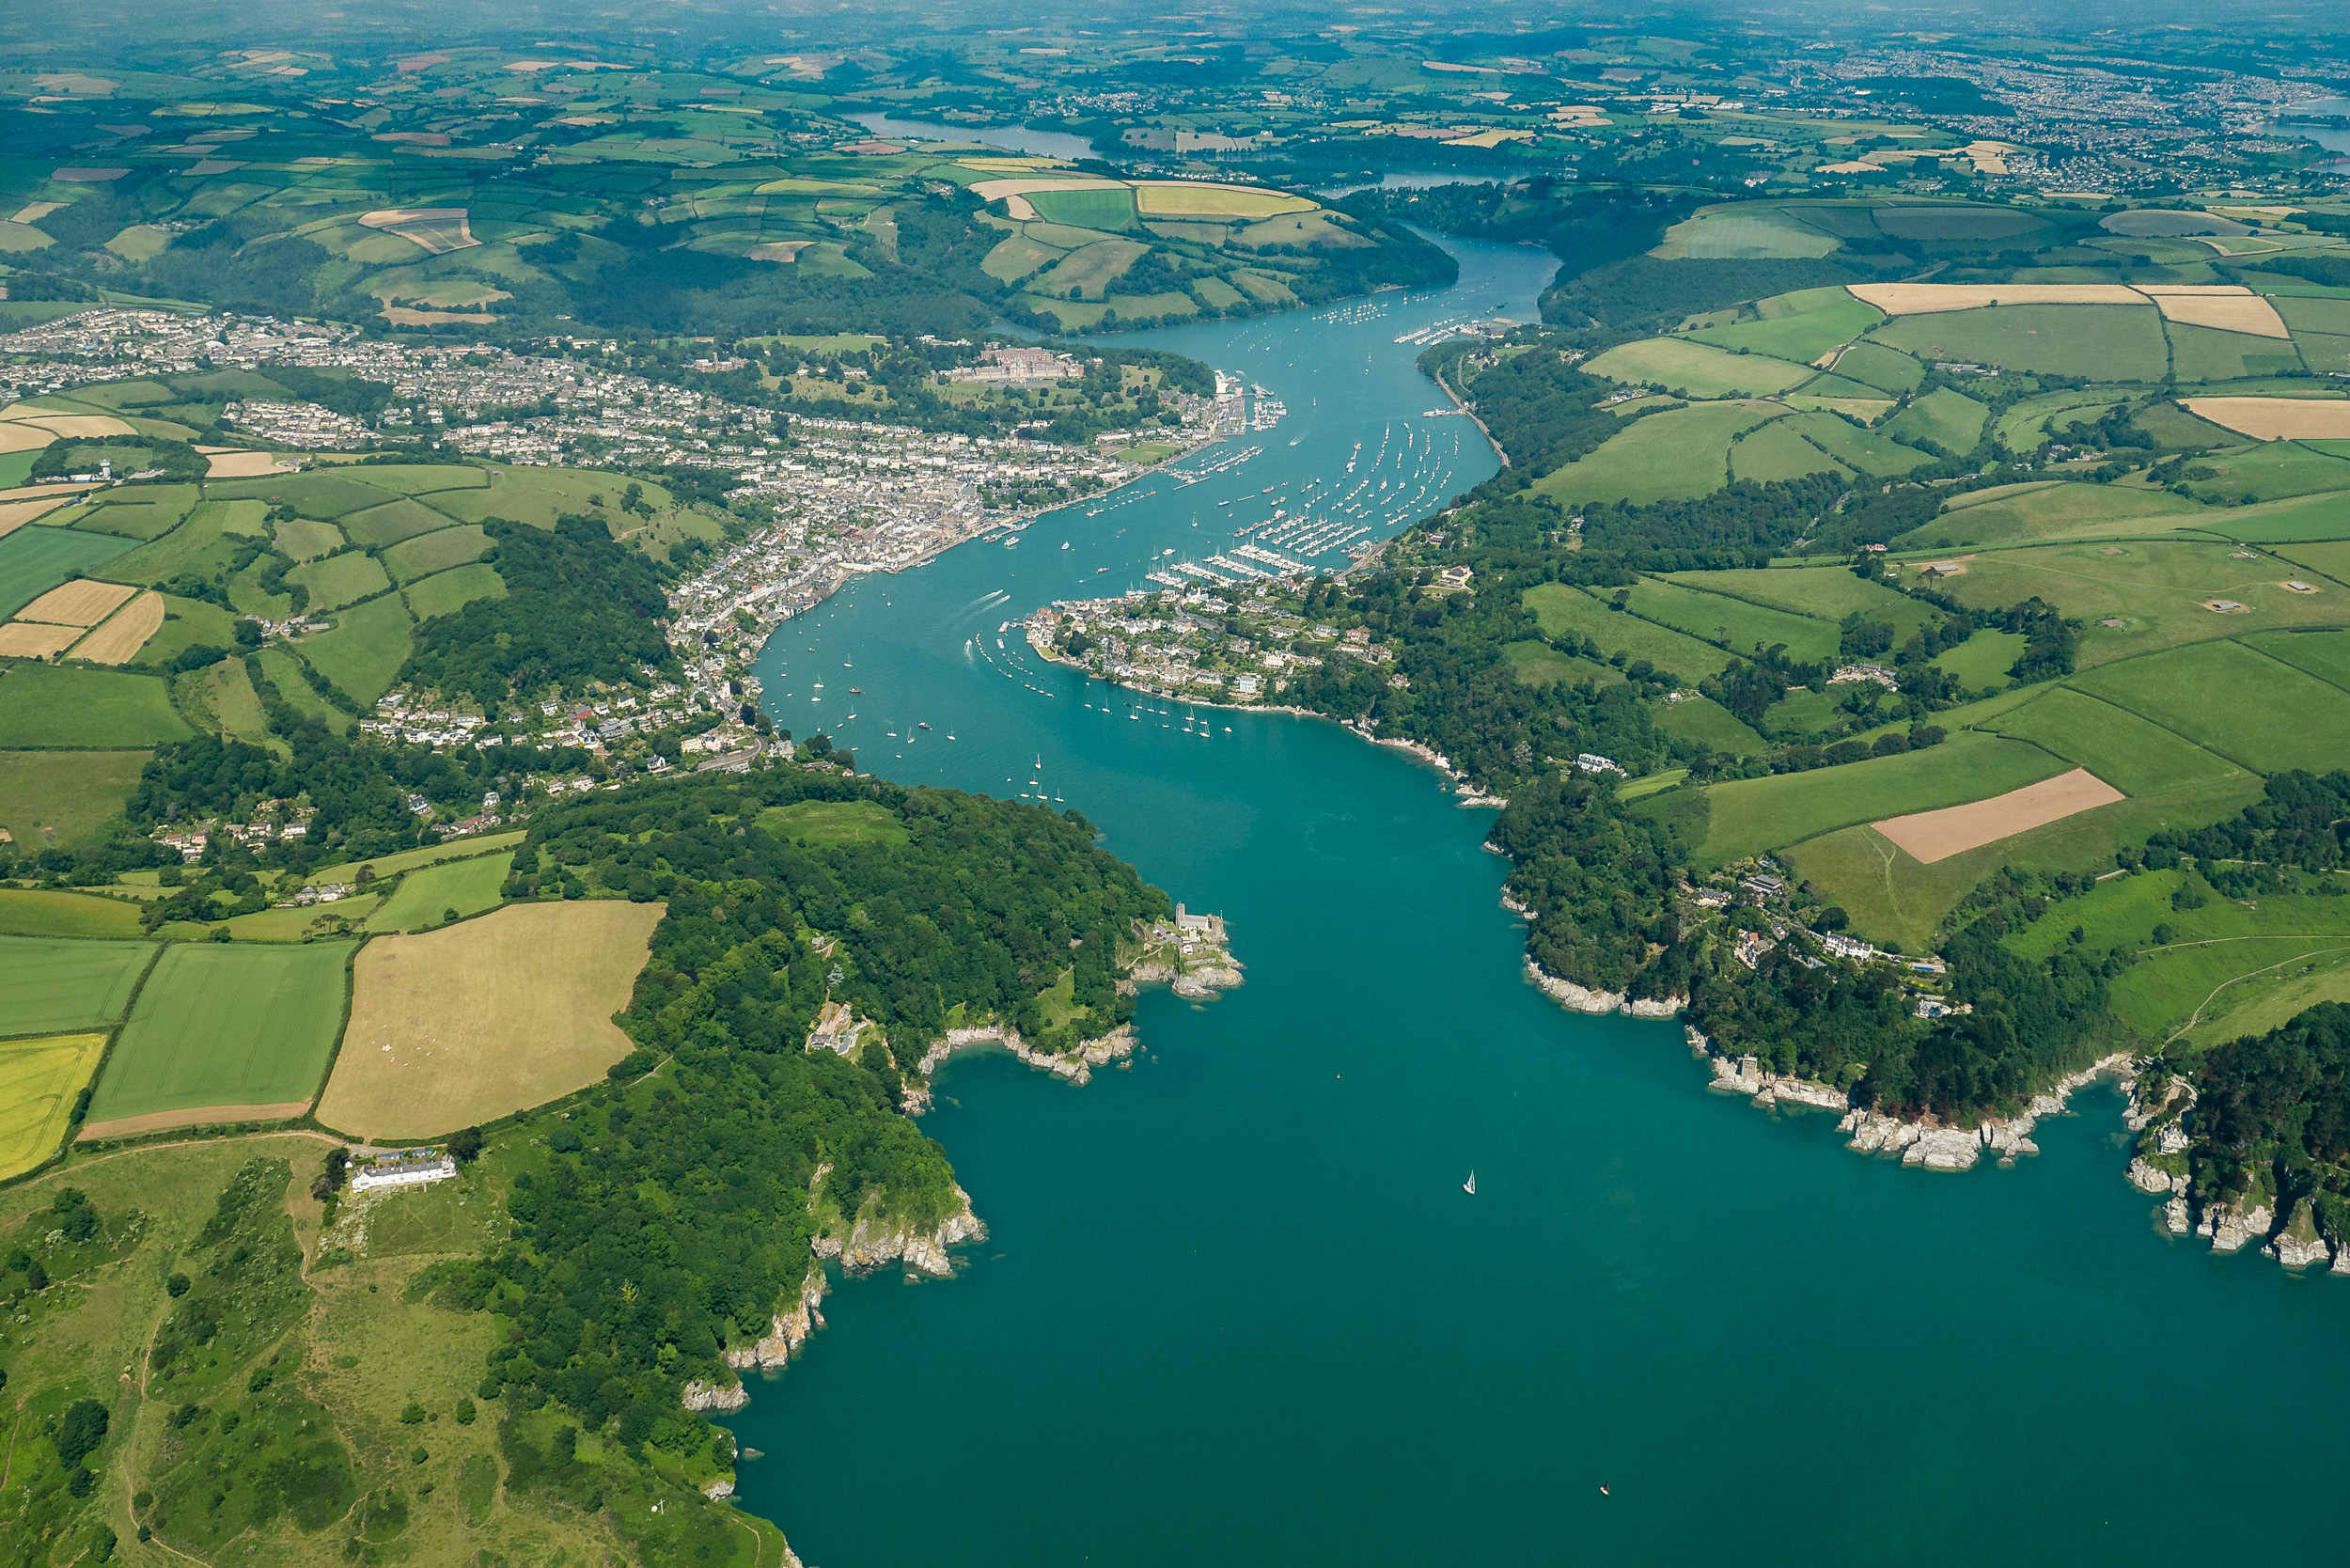
As on the ground, rivers can make excellent lead in lines.
It's not that easy though
So all this flying about taking pictures sounds easy doesn't it. Well not really. It's actually a bit challenging, but not necessarily in ways you might think.
Firstly, I'm when I'm in the right hand seat I'm the Pilot in Command which means I'm responsible for flying the plane. Activities with the camera have to take a back seat to flying, navigating and communication. So in order for me to get busy with the camera I normally have to go flying with another pilot. However this isn't too much of a problem as there are always pilots about at my local club who want to go flying!

There is a lot manage as Pilot in Command, so it's best to leave the image taking to when you're a passenger.
The next challenge is the plane itself. Unlike a helicopter which can hover and plane is constantly moving forward. The planes I fly normally have a ground speed of just over 100 mph so the scene is constantly changing. The effect isn't too bad at 3000 ft, but you still have to work at speed if you want get a particular image. There isn't much scope for fine tuning your composition.
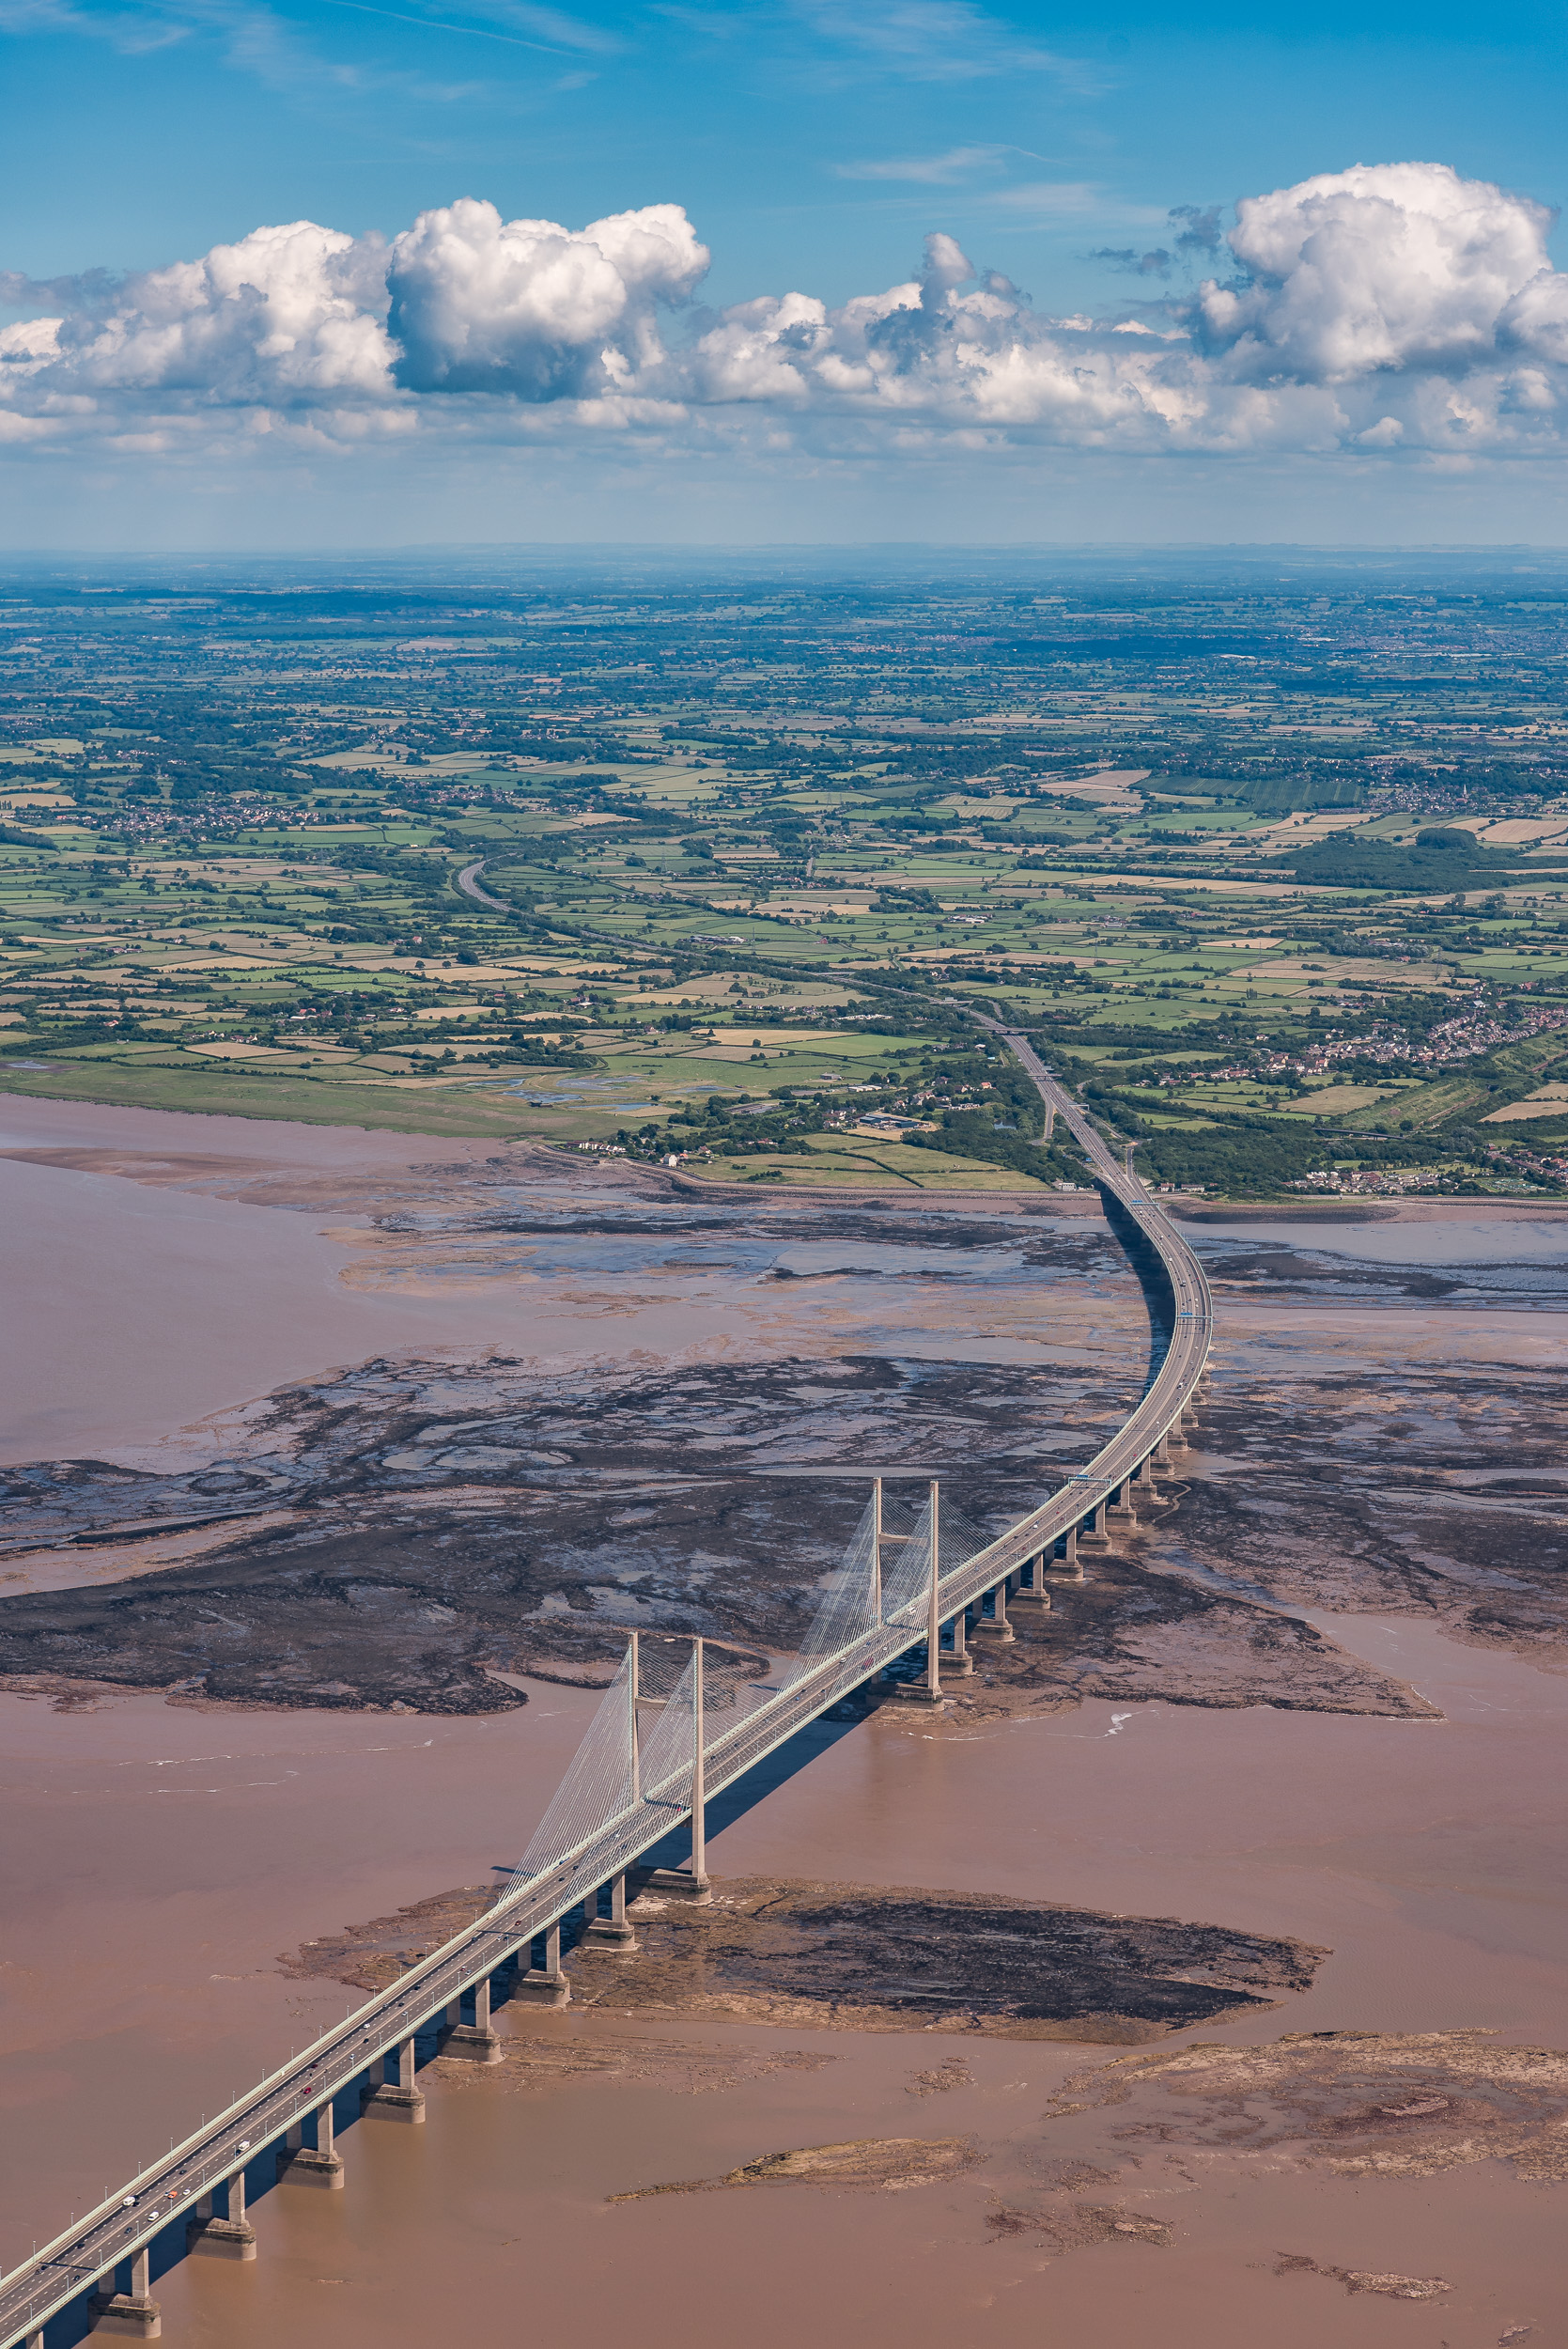
Objects can pass quickly between the nose and the wing so I didn't have much time to compose this shot.
Visibility in a plane is also a challenge. Again, unlike helicopters where you can sometimes take the doors off, my doors (or to be more accurate, canopy) is firmly attached. While the aircraft I fly offers some excellent visibility for the pilot, the low wings and canopy screen don't always lend themselves to good photography.
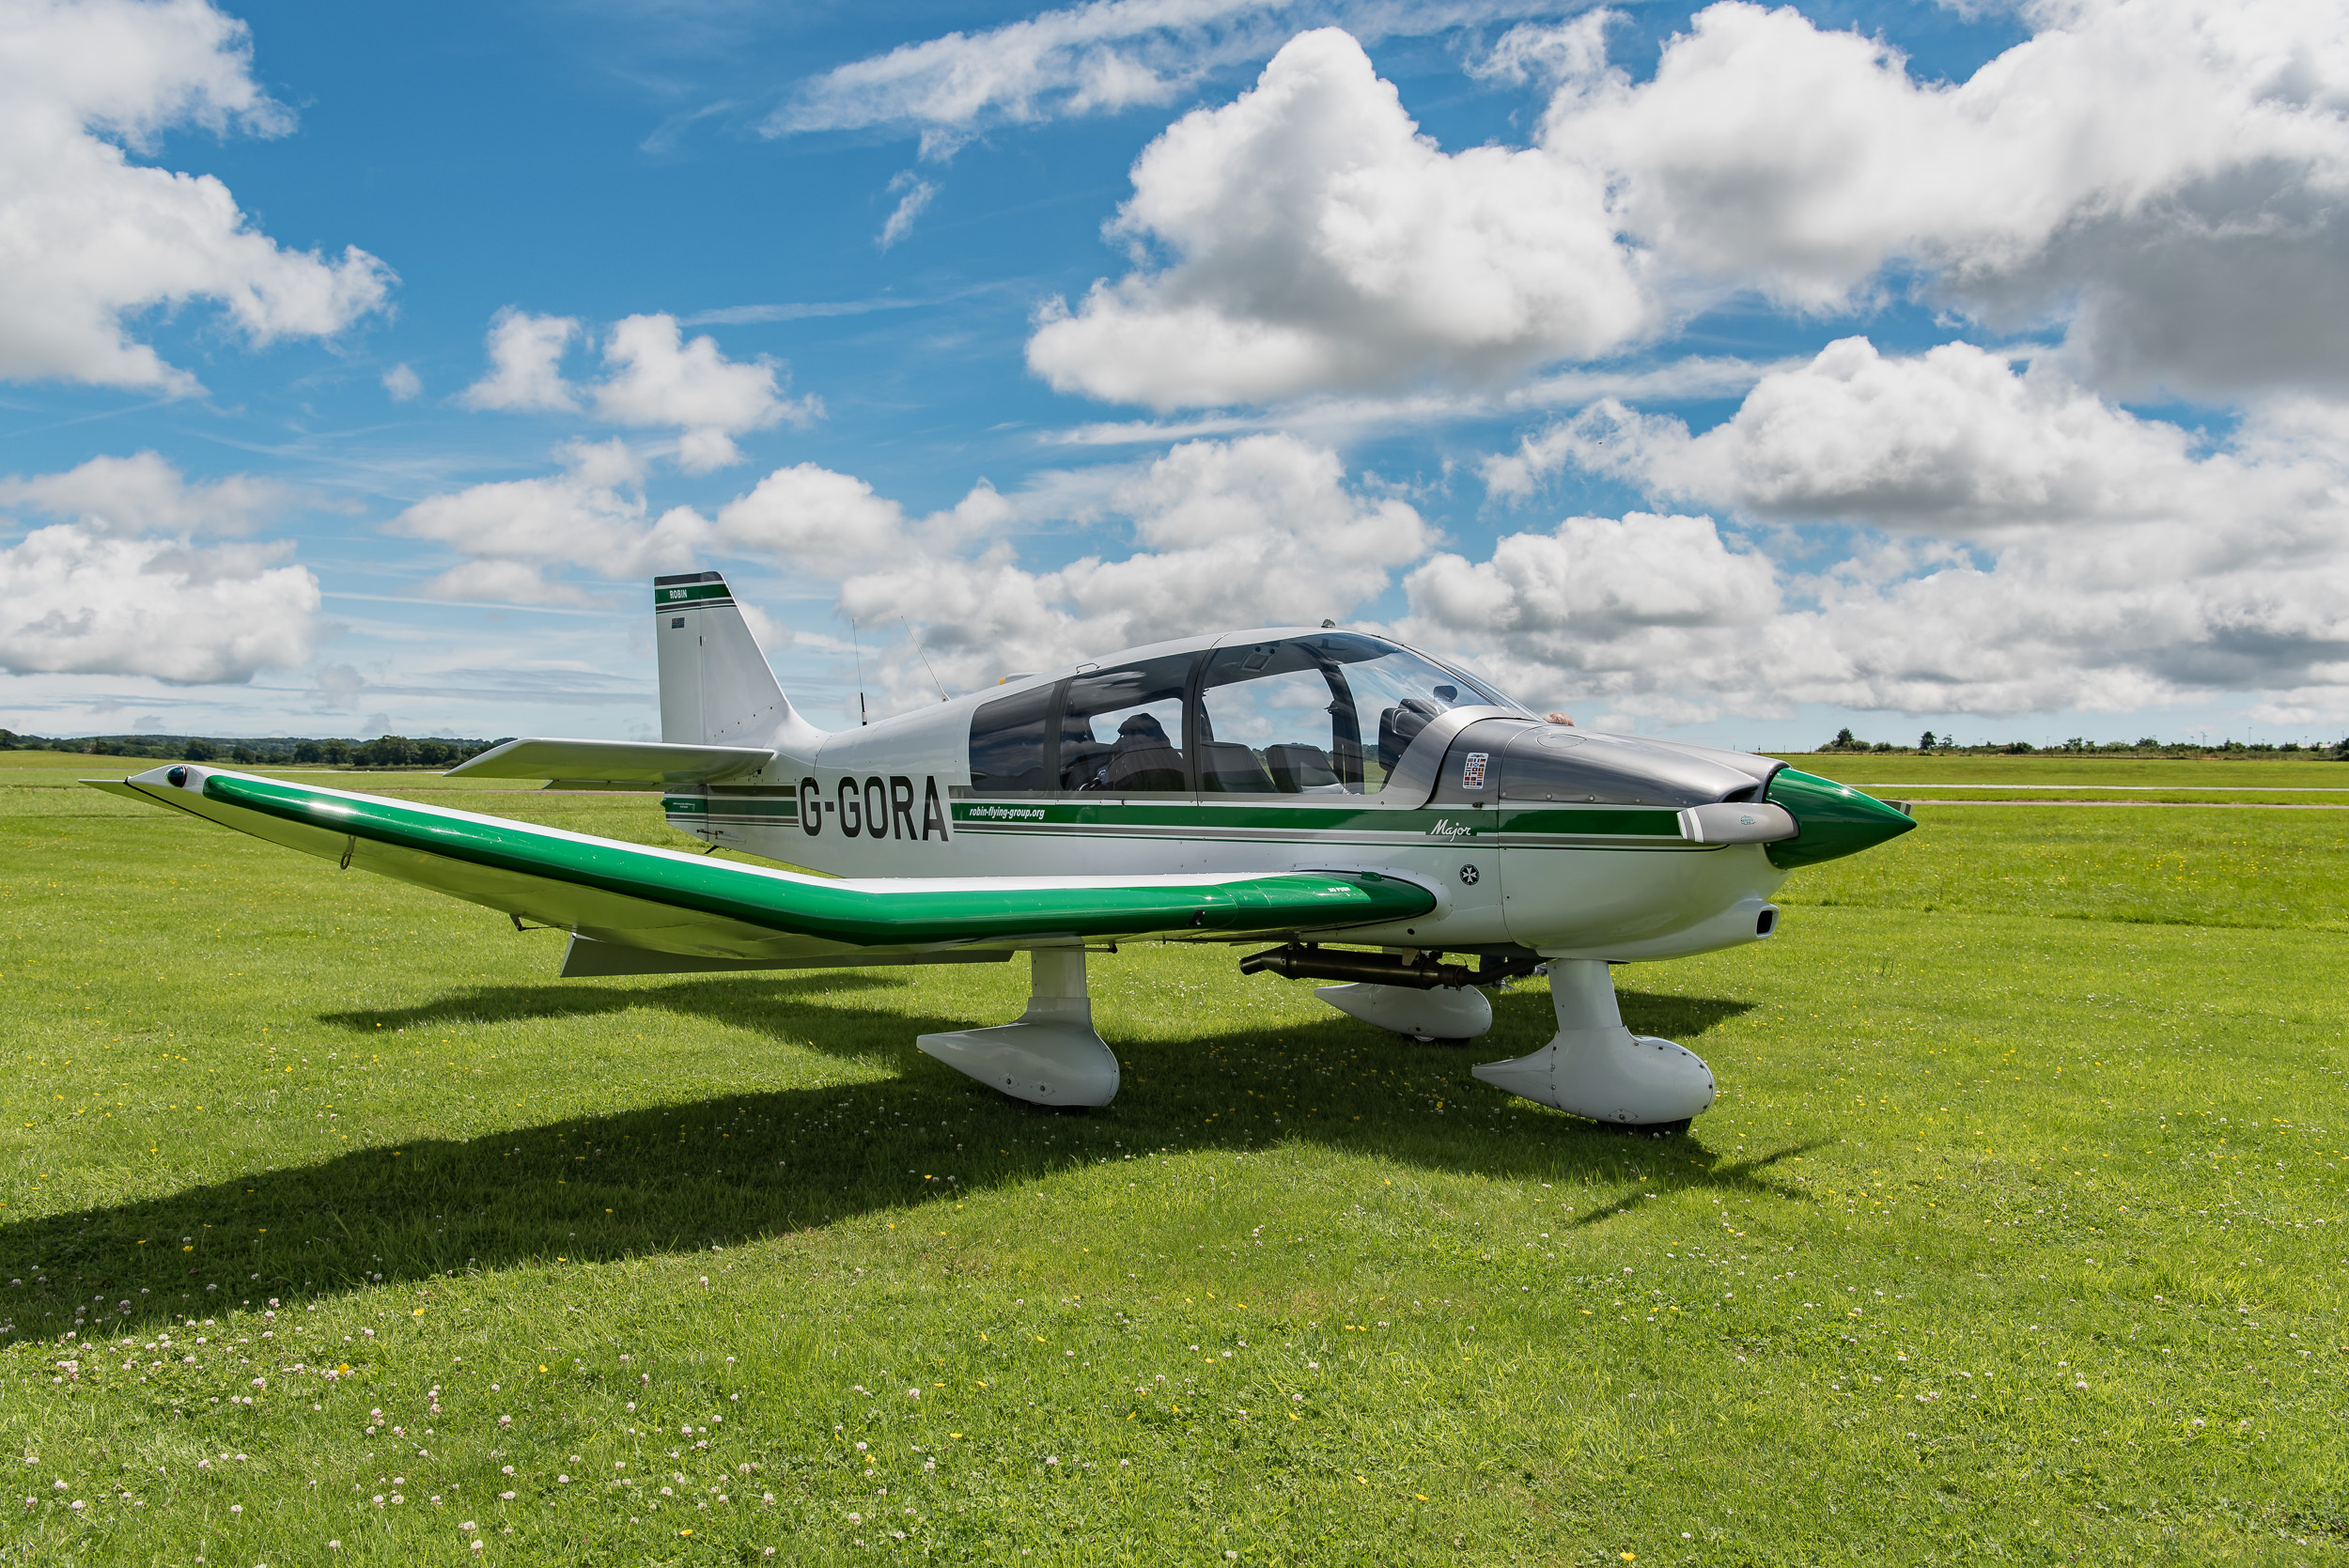
The Robin DR400, a wonderful aircraft to fly, but the low wings make photography challenging.
Between the nose and the wing there isn't much in the way of a clear view. Steeply banking the aircraft can improve things but the scene changes even more quickly then. All that aside though, it's the canopy that can be the most challenging thing to get over. Canopy's can cause a lot of reflections! I have flown aircraft where there has been small opening in the door which makes things a lot easier but with my current aircraft you have to battle the reflections.
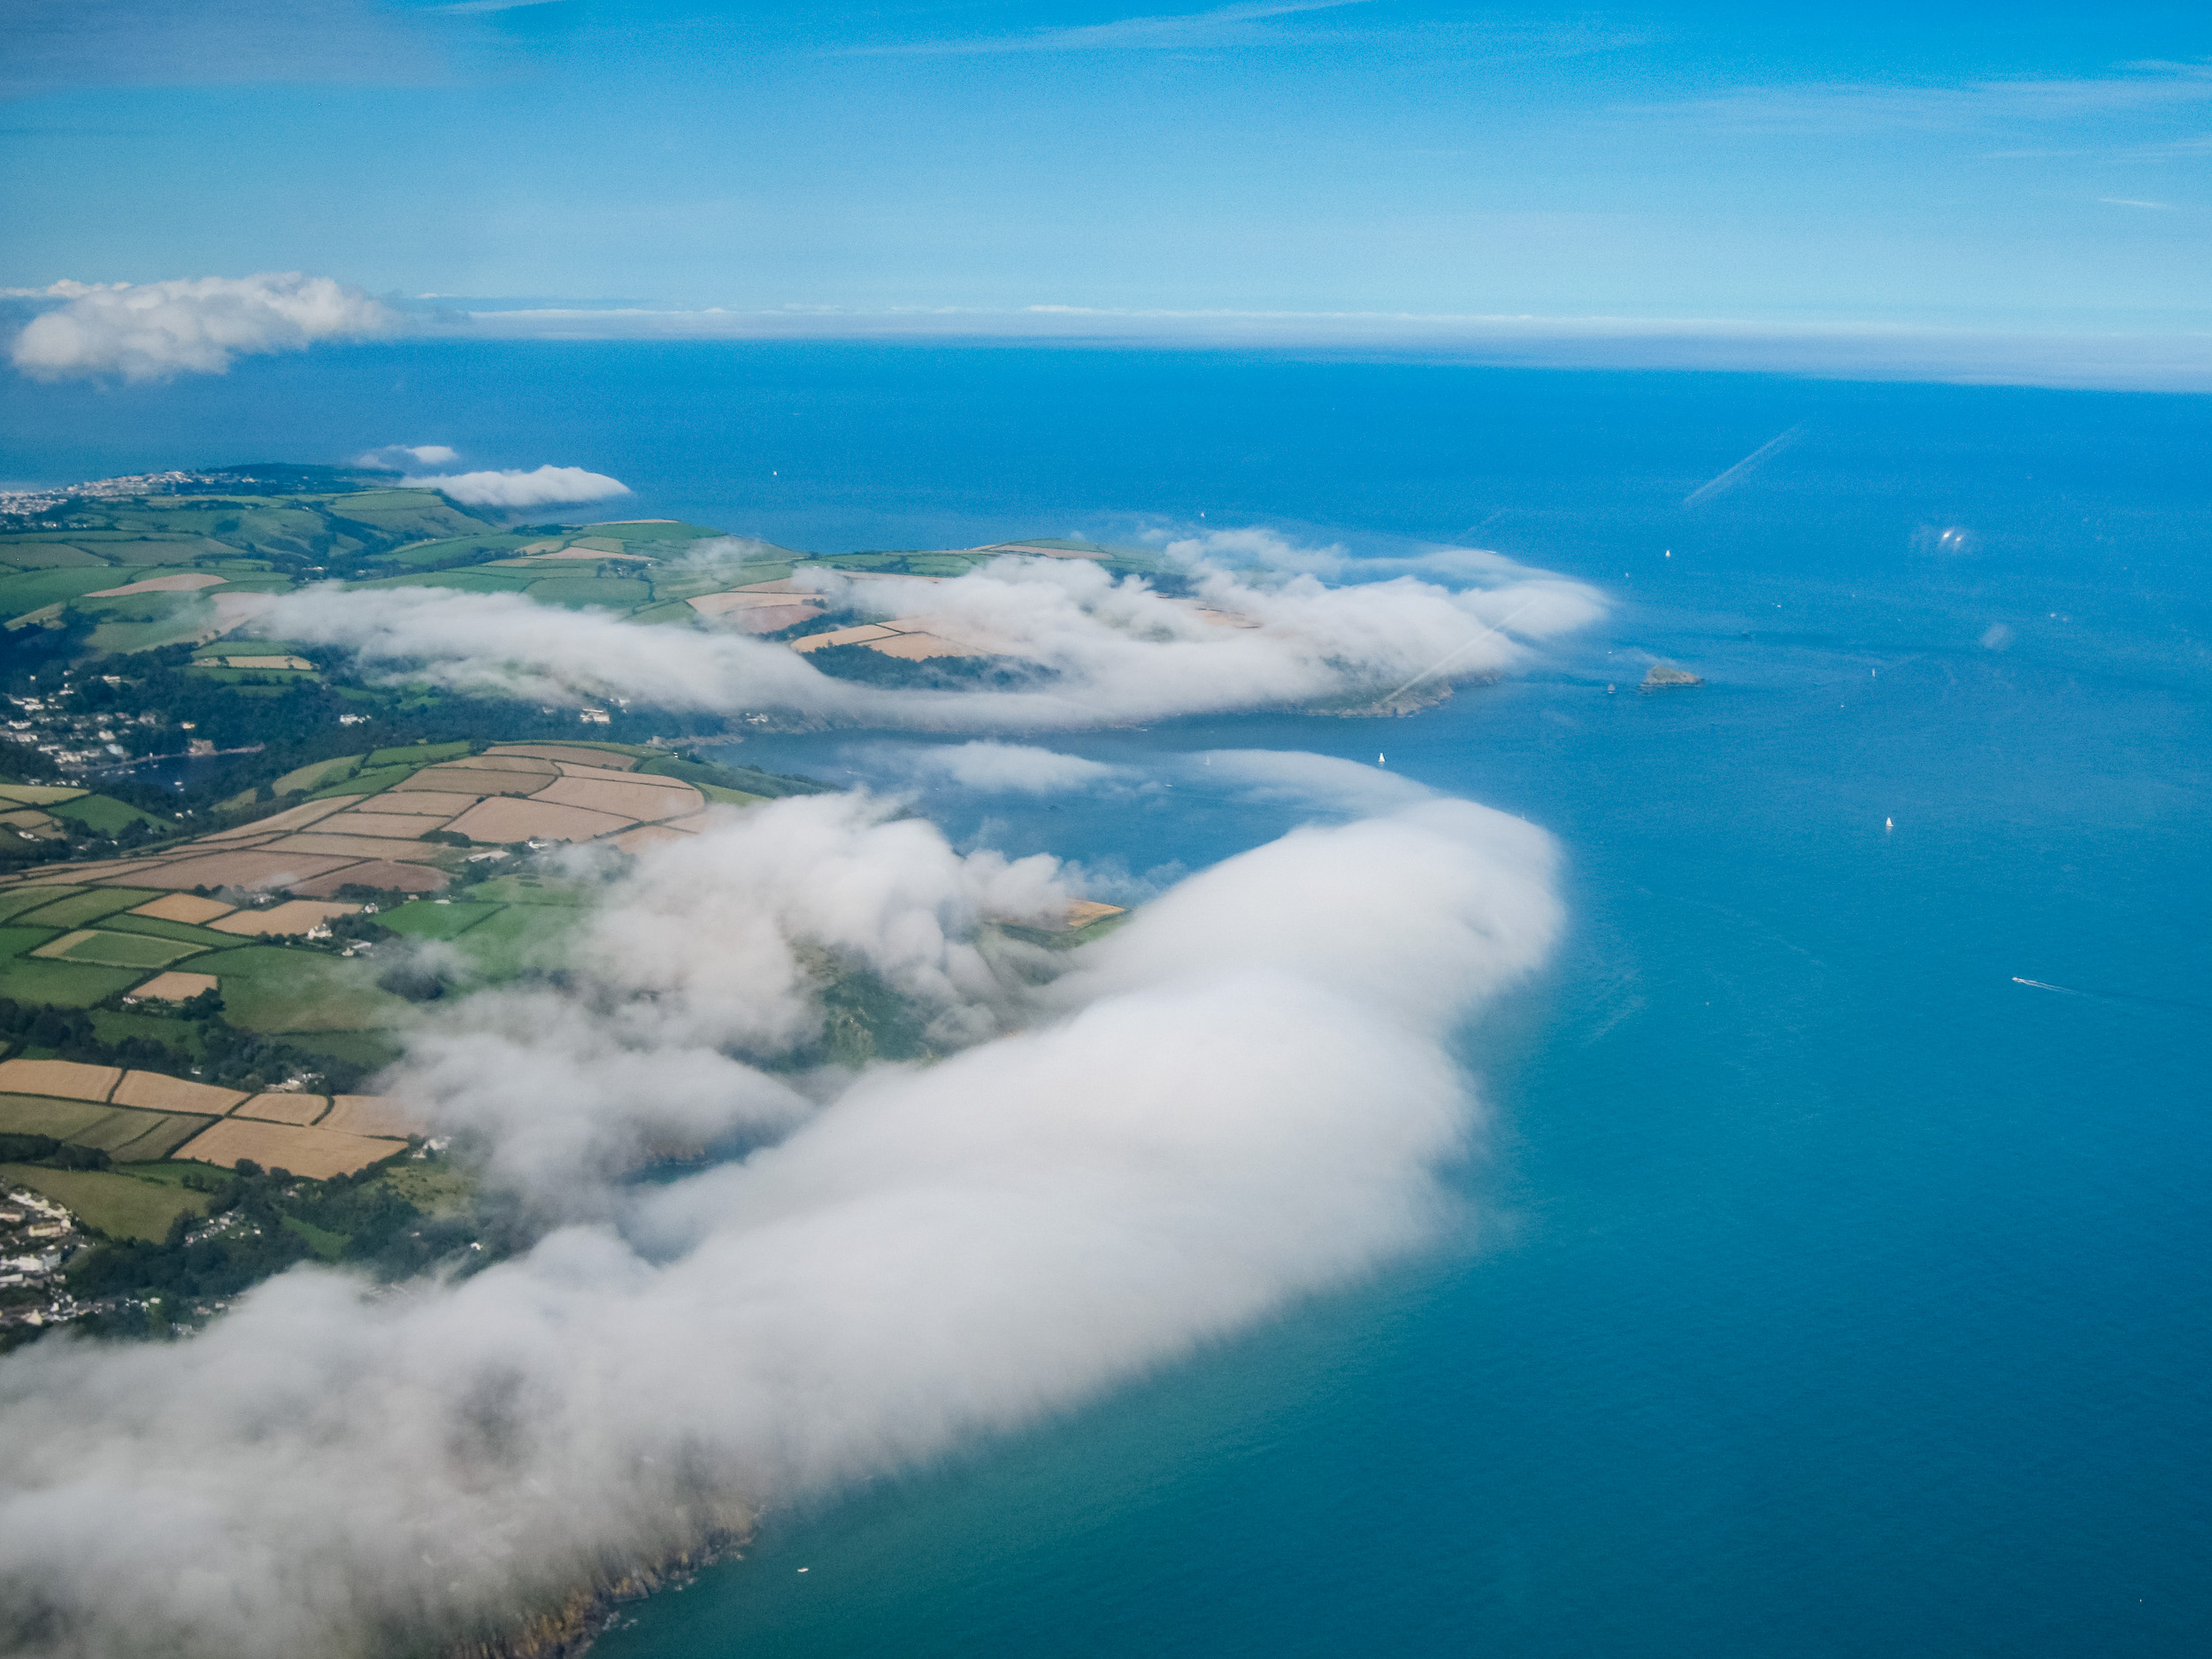
Amazing cloud formations but the image suffers from canopy reflections on the right.
Given the right conditions
Saying all that though, if the weather conditions are good, and you can get the plane positioned well, shooting from a plane offers some fantastic views. Camera setup is actually relatively straightforward compared to how I would set it up on the ground. I'll set it for automatic focus, f/8, and a shutter speed of at around 1/500 sec. No need for filters, cable releases and tripods (obviously!). There is a certain sense of freedom and the whole process becomes very dynamic (as it is with my music related work).
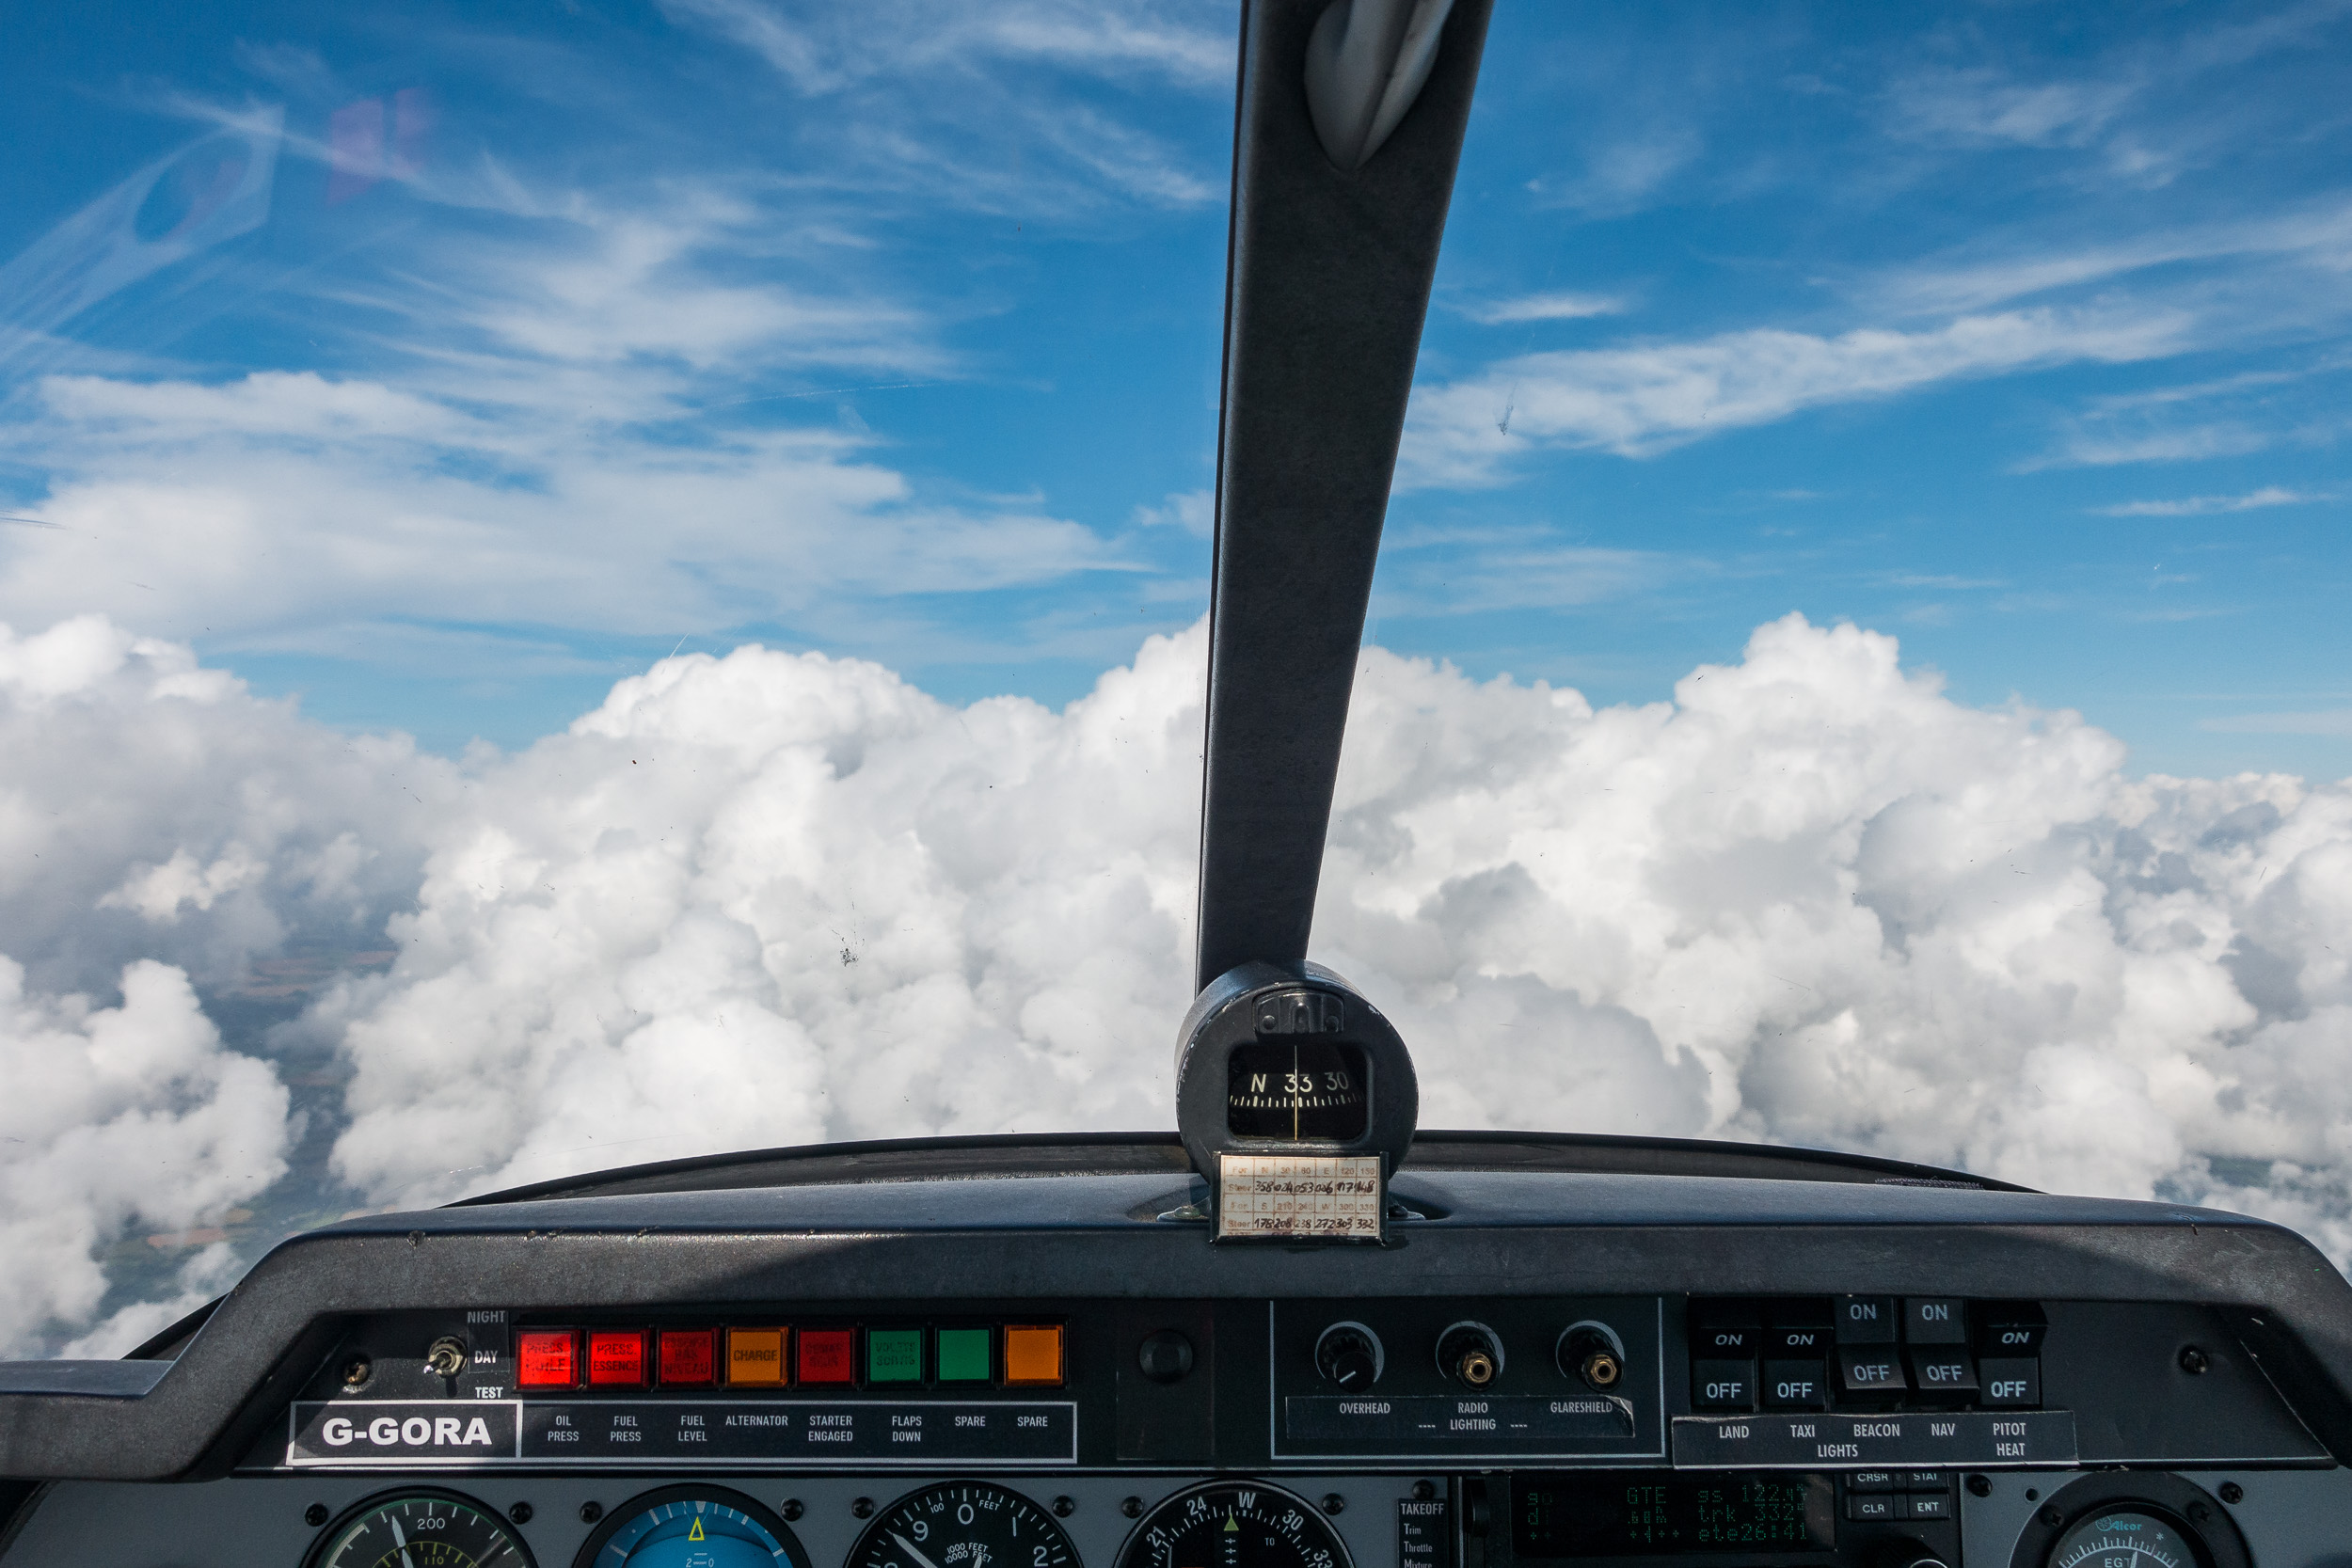
There are some views you can only get from the air.
Photography everywhere
This is the wonderful thing about photography. You can integrate it into so many aspects of your life. I love flying. I love the adventure and the freedom. These are some of the qualities that I love about photography and so when I get to do both it's fantastic. Like photography though, flying is a skill and requires practice. However, as with many of my hobbies time, money and weather are all influencing factors on how much practice I get!
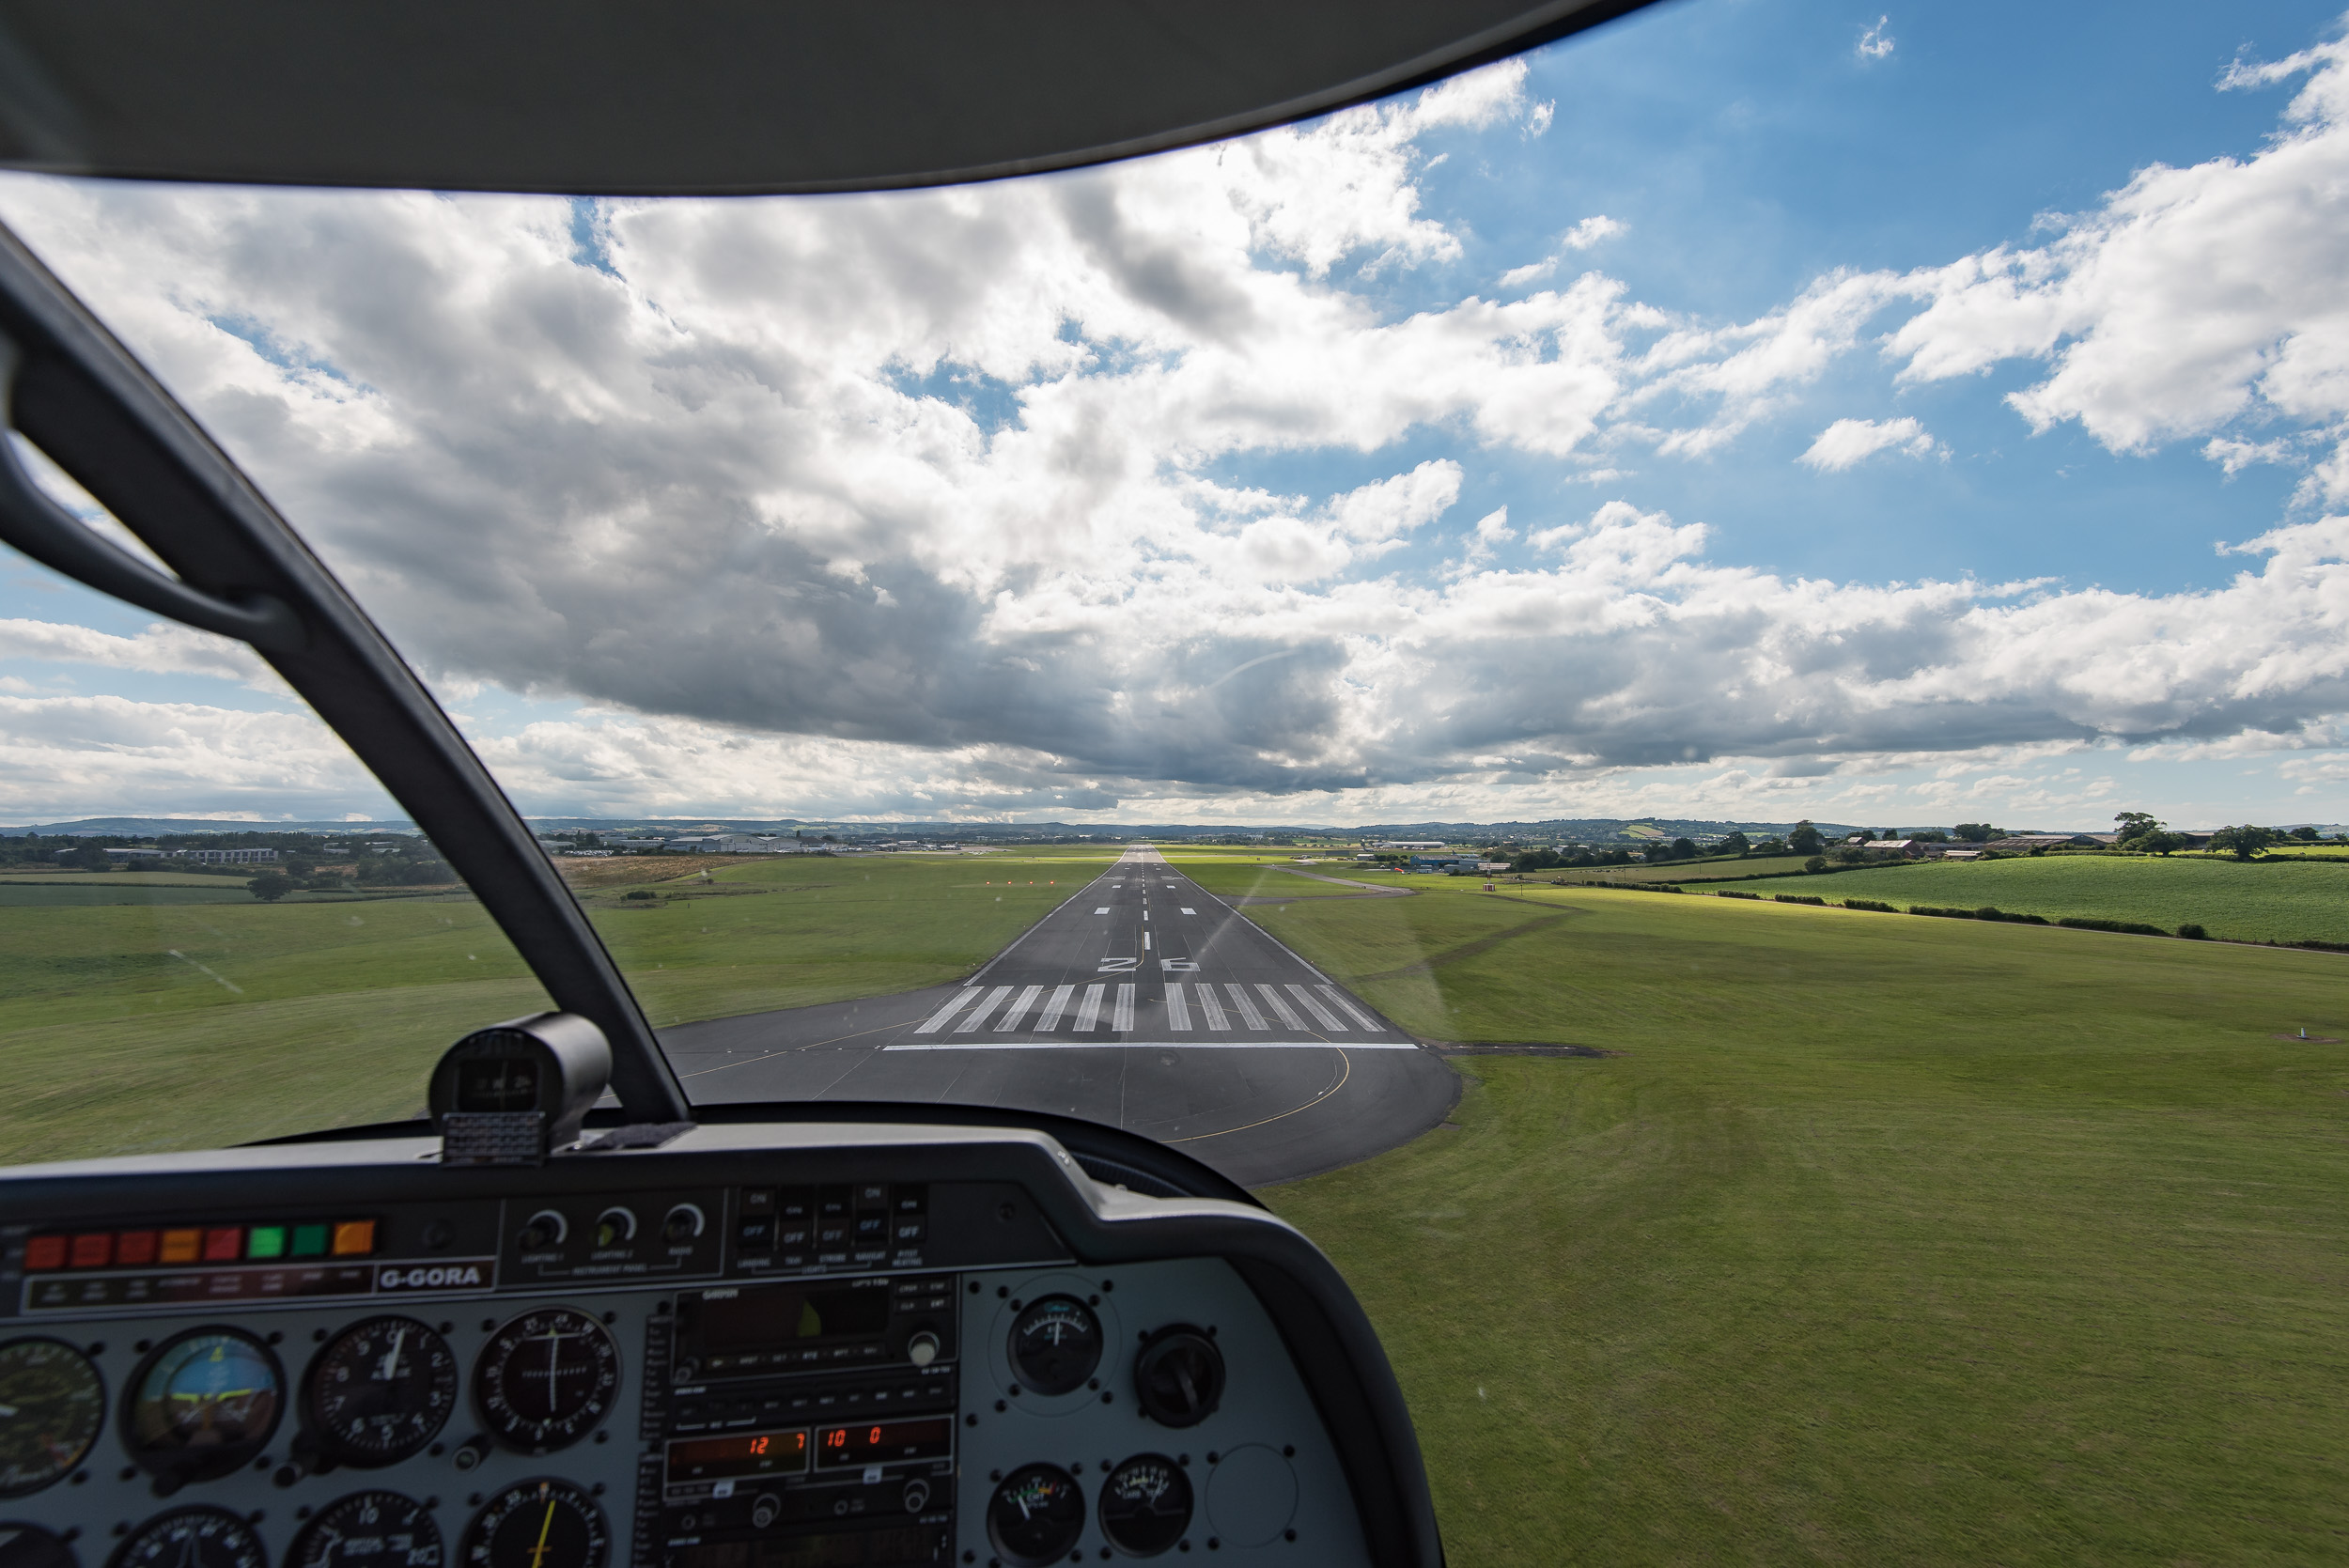
As with photography it's important to practice flying, particularly your landings!
Unfortunately flying has taken a little bit of back seat for me at the moment but I'm getting back to it in the New Year. Photography from the plane is gradually getting easier and I hope the New Year will bring more opportunities to capture some wonderful landscape images.
So do you integrate your photography with other hobbies? Have you tried to shoot from a small plane? Have you ever hung out the door of a helicopter with your camera? Let me know in the comments.
See you next time!
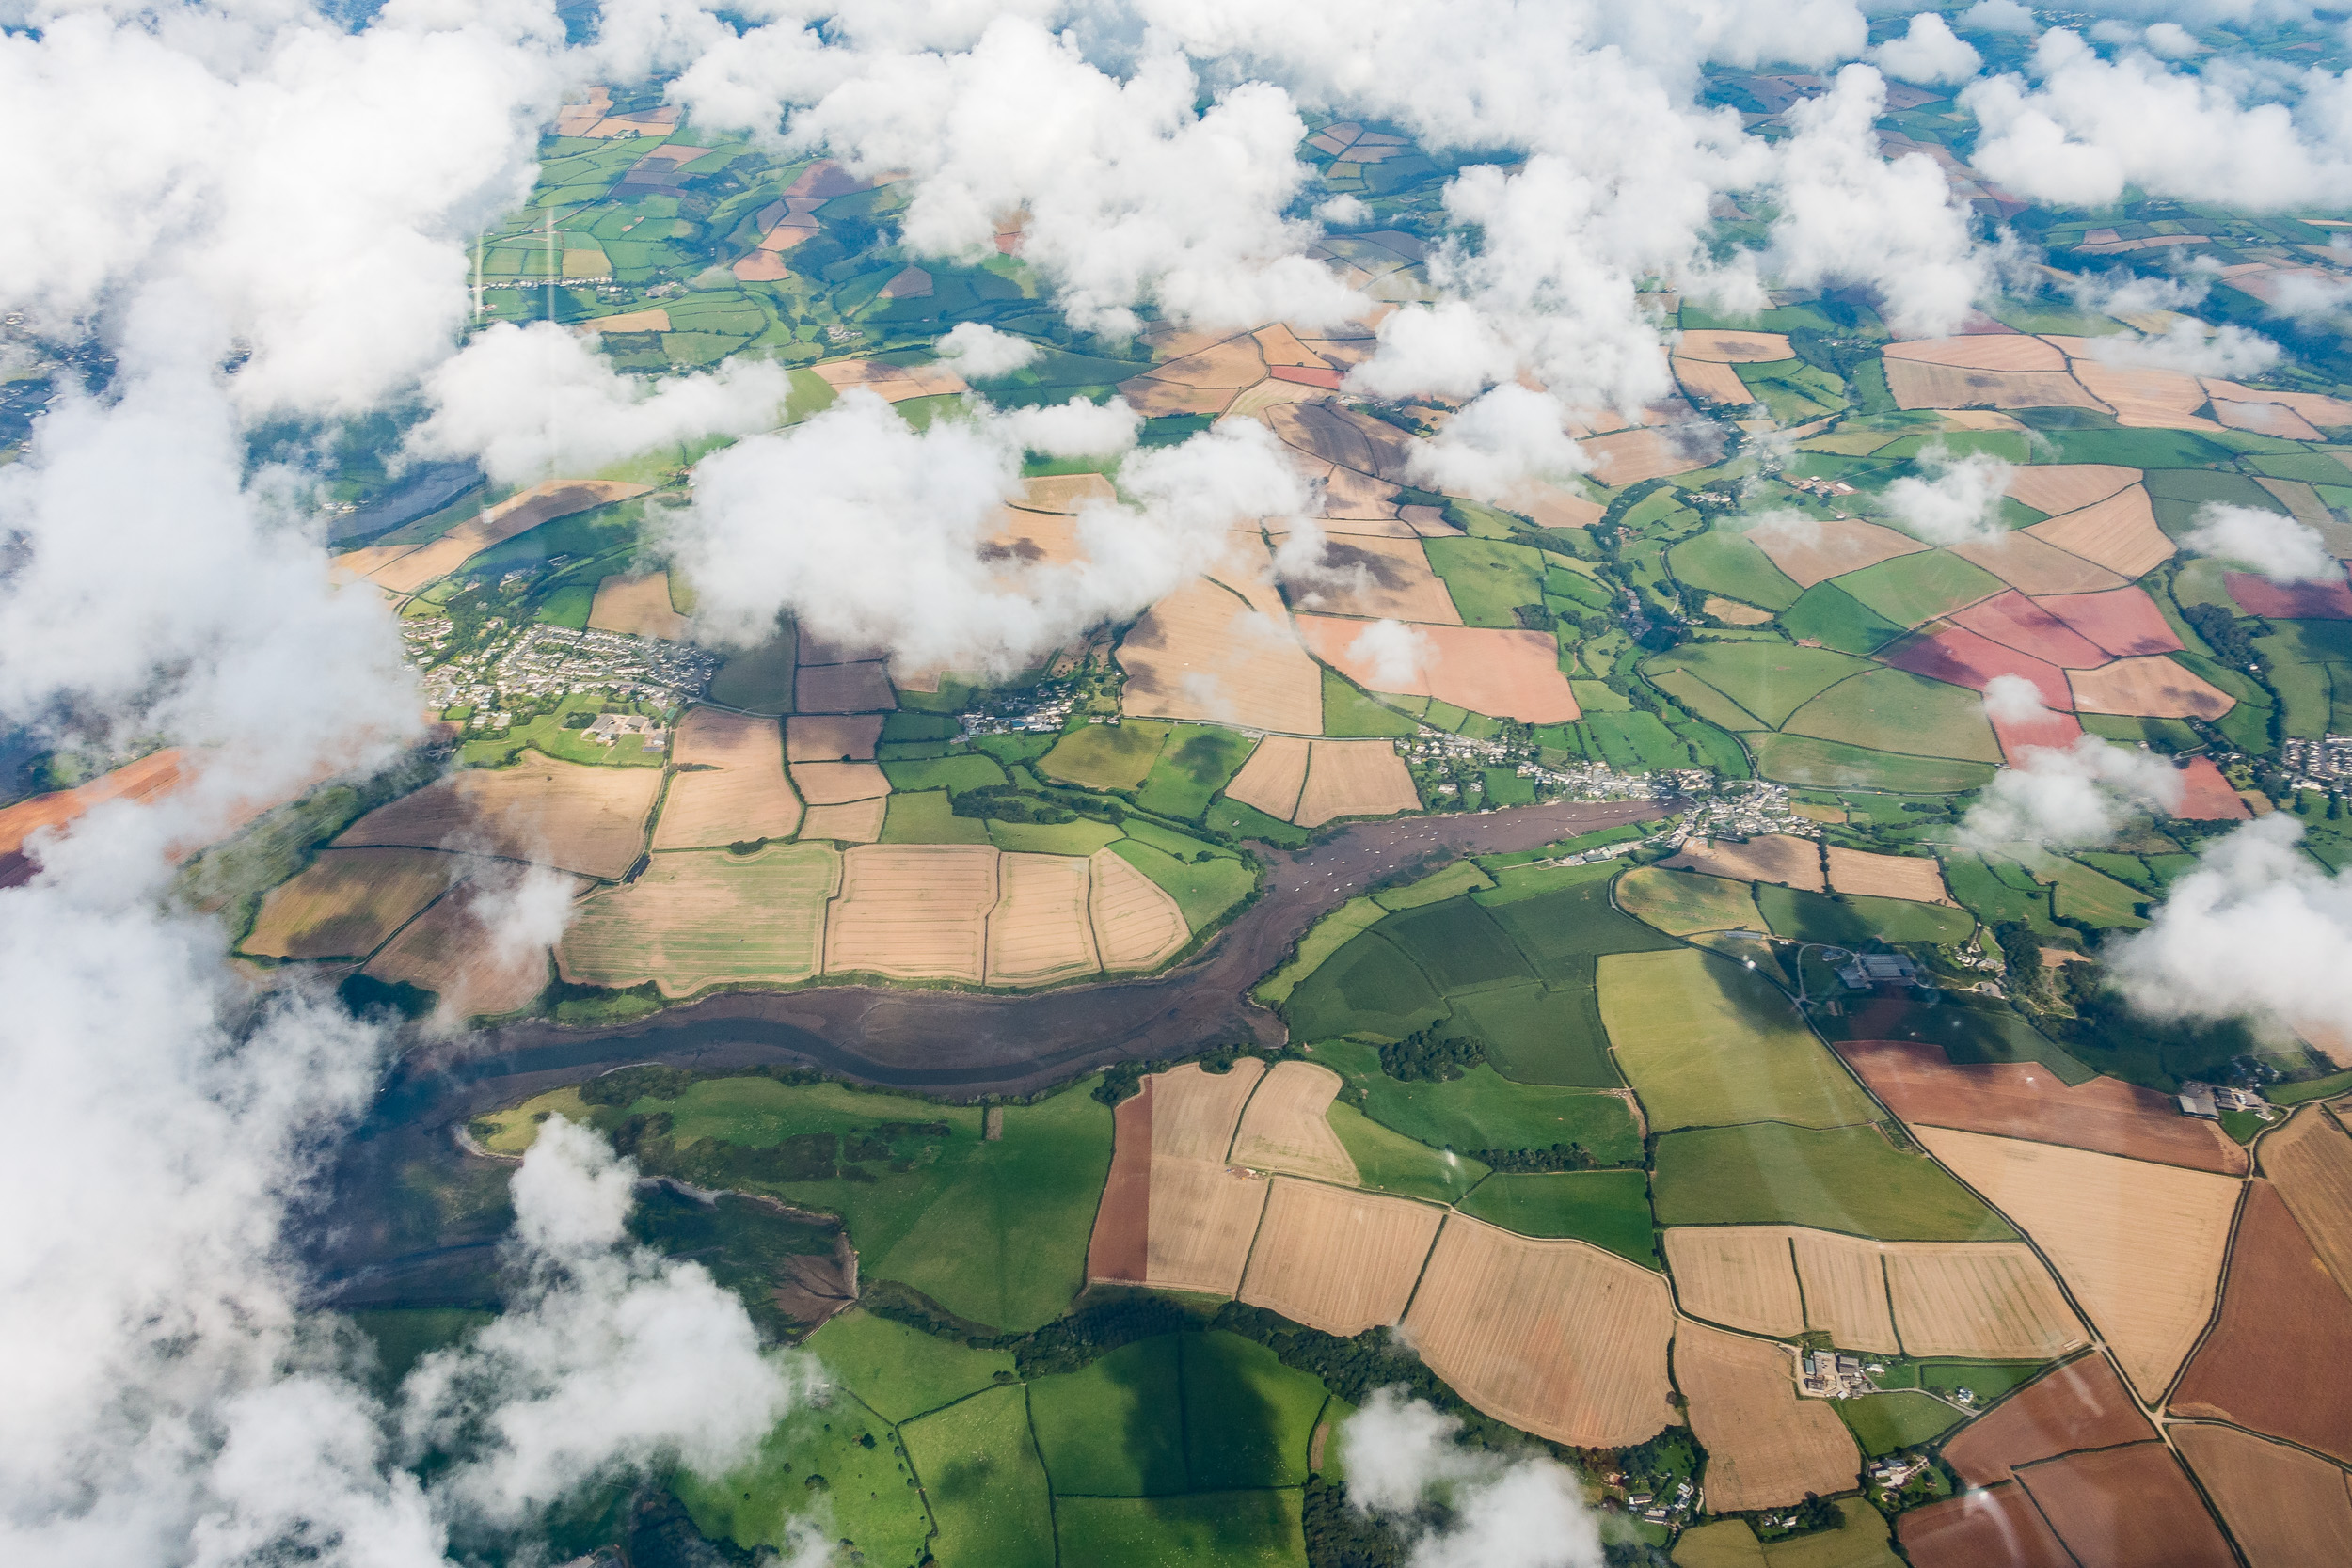
A unique view of the patchwork of fields in Devon.

Landscape Photography in the Lake District
In this blog post I write about my 2 day photographic adventure in the Lake District. Read about how despite the challenging weather I still came away with some great images and a sense of satisfaction.
Escape to the Lakes
When a photographer friend of mine invited me to spend a couple of days shooting the Lake District in the height of autumn I literally jumped at the chance. Over the last decade or so I had visited the Lake District a number of times with my family and enjoyed it immensely. After all if you like the outdoors there really isn't much not to like about the Lake District. This was going to be a different type of visit though. This visit was going to be all about photography and I couldn't wait!
The plan was to spend two full days shooting various locations around the Keswick area taking in tarns, lakes, hills and of course the odd jetty. Our only restriction was dates. Free time for photography has to fit in around family and work time, so when we picked our dates we were committed, no matter the weather.
November seemed to take an age to come round but when it did my levels of excitement had almost become palpable. I had packed my stuff two days prior to departure and when I did hit the road the 300+ mile journey flew by. I couldn't wait to get shooting but as I would soon find out, the Lake District weather was going to be typically British.
High Brandelhow Landing
It was a 5:30 am alarm call on the first day and despite the lack coffee I was in high spirits and ready to get shooting. Our first stop was High Brandlehow Landing, a pier on Derwentwater. It's a classic Lake District composition with a pier but it was an ideal location to get the photography brain into gear.
My first instinct was to shoot the pier vertically but I actually ended up preferring the horizontal version. Using the Little Stopper at ISO 100, f/11 gave a 2 minute exposure but I was loosing the detail in the sky. Setting the camera to ISO 200 gave me a one minute exposure maintaining some texture in the sky.
Stock Ghyll
Despite the sky being almost completely overcast it had been a reasonably successful start to the day. After breakfast though the weather turned rainy so we decided to head into the woodland at Ambleside and walk along Stock Ghyll.
Photographing Stock Ghyll was a real challenge as I spent most of the time clearing rain water from the camera. I found it difficult to concentrate on my composition. I later tried to shoot the waterfalls but couldn't really find a composition I liked.
Grasmere
After drying out over a pub lunch we took the short drive down to the southern end of the lake at Grasmere. Though it had stopped raining the weather remained resolutely overcast which was a shame as there was barely a breath of wind and the reflections were stunning.
Lovely reflections, just a shame about the light. This image is a 2:1 crop from the original frame.
Latrigg Fell
With a renewed sense of optimism on the morning of day 2 I headed down to the hotel lobby to meet my friend. Unfortunately he was taking shelter from the down pour of rain. Not to be put off we checked our respective weather forecast apps and agreed that an ascent of Latrigg Fell could be rewarded with some nice light come sunrise.
The weather at dawn was not great but we dug in and waited.
As time progressed some splashes of light started to appear on Cat Bells. This image is a 3:1 crop of a 9 vertical image panoramic stitch.
The dawn light struggled to get through the clouds but when it did it provided little moments of magic. This is 16:9 crop from the original frame.
Castlerigg Stone Circle
While ancient stone circles don't necessarily offer a lot of interest for me, the location of Castlerigg Stone Circle is still an interesting location to shoot. You don't necessarily need to include the stones in your compositions.
Bad weather can work in your favour as well. I just needed to wait for a break in the light which came and went in the space of seconds. You just have to stand there with the finger on the shutter....waiting....till you get that fleeting moment of light.
As I've written about before, its important to look around to see what else is happening. I was focused so much on getting the previous image that I almost missed this one.
Tarn Hows
After our trip to Castlerigg we headed up to Ashness Bridge. It was a short stop as no sooner had we got our cameras out it started to rain heavily. So as we approached the end of day 2 we decided that we might try and catch last light at Tarn Hows. The weather hadn't exactly been kind to us up to that point and unsurprisingly it didn't improve that much.
This scene just need a splash of light on the trees but it wasn't to be.
Cat Bells
I was due to make the long trip home the morning of the 3rd day, but I couldn't resist one more dawn shoot. My friend had hit the road at 4am to go home, so as I was on my own I decided I would make the 450m ascent of Cat Bells. Despite the the previous two days of poor weather, I remained optimistic as the weather forecast looked like it might produce some nice early morning light.
My vision for this image was to get some morning light break over the fell peaks (Robinson and Red Knot). I waited and waited but this was as good as it got.
As is often the case in the Lake District, the moments of good light are brief but wonderful. This image of Rigg Beck and Causey Pike is a 3:1 crop from a single frame.
I was on my way down from Cat Bells and looking forward to breakfast but sometimes you just have to stop and unpack all your gear again. The light on Lonscale Fell was too good to miss.
Fun but Challenging
There was no doubt that I was extremely excited about my trip to the Lake District. Having seen so many autumnal images of the area I was keen to produce my own spectacular images. However, as you can see from my images old mother nature had a different plan which mostly involved rain and overcast skies. Even when it was dry there was very little of that magical light that you want to really lift a scene. When it did rain I would just spend most of time trying to keep my gear and filters clear of water. This can be infuriating and doesn't leave much time for the creative side of photography.
So was the trip a failure? Of course not! Yes, it was challenging, difficult and sometimes frustrating but I was in the Lake District, in autumn, with my camera. Sure it would have been nice to have better weather but sometimes as a landscape photographer you have to work with what you get. As I write this blog and look back at the photographs there is a lot to be happy about. Those little breaks of light like I saw on Cat Bells, or the stormy sky over the trees at Castlerigg just goes to show that there is an image to capture in almost any weather condition.
For me landscape photography is also about the adventure, about being outdoors. This trip was an adventure and I managed to capture some dramatic images of the Lake District, so I'm calling my trip a success!
Do you have a bucket list of locations or areas you want to shoot? Have you turned up to a location and faced a few challenges? Is there any type of weather you wouldn't go out in? Let me know in the comments.
Remember to check out my Instagram and Flickr feeds so you can see even more of my images. See you next time!

Inspiration and Influence
In this blog post I discuss my personal photographic influences. These are the photographers that have not only inspired my creative style but also given me encouragement to publish my work, write this blog and even create videos.
A Source of Inspiration
Inspiration is a powerful thing and for landscape photographers it can come from many sources. It could be from seeing in image in a magazine you were reading over a coffee one morning, or from a visit to an art gallery to see the work of some of the greats. Either way, I'm not sure many of us would have become photographers if we hadn't been inspired by someone or something.
As a landscape photographer (who is still learning his craft), I gain a lot of inspiration from the work of other landscape photographers. In particular I have been heavily motivated by the inspiring photographs in competitions such as Landscape Photographer of the Year. (Read my thoughts on photography competitions here). Images like those found in Landscape Photographer of the Year have driven me to shoot more and improve the quality of my work. Without the influential and inspiring works of others I probably would have chosen to ignore some of those 4am alarm calls or have chosen to open a bottle of wine in the evening.
In this blog post I discuss my personal photographic influences. These are the photographers that have not only inspired my creative style but also given me encouragement to publish my work, write this blog and even create videos.
Thomas Heaton
I first discovered the work of Thomas Heaton on the Improve Photography podcast where I pleased to hear a British photographer being interviewed. Not only does Thomas Heaton produce stunning landscape images but he produces fantastic YouTube videos on how he goes about his photography. It was content that I could connect to and relate to.
His stories are wonderfully told and though I'd been thinking about blogging and vlogging for a while it was definitely the viewing of Thomas Heaton's videos that gave me that final inspiration to just get on and do it. His images also are a great source of inspiration. So much so that I've purchased his 2017 calendar which you can see here and purchase here. That calendar should encourage me to see a few more 4am alarm calls.
And if you ever need some motivation or inspiration for you landscape photography check out this wonderful video by Thomas Heaton called Wake Up.
Not only is this video by Thomas Heaton inspiring, but it is a great example of how to produce engageing content.
Jared Polin - Aka FroKnowsPhoto
As with Thomas Heaton I discovered the work of Jared Polin on a photography podcast, but this time it was TWiP. It's hard to describe Jared in words but larger than life seems apt. His work has influenced and inspired me in two ways. Firstly his photography has greatly influenced my music work (see my blog post on My Other Photography Life). Through his YouTube channel I have learnt not only how to go about shooting live music but how to work my way up from shooting local venues to music festivals run by national broadcasters.
He has also been very influential in how I style the content that I'm writing now and will be in the future. If there was ever a great example of how to produce compelling and entertain content it is him. His free video guide to branding is well worth a download and I recommend you subscribe to his YouTube channel.
My first landscape photography video. I'm trying to make engaging content, something that Jared is a master at. I have a long way to go, but we've all got to start somewhere.
David duChemin
David's work and videos have been inspirational in developing the artistic style of my images. His YouTube channel has a wonderful series of videos in which he delves into the art of photography. Topics such as intent, composition, processing and printing have all influenced my approach to photography and how I output my images. It inspires me to improve my process and approach to taking images in the field.
Though I will probably never visit some of the locations David has photographed, images like the those found in his Portraits of Earth collection inspire me to improve my artistic skills and develop my own personal style.
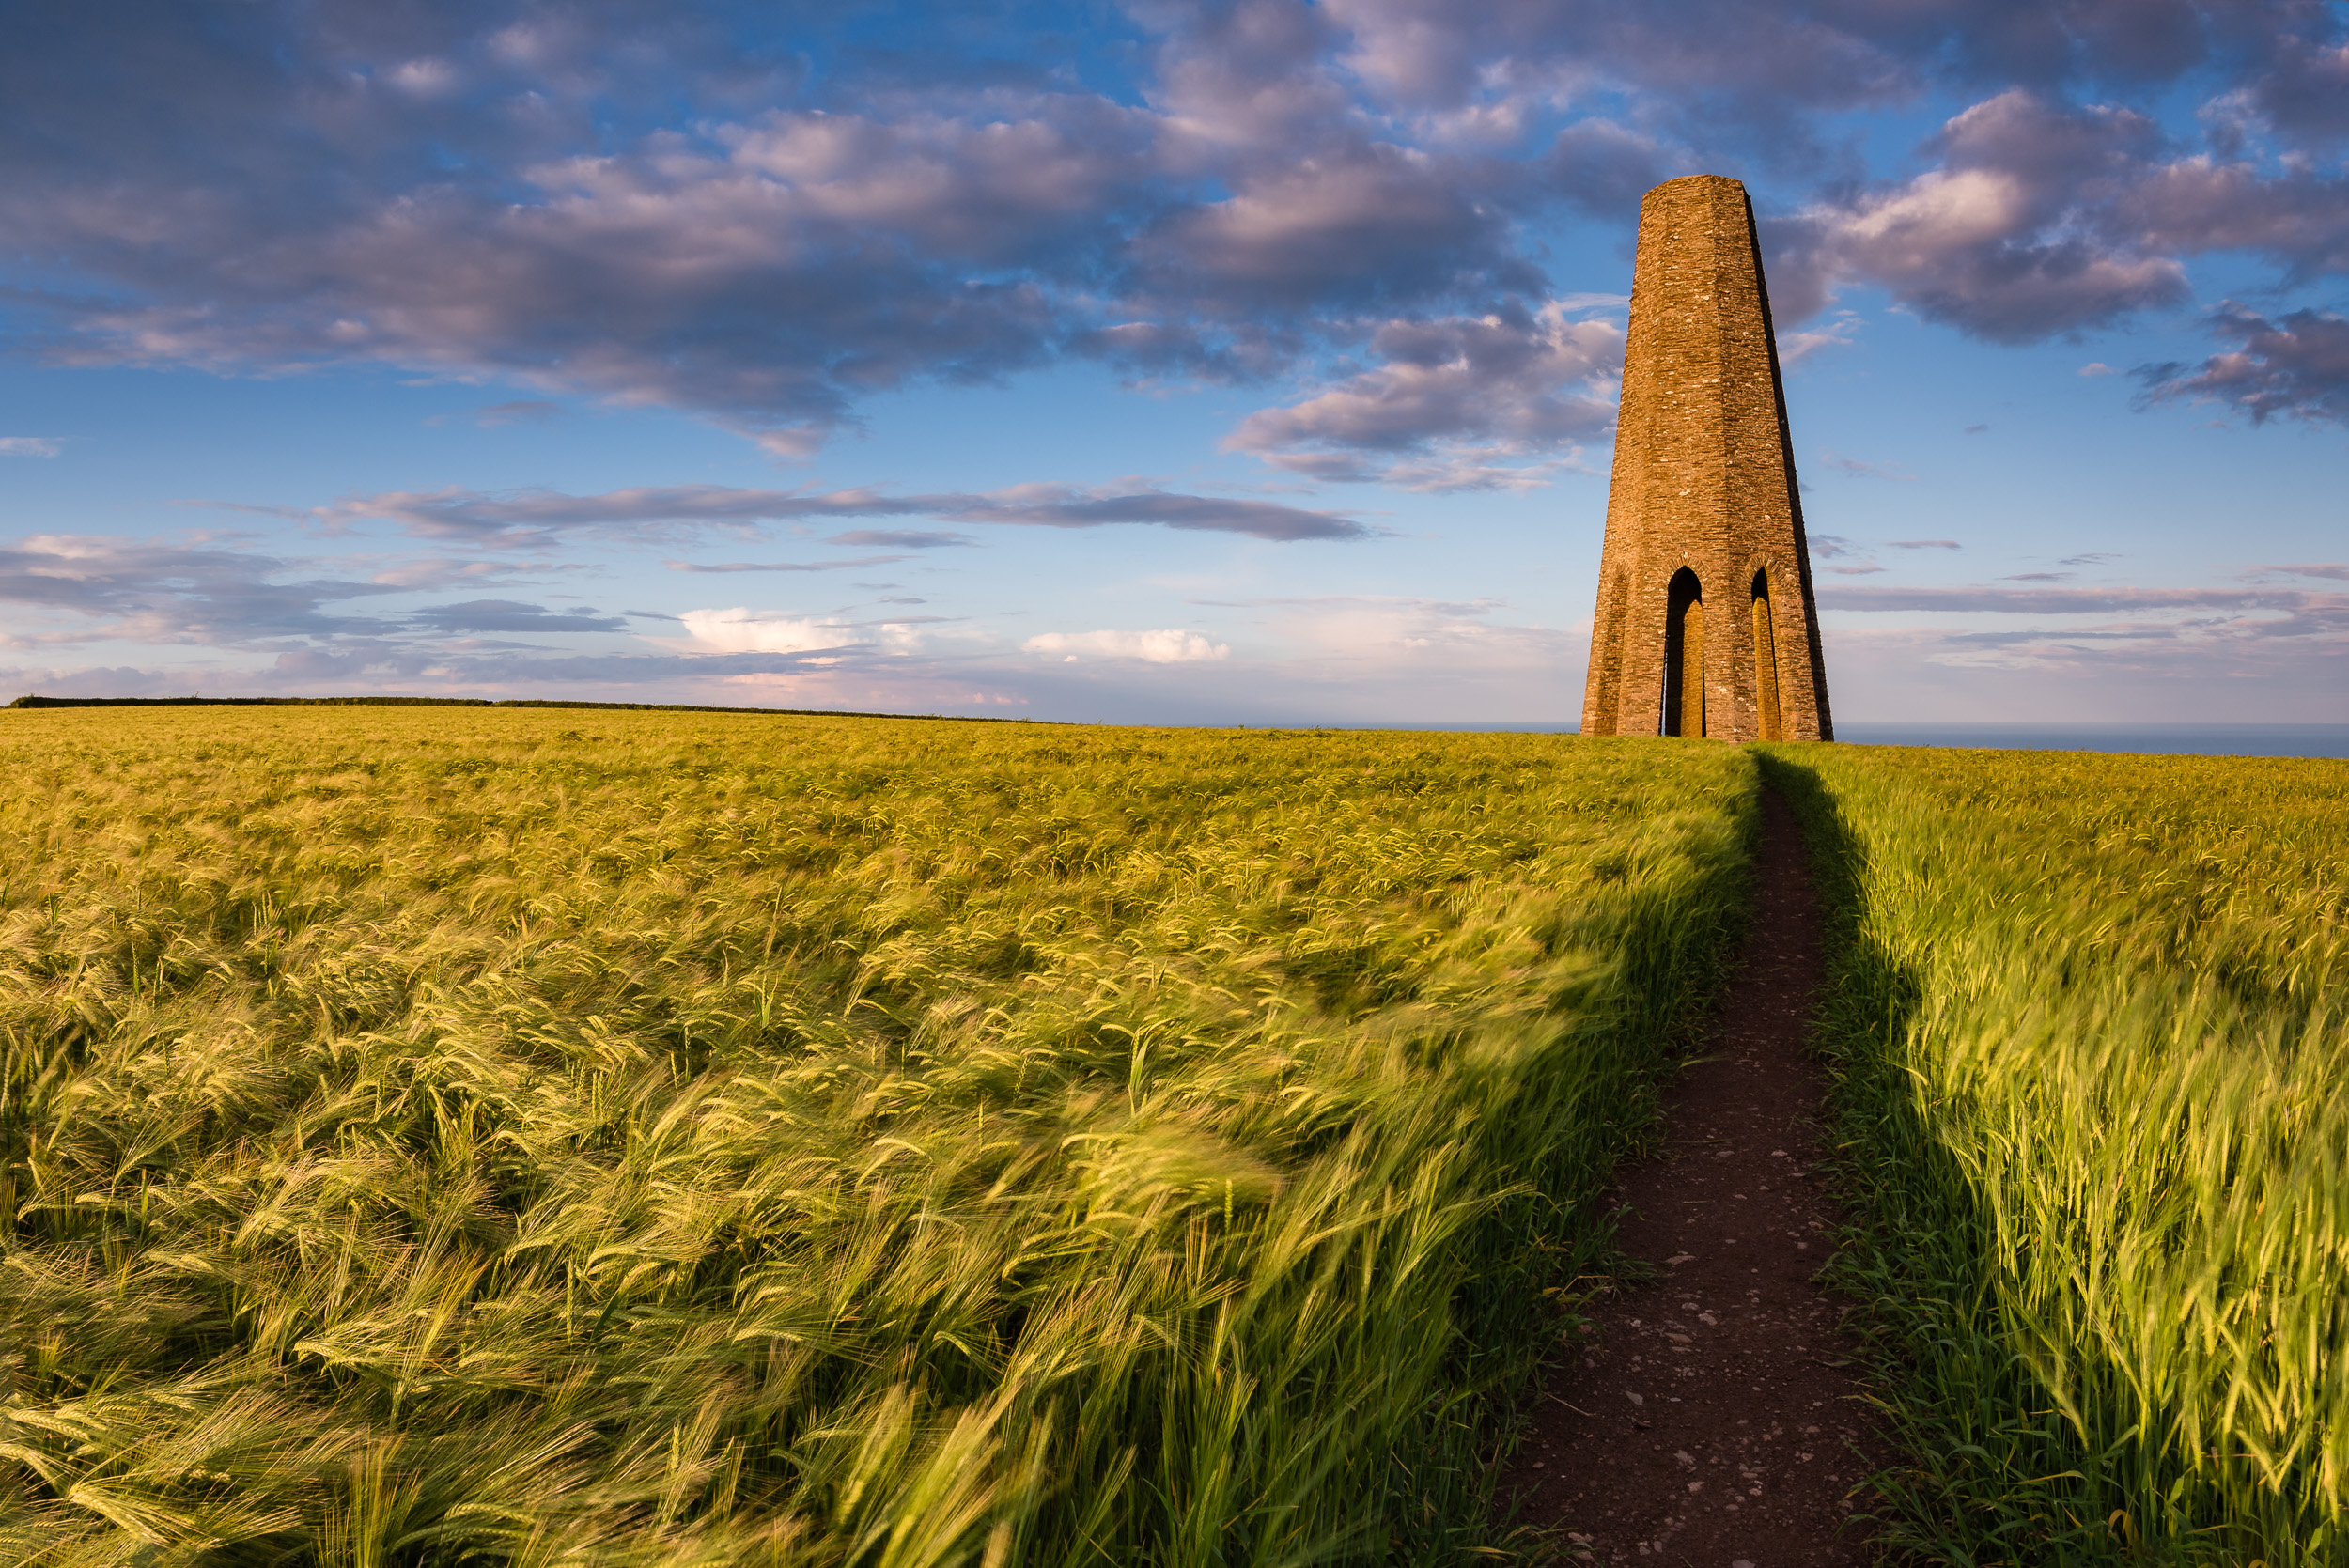
When I shot this image I had a vision in mind. It also didn't need much post-processing. This kind of approach to my photography has been influenced by the approach taken by David in his videos.
Ross Hoddinott
Ross has probably has probably inspired me the most in my journey as a landscape photography. This will be largely due to the regular contact I have with him (see my post on Tuition and Mentoring). Through the many 1-2-1 tuition sessions I've had with Ross I have learnt a great deal about photography and how to approach and shoot the landscape. With each new photography skill learnt from Ross my confidence grows and it is with that growing confidence that I find myself being even more inspired to not only shoot more but to drive up the quality of my images.
Furthermore I find his images inspiring as not only is a lot of his work local to me but I find he produces images of a style and quality that I wish to aspire to. Just check out his wonderful image of Dawlish Warren in this link.
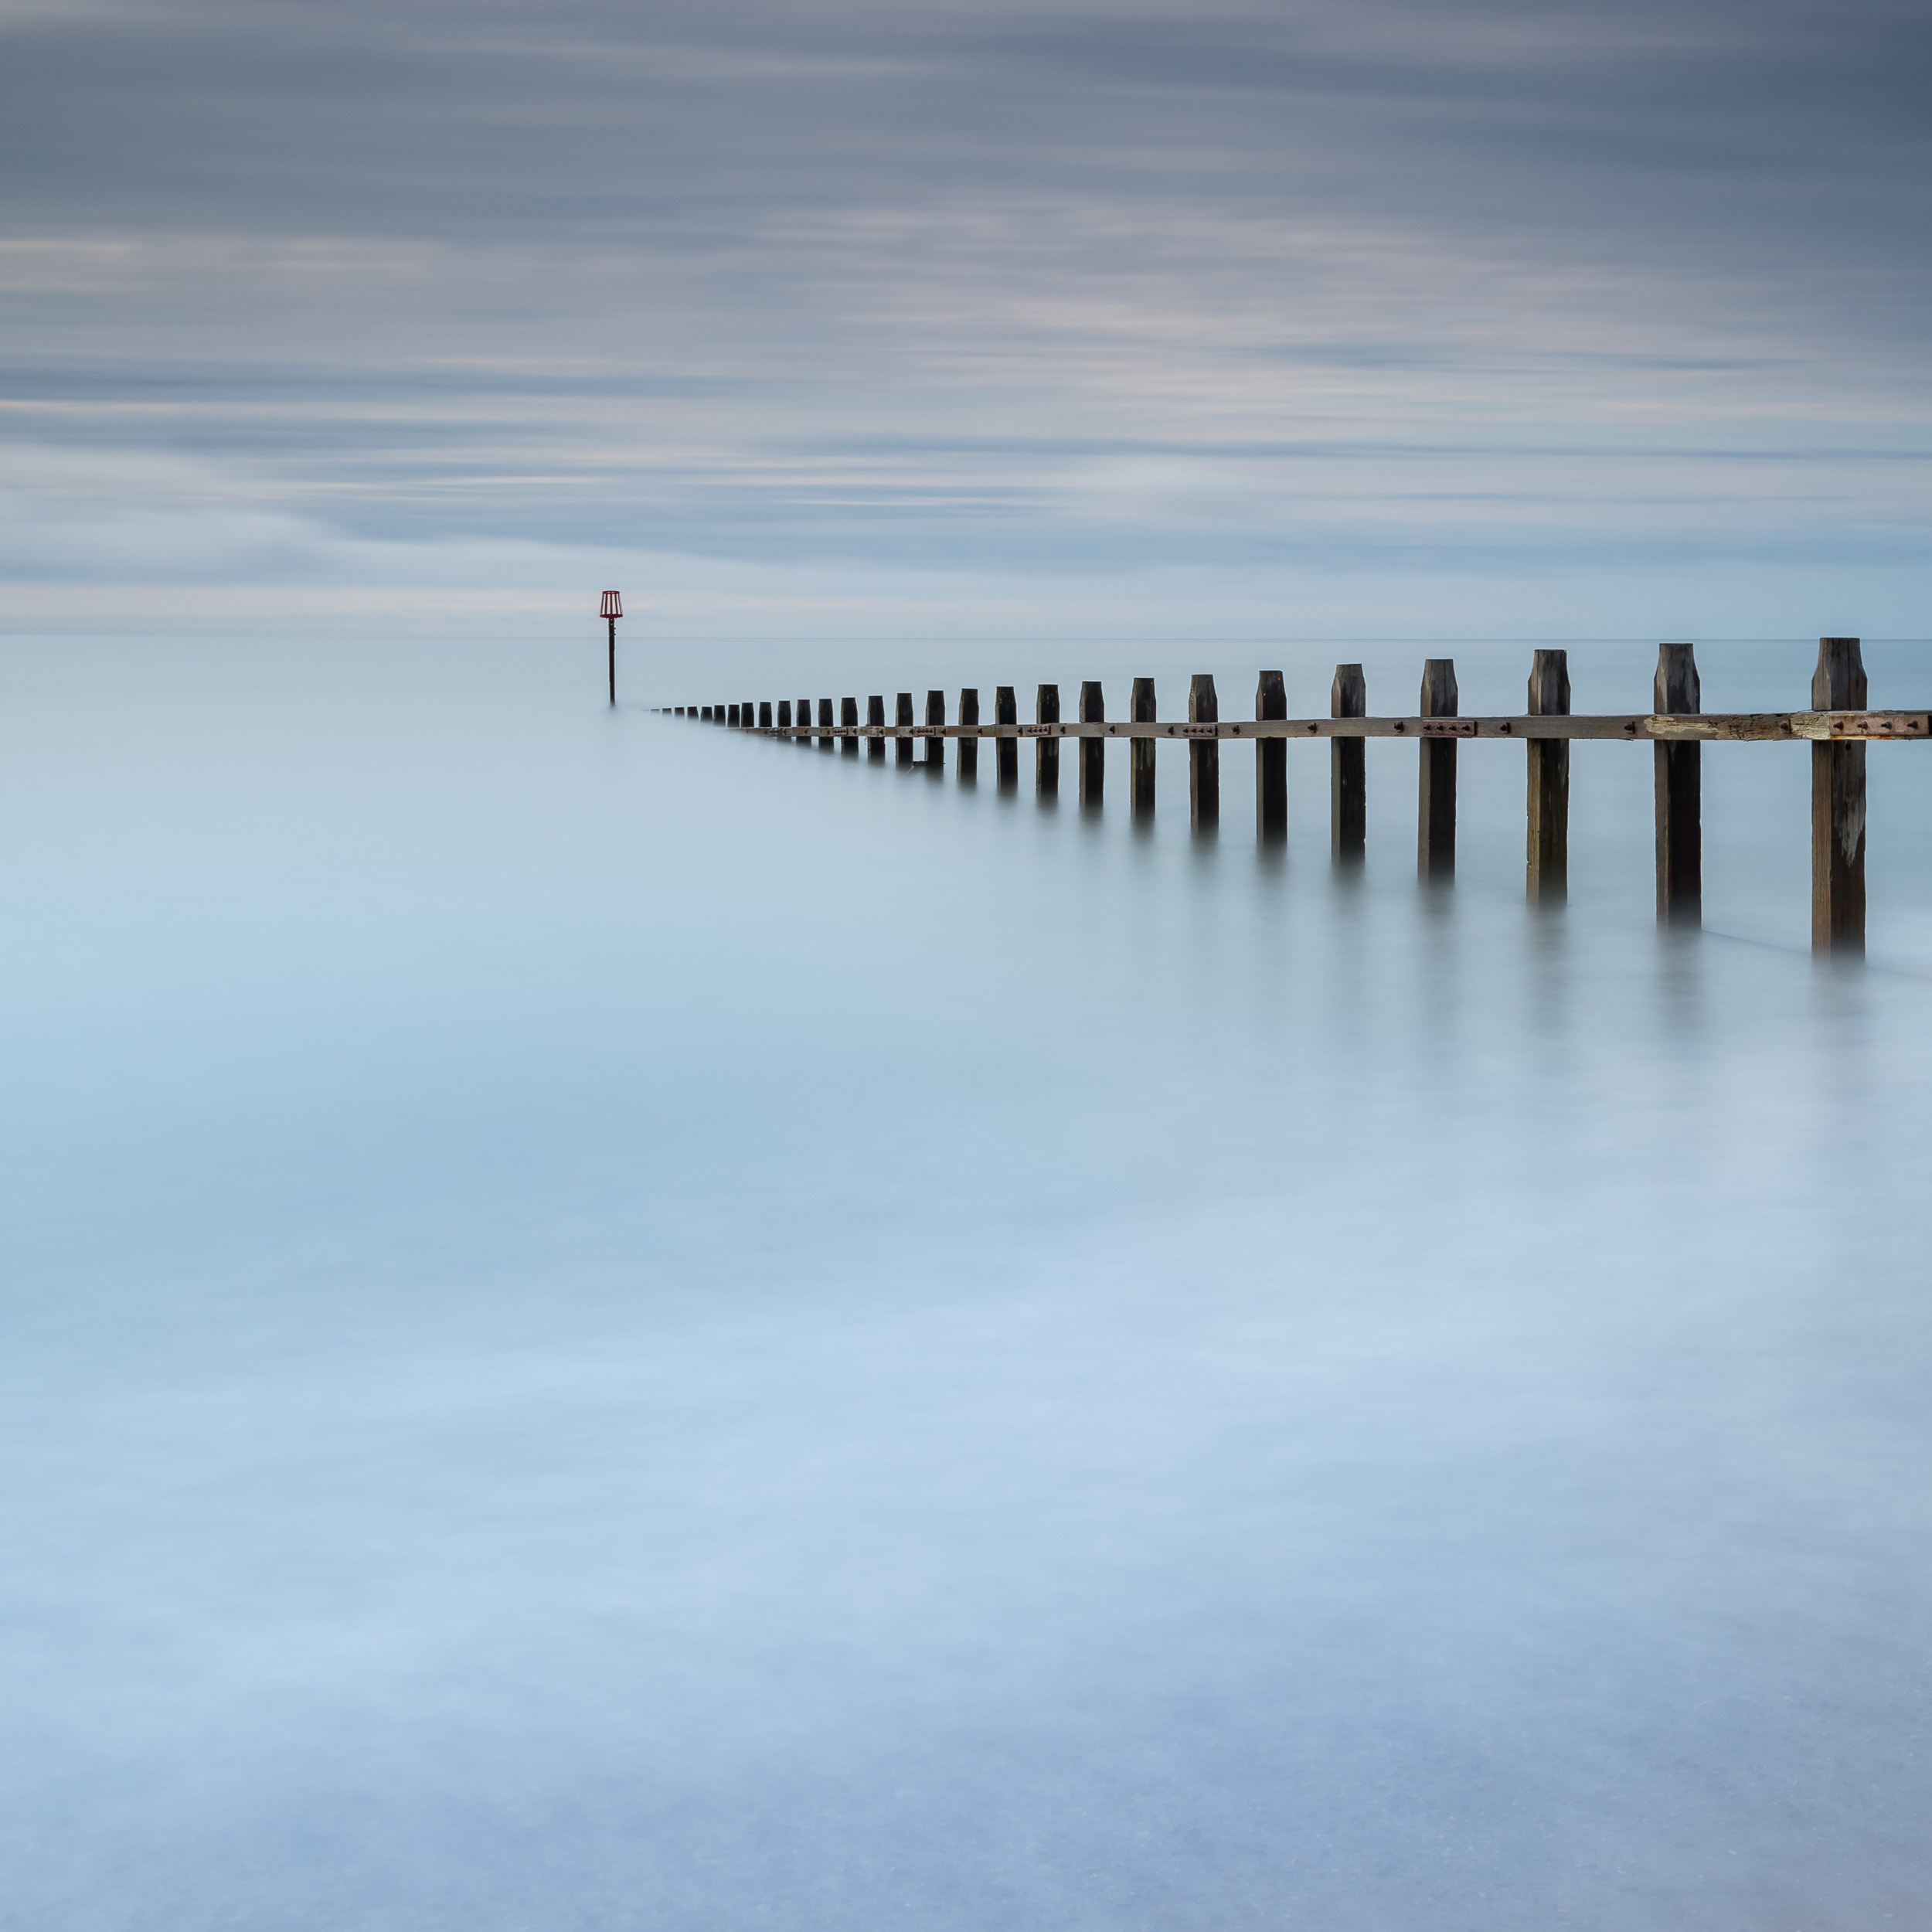
I created this image of a groyne on Dawlish Warren after being inspired by the work of my photography mentor Ross Hoddinott.
Always Look for Inspiration
While all these photographers have inspired and influenced my artistic style, each one has also influenced my photographic journey in other ways. Photography is so much more than just taking images and through following the work of others I have been inspired to extend my skills as a photographer by taking on challenges such as writing this blog.
I continue to find new sources of inspiration and influence, and hopefully one day the pictures I take or the content I create will inspire a photographer to produce something special.
Which photographers inspire you to get out of bed in the morning? Do we even need inspiration or should we try to find our own direction from the start? Let me know in the comments.